
The PowerPoint Print dialog box contains some settings that are probably familiar to you from other programs, such as word processors or spreadsheet programs, and some that are very specific to PowerPoint. For example, you can choose to print slides, the presentation outline, handouts, or notes pages. You can also choose how many slides to include on a single page if you are printing slides, handouts, or notes.
Tip
If you want the same printer to be the default option every time you print, you can go to the Windows Control Panel (Start, Control Panel, and click the Printer link), right-click a printer, and choose Set As Default Printer. You can still change the printer choice in a Print dialog box, but the new setting will only apply to the document you are printing.
 Click the Properties button. (Note that your Properties dialog box shows settings specific to your printer model).
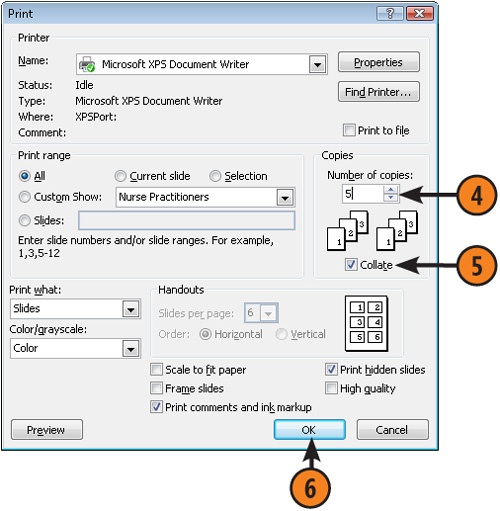
 Click OK to save the setting and return to the Print dialog box. At this point, you can continue to change the settings as described in the next three tasks or click Print to print your presentation.


Tip
Different printers may offer different property options. For example, if you have a color printer you can choose to print in color or grayscale. You may be able to select media type, such as printing to glossy paper or to transparencies for overhead projection. Take a look at your Printer Properties dialog box to see what other settings might be available to you.
 Choose any of the following options:
Click All to print all the slides in the presentation.
Click Current Slide to print only the currently displayed slide.
Click Selection to print whatever contents you selected prior to opening the Print dialog box.
Click Slides and enter slide numbers or a range (2, 15, or 3–15, for example) to print a range or selection of slides.

Tip
It’s easiest to use the Slide Sorter view to select certain slides prior to using the Selection option in the Print dialog box. Display this view and click on one slide, then hold down the Ctrl key on your keyboard and click other slides to include. Then go to the Print dialog box and print your selection.
See Also
For more information about displaying the Slide Sorter view, see "Display Slide Sorter View".
- Click the Print What field and choose the type of output to print.
 If you selected Handouts or Notes in Step 2, click the Slides Per Page field and select the number of slides to include on each page of printed output.
 Click Horizontal to have pages with multiple slides progress from right to left across the page; click Vertical to have slides progress down the page along the left and then move to the top of the right side of the page for the second column.


Tip
If you want to prepare a printed document in Word rather than PowerPoint, you can use the Publish command under the PowerPoint Office button menu to send your presentation to Microsoft Word and prepare handout pages or an outline for printing. You can then simply print from Word’s Print dialog box.
See Also
For more information about working with handouts and notes layouts, see "Working with Handout and Notes Masters".

Tip
If you have to print a lot of copies and want to save pages, consider modifying the number of slides per page that you print for handouts or notes pages. For more information about this setting, see the task "Choose the Format to Print" in this section.