Chapter 8. Building a Tab-Based App
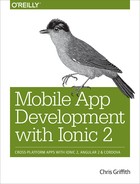
A very common type of application you might build is one that uses a tab-based navigation system. This design pattern works very well when you have a limited number (five or fewer) of groups (or tabs) of content. We are going to use this design pattern to create an app that will allow you to explore the various US national parks (in honor of them celebrating their centennial in 2016). Figure 8-1 shows what our final app will look like.
We are again going to use the Ionic CLI to scaffold our application. First, create a new directory that we will be building from. I named my directory IonicParks:
$ ionic start IonicParks --v2
Since we are going to be creating a tabs-based app, we did not need to pass in a template name, since the tab template is the default.
Next, change your working directory to the newly created IonicParks directory:
$ cd IonicParks

Figure 8-1. Ionic national parks app
Now let’s explore the template itself (Figure 8-2) before we get down to business:
$ ionic serve

Figure 8-2. Ionic tabs template
Not a lot here, but we can navigate between the three tabs (named Home, About, and Contact), and see the content change.
Taking a look inside the app.module.ts file, we see that instead of importing one page, we now are importing four. These four pages comprise the three pages for each tab (HomePage, AboutPage, and ContactPage) and one page (TabsPage) that will serve as the container for the application. Each of these pages is included in the declaration and entryComponents array.
Looking at the app.component.ts file, the only change here is that the rootPage is the TabsPage and not a specific tab view.
Now, let’s go take a look at the pages directory. Inside this directory, we will find four additional directories: about, contact, home, and tabs. Open the home directory, and within it are the HTML, SCSS, and TS files that define our home tab.
The SCSS file is just a placeholder, with no actual content inside. The HTML file has a bit more content inside.
First, the HTML defines an <ion-navbar> and <ion-title> component:
<ion-header>
  <ion-navbar>
    <ion-title>Home</ion-title>
  </ion-navbar>
</ion-header>
Next, the code defines the <ion-content> tag. The component also sets the padding directive within the <ion-content> tag:
<ion-content padding>
The rest of the HTML is just plain-vanilla HTML.
Now, let’s take a look at the component’s TypeScript file. This file is about as light-weight as possible for an Ionic Page:
import { Component } from '@angular/core';
import { NavController } from 'ionic-angular';

@Component({
  selector: 'page-home',
  templateUrl: 'home.html'
})
export class HomePage {

  constructor(public navCtrl: NavController) {

  }
}
Our Component module is imported into our code from the Angular core. Next, our NavController is imported from the ionic-angular library. This component is used whenever we need to navigate to another screen.
In our Component decorator, we set our templateURL to the HTML file and the selector to page-home.
The last bit of code is just setting the HomePage class to be exported and has the navController pass into the constructor.
The other two pages are almost identical to this Page component. Each exporting out a component respectively named AboutPage and ContactPage.
Let’s look at the tabs themselves. In the tabs directory, we see that it contains just a tabs.html file and a tabs.ts file. Let’s look at the HTML file first:
<ion-tabs>
  <ion-tab [root]="tab1Root" tabTitle="Home" tabIcon="home">↵
  </ion-tab>
  <ion-tab [root]="tab2Root" tabTitle="About" tabIcon="information-circle">↵
  </ion-tab>
  <ion-tab [root]="tab3Root" tabTitle="Contact" tabIcon="contacts">↵
  </ion-tab>
</ion-tabs>
Like Ionic 1, Ionic 2 also has an <ion-tabs> and <ion-tab> components. The <ion-tabs> component is just a wrapper component for each of its children, the actual tabs themselves. The <ion-tab> component has a more few attributes that we need to change. Let’s start with the two easier ones: tabTitle and tabIcon. These two attributes set the text label of the tab and the icon that will be displayed. The icon names are from the IonIcon library.
You do not need to set both the title and the icon on tab component. Depending on how you want yours to look, only include what you want.
Also, depending on the platform you are running your app on, the tab style and position will automatically adapt (see Figure 8-3).

Figure 8-3. Tabs component rendering based on platform type
If you want to force a specific tab placement, there are two options—either directly on the component itself with:
<ion-tabs tabsPlacement="top">
or globally through the app config options. This is done in the app.module.ts file:
IonicModule.forRoot(MyApp, {tabsPlacement: 'top'} )
For a full list of configuration options, check out the Ionic Framework documentation.
The last item to look at in the <ion-tab> is the [root] binding that defines what component should act as that tab’s root:
import { Component } from '@angular/core';
import { HomePage } from '../home/home';
import { AboutPage } from '../about/about';
import { ContactPage } from '../contact/contact';

@Component({
  templateUrl: 'tabs.html'
})
export class TabsPage {
  // this tells the tabs component which Pages
  // should be each tab's root Page
  tab1Root: any = HomePage;
  tab2Root: any = AboutPage;
  tab3Root: any = ContactPage;

  constructor() {

  }
}
We have our now familiar import statements. The first loads the base Component module, and the next three load each of the pages for our tabs.
Next, in our Component decorator, we set the templateUrl to the tabs.html file.
The class definition is where we assign each of the tabs to its corresponding components. That is all we need to establish our tabs framework. Ionic will manage the navigation state for each tab for us.
Bootstrapping Our App
Now that we have a general understanding of the structure of a tab-based Ionic 2 application, we can start to modify it for our app. But rather than having you go through all the files and folders and rename them to something meaningful, we are going to take a shortcut. I have already made the initial changes to the template files. In addition, I also included a datafile with the national park data and various images for use in the app.
First, go ahead and delete the IonicPark directory that the CLI generated. Now we will be scaffolding our app from a template from my GitHub repo:
$ ionic start Ionic2Parks https://github.com/chrisgriffith/Ionic2Parks --v2
Once this process is complete, again remember to change your working directory:
$ cd IonicPark
And if you are targeting Android, don’t forget to add that platform:
$ ionic platform add android
Loading Data via the HTTP Service
Before we start building the app in earnest, let’s create a provider to load our local JSON data into our app. This way, we will have actual data to work with as we build out our app.
In the app directory, create a new directory named providers; and within that directory, create a new file named park-data.ts.
As you can expect, using the HTTP service in Angular 2 is slightly different from Angular 1. The main difference is that Angular 2’s HTTP service returns Observables through RxJS, whereas $http in Angular 1 returns Promises.
Observables give us expanded flexibility when it comes to handling the responses coming from the HTTP requests. As an example, we could leverage an RxJS operator like retry so that failed HTTP requests are automatically re-sent. This can be very useful if our app has poor, weak, or intermittent network coverage. Since our data is being loaded locally, we don’t need to worry about that issue.
Returning to our park-data.ts file, we will inject three directives into it:
import { Injectable } from '@angular/core';
import { Http } from '@angular/http';
import 'rxjs/add/operator/map';
Next, we use the @Injectable() decorator. The Angular 2 documentation reminds us to remember to include the parentheses after the @Injectable; otherwise, your app will fail to compile.
We are going to define ParkData as the provider’s class. Now add a variable named data, and define its type to any and set it to be null. In the constructor, we will pass in the Http directive that we imported and classify it as a public variable. The class’s actual constructor is currently empty:
@Injectable()
export class ParkData {
  data: any = null;

  constructor(public http: Http) {}

}
Within the class definition, we will create a new method named load. This method will do the actual loading of our JSON data. In fact, we will add in some checks to make sure we only load this data once throughout the lifespan of our app. Here is the complete method:
load() {
  if (this.data) {
    return Promise.resolve(this.data);
  }

  return new Promise(resolve => {
    this.http.get('assets/data/data.json')
      .map(res => res.json())
      .subscribe(data => {
        this.data = data;
        resolve(this.data);
      });
  });
}
Since we are hardcoding the file’s location that we are loading, our method is not taking in a source location—hence, load().
The first thing this method does is check if the JSON data had been loaded and saved into the data variable. If it has, then we return a Promise that resolves to this saved data. We have to resolve our data to a Promise since that is the same return type that the actual loading portion uses in park-list.ts. We will look at working with Observables in another chapter.
Let’s look at that block of code in detail. If the data has not been loaded, we return a basic Promise object. We set it to resolve after calling the HTTP service and using the get method from our JSON data that is at assets/data/data.json. As with all Promises, we need to define its subscription. Again using the fat arrow function, =>, the result is stored in a variable named res. We will take the string and use Angular’s built-in JSON converter to parse it into an actual object. Finally, we will resolve our Promise with the actual data.
At this point, we only have written the provider. Now, we need to actually use it in our app. Open app.component.ts, and add import { ParkData } from '../providers/park-data'; with the rest of the import statements. This will load the provider and assign it to ParkData.
Next, we need to add an array of providers in the @Component declaration:
@Component({
  templateUrl: 'app.html',
  providers: [ ParkData ]
})
Let’s now modify the constructor to load our data. We will pass in the reference to the ParkData provider into the constructor. After the platform.ready code block, we will call the parkData.load() method. This will trigger the provider to load our datafile:
constructor(platform: Platform, statusBar: StatusBar, splashScreen: SplashScreen,
            public parkData: ParkData) {
  platform.ready().then(() => {
    // Okay, so the platform is ready and our plugins are available.
    // Here you can do any higher level native things you might need.
    statusBar.styleDefault();
    splashScreen.hide();
  });
  parkData.load();
}
If you want to do a quick test to see if the data is being loaded, wrap the parkData.load() in a console.log(). The __zone_symbol__value of the ZoneAwarePromise will contain an array of the 59 objects that are created.
What Is a Zone?
A zone is a mechanism for intercepting and keeping track of asynchronous work. Since our data is being loaded in an asynchronous fashion, we need to use zones to keep track of the original context that we made our request in.
Here is a formated sample of what the each of the park’s object data looks like:
createDate: "October 1, 1890"
data: "Yosemite has towering cliffs, waterfalls, and sequoias in a diverse↵
      area of geology and hydrology. Half Dome and El Capitan rise from the↵
      central glacier-formed Yosemite Valley, as does Yosemite Falls, North↵
      America's tallest waterfall. Three Giant Sequoia groves and vast ↵
      wilderness are home to diverse wildlife."
distance: 0
id: 57
image: "yosemite.jpg"
lat: 37.83
long: -119.5
name: "Yosemite"
state: "California"
Display our Data
Now that the data has been read into the app and is available via our service provider, let’s turn our attention to actually displaying our 59 national parks in a list.
First, we need to add a method on our ParkData service provider to actually return the data that we have loaded. After the load method, add the following method:
getParks() {
  return this.load().then(data => {
    return data;
  });
}
Two things to note about this method. First, it calls the load method. This is a safety check to ensure that the data is there. If for some reason it is not, it will load it for us. Since our provider is using Promises, constructing a system that can be chained together is quite easy. Second, since this system is Promise based, we have to handle everything in a .then syntax. This is something that you might have to remember to do as you migrate from Angular 1 to Angular 2.
Switching to park-list.html, we add the following after the <ion-content> tag:
<ion-list>
  <ion-item *ngFor="let park of parks" ↵
            (click)="goParkDetails(park)" detail-push>
    <ion-thumbnail item-left>
      <img src="assets/img/thumbs/{{park.image}}">
    </ion-thumbnail>
    <h2>{{park.name}}</h2>
    <p>{{park.state}}</p>
  </ion-item>
</ion-list>
If you recall from the Ionic2Do app, we will define an <ion-list> component, then define the <ion-item> that will be auto-generated for us. The repeated items are being supplied by an array named parks, which we will define shortly. Each element of this array is put into a local variable named park. A click handler is also added to the <ion-item>; it will call a function named goParkDetails and will pass in the park variable as its parameter.
If our app is running in iOS mode, disclosure arrows will automatically be added. On Android and Windows, this icon is not added to the list item. If we want to show the right arrow icon that does not display it by default, we can include the detail-push attribute. Conversely, if we don’t want to show the right arrow icon, we can use the detail-none attribute. We will still need to enable this visual state in the variables.scss file by adding:
$item-md-detail-push-show: true;
after we define our $colors variable.
Returning back to the park-list.html file, within the <ion-item>, we will insert an <ion-thumbnail> component and set its position in the row by using item-left. The image tag is fairly straight forward. If you used the template for the project, it should have included an img directory that also contained a thumbs directory. That directory will hold thumbnails for each of our parks. By using Angular’s data binding, we can dynamically set the src for each thumbnail with src="assets/img/thumbs/{{park.image}}". Next, the park name and state are shown with <h2> and <p> tags, respectively, and are also data bound to the park object.
One last thing to do is to remove the padding attribute on the <ion-content> as well. This will enable the list to be the full width of the viewport. With the HTML template updated, we can now focus on the component’s code.
Extending parklist.ts
The first thing that we need to do is to inject our service provider into the component with:
import { ParkData } from '../../providers/park-data';
Initially, the component’s class is completely empty. We will replace it with the following code:
export class ParkListPage {
  parks: Array<Object> = []

  constructor(public navCtrl: NavController, public parkData: ParkData) {
    parkData.getParks().then(theResult => {
      this.parks = theResult;
    })
  }

  goParkDetails(theParkData) {
    console.log(theParkData);
  }
}
Let’s define the parks variable that we referenced in our HTML template:
parks: Array<Object> = [];
Within the parameters of the constructor for the class, we will define a public variable parkData of type ParkData.
Next, we will call the getParks method on the parkData. In the past, we might have written something like this to get our park data:
parks = parkData.getParks();
But since we are leveraging the power of Promises, we need to actually write our request for this data as such:
parkData.getParks().then(theResult => {
   this.parks = theResult;
   }
)
That wraps up the changes to the constructor itself. The last bit of code that was added was a placeholder function for the click event from the <ion-item>. The method accepts the park data object as a parameter, and simply writes that data to the console. We will focus on this function shortly, but let’s view our work so far by using $ ionic serve (see Figure 8-4).

Figure 8-4. National parks app
Once the app has been regenerated, we should see a scrolling list of national parks in a browser, each with a thumbnail, title, and state listed. If you click on an item, the park data will be written out to the JavaScript console. Now that we have this initial screen working, we can turn our attention to creating the details page for that park.
Generating New Pages
With Ionic 2, adding new pages into our app is now a bit more complex. Thankfully, there is a page-generator function available in the CLI. Since we need to generate a park details page, our command will be:
$ ionic g page parkDetails
The CLI will take our camelCase name and convert it into a kebab-case version. The generator will automatically append Page to the class name for us. So if you open the park-details.ts file, you will see this class name:
export class ParkDetailsPage { ...
We also need to include a reference to the new component in the app.module.ts file:
import { ParkDetailsPage } from '../pages/park-details/park-details';
Then add this module to both the declarations and entryComponents arrays.
Ionic Generators
We also use the Ionic CLI generator to create providers by replacing the page flag with the provider flag. In fact, the provider we wrote earlier in the chapter could have been generated in that fashion.
Now, let’s build upon the code in the park-list.ts file to enable the navigation to our newly generated page. We need to import some additional modules from the Ionic core. Our first import will become:
import { NavController, NavParams } from 'ionic-angular';
Next, we will need to import the reference to the page that we are going to navigate to:
import { ParkDetailsPage } from '../park-details/park-details';
With these modules injected into our component, the goParkDetails function will now navigate to the park details page and pass along the park information:
goParkDetails(theParkData) {
  this.navCtrl.push(ParkDetailsPage, { parkData: theParkData });
}
Understanding the Ionic 2 Navigation model
Back in Ionic 1, the AngularJS UI-Router was used to navigate between pages. For many apps, this navigation system works fairly well. But if your application has a complex navigation model, using it would become problematic. For example, if we were creating our Ionic Parks app in Ionic 1, we would have to have two distinct URLs for a Parks Details page if we want access it via both a park list screen and a map list screen. These types of issues forced the Ionic team to rebuild their entire navigation model.
The current navigation model is based on a push/pop system. Each new view (or page) is pushed onto a navigation stack, with each view stacking atop the previous one. When the user navigates back through the stack, the current view is removed (popped) from the stack (see Figure 8-5).

Figure 8-5. Ionic 2 navigation model
This new model makes the navigation model much simpler to work with.
Passing Data Between Pages
In our goParkDetails function, it received the parkData for the clicked list item. By using the NavParams module, we can pass this data to the constructor of the new page.
We need to refactor the park-details.ts file to support the incoming data. With generated Ionic pages, the NavParams module from ionic-angular is already included. Next, in the class definition, we need to add a parkInfo variable that is typed to Object.
In this constructor, the navigation parameters are passed in and stored in the variable navParams:
import { Component } from '@angular/core';
import { NavController, NavParams } from 'ionic-angular';

@Component({
  selector: 'page-park-details',
  templateUrl: 'park-details.html'
})
export class ParkDetailsPage {
  parkInfo: Object;
  constructor(public navCtrl: NavController, public navParams: NavParams) {
    this.parkInfo = navParams.data.parkData;
    console.log(this.parkInfo);
  }
}
For now, let’s just write to the console the parkData that has been piggybacked on this parameter. Our selected park’s data object is saved on the data method of the navParams. Saving our files and running $ ionic serve, clicking any item should now change our view and write to the console our data.
You will notice that the Ionic Framework handled the screen-to-screen animation, as well as automatically added a back button in our header to enable the user to navigate back through the navigation stack.
Updating the Park Details Page
Since we can now navigate to the park details page, let’s turn our attention to taking this dynamic data and displaying it. Figure 8-6 shows what our initial Park Details screen will look like.

Figure 8-6. The national park details screen
The generated HTML page has some basic tags included, but we are going to replace most it. First, let’s remove the help comment from the top of the page. For the page title, we will replace it with {{parkInfo.name}}:
<ion-header>
  <ion-navbar color="primary">
    <ion-title>{{parkInfo.name}}</ion-title>
  </ion-navbar>
</ion-header>

<ion-content>
    <img src="assets/img/headers/{{parkInfo.image}}">
    <h1 padding>{{parkInfo.name}}</h1>
    <ion-card>
        <ion-card-header>
            Park Details
        </ion-card-header>
        <ion-card-content>
            {{parkInfo.data}}
        </ion-card-content>
    </ion-card>
</ion-content>
One new component we are using on this screen is the <ion-card>. As the documentation states, “Cards are a great way to display important pieces of content, and are quickly emerging as a core design pattern for apps.” Ionic’s card component is a flexible container that supports headers, footers, and a wide range of other components within the card content itself.
With a basic park details screen in place, go ahead and preview it with $ ionic serve.
Add a Google Map
As you might expect, an app about the national parks would require them each to be shown on a map of some kind. Unfortunately, there is not an official Google Maps Angular 2 module. There are some third-party efforts, but let’s work instead with the library directly. To do this we will need to include the library in our index.html file. Since the terms of use for the Google Maps SDK forbids the storing of the tiles in an offline fashion, we can reference the remotely hosted version:
<!-- Google Maps -->
<script src="http://maps.google.com/maps/api/js"></script>

<!-- cordova.js required for cordova apps -->
<script src="cordova.js"></script>

<!-- The polyfills js is generated during the build process -->
<script src="build/polyfills.js"></script>

<!-- The bundle js is generated during the build process -->
<script src="build/main.js"></script>
We can ignore the need for an API key while we are developing our application, but an API key is required for production. You can obtain an API key at the Google Developers page. When you get your API key, change the script src to include it in the query string.
Adding Additional Typings
Since we are adding in a third-party code library to be used in our app, wouldn’t it be nice to have code hinting support and strong typing for that library? We can do this by extending our TypeScript definitions. The command to do this is:
$ npm install @types/google-maps --save-dev --save-exact
Adding Our Content Security Policy
A Content Security Policy (CSP) is an added layer of security designed to reduce certain types of malicious attacks, including cross-site scripting (XSS). Remember, our hybrid apps are still bound by the same rules that web apps have. As such, we also need to safeguard our applications in a similar manner.
In our index.html file, we need to include a CSP:
<meta http-equiv="Content-Security-Policy" content="default-src * gap://ready; ↵
img-src * 'self' data:; font-src * 'self' data:; script-src 'self'↵
'unsafe-inline' 'unsafe-eval' *; style-src 'self' 'unsafe-inline'↵
*">
Since Google Maps transfers its map tiles via the data URI method, our CSP needs to allow for this type of communication. In addition, we will need to add support of font-src as well as for the Ionicons to work properly. This tag should be placed within the <head> tag.
Adjust the CSS to support the Google Map
With our library able to be loaded and related data, let’s turn our attention to the map page itself. In park-map.html, we need to add a container for the map to be rendered in:
<ion-content>
  <div id="map_canvas"></div>
</ion-content>
We need to give it either a CSS id or class in order to apply some CSS styling. Since the tiles are dynamically loaded, our div has no width or height when it is first rendered. Even as the map tiles are loaded, the width and height of the container are not updated. To solve this, we need to define this div’s width and height. In the park-map.scss file, add the following:
#map_canvas {
    width: 100%;
    height: 100%;
}
This will give the container an initial value, and our map will be viewable.
Rendering the Google Map
We are going to work on this code in three sections. The first will get the Google Map displaying, the second will be to add markers for each of the national parks, and the final section will make clicking on the marker navigate to the Park Details page. Switch to the park-map.ts file.
We will need to add the Platform module to the import statement from ionic-angular:
import { Platform, NavController } from 'ionic-angular';
We will use the Platform module to make sure everything is ready before setting up the Google map.
Within the class definition, we will define the map variable as a Google Map. This variable will hold our reference to the Google map:
export class ParkMapPage {
    map: google.maps.Map;
Next, we expand the constructor:
constructor( public nav: NavController, public platform: Platform) {
  this.map = null;
  this.platform.ready().then(() => {
    this.initializeMap();
  });
}
We make sure that we have reference to Platform module, then set up a Promise on the platform ready method. Once the platform ready event has fired, we then call our initializeMap function, using the fat arrow syntax:
initializeMap() {
  let minZoomLevel = 3;

  this.map = new google.maps.Map(document.getElementById('map_canvas'), {
    zoom: minZoomLevel,
    center: new google.maps.LatLng(39.833, -98.583),
    mapTypeControl: false,
    streetViewControl: false,
    mapTypeId: google.maps.MapTypeId.ROADMAP
  });
}
This function will create the new map and assign it to the div with the id of "map_canvas". We also define some of the various map parameters. These parameters include the zoom level, the center map (in our case, the center of the continental US), the various map controls, and finally the style of the map. The last object method is a custom method where we will store the park information that we will need later in this chapter.
If we run $ ionic serve, then we should see a map being rendered in the Map tab, as seen in Figure 8-7.

Figure 8-7. Google map within our Ionic app
Add Map Markers
Now that we have a Google map displaying in our mobile app, we can turn to the next task: adding the markers for each national park. The first thing we need to do is inject the ParkData service into our component:
import { ParkData } from '../../providers/park-data';
Next, we will need to add an array that will hold our park data, as well as ensure the parkData is properly available to the class:
export class ParkMapPage {
  parks: Array<Park> = [];
  map: google.maps.Map;

  constructor(
    public nav: NavController,
    public platform: Platform,
    public parkData: ParkData
    ) {
Although we could simply type our parks array to any, let’s properly type to our park’s data structure. To do this, we will need to define the interface. Create a new directory named interfaces within the app directory. Within that new directory, create a new file named park.ts. This file will hold our simple definition for our Park interface. The code for this is:
export interface Park {
    id: number;
    name: string;
    createDate: string;
    lat: number;
    long: number;
    distance: number;
    image: string;
    state: string;
    data: string;
}
This interface will tell the compiler that Park data type will have these elements and their associated data types.
Back in the park-map.ts file, we will need to import this interface file:
import { Park } from '../../interfaces/park';
That should resolve any warnings in your editor about the Park data type.
Go ahead and also import this interface in the park-list.ts file and change this variable:
parks: Array<Object> = [];
to:
parks: Array<Park> = [];
Within the initializeMap function, we will need to add the code to actually display our markers.
But rather than use the standard Google marker image, let’s use a marker that looks like the National Parks Service arrowhead logo:
let image = 'assets/img/nps_arrowhead.png';
Then we will get the park data from the parkData service. Once this Promise is answered, the result will be stored in the parks array:
this.parkData.getParks().then(theResult => {
  this.parks = theResult;

  for (let thePark of this.parks) {
    let parkPos:google.maps.LatLng = ↵
        new google.maps.LatLng (thePark.lat, thePark.long);
    let parkMarker:google.maps.Marker = new google.maps.Marker();
    parkMarker.setPosition(parkPos);
    parkMarker.setMap( this.map);
    parkMarker.setIcon(image);
  }
})
Our code will loop through this array and generate our markers. Save this file, and if ionic serve is still running, the app will reload. Select the Map tab, and you now see icons on our map for each of the national parks. Right now, these markers are not interactive. Let’s add that capability.
Making the Markers Clickable
When a user clicks or taps a marker on the map, we want to navigate them to the Park Details page for that markers. To do this we need to inject some of the Navigation modules from Ionic, as well as the actual ParkDetailsPage module. Our new import block will now look like this:
import { Component } from '@angular/core';
import { Platform, NavController, NavParams } from 'ionic-angular';
import { Park } from '../../interfaces/park';
import { ParkData } from '../../providers/park-data';
import { ParkDetailsPage } from '../park-details/park-details';
Within the for loop that adds each marker, we will need to add an event listener that will respond to our click, and then navigate to the ParkDetailsPage and pass along the marker’s park data. Unfortunately, the standard Google Map Marker has none of that information. To solve this, we are going to create a custom Map Marker that we can store our park information.
Create a new file, custom-marker.ts, within our park-map directory. This new class will extend the base google.maps.Marker to have one additional value, our parkData. We first need to import the Park interface. Then we will export our new class, CustomMapMarker, which is extended from google.maps.Marker. Next, we define our parkData variable and assign the type of Park. Within the class’s constructor, we will pass in the actual park data. The critical bit of code is the super(). This will tell the class we extended from to also initialize:
import {Park} from '../../interfaces/park';

export class CustomMapMarker extends google.maps.Marker{
  parkData:Park
  constructor( theParkData:Park
  ){
    super();
    this.parkData = theParkData;
  }
}
Save this file, and return back to park-map.ts. If you guessed that we need to import this new class, you would be correct:
import { CustomMapMarker } from './custom-marker';
Now, our parkMarker can use our CustomMapMaker class in place of the google.maps.Marker. So this line of code:
let parkMarker:google.maps.Marker = new google.maps.Marker();
becomes this:
let parkMarker:google.maps.Marker = new CustomMapMarker(thePark);
Note
We are passing the park’s data into the instance, thus saving our park data within each marker.
Now we can assign our event listener for each marker. But how do we reference the actual parkData stored within each marker so that we can include it as a navParam?
We are going to take a shortcut with this block of code. Since we did not define an interface for our CustomMapMarker, our compiler does not know about our additional property. But, we can use the any data type to sidestep this issue. So, if we simply create a local variable, selectedMarker, with the type of any and assign the parkMarker to it, we will be able to reference the parkData. Here is the completed fragment:
google.maps.event.addListener(parkMarker, 'click', () => {
  let selectedMarker:any = parkMarker;

  this.navCtrl.push(ParkDetailsPage, {
    parkData: selectedMarker.parkData
  });
});
The navigation code should look very familiar from the Park List page. Here is the complete initializeMap function:
initializeMap() {
  let minZoomLevel:number = 3;

  this.map = new google.maps.Map(document.getElementById('map_canvas'), {
    zoom: minZoomLevel,
    center: new google.maps.LatLng(39.833, -98.583),
    mapTypeControl: false,
    streetViewControl: false,
    mapTypeId: google.maps.MapTypeId.ROADMAP
  });

  let image:string = 'img/nps_arrowhead.png';

  this.parkData.getParks().then(theResult => {
    this.parks = theResult;

    for (let thePark of this.parks) {
      let parkPos:google.maps.LatLng =↵
          new google.maps.LatLng (thePark.lat, thePark.long);
      let parkMarker:google.maps.Marker = new CustomMapMarker(thePark);
      parkMarker.setPosition(parkPos);
      parkMarker.setMap( this.map);
      parkMarker.setIcon(image);

      google.maps.event.addListener(parkMarker, 'click', () => {
        let selectedMarker:any = parkMarker;

        this.navCtrl.push(ParkDetailsPage, {
          parkData: selectedMarker.parkData
        });
      });
    }
  })
}
Save the file, and we should now be able to click a marker and see the Park Details page (Figure 8-8).

Figure 8-8. Custom markers on our Google map
Adding Search
Let’s extend our application a bit further by adding a search bar for the Park List. Ionic has an <ion-searchbar> as part of the component library. The search bar component will let the user type in the name of a national park and the list of parks will automatically update (Figure 8-9).

Figure 8-9. Search bar component added to our Ionic app
Since we want the search bar to always be available, we need it to be fixed to the top of the screen. We can use the <ion-toolbar> component to handle this. This component just needs to be after the <ion-navbar>.
We’ll need to define a model to our <ion-searchbar> component and bind it to the query string. Also, we need to add a function to handle user input:
<ion-toolbar>
  <ion-searchbar [(ngModel)]="searchQuery" (ionInput)="getParks($event)" ↵
                 (ionClear)="resetList($event)">↵
  </ion-searchbar>
</ion-toolbar>
If you are wondering what the [( )] is doing around ngModel, this is a new syntax for Angular’s two-way data binding. The square brackets tell Angular that this is a getter, while the parentheses tell Angular that this is a setter. Putting the two together, you have two-way data binding.
Now in the park-list.ts file, let’s define this variable within our class:
export class ParkListPage {
  parks: Array<Park> = []
  searchQuery: string = '';
Also in the park-list.ts file, we need to add our getParks function:
getParks(event) {
  // Reset items back to all of the items
  this.parkData.getParks().then(theResult => {
    this.parks = theResult;
  })

  // set queryString to the value of the searchbar
  let queryString = event.target.value;

  if (queryString !== undefined) {
    // if the value is an empty string don't filter the items
    if (queryString.trim() == '') {
      return;
    }

    this.parkData.getFilteredParks(queryString).then(theResult => {
      this.parks = theResult;
    })
  }
}
The first part of the getParks function ensures that we will be using the original list of parks. If you have coded any filtering functions in the past, you are probably aware that you need to make sure that you are working from an unfiltered list.
Next, we get the query string from the search bar, then check that it is neither undefined nor empty.
Finally, we will call a new method on the parkData provider (park-data.ts) to do the actual filtering based on the search string, and set the results to the parks:
getFilteredParks(queryString) {
  return this.load().then(Parks => {
    let theFilteredParks: any = [];

    for (let thePark of Parks) {
      if (thePark.name.toLowerCase().indexOf(queryString.toLowerCase()) > -1) {
        theFilteredParks.push(thePark);
      }
    }

    return theFilteredParks;
  });
}
We first make sure we have the master park data again, then we define a new empty array that will push any matching parks onto it. The code then loops through each park and compares the park’s name against the query string. This code does take an additional step, forcing both the park name and query string to lowercase before testing if it can find a match. If a match is found, it is pushed to theFilteredParks array. Once all the parks have been examined, this array is returned and our displayed list automatically updated.
Our search is still not quite functionally complete. The clear button is not working. Although we bound the ionClear event to a resetList function, we haven’t written it yet. The function is actually quite simple; we just need to reset our parks array back to the full list:
resetList(event) {
  // Reset items back to all of the items
  this.parkData.getParks().then(theResult => {
    this.parks = theResult;
  })
}
With that, we should have a fully functioning search bar in our app.
Theming Our Application
Now that we have a functioning app, it certainly could use a touch of color to brighten it up from the default look. There is nothing special about styling an Ionic-based application. The same techniques used in styling a web app or web page apply here.
Ionic uses Sass or Syntactically Awesome Style Sheets as the CSS pre-processor solution. If you have not used a CSS pre-processor before, one of the main reasons to do so is it gives you the ability to abstract your CSS in reusable parts. For example, you can define a variable that is the app’s primary color, and let the preprocessor apply it throughout the CSS. So, if you need to change it for some reason, you change it in one place.
Ionic breaks down its Sass files into two files; src/app/app.scss for any global app specific styling, and src/theme/variables.scss for the predefined theme colors.
The first styling change to make is to assign a forest green color to the header. There are several ways accomplish this: we could directly style each specific component, or modify one of the prebuilt themes. For these components, let’s choose the latter solution.
In variables.scss file, replace the hex color associated with the primary color with #5a712d. Since we did not assign a theme to either the header or the tabs components, we need to do so. In each of the three pages, update the <ion-navbar> to <ion-navbar color="primary">.
In tabs.html, replace <ion-tabs> with <ion-tabs color="primary">. Saving all these files, run $ ionic serve. The headers and tabs should now have a forest green background.
Now let’s turn our attention to styling the various content elements in the app. Let’s change the general <ion-content> background color to a light tan. In the app.scss file, add the following CSS:
ion-content {background-color: #f4efdd;}
ion-card-header {background-color: #cfcbbb; font-weight: bold;}
ion-card-content{margin-top: 1em;}
ion-item-divider.item {background-color: #ab903c; color: #fff;
     font-size: 1.8rem; font-weight: bold !important;}
.item {background-color: #f4efdd;}
.toolbar-background {background-color: #706d61;}
.searchbar-input-container {background-color: #fff;}
As you can see this CSS is a mix of styling the Ionic components directly, such as the ion-content and ion-card-header, but also setting specific CSS classes. By setting this in the app.scss, these will be applied throughout the app. If you needed to set the style of a specific page or component, then you would do that within the .scss file for that item. Let’s do that now.
The park’s name on the Park Details page is a bit too far down from the header photo, and we need to make sure our header image fills the entire width:
page-park-details {
  h1{margin-top: 0;}
  img{width: 100%;}
}
Now the <h1> tag only on the Park Details page will have its top margin set to zero, leaving any other <h1> tags we might use styled as they normally would be (see Figure 8-10).

Figure 8-10. Our styled national parks app
The Ionic Framework actually exposes quite a few variables in their SCSS that you can override.
Virtual Scrolling
One of the greatest impacts on the performance of a hybrid application is the number of DOM elements on a given page. Usually this manifests as an issue when scrolling lists of content. Most users can spot a hybrid application by the poor scrolling performance. Knowing this issue, the team at Ionic focused its efforts on creating a scrolling experience that is as native as possible.
Our app only has 59 items, and each row is rather straightforward in the elements it contains. If we expanded our app to include all the national monuments, our list would exceed 400. At this value, we probably would start to see some stutter and jerkiness in the scrolling.
To address this issue, the Ionic Framework introduced a special set of directives, known collectively as Virtual Scrolling.
What About Collection Repeat?
If you used Ionic 1.x, you might be familiar with Collection Repeat. This was the system that was introduced to solve the problem of scrolling large datasets. It has been replaced with the Virtual Scrolling solution.
Instead of creating DOM elements for every item in the list, only a small subset of records (enough to fill the viewport) are rendered and reused as the user scrolls. The Virtual Scroller manages this completely behind the scenes for us.
There are a few differences between a standard list and one that uses Virtual Scrolling. First, the <ion-list> now has [virtualScroll] binding to our data. The data given to the virtualScroll property must be an array. Second, the <ion-item> now has a *virtualItem property, which references the individual item that will be passed into the template.
It is probably easier if you see the revised code for a park’s list:
<ion-list [virtualScroll]="parks">
  <ion-item *virtualItem="let park" (click)="goParkDetails(park)" detail-push>
      <ion-thumbnail item-left>
          <img src="assets/img/thumbs/{{park.image}}">
      </ion-thumbnail>
      <h2>{{park.name}}</h2>
      <p>{{park.state}}</p>
  </ion-item>
</ion-list>
Other than replacing the *ngFor="let park of parks" with the two virtualScroll properties, the code remains the same. However, there is one more change we should make to improve our list’s scrolling performance, and that is to replace the <img> tag with <ion-img>:
<ion-img src="assets/img/thumbs/{{park.image}}"></ion-img>
This tag is designed for use specifically with the Virtual Scrolling system. The <ion-img> tag manages HTTP requests and image rendering. Additionally, it includes a customizable placeholder element which shows before the image has finished loading. While scrolling through items quickly, <ion-img> knows not to make any image requests, and only loads the images that are viewable after scrolling.
Here are some additional performance tweaks that you might consider making to improve performance:
Custom List Headers
The Virtual Scrolling system also supports dynamic headers and footers. In this sample, our list will have a header inserted after every 20th record:
<ion-list [virtualScroll]="items" [headerFn]="customHeaderFn">

  <ion-item-divider *virtualHeader="let header">
    {{ header }}
  </ion-item-divider>

  <ion-item *virtualItem="let item">
    Item: {{ item }}
  </ion-item>

</ion-list>
and the supporting function would be:
customHeaderFn(record, recordIndex, records) {
  if (recordIndex % 20 === 0) {
    return 'Header ' + recordIndex;
  }
  return null;
}
When applied to our list of national parks, our <ion-list> becomes:
<ion-list [virtualScroll]="parks" [headerFn]="customHeaderFn">
  <ion-item-divider *virtualHeader="let header">
    {{ header }}
  </ion-item-divider>

  <ion-item *virtualItem="let park" (click)="goParkDetails(park)" detail-push>
    <ion-thumbnail item-left>
      <ion-img src="assets/img/thumbs/{{park.image}}"></ion-img>
    </ion-thumbnail>
    <h2>{{park.name}}</h2>
    <p>{{park.state}}</p>
     </ion-item>
</ion-list>
And in our park-list.ts file, we can add the following function to insert the first letter of the park’s name into our custom header:
customHeaderFn(record, recordIndex, records) {
  if ( recordIndex > 0) {
    if ( record.name.charAt(0) !== records[recordIndex-1].name.charAt(0)) {
      return record.name.charAt(0);
    } else {
      return null;
    }
  } else {
    return record.name.charAt(0);
  }
}
One last piece will be to provide a little bit of styling on ion-item-divider. Make the change in the park-list.scss to:
page-park-list {
  ion-item-divider {
    background-color: #ad8e40;
    font-weight: bold;
  }
}
So, we now have an app that looks like Figure 8-11.

Figure 8-11. Virtual Scrolling with dynamic headers applied
Summary
With this app we have explored how to work with a tab-based design, used a data provider, integrated a Google map, and applied some basic theming. If you want to extend this app some, here are a couple of ideas that you can try.
Add a park specific map to the page details screen.
Look at adding a photo slide show to each park. Ionic has an
<ion-slides>component that can do the trick.If you want a real challenge, look at calculating the distance to each park. There is a distance property already in the data.json file. You can leverage the Geolocation plugin to find your current latitude and longitude, then use the Haversine formula to calculate the distance.