UNIT 10
EXCELLENT ECOLOGY
THE WORD ECOSYSTEM DESCRIBES THE INEXORABLY INTERTWINED RELATIONSHIPS AMONG LIVING ORGANISMS, THEIR PHYSICAL ENVIRONMENTS, AND ALL OF THE OTHER ORGANISMS SHARING THE SAME SPACE. While some ecosystems are small, such as a decaying tree trunk, each ecosystem is part of a larger one, for instance, an island, a rainforest, or even an entire planet.

All living things depend on healthy ecosystems for survival. Here on Earth, there are a limited number of resources, and what happens in one ecosystem often impacts others, sometimes reaching all the way across the globe.
Currently, the world is losing species at an unusually high rate, largely as a result of human behavior. Scientists who study our planet, the environment, and creatures that live here are trying to understand what we can do to best protect the delicate balance of Earth’s larger ecosystem, which sustains us all.
The labs in this unit will help you get a closer look at the ecosystems that surround you. You’ll be amazed by the diversity of life in your own backyard.
LAB 40
PROTECTED PITFALL TRAPS
CREATE HIDDEN TRAPS TO CAPTURE CREEPING CREATURES.

MATERIALS
![]()
![]() Garden trowel
Garden trowel
![]() Collection container such as a cup, bucket, can, or plastic container
Collection container such as a cup, bucket, can, or plastic container
![]() Plastic lid slightly larger than the container (optional)
Plastic lid slightly larger than the container (optional)
![]() Rocks to elevate the lid (optional)
Rocks to elevate the lid (optional)
![]() White cloth
White cloth
![]() Magnifying glass
Magnifying glass

SAFTEY TIPS & HINTS
![]()
— Don’t set traps where people are likely to step in them.
— You’ll probably catch more insects in shady spots than sunny ones.
— Don’t pick up insects with bare hands unless you know they don’t bite or sting.
PROTOCOL
STEP 1: Select a spot for your pitfall trap. Gardens and areas near trees and plants are good places to sample arthropod populations.
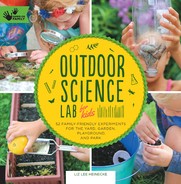
STEP 2: Use a trowel to dig a hole a little deeper than your collection container. (Fig. 1)

Fig. 1: Dig a hole for your container.
STEP 3: Place the collection container in the hole and fill dirt around it so that the top of the container is flush with the surrounding soil.
STEP 4: Camouflage the edges of the container with leaves, if you want.
STEP 5: For a protected trap, set rocks around the edges of the container and place a lid on top to make an elevated roof for your trap. This will protect whatever falls into the pit from drowning if it rains. (Fig. 2)
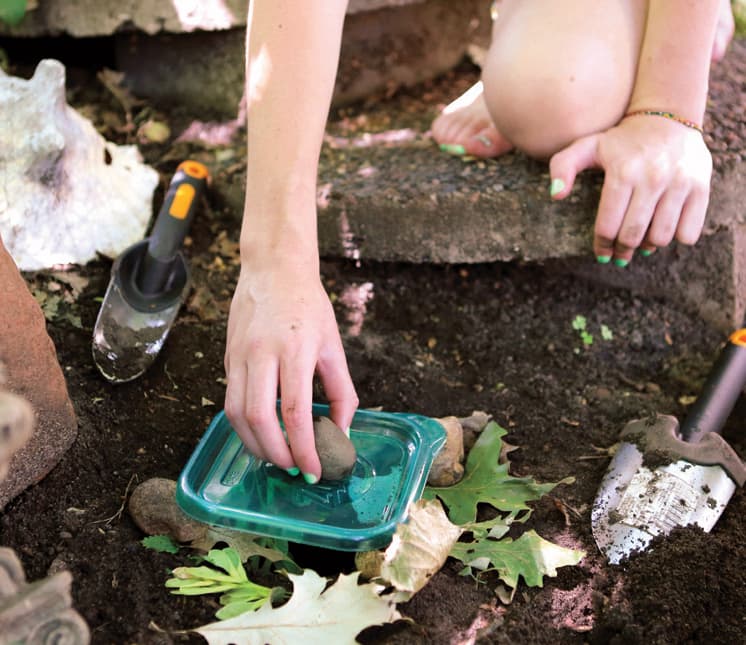
Fig. 2: Cover the trap with a raised lid.
STEP 6: Check your trap daily to see what falls in. Gently shake what you catch onto a white cloth or towel. (Fig. 3)

Fig. 3: See what falls in the trap.
STEP 7: Observe each arthropod with a magnifying glass. Record its approximate size and draw it in your science notebook. Set the arthropods free where you caught them. (Fig. 4)

Fig. 4: Observe the creatures you catch.
STEP 8: Try to identify the arthropods you captured in your pitfall trap.

CREATIVE ENRICHMENT
![]()
Set pit traps in a wooded area, an area with tall grass, weeds, and wildflowers, and a manicured grass lawn to compare how the arthropods you catch differ.
LAB 41
ALGAE AQUARIUM
DO SOME WATER TESTING TO SEE WHERE ALGAE THRIVE.
MATERIALS
![]()
![]() Clear jars or bowls
Clear jars or bowls
![]() Bottled spring water or tap water left to sit overnight to remove chlorine
Bottled spring water or tap water left to sit overnight to remove chlorine
![]() Small cups for taking samples
Small cups for taking samples
![]() 1/8 teaspoon sugar, for each sample
1/8 teaspoon sugar, for each sample
![]() Microscope (optional)
Microscope (optional)
SAFTEY TIPS & HINTS
![]()
— Never leave young children unattended near water.
PROTOCOL
STEP 1: Fill several jars or bowls halfway with chlorine-free water. (Fig. 1)

Fig. 1: Pour the chlorine–free water into jars.
STEP 2: Think of places algae might grow, such as lakes, streams, puddles, and pools. You can also test other natural objects, such as plants. Label each jar and bottle with a sample name.
STEP 3: Take small samples of water or objects from the areas you chose and add them to the jars of water. Add sugar to each of the jars to speed the growth of algae. (Fig. 2, 3)

Fig. 2: Take water samples.

STEP 4: Loosely cover or leave the lids off the jars and let them sit in a covered area for several weeks, checking for algae growth. Add more bottled water if they start to dry out. Record algae growth and the color of the algae from the different sources. (Fig. 4)

Fig. 4: See where algae grows.
STEP 5: If you have a microscope, look at the algae under magnification.
CREATIVE ENRICHMENT
![]()
Many metals hinder the growth of algae and other microscopic organisms. Create your own experiment, using one of your algae cultures to test different metals (e.g., coins) to see whether they slow the growth of the algae. Be sure to have a control sample and record everything in your science notebook.
LAB 42
CAPTURE-MARK-RECAPTURE
CATCH AND TAG ISOPODS SUCH AS PILL BUGS TO STUDY THEIR POPULATION SIZE.
MATERIALS
![]()
![]() Tape measure
Tape measure
![]() Sticks or garden markers
Sticks or garden markers
![]() String
String
![]() Container for bugs, such as an empty plastic container
Container for bugs, such as an empty plastic container
![]() Science notebook
Science notebook
![]() White correction ink or white nail polish
White correction ink or white nail polish
SAFTEY TIPS & HINTS
![]()
— In areas with poisonous snakes, use caution when lifting rocks and logs.
— You can usually find isopods under rocks, mulch, small logs, and paving stones.
PROTOCOL
STEP 1: Hunt for an area containing isopods, such as pill bugs and sow bugs. Look under rocks and logs. (Fig. 1)
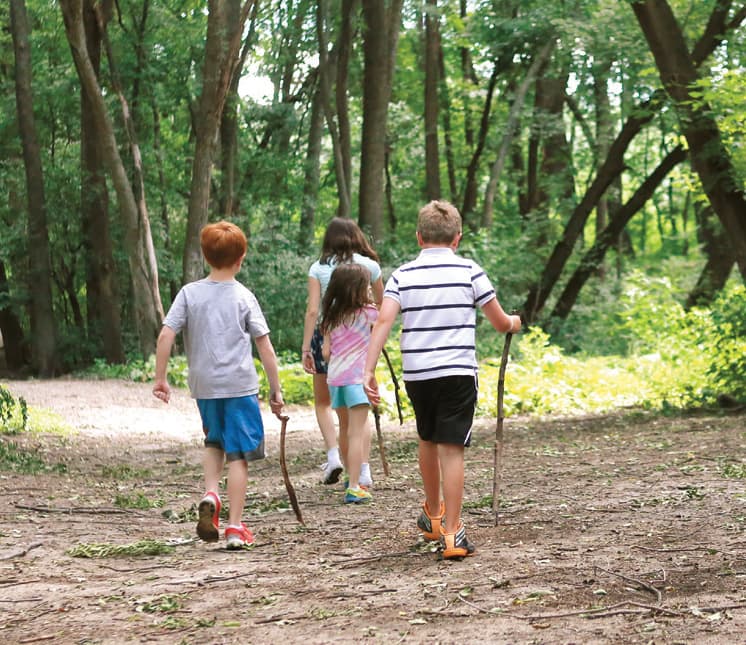
Fig. 1: Hunt for an area with isopods under rocks and logs.
STEP 2: Measure and mark off the area you want to sample using a tape measure, sticks, and string. For example, mark off a square area that is 61/2 feet (2 m) on each side.
STEP 3: Lift up a rock or log inside the area, collect any isopods you see, put them in a container, and count them. Record the total number of isopods in your notebook. (Fig. 2)

Fig. 2: Lift up rocks to find isopods.
STEP 4: Gently mark each isopod with white correction ink or nail polish. (Fig. 3)

Fig. 3: Mark isopods with white ink or nail polish.
STEP 5: Return the rock or log to its original position and release the isopods nearby. Leave your marked-off square standing.
STEP 6: After a few days, resample the same area, recording the total number of isopods you find and how many of them are marked with white. (Fig. 4)

Fig. 4: After a few days, resample the same area to see how many marked isopods you find.
STEP 7: Divide the number of marked isopods you recaptured on your second visit by the total number of isopods you found that day. Then, divide the number of isopods you marked the first day by that result. This will tell you approximately how many isopods live in the area you tested.
CREATIVE ENRICHMENT
![]()
Design a capture-mark-recapture experiment for a national park, including details about the population you want to study, how you will tag or label the animals, how long you will wait to recapture them, and how the information you glean could be used.
LAB 43
MOONLIT NATURE WALK
LET YOUR NIGHT VISION KICK IN ON A NOCTURNAL ADVENTURE.
MATERIALS
![]()
![]() Guide to local wildlife and star map
Guide to local wildlife and star map
![]() Insect repellent
Insect repellent
![]() Comfortable shoes
Comfortable shoes
![]() Thermometer or phone with weather app for telling temperature (optional)
Thermometer or phone with weather app for telling temperature (optional)
SAFTEY TIPS & HINTS
![]()
— Walk in a group and dress for the weather.
— Take your walk on a night when the Moon is full or almost full so you can see.
— Set out around twilight.
— Bring flashlights, but keep them off unless you need them. Your eyes will adjust.
— Hike in an area you know well and stay on the path or go with a guide at a local nature center.
PROTOCOL
STEP 1: Will you be walking in a prairie, at the seashore, or in a forest? Is it summer or winter? Research which animals you might see and hear at night. Look at a star map or a star app to find out what constellations you might spy.
STEP 2: Put on bug spray and comfortable shoes, and hit the trail when the sun goes down. (Fig. 1)

Fig. 1: Hit the trail as the sun goes down.
STEP 3: Walk quietly, stopping frequently to listen. It can take half an hour for your eyes to completely adjust to the dark. Do night sounds change as it gets darker? (Fig. 2)
Fig. 2: Your eyes will adjust to the dark.
STEP 4: In summer, listen for crickets. Count how many chirps you hear in fourteen seconds and add forty to get the temperature in Fahrenheit. To calculate the temperature in Celsius, count the chirps in twenty-five seconds, divide by three, and add four. Compare your number to the temperature on your thermometer or phone. It should be pretty close! (Fig. 3)

Fig. 3: Close your eyes and listen.
STEP 5: Close your eyes and breathe in. Does the air smell different at night? (Fig. 4)

Fig. 4: Take a nature walk on a night when the Moon is full.
STEP 6: Look at the stars. Can you find the Big Dipper or the Milky Way?
STEP 7: Listen for frogs and see how many different calls you hear.
CREATIVE ENRICHMENT
![]()
Bring a UV/black light flashlight on your night walk to look for fluorescent fungi and fauna, including certain lichens, scorpions, and millipedes that will glow under the beam.
LAB 44
QUADRAT SAMPLING
EMBARK ON AN ECOLOGICAL STAKEOUT TO OBSERVE PLANTS.
MATERIALS
![]()
![]() 4 stakes or ice pop sticks
4 stakes or ice pop sticks
![]() Measuring tape
Measuring tape
![]() About 16 feet (5 m) of string or yarn
About 16 feet (5 m) of string or yarn
![]() Science notebook
Science notebook
![]() Plant identification book or app
Plant identification book or app
SAFTEY TIPS & HINTS
![]()
— Avoid placing your quadrat where there is poison ivy or poison oak.
— Bring extra stakes along, in case some break.
PROTOCOL
STEP 1: Choose the area you want to sample. A lightly wooded area works well for amateur ecologists.
STEP 2: Place a stake or ice pop stick in the ground at a random spot.
STEP 3: Measure a spot about 3 feet (1 m) away from the stake and place another stake in the ground. (Fig. 1)

Fig. 1: Measure out a grid.
STEP 4: Tie your string between the two stakes.
STEP 5: Place another stake about 3 feet (1 m) away from each of the first two stakes to form a square. (Fig. 2)

Fig. 2. Place stakes at the corners.
STEP 6: Use the string to connect the stakes, marking off an area of about 3 feet (1 m). This is called a quadrat. (Fig. 3, 4)

Fig. 3: Tie strings between stakes.

STEP 7: Count the total number of trees and plants inside the square and record the number in your notebook.
STEP 8: Try to identify the trees and plants contained in the square and how many there are of each species you find.
STEP 9: Remove the stakes and string, walk several feet (2 to 2.5 m) in a random direction, and repeat steps 2 through 8.
STEP 10: After taking at least two quadrat samples, compare your results. Are the number of plants and species consistent in each grid?
CREATIVE ENRICHMENT
![]()
1. Design and build a rigid quadrat using wood or metal.
2. Calculate species density for each type of plant or tree you found in this lab.
3. Figure out approximately how many quadrats it would take to cover the entire ecosystem you are sampling.