
In the two previous chapters, you built an application called wxPIM. You used the knowledge of Webix you built up in prior chapters and learned a few new things as you built the app. Now, wxPIM is a decent little app: it’s nominally useful and works whether on a desktop or mobile device.
However, what happens if you want to use it on more than one device? Indeed, you can already, but the data you create won’t be shared between them. That’s a little bit of a deal-breaker, no?
To address that issue, you need a server. As the title of the chapter says, you need a cloud (since everything is a cloud these days if it’s connected to other machines it seems!), and you need to hook wxPIM up to it.
Now, this is a book about Webix, not about building servers. But, fortunately, there’s a tool out there that makes building serves remarkably easy, and best of all, it uses the same fundamental technology as you used when building wxPIM itself, namely, JavaScript. I am, of course, talking about the famous and popular Node.js, or just Node for short. In this chapter, you’ll build a simple Node-based server to store your data on and then modify wxPIM to talk to that server. If you do this right, you’ll be able to run wxPIM on multiple devices, save your data to the server, and access it on other devices as well.
Of course, if the name Node, REST, Express, and NeDB all already have strong meaning for you, then, by all means, skip ahead to the “Hooking wxPIM Up to the Server” section. But, otherwise, read on, and consider the next few sections an added bonus on top of learning Webix! (Hey, I like to give my readers more than they bargain for when I can!)
Building a Server with Node…Wait, What’s Node?
Ryan Dahl. That cat has some talent, I tell ya! Ryan is the creator of a fantastic piece of software called Node.js, or just plain Node from here on out. Ryan first presented Node at the European JSConf conference in 2009
, and it was quickly recognized as a potential game-changer, as evidenced by the standing ovation his presentation received.
Node is a platform for running (primarily, though not exclusively, server-side) code that is high-performance and capable of handling tons of load with ease. It is based on the most widely used language on the planet today: JavaScript
. It’s extremely easy to get started with and understand, yet it puts tremendous power in the hands of developers in large part thanks to its asynchronous and event-driven model of programming. In Node, almost everything you do is nonblocking, meaning code won’t hold up the processing of other request threads. This, plus the fact that Node uses Google’s popular and highly tuned V8 JavaScript engine to execute code (the same engine that powers their Chrome browser), makes it very high performance and able to handle a large request load.
It’s no wonder that so many significant players and sites have adopted Node to one degree or another. Moreover, these aren’t minor outfits either; I’m talking about names you doubtless know, including DuckDuckGo, eBay, LinkedIn, Microsoft, Walmart, and Yahoo as just a few examples.
Node
is a first-class runtime environment, meaning you can do things like interact with the local file system, access relational databases, call remote systems, and much more. In the past, you’d need to use a “proper” runtime like Java or .NET to do all this; JavaScript wasn’t a player in that space. With Node, this is no longer true!
To be clear, Node isn’t in and of itself a server. You can’t just start up Node and make HTTP requests to it from a web browser. It won’t do anything in response to your requests by default. No, to use Node as a server, you have to write some (straightforward and concise, as you’ll see) code that then runs inside Node. Yes, you effectively write your own web server and app server, if you want to split hairs (or potentially FTP, Telnet, or any other type of server you might want). That’s a very odd thing to do as a developer, to say the least, and it does sound daunting! To be sure, it would be if you tried to write a web server from scratch in many other languages, especially if you want it to do more than just serve static content files. But not with Node!
But remember, acting as a server is just one capability that Node
provides as a JavaScript runtime, and it can provide this functionality only if you, as a developer, feed it the code it needs to do so! In fact, a great many developer tools, and other types of apps, use Node as their runtime nowadays. Node really is all over the place!
Node also allows you to use the same language and knowledge on both client and server, something that was difficult to accomplish before. In fact, aside from Java and some Microsoft technologies, there never before has really been an opportunity to do so until Node came along. It’s a pretty compelling opportunity.
Another key aspect of Node is a driving design goal of the project, which is keeping its core functionality to an absolute minimum and providing extended functionality by way of APIs (in the form of JavaScript modules) that you can pick and choose from as needed. Node gets out of your way as much as possible and allows you only to introduce the complexity you really need, when you need it.
In addition to all of this, getting, installing, and running Node are trivial exercises, regardless of your operating system preference. There are no complicated installs with all sorts of dependencies, nor is there a vast set of configuration files to mess with before you can bring up a server and handle requests. It’s a five-minute exercise, depending on the speed of your Internet connection and how fast you can type!
All of this makes working with Node so much simpler than many competing options, while providing you with top-notch performance and load-handling capabilities. Moreover, it does so with a consistent technological underpinning as that which you develop your client applications.
That’s Node in a nutshell! Please be aware that this section is in no way, shape, or form meant to be an exhaustive look at Node. There’s so much more to Node than this, and if you’re new to it, I very much encourage you to peruse the Node site for a while. But, for the purposes of this book, this level of understanding (plus a few additional items that you’re going to get to next) should be sufficient.
Next, let’s see about getting it onto your machine so that you can start playing with some code together.
Getting and Installing Node
Getting and installing Node couldn’t be easier, and there’s only one address to remember:
http://nodejs.org
. That’s your one-stop shop for all things Node, beginning with, right on the front page, downloading it, as you can see in Figure 8-1.
Figure 8-1
Whatever the button label
, you’re probably not going to miss it!
Although it really shouldn’t matter for our purposes here, I do suggest using the LTS (Long Term Support) version. The LTS version
tends to be more stable with fewer bugs, at the cost of not having all the latest and greatest features.
The download will install in whatever fashion is appropriate for your system. For example, on Windows, Node provides a perfectly ordinary and straightforward installer that will walk you through the necessary (and extremely simple) steps. On Mac OS X, a typical install wizard will do the same.
Once the install completes, you will be ready to play with Node. The installer should have added the Node directory to your path. So, as a first simple test, simply type node at a command prompt and press Enter. You should be greeted with a > prompt. Node is now listening for your commands in CLI mode
. To test it, type the following:
console.log("test");
Press Enter, and you should be greeted with something like what you see in Figure 8-2 if running on Windows. (On Mac OS X or *nix, it should look substantially the same, accounting for platform differences.)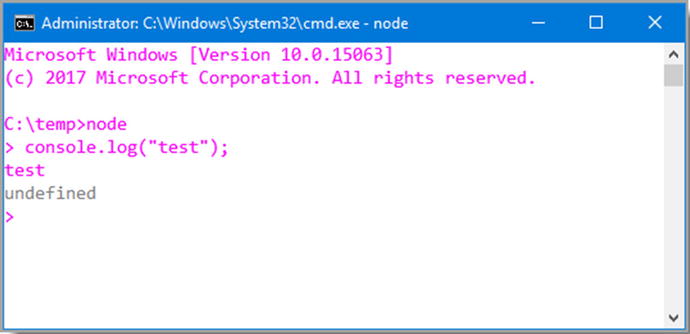
Figure 8-2
Say hello to my little friend, Node!
Interacting with Node in CLI mode is fine, but it’s limited. What you really want to do is execute a saved JavaScript file using Node. As it happens, that’s easy to do! Simply create a text file named listing_08-01.js, for example, and type the code shown in Listing 8-1 into it and save it.
var a = 5;
var b = 3;
var c = a * b;
console.log(a + " * " + b + " = " + c);
Listing 8-1
A Quick Node Test
To execute this file, assuming you are in the directory in which the file is located, you simply need to type this:
node listing_08-01.js
Press Enter after that, and you should be greeted with an execution, such as the one you see in Figure 8-3 (in which I’ve also displayed the JavaScript file to be executed).
Figure 8-3
An elementary
Node example
Now, clearly this little bit of code is unexceptional, but it does demonstrate that Node can execute plain old JavaScript just fine. You can experiment a bit here if you like, and you will see that Node should execute any basic, plain old JavaScript that you care to throw at it.
Even if that were all Node did, it would be pretty cool and useful for many things. Of course, that’s far from all that Node can do! I’m here to talk about writing server software, and Node makes that a trivial exercise indeed.
My First Node Server
When I say that Node makes writing server software trivial, that may well be the understatement of the year! Perhaps the simplest example (that actually does something anyway) is what you can see in Listing 8-2.
var http = require("http");
var server = http.createServer(function (inRequest, inResponse) {
inResponse.writeHead(200, { "Content-Type" : "text/plain"} );
inResponse.end("Hello from my first Node server!");
});
server.listen(80, "127.0.0.1");
Listing 8-2
A Simple Web Server
in Node
Type that into a file, save it as listing_08-02.js, and then launch it from a command line the same way you did for the previous example. Now fire up your favorite web browser, and visit http://127.0.01. You’ll be greeted with the text “Hello from my first Node server!” If that isn’t a little bit amazing to you, then you’ve probably seen the Flying Spaghetti Monster travel one too many times around your neighborhood and have been totally desensitized to the amazing!
Obviously, this is a simplistic example, but it should get the basic idea across well enough. But, what exactly is going on in that simple example at a code level? As it happens, quite a bit actually, and most of it is key to how Node works.
The first concept is the idea of importing modules. In the example code, http is a module. This is one of the core Node modules, and, as such, it is compiled directly into the Node binary. Therefore, you won’t find a separate JavaScript file for it in the Node installation directory. This is true of all the Node core modules, all of which you can find in the Node documentation on the Node site. To import any of them, you just require() them by name.
You can create your own modules too just by adding other .js files and require()’ing them. This gets a little more involved, with discussions of things like scope and exports, but for the purposes of this book you won’t need to do that, but I wanted to at least mention it in case you really are completely new to Node so that you can find the appropriate section in the Node docs to describe this.
The
require() function
returns an object that is essentially the API provided by the module. This object can include methods, attributes, or whatever you want. In fact, it could conceivably be just a variable with some data in an array. More times than not, though, it will be an object with some methods and attributes. In the case of http in this example, one of the methods the object returned is createServer()
. This method creates a web server instance and returns a reference to it. The argument you pass to this method is a function that serves as a request listener, that is, the function executed any time a request is made to the server.
Creating a web server alone won’t actually do anything. It won’t respond to requests until you do a little more work. The createServer() method returns a reference to the web server instance, which contains the method listen(). That method accepts a port number on which the server should listen and, optionally, the hostname on which to listen. In the example, the standard HTTP port 80 is specified, along with the standard local machine address 127.0.0.1. Once you call this method, the server will begin listening for requests (assuming nothing else is already using that port on your system, that is!), and for each request that comes in, it will call the anonymous function passed to createServer().
This callback function
(callback functions being the most common mechanism by which Node provides nonblocking functionality) receives two arguments, inRequest and inResponse, which are objects representing the HTTP request and response, respectively. In this simple example, all this callback function does is first write an HTTP header to the response object specifying a good outcome via an HTTP 200 response code. You also pass, as the second argument to writeHead(), an object that defines response headers. In this case, the Content-Type header is set to text/plain to indicate a simple text response. Finally, the end() method is called on the response object, passing the response you want to send back. This completes the handling of a given request.
As you can see, creating a server with Node is exceedingly simple, in its most basic form at least. However, there’s an even easier way to do so, and it’s in fact probably the most common way of writing a Node server, and that’s by using the very popular Express module. But, before you go there, let’s discuss something else first: NPM.
Node’s Partner in Crime: NPM
NPM, which stands for Node Package Manager
, is a companion app that installs alongside Node. With it, you can download packages, which are just JavaScript modules (and any supporting stuff they might need) from a central package registry, which you can find at
https://www.npmjs.com
.
Using NPM is simple: it’s simply another command to run from a command prompt, just like Node. For example, if you want to see what modules have been installed into the global cache, you can execute the following:
npm -g ls
The global cache is one place modules can be installed to. This makes them accessible to any project that uses Node
. You can also install modules in a specific project, and this is usually where you do want to install them. For example, let’s say you create a directory named MyFirstNodeProject. In it, you execute the following:
npm install express
If you do that, you’ll find that a directory called node-modules has been created, and inside it will be a lot of…well, a lot of stuff you typically don’t need to worry about too much! In short, though, it’s all the code that makes up the Express package (which I’ll cover shortly) plus whatever packages Express itself depends on (and whatever they might depend on, and so on). NPM takes care of fetching all of those dependencies for you. You’ll also notice a file named package-lock.json has been created, and for our purposes here you don’t need to worry about that except to know not to delete it as NPM needs it to do its job.
Now, in all of this, I did skip one step that clearly is optional but is, in fact, typical, and that’s initializing a new project. With most Node/NPM projects, you’ll also have a file named package.json in the root directory of the project. This provides information to NPM and Node about your project that it needs to do certain things. While you can write this file by hand or even go without it, it’s a good idea to have it, and it’s a good idea to let NPM create it for you, which you can do by executing this command:
npm init
If you are following along, please make sure the directory you run this from is empty (delete node_modules and package-lock.json if present). This will trigger an interactive process that walks you through the creation of the package.json file, something like you see in Figure 8-4.
Figure 8-4
Initializing a project with NPM
Opening the generated package.json file
should look something like this:
{
"name": "myfirstnodeproject",
"version": "1.0.0",
"description": "Testing",
"main": "index.js",
"scripts": {
"test": "echo "Error: no test specified" && exit 1"
},
"author": "Me",
"license": "ISC"
}
Now, let’s say you want to add that Express package to this project. Running the same install command as before will do that, but it will also update the package.json file, adding this element:
"dependencies": {
"express": "^4.16.1"
}
The reason this is important is that now, let’s say you want to give this project to someone else. You typically do not want to give them all the dependencies your project requires, all the content of
node_modules
. Instead, they can re-create it using the package.json file just by doing this:
npm install
That will read the package.json file and automatically install all the dependencies! Now, the person you’re working with has the same development environment as you as far as project dependencies go for this project without having to do any leg work themselves! Pretty sweet, right?
As you can guess, there’s quite a bit more to NPM than just what I’ve shown here, but these are the real basics that will allow you to understand the code for the server that you’re going to write in support of wxPIM. And, in fact, I’m just about ready to discuss that, but before I do, there’s one last bit of foundational knowledge I need to make sure you have, namely, REST.
Taking a Very Active Break with REST
REST
, which stands for Representational State Transfer, is an architectural approach to providing web services. The basic idea is that a given URL represents a resource, and a client can interact with that resource using standard HTTP methods such as PUT, GET, POST, and DELETE (which correspond to the well-known CRUD methods of Create, Retrieve, Update, and Delete). This is all independent of what technology the service is written in.
For example, let’s say you want to provide access to a bank account resource. The URL might be as follows:
If you access this URL with an HTTP method of GET, you will retrieve checking account 123456789, assuming it exists, of course. The format of the response, in this case, would be JSON since that’s the extension used. Some RESTful web services, as many people refer to this model as, allow you to request that the response be in XML, JSON, or other formats, while some don’t give you a choice (in which case you might not have an extension there at all).
The response is said to be a “representation” of the checking account resource, which is where the “Representational” portion of REST
comes from. Likewise, if you wanted to update an attribute of this account, you would POST back to the same URL, and the contents of the POST body would be the JSON for the account with the changes in it (and this covers the “State Transfer” part of the name). To create a new account, use the HTTP PUT method and leave off the account number part of the URL; to delete the account, just use the DELETE method without sending any content (and, most likely, without the JSON extension part of the URL).
Note that the HTTP methods are usually referred to as verbs, since they specify an action, and the corresponding operations I’ve described here are typical but not set in stone. You may encounter a service that uses other HTTP methods for the various operations the API of the service supports, but what I describe here is what you’re likely to see most of the time.
I mentioned verbs there, and it’s an important distinction. Notice here is that the URL doesn’t include anything like getAccount?acctNum=123456789, like you might typically see in a normal URL. Instead, the HTTP method conveys to the service what action you want to be performed, while the URL includes the noun, or the object (or type of object), that is being operated on.
REST is a pretty simple model for web services but one that has gained a ton of traction precisely because it is so simple! It’s easy to write clients in a variety of technologies, and creating RESTful service providers is no more difficult. It builds on the standards we all know and love and use every day (HTTP) and can make use of the same sorts of security mechanisms used in such environments.
You already know enough of Node to create such a service interface, but it can be even easier, if you can believe it, and that’s thanks to one specific module, Express, and that’s what you’re finally getting to now!
Hurry It Up, Kid: Express It!
Express (
https://expressjs.com
), which is perhaps the most popular Node module around, is a minimal framework for creating web applications that offers developers a set of robust features that eliminates a lot of boilerplate-type code from your application code. Express offers a large set of APIs, utility methods, and what it calls middleware to provide many of the common things modern web applications need. Being a minimal, thin framework means that Express provides excellent performance on top of everything else.
Express is especially useful for, but is in no way specific to, writing RESTful API code. If you look back at the previous sample server code, you’ll notice that there’s no mention of HTTP methods there. In fact, every request of any type will be handled by the one callback function supplied. That means if you want to implement a RESTful service, that callback will need to interrogate the request object, determine the HTTP method, and then branch accordingly. That’s not especially difficult to do, but it’s code you have to write. Then, since REST is based on URL structure, you’ll need to write code to parse the URL to figure out what operation to perform. Again, it’s not rocket science, but it’s work you have to do yourself.
Using Express avoids all of that. Instead, you write code like this:
const app = express();
app.get("/cars/:vin", function(inRequest, inResponse) {
// Return a car object with the specific VIN number
});
app.listen(8080);
Here, you create an Express application
, which is the basis of everything you do with Express. Then, you tell the app that for a GET request to a URL in the form /cars/:vin, execute the given function. The :vin part of the URL tells Express that after /cars in the URL will come a value that you want to have presented in the collection of parameters that Express parses out of the URL and you want to name it vin (which you can access in the function by doing inRequest.params.vin). In case you are unaware, VIN is short for “vehicle identification number” and is the unique number that identifies every car manufactured. So, assuming you have a database of VIN numbers, a GET request to this particular URL can return an object representing the car associated with the VIN number specified. Finally, you just have to start up the Express app by telling it what port to listen on. That’s it! No parsing the URL yourself, no handling different request methods, not even creating a server yourself. Express takes care of all those details for you!
As with Node and NPM
, there’s quite a bit more than Express can do, and you’ll see some of it when you write the server code. But for the most part, this example shows you almost everything you need. I will, of course, describe the additional parts, but before that you have one final helping hand to look at that you’ll need to write the wxPIM server, called NeDB.
Third-Party Data Help: NeDB
Since the whole point of writing a server for wxPIM to talk to is to store the data somewhere beyond local storage in the browser, you obviously need a mechanism to save that data on the server. There are a great many options for doing so in a Node application, from just writing plain-text files on the file system to interacting with an Oracle database. However, for our purposes here, I wanted something with a simple API and something that doesn’t require setting up yet another server. The module I found that fits the bill on all counts is NeDB (
https://github.com/louischatriot/nedb
) by Louis Chatriot.
NeDB has an API that seeks to emulate the popular MongoDB, which is a document-based database that has no schema. MongoDB and by extension NeDB are not relational in nature, instead storing (usually) JSON-based objects (called documents) and then allowing you to query them based on their attributes.
While MongoDB is its own server that a Node-based app can connect to, NeDB is JavaScript-based and is just a module added to a Node app. NeDB also stores its data in plain text files that you can open in a text editor if you want, which is nice in case you ever need to recover anything. It has (most) of the important features of MongoDB, certainly everything you’ll need: creating items, updating them, finding them and deleting them, and allowing you to do so across different collections of items.
To give you a quick flavor of working with NeDB, here’s a simple example:
const db = new nedb({ filename : "people.db", autoload : true });
db.insert({ firstName : "Billy", lastName : "Joel" },
function (inError, inDocument) {
if (inError) {
console.log("Error" + inError);
} else {
db.findOne({ firstName : "Billy" },
function (inError, inDocument) {
if (inError) {
console.log("Error" + inError);
} else {
console.log(inDocument);
}
}
);
}
}
);
You create an instance of a database by providing NeDB
with the file name of that database and also tell NeDB to load it at that point automatically. Then, you can call the insert() method, passing it an object to insert and a callback function. The callback function can do whatever makes sense. In this case, I just retrieve the document that was just inserted and log it to the console. Remember that NeDB is almost always asynchronous, so you’ll need to deal with callbacks (or use a Promise-based approach if you prefer). The findOne() method does exactly that: finds a specific single document based on some query, here based on the firstName attribute. Of course, if there’s a chance there’s more than one document with a firstName of Billy, then chances are you want to use the find() method instead, which returns an array of matching documents.
For the purposes of this server, you won’t need too much more NeDB than this, but know that it provides a very rich API, so if you need a simple database module that doesn’t have any outside dependencies (as in no additional server to run), then NeDB is, in my opinion, one of the best choices available in the world of Node development.
Writing the Server
Before you really get into the code behind the server
, I want to make a quick disclaimer. There are two things that won’t be dealt with here: security (and by extension any notion of multiple users) and robust data synchronization. For the former, it’s simply not needed for what you’re doing in this book. For the latter, data synchronization is a complex and tricky topic that, again, isn’t really required in this book. Instead, I’ll be implementing a simple data synchronization scheme that I’ll admit right up front isn’t production-ready. But, as a learning exercise, I believe it’s more than sufficient.
With that said, let’s get down to business!
First things first, being a Node application that has a few dependencies, you’re going to need a properly set up package.json file
. It just so happens I’ve got one ready to go.
{
"name" : "wxPIM",
"version" : "1.0.0",
"description" : "wxPIM app from the book Practical Webix",
"repository" : "https://github.com/fzammetti/wxpim",
"main" : "server.js",
"author" : "Frank W. Zammetti",
"license" : "MIT",
"dependencies" : {
"body-parser" : "*",
"express" : "*",
"nedb" : "*"
}
}
As you can see, it’s just like the basic package.json that NPM generated for the earlier example (with values appropriate for this project inserted, of course), but now with a few dependencies listed. You know what express and nedb are now. The body-parser dependency is another module that handles the parsing of incoming request bodies. You’ll need this because when you perform POST and PUT requests for creating and updating data items, respectively, the data will be sent as a string of JSON in the body of the request. Parsing a request body is a little more involved with Node than you might imagine, so it’s far better to use some good, vetted, and existing code to do that, so body-parser it is.
One quick note: did you notice the "*" as the value for the three dependency attributes? Those values specify the version of each dependency you want NPM to pull down when you do an npm install command. The values here are known as SemVer values, short for “semantic versioning.” SemVer is a fairly in-depth topic, but it’s also not especially relevant for our purposes here. But, so as to not leave you hanging, the string "*" is a SemVer value that means that any version satisfies the dependency. You’re saying that any version of express and nedb could be used by our project. However, in practice, what happens is that NPM will pull down the latest available major release version. It’s a shortcut to say “gimme the latest stable version of this dependency.”
Now, you can move on, finally, to the server code, as housed in the (surprise!) server.js file. You’ll go through this in chunks, beginning with this bit:
const bodyParser = require("body-parser");
const express = require("express");
const nedb = require("nedb");
const path = require("path");
The first thing you need to do is to import the modules that will be used to write the server. The body-parser you know about, and
express
and nedb should be obvious. The path module is a module that contains useful utility functions for dealing with file system paths. And, it just so happens, that’s used in the next chunk of code, among other things:
const app = express();
app.use(bodyParser.json());
app.use("/", express.static(path.join(__dirname, "../app/v3_add_Server")));
app.use("/webix", express.static(path.join(__dirname, "../../webix")));
A shown in the previous examples, the first step to using Express is to instantiate it, and what you get back is a skeleton Express app that you can build upon as necessary. The app.use() method is one way to build upon it. Express has a notion of something called middleware. Middleware consists of functions that get inserted into the request/response cycle of the app. In other words, think of a request coming into an Express-based server application. There may be a number of things you want to happen to the request. Maybe you want to log its content, then check it for some security token (aborting if not found probably), then parse the request URL to get a map of parameters on it, and finally process the request in whatever application-specific code you’ve written. If you imagine all those steps as a pipeline that the request goes through, each of the steps can be considered middleware. Express lets you build up this pipeline by adding whatever middleware makes sense. You could certainly write all that logic in your application code, but that’s probably not a great idea, certainly not the most efficient approach. Using preexisting middleware (or writing your own that you can reuse time and again) is probably a better idea, and the middleware approach allows for this, as well as changing the processing flow of requests quickly and easily without changing much code at all.
Here, the first step you want to happen in the pipeline is for the body of the incoming request to be parsed and translated to a JSON object. So, you tell Express that by calling app.use() and passing it an instance of the middleware to execute, the return value of bodyParser.json() in this case. This piece of middleware will execute for all requests because there is no path specified.
However, what if you want some middleware to execute only for some specific path? That’s entirely doable: you just need to tell Express what the path is by passing it as the first parameter to app.use(). There’s two such calls after the first, and these use a built-in bit of middleware, express.static(). This tells Express that for a specific path, / and /webix here, the request should be served as static content. In other words, a request URL in the form /test.htm will return the file test.htm without executing any application-specific code. This is necessary for this app because the wxPIM code needs to be served when the initial request to <server_ip>/ is requested. Express intelligently assumes that if there’s nothing after that, then the index.html will be the default. Since the Webix code and resources need to be loadable too, a second app.use() call is made to cover those.
The middleware for both of those is returned by the call to express.static(). The argument to that function is a file system path, but here is where that path module comes into play. Using path.join(), and telling it to join __dirname with a relative path specification, results in a true, absolute file system path being generated. The variable __dirname is something Node supplies that corresponds to the path to the script that was executed, so that’s server.js in this case. The path.join() function
takes care of the system-specific details of creating the path so that the code can move from server to server, and as long as the location of the application code and Webix code stays the same relative to the server.js file, path.join() can create an absolute path that express.static() needs to work.
With the modules imported and the Express processing pipeline set up, it’s time to think about data, and that means creating/opening some databases with NeDB.
const databases = {
appointments : new nedb({ filename : `${__dirname}/appointments.db`, autoload : true }),
contacts : new nedb({ filename : `${__dirname}/contacts.db`, autoload : true }),
notes : new nedb({ filename : `${__dirname}/notes.db`, autoload : true }),
tasks : new nedb({ filename : `${__dirname}/tasks.db`, autoload : true })
};
I’ve created a single object with four attributes, one for each database associated with each wxPIM module.
(C)RUD: Create (POST Handler )
The reason I house the databases in an object keyed by name is because it will allow us to write generic code, as you can see in the first of five functions (one for each HTTP method POST, GET, PUT and DELETE, plus on extra that you’ll get to soon):
const postHandler = function(inRequest, inResponse) {
let [collection, id, item] = commonOpening("POST (create)", inRequest);
const db = databases[collection];
db.insert(item, function (inError, inDocument) {
if (inError) {
commonErrorHandler(inError, inResponse);
} else {
inResponse.status(201);
inResponse.send(JSON.stringify(inDocument));
}
});
};
app.post("/data/:collection", postHandler);
This handler handles POST requests
(which corresponds to the C, Create, in CRUD), as you can tell by the fact that the final line is to tell Express to use it for post requests, but only for URLs in the form /data/:collection. The :collection token means that Express will look for a single value after /data/ in the URL and will grab that value and put it in the inRequest.params map. The term collection here corresponds to the name of a wxPIM module, which matches up with the database members in the databases object (in all lowercase, though).
Terms of endearment.
When speaking of REST, especially in the Express world, you may hear the term routes and endpoints. Route means the part of the URL following the server name and the base part that identifies the API. So, if you make a GET request to this server app at 127.0.0.1/data/notes/1234, the route is notes/1234 (and the API itself is said to reside at 127.0.0.1/data). An endpoint represents a specific operation within an API, so that really refers to the HTTP method that’s used. To put it another way, a route is the name you use to access an endpoint, and the endpoint specifies the operation to perform on the item that name specifies (and of course, the URL is the combination of the two, plus the server path to the API itself).
The first thing this function does is call a common helper function, commonOpening(), which is this:
const commonOpening = function(inMethodDescription, inRequest) {
const collection = inRequest.params.collection;
const id = inRequest.params.id;
const item = inRequest.body;
console.log(
`${inMethodDescription}
collection: ${collection}
id: ${id}
item: ${JSON.stringify(item)}`
);
return [ collection, id, item ];
};
The goal here is to return the :collection token value, as well as the ID of an item and the parsed POST body as an object. There’s also some logging so you can see a request coming into the server on the console.
Now, it’s important to realize that this function is used by all the request handlers, even though for some, not all of the data items it pulls out of the request are present. For example, for this POST handler
, there’s not going to be an ID on the URL; there’s only going to be a collection. But, that’s fine. You’ll just get null values for the things that aren’t applicable. Later, you’ll see that for a DELETE request, you have no POST body, and that’s likewise not a problem. Using this common code, though, reduces duplication, and Don’t Repeat Yourself (DRY)
is usually a good principle to follow, so I have!
After that, you can finally see why the databases are contained in an object. You can use the :collection value as an index into that object to get a reference to the correct database for the module. This way, this POST handler will work for any wxPIM module and doesn’t need to know what they are (only the databases code needs to know about modules, but that’s a little harder to avoid frankly).
Once a reference to the correct database is obtained, then it’s just a matter of making a simple db.insert() call on it, passing it the parsed POST body in the variable item, which is whatever item the wxPIM client app is trying to create (an appointment, contact, note or task) and giving it a callback function.
The callback function, as you saw previously, first checks for an error, and if one occurs, it calls the commonErrorHandler() function.
const commonErrorHandler = function(inError, inResponse) {
console.log(inError);
inResponse.status(500);
inResponse.send(`{ "error" : "Server error" }`);
};
This again avoids repeating too much code. If any error occurs, you send back an HTTP 500 error response and a response body that is a bit of JSON that the client can display to the user.
If no error occurs, then you send back an HTTP 201
(created) and the created object, in case there are new members added to it that the client may need (in fact there is: NeDB adds an _id attribute, though the client code doesn’t actually need this). This is a best practice RESTful design in terms of both response code and what gets returned.
C(R)UD: Read (GET Handler )
The next bit of code you find in server.js is the R in CRUD, Read, or the GET HTTP request method handler.
const getHandler = function (inRequest, inResponse) {
let [collection, id, item] = commonOpening("GET (read)", inRequest);
const db = databases[collection];
const callback = function (inError, inDocuments) {
if (inError) {
commonErrorHandler(inError, inResponse);
} else {
inResponse.status(200);
inResponse.send(JSON.stringify(inDocuments));
}
};
if (id) {
db.findOne({ id : id }, callback);
} else {
db.find({}, callback);
}
};
app.get("/data/:collection/:id?", getHandler);
As you can see, it’s substantially the same as the POST handler, a theme you’ll see repeated for the remaining method. The commonOpening() function is used again to get the name of the collection to operate on, the ID of the item to get, and the POST body as the item (which of course isn’t relevant for this operation, but commonOpening() gets it anyway). This time, there are two types of request: getting a single specific item or getting all items for a specified collection. That’s where the if branch after the callback is defined comes into play. Notice that the callback isn’t passed inline to the NeDB method this time; it’s assigned to the callback variable instead. That’s because which NeDB method is called depends on whether the URL included an ID
or not, but either way, the same callback handler should be used. If it did include an ID, then the findOne() method, with the first argument being the match criteria to find the document with the specific ID, is what you need because the caller requested a specific item. If there was no ID, however, then the caller wants all items in the collection, so the find() method, with no match criteria, is used instead. But, for either, the same callback function is used; that’s why it’s separate this time, as compared to the POST handler. An HTTP 200 (ok) response code with the document(s) in the body is the response in either case.
Note how the path passed to the app.get() method specifies both :collection and :id? as tokens. The ? character has special meaning: it tells Express that the token is optional. Without that, Express wouldn’t recognize a request to get all because it would expect two tokens while only one would be passed (there’s no :id when requesting all items in a collection).
CR(U)D: Update (PUT Handler )
Next up is the PUT method handler, which handled the U in CRUD, Update.
const putHandler = function (inRequest, inResponse) {
let [collection, id, item] = commonOpening("PUT (update)", inRequest);
const db = databases[collection];
db.update({ id : id }, item, { returnUpdatedDocs : false },
function (inError, inNumAffected, inAffectedDocuments, inUpsert) {
if (inError) {
commonErrorHandler(inError, inResponse);
} else {
getHandler(inRequest, inResponse);
}
}
);
};
app.put("/data/:collection/:id", putHandler);
Once again, it’s almost identical in most ways to the previous two. Of course, this time, it’s the update() method of the database object that gets called, and it is passed a query, the ID of the item to update, and the updated item itself. The third argument tells the method that you do not want the document returned. The reason for this is that instead you’re going to call the getHandler() method. I ran into some issues when trying to use the returned document; some sporadic corrupt documents were being returned. I suspect it’s a NeDB bug, but the solution was simple enough: just use the code you already know works in the getHandler() method!
As with the GET handler, the URL
that maps to this function includes two tokens, one for the collection and one for the ID of the item to update, but this time the ID is not optional, so there’s no question mark involved.
CRU(D): Delete (DELETE Handler)
To complete the set of four CRUD methods, you, of course, need an HTTP DELETE handler
, and that’s up next.
const deleteHandler = function (inRequest, inResponse) {
let [collection, id, item] = commonOpening("DELETE (delete)", inRequest);
const db = databases[collection];
db.remove({ id : id }, { }, function (inError, inRemovedCount) {
if (inError) {
commonErrorHandler(inError, inResponse);
} else {
inResponse.status(200);
inResponse.send(id);
}
});
};
app.delete("/data/:collection/:id", deleteHandler);
Of course, this is extremely similar to updateHandler() because like that method, deleting requires a specific ID be specified, and it is passed as the query argument first. The second argument, an empty object, is used to specify options for the removal. NeDB supports a multi-option here (which is, in fact, the only one supported at the time of this writing) to allow for deleting multiple matching documents. But since that’s not something you need since you’re specifying a unique ID to delete, that’s just an empty object. Finally, app.delete() is called to map this function to the DELETE HTTP method
with a path that includes :collection and :id tokens, as you’d (ideally at this point!) expect.
The response from this function is an HTTP 200 and the ID of the deleted item, which is a typical convention for REST DELETE operations.
And, As an Added Bonus…
That takes care of the four CRUD operation handlers, but there’s one additional function that I alluded to earlier that you need, and that’s one to get all the data in all collections at once. This will be used whenever wxPIM starts up, so all the data on the server can be retrieved and stored in local storage in one request.
app.post("/getAllData", function(inRequest, inResponse) {
let [collection, id, item] = commonOpening("POST (getAll)", inRequest);
const returnObject = { };
let collectionsToLoad = item.length;
for (let collectionName of item) {
databases[collectionName.toLowerCase()].find({},
function (inError, inDocuments) {
if (inError) {
commonErrorHandler(inError, inResponse);
} else {
returnObject[collectionName] = inDocuments;
collectionsToLoad = collectionsToLoad - 1;
if (collectionsToLoad === 0) {
inResponse.status(200);
inResponse.send(JSON.stringify(returnObject));
}
}
}
);
}
});
You’ll notice first that I wrote this a little differently than the other four: the handler function is now an anonymous function passed to app.post()
. There’s no reason this is better or worse really; it’s nothing beyond aesthetics and the code style you prefer. The only thing I’d say is that if you think or know you will need to call a handler method directly, as I did with getHandler()
being called from updateHandler()
, then you really can’t use this inline anonymous function style.
But, regardless of style, the function isn’t too complex. It handles a POST request to the path /getAllData. Note that you might expect it to be something like /data/getAll so that it’s part of the base API, and that would be a reasonable expectation. However, that would clash with the previous POST handler because remember that it expects a collection name after the /data route, so /data/getAll would treat getAll as the collection name, and you’d have a problem since there is no such collection. By giving this function its own API route, that problem is avoided.
The POST body here will contain an array of module names, which remember means collection on the server side, which is really a synonym of database. That array is iterated over, and for each, the name is lowercased so that it matches what’s in the databases object, and then the
find() method
is called with no query on each database object, which returns to you all items in that database.
Now, this means you’ll have four asynchronous operations running at once, once for each database. For each, the returned documents are added to the
returnObject object
. When all of them are complete, a response needs to be rendered by the server. However, since the calls are asynchronous, you don’t know which order they’ll finish in, so how do you know when to render the response? Easy: you count down, starting from the number of items in the incoming array, until you hit zero in the callback. The order then doesn’t matter because whichever callback invocation results in the countdown reaching zero, that’s the one that fired last and so it knows to render the response, which is just a JSON serialization of returnObject, which then will contain all the data for all modules. You could write this in a Promise-centric way as well if you prefer that style of asynchronous coding.
Just one small bit of code remains in
server.js
, and it’s the code that kicks it all off.
app.listen(8080, function () {
console.log("wxPIM server listening on port 8080")
});
Yep, it’s just like you saw in the earlier example! Once this executes, the server is up and running, and wxPIM has a remote API to call to persist its data!
Hooking wxPIM Up to the Server
With the server code fully investigated, you can now look at the changes required to the wxPIM version you’ve developed over the past two chapters and make the changes necessary to connect the client app to the server. It turns out to not be all that much, but it does introduce some new Webix capabilities, so let’s dive right in!
Modules : A Small but Necessary Change
Virtually all of the changes are in the core code, save one minor but important change in all four modules. Previously, in the newHandler() of each module was this line of code:
wxPIM.modules.Appointments.editingID = new Date().getTime();
Now, that line is changed to the following:
wxPIM.modules.Appointments.editingID = "" + new Date().getTime();
This was needed because NeDB seemed not to be able to find documents when the IDs were numbers. So, by concatenating the time value with an empty string, JavaScript coerces the value to a string, which makes the queries with NeDB work as expected. Like I said, it’s a very minor thing but critical to making this work, and this is literally the only change to any module’s code!
Starting a Little Differently
To begin looking at the core code changes, you first have a small but important change in the
start() method
in core.js.
start() {
for (let moduleName of wxPIM.registeredModules) {
wxPIM.modules[moduleName] = new wxPIM.moduleClasses[moduleName]();
}
webix.ui(this.getBaseLayoutConfig());
webix.extend($$("baseLayout"), webix.ProgressBar);
webix.ui(this.getSideMenuConfig());
wxPIM.getAllData();
}
There are two changes here. The first is the line that adds a ProgressBar to the base layout using the
webix.extend() method
. This will be needed when you call the server. Since those requests are asynchronous, and because you want to keep this code as simple as possible, I’ll use the “block the user from doing anything until the code is finished” approach and mask the screen when a request is in flight. The ProgressBar will show a spinning icon during that period to give the user some indication that work is occurring. Blocking the user isn’t typically a great user experience (UX), but it is simple and effective, so it’s suitable for our purposes here.
Before You Go Any Further, Let’s Talk About Good Ol’ AJAX
AJAX is a technique that came to life, so to speak, at the hands of one Jesse James Garrett in an essay he wrote in February 2005. There, he coined the term AJAX
, which stands for Asynchronous JavaScript and XML. The interesting thing about AJAX, though, is that it doesn’t have to be asynchronous (but virtually always is), doesn’t have to involve JavaScript (but virtually always does), and doesn’t need to use XML at all (but probably doesn’t 99+ percent of the time).
Ajax is, at its core, an exceedingly simple, and by no stretch of the imagination original, concept: it is not necessary to refresh the entire contents of a web page for each user interaction, or each “event,” if you will. When the user clicks a button, it is no longer necessary to ask the server to render an entirely new page, as is the case with the “classic” Web. Instead, you can define regions on the page to be updated and have much more fine-grained control over user event handling as a result. No longer are you limited to simply submitting a form to a server for processing or navigating to an entirely new page when a link is clicked.
The interesting thing about Ajax is that it is in no way, shape, or form new, and it actually wasn’t even when Mr. Garrett coined the term. A few years ago, when AJAX
was still somewhat new, I liked to say that you could always tell who has done AJAX before and who hadn’t because those who had are mad that it was a big deal and they didn’t get credit for “inventing” it themselves!
Nowadays, the term AJAX isn’t used as much as before. People tend to talk about “out-of-band requests” or simply “asynchronous requests,” and as I alluded to earlier it’s virtually never XML nowadays. It’s almost always JSON. But, the core concept remains the same: call the server, get some data, and use it in some way without repainting the entire screen. That’s ultimately the point.
However, there are still remnants of AJAX it floating around, and one of the places you can find such remnants in in Webix itself, where you find the webix.ajax() function. This is the singular function that allows the client application to interact with the server.
When you call webix.ajax(), you get back an object that has a number of methods on it for configuring the call to the server, plus some methods for actually executing that call. There are also some shortcut methods available if you’re making typical GET and POST requests, so which call syntax you use comes down to what your needs are. I’m going to use the more verbose approach in the wxPIM server code because I think it’s slightly easier to see what’s going on.
And, rather than give you any contrived examples here, because it’s not at all fundamentally complicated, you’ll just look at the real use of webix.ajax() in the code.
Back to That getAllData( ) Method
With AJAX generically out of the way, you can look at the second change in the start() method, which is the call to wxPIM.getAllData(). This implements our very simplistic form of synchronization, as you can see here:
getAllData() {
wxPIM.maskUI();
webix.ajax()
.timeout(10000)
.headers({ "Content-Type" : "application/json" })
.post("/getAllData", JSON.stringify(wxPIM.registeredModules))
.then(function(inResult) {
localStorage.clear();
const allModuleData = inResult.json();
for (let moduleName of wxPIM.registeredModules) {
const moduleDataArray = allModuleData[moduleName];
const moduleDataObject = { };
for (let i = 0; i < moduleDataArray.length; i++) {
const nextItem = moduleDataArray[i];
moduleDataObject[nextItem.id] = nextItem;
}
localStorage.setItem(`${moduleName}DB`, webix.stringify(moduleDataObject));
}
localStorage.setItem("dataLoaded", true);
wxPIM.unmaskUI();
wxPIM.dayAtAGlance();
})
.fail(function(inXHR) {
$$("baseLayout").hide();
webix.message({
type : "error", text : "Server not available, wxPIM cannot start"
});
});
}
The first step is to block the UI with the
ProgressBar
that was added to the base layout. This is done with a call to wxPIM.maskUI().
maskUI(inModuleName) {
$$("baseLayout").disable();
$$("baseLayout").showProgress({ type : "icon" });
if (wxPIM.uiType === "desktop") {
for (let moduleName of wxPIM.registeredModules) {
let moduleWindow = $$(`moduleWindow-${moduleName}`);
if (moduleWindow) {
moduleWindow.disable();
if (moduleName === inModuleName) {
moduleWindow.showProgress({ type : "icon" });
}
}
}
}
}
First, the base layout is disabled, so no user input is possible, and the ProgressBar on it is shown. If you’re in mobile mode, then you’re done at this point, but if in desktop mode, then there’s more work to do. The problem is that the module windows aren’t part of the base layout, which means that the
ProgressBar
on it won’t block the windows. It doesn’t do much good to block the base layout if the user can still interact with a module window! So, you iterate the collection of modules and look for a window for each. If one is found, then it’s disabled. That covers all windows. Then, when you find the window corresponding to the name of the module that was passed in, then you show the ProgressBar on it (which is added when the window is launched, just like it’s added to the base layout). In the case of calling this from getAllData(), there is no module name passed in, but that’s fine—no harm, no foul.
Small launchModule( ) change.
As mentioned, there is a small change in launchModule() related to this. The change is simply that when webix.ui() is called to create the window, now the returned reference is captured in a variable win. Then, rather than immediately calling show() on it anonymously, a call to webix.extend() is first made to add the ProgressBar, just like is done to the base layout. Only after that is win.show() called. The reason for this is that if you call show() before the extend() call, then an error occurs, and the window doesn’t get built properly. Since show() was previously called directly on the reference returned by webix.ui() anonymously, this change was necessary; otherwise, there would have been no way to call extend() on it first and avoid that error.
Once that’s done, you can go ahead and call the server using that webix.ajax() method I mentioned. All of the AJAX calls that are made from here on out will have some common configuration: setting a timeout and headers. Because the UI is being blocked, you don’t want there to be a long timeout in case of problems. I decided on ten seconds, though you could argue for a lesser or greater value. It’s also necessary to ensure that the server knows that you’re sending in JSON in the POST body, so the Content-Type header needs to be set. Without this, the content won’t be parsed properly by Express body-parser middleware.
After the timeout() and headers() methods are called, it’s time to make the request, and that’s done through one of the methods of the object returned by webix.ajax(), which correspond to HTTP methods: del() (for DELETE), get(), patch(), post(), or put(). You provide these methods with the URL to send the request to, which here is that /getAllData route you created earlier. Then, in this case, you need to send an array of module names in the POST body so that object is serialized to JSON and provided as the second argument to the post() method.
The return value from any of these methods is a promise, so you can then attach a then() handler for successful responses and a fail() handler
for error responses. Assuming no errors occur, the first step in the then() handler is to clear local storage. Remember, this is a “cheap” method of synchronization here, so you’re literally just replacing whatever data you have locally with what the server gives you, making the server the canonical source of wxPIM data at all times.
After that, you, of course, need to populate local storage with what the server sent back, so the array of module names is iterated, and for each, the data from the returned object is pulled out based on the name. Each item in the data array is attached to an initially empty object using the id field of each array element as the key in the new object, and finally, that object is stored in local storage. That ensures the data structure that the client-side wxPIM code depends on is there.
When all the data has been stored, then it’s just a simple matter of calling wxPIM.unmaskUI() to reenable the UI.
unmaskUI() {
$$("baseLayout").enable();
$$("baseLayout").hideProgress();
if (wxPIM.uiType === "desktop") {
for (let moduleName of wxPIM.registeredModules) {
let moduleWindow = $$(`moduleWindow-${moduleName}`);
if (moduleWindow) {
moduleWindow.enable();
moduleWindow.hideProgress();
}
}
}
}
It’s exactly like wxPIM.maskUI() except of course you’re calling enable() on the base layout and all windows and hiding the ProgressBar components on each. Finally, a call to wxPIM.dayAtAGlance() is made to populate that screen, like would normally happen at this point even without the call to the server.
Now, in the case of a failure, you take drastic but simple and effective measures: hide the ProgressBar, hide the entire UI, and tell the user that wxPIM
couldn’t start. This is far from being a robust approach, but this isn’t an app you’ll be selling to people for real-world use, so it doesn’t need to be production-ready (and besides, this gives you an opportunity to enhance the app later as an independent learning exercise!).
Saving to the Server
Next up is the common
wxPIM.saveHandler() method
, which naturally needs to make an AJAX call to the RESTful API that is the wxPIM server code.
saveHandler(inModuleName, inFormIDs) {
const itemData = { };
for (let i = 0; i < inFormIDs.length; i++) {
const formData = $$(inFormIDs[i]).getValues();
webix.proto(itemData, formData);
}
itemData.id = wxPIM.modules[inModuleName].editingID;
delete itemData.$init;
wxPIM.maskUI(inModuleName);
const thenHandler = function(inResult) {
const moduleData = wxPIM.getModuleData(inModuleName);
moduleData[itemData.id] = itemData;
localStorage.setItem(`${inModuleName}DB`, webix.stringify(moduleData));
wxPIM.modules[inModuleName].refreshData();
$$(`module${inModuleName}-itemsCell`).show();
wxPIM.dayAtAGlance();
wxPIM.unmaskUI();
webix.message({ type : "error", text : "Item saved" });
};
const failHandler = function(inXHR) {
wxPIM.unmaskUI();
webix.message({
type : "error", text : "Server not available, data changes not currently possible"
});
};
const callURL = `/data/${inModuleName.toLowerCase()}`;
const callTimeout = 10000;
const callHeaders = { "Content-Type" : "application/json" };
const callBody = JSON.stringify(itemData);
if (wxPIM.modules[inModuleName].isEditingExisting) {
webix.ajax()
.timeout(callTimeout)
.headers(callHeaders)
.put(`${callURL}/${itemData.id}`, callBody)
.then(thenHandler)
.fail(failHandler);
} else {
webix.ajax()
.timeout(callTimeout)
.headers(callHeaders)
.post(callURL, callBody)
.then(thenHandler)
.fail(failHandler);
}
}
Things are the same early on: the same sort
of form merging you already know about is still done, but the changes start with masking the UI, as you saw in wxPIM.getAllData(). Next, you define a success and failure handler, which corresponds to thenHandler and failHandler. You have to remember that this method handles both creating a new item and updating an existing one, so there’s two different calls that can be made from here, a POST for creating and a PUT for updating. But, the basic logic in the then() handler and fail() handler is the same in both cases, so they get defined and stored in the
thenHandler and failHandler
references. Likewise, the URL starts off the same (but with the ID of the item added when doing an update), so the callURL variable contains that common base. To avoid repeating too much code, the callTimeout, callHeaders, and callbody variables are likewise created independently of the actual call.
Then, with all those variables populated with the appropriate value, the code interrogates the isEditingExisting member of the current module. If it’s true, then the if branch is followed, resulting in a put() call. This is where the ID is added to the base URL to create the complete appropriate URL for that operation. If a new item is being created, then the else branch executes, making a post() request.
Upon a successful call, the thenHandler code fires. You can update local storage only once the response comes back successfully from the server; otherwise, you would have a synchronization problem, so that’s the first step done in the callback. In fact, the code in the callback is essentially the same as before you added the server component to this app, save for hiding the mask and reenabling the UI. So, as before, the module is given a chance to update its data (its summary screen more specifically), and then the day-at-a-glance screen is asked to refresh itself as well in case this new or updated item is to be displayer there.
Similarly, the failHandler code simply unmasks and reenables the UI and tells the user the change couldn’t be saved. Nothing is saved to local storage in that case, and the user can retry the save if they want. Otherwise, they can treat the app as if it’s in a read-only mode.
Deleting from the Server
The final difference in the core code, meaning the last thing you need to do to make wxPIM server-aware, is a similar change to wxPIM.saveHandler() but this time in the wxPIM.deleteHandler().
deleteHandler(inModuleName) {
webix.html.addCss(webix.confirm({
title : `Please Confirm`, ok : "Yes", cancel : "No", type : "confirm-warning",
text : `Are you sure you want to delete this item?`, width : 300,
callback : function(inResult) {
if (inResult) {
wxPIM.maskUI(inModuleName);
webix.ajax()
.timeout(10000)
.del(`/data/${inModuleName.toLowerCase()}/${wxPIM.modules[inModuleName].editingID}`)
.then(function(inResult) {
const dataItems = wxPIM.getModuleData(inModuleName);
delete dataItems[wxPIM.modules[inModuleName].editingID];
localStorage.setItem(`${inModuleName}DB`, webix.stringify(dataItems));
wxPIM.modules[inModuleName].refreshData();
$$(`module${inModuleName}-itemsCell`).show();
wxPIM.dayAtAGlance();
wxPIM.unmaskUI();
webix.message({ type : "error", text : "Item deleted" });
})
.fail(function(inXHR) {
wxPIM.unmaskUI();
webix.message({
type : "error", text : "Server not available, data changes not currently possible"
});
});
}
}
}), "animated bounceIn");
}
This code is the same as before until you get inside the callback
. Masking and disabling the UI has been added again, and now a webix.ajax() call is made to the server to do the delete, this time using the del() method, which corresponds to the HTTP DELETE method. Since there’s just one type of call here, the code is simpler than in wxPIM.saveHandler() since there’s no branching involved. All the configuration for the call is therefore inlined, as are the then() and fail() handlers. Upon a successful response, the data is again deleted from local storage, the module is given a chance to refresh its data and summary screen, and the same goes for day-at-a-glance. The UI is returned to its usable state, and a message is shown to the user. If a failure occurs, the same message is given to the user indicating they appear to be in an offline state, and no data changes occur.
With that, wxPIM is now fully server-capable!
Summary
In this chapter, you took a small detour from Webix to learn about some server-side technologies including Node, NPM, Express, RESTful APIs, and NeDB. Then, you took a detour right back into Webix to learn how to hook wxPIM up to the server. You saw how easy it is to make calls to remote systems from a Webix app.
In the next chapter, you’ll take the next logical step, which is making wxPIM a true mobile app using the popular Cordova (aka Phonegap) tool.