This chapter covers two APEX features: conditions and authorization schemes. These two features can often be used to achieve the same thing: controlling the areas of your application the user can access and use.
You can use conditions to control the rendering of page elements (such as regions, reports, and page items), as well as to control the execution of certain pieces of logic (such as processes and computations). Many application elements allow a condition to be applied to them. Authorization schemes similarly allow you to control the display and processing of elements within your application, but in a more secure manner.
The key difference between conditions and authorization schemes is that a condition is used to control the rendering and processing of a specific element of your application (a page, a region, an item, and so on), whereas an authorization scheme is used to control access to a specific element in your application. The difference can be quite subtle, but as you'll learn in this chapter, it's also quite important.
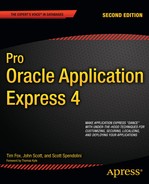
APEX offers many different condition types, and the number seems to increase with each new release. Figure 3-1 shows just a few of the condition types available.
Each of these condition types is well-documented and -defined in the Oracle documentation. Here, you'll see how to use some of the more common condition types in your applications, as well as some of the places you can use conditions to affect the elements that are displayed and processed on your page. We suggest that you refer to the Oracle documentation to review all of the condition types and experiment with them yourself. We also encourage you to check the list of available condition types whenever you upgrade to a new release of APEX to see if any new types have been introduced.

As you will see, quite often, you can achieve the same result using different condition types. Your choice will depend on your particular situation and personal preferences. For example, although one condition type may perform better than another that achieves the same goal, if the condition isn't evaluated that often, the performance aspect may not be as important as using a condition type that is easy to read. The key is to be aware of all of the different condition types available to you and how you can use them in your application.
The wording of the No Condition type varies depending on the actual element type you're using. For example, it may read "Button NOT Conditional" if you are using a button, or simply "No Condition" for a report region. However, the result is the same: the page element will always be displayed. This is the default condition for newly created elements (unless you change it during the creation). It's sometimes helpful to use the No Condition type during debugging to ensure that elements you wouldn't normally see are working as intended.
The Exists (SQL query returns at least one row) condition is perhaps among the first and most common condition types you'll use. It allows you to easily tie the conditional display of an item to the existence of a record (or records) in the database. If you're familiar with SQL, you've probably used this type of conditional SQL.
For example, the Buglist application currently allows everyone to create new records, as shown in Figure 3-2. You can modify this behavior so that only certain users will be able to see the Create button.

Let's say you want to show the Create button only to users who are designated as administrators. First, in the user_repository table, you need to identify which users are administrators. You can do that by adding a new column to hold an admin flag, as shown in Listing 3-1.
Example 3-1. Adding an admin Flag to the user_repository Table
apexdemo@10gR2> desc user_repository;

Name                  Null?    Type
--------------------- -------- ----------------
USERNAME              NOT NULL VARCHAR2(8)
FORENAME                       VARCHAR2(30)
SURNAME                        VARCHAR2(30)
EMAIL                          VARCHAR2(50)
PASSWORD_HASH                  RAW(16)
LOCKED_FLAG           NOT NULL CHAR(1)
VERIFIED              NOT NULL CHAR(1)

-- add the new colum
apexdemo@10gR2> alter table user_repository
2  add(admin char(1) default 'N'),

Table altered.
-- modify the existing records so that 'toby' is an administrator
apexdemo@10gR2> update user_repository
2  set admin = 'Y' where username = 'toby';

1 row updated.

apexdemo@10gR2> update user_repository
2  set admin = 'N' where username <> 'toby';

3 rows updated.

apexdemo@10gR2> commit;

Commit complete.

-- add a not null constraint to the new column
apexdemo@10gR2> alter table user_repository
  2  modify admin not null;

Table altered.

-- add a check constraint to the column
apexdemo@10gR2> alter table user_repository
  2  add constraint admin_yn check (admin in ('Y','N'));

Table altered.
Next, you need to check whether the user currently logged in to the application is an administrator, which will determine whether that user sees the Create button. In essence, you want to check whether a row exists in the user_repository table where the username is the same as the logged-in user and the admin flag is set to 'Y', as shown by the query in Listing 3-2.
Example 3-2. Query to Determine if the Current User Is an Administrator
select 1 from user_repository

  where upper(username) = :APP_USER
  and admin = 'Y'
You might wonder about the select 1 used in this query. You need to select something to return to the outer query, because the query is actually being used as an exists subquery. You could select the username or any other column or constant you preferred; however, doing a select 1 is a very common convention that you should follow, unless you have specific reasons not to use this convention. Also notice the uppercasing of the username, since the :APP_USER substitution variable will be in uppercase (as discussed in Chapter 2).
You can now modify the condition type of the Create button to the Exists (SQL query returns at least one row) condition type and add the query, as shown in Figure 3-3.

Figure 3.3. Adding the Exists (SQL query returns at least one row) condition type to the Create button
Now if you run the application while logged in as a nonadministrator, such as the brian user, you won't see the Create button, as shown in Figure 3-4. If you log in as peterw, who is an administrator, you will see the Create button (as in Figure 3-2).

Warning
At this point, you might be thinking that conditions are a great way of preventing people from doing things you don't want them to do. Using conditions will stop page elements from being displayed or processed. However, knowledgeable users may still be able to get to a particular feature (such as the page to add a bug), even though you've used a condition to hide a button from them. In the "Authorization Schemes" section later in the chapter, you'll see how users can circumvent conditional processing to reach areas of the application they shouldn't be allowed to access. You should use authorization schemes (together with other techniques) to protect restricted areas of your application.
The NOT Exists (SQL query returns no rows) condition type, as you can guess from the name, is the inverse of the Exists (SQL query returns at least one row) condition type. In this case, if the query returns a single row (or more), the overall result of the condition is deemed to be false and the element will not be displayed or processed.
In the previous example, we modified the application so that the Create button would appear only if the logged-in user was an administrator. This means that you can't add any bugs until an administrator is defined. You could modify the logic so that if there are no administrators defined, everyone gets to see the Create button. In other words, you check the user_repository table to see if there are any records where the admin flag is set to 'Y' and the username is not the same as the current user. In a nutshell, what you're asking is, "Is there another user who is an administrator?" To keep the example simple, we'll assume that only one administrator is ever defined in the application. Listing 3-3 shows the new query logic.
Example 3-3. Query to Determine If Any Other User Is an Administrator
select 1 from user_repository

  where upper(username) <> :APP_USER
  and admin = 'Y'
You would modify the existing condition type to a NOT Exists type (you actually want to know if no other users are administrators) and put in the new query, as shown in Figure 3-5. If you now run the application and log in as the brian user, who is a not an administrator, the Create button will not be displayed, since the query will return a record for the peterw user, who is an administrator. And if you log in as the peterw user, you will see the Create button (since the query does not return any rows because there are no other administrators).

To see the NOT Exists condition in action, update the user_repository so that no administrator is defined:
apexdemo@10gR2> update user_repository set admin = 'N';

4 rows updated.

apexdemo@10gR2> commit;

Commit complete.
Then when you log in as any user, you will see the Create button.
Although the logic for this condition is probably not something you'd use in production, it does show that sometimes a NOT Exists condition may be a more logical choice than an Exists condition.
A SQL expression is essentially any Boolean expression that you might place into a where clause. In fact, the logic in SQL expressions is effectively evaluated as a where clause restriction in a SQL statement. In other words, the APEX engine will perform a query such as the following:
select 1 from dual
  where <your expression here>
where the condition evaluates to true if a row is returned from the query, and evaluates to false if no rows are returned.
The earlier example of using an Exists condition type used the following piece of SQL (Listing 3-2):
select 1 from user_repository

  where upper(username) = :APP_USER
  and admin = 'Y'
The equivalent SQL expression logic would be something like this:
:APP_USER in
  (select username from user_repository where admin ='Y')
This would effectively become the following SQL statement:
select 1 from dual

where :APP_USER in
  (select upper(username) from user_repository where admin = 'Y')
SQL Expression condition types can be useful when you simply want to write the logic of your condition in a shorter, more concise form than the full select statement (as you would with an Exists condition). For example, you could compare the current date in dd/mm/yyyy format against a page item P1_DATE with the following SQL expression:
to_char(sysdate, 'dd/mm/yyyy') = :P1_DATE
This is more readable than the slightly longer equivalent Exists condition:
select 1 from dual where to_char(sysdate, 'dd/mm/yyyy') = :P1_DATE
Whether to use a SQL Expression condition type or an Exists condition type is often a matter of personal preference—whether you prefer to write out the entire query yourself or use the shortened form of a SQL expression.
A PL/SQL Expression condition can consist of any valid PL/SQL syntax that evaluates to a true or false value. For example, you could use logic such as the following:
length(:P1_USERNAME) < 8
This returns true if the value contained in the P1_USERNAME page item is less than eight characters long.
Suppose that Buglist users must meet certain performance targets for the number of bugs they've successfully fixed and cleared each month. You can modify the application to display some text that reminds the users that they need to clear as many bugs as they can before the month ends. You want to display this message during the last week of every month. To do this, simply add a new HTML Text region to the page, as shown in Figure 3-6.

Note
This example uses the Sidebar Region template and positions the region in column 2. This means that it will display on the right side of the report on the page. Positioning and layout are covered in Chapter 5.
Since this is an HTML Text region, you can also include some HTML markup in the actual region source, as shown in Figure 3-7. Now if you run the application, you should see something like the screen shown in Figure 3-8. The reminder appears because it displays by default (remember that No Condition is the default).


To determine the last week of the month, you can use some date and time functions available in Oracle, as shown in Listing 3-4.
Example 3-4. Determining the Last Week of the Month
-- get today's date

apexdemo@10gR2> select to_char(sysdate, 'dd/mm/yyyy')
2  as value from dual;
VALU
----------
11/18/2010

-- get the last day of the mont
apexdemo@10gR2> select to_char(last_day(sysdate), 'dd/mm/yyyy')
2  as value from dual;

VALU
----------
11/30/2010

-- determine the current week numbe
apexdemo@10gR2> select to_char(sysdate, 'w')
2  as value from dual;

VALU
----------
3

-- determine the week number for the last day of the mont
apexdemo@10gR2> select to_char(last_day(sysdate), 'w')
2  as value from dual;

VALU
----------
5
The method used in Listing 3-4 actually counts weeks in terms of days from the start of the month; that is, the first seven days in the start of the month are considered the first week, and then the next seven days are the second week, as opposed to running from Monday to Sunday.
You can modify the Month End Reminder region to use a PL/SQL Expression condition that compares the current week number to the week number of the last day of the month, as shown in Figure 3-9. The region will now be shown only in the last seven days of the month.

The PL/SQL Function Body Returning a Boolean condition type, as you'd guess, allows you to use a PL/SQL function that returns true or false to determine whether the condition succeeds or fails. For example, you could use something like the following code:
begin

  if :APP_USER = 'BOB' then
    return true;
  else
    return false;
  end if;
end;
However, as discussed in Chapter 1, you should aim to put as much of your code as you can into packages, and to reference those packaged functions and procedures from your application. Therefore, rather than including the previous code in your application, you could put that code into a packaged function, then call that function in the condition:
pkg_auth.check_for_bob;
The advantage of using a package is threefold:
It's easy to reuse the code in another condition without having to copy and paste a lot of code.
If you want to change the actual logic of the condition, you can change it in only one place (the package), regardless of how many places you're using it in your application.
You can change the logic in the package without needing to modify your application. You can modify and recompile the underlying package without having to recode anything in your application (since it is just calling the function).
Remember, it will be far easier to send a new package body to customers and tell them to recompile it than to give them an entire application—which they will need to upgrade—just because you want to change something in a single routine.
Whenever a page is submitted, the value of the REQUEST application attribute is set to the name of the object that caused the page to be submitted. This happens, for example, when a user clicks a button or a particular tab. Using the REQUEST application attribute means you can perform different actions depending on what the user actually did.
Now, let's say you want to keep track of the search phrases people are using in the Buglist application. For example, you want to record that the user searched for the phrase "logo" as shown in Figure 3-10.

To accomplish this, first you need to create a table to store the search text, as shown in Listing 3-5.
Example 3-5. Creating the user_searches Table
apexdemo@10gR2> create table user_searches(id number,

  2  logged date not null,
  3  username varchar2(8),
  4  search_phrase varchar2(50),
  5 primary key (id));

Table created.

-- create a sequence to use as the PK of the table
apexdemo@10gR2> create sequence search_seq cache 100;

Sequence created.
Next, you need to create a new PL/SQL page process that will fire after a page submission, as shown in Figure 3-11. The PL/SQL for the process will simply insert a record into the user_searches table:
insert into user_searches

  (id, logged, username, search_phrase)
values
  (search_seq.nextval, sysdate, :APP_USER, :P23_SUBJECT)

You also need to make sure that this process fires only if the user has clicked the Go button; otherwise, it will end up inserting rows into the user_searches table when the user performs other actions, such as navigating to the page using the Bugs tab. The key to doing this is to use the value of the REQUEST setting for the Go button, as shown in Figure 3-12.

Often, with an automatically generated element, the REQUEST value will already be defaulted to something sensible. If not, you can set or change the value. It's also very important to notice that you're using the REQUEST value, not the name or label of the button. Many people get caught out by trying to use the label of the element rather than the REQUEST value, and then can't figure out why their condition isn't working the way they thought it should.
With the REQUEST value of the Go button set to Go, you can use that value in the PL/SQL page process condition, as shown in Figure 3-13.

Now run the application and search for a particular phrase, such as "browser," as shown in Figure 3-14.

Listing 3-6 shows that the search phrase, the username, and the timestamp of the search were all stored in the user_searches table.
Example 3-6. Querying the Entries in the user_searches Table
apexdemo@10gR2> select * from user_searches;

     ID LOGGED    USERNAME SEARCH_PHRAS
------- --------- -------- -------------------
      1 20-NOV-10 TIM      browser
Great, it all works. But you may have also spotted a problem with this way of recording searches. Currently, the PL/SQL page process will execute only if the user clicks the Go button. Many people simply press the Enter/Return key after they've entered something in the Search field. The existing logic won't log those searches into the user_searches table. A simple way to address this problem is to make the REQUEST value of the Go button and the REQUEST value of the P1_REPORT_SEARCH text field the same. Then you'd need to check for only a single REQUEST value in the PL/SQL page process condition, regardless of whether the page was submitted as a result of the user clicking the Go button or hitting Enter/Return.
However, if you examine the attributes of the P1_REPORT_SEARCH text field, you'll see that, unlike for the button, you can't specify your own REQUEST value for the text field. In the case of a text field (and other element types), the REQUEST value is defined to be the actual element name; that is, the REQUEST value for the P1_REPORT_SEARCH text item is P1_REPORT_SEARCH. Since you can't change the REQUEST value of the text field to be the same as the button, you will need to change the REQUEST value of the button to be the same as the text field, as shown in Figure 3-15. You also need to modify the PL/SQL process condition so that it compares the REQUEST value against P1_REPORT_SEARCH rather than Go, as shown in Figure 3-16.


All search queries will now be logged, regardless of whether the user clicks the Go button or presses the Enter/Return key.
The Request != Expression 1 condition type is the reverse of the Request = Expression 1 type. This condition evaluates to true if the value of the REQUEST item does not match the value in Expression 1. The way to use this condition type should be fairly obvious from the example in the previous section.
The Request Is Contained within Expression 1 condition type allows you to compare the REQUEST value against the multiple values specified in Expression 1.
In the previous example that used the Request = Expression 1 condition, we modified the REQUEST value of the Go button to match the REQUEST value of the P23_SUBJECT text field so we could compare a single REQUEST value. Using the Request Is Contained within Expression 1 condition type instead, you can simply use the two different REQUEST values, rather than needing to make the REQUEST values the same.
If you change the REQUEST value of the Go button back to its original value of Go, you can modify the PL/SQL page process to use a condition like the one shown in Figure 3-17.

Notice that this example uses a comma-separated list of values in Expression 1. However, the text in Expression 1 is actually evaluated using an INSTR test, so the REQUEST value is tested like this:
INSTR(text in expression 1, value of REQUEST item) > 0
and the condition is effectively evaluated as this:
INSTR('P23_SUBJECT,Go', :REQUEST) > 0So it does not really matter which delimiter you use. You could use a colon, an exclamation point, or any other symbol, since the values contained in Expression 1 are not being parsed into their individual values. Instead, the entire text in Expression 1 is searched to see if the string containing the REQUEST value appears anywhere within it.
You need to be very careful when using Contained within Expression conditions, because of the opportunities for false-positive matches to be made. If you make poor choices for your REQUEST values, you may end up matching against a REQUEST value you didn't intend to match against.
As an example, imagine you have two buttons on your page: one used to submit the page, with a REQUEST value of Go, and another used to log the user out of the application, with a REQUEST value of Goodbye. Suppose you want to run a PL/SQL process when the user clicks the logout button, and therefore use the condition shown in Figure 3-18. The problem is that when the user clicks the submit button, which has a REQUEST value of Go, the APEX engine will perform this evaluation:
if instr('Goodbye', 'Go') > 0 then

  return true;
else
  return false;
end if;
Because the letters Go appear in the text "Goodbye," the condition will return true and the process will run, even though the user clicked the submit button rather than the logout button.
Warning
Check your REQUEST values to make sure that they will match only when you want them to, and try to avoid using a REQUEST value that is a substring of another REQUEST value. Note that you don't need to worry about this issue when you use one of the condition types that deal with properly delimited values, such as those that are colon-delimited.
The Value of Item in Expression 1 = Expression 2 condition type allows you to perform a case-sensitive comparison of the value of an item specified in Expression 1 with a string contained in Expression 2. For example, say you wanted to modify your application so that rather than logging every search phrase, it logs only the use of the search phrase "secure." You can achieve this by modifying the conditional logic for the PL/SQL page process, as shown in Figure 3-19.

Here you enter the name of the item P23_SUBJECT as Expression 1 and the text you wish to compare it with as Expression 2. Now an entry will be added to the user_searches table only if the user enters the word "secure" into the Search text field. Note that this performs an exact, case-sensitive match against the text in Expression 2. If the user enters "is it secure" or "Secure" in the Search text field, the condition will not evaluate to true and the search phrase will not be logged into the user_searches table.
The purpose of the Value of Item in Expression 1 Is NULL condition type should be fairly obvious. This condition can be very useful. For example, you can easily modify your application so that users are given a warning if they click the Go button without entering a search phrase into the Search text field. Usually, the best way to achieve this is to use a validation, but you can implement similar functionality by creating a new field with warning text that will appear only if the Search text field is empty and the user clicked Go. Figure 3-20 shows the new text field.

Set this text to display just to the right of the Go button by setting the Begin On New Line property to false as shown in Figure 3-21. Also change the template to Required, which will make the text appear in red. You can now check the value of the P23_SUBJECT item for a null value, as shown in Figure 3-22. Users will see the text warning if they click the Go button or hit the Return/Enter key without entering a search phrase, as shown in Figure 3-23.


As mentioned, using a validation would be a far more sensible way of performing this check. However, sometimes methods like the one shown here can prove useful.
The Current Page = Expression 1 condition is ideal when you use shared components or make use of page zero (covered in Chapter 1) and want to conditionally display or process a page element based on which page the user is currently viewing.
For example, the Logout link is currently displayed in the top-right corner of the Buglist application screen. Suppose you want to make it visible only when the user is on the page containing the Bug report (page 1 in the application). To accomplish this, you can edit the navigation bar entry and use the condition shown in Figure 3-24. Now when the user clicks the Analyze tab, which will take him to page 5, the Logout link will no longer be visible, as shown in Figure 3-25.


The Current Page Is Contained within Expression 1 (comma delimited list of pages) condition is similar to the Current Page = Expression 1 condition, but it allows you to supply a comma-delimited list of pages rather than just limiting you to a single page. For example, you could modify the previous example to display the Logout link for both pages 1 and 5, as shown in Figure 3-26.
Using conditions like these, combined with features such as page zero, can lead to some incredibly sophisticated applications. They allow you to display page elements selectively on many different pages, without needing to add that page element to each individual page. Take advantage of this power to minimize the amount of manual work you need to do wherever you can.

The User is Authenticated (not public) condition evaluates to true if the user has successfully authenticated to the application using the current authentication scheme, which can be either one of the built-in schemes or a custom authentication scheme.
A typical use of this condition is to display different information to users depending on whether or not they are logged in to your application. For example, you might have a navigation menu that gives extra options to people after they have logged in.
The previous example showed how to display the Logout link only if users are currently on page 1 or 5. A far more sensible usage would display the Logout link only if the user has actually logged in (is authenticated), as shown in Figure 3-27.

The User is the Public User (user has not authenticated) condition is the reverse of the User is Authenticated (not public) type. It will evaluate to true if the user is not authenticated to the application. Here, Public User refers to whether the username is the same as the username that is specified in the DAD in your Apache configuration file, which is used to connect to the database. This username will typically be something like HTMLDB_PUBLIC_USER (if you have upgraded from an older version of APEX) or APEX_PUBLIC_USER; if you are using Oracle XE, it will typically be defined as ANONYMOUS.
At the application level, you can set which value to use for Public User, as shown in Figure 3-28. Whenever the APP_USER variable equals the same value as you have specified at the application level, the user is deemed to be a public user.

Figure 3-28 shows APEX_PUBLIC_USER specified as the Public User application attribute, which is the username specified in the DAD in this example. Until you log in to the application as another user, the APP_USER variable will be set to APEX_PUBLIC_USER (since that's the username specified in the DAD). And until you successfully authenticate to the application, your current session will be classified as a Public User session. If you alter the Public User value to be something else (such as nobody), it will no longer match the username specified in the DAD, and so your unauthenticated session will not be classified as a Public User session.
The Current Language is Contained within Expression 1 condition is extremely useful for enabling your application to take advantage of multiple-language support. Using this condition type, you can perform different processing depending on the language setting of the web browser that the user is using. For example, to detect whether the user's browser is set to either French or German, you could use a condition such as the one shown in Figure 3-29.

In Chapter 11, you will learn how you can use this type of condition to build an application that uses the browser settings to determine the correct language translations and character set when displaying the pages. This lets you make your application accessible to a far wider audience.
As the name suggests, the Never condition will never be active—the page element will never be displayed or processed. You would typically use this condition type if you wished to temporarily disable a page element for debugging purposes. You might also use it to disable an element but not remove it completely from your application (in case you wanted to revert back to using it again in the future). However, leaving a lot of unused code lying around is generally not a good long-term strategy.
Conditions can make it incredibly easy to dynamically modify the way your application behaves at runtime. However, sometimes it's easy to misuse conditions to make your application behave in a particular way when another way of achieving the same result would be more appropriate.
For example, suppose you want to modify your application so that only administrators are able to see the Submitted By and Assigned To columns in the report. You can define conditional display logic against individual columns in the report by selecting the column from the Report Attributes tab, as shown in Figure 3-30.

You can use the same query we saw in the earlier example for determining whether the current user has the admin flag set to 'Y' (Listing 3-2). Figure 3-31 shows the conditional logic applied to the Submitted By column. After also applying the same condition to the Assigned To column, anyone who is not an administrator will no longer be able to view these columns, as shown in Figure 3-32.

Figure 3.31. Using an Exists (SQL query returns at least one row) condition to display an individual report column

Using conditional display in this way is perfectly acceptable. In fact, it's an extremely elegant way to dynamically change the way that the data is presented to different users (or different classes of user).
Now suppose you also want to hide the Status and Priority fields from nonadministrators. You could easily do that by adding the same conditions you placed on the Submitted By and Assigned To columns to those two columns. In this case, you are now hiding four columns of data from the nonadministrators. However, the query is still selecting the data from those columns, regardless of whether or not the user is an administrator. This is where you need to use your judgment to determine whether applying conditions in this way is the best choice for your particular case. For example, if your application has 1 administrator and 99 nonadministrators, then (on average) you will be displaying all the fields that are being selected in the query only every 1 in a 100 times. In other words, the vast majority of the time you are having the query select columns you are not actually going to use—making the database perform extra, unnecessary work.
It's very important to realize that when you place conditions on report columns, you are not modifying the actual query that is being performed. You are affecting only which columns will be displayed after the query has been performed.
To achieve the same end result, you could have two different report regions: one with the query to select the columns that administrators should be able to see, and the other whose query selects the columns that nonadministrators should be able to see. You would then use mutually exclusive conditions so that only one report region was shown at a time—if the user is an administrator, the report region relevant to administrators is processed and vice versa. However, duplicating the report region in this way adds extra overhead in terms of maintenance for your application, meaning that if you wanted to change something, you might need to change it in two places rather than just one place.
Perhaps a better alternative would be to change the report region type from SQL Query to SQL Query (PL/SQL function body returning SQL query). This would allow you to use a PL/SQL function to return a different SQL query for the report to use depending on whether the user was an administrator.
Don't be afraid to reevaluate your options when the requirements change. You may find that the method that used to suit your needs perfectly has now become less attractive.
Like conditions, authorization schemes allow you to control the display and processing of elements within your application. However, unlike a condition, an authorization scheme is a far more secure choice when it comes to restricting the areas of your application that a user should be able to access.
An authorization scheme is similar to an authentication scheme and condition type in that it is a piece of logic that returns a true or false value. If it returns true, the authorization is deemed to have been successful; otherwise, the authorization fails.
You can create new authorization schemes for your application from the Shared Components section of the application builder, as shown in Figure 3-33. Any existing authorization schemes can also be accessed from here.

The difference between a condition and an authorization scheme starts with the way in which you define the two. Whereas the logic for a condition is defined for a particular element (for example, a page item or a region), an authorization scheme is defined in one place and is then available to be used by one or more of your application elements.
As an example, we will create an authorization scheme that determines whether the current user is an administrator. First, you need to create the scheme itself. The wizard gives you the choice of whether you wish to create a scheme from scratch or to base the scheme on an existing schema, as shown in Figure 3-34.

As when you define the logic for a condition, you can select from different authorization scheme types, such as Exists SQL Query and PL/SQL Function Returning a Boolean. The list of types is nowhere near as comprehensive as the list of condition types, but it is usually sufficient to cover the vast majority of authorization schemes you might want to create.
As shown in Figure 3-35, name the new scheme USER_IS_ADMIN and choose the Exists SQL Query scheme type. For Expression 1, use the same query as the one you used earlier (Listing 3-2) for the Exists (SQL query returns at least one row) condition. You must also specify an error message that will be displayed to a user when the authorization scheme fails. Supplying an error message is mandatory for an authorization scheme, unlike with a condition.

An important configuration setting you can define for an authorization scheme is called the evaluation point, as shown in Figure 3-36. You can use the evaluation point setting to define whether the authorization scheme logic should be evaluated every time you view a page that uses it or evaluated only once per session. For this example, choose once per session.

When you choose once per session for the evaluation point, the result of the authorization scheme is cached, and the cached value is used whenever an element references the authorization scheme. If the logic in your scheme is particularly time-consuming and the results probably won't change that often, taking advantage of the caching facility will lead to a much more responsive application for the user. For example, if the logic takes one second to perform and you use that authorization scheme on a lot of different pages, the user won't need to wait that extra second per page (and shaving a second off your page-delivery times can make a big difference to the users' perception of your application). We'll discuss the evaluation point choice in more detail in the "To Cache or Not to Cache" section later in this chapter.
Next, return to the Home page in your application and ensure that the condition type for the Create Bug link is set to No Condition Specified, as shown in Figure 3-37. As mentioned earlier, this is a quick way of disabling the condition without needing to remove the code. Then use the Authorization Scheme drop-down list, shown in Figure 3-38, to select the USER_IS_ADMIN scheme you created.


As you can see, three schemes are available, even though you created only one:
- Must Not Be Public User:
This scheme is added automatically. As the name suggests, it is a good way to determine if the user is authenticated to the application. This scheme uses the value of the Public User application attribute that was discussed earlier in the section about the User is the Public User (user has not authenticated) condition type.
- USER_IS_ADMIN.
This is the scheme you added using the wizard.
- Not USER_IS_ADMIN.
This scheme is also added automatically. It is the reverse of the scheme you just created. Whenever you create a new scheme, APEX will automatically create the reverse of the scheme for you. This makes it very easy to not only check that the user is an administrator, but also that the user is not an administrator.
Now the Create link should behave as it did before, appearing only to people who are administrators.
One big difference between using conditions and using authorization schemes is that you can easily reuse an authorization scheme with other page elements simply by selecting it from the drop-down list. Any changes to the authorization scheme will automatically be reflected in any elements that use the scheme.
At first glance, it might look like you have succeeded in preventing nonadministrators from being able to create new records, since they can no longer access the Create button. However, it's important to note the distinction here between the following:
Preventing the user from seeing the button
Preventing the user from doing whatever clicking the button would have done
When users click the Create button, they are redirected to page 2 of the application, as shown in Figure 3-39, which is the page where they can create a new record. Also notice in Figure 3-40 that the cache is cleared for page 2. Any page items that are defined on page 2 will have their session state cleared, since you'd usually want the page to default to blank entries when you are creating a new record.

So, what would happen if a nonadministrator tried to get to page 2 by typing that address into a browser? Well, that's easy to test. Simply change the page number specified in the URL of the browser to go to page 2 instead of page 1. In the browser, the URL will contain something like this:
http://127.0.0.1:7780/pls/apex/f?p=101:1:2357672961634263
where 101 is the application ID, and 1 is the page number. The long number after the page number is the session ID. Modify this URL as follows:
http://127.0.0.1:7780/pls/apex/f?p=101:2:2357672961634263
and then press the Enter/Return key to submit the URL request to the browser. You will see that a nonadministrator user can still access the page for creating new records, as shown in Figure 3-40.

This is where the simplicity and power of authorization schemes become very useful. You can apply the same USER_IS_ADMIN scheme to an entire page. To do so, edit page 2 of the application and go to the security settings, as shown in Figure 3-41.

Note that the authorization scheme can work independently from any authentication settings you have made for the page. Here, you are not only saying that users need to be authenticated to view this page, but they also need to pass your authorization scheme check, and therefore they must be an administrator.
If you now repeat your test and modify the URL for a nonadministrator to navigate directly to page 2, you will see the error message shown in Figure 3-42.

Figure 3.42. Your error message appears when a nonadministrator tries to access a page protected by an authorization scheme.
To properly protect the resources in your application, make sure that when you are restricting the display of certain page elements, you also protect the resources for which those page elements are responsible. It's not enough to just hide all the links and buttons to a particular page, for example. Make sure you protect access to that page itself with an appropriate authorization scheme.
This applies equally to any processes your pages might execute as a result of a user action. For example, you could modify the PL/SQL page process that logs the search phrases so that it logs phrases only when the current user is an administrator by using the authorization scheme rather than using a condition. In this particular scenario, you would not get a warning message when nonadministrators perform a search (unlike when they try to access a page protected by the same authorization scheme), but the PL/SQL process would not be processed at all. By using the authorization scheme rather than a condition, you again have the benefit of being able to decide whether the scheme is checked on every page view or the cached value should be used.
Please excuse the corny title of this section, but it does describe the topic: deciding whether to evaluate authorization schemes on every page view or just once per session.
In this chapter's example, the USER_IS_ADMIN authorization scheme is evaluated only once per session. This means that the value is cached the first time it needs to be evaluated after a new session is established (which would usually occur after the user successfully authenticates to the application). So if a nonadministrator, such as the tim user, authenticates to the application, he will not see the Create link. But what if you modify that user so that he is now an administrator, as shown in Listing 3-7?
Example 3-7. Modifying the brian User to Be an Administrator
apexdemo@10gR2> update user_repository

  2  set admin = 'Y'
  3  where username = 'brian';

1 row updated.

apexdemo@10gR2> commit;

Commit complete.
This user will still not see the Create button, even if he navigates away from the page and then returns to it. You would need to tell the user to log out and then back in again in order for his new administrator privileges to be recognized by the application. To avoid this, you could modify the authorization scheme so that it is evaluated on each page view. Then the next time the user performs an action that displays a page that references the authorization scheme, the authorization scheme will be reevaluated. In this case, the user's new administrator privileges would be recognized, so he would not need to log out and log back in.
As noted earlier, the downside to having authorization schemes reevaluated each time the page is displayed is performance. For example, imagine that your application has quite a large user repository and attracts perhaps 1,000 different users throughout the day, each viewing 10 different pages, each with a reference to your authorization scheme. That would mean that throughout the course of the day, your authorization scheme is evaluated around 10,000 times. Using once per session evaluation instead potentially reduces the number of queries the database needs to handle in a day by around 9,000 (to around 1,000 times a day—once for each user, assuming a user logs in for only a single session).
You might say, "So what? The query was running really quickly anyway!" Don't forget that anything you do in a multiple-user system can impact other sessions running in that database. So even if your query runs blisteringly fast, if you don't need to do it, then don't.
Your individual business requirements should determine whether every page view or once per session is best for that particular authorization scheme. In the example, promoting users to administrator status won't happen very often, so you don't need to reevaluate that check every time a page is viewed; once per session is a reasonable choice. Reevaluating your authorization schemes more often than necessary not only gives the database more unnecessary work to do, but may also negatively impact the impression your end users have of the application, if the pages take longer to refresh than they should.
There is actually an alternative to making the user log out and then back in again when your authorization scheme is set to reevaluate once per user session. You can invalidate the caching of the authorization scheme values in the current APEX session with the following call:
apex_util.reset_authorizations;
This will force the authorization schemes to be evaluated again the next time they are referenced.
As an example, suppose you added a new Reset Auths button to the report page, and also added a new PL/SQL page process that makes a call to apex_util.reset_authorizations whenever the Reset Auths button is clicked. Now if the brian user (who is not an administrator) logs in to the application, he will see the screen shown in Figure 3-43. Notice that the report columns are still being hidden by conditions applied to the individual columns, rather than by the authorization scheme. Here, you are concerned only with the status of the Create button, since that page item is using the IS_ADMIN_USER authorization scheme.

Now suppose you update the user_repository table to make the brian user an administrator (see Listing 3-7) while he is still logged in, and he navigates back to the report page. Figure 3-44 shows that the report columns will now be displayed (since they were being hidden by a condition, which does pick up the change to the admin flag for the user), but the Create button is still hidden, since the cached value for the authorization scheme is being used.

If brian now clicks the Reset Auths button (which will call the apex_util.reset_authorizations routine), he is redirected back to the same page, and the authorization scheme value is reevaluated (having been invalidated by the call to reset_authorizations). Figure 3-45 shows that the Create button is now correctly displayed for the user.

Clearly, this is not a solution you'd use in your production applications, since it would be almost as inconvenient to have users click the Reset Auths button as it would to have them log out and then back in again.
However, you could make a call to the apex_util.reset_authorizations routine in other ways. It gives you many different alternatives to forcing the user to authenticate to the application again. For example, you could write a process that calls the reset_authorizations procedure only if X number of minutes have elapsed since the last time a call was made to it, or you could have a process that checks a table for a flag that determines whether the authorizations should be invalidated.
In this chapter, you learned about conditions and authorization schemes. Be sure that you understand the difference between the two. Use authorization schemes as a security mechanism to control access to different parts of your application. Use conditions to control the flow of processing, or to control the display of elements on a page when security is not an issue. For example, if you wish to display a certain button only on the first of the month, use a condition. But if you want to restrict access to that button to certain users, use an authorization scheme. Don't fall into the trap of enforcing security through conditions, because you might discover that your security is really an illusion. Review the section "Protecting Your Resources" if you have any doubts as to when to use conditions versus authorization schemes.