
Chapter 5: Exploring Google App Engine as a Compute Option
App Engine is a Platform-as-a-Service (PaaS) offering. It is the fastest way to get your application running with Google Cloud. It is suitable for web, mobile, and IoT applications, takes away the overhead of managing the execution environment, and scales quickly on demand. Multiple languages, such as Node.js, Java, Ruby, C#, Go, Python, and PHP, are supported. This way, the developer can concentrate on solely delivering the code. The applications are versioned, and traffic can be directed to multiple versions, allowing us to perform A/B or canary tests. Applications in App Engine can be secured with firewalls, IAM roles, and SSL certificates, and can be scanned for common vulnerabilities using the Web Security Scanner service.
We will cover the following topics in this chapter:
- App Engine components
- Choosing the right location
- Working with App Engine
- Environment types
- Deploying an App Engine application
- Versions
- Splitting traffic
- Migrating traffic
- Firewall rules
- Settings
- Scaling
- Cron jobs
- Memcache
- IAM
- Quotas and limits
- Pricing
Exam Tip
Expect a couple of questions on App Engine in the Cloud Architect exam. However, there is another (Cloud Developer) exam that tests your knowledge of App Engine in detail. For this exam, make sure you know how App Engine works, the two types of App Engine environments – namely standard and flexible – the two types of Memcache and use cases for them, versioning, how to split migrate traffic, what cron jobs are for, custom domains, and what SSL certificates can be used.
App Engine components
First, we need to understand that each project can only host one App Engine application.
The application can have multiple services with multiple versions, as shown in the following diagram:

Figure 5.1 – App Engine components
Which version is served to the end user is based on the network traffic's configuration. We decide on the percentage of traffic that should be directed to a particular version. This means that it is very easy to make new rollouts and possibly even rollbacks.
Choosing the right location
Applications in App Engine are deployed regionally. This means that the infrastructure that's used to host it is spread across the zones within this region for high availability. The main consideration when it comes to choosing the region is where your end users will be connecting from. However, you should also remember that your app might use other GCP resources. This has an impact on delays as well as costs. Consult the documentation to see which regions the App Engine service is available in as this might change.
Important Note
Once the application has been deployed, you cannot change its region.
Working with App Engine
The deployment itself is fairly easy. We define an app.yaml file that defines the application and develop the code. By using gcloud app deploy, the application will be deployed to App Engine:
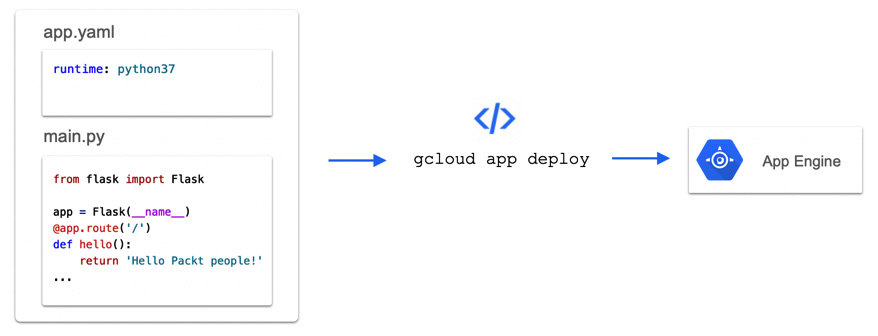
Figure 5.2 – Working with App Engine
The preceding example is very simple, and you can create far more sophisticated applications. The Cloud Architect exam does not require you to have deep knowledge of how to define the app.yaml file or how to write applications. However, we suggest that you have a look at the Further reading section as it might help you understand App Engine concepts better.
Environment types
App Engine comes with two types of environments, namely standard and flexible. If you don't have any special requirements, such as unsupported languages or need to customize the execution environment, always go for standard. Keep in mind that flexible App Engine will allow you to migrate your workloads more easily as your workload will already be containerized. Let's have a look at these environment types.
App Engine standard environment
The standard environment uses containers running in GCP. These are standardized for each available execution environment. The traffic to your application is distributed using load balancing. The application can scale down to zero if it is not used and can be scaled up within seconds when the demand rises. The following execution environments are supported:
- Python 2.7 and 3.7
- Java 8 and 11
- Node.js 8 and 10
- PHP 5.5, 7.2, and 7.3
- Go 1.9, 1.11, and 1.12
Exam Tip
App Engine standard is often also defined as a sandbox for developers.
We will now look at the flexible environment.
Flexible environment
The flexible environment uses GCE virtual machine instances. It also scales up and down automatically and distributes traffic using load balancing. However, it always requires at least a single instance to run. Starting the instances takes minutes, while in standard environments, it takes seconds. The following execution environments are supported:
- Java 8
- Python 2.7 and 3.6
- Node.js
- Ruby
- PHP 5.6, 7.0, 7.1, and 7.2
- .NET Core
- Go 1.9, 1.10, and 1.11
- Custom
Note that the runtimes can be customized. You can even create your own runtime. This can be done by supplying a custom Docker image or Dockerfile.
Exam Tip
As you may have noticed, the App Engine standard environment can scale down to zero, while the flexible environment will always run at least one instance. This has an impact on the cost of running your application.
An App Engine flexible environment service allows you to access root accounts on your instances via a secure shell, known as SSH. However, by default, this is disabled. Remember that the instances will be restarted weekly so that the necessary patches are applied.
Deploying an App Engine application
We have already seen how applications are deployed to App Engine at a high level. Now, let's have a look at the actual steps we need to take. Here, we will provision a Hello World application. This application leverages the Python Flask web server. As you can probably imagine, the application will display static Hello World text on the website. Let's get started:
- To start, go to the Google Cloud Console and switch to the project that your application will be deployed to. From the hamburger menu, choose App Engine. On the welcome screen, click the Create Application button:

Figure 5.3 – Welcome to App Engine
- In the Create app window, choose a region and click Create app, as shown in the following screenshot:

Figure 5.4 – Choosing a region
We have chosen europe-west as our region.
- In the Get started window, choose the runtime language. We have selected Python:

Figure 5.5 – Choosing a language
- From the Environment dropdown, choose either Standard or Flexible. As we do not need runtime customization, we have chosen the Standard environment:

Figure 5.6 – Choosing an environment
- Now, we can either use the installation SDK on our machine or use the Cloud Shell machine. To learn how to use both those tools, check out Chapter 16, Google Cloud Management Options.
We will open the Cloud Shell as it comes with the SDK already installed and configured. Open the console and run the following command:
gcloud config set project $PROJECT
Here, <project_id> is the ID of the project you used in the Google Cloud Console.
- Now, let's download a sample Python application that Google provides on GitHub:
git clone https://github.com/GoogleCloudPlatform/python-docs-samples
- Change directory to browse to the application:
cd python-docs-samples/appengine/standard_python3/hello_world
- Now, you can use any text editor to view the content of the main.py file, which contains our application code. Open the file in an editor by running the following command:
cloudshell edit main.py
- You will see that the application is using the Flask web server and displays Hello World! on the main page:

Figure 5.7 – The main.py file
- If we have a look at that app.yaml file, we will see that we only need to define the runtime type, without any additional parameters:

Figure 5.8 – The app.yaml file
- Finally, we will have a look at the requirements.txt file, which defines the modules that are used in our Python code:

Figure 5.9 – The requirements.txt file
- Now that we know what the configuration and code are, we can deploy the application to App Engine. Being in the folder where all the files are, run the following command:
gcloud app deploy app.yaml --project $PROJECT
Confirm this action when you are asked in the console. It may take a minute or two to deploy.
- Once the application has been deployed, we can check the URL that's been assigned to the application by running the following command:
gcloud app browse
- Copy the URL and paste it into your browser. You will see that the application is already running in App Engine. Simple, isn't it?
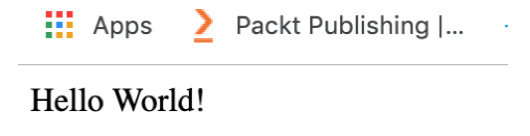
Figure 5.10 – Viewing the application
Next, let's look at versions.
Versions
Now, let's imagine that we want to update the application with new content:
- Let's modify the welcome message to Hello Packt people!:
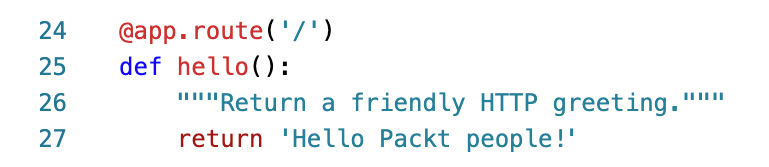
Figure 5.11 – Modifying the application
- We will save the changes and deploy the application again:
gcloud app deploy app.yaml --project <project_id>
- Now, if we switch to the Google Cloud Console and go to App Engine | Versions, we will see that a new version of the application has been deployed:

Figure 5.12 – Traffic allocation
Note that all the traffic is directed toward the new version.
Go back to your browser and refresh to see that the new version of the application has been deployed:

Figure 5.13 – Viewing the new application version
In the next section, we will look at splitting traffic.
Splitting traffic
Now, imagine that we want to test the changes that we've made on a small number of users. We can do that by clicking on Split traffic, which can be found in the top-right corner. This will bring us to a window where we can choose how much traffic is directed to each version of the application. Choose an appropriate percentage and click the Save button:

Figure 5.14 – Split traffic
Important Note
If you don't see the old version, click the Add version button.
Migrating traffic
Instead of splitting the traffic, we can also migrate the traffic at once. There are also gradual traffic migrating options so that we can gracefully change the version. Follow these steps to do so:
- Select the checkbox next to the new version and click MIGRATE TRAFFIC, which can be found at top of the screen. From the popup window, click MIGRATE, as shown in the following screenshot:
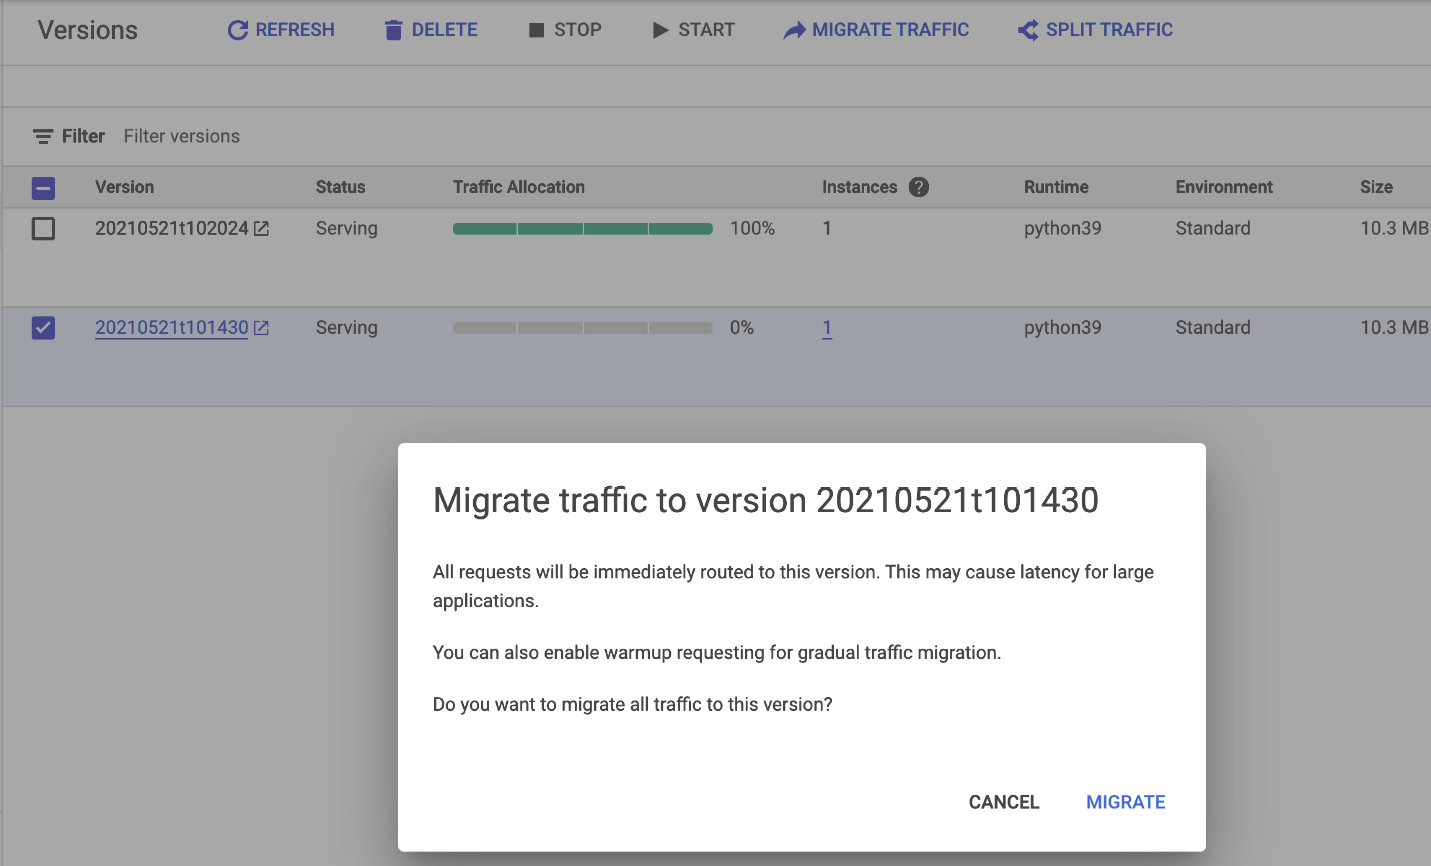
Figure 5.15 – Migrating traffic
The traffic will now be migrated to the new version.
Exam Tip
Pay special attention to how you switch traffic between different versions. This can be used for both rolling out the new version as well as rolling back to the last stable version.
- Now, if we check the console, we will see that all the traffic has been allocated to the new version:

Figure 5.16 – Traffic migrated to the old version
- If we browse to the URL, we will see that the new version of the application is now being served:

Figure 5.17 – Viewing the application
Here, we can see the old version of the application.
Firewall rules
The firewall for App Engine is pretty simple. It contains a list of rules for allowing or denying traffic to your application from a specific IP range. Note that these rules apply to all the resources of the application. The rules are ordered by priority, with a value of 1 being the most important and 2147483647 being the least important:

Figure 5.18 – Firewall rules
The default rule, which allows all traffic from all IP ranges, has the lowest priority and is always evaluated at the end.
Settings
From the hamburger menu, go to App Engine | Settings. Here, you will find two important settings: Custom domain and SSL certificates. Let's go over these now.
Custom domain
As you already know, when you deploy an application, you are assigned a URL in the form of <project_id>.appspot.com.
However, you can add a custom domain or register a new domain. You do this from the App Engine | Setting | Custom domains menu:

Figure 5.19 – Custom Domains
If you choose to register a new domain, you will be able to purchase it from the Google Domains service.
SSL certificates
Since the traffic in the App Engine is load-balanced and uses SSL, GCP offers globally distributed SSL endpoints so that you can serve your application users. An application with a custom domain has a managed SSL certificate assigned to it by default. The certificate will be provisioned and renewed before expiration automatically. When you remove the custom domain, the certificate will be revoked:

Figure 5.20 – SSL certificates
If you wish to use your own certificate, you are responsible for managing its life cycle.
Scaling
One of the most important features of App Engine is its ability to scale several instances. We have a choice regarding the level of automation we wish to use. App Engine offers three options, as follows:
- Manual scaling: In this setup, you specify the number of instances that will run, no matter what the load will be. Since the instances keep the memory state, they can be used for applications that depend on them.
- Automatic scaling: In this setup, several instances depend on the request rate, response latencies, and other application metrics. It also allows you to specify the number of instances that should always run independently of the load.
- Basic scaling: In this setup, an instance is created when a request is received by the application. The instance will be shut down when the application becomes idle. It can be used for apps that are driven by user activity.
Important Note
Scaling is a very important topic for App Engine. We want to make sure that the application can handle the load, but we also want to control the cost. Remember that you pay for the time it takes to run the instances. You can control the scaling behavior using parameters in the YAML that defines your application. Check the Further reading section regarding App Engine scaling to find out more.
Cron jobs
With cron jobs, you can schedule tasks that run at a defined time or regular intervals. The use case for cron jobs includes administration tasks that need to reoccur. For example, perhaps you need to send out an email every day that includes a report about the environment.
For each language, cron jobs are configured a little bit differently. See the Further reading section to find detailed configuration information for various languages. The cron jobs are defined in YAML format and placed in the cron.yaml file.
The following is a YAML file that will run the task every 24 hours:
- The actual task is to run it using the handler defined under the url parameter:
cron:
- description: "daily summary job"
url: /tasks/summary
target: beta
schedule: every 24 hours
- To deploy the cron job, use the following command:
gcloud app deploy cron.yaml --project <project_id>
- Once deployed, the jobs will be visible via Cloud Scheduler. In the Google Cloud Console, under App Engine | Cron jobs, click the GO TO CLOUD SCHEDULER button:
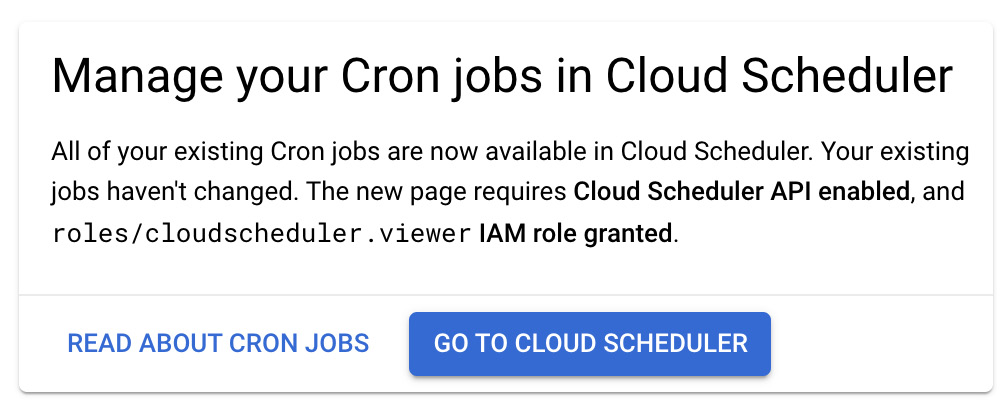
Figure 5.21 – Cron jobs
Click on the APP ENGINE CRON JOBS tab:

Figure 5.22 – Cron job summary
With that, your newly created job has been created and will run every 24 hours. Note that you might need to enable the Cloud Scheduler API if you have not used it before.
Exam Tip
Remember that cron jobs are a way of triggering jobs periodically and are an alternative to using Compute Engine with native third-party tools.
Memcache
Caching is a common way of speeding up how we can access frequently accessed data. This includes session data, user preferences, or any other queries that don't change often. If multiple queries are accessing the same data, it is a perfect candidate to be cached. Memcache is a service that's built into App Engine. It allows you to keep key-value pairs in memory that can be accessed much faster than querying a database. There are two service levels for Memcache, as follows:
- Shared: This is the default and free version of Memcache. Note that this service provides cache capacity on best effort basis. The resources are shared with multiple applications within the App Engine platform.
- Dedicated: This is an optional and paid version of Memcache. It provides a fixed cache capacity that's dedicated to your application. It is paid per GB/hour. This should be used for applications that require predictable performance.
You can add values to be cached by accessing the App Engine | Memcache menu:

Figure 5.23 – Memcache
Exam Tip
Make sure you understand that the standard cache is delivered at the best effort and might not fit all use cases. If you want to have predictable performance, use a dedicated cache.
Next, we will look at the IAM roles required for App Engine.
IAM
Access to Google App Engine is secured with IAM. Let's have a look at a list of predefined roles, along with a short description of each:
- App Engine Admin: Has the right to read, write, and modify access to all application configurations and settings.
- App Engine Creator: Has the right to create App Engine resources for the project.
- App Engine Service Admin: Has read-only permissions to application configuration and settings. It also allows write access to service and version settings, though it does not allow us to deploy versions of apps.
- App Engine Deployer: Provides read-only access to application configuration and settings. It allows us to deploy and create new versions and delete old ones. However, we cannot modify an existing version traffic configuration.
- App Engine Viewer: Provides read-only access to application configuration and settings.
- App Engine Code Viewer: Provides read-only access application configuration, settings, and deployed code.
For less granular access, you can also use primitive roles such as Owner, Editor, and Viewer.
Quotas and limits
Google App Engine comes with predefined quotas. These default quotas can be changed via the hamburger menu, under IAM & Admin | Quotas. From this menu, we can review the current quotas and request an increase to these limits. You should be aware of the limits for each service as this can have an impact on your scalability.
For App Engine, we should be aware of the following quotas:
- Free quotas: For each application, you are allowed a certain number of resources for free. This quota can only be exceeded for paid applications.
- Spending limits: This quota is used to control the limits of your spending. It can be set by the project owner or billing administrator.
- Safety limits: This quota is set by Google to protect App Engine.
Pricing
The price of App Engine consists of multiple factors and differs for standard and flexible environments. For standard environment instances, the manual and basic scaling services are billed at hourly rates based on uptime. For flexible environments, the applications are deployed in virtual machine instances that are billed on a per-second basis with a minimum of 1-minute usage.
On top of that, you need to include the cost of additional resources that are used by your application. To get the most recent prices, take a look at the following link: https://cloud.google.com/appengine/pricing.
Summary
In this chapter, we had a look at App Engine, which is a PaaS offering. We distinguished between two types of environments, namely standard and flexible. Then, we looked at how to deploy an App Engine application and how to update it to newer versions. We also learned how to split and migrate traffic between the versions. Finally, we learned about cron jobs, which allow us to run scheduled jobs.
In the next chapter, we will have a look at Cloud Functions, which is a Function-as-a-Service (FaaS) offering.
Further reading
To find out more about App Engine, check out the following links:
- app.yaml reference: https://cloud.google.com/appengine/docs/standard/python/config/appref
- Environments: https://cloud.google.com/appengine/docs/the-appengine-environments
- Memcache: https://cloud.google.com/appengine/docs/standard/python/memcache/
- Firewall: https://cloud.google.com/appengine/docs/standard/python/creating-firewalls
- Cron Jobs for Python: https://cloud.google.com/appengine/docs/standard/python/config/cron
- Cron Jobs for Java: https://cloud.google.com/appengine/docs/standard/java/config/cron
- Cron Jobs for Go: https://cloud.google.com/appengine/docs/standard/go/config/cron
- Custom domains: https://cloud.google.com/appengine/docs/standard/python/mapping-custom-domains
- SSL certificates: https://cloud.google.com/appengine/docs/standard/python/securing-custom-domains-with-ssl
- App Engine scaling: https://cloud.google.com/appengine/docs/standard/python/how-instances-are-managed