
8
Developing the Project Schedule
It’s funny, really. The one activity that the common person associates with project management is planning, and the main output from this planning effort is a schedule. Yet, it is a challenge to find a project manager who can develop one accurately. Although scheduling is one of the two primary technical aspects of project management, it is a common technical weakness of many project managers.
Why is this? Well, from my own experience, I can state at least four reasons: lack of time for proper planning, lack of education on the schedule development process, lack of training with the scheduling software, and a belief that a detailed schedule is not necessary. I believe this issue is one of the fundamental reasons why many organizations started project management offices (PMOs)—internal support and governance organizations to improve project performance. Unrealistic project schedules have an adverse impact on resource management and project investment decisions.
Of course, as a reader of this book, you will know the proper process for developing a schedule, you will understand the necessity of a detailed schedule, and you will have plenty of ammunition to use when negotiating for project planning time. Combined with proper knowledge of the scheduling software you are using, you will possess a key strength for successful project managers and be a key asset to your stakeholders. Given that, let’s continue our review of the overall schedule development process.
In this chapter, we emphasize the vital importance of the project schedule, step through the process for developing a realistic schedule, and highlight the areas where people often go astray. This will lead to a schedule that your stakeholders will believe and accept, and it will provide you with the foundation to properly execute and monitor the project.
And yes, this process and these principles still apply for an agile project or hybrid agile project. While the approach for performing the work is iterative and detail planning for each iteration is an ongoing process, there is generally still a need for an integrated master schedule that accounts for all aspects of the project and maps the elements of the product roadmap to planned releases and iterations (sprints). We will review a few more specifics in Chapter 25, “The Fun Never Stops”.
The Impact of the Project Schedule
The project schedule is the tool that merges all the work tasks to be performed, their relationships, their estimated durations, and their assigned resources to a calendar. Examples of partial schedules are illustrated in Figures 8.1 and 8.2. For most, specialized scheduling software (such as Microsoft [MS] Project) is used to produce a project schedule. For those managers who use Microsoft Project, I discuss how to make better use of this tool in Chapter 23, “Making Better Use of Microsoft Project.”

FIGURE 8.1
An example of a partial schedule displayed in table form.

FIGURE 8.2
An example of a partial schedule displayed in Gantt chart form.
As mentioned earlier in the book, the project schedule is often referred to as the “project plan” in error. Although not technically correct, it is easy to understand why this term is often used. The project schedule serves as the chief integration point for most, if not all, of your project planning efforts. The project schedule reflects (or should reflect, when the schedule development process is complete) all the following:
Work breakdown structure (WBS)
Resource plan
Work estimates
Key milestones
Responsibility assignments (RASIC)
Quality management plan
Risk management plan
Communications management plan
Procurement management plan
Staff management (training) plan
In addition to providing this vital integration role, the project schedule is important to the project manager for these reasons as well:
Drives project budget—Because most of your project costs are a factor of time (we cover this in more detail in Chapter 9, “Determining the Project Budget”), the project schedule is a main driver for your project budget. If the schedule is inaccurate, your budget is likely incorrect, too.
Drives resource schedule—Your schedule drives the timing of your resource needs. Especially in organizations where resources are shared across projects or centrally managed, the accuracy of the schedule is key to efficient resource management.
Essential for managing expectations—With a well-developed schedule, you have the best tool for managing stakeholder expectations regarding the schedule-cost-quality equilibrium. A well-developed schedule illustrates the earliest date a project can be completed given the project’s current requirements and constraints. This is an invaluable tool when negotiating the final schedule with senior management or customers and when assessing the impact of any change to any equilibrium factor during the execution of the project.
Allows project performance to be measured—With a well-developed and approved project schedule, you have the capability to establish a baseline for how the project is actually performing. We discuss this in more detail in Chapter 10, “Controlling a Project.”
Provides for “what-if” analysis capabilities—Another important ability that a well-developed schedule provides is the ability to perform what-if analysis during the execution of the project. Over the course of a project, things happen that can negatively affect project performance. At these times, you need to know what corrective actions can be taken to possibly get the project back on schedule. Without a well-developed schedule, you cannot quickly determine the effect of implementing a given schedule compression technique, such as fast-tracking, crashing, or limited overtime.
The Goal of the Schedule Development Process
I’ve used terms such as “realistic” and “well-developed” to describe the type of project schedule we want to develop. Before we continue, let’s clarify what the goal of the schedule development process should be. The schedule development process should generate a project schedule that meets the following criteria:
Complete—The schedule must represent all the work to be done. This is why the quality and completeness of the WBS is so important.
Realistic—The schedule must be realistic with regard to time expectations.
Accepted—The schedule must have buy-in from team members and stakeholders.
Formal—The schedule must be documented and formalized.
After reviewing this list, you probably see why so many projects are troubled from the start. Although there are many factors that can adversely affect project performance and cause us to replan, reschedule, or take corrective actions, an improper schedule should not be one of them. Of course, by understanding the lessons discussed in this chapter and in this book, you will be well on your way to developing solid project schedules every time.
Key Inputs for Building a Schedule
The first step in building a schedule is to review the key inputs. Let’s make sure we are clear on these and where we are in the overall schedule development and planning process. To build a project schedule, you need five key inputs:
WBS—List of organized tasks, the work to be done (covered in Chapter 6, “Developing the Work Breakdown Structure”).
Effort estimates—Amount of effort and time each task will take (covered in Chapter 7, “Estimating the Work”).
Task relationships—The logical dependencies that exist between work tasks. I review this step in this chapter.
Resources—The actual personnel and equipment needed to perform the work between work tasks (referenced throughout Part II, “Project Planning,” and covered in more detail in this chapter).
Risk responses—Measures taken to deal with the uncertainty surrounding effort and resource estimates; usually in the form of additional time (contingency buffer) added to the schedule.
Due to the amount of important information and the critical nature of two of these inputs (developing the WBS and estimating the work packages), we reviewed them in their own chapters. In this chapter, we take these two key inputs together with the other three (sequence the work, develop schedule, and finalize schedule) to develop a realistic schedule, as depicted in Figure 8.3.

FIGURE 8.3
The schedule development points to be reviewed in this chapter.
Creating a Schedule
Because we are on this wavelength, let’s go ahead and review the key steps involved in building a project schedule. The steps are also summarized in Figure 8.4. We will follow up this section with a more in-depth look at a few of these:

FIGURE 8.4
The ten steps involved in creating a schedule.
Identify the work tasks (WBS)—Identify the work tasks that need to be performed (reviewed in Chapter 6, but might need to be revisited as you iterate through the process).
Estimate the effort for each work task—Based on specific resource types, estimate the amount of effort each task will require (covered in Chapter 7, but might need to be revisited until resource assignments are finalized).
Determine task relationships (network diagram)—Identify which tasks have to be done before others can begin and which tasks can be done at the same time (in parallel).
Assign resources—Assign the roles, personnel, and equipment that will perform each task.
Develop preliminary schedule—If you have not already, capture all these inputs using your preferred scheduling software.
Perform “reality” check—This is a key, often overlooked, step in the process to make your schedule realistic. This step includes a review of resource allocation and calendar setup.
Shorten the schedule—In this step, you determine the critical path and look for ways to reduce the time required to complete the critical path tasks.
Account for risk responses—If any of the risk responses includes adding a contingency buffer to any specific task or to the entire schedule, make sure to include this in the schedule, too.
Walk through the schedule—In this important step, the proposed schedule is presented for review and feedback. At a minimum, the schedule should be closely reviewed first by the core project team and then by the key stakeholders (management, customers).
Finalize schedule—Incorporate feedback from stakeholders; make any adjustments for actual resource assignments, final risk responses, and success factor trade-offs; get formal acceptance of schedule.
Let’s take a closer look at a few of the key steps.
Determining Task Relationships (Sequencing the Work)
In this step, we think about what needs to be done first and what can be done at the same time. We want to capture the logical relationships that exist between the tasks in our WBS. The traditional technique used to capture these relationships is the network diagram. An example of a network diagram is pictured in Figure 8.5.
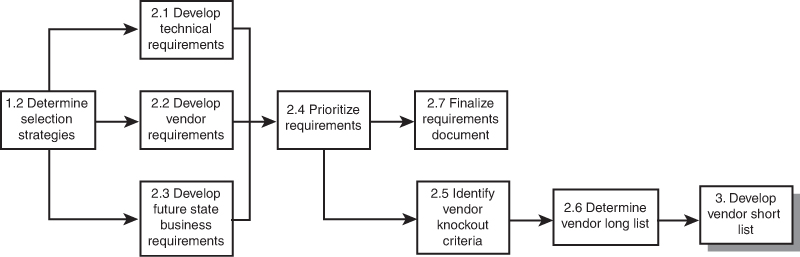
FIGURE 8.5
Example of a partial network diagram showing logical sequence of tasks.
Unlike most introductory project management books, I’m not going to spend five to ten pages (or more) on traditional network diagram topics such as types of network diagrams (Activity-on-Node, Activity-on-Arrow, GERT), dependency types (Finish-to-Start, Start-to-Finish, Start-to-Start, Finish-to-Finish), or mathematical analysis scheduling techniques (Critical Path Method, PERT, and Monte Carlo simulation). Why? Because unless you are in a specialized industry, these techniques are not used very often, and most project scheduling software will take care of this for you (if you know how to use it). Of course, if you plan to take the PMP, you will need to hone your knowledge of these concepts.
The whole idea here is to look at your work visually and think about in what order (sequence) the work needs to occur. This is an exercise in logic. In many cases, this step is an excellent team activity. At this time, you don’t want to concern yourself with resource constraints: just focus on logical sequence of the work. When you complete this task, you want to be clear on three things:
For each task, what other tasks must be completed first?
For the project, what tasks could be done at the same time (concurrently, in parallel)?
For the project, where are your external dependencies? What tasks can’t start until an external event or task has completed?
Building the Preliminary Schedule
Now that we have our key inputs (WBS, task relationships, effort estimates, and resource assignments), we are ready to build our initial schedule. There are a few keys to remember here:
Use scheduling software and be properly trained in how to use it.
If you’ve completed the other steps well up to this point, this step is much easier. For each task you want to schedule, you need to enter the following information:
Task name
Estimated effort
Predecessor task
Assigned resource
Understand the relationship between work, duration, resources, and productivity.
The duration of a task is dependent upon the number of resources (and their productivity rate) that are assigned to the total work effort.
Using the scheduling software, locate the critical path. Often, the software differentiates the tasks that comprise the critical path in some way, such as showing these tasks in red font.
The critical path is the longest path through your network and represents the minimum amount of time it will take to complete the project.
Although the overall schedule development process should be a team-based activity, a single person generally performs the construction of the actual schedule, due to the nature of the software.
Perform Reality Check
In this step, we need to make sure the schedule is reasonable and is aligned with the organizational culture. The primary checkpoints are to check for proper allocation of resources and check for proper use of calendars.
When checking for proper allocation resources, you want to do two things: remove unrealistic work allocations and optimize the use of your resources.
This activity is commonly referred to as resource leveling. Most scheduling software systems provide a function to do this for you, but proceed with caution—the software does not always get this right. As a result, you can have a less-than-optimal schedule.
I recommend, especially if you are just beginning, that you manually level the allocation of your resources. As a result, you will learn more about your scheduling software and become more intimate with your schedule.
Review the resource schedule and look for any allocation that is more than the maximum hours per day or per week. In other words, if Joe Analyst is allocated for 16 hours on Monday, you have an unrealistic expectation. An adjustment needs to be made. The three common responses to resource overallocation situations are the following:
Utilize other resources. Assign one or more of the affected tasks to an available resource.
Establish a predecessor relationship. If Joe is the one who must perform each task, make the start of one task dependent on the finish of the other(s).
Modify the priority level of one or more of the tasks and let the software perform its resource leveling function.
To check for proper use of calendars, verify the following:
Are nonworking days accounted for (holidays or weekends)?
Are the number of work hours per day consistent with the organization’s expectation? Are eight hours of productivity per day assumed or something different?
For part-time resources or resources with special work schedules, are individual calendars assigned to them that reflect this reality?
Shorten the Schedule
On most projects, your preliminary schedule will not be the schedule presented to the stakeholders for approval. Due to either stakeholder expectations or an external deadline that must be met, an effort must be made to compress or shorten the schedule without reducing the scope of the project. The key to this effort is the critical path.
The critical path determines the earliest (the soonest) your project can be completed given the current task relationships and estimated durations. As a project manager, you want to be very clear about which tasks comprise the critical path for two reasons:
If you can reduce this critical path (or change it), you might be able to complete the project sooner.
Any slippage in the completion of a critical path task pushes out the completion date for the entire project.
The common techniques to consider are detailed in Table 8.1.
TABLE 8.1 Techniques for Compressing the Project Schedule
Technique | Definition | Key Issue(s) |
|---|---|---|
Crashing | Adding resources to critical path activities only. | Certain activities cannot be completed faster by adding resources. Additional resources often add overhead that can negate any time savings. Crashing can increase project costs. |
Fast tracking | Performing critical path activities in parallel. | Fast tracking is a high-risk technique that increases the probability of rework. |
Process improvements | Gaining productivity increases based on different work processes, technologies, or machinery. | New approaches can increase project risks. Process improvements are not always available. |
Limited overtime | Increasing the number of hours per day or week available to work on project tasks. | Overtime is most effective when used for limited periods of time. Overuse can lead to issues with team morale and quality of work. |
Walk Through the Schedule
In our pursuit of both a more realistic schedule and a schedule that our stakeholders feel ownership for, you need to walk through the schedule with at least two groups—and if at all possible get a third quality-based review.
Review with project team—First, present the proposed schedule to your project team. Seek their feedback on all aspects: complete task listing, correct resource assignments, logical task sequence, reality factors, and so on. Make any necessary adjustments.
Quality review—This review is not always possible, but whenever possible, have an experienced and knowledgeable project scheduler review your proposed schedule before you submit it to your stakeholders. Especially if you are just gaining experience at this, this input and training can be invaluable.
Review with project stakeholders—Present the proposed schedule to key stakeholders. Seek feedback and questions on all aspects: verify resource assignments, risk responses, key milestones, and so forth. There are two keys to this step: one, the form and manner in which the schedule information is presented (making it as reviewer-friendly as possible), and two, investing the time to have a real-time, interactive review session.
Presenting the Schedule
One element of project planning and project management that is often overlooked is effectively communicating the project schedule to the various project stakeholders. Although presenting a detailed, tabular view of the schedule to the core team is acceptable, the use of visual summary representations of the schedule is highly recommended when presenting the schedule to other stakeholders. The common methods of presenting a project schedule summary are detailed in Table 8.2.
TABLE 8.2 Methods for Presenting a Project Schedule Summary
Method | Key Attributes | Benefits | Notes |
|---|---|---|---|
Milestone chart | This is a bar chart that shows start and end dates, major deliverables, and key external dependencies. | Highlights key decision and completion points as well as any external dependencies. | Milestone tables are also used (same information, no bar chart). |
Gantt chart | This is a bar chart that shows the various levels of the WBS. | Easy to read, incorporates the WBS, and can easily show actual progress against estimates. | Usually does not show interdependencies. |
Timeline summary | Combines aspects of a milestone chart and a Gantt chart. | Summarizes critical path, key milestones, and relative duration of key activities. Excellent for executive presentations. | Microsoft Project (starting with 2010) offers a feature called Timeline View that makes this method much easier to generate. |
Network diagram | A network diagram uses nodes and arrows. Date information is added to each activity node. | Highlights the critical path and shows project logic (flow). | For presentations, the summary task level of the WBS is generally used; otherwise, a network diagram is best suited for wall display. |
Modified WBS | Uses the project WBS organization with status information added to each node. | Shows progress against original work breakdown organization. Easy to read. | Similar to network diagram type representations. |
The map in Figure 8.6 summarizes the main points reviewed in this chapter.

FIGURE 8.6
Overview of developing a schedule.