If you’re running a Windows Web server, odds are you skipped Chapter 11, “Securing Apache and MySQL.” Before you delve into this chapter, take a moment to read the first section in Chapter 11, “Programming Languages, Web Servers, and Operating Systems Are Inherently Insecure.”
The first step in securing a Windows Web server is making sure that you’ve installed the latest patches from Microsoft. This isn’t to imply that you should upgrade Windows every time a newer version is released. Microsoft is notorious for releasing new versions of Windows before they’re really production-ready. Conventional wisdom is to wait until Service Pack 1 is released before you upgrade to a new version of Windows. Patching is a different story. You should generally install new Service Packs as soon as they’re released. In this section, we’ll walk you through installing the latest patches to Windows, IIS, and SQL Server.
To check for a new Service Pack release, follow these steps:
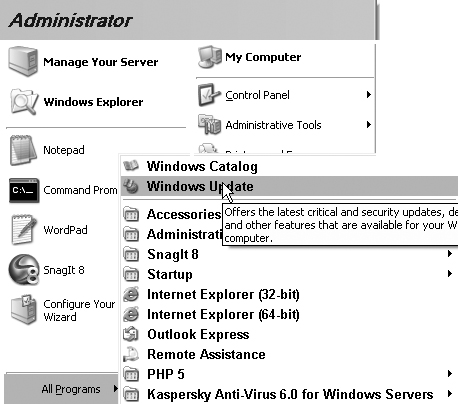
1. In the Start menu, click All Programs, then click Windows Update, as shown in Figure 12.1.
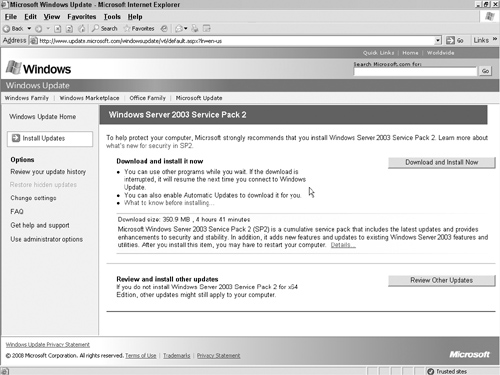
2. The Windows Update screen will scan your system to find out which version of the operating system, Web server, and database server you are running, as shown in Figure 12.2. This process will take a few minutes.

3. The next page will list critical operating system updates. Click the Review Other Updates button, as shown in Figure 12.3.
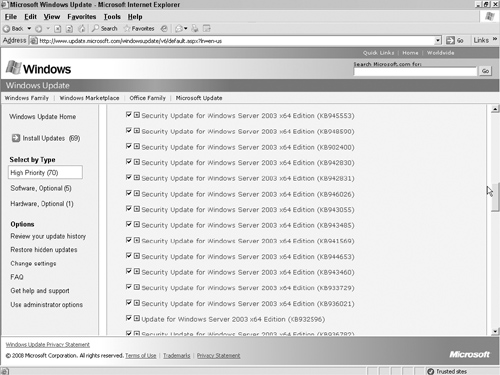
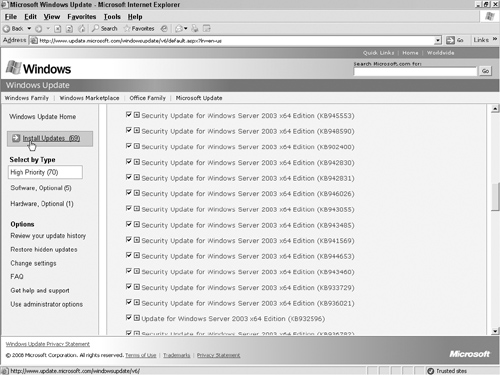
4. There are three types of other updates, as shown in Figure 12.4:
• High Priority: These are security updates for your operating system, IIS, and SQL Server.
• Software, Optional: These are noncritical software updates and new versions of software applications.
• Hardware, Optional: These are driver updates.

Choose which updates to install and which to skip. You don’t need to install every update, even the security-related ones. Since this is a server and not a desktop machine, you probably don’t need a lot of the applications that come with Windows, such as Windows Media Player. Since you don’t use it on the server, you shouldn’t install the update for it because the update could adversely affect libraries that you do use for other services, such as IIS. Install only the updates that are relevant to the services you use on your server and uncheck the rest, as shown in Figure 12.5.
When you uncheck the box next to an update you don’t need, you’ll see a dialog box like the one in Figure 12.6, asking you if you want to see updates for that application again. Unless you’re planning to update Windows Media Player or other unnecessary applications some other time, you can go ahead and have Windows hide those updates from you in the future.

5. After you decide which updates you need, click the Install Updates button, as shown in Figure 12.7.
Windows Update will then display a review page that allows you to double-check the updates you’ve chosen. Verify that the correct updates are listed and click the Install Updates button, as shown in Figure 12.8.

6. Accept the license agreement, as shown in Figure 12.9.

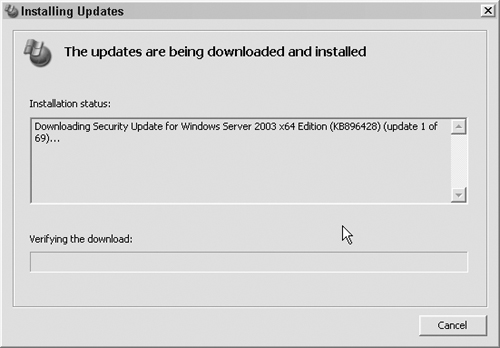
7. Windows Update will download and install the updates automatically from this point, as shown in Figure 12.10.
It’s a good idea to run Windows Update monthly, but you shouldn’t allow Windows to update automatically because it will install every available update. Ideally, you should install patches on your test environment before updating your production server. We’ll discuss using a test environment in detail in Chapter 17, “Plan B: Plugging the Holes in Your Existing Application.”
Now that we’re confident that the software is up to date, it’s time to focus on Internet Information Server.
The first major step in securing your IIS server is to reduce the server’s footprint on the Web. Your footprint is the number of entry points to your server. The server should have as few points of entry to the outside world as possible; every open port is an opportunity for a hacker. To be effective, a Web server needs at least one open port—the one the server software listens to. It may also need an open port for FTP and mail services, but it probably doesn’t need ports dedicated to file and print services. A good rule of thumb is: If you don’t absolutely need a port to be open, you should explicitly close it.
If you’re running a dedicated Web server that you administer locally, you should start by disabling SMP and NetBIOS. Disabling these network protocols blocks the server from acting as a file/print server. It also prevents the server from being administered over the network. If you need to administer the server remotely, you can’t disable these services completely, so disable any subcomponents that you don’t need, such as NNTP, SMTP, FTP, BITS, Internet printing, and so on. By default, most of these services come disabled, but it’s a good idea to take a look at your IIS configuration and disable any services that aren’t absolutely necessary. Follow these steps to disable unneeded services:
1. Click Start → Administrative Tools → Services MMC. In the Services window that appears, locate the services you want to disable, as shown in Figure 12.11.

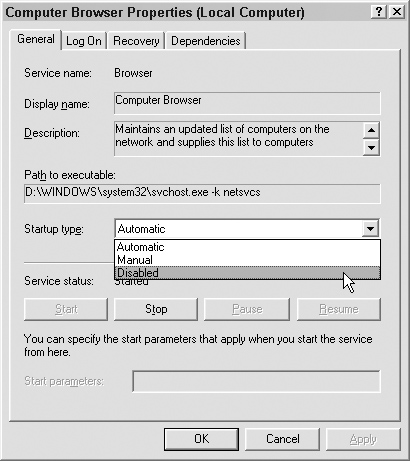
2. Double-click the name of the service you want to disable. The Computer Browser Properties dialog box appears. In the Startup type drop-down menu of the Computer Browser Properties dialog box, select Disabled (as shown in Figure 12.12), then click OK. The Computer Browser Properties dialog box will close.
After you disable the services that you can do without, you next need to set up your Web root on a nonsystem drive. Doing so prevents hackers from accessing your system files. They can access only the files on that drive, which means that you’re stopping directory traversal attacks, which involve a hacker navigating your directory structure to parts of the server they shouldn’t have access to.
To set up your Web root on a nonsystem drive, follow these steps:
1. Click Start → My Computer, then double-click a secondary hard drive in the My Computer window that appears. The hard drive you choose could be a virtual drive, but it’s better to house your Web root on a separate physical hard drive. That way if your primary hard drive fails, at least you haven’t lost the data stored in the Web root.
2. Within Windows Explorer, navigate to the hard drive that will house your Web root. Right-click on the drive and select New → Folder to create a Web root folder. You can name this folder anything you want, as long as you set that folder as the Web root in the properties of the Web sites you create.
3. Right-click on the folder and click on the Sharing and Security menu item to set up an Access Control List (ACL) for that folder.
4. You may want to create a Web Authors group that has Read, Write, Modify, and List Folder Contents access, which you do by opening the Control Panel, then clicking on Administrative Tools. Click on Users and Groups and create a new group. Then create a Web Users group that’s limited to Read & Execute access.
5. Set up subfolders under the Web root folder for each Web site you plan to host.
6. Create a user for each Web site and grant that user access to its own subfolder but not to any other Web site’s subfolder.
The next step in securing your IIS server is to create the Web sites that you’ll host. Click Start → Administrative Tools → Internet Information Services Manager, right-click Web Sites, and then choose New → Web Site, as shown in Figure 12.13.

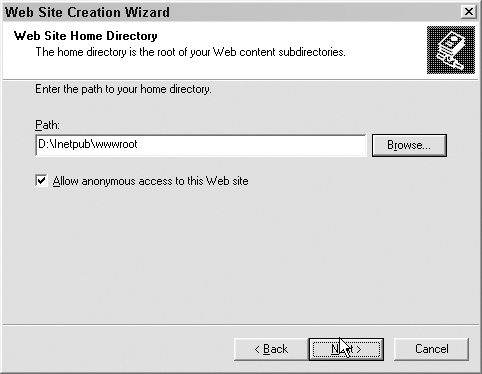
Follow the prompts in the Web Site Creation Wizard. On the Web Site Home Directory screen of the wizard, check the “Allow anonymous access to this Web site” box (unless you want every visitor to your site to be required to log in) and enter the path to the subfolder you created for each Web site, as shown in Figure 12.14. Click OK to exit the wizard.
Now you need to set up individual application pools, or sandboxes, for each Web site. Setting up these pools limits the damage that an insecure application can do to your system by confining it to its own pool. It is very similar to SuEXEC for Apache in that it causes applications to be run under the user ID that owns the application pool, rather than the system user under which IIS runs.
To set up application pools, follow these steps:
1. Start → Administrative Tools → Internet Information Services Manager to open the IIS Manager. Right-click Application Pools, and then choose New → Application Pool, as shown in Figure 12.15. Follow the prompts in the creation wizard to create a new application pool. The new application pool will appear in the Application Pools folder.

2. Right-click the newly created application pool and select Properties from the menu that appears. Click the Identity tab to open the Identity dialog box, shown in Figure 12.16.
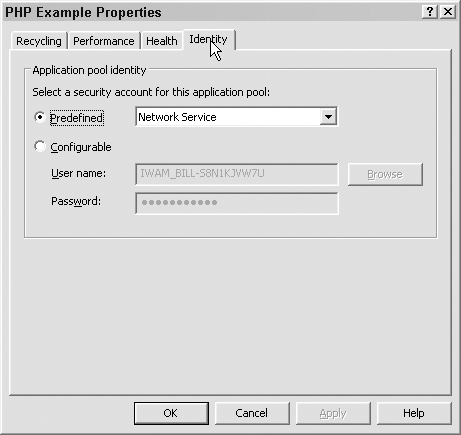
3. Select the “Configurable” radio button and enter the username of the user who has ownership of the application pool and the user’s password in the “User name” and “Password” text boxes, as shown in Figure 12.17. Click OK.

4. Right-click the Web site in the Web Sites folder and select Properties from the menu that appears, as shown in Figure 12.18.

5. Click the Web Sites folder, then click on the Web site you are working with. Right-click the subfolder that contains your PHP scripts. You need to create this folder within the Web root folder if you haven’t already. Right-click on the Web Site Select Properties, and then select the Directory tab, as shown in Figure 12.19.

6. Select the appropriate level of permissions from the “Execute permissions” drop-down list, as shown in Figure 12.20. Set this level to Scripts only, unless you have a compelling reason to allow executables.

The last thing you need to do to secure your IIS server is to enable only the needed Web service extensions, such as ASP, by following these steps:
1. Click Start → Administrative Tools → Internet Information Services Manager to open the IIS Manager, then select the Web Service Extensions folder icon, as shown in Figure 12.21.

2. Select the Web service extension you want to modify, then select the Allow or Prohibit button, as shown in Figure 12.22, depending on your application’s needs.

3. Right-click a Web site in the Web Sites folder and select Properties, then select the Home Directory tab, shown in Figure 12.23.

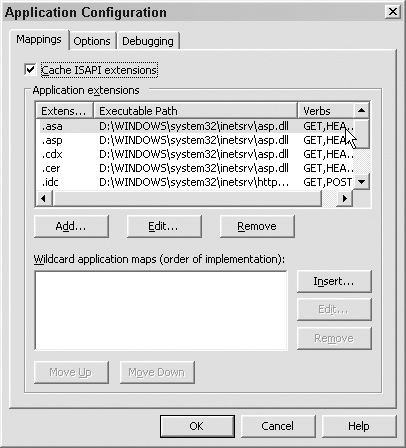
4. In the Home Directory dialog box, click the Configuration button. Be sure that the verbs are set correctly for the service, as shown in Figure 12.24.
At this point, you have secured your IIS server. Next, you’ll need to secure your database server.
The third element of a Windows Web application server is the database. Although you can run MySQL and other relational database engines on Windows, Microsoft SQL Server is by far the most commonly used database engine.
If you already have SQL Server installed, use Windows Update to verify that you have the latest patches and Service Packs. If you don’t have SQL Server yet, you’ll have to decide which version you need:
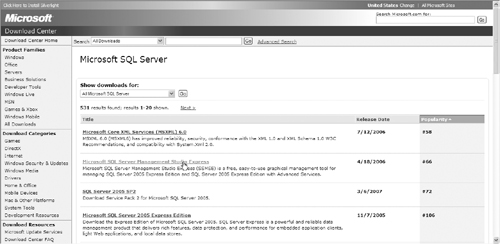
• SQL Server Express Edition is the free edition of Microsoft SQL Server. It has all the main functionality of the full version but is limited to a single processor server, 1GB of memory, and 4GB of space for database files.
• SQL Server Enterprise Edition is the full-featured version of Microsoft SQL Server.
If you need the extra power of SQL Server Enterprise Edition, you can purchase it directly from Microsoft at www.microsoft.com/sql/default.mspx. You can also download SQL Server Express Edition from the same Web site. For the examples in this chapter, we use SQL Server Express Edition.
After you have decided on a version of SQL Server, you need to install and harden it. It is best to install it on a different machine from your Web server.
We have kicked off the installation.
1. Read and accept the standard Microsoft license agreement and installation will begin, as shown in Figure 12.25.

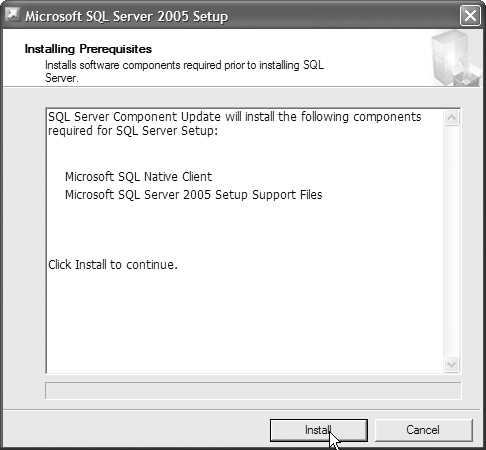
2. On the following screen, install the prerequisites needed by SQL Server Express by clicking the Install button, as shown in Figure 12.26.
3. Click Next to install Microsoft SQL, as shown in Figure 12.27.

This will launch a system configuration check that will give you a report detailing any other software you need to add to get MS SQL running. Assuming everything is correct, click Next, as shown in Figure 12.28.

4. In the first installation window, enter your information and uncheck the “Hide advanced configuration options” box, as shown in Figure 12.29.

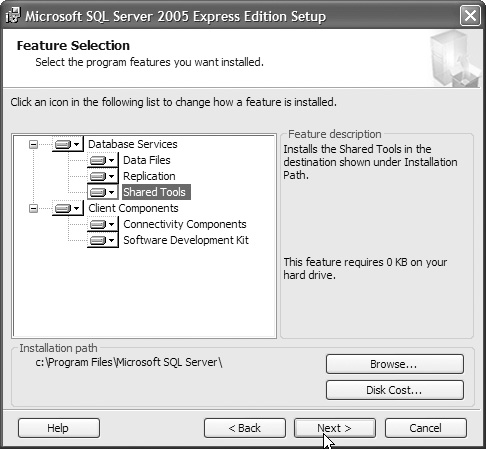
5. Select the features you will need and click Next, as shown in Figure 12.30.
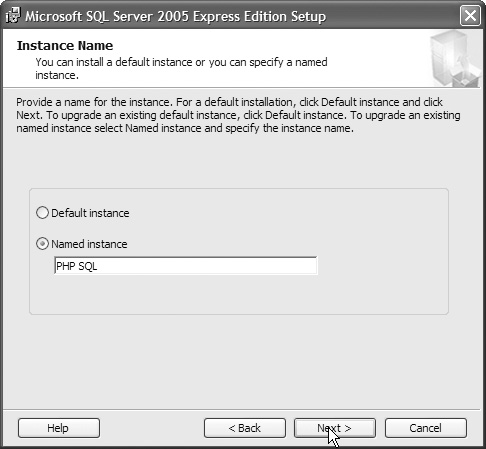
6. On the next screen, name this instance of SQL Server, as shown in Figure 12.31. (You never want to choose Default instance; why make it easier to find your server?)
7. You want to use a custom account for each service; do not let the service run under the default account. If you haven’t created an SA account yet, make one now and enter the account password, as shown in Figure 12.32.
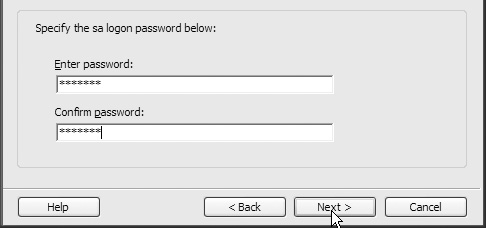
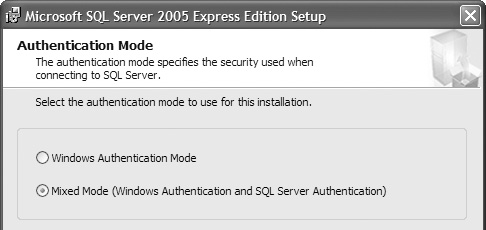
8. Next we set our authentication type. In a perfect world we would pick Windows Authentication, but unfortunately a lot of third-party applications and custom applications require Mixed mode, as shown in Figure 12.33. If you have to turn on Mixed mode, make sure to set an SA password.
9. Set your sort behavior and click Next, as shown in Figure 12.34.

10. Make sure that user instances are enabled so that SQL instances can be run by users with lower rights. Click Next, as shown in Figure 12.35.

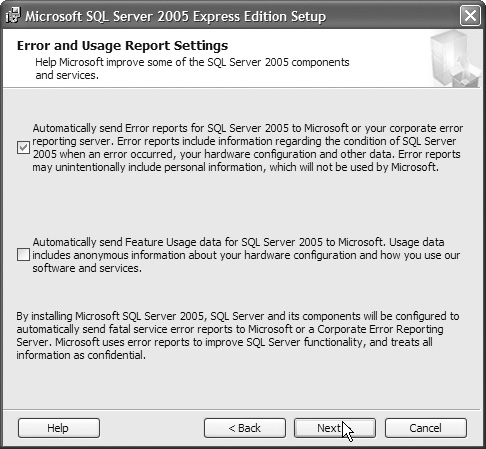
11. If you have an error-logging server, enable SQL Server to forward errors to it and click Next. This is a very good idea but requires another server, as shown in Figure 12.36.
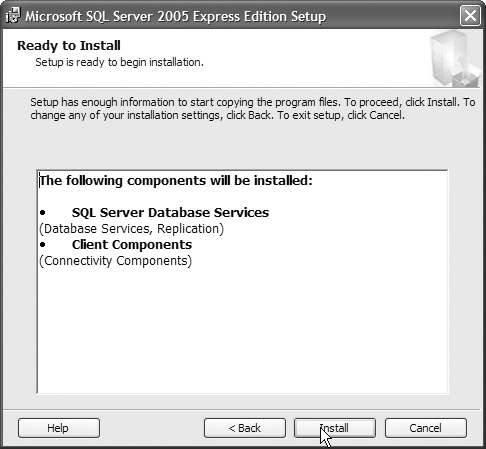
12. Click Install, as shown in Figure 12.37.
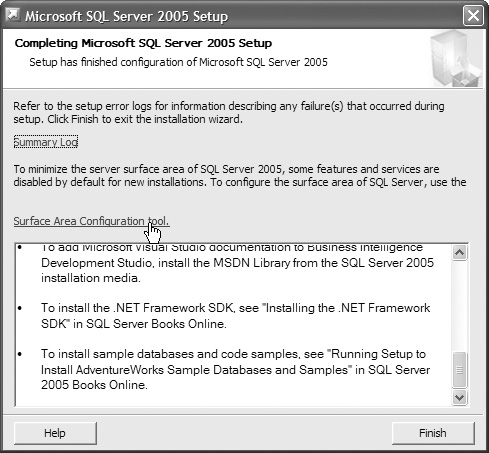
13. After some time, the components will have installed. Click Next, as shown in Figure 12.38.

14. We are not done yet; click on the Surface Area Configuration tool to reduce SQL Server’s footprint, as shown in Figure 12.39.
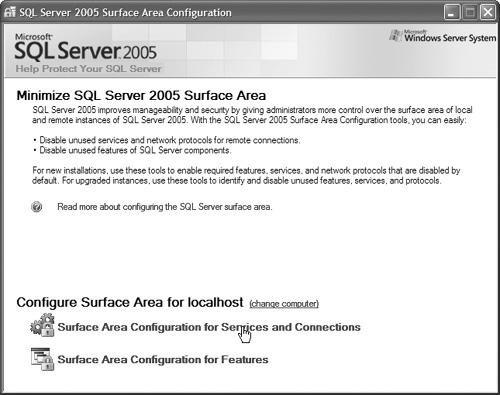
15. Select Surface Area Configuration for Services and Connections, as shown in Figure 12.40.
16. Disable the services you will not require and click OK, as shown in Figure 12.41.

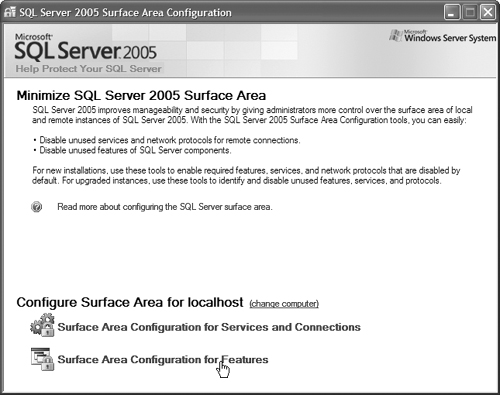
17. Now click on the Surface Area Configuration for Features button, as shown in Figure 12.42.
18. Disable the features you don’t use, as shown in Figure 12.43, and click OK.

19. Close the Surface Area Configuration and finish the SQL install.
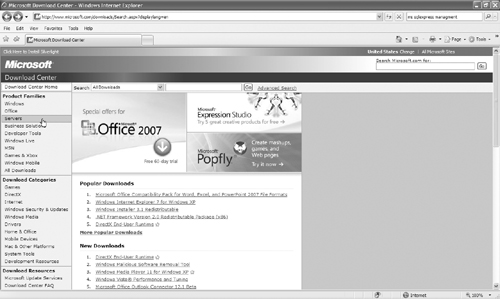
After the install, it is a really good idea to head out to Microsoft and grab the Microsoft SQL Server Management Studio Express (SSMSE). You can do everything you need to do with a command line, but the SSMSE will make your life a lot easier. To get it, go to the Microsoft download center at www.microsoft.com/downloads/ and click Servers on the menu on the left side of the page, as shown in Figure 12.44.

The topic of Microsoft SQL Server security could be a book in itself, but there are some basic steps that we can cover that will help further secure your environment. If you can, have MS SQL running on its own server, preferably behind a firewall. The ideal situation would be a Web server on the DMZ, capable of receiving Web communications, that talks to a SQL server, behind another firewall, that allows only the SQL port, as shown in Figure 12.47.

If setting up a DMZ isn’t an option, there are some steps you can take to harden your MS SQL server:
1. Make sure the server has a small footprint, as we discussed earlier in this chapter. It is also a very good idea to physically secure the server by keeping it in a locked room.
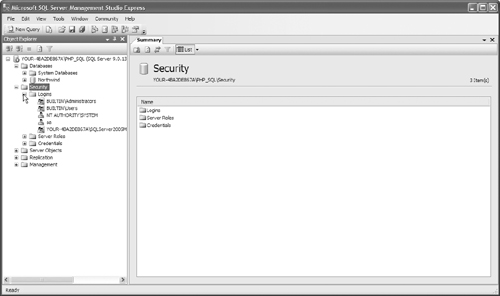
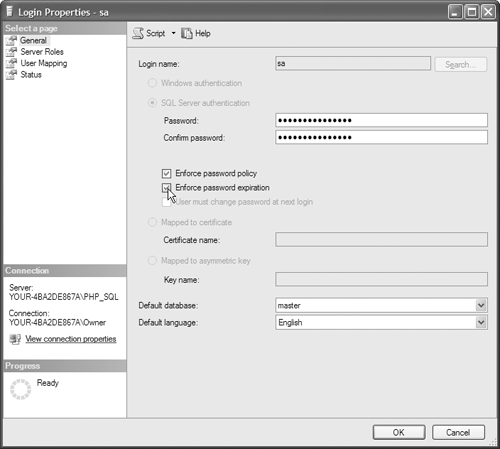
2. Secure the SA account with a strong password. You do this by opening your SSMSE and navigating to the Security → Logins folder, as shown in Figure 12.48. Right-click on SA and select Properties, as shown in Figure 12.49. Make sure that you have a password and that password policy is enforced. It is also a good idea to have the password expire, as shown in Figure 12.50.

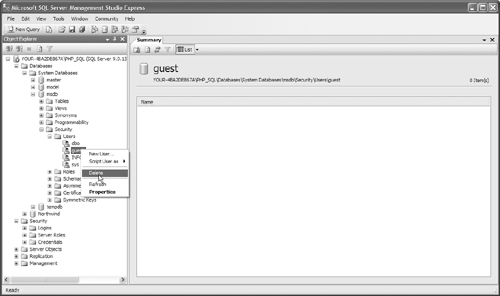
3. Remove the guest account from any database that you can. Master and Tempdb require the guest account. To remove an account in the SSMSE, navigate to the Databases → Security → Users folder, as shown in Figure 12.51, and right-click on the user to be removed. Select Delete, as shown in Figure 12.52.

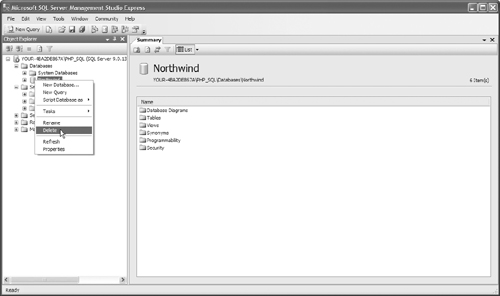
4. Depending on how Microsoft SQL Server was installed, and what version you have, there may be some sample databases on your system. These need to be removed, as well as any other nonsystem database that isn’t being used. Again we are reducing our footprint; an unused database, especially one that you didn’t create, exposes you to greater risk. To remove the database in the SSMSE, open the database folder, as shown in Figure 12.53. Right-click on the database and select Delete, as shown in Figure 12.54.

Now you have a reasonably secure database server. If you’re storing very sensitive data—credit card numbers, Social Security numbers, etc.—you should take the time to go beyond what we’ve discussed in this chapter. We’ve listed a good reference on Microsoft SQL Server security in the Appendix, “Additional Resources.”
At this point, we’ve taken care of the major tasks related to Windows Web server and database security, but that doesn’t mean you can relax. If you administer your own Web server, you should take the time to dig much deeper into server security than we have in this chapter. What we’ve given you here is a good head start, enough to keep you reasonably secure while you research further.