

Piping
Piping is a trim or embellishment you can use to define
the edges of a project. Many sizes and colors are avail-
able premade, but it’s also easy to make your own. You
can follow the steps to make bias strips and then simply
fold them in half over the desired size of cording and
baste to secure. One of the most common uses of pip-
ing is to edge a pillow. It adds a finished look and a pop
of color!
Place the raw edge of the piping trim along the
raw edge of the right side of the fabric. Pin in
place along the seam allowance.
Baste stitch to hold the piping in place. Cut small
slits into the seam allowance to gently curve around
a corner. The curve should be smooth, not folded.
1 2
What You Need
• Zipper foot attachment
• Seam ripper
• Piping
• Straight pins
• Small scissors
74 Part 2: Start Sewing
The piping is pinned to the right
side of the fabric.
iiCH6_Sewing.indd 74 5/23/13 3:37 PM
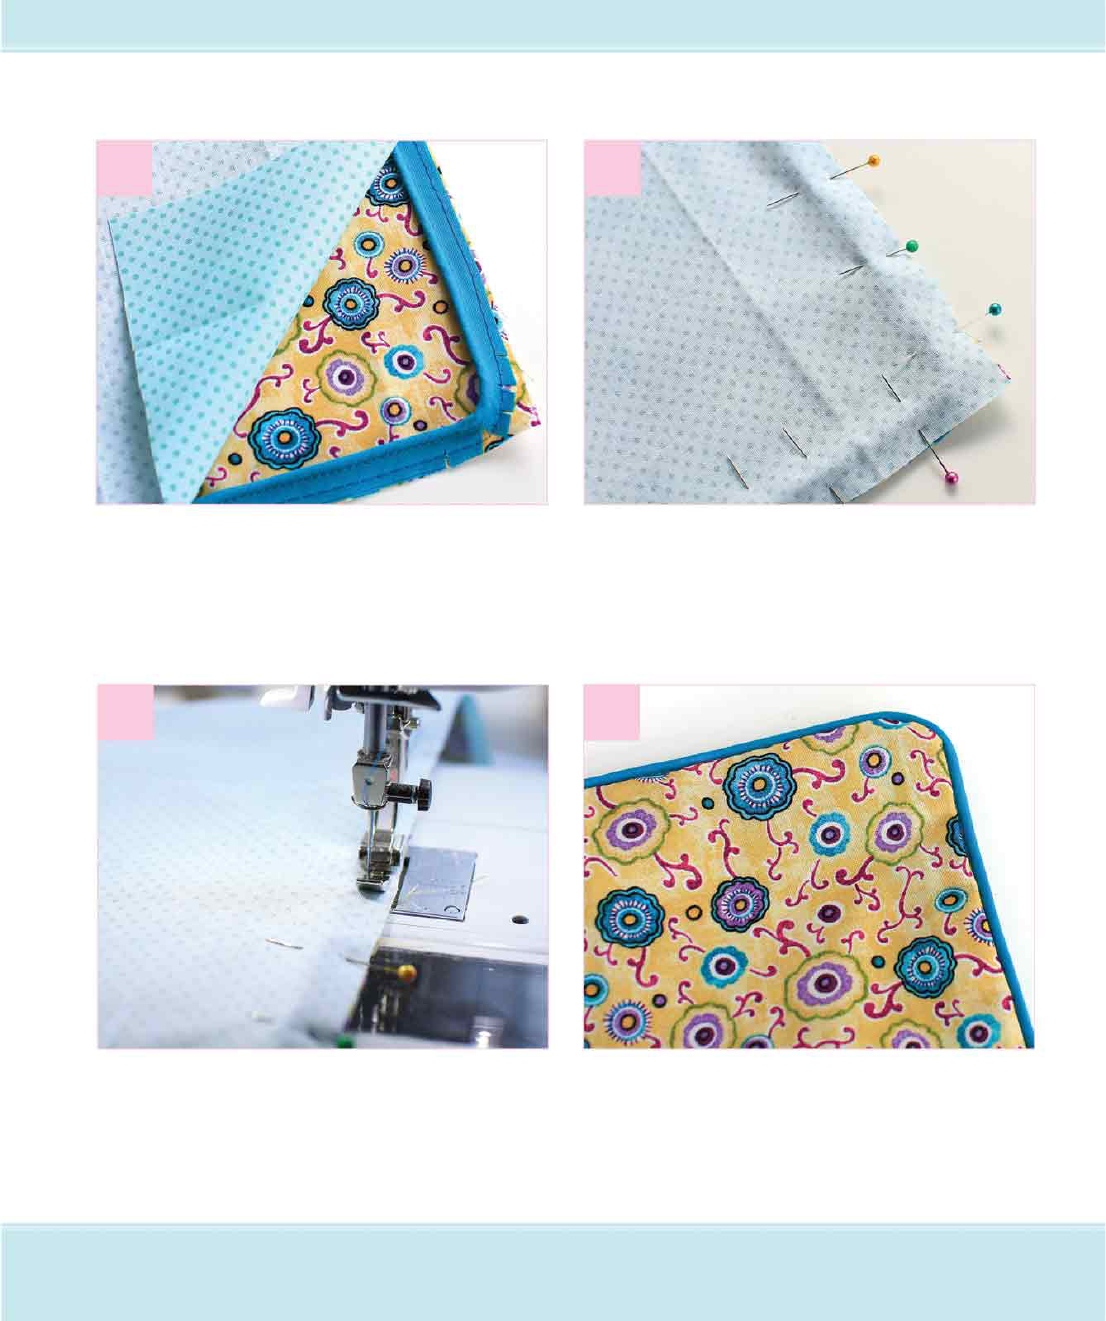
With the zipper foot attached, guide the foot just
along the lump from the cord. Straight stitch as
close to the piping cord as you can.
Turn the fabric right side out and gently push out
the corners. If any basting stitches are showing on
the piping, simply remove with a seam ripper.
3
4
5 6
75Chapter 6: Trims and Finishes
Layer the other piece of fabric on top with the
right sides together. Match up the raw edges.
Pin through all three layers. It’s easiest to pin
through the seam allowance, not through the
cording.
iiCH6_Sewing.indd 75 5/23/13 3:37 PM
..................Content has been hidden....................
You can't read the all page of ebook, please click here login for view all page.