
6
Using MobX as a State Manager in a React Native App
In the previous chapter, we had a chance to try the most popular state management solution in the React ecosystem – Redux. We looked in detail at replacing the FavoritedImages context with Redux. You can go back at any time to check what exactly was changed in the code in the GitHub repo’s folder for Chapter 5: https://github.com/PacktPublishing/Simplifying-State-Management-in-React-Native/tree/main/chapter-5.
If you’re curious to see the entire app fully migrated to Redux, please go to another folder: https://github.com/PacktPublishing/Simplifying-State-Management-in-React-Native/tree/main/chapter-5-complete.
We’ve had a steep hill to climb so far. We talked about ReactJS, React Native, and managing state without additional libraries, and finally, we looked at Redux. I can assure you, my dear reader, that if you were able to internalize the first five chapters of this book, the rest will be a breeze! All we will do now is the same exercise: replacing ReactJS context for FavoritedImages with a state management library. In this chapter, we will talk about MobX. We will start by taking a brief look at the history of MobX and learning about the concepts of MobX at a high level. After that, we will move on to configuring MobX in the Funbook app. Once we have the library set up in our project, we will move on to re-writing the FavoritedImages context with a MobX state, models, and actions.
Here’s what this chapter will include:
- Going over MobX concepts
- Configuring MobX in the Funbook app
- Using MobX for FavoritedImages
By the end of this chapter, you should feel comfortable using MobX. Not only will you know what MobX models, snapshots, and stores are but you will also know whether you prefer them over Redux! And that’s what this book is really about: getting to know different solutions so you can pick whichever you prefer for your future projects.
Technical requirements
In order to follow along with this chapter, you will need some knowledge of JavaScript and ReactJS. If you have followed at least Chapters 1 to 4 of this book, you should be able to go forward without any issues.
Feel free to use an IDE of your choice, as React Native does not need any specific functionality. Currently, the most popular IDEs for frontend developers are Microsoft’s VSCode, Atom, Sublime Text, and WebStorm.
The code snippets provided in this chapter are there to illustrate what we should be doing with the code. They do not provide the whole picture. To code along easier, please open the GitHub repo in your IDE and look at the files in there. You can either start with the file in the folder named example-app-full or chapter-6. If you start with example-app-full, you will be responsible for implementing the solutions described in this chapter. If you choose to look at chapter-6, you will see the entire solution implemented by me.
If you get stuck or lost, you can check the code in the GitHub repo: https://github.com/PacktPublishing/Simplifying-State-Management-in-React-Native/tree/main/chapter-6.
Going over MobX concepts
As you may have noticed, my dear reader, I like to start every big section with a little bit of history about the piece of software that we are going to examine. It so happens that MobX has a very calm presence in the React community. There isn’t really any drama surrounding its conception or development. It was announced in 2015 as a solution on the blog of the company Mendix, where the creator of MobX, Michel Weststrate, used to work. The blog post details the reasons for creating this library, namely the fact that a pure ReactJS app in 2015 was not very good at managing complex states. Since then, MobX has been developed as an OSS library on GitHub. In 2016, it was joined by MobX-State-Tree (MST), a state container system for MobX. MST is to MobX what Redux Toolkit is to Redux. It’s an additional tool made for a better developer experience (DX), but it’s not required. I personally like to make my life easier, so in this book, we will use MST.
I exchanged a few messages with Jamon Holmgren, who is the CTO of Infinite Red, one of the most renowned software houses specializing in React Native, and the maintainer of MST. He said he found out about MobX around 5 years ago when his teammates were looking for alternatives to Redux. After doing a trial project, they really liked it and they’ve been using it ever since. It’s even integrated into Ignite, the React Native boilerplate by Infinite Red. Jamon says that “MST’s main advantage is that you get the central store feel of Redux without having to touch four or five different files for every change. You also get granular re-renders without having to write a single selector and a very natural JavaScript-y feel. Developers at Infinite Red used MST on apps with hundreds of screens and millions of daily active users with little issue, so it’s a proven state management system that works really well with React and React Native.” In cases where developers have to work with less structured data, over which they need more control, MobX could be the better solution over MST.
“MobX still brings the observability (granular, targeted re-renders) and natural updates that MST has, but is much lighter weight," Jamon added.
MobX was created around 7 years ago, but it has stayed relevant over the years. Jamon says he would like to improve the TypeScript (TS) types of the library, but overall, he thinks the library is holding up very well thanks to its author’s, Michel Westrate’s, excellent engineering.
MobX is currently one of the most popular state management libraries for React apps. The documentation states that it’s one of the most popular Redux alternatives. If you read the docs closely enough, you may find a few places where the authors allude to MobX being better than Redux. When I asked Jamon about this rivalry, he said, “It’s always fun to have other great communities to banter with. The reality is that the MobX community respects the Redux community a ton. Their community pushes ours to be better and improve. They make different trade-off decisions and one or the other might not be your particular style, so it’s great to have options.”
The MobX maintainers have, of course, the full right to think the solution they are working on is better. Now, let’s see what you think, my dear reader!
As far as MobX concepts and high-level ideas are concerned, there is one very important sentence underlined in the documentation:
This is a new concept! Anything that can be derived, should be derived automatically. Have we derived anything from our app state automatically before? Not really. At first, we created useState and useEffect hooks, coupled with React context. We had to manually update all the necessary pieces of the state whenever the user interacted with our app. In Redux, we wrote out actions and they passed the information on state updates to the reducers. We may say the state update happened automatically; we didn’t have to perform any additional tasks after passing the actions. We did, however, create the action and call it manually. We also know that Redux does not promote deriving values from the application state specifically. The Redux documentation concentrates more on immutability, the state being the single source of truth, and using plain functions.
The MobX documentation states that this library is based on transparent functional programming – a concept further explained in the book MobX Quick Start Guide, published by Packt Publishing. The philosophy of MobX is to be the following:
- Straightforward – write minimalistic code and the reactivity system will automatically detect all changes without adding special tools or boilerplate.
- Effortlessly optimal – data changes are tracked at runtime, which means the computations run only when needed and we avoid unnecessary component re-renders.
- Unopinionated – MobX can be used with any UI framework, which makes your code decoupled, portable, and easily testable.
One more interesting concept in MobX-land is snapshots. If you have ever written tests for JavaScript applications, you may have heard the term “snapshot.” MobX snapshots are similar to test snapshots. They save the state of the state tree at a given moment in time. Looking at MobX snapshots can be very handy during debugging or for making performant state updates after fetching data from the server. If you want to learn more about snapshots and debugging MobX states, I invite you to take a look at the Egghead.io course created by Michel Westrate, the creator of MobX; you can find the link in the Further reading section. As for fetching data from the server, we will look into that in this chapter, in the last section.
Now, we have a very theoretical hang on the main concepts of MobX. We know it’s different from Redux, but you would probably like, my dear reader, to see some code! Let’s move on to configuring MobX in the Funbook app.
Configuring MobX in the Funbook app
As promised by the MobX authors, the boilerplate for this library is minimal. We will have to add three dependencies and a couple of files for everything to work correctly. Let’s start by adding the necessary dependencies by running the following command in the terminal:
npm install mobx mobx-state-tree –save
This command will install both MobX and MobX-State-Tree. MobX is unopinionated about the UI library we want to use it with. This means that when we decide to use a specific UI library, we will have to find a way to get it to cooperate with MobX. It so happens that we have chosen React Native as our UI library, so we need to add an additional dependency that will make MobX cooperate smoothly with React. Let’s run the following command:
npm install mobx-react-lite –save
Now that we have our dependencies, let’s run the following command:
expo start
It’s a good idea to check frequently whether our app is still running correctly. Something as innocent as installing dependencies can sometimes break the app, and we want to know about any issues as soon as they arise.
Assuming everything is working as expected, we can move on to implementing MobX instead of React’s context in the Funbook app.
A little reminder, my dear reader, about the code: the code related to this chapter can be found in the chapter-6 folder of this book's repository: https://github.com/PacktPublishing/Simplifying-State-Management-in-React-Native/tree/main/chapter-6. If you prefer to follow along on your own, please copy the example-app-full folder and start working from there.
Using MobX for FavoritedImages
At the beginning of this book, I made a choice, my dear reader, to write all examples in JavaScript. I have come to regret that decision while working on the examples with MobX. MobX documentation uses TS, a JavaScript superset, which brings many advantages. I encourage you my dear reader to learn about TS. I will not spend any more time on this topic as there are hundreds of hugely valuable TS resources both online and in book form, but I wanted to let you know, in case you read the MobX documentation, that the examples look a little different from the code in this book.
Now that we have all of this out of the way, let’s get to coding! We will create a new folder called models where we will store data models for our app. The term “data models” may sound very serious to you, but don’t worry. MobX data models are nothing more than JavaScript objects with superpowers – by which I mean to say, they look like simple JavaScript objects, but they are capable of doing much more!
When we have a couple of models ready, we will create one more file for our global MobX-managed state. We will call this file store.js and we will place all the logic for fetching and managing liked images in this file.
Let’s start by creating the simplest model: for the user. We won’t be implementing actual user state changes, but we’ll just take a quick look at what MobX models look like in real-world implementation:
// ./models/User.js
import { types } from "mobx-state-tree"
export const User = types.model({
    name: types.string,
    loggedIn: types.boolean,
})
We only need to import one item: types from mobx-state-tree. These types are very powerful tools in MobX. You can declare very simple types, such as the ones here – a string and a Boolean – but you can also declare that these values are optional, as follows:
name: types.optional(types.string, "")
You can also tell MobX what the default values are (that’s what the "" symbols after the types.string definition in the preceding example signify), or that a given value may be undefined, like so:
name: types.maybe(types.string)
There are many more types out there, but we won’t be covering all of them. However, the MST documentation has a very thorough section on types, and you can find a link to this in the Further reading section.
You may have noticed that types.model is also at the very beginning of the declaration. This is what indicates to MobX that we are describing the shape of our data.
Our Users model is very simple. We used it to get a first glance at MobX data models. Now, it’s time to dig into something more interesting: the LikedImages model.
We start again by importing types from mobx-state-tree and declaring the shape of a single LikedImage item:
// ./models/LikedImages
import { types } from "mobx-state-tree"
const LikedImageItem = types
    .model({
        itemId: types.number,
        authorId: types.number,
        timeStamp: types.string,
        url: types.string,
        likes: types.string,
        conversations: types.string,
    })
We added a few properties to the LikedImageItem model. We will use those properties in the future to display the necessary data on the Favorited surface. It just so happens that these properties are present in the image items fetched from the server.
Now that the single image model has been described, we can move on to setting up the array of identical images and the actions related to this array:
export const LikedImages = types
    .model({
          imageList: types.optional             (types.array(LikedImageItem), []),
    })
    .actions(self => ({
        addLikedImage(newImage) {
            // will add images here
        },
        removeLikedImage(imageToRemove) {
            // will remove images here
        },
    }))
Starting from the top, you will notice that we are declaring an object called imageList, which will store an array of LikedImageItems, and will be instantiated with the default value of an empty array.
The LikedImageItem model doesn’t do anything interesting, so let’s move on to the LikedImages array. We have to add a types.model, where we tell our state manager that this piece of state will be an array of LikedImageItems – and then we add placeholders for the two functions that need to be created: adding and removing liked images.
We can now continue setting up MobX in our app. First of all, we will set up a store – similarly to Redux-managed apps, this will be the source of truth for the app. We will then fetch data from the server and pass it to the app. Once we have all of that ready, we will look at MobX actions – events to which our models will need to respond. Last, but not least, we’ll learn about deriving data from the state.
Creating the store
Before adding and removing images, there’s one more step we need to take. What do you think, my dear reader? Yes, we need to hook up the store!
Let’s go to our store.js file and tell it to use the User and LikedImages models. We’ll start by importing all the necessary files and creating an empty store:
import { types, flow, applySnapshot } from "mobx-state-tree"
import { LikedImages } from "./src/models/LikedImages";
import { User } from './src/models/User';
const RootStore = types
    .model({
        users: User,
        likedImages: LikedImages
    })
export const store = RootStore.create({
    users: {},
    likedImages: {}
})
As you may remember, my dear reader, MobX and MST are unopinionated as far as the UI is concerned. This means we need to look for detailed instructions on how to best integrate MST with our React Native app. It just so happens that the documentation recommends using React’s context to share trees between components. Our example is small so far and we will concentrate on one tree (the favorited images); however, it’s good to get set up correctly for our app to scale. And also: we understand context very well from the previous chapters, right? So, this is going to be a piece of cake:
const RootStoreContext = React.createContext(null);
export const Provider = RootStoreContext.Provider;
export function useMst() {
    const store = useContext(RootStoreContext);
  if (store === null) {
      throw new Error("Store cannot be null,        please add a context provider");
  }
  return store;
}
In the preceding code, we are creating a very simple context, which will be the vessel for MobX state. We also added a useMst hook (as in, “use MobX-State-Tree”) to consume data from the React context. We also added a handy error message in case anything goes wrong. We start with a context with a value of null and we will pass the real store when we add the <Provider> to our app:
// App.js
//…
Import { Provider, store } from "./store.js"
//…
export default function App() {
//…
  return (
    <SafeAreaProvider>
      //…
          <Provider value={store}>
Remember to wrap your app in the Provider created for the MobX state. This is what is shown in the preceding code snippet.
Now that we’ve declared the store and our models, wrapped the app in a Provider, and passed the store to this Provider, we need to pull in the data from MobX in the component. Let’s go to ListOfFavorited.js and replace the pure React context used previously with MobX data:
import { useMst } from '../../store';
export const ListOfFavorites = ({ navigation }) => {
  const { likedImages } = useMst();
  //…
  return (
    //…
    >
      <FlatList
        data={likedImages.imageList}
        //…
This is going pretty nicely, don’t you think? We have our ListOfFavoritedImages component ready! Yes? Let’s check in the app:
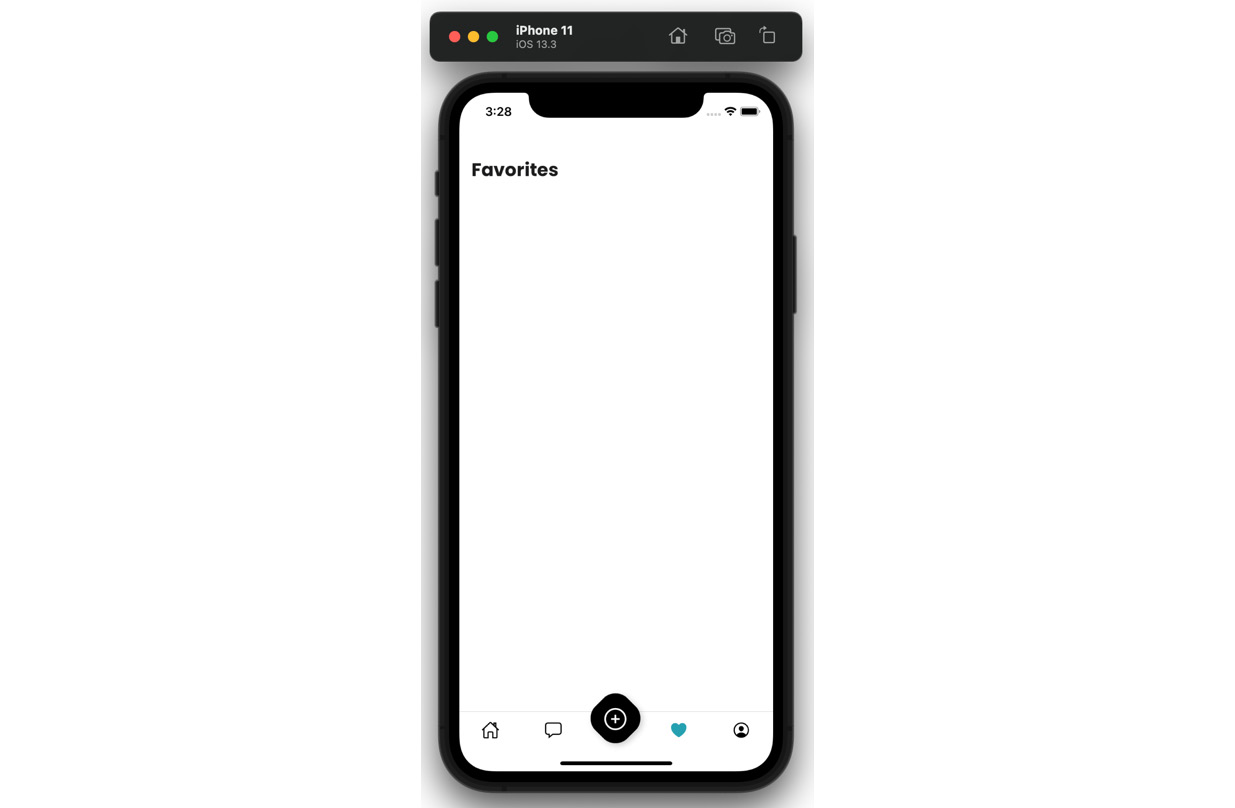
Figure 6.1 – Favorited surface with no images
All we see is a blank screen on the Favorited surface. What happened? We forgot to fetch the images! Let’s see how to do that in the next section.
Fetching data
We have our image list stored on the server. MobX-State-Tree proposes two ways of fetching asynchronous data, but both are actions. Let’s create an action in the store:
// ./store.js
const RootStore = types
    .model({
        users: User,
        likedImages: LikedImages
    })
    .actions(self => ({
        async fetchImages() {
               const response = await fetch(requestBase + "/                 john_doe/likedImages.json");
             const data = await response.json();
             return data;
        }
    }))
We need an asynchronous function that will do the fetching – we have called it fetchImages. This function uses JavaScript’s fetch function and returns data from the server. Now that we have the data, we need to pass it into the LikedImages model. Let’s add a function that will do just that:
// ./store.js
const RootStore = types
    //…
    .actions(self => ({
        setLikedImages(newImages) {
            store.likedImages.imageList.replace(newImages)
        },
        async fetchImages() {
               const response = await fetch(requestBase + "/                 john_doe/likedImages.json");
             const data = await response.json();
             store.setLikedImages(data);
        }
    }))
The newly added setLikedImages function takes care of replacing the entire array of images with anything that’s passed to it. We also adjusted the fetchImages function, to pass the result of the fetch into setLikedImages.
Now that we have told our app where to get the data from and where to put it, we only need to add WHEN. We could call the store.fetchImages() function directly from the app when it’s rendered. However, there is a more elegant solution: using the life cycle hooks provided by MobX. One of those hooks is called afterCreate, and it’s called, as you may expect, after a given store is created. Let’s add this hook to the list of actions in our store:
// ./store.js
const RootStore = types
    //…
    .actions(self => ({
        afterCreate() {
            self.fetchImages();
        },
        //…
    }))
Ta-da! Our app will know what to fetch (the data from the server), where to put it once it’s fetched (in the LikedImages array), and when to do so (when the store is created). If you check the app now, you should see the list of images rendered correctly.
The code we wrote works fine, but we can improve it further. MobX and MST offer us optimized solutions for writing async logic. Their solution is called generator functions. This may sound scary at first, but don’t worry. All we need to do is import a couple of utilities from MST and change the syntax of our function slightly:
// ./store.js
 import { types, flow, applySnapshot } from "mobx-state-tree"
//…
    .actions(self => ({
        afterCreate() {
            self.fetchImages();
        },
        fetchImages: flow(function* fetchImages() {
              const response = yield fetch(requestBase + "/                john_doe/likedImages.json");
              applySnapshot(self.likedImages.imageList,                yield response.json());
        })
The fetchImages function in this version uses a generator. For MobX to understand that this is a generator, we wrap it with flow and use * with the function keyword. Then, we replace async/await with yield, which pauses the function and returns a Promise.
As you may have noticed, we removed the setLikedImages action in this version of the code. It is not needed anymore, as we’re using another MST utility called applySnapshot. I’ve mentioned briefly before what snapshots in MobX are: they are JavaScript objects representing the state tree at any given moment. Using the applySnapshot utility here, we are making sure the update is optimized, as only the necessary data is updated.
This version of the code produces the same result as the previous one. However, it is written in fewer lines of code and uses practices recommended by the authors of MobX. It’s a good idea to write code in the recommended way – it helps us avoid bugs and performance issues. We surely know less about MobX than its author and maintainers, so let’s follow their lead.
Okay – we’re making great progress here. We have the data models and we have wired them up into a store. We passed the store into our app thanks to a Provider, and we fetched the initial data. The only thing left is to add actions and make this app come alive!
Adding actions
Let’s go back to our LikedImages model and add some real code for the addImages action:
.actions(self => ({
        addLikedImage(newImage) {
            self.imageList.unshift(newImage)
        },
The actions function itself holds a reference to the entire array of liked images – this is the self keyword. In the first iteration of the MobX library, you could find uses of a known JavaScript keyword: this. this can unfortunately be confusing for many developers, which is why MobX introduced self. Plus, MobX realizes that if you’re doing an action on a model, you probably need access to that model, so it serves us what we need!
Now that we have a reference to the LikedImages array, we want to add a new item to that array. We could use .push(), but I chose to use .unshift(), which will push the new item to the top of the array and effectively display it at the top of the list of images on the Favorites surface.
The place where we would like to call this action is ImageDetailsModal, because we can “like” images from within this modal. This modal has a heart button. When it’s tapped, we would like the image to be added to our user’s array of liked images:
// ./surfaces/ImageDetailsModal.js
export const ImageDetailsModal = ({ navigation, route }) => {
  const { likedImages } = useMst();
//…
<Pressable
        onPress={() => {
            likedImages.addLikedImage(route.params.imageItem)
        }}
      >
Beautiful! Now, when we tap this pressable heart icon on an image from the main feed, we should see the image added on the Favorited surface, right? Unfortunately, not yet. MobX doesn’t have a lot of boilerplate, but we do need to tell it what data to observe. We have to add an observer wrapper to the ListOfFavorited component. This observer wrapper will re-render our component when it detects a change in the data models:
// ./components/ListOfFavorited
import { useMst } from '../../store';
import { observer } from "mobx-react-lite"
export const ListOfFavorites = observer(({ navigation }) => {
  const { likedImages } = useMst();
And now we’re almost done! There’s only one small catch left. When you like an image and then go back to the Favorited surface, you probably won’t see the new image until you start scrolling. This is not the functionality we’re looking for. We would like to see the newly liked image appear immediately. The issue here is React Native’s FlatList component, which accepts simple arrays, but we’re trying to pass a special sort of array from our MobX model: an observable array.
Making FlatList play nice with MobX
In order for our FlatList to render the updated data correctly, we need to use the values utility provided by MobX.
Here’s the code of FlatList in the ListOfFavorited component:
Import { values } from "mobx"
<FlatList
        data={values(likedImages.imageList)}
Values is a collection utility provided by the MST library that returns all values in the collection as an array, which is exactly what FlatList is expecting. You can read more about collection utilities in MobX in their documentation, and you can find a link in the Further reading section.
Now, everything should be working as expected. Make sure to check your phone or phone simulator frequently. The sooner you discover errors and issues, the easier they are to debug.
Deriving data from state
I’ve mentioned the fact that MobX’s authors state that anything that can be derived from state should be. We’ll get a chance to derive some data now.
We would like to know which images are liked and which are not so that we can successfully add them to the list of liked images or avoid duplicating them. Deriving data from the state is done on the data models through views. I’ve decided to add this following view to the store because we are working in a constrained environment, and I want to keep things simple. Here’s the view that I have added to the RootStore model:
const RootStore = types
 //…
    .views(self => ({
        getIsImageLiked(itemId) {
            return values(self.likedImages?.imageList).filter(
                      (favoritedImg) => favoritedImg.itemId ===                        itemId
                  ).length > 0;
        }
    }))
As with actions, you will notice the self keyword here. It holds a reference to the current data model for easy access.
I created a getIsImageLiked function by passing it an image ID. We then filter over the entire liked images array to check whether that image ID exists.
Sure, this is not the most efficient way to check a user’s liked images in a social media app, which could potentially be hundreds upon hundreds of images – but we do want to see what these views are about, and this is a great chance to do so.
Let’s go back to ImageDetailsModal, where we would like to check whether a given image is liked or not and then display the appropriate icon (an empty heart for images that are not liked and a filled-in heart for liked images) and pass the appropriate function (either adding or removing it from the liked images array).
If you copied your code from the example-app-full folder, you’ll find useEffect in this component, which takes care of checking this exact thing. Let’s try simply replacing the old React context values with the new values from the MobX store. Does the code work? Go ahead and check, I’ll be waiting right here.
Something is not quite right, right? The code does not work as expected. To be honest, it does not work at all. If you tried to work out step by step what was happening, and what should be happening between MobX tree updates and React’s useEffect changes, you may have found that it’s not that simple to figure out. The precedence of side effects can be very complicated, and it gets even more complicated in bigger apps – and that is why we use MobX’s dedicated tools: views.
Going back to our code, we can go ahead and remove useEffect completely. We’re taking care of the filtering in views, which is added to the store. Let’s use import from the context hook and use the values provided by MobX:
  export const ImageDetailsModal = observer(({ navigation,    route }) => {
  const { likedImages, getIsImageLiked } = useMst();
    const isCurrentImageLiked = getIsImageLiked       (route.params.imageItem.itemId)
Don’t forget to add the observer wrapper for our component to observe changes in data!
The heart icon is working as expected now – it looks filled in when an image has been liked on the Favorited surface and gets filled in when an un-liked image is newly liked.
We have gone over creating data models and setting up the store, actions, and views in our MobX-managed version of the Funbook app. By now, we have an app with MobX and MobX-State-Tree as state managers. We’re fetching and mutating data; we are even deriving data from our state! There is still a lot to do in order to convert all of the states and functionalities of the app to MobX. Feel free to play around on your own, or check out the chapter-6-complete folder if you would just like to see the complete app.
Summary
We have just gone over the main ideas and the implementation of MobX and MobX-State-Tree in the Funbook app. MobX may not be as popular as Redux in the React ecosystem, but it does hold a very important place, nonetheless. MobX presents a different way of looking at the state than Redux does and a very different way of managing it. We created data models and attached actions to them. If you are a developer trying to understand an existing app for the first time, having the data and actions in one place may be very helpful to understand what is going on more quickly. MobX takes this state centralization one step further by introducing views. We have all the tools necessary for creating and managing a state accessibly from the very same place where we declare the shape of the state. The last step is to add observer wrappers to the components that need to be aware of state changes and then we have a very nice MobX-managed app.
It’s great to know how you can manage states in a React Native app. It’s even better to know a few different ways to do so – and if you like different options, you’ll be happy to know that we will talk about XState in the next chapter!
Further reading
- https://mobx.js.org/README.html: MobX documentation.
- https://mobx-state-tree.js.org/intro/welcome: MobX-State-Tree.
- https://egghead.io/courses/manage-application-state-with-mobx-state-tree: Manage Application State with Mobx-state-tree.
- https://www.packtpub.com/product/mobx-quick-start-guide/9781789344837: MobX Quick Start Guide.
- https://github.com/infinitered/ignite: Ignite – React Native boilerplate by Infinite Red.
- https://reactnativeradio.com/episodes/rnr-241-redux-toolkit-vs-mobx-state-tree-showdown: Redux Toolkit versus MobX-State-Tree.
- https://www.loom.com/share/9e3afe0547824e42bada06191e891ae1: Intro to MobX-State-Tree and MobX-React by Jamon Holmgren.
- https://mobx-state-tree.js.org/overview/types: MST types.
- https://mobx.js.org/collection-utilities.html: MobX collection utilities.