Set Up Reminders
Whether you’re the type of person who loves the satisfaction of checking off items on your to-do list or you need a kind of backup brain to remind you of the tasks that have come your way, the Reminders app can quickly become an important part of your daily routine.
This is especially the case if you take advantage of the iCloud features in Reminders. Walking the dog when you remember you’re out of coffee beans? Reminders has got your back: add a reminder using your iPhone or Apple Watch, and it’s available automatically on all the devices you’ve connected to the same iCloud account—pretty good assurance that you won’t forget.
Reminders has a unique organizational system I covered in Calendar vs. Reminders at the start of the book. Here’s a brief, er, reminder of how this interacts in the app:
A reminder is a unique item, like “Remember to take out the trash” or “Pick up Jane from the library.” It can be just a bit of text or have all sorts of attributes attached to it.
Reminders are collected into lists and smart lists:
A list contains reminders you added manually to it. It’s an arbitrary collection of items you put in one place. Lists can be grouped in the Reminders sidebar into something like folders.
A smart list is a collection of reminders that can appear in any list, derived from attributes like date, flags, priority, tags, location, and other elements.
This chapter and the next three teach you how to use Reminders effectively. I start with a tour of the app features, examine what’s new in the latest two versions of macOS, and then look at how to configure Reminders on your Mac, with iCloud, and with other services.
In the following two chapters, I take you through the “atom” of Reminders: the individual reminder item (Work with Reminders) and then how to best deal with lists and smart lists (Manage Lists).
Take a Tour of Reminders
Before we get started with using Reminders, I want to give you the lay of the land. Reminders packs a lot of detail into a small amount of space, so every icon, checkbox, and organizational view matters. Let’s start with a general overview of Reminders. Then, I’ll take you through the myriad changes and new features Apple added in the last two cycles of operating systems—there are so many, anyone who has used Reminders in the past should be aware of what’s new.
General Overview of Reminders
Reminders is built for simplicity as you can see in its compact display. On a Mac or an iPad, a sidebar appears on the left, stocked with your individual lists divided into categories (Figure 58).
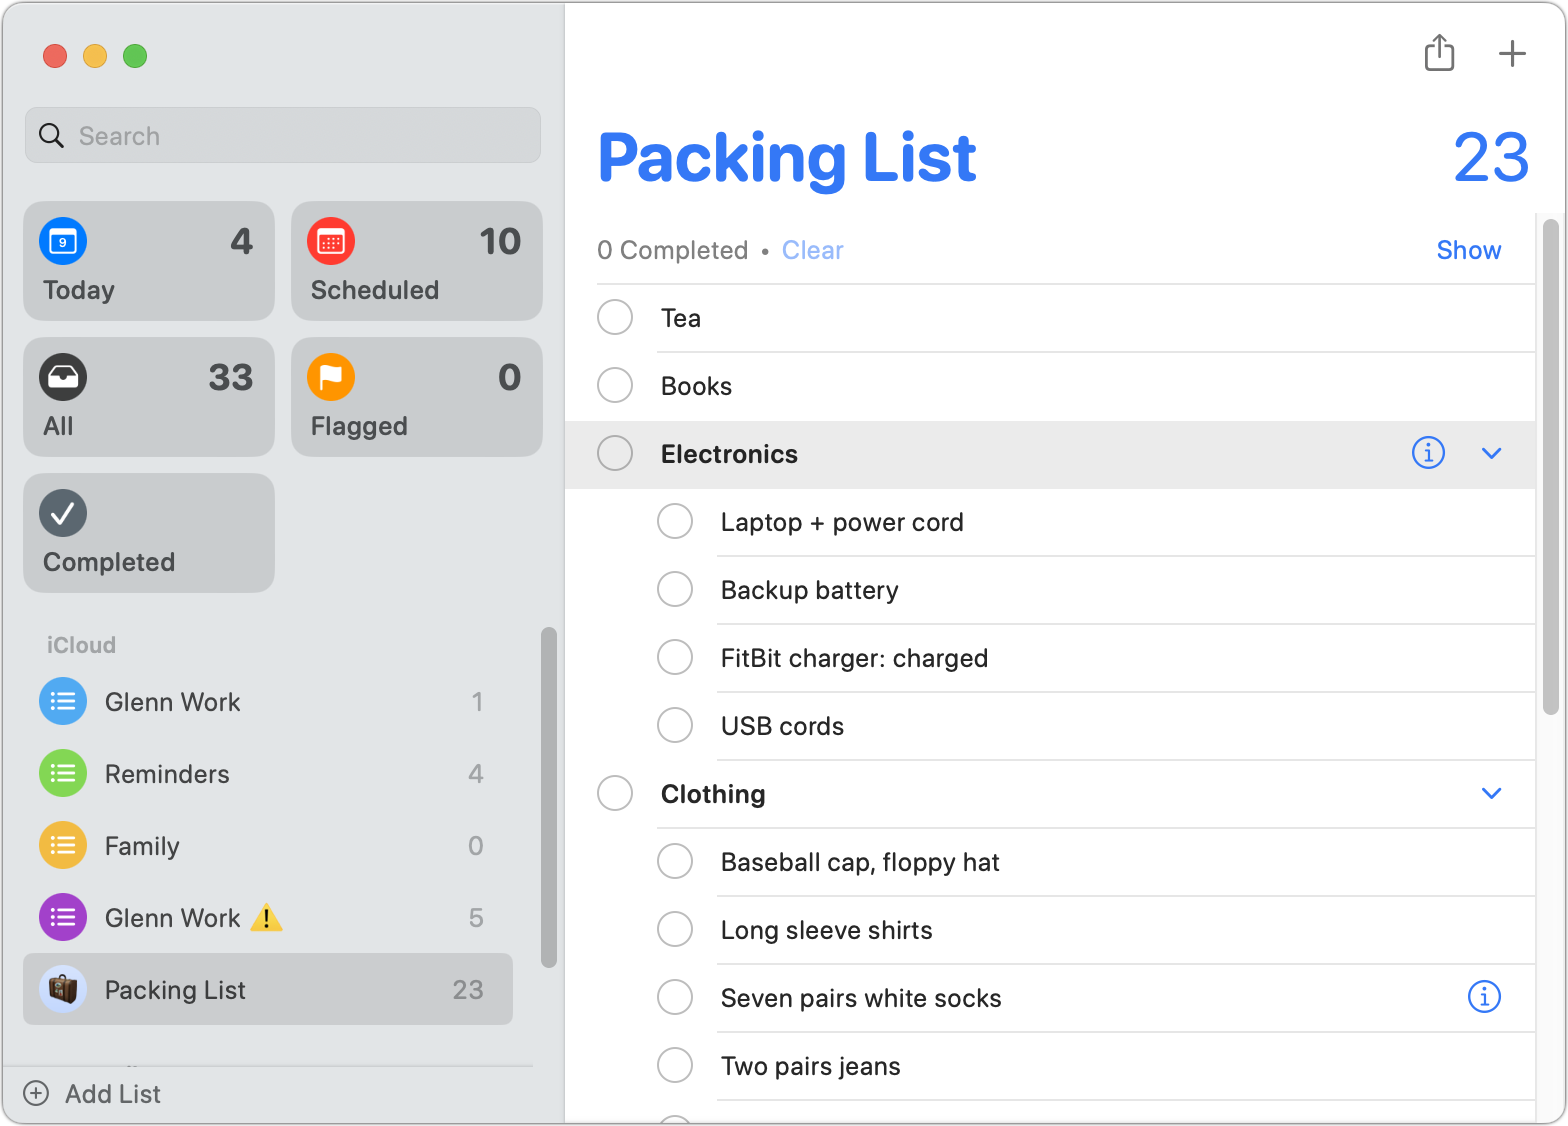
From top to bottom at left, you see a search field, smart lists, and then your lists. If you have syncing disabled or are syncing just via iCloud, lists appear under a My Lists label; otherwise, they’re divided by host, like iCloud and others.
Select a list in the sidebar and its reminders appear on the right, ready to be checked off. The total number of items appears in macOS (but not iPadOS) in the upper-right corner just below a share ![]() icon (starting in Ventura) and the New List
icon (starting in Ventura) and the New List ![]() icon (all versions of macOS).
icon (all versions of macOS).
On an iPhone, your lists appear on one screen. Tap a list’s name to see its reminders (Figure 59).
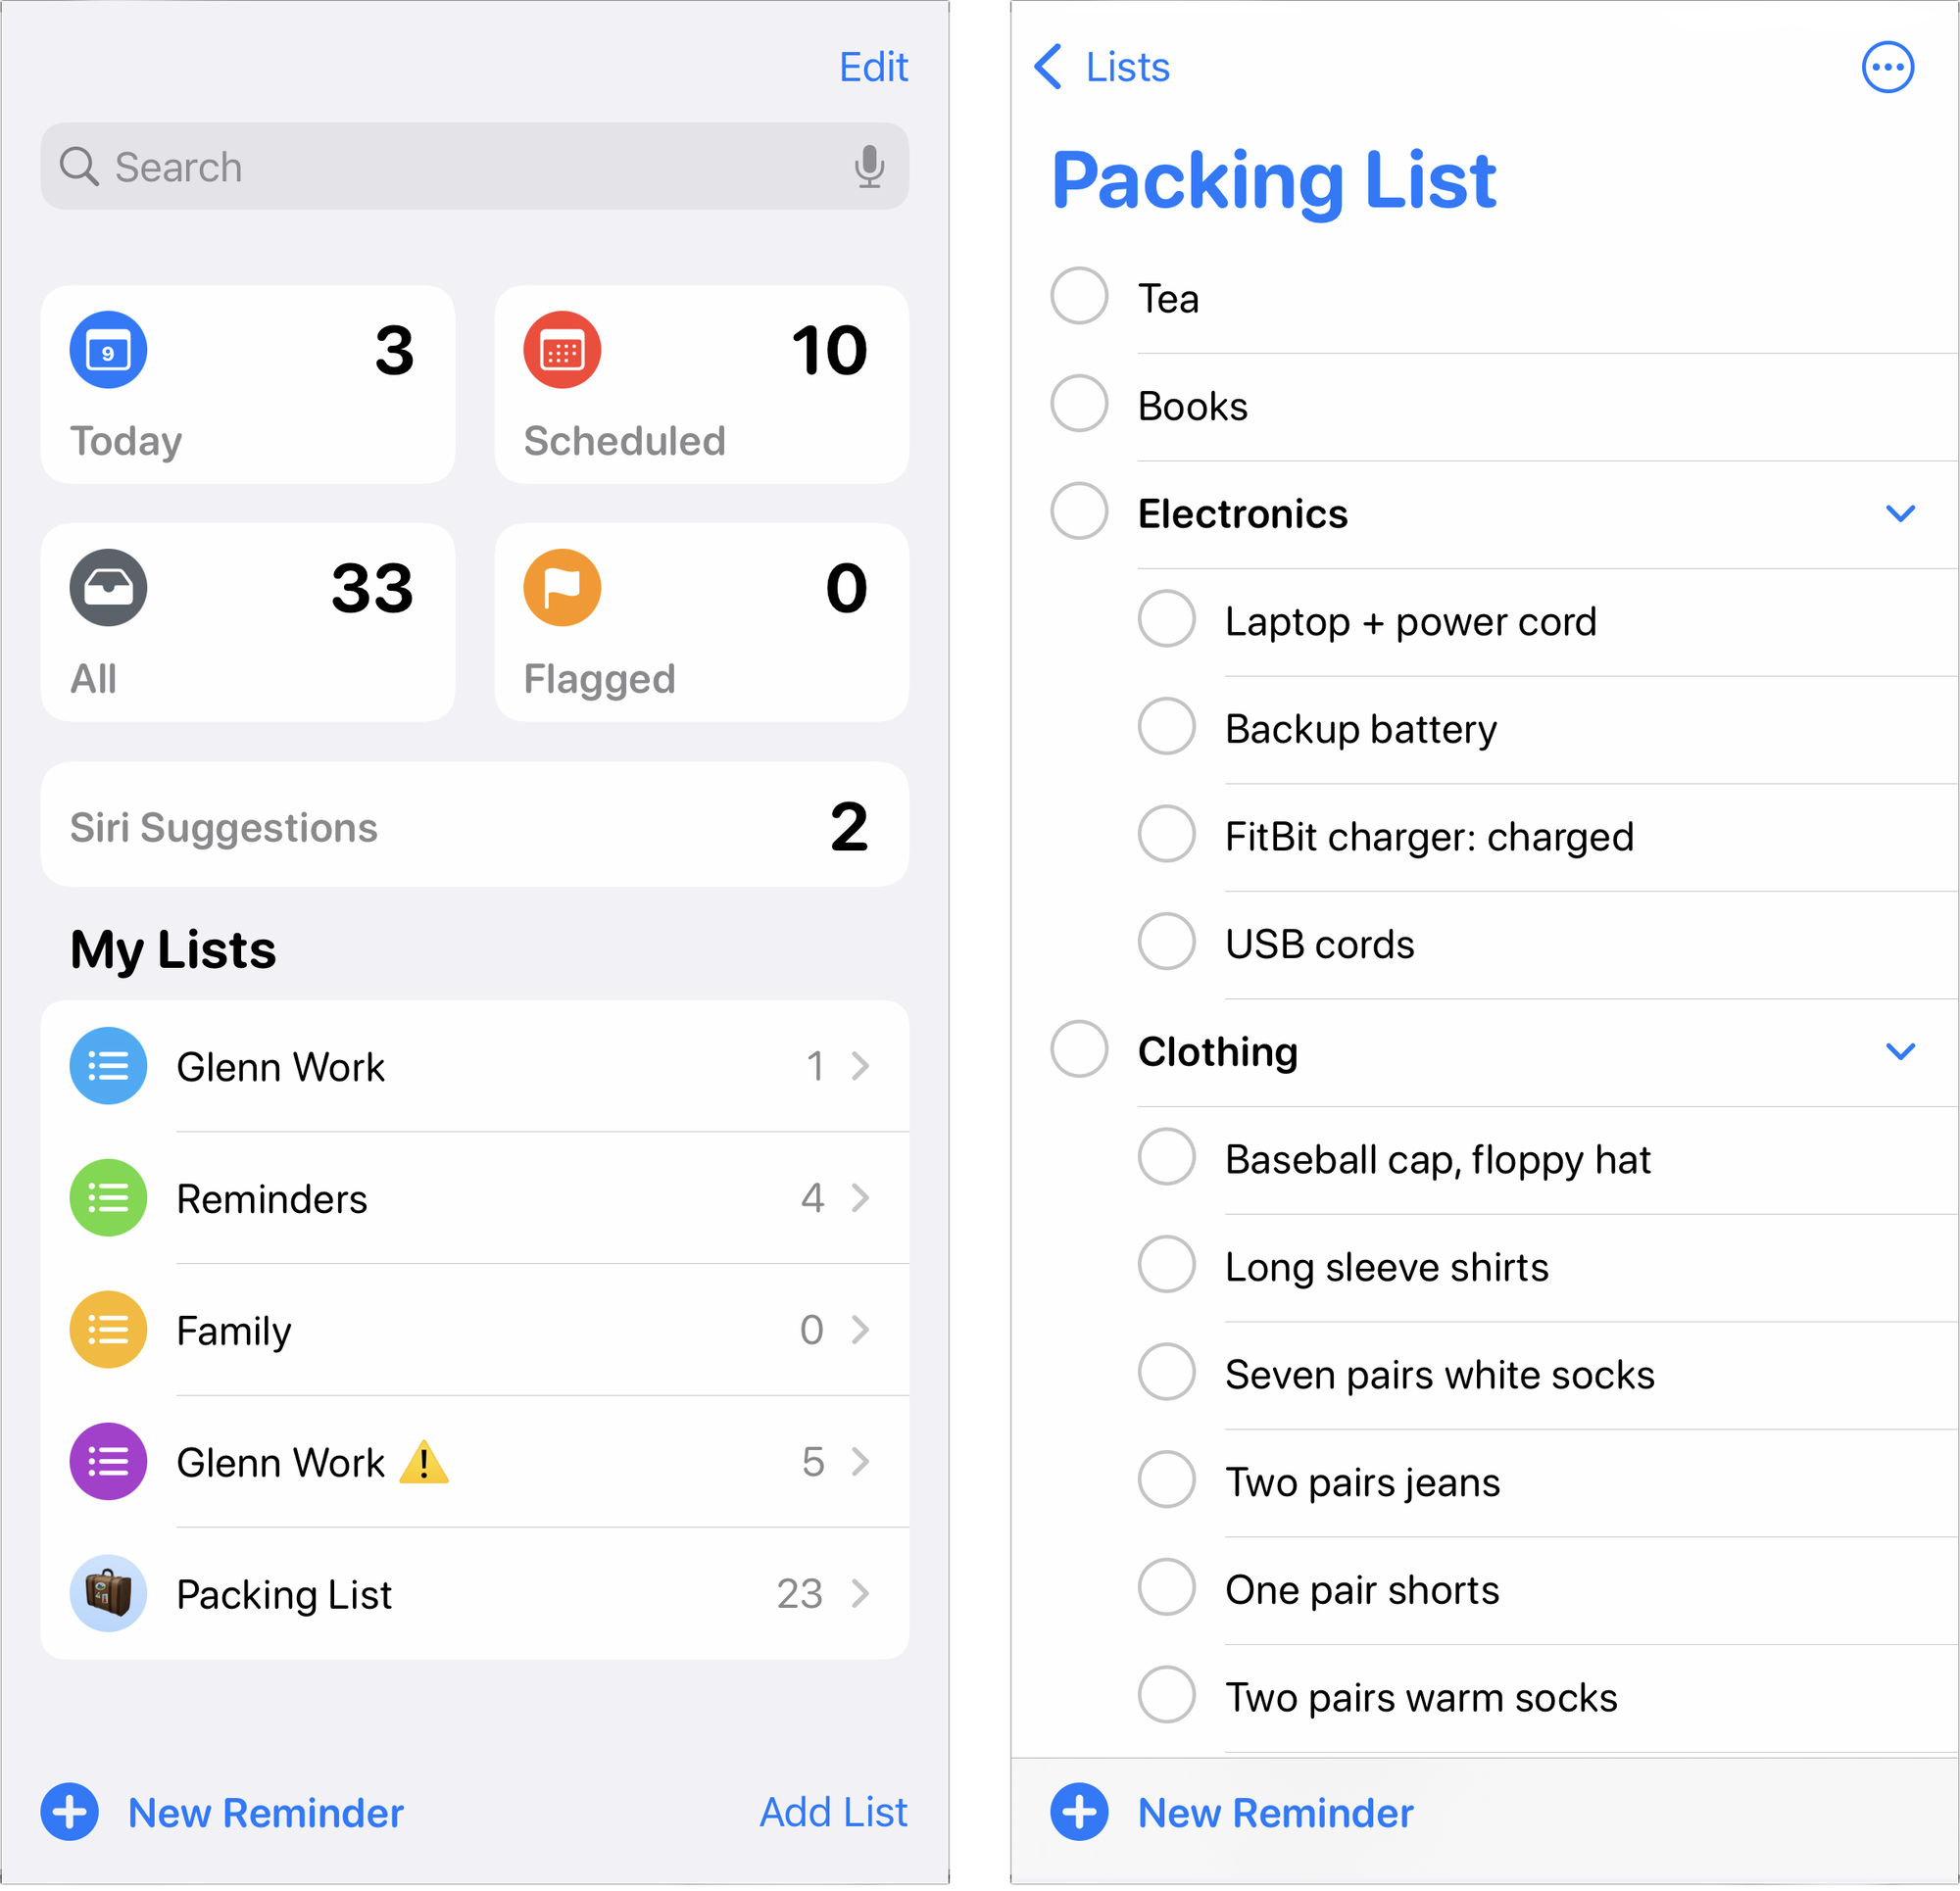
Out of the box, Reminders includes one list: Reminders. If you set up a Family Sharing group, you also see a Family list (see Share Family Reminders). Reminders also includes smart lists for quick access to reminders that fit certain categories—for example, all reminders that are due today or all flagged reminders (see Manage and Create Smart Lists).
Setting up the Reminders app involves specifying where your lists are stored and creating any additional lists that you need, plus telling Reminders which list to add items to by default.
All the New Things in Reminders
While Calendars has remained largely the same with cosmetic and minor feature changes for the last few years, Apple has aimed the upgrade cannon at Reminders and added dozens of refinements and new options.
If you’ve used macOS, iOS, or iPadOS for even two or three years, take a gander at this list of significant changes. In macOS 12 Monterey and iOS 15/iPadOS 15, Apple added the following:
Tags: Reminders supports tags, freeform hashtag entries that can be used across reminders to find matches. This includes a Tag Browser that appears in the sidebar. See Add Tags to Reminders.
Custom Smart List: Create custom smart lists with criteria that include tags, dates, times, locations, flags, and priority. See Manage and Create Smart Lists.
Delete completed reminders: Delete completed reminders, which removes them everywhere. See Manage and Create Smart Lists.
Smart completion and suggestions: When creating a new reminder, you can type more sophisticated natural-language phrases, as in Calendar, than in previous releases. The New Reminder entry dialog also provides single-click access to adding tags, flags, priority, and people. See Add an Item in the Reminders App.
macOS 13 Ventura and iOS 16/iPadOS 16 added further features and refinements:
Completed Smart List: A new Completed Smart List includes all reminders you’ve marked as completed. It’s also a place you can easily clear older completed reminders. See Manage and Create Smart Lists.
Pinned lists: You can pin a list, which adds it to the smart list area. See Pin Lists.
Templates: Turn a list into a template that you can reuse and share with others. See Create a Template.
Reorganized Today and Scheduled lists: The Today list in Ventura, iOS 16, and iPadOS 16 breaks out reminders into Morning, Afternoon, and Tonight. The revamped Scheduled list now breaks down upcoming reminders into near-term and far-term events. See Manage and Create Smart Lists.
Other improvements in the last few versions of macOS I note in upcoming chapters, including which version you require to use it.
Specify Where Your Lists Will Live
You can store reminders locally (just on your Mac) or sync them with iCloud or other Reminders-compatible services. Here are the tradeoffs among those options:
Local reminders: They remain private, but you can access them only there. You can’t flag, add a clickable URL, or include an image.
Use iCloud: Your reminders are available, editable, and always up to date across all your Apple devices and iCloud.com.
Use a third-party cloud service: Reminders and their status are synced across all devices you have linked to the cloud service through apps and websites. However, the same features lacking on local-only reminders can’t be used with non-iCloud hosts, either.
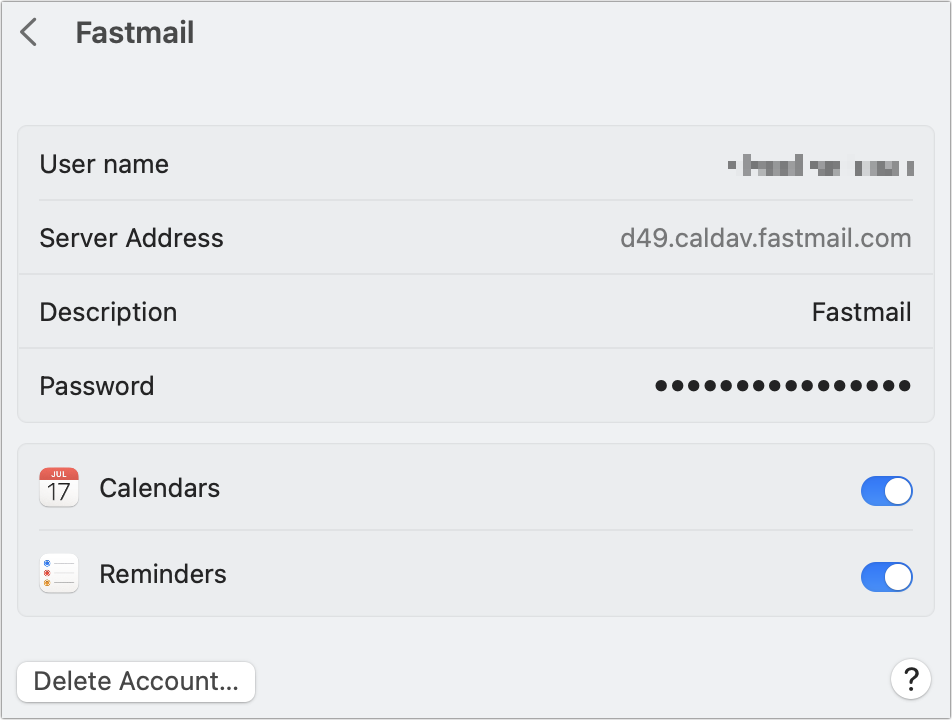
Services that offer reminders include AOL (yes, it’s still listed), Exchange, and Yahoo. Some other mail and calendar hosts also include reminders support, such as Fastmail.
To use a cloud service for Reminders on your Mac (or remove reminders that rely on that service):
Go to System Preferences > Internet Accounts (Monterey and earlier) or System Settings > Internet Accounts (Ventura).
Select the account in the list.
Enable or disable Reminders (Figure 60). If you don’t see a Reminders box for a service, that provider doesn’t offer reminders.
Now let’s move on to working with individual reminders before we tackle lists.