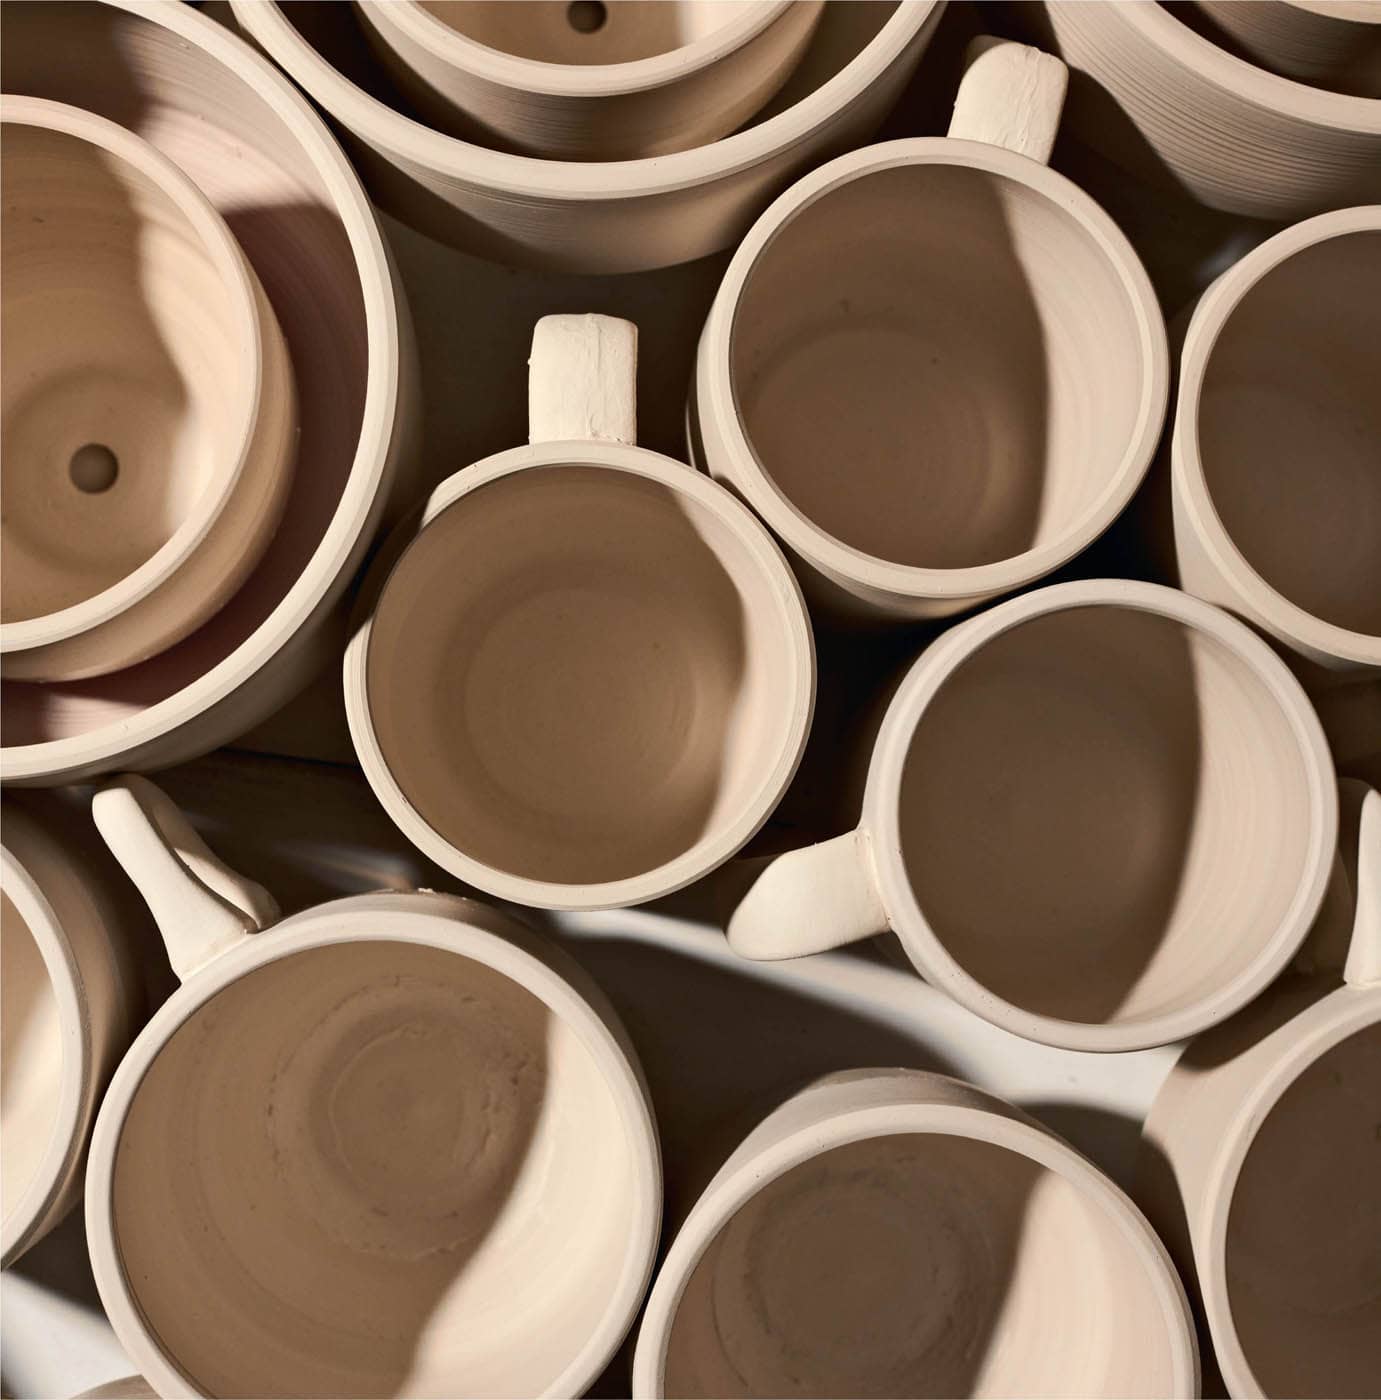
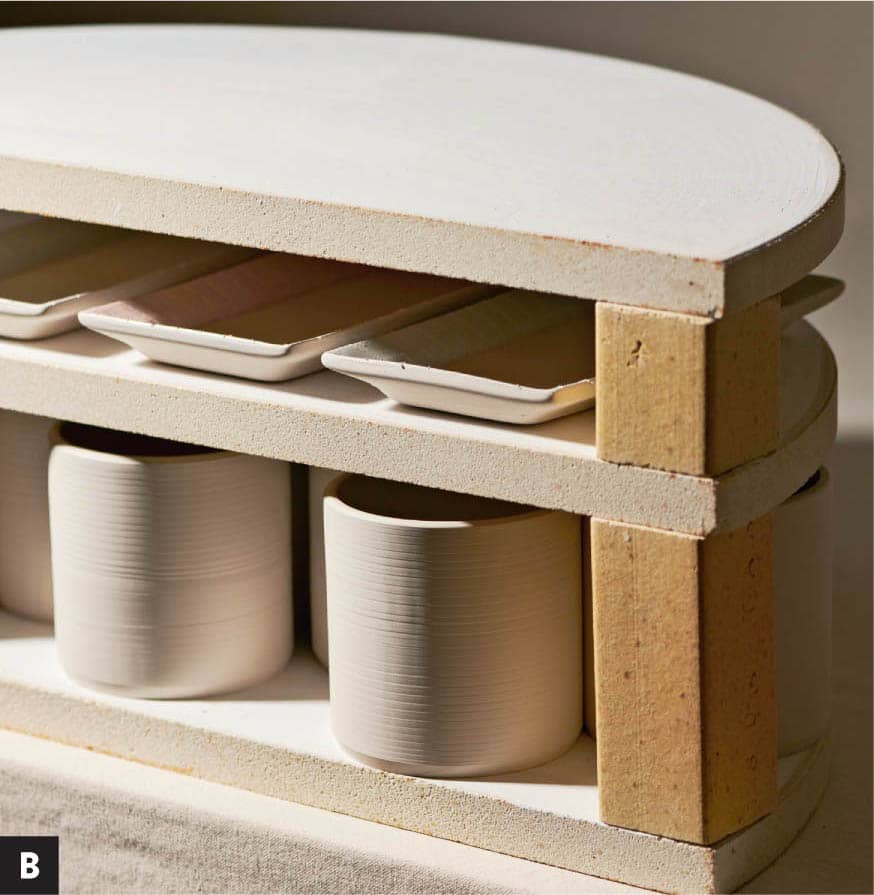
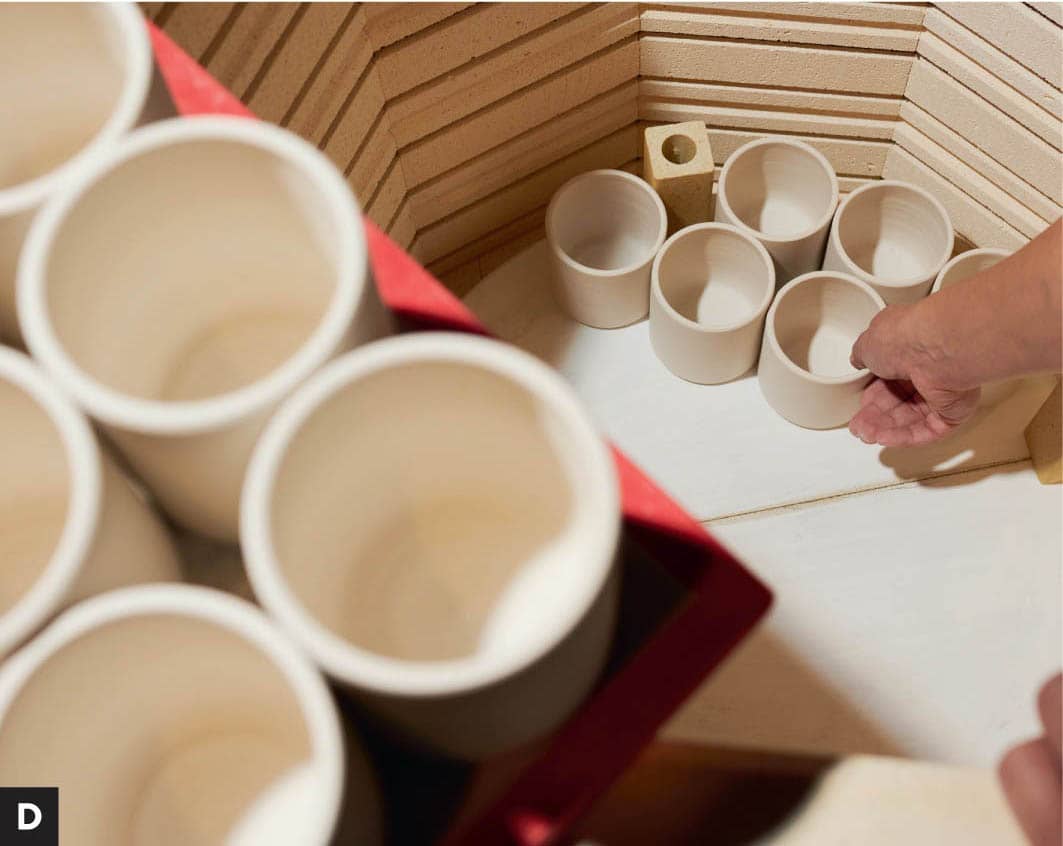
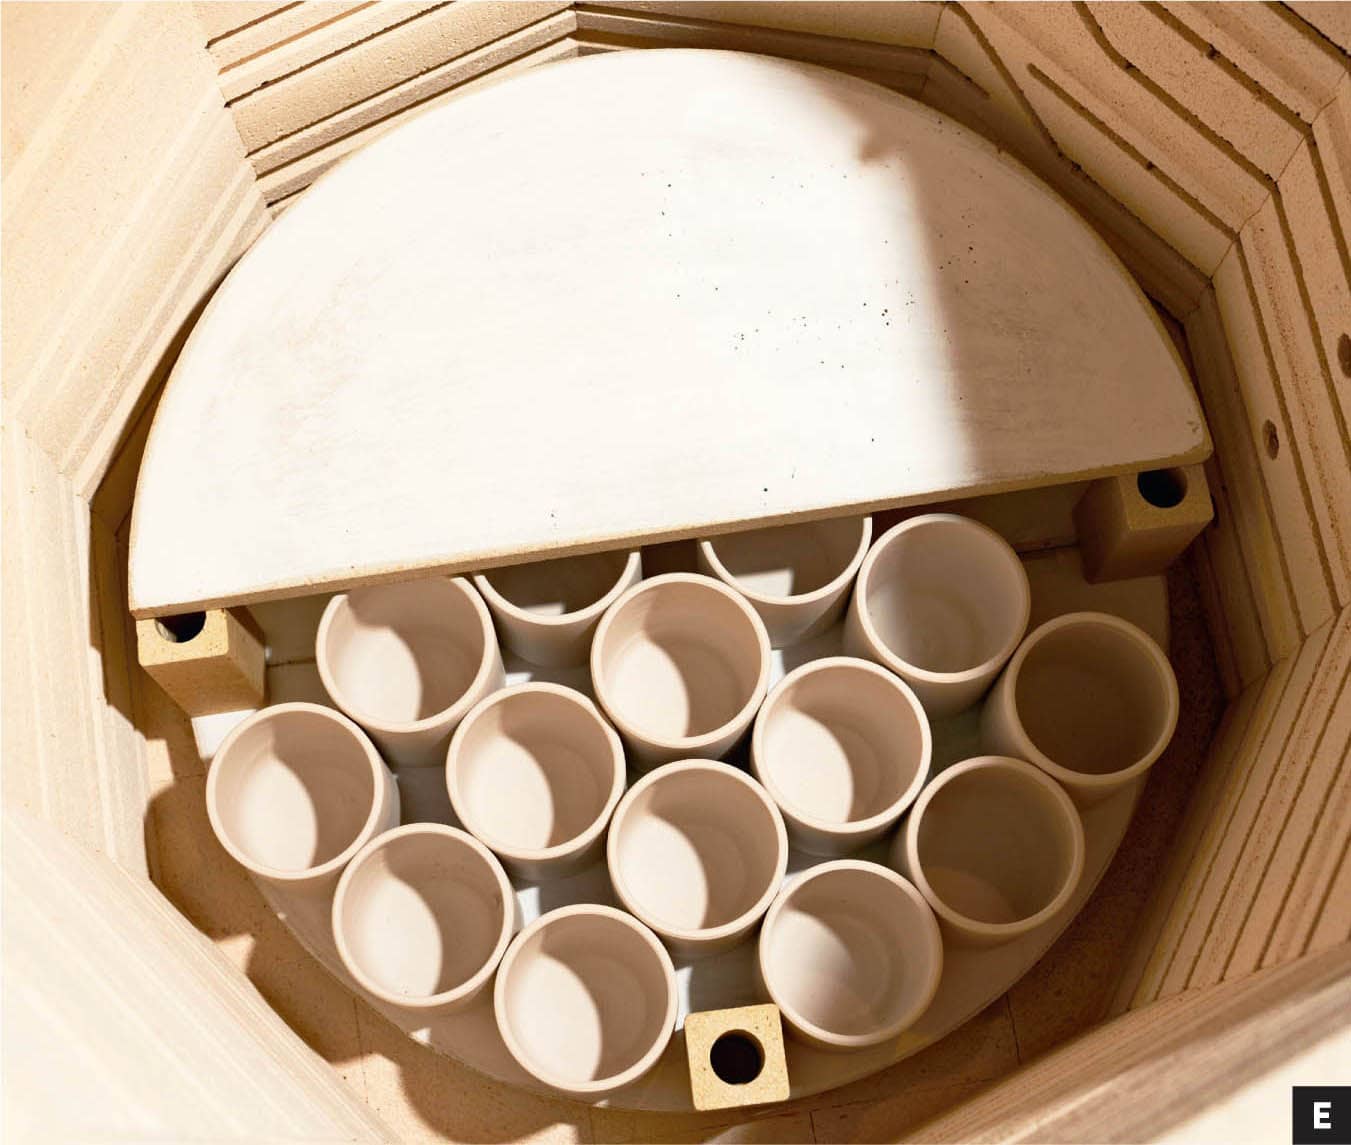
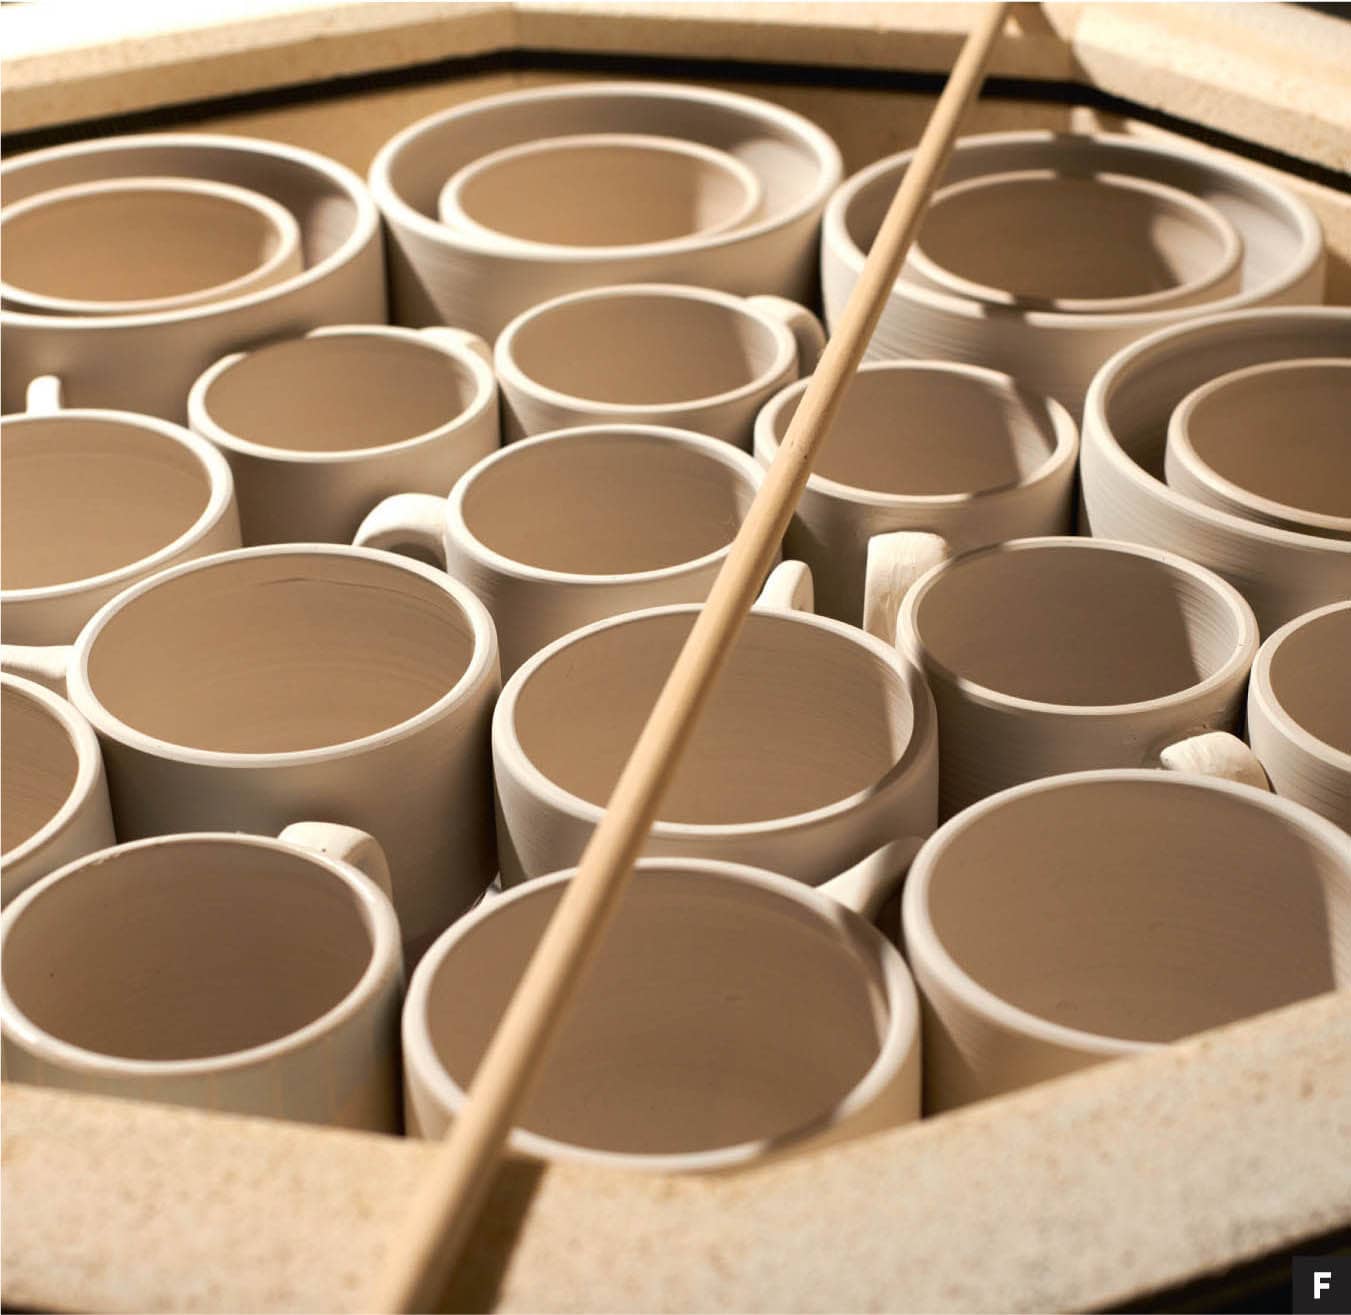
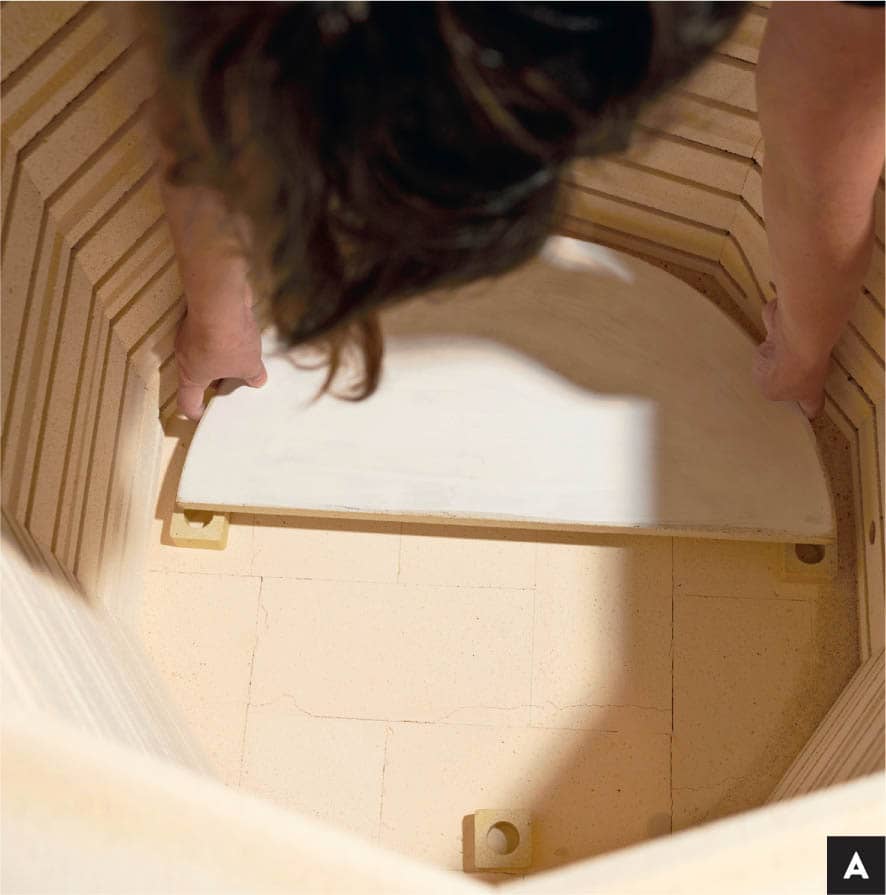
If you enjoy puzzles, then you will love loading kilns. Loading a kiln may seem like a scary task at first, but if you follow these simple instructions, you have nothing to fear. First things first: Before I load, I check that the bottoms of my pots are smooth and have not been scratched up during transport. If any of your pots need attention, use a wet sponge to smooth over the abrasions. To start the planning process, organize your pots by height. This is essential to make the most out of the room you have in your kiln. Also take the time to layer pots that can be stacked. For example, a small bowl can be bisque fired inside a larger bowl. There are so many creative ways to load a bisque kiln via stacking. STEP 1 Place four small stilts on the floor of the kiln. It is good to have a little bit of lift underneath the bottom kiln shelves to allow heat and air to flow under evenly. Also, some kilns are ventilated from the bottom, so you don’t want to plug up the vent holes. STEP 2 Place the first kiln shelf in the kiln. Both ends should only be covering half of the stilt. This is because the other shelf will share. Sharing stilts at connection points isn’t necessary but it is a space saver. (You could easily have six stilts at the bottom of the kiln, but keep in mind you might need more stilts.) [A] STEP 3 Place another kiln shelf on the other side. STEP 4 Next, determine what you will load first. I recommend not placing anything lower than 4" (10 cm) from the bottom shelf. If you load plates at the bottom of your kiln, you run the risk of underfiring them, as there are no heating elements in the very bottom of the kiln. Next, find four matching kiln stilts closest to that size, making sure they are at least ½" (1.27 cm) taller than your pots. [B] STEP 5 Place the stilts in the kiln in the same placement as the bottom stilts. [C] STEP 6 Load your pots. Since there is no melting involved in bisque firing, your pots can be as snug as you want and touching. Just remember to handle them with care. [D] TIP Most kilns have a thermocouple, which measures the temperature in a digital kiln. When loading, be aware of the thermocouple and make sure that no shelves are resting directly on it or pots too close to it. It needs a little space for the most accurate reading. STEP 7 Once your first layer is loaded, add another layer of shelves and repeat steps 2 to 6 until you have a full kiln. [E] TIP Before you close your kiln to program it or begin firing, follow this simple trick so that no pots are taller than the threshold. Place a long ruler or dowel over the top. If no pots are touching it, then you are good. [F] To program your kiln, follow the instructions in your kiln manual. All kiln manufacturers are different, so it is very important that you follow the instructions specific to the model of kiln you are using. Before programming your kiln, plug all peepholes and make sure the kiln vent is on. Ventilation is not covered in this book, but it is absolutely necessary for safety reasons. Good luck and happy bisquing!
Loading a Bisque Kiln

Firing a Bisque Kiln
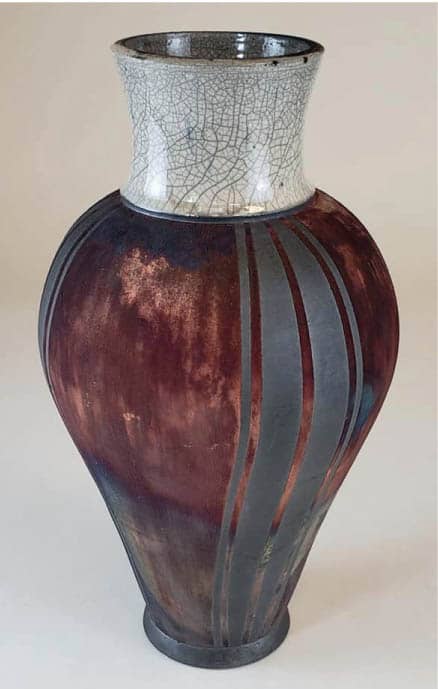
So, what is a glaze then? Glaze consists of three main ingredients: silica, flux, and alumina. Silica is the main ingredient in glass. It can be obtained naturally in the form of sand, quartz, sandstone, or flint. It melts at an extremely high temperature, above 3000°F (1650°C), which is higher than most clays and kilns can fire. That means a flux must be added to a glaze recipe. Flux lowers the melting point of silica and comes in the form of sodium, potassium, lithium, and magnesium, just to name a few. The last main ingredient necessary to make a well-rounded glaze is the refractory agent alumina. Alumina is a primary component in clay that is used in glaze to keep it in suspension. These three ingredients are often referred to a “base glaze” and are formulated in a ratio that represents unity—meaning all the parts work together to melt at your specific firing temperature. Most glaze recipes also contain additives, known as colorants or opacifiers, that work to change the color of the glaze or alter how opaque it will be. In most communal studios, you will be working with clay and glazes in the low-fire or midrange temperature ranges and fired in an oxidation atmosphere. Just remember that you are locked in to the specific temperature range of your clay. You cannot try wood firing with your low-fire clay. RAKU – An ancient Japanese firing technique. Pots are removed from the kiln with special tongs when they are red hot and placed in a combustible material, typically sawdust or newspaper, in a metal bin or a pit that can be covered. The idea is to starve the pot of oxygen, which at the molten stage gives the glaze a nice variety of colors that can’t be achieved any other way. If you love instant gratification, this technique is a one-day firing. There’s no waiting for the kiln to cool, and pots are typically fired in a specially made pulley kiln fueled by propane. Cone 08 – Cone 06 Paul Gisondo MAJOLICA – A deeply rooted historical technique of painting glaze materials overtop white-glazed earthenware clay. Typically a white tin-based glaze is painted or dipped after bisque firing, then stains and glazes are painted directly overtop. The pot is then fired to a low temperature in an electric kiln. This technique creates colorful and vivid decoration. Cone 04 – Cone 03 OXIDATION – The most common and accessible method of firing in an electric kiln. The electric kiln has sufficient oxygen in the atmosphere, allowing for complete combustion. Due to this method’s popularity for glaze firing pottery, there is a plethora of glaze recipes and commercial glazes to choose from to achieve your desired results. Cone 06 – Cone 8 REDUCTION – A firing technique that is achieved in a gas kiln. In reduction firing, the kiln is starved of oxygen, causing incomplete combustion. Carbon monoxide steals oxygen from the materials in the glaze, leading to certain glaze effects only achievable in a gas-reduced environment, such as tenmoku glaze and copper red glaze. Cone 06 – Cone 10 Gabriel Kline SALT – Salt firing is an atmospheric firing wherein salt (sodium chloride) is introduced in the kiln near the end of the firing cycle at a very hot temperature. The salt vaporizes and is carried by the flame throughout the kiln and onto the pots, combining with the silica on the surface to form a hard glass glaze. Salt-fired pots are often recognizable with an orange peel texture. This method of firing requires a gas kiln built specifically for this purpose, as the salt coats the brick walls of the kiln. Cone 10 SODA – Not to be confused with salt firing, although the techniques are similar. The main difference is that a mixture of baking soda and soda ash are mixed with water and sprayed into the kiln near the maturing temperature. The sodium interacts with the silica and calcium carbonate in the glaze to form a layer of glass. Soda firing also requires a gas kiln specifically for this firing. Cone 10 Luke Doyle WOOD – The oldest method of firing pottery in a large chamber kiln fueled only by wood. It was traditionally built into the landscape of a mountain but can be built of brick and freestanding. This type of firing takes several days and requires 24-hour stoking and monitoring–often a group effort. Wood when burned creates wood ash. At a very high temperature, this ash falls onto the surface of the pots, creating an often glossy, sometimes muddy layer of glaze. Cone 10 – 13Firing Temperatures
Firing Types (from Low to High)

Loading a glaze kiln is very similar to loading a bisque kiln, but different in one key way: pots in a glaze kiln cannot be touching. This means that no glazed pots should touch on their sides, no stacking of pots, and no glazed surfaces touching the kiln shelves. This is because if pots are touching, they will likely be stuck together for life. To ensure this doesn’t happen, leave a finger-width between each pot, because as the glaze is close to reaching temperature, it can bubble slightly. While loading, it is also a good idea to check all the bottoms of the pots to be sure there is no glaze left on the surface or too close to the foot. Another tip for success in glaze firing is to stagger your kiln shelf layers. Rather than having four posts, try using three posts per shelf at varying heights per layer. This will ensure even flow of the heat throughout the kiln. This is not absolutely necessary, but many potters prefer this method of loading, especially in gas kilns when atmosphere comes into play. With your glaze kiln completely loaded, lid closed, and the peepholes closed, program your kiln. Always read the manual first because each kiln brand varies in function and program. Most potters prefer to use the easy cone-fire method in which you plug in your desired temperature and speed. Other potters prefer to use the ramp/hold option to plug in their own specific firing schedule. No matter the brand or the method, I recommend programming your kiln to fire at a medium speed for glaze firing. This is middle of the road. Some potters in a hurry will program their kiln to fire quickly, while others will fire their kiln slowly to allow for full development of the glaze. If you’re not sure where you stand, try all three and take notes. Below is an example of a typical glaze firing schedule at medium speed. Below is an example of the factory installed multisegment program when you press cone 6 medium speed on a skutt kiln. SEGS RATE TEMP 1 200°F (93°C) / Hr 180°F (82°C) 2 200°F (93°C) / Hr 250°F (121°C) 3 400°F (204°C) / Hr 1000°F (538°C) 4 180°F (82°C) / Hr 1150°F (621°C) 5 300°F (149°C) / Hr 1982°F (1083°C) 6 120°F (49°C) / Hr 2232°F (1222°C)Loading
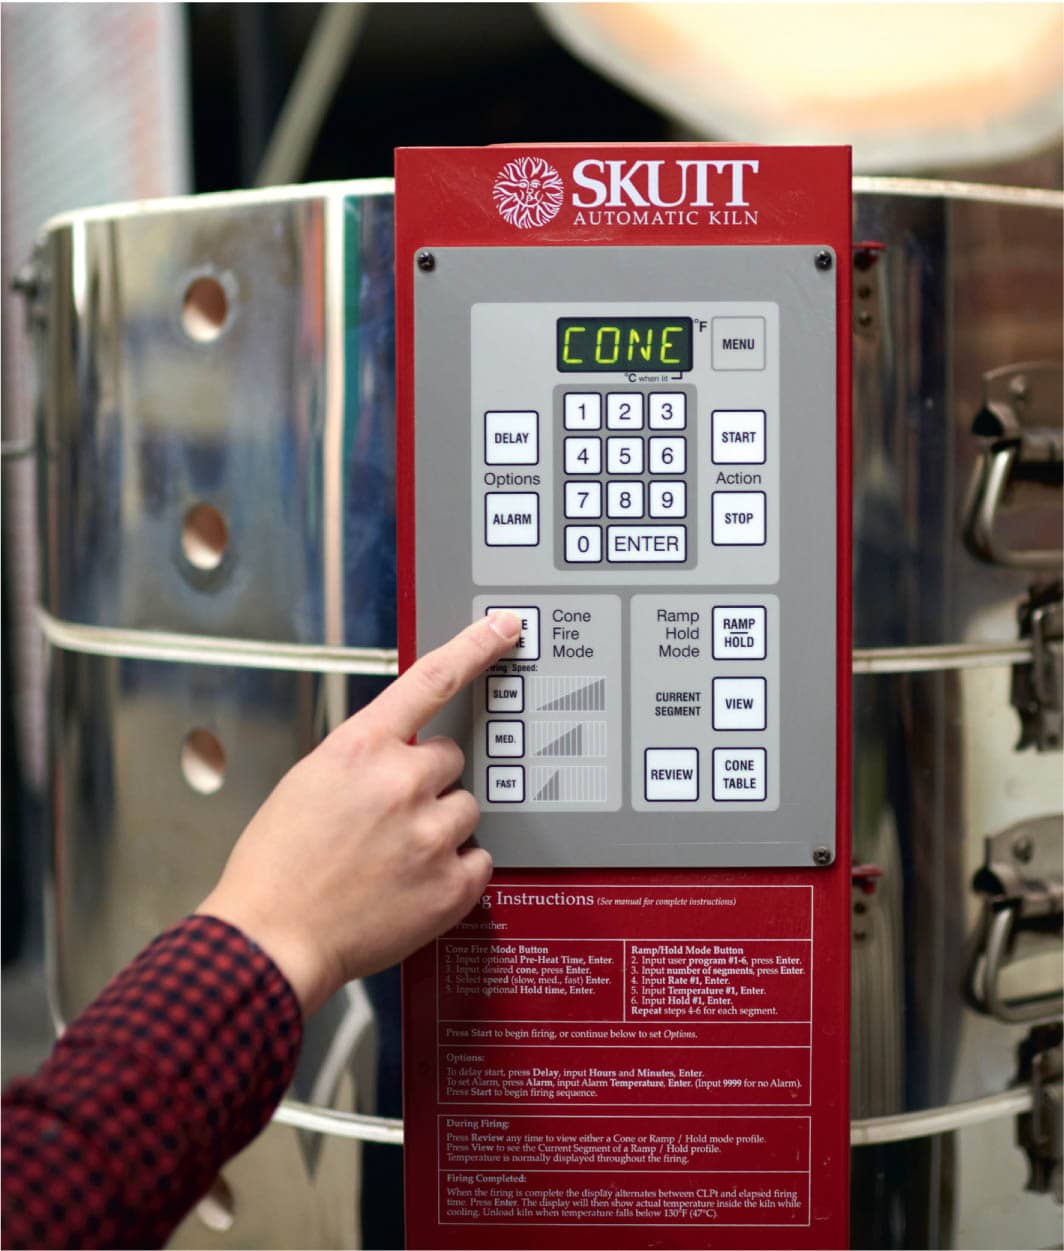
Programming the Kiln
Cone 6 in an Electric Kiln Medium Firing
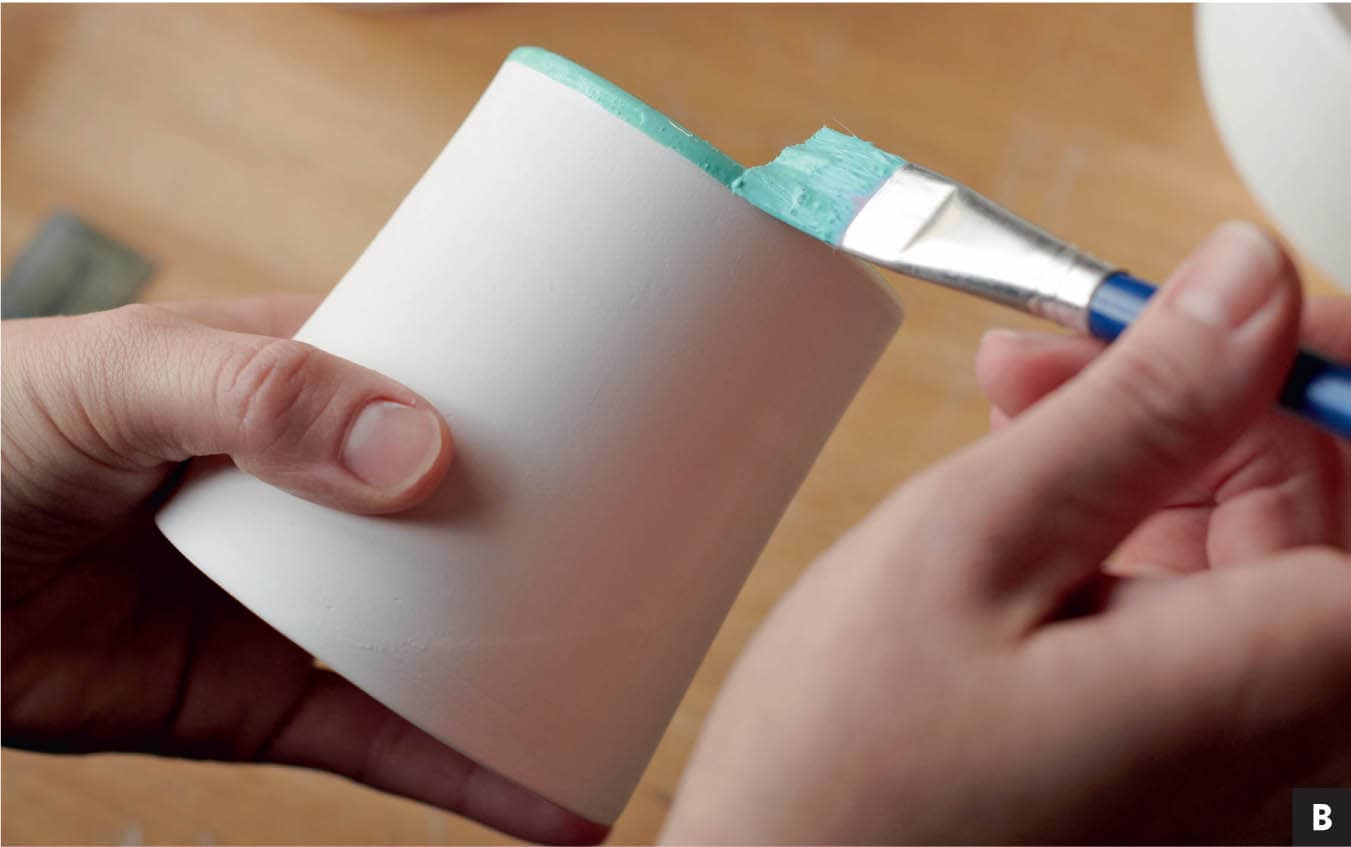
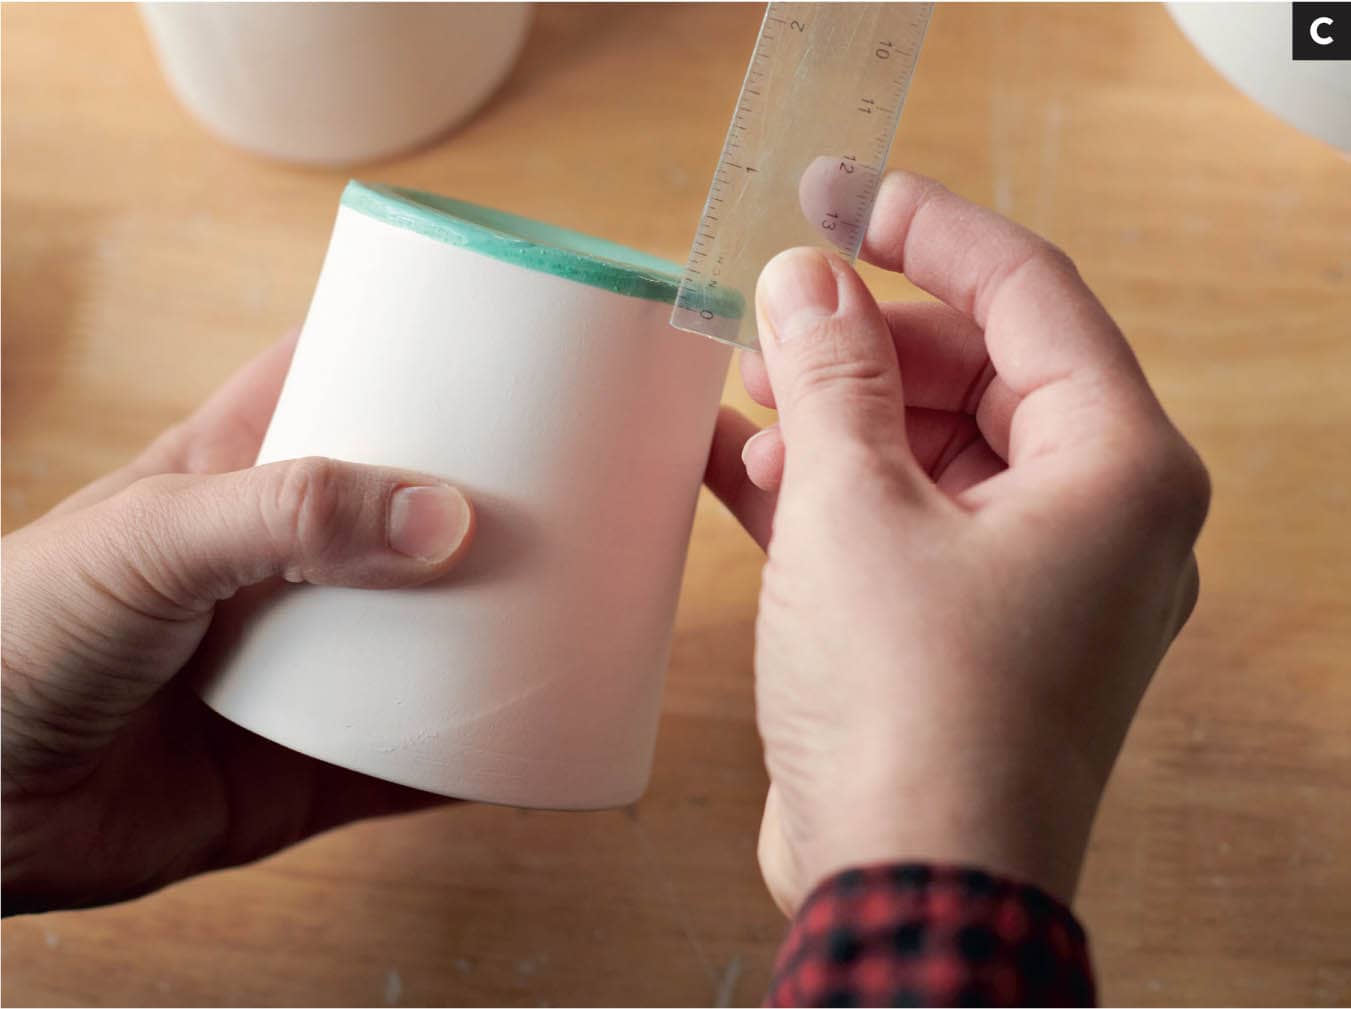
STEP 1 Wipe each pot inside and outside with a slightly damp sponge. If you use too much water, your pots might not have the time to properly dry before glazing. This might cause the glaze to look thin after firing. Your pot should dry almost as fast as you are wiping it. TIP Make sure your hands are clean! You don’t want to eat a sandwich dripping in juices then handle your pots. Oil and grease, like dust, will prevent the glaze from sticking to the surface. STEP 1 Using a paintbrush, cover the bottom of your pot with wax resist, including the foot and any part of the pot that will touch the kiln shelf. [A] If you’re unsure of the glazes you are using, leave some extra space. TIP If you are having difficulty seeing the wax while painting, simply add a little bit of food coloring to the wax. This will not harm the wax or affect the pot; the wax will simply burn out in the firing. [B] [C]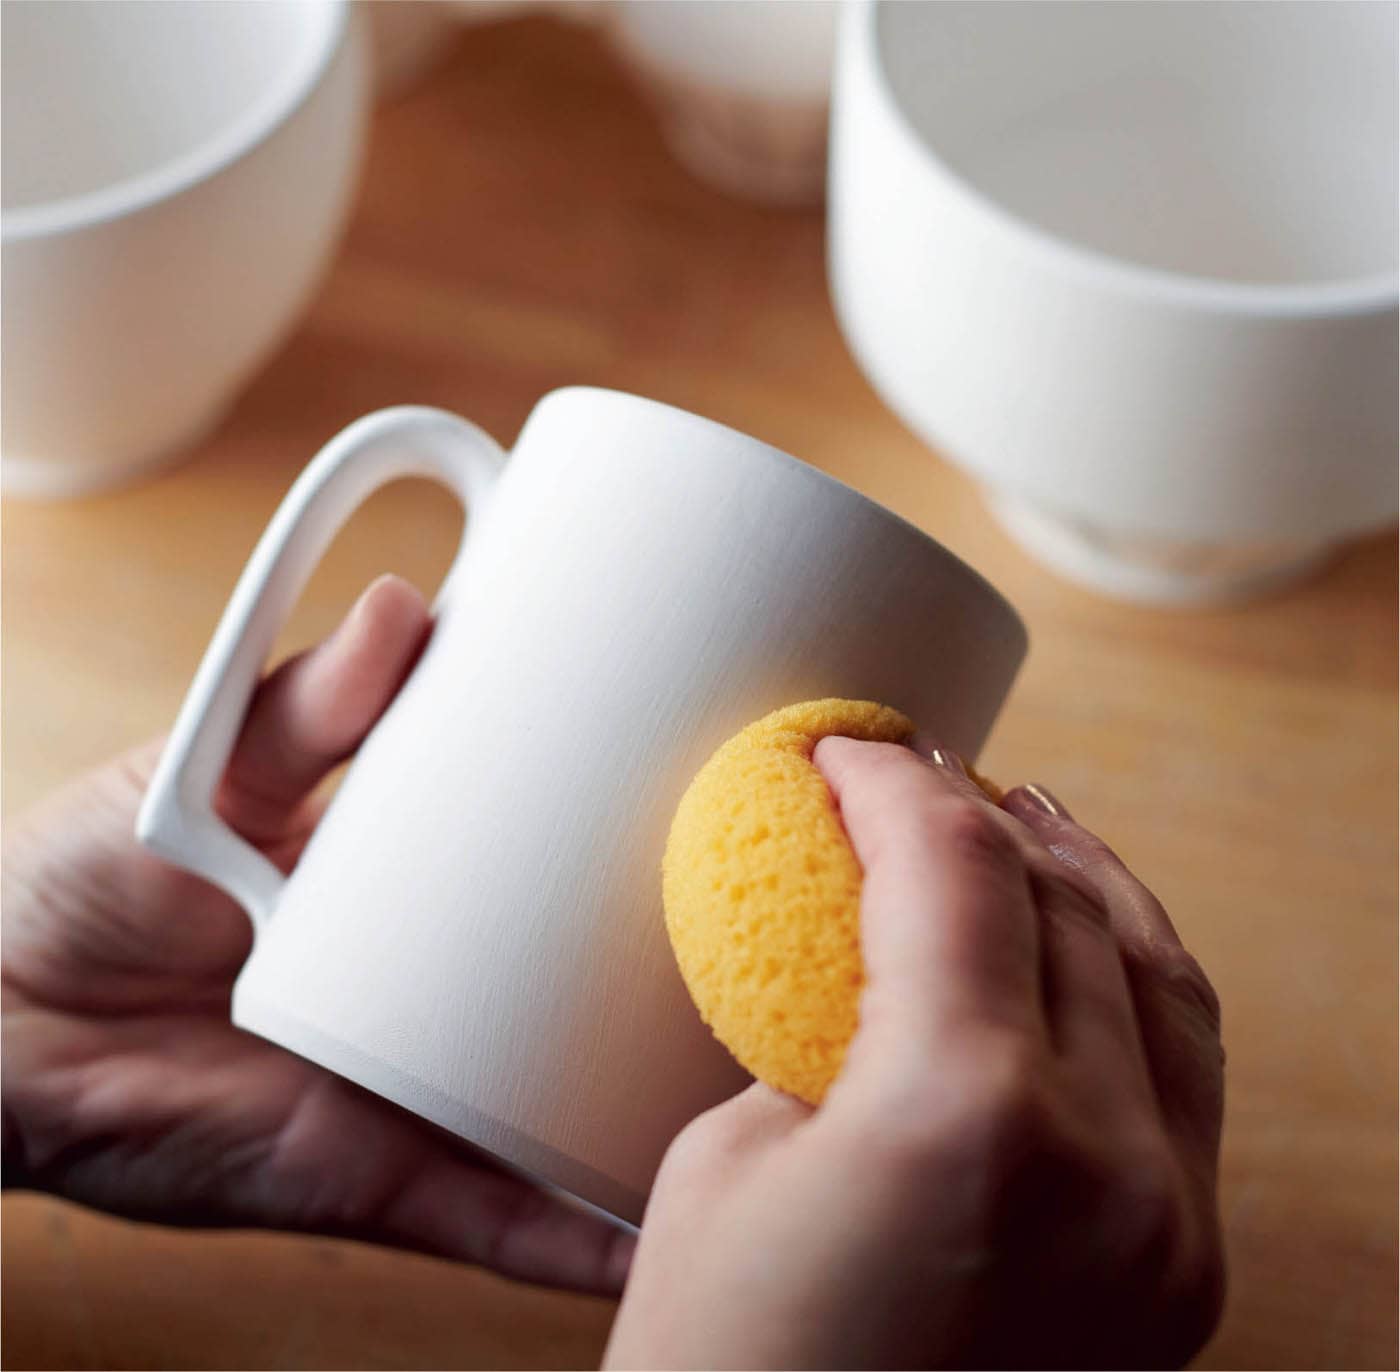
Wipe Clean
Wax the Bottom

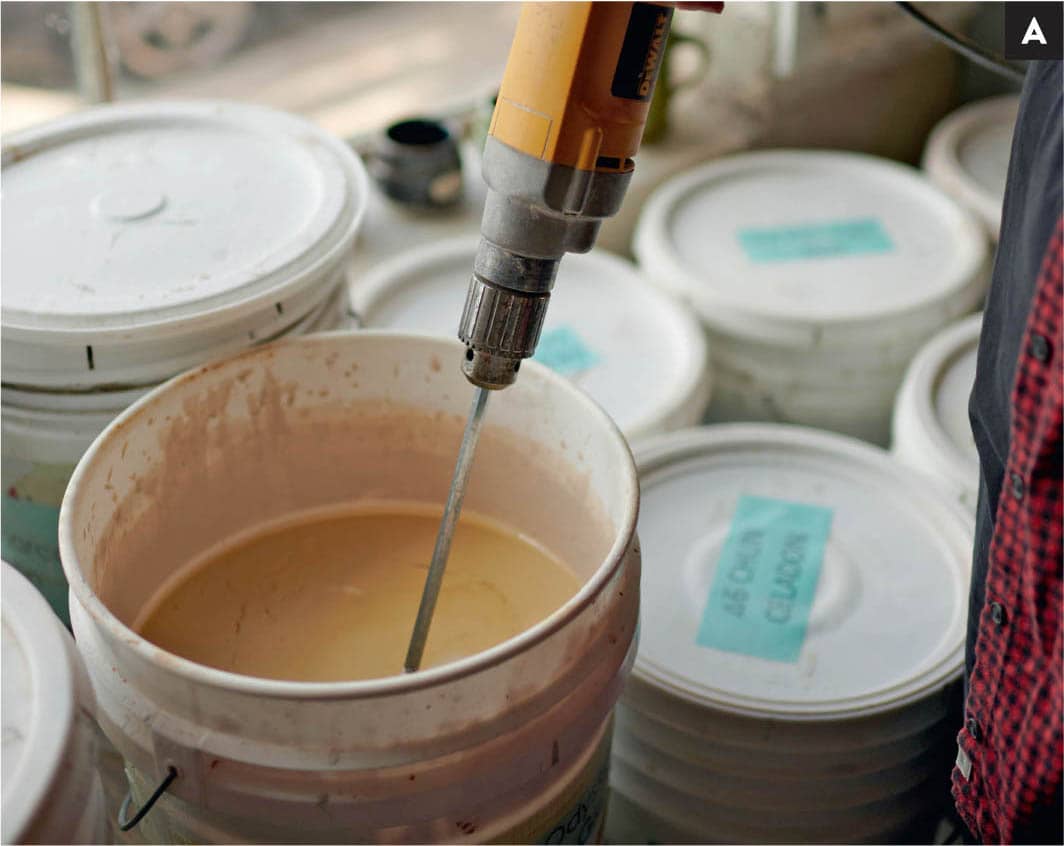
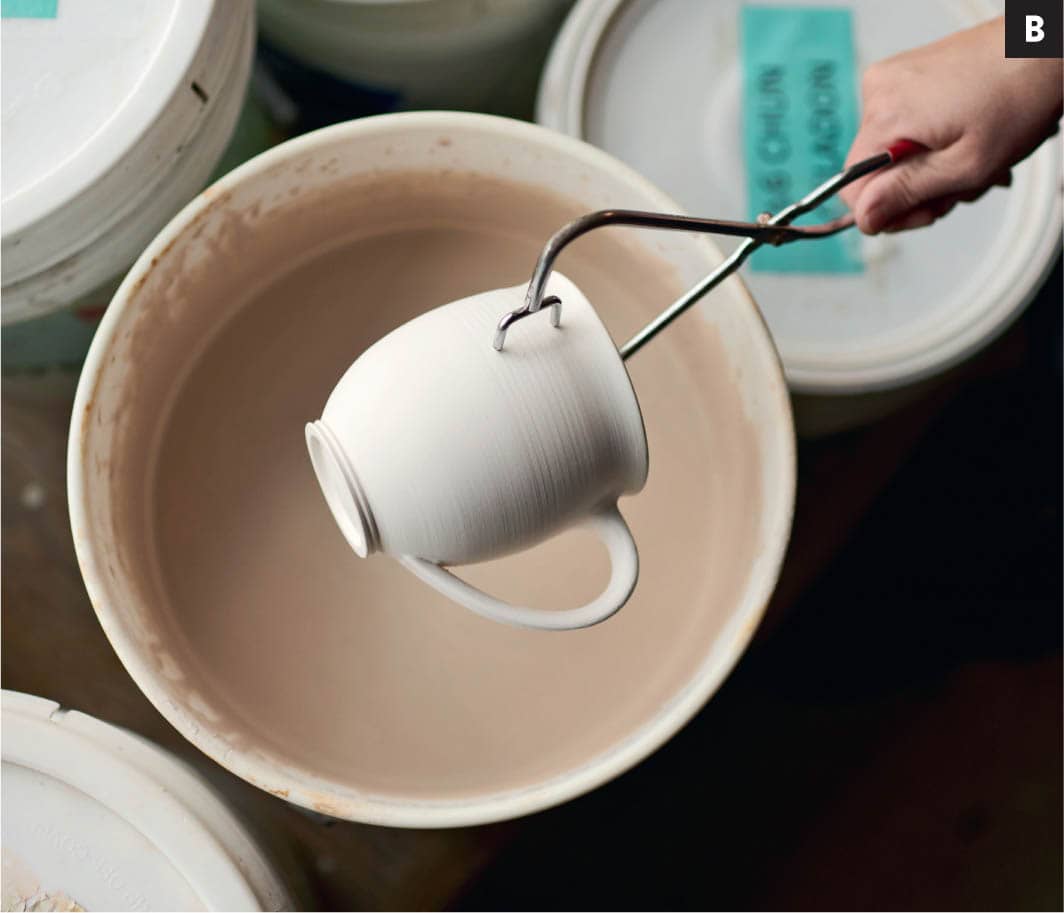
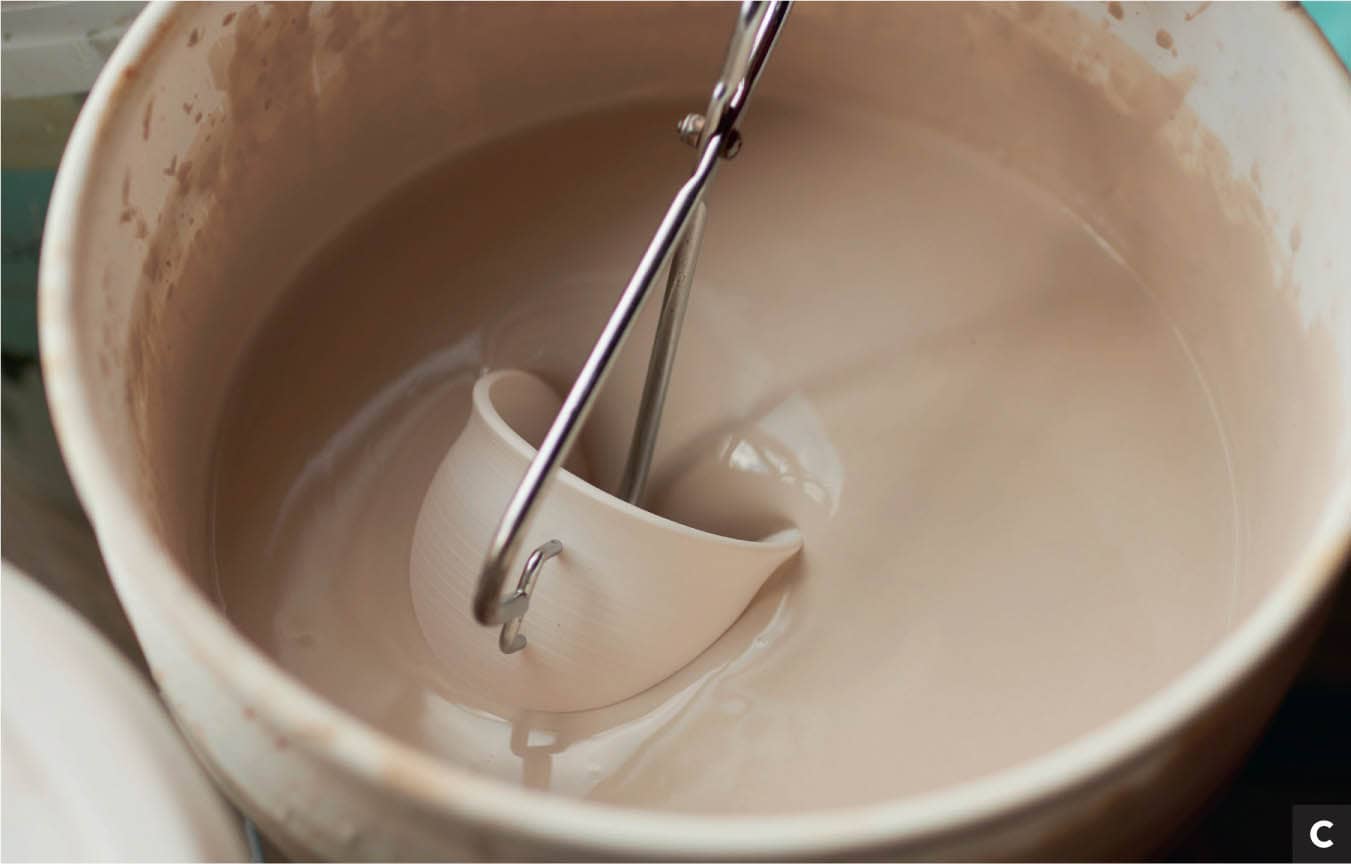
STEP 1 Before beginning to glaze, thoroughly mix your glaze. I recommend using a power mixer, as this is the most precise way to ensure the glaze is mixed properly. You can also use a stick or a spatula. Whichever method you use, don’t leave any glaze left unmixed at the bottom of the bucket. [A] STEP 2 Open up the glaze tongs and gently clamp your pot. Depending on the wall thickness, if you clench your hands too tightly, you could puncture the pot. But if you don’t hold the tongs tight enough, you might drop your pot in the glaze. Just like in pulling the walls of clay, you will eventually learn to use the right amount of pressure. [B] STEP 3 Dip your pot into the glaze with a fluid motion and for no longer than a few seconds. Count 1-2-3 and then pull it out. [C] STEP 4 When you pull your pot out of the glaze, gently shake off excess glaze and allow it a few moments to dry before unclamping and setting down. STEP 5 Once your pot is completely dry, gently rub any marks left by the tongs. If these markings seem excessive, dab glaze on them with a paintbrush to cover them up. [D] STEP 6 Using a clean sponge, wipe off any glaze remaining on the bottom of your pot. Your pot is ready to be glaze fired. [E]Instructions


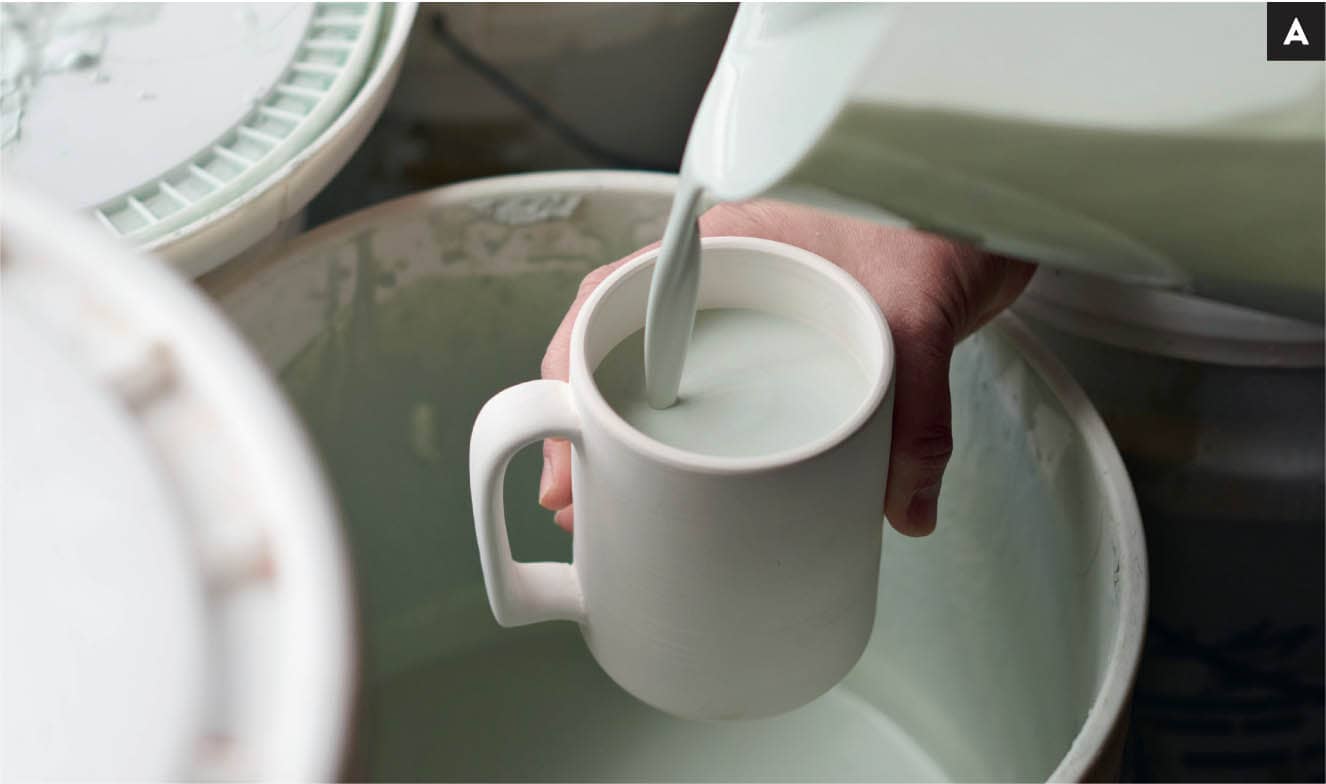
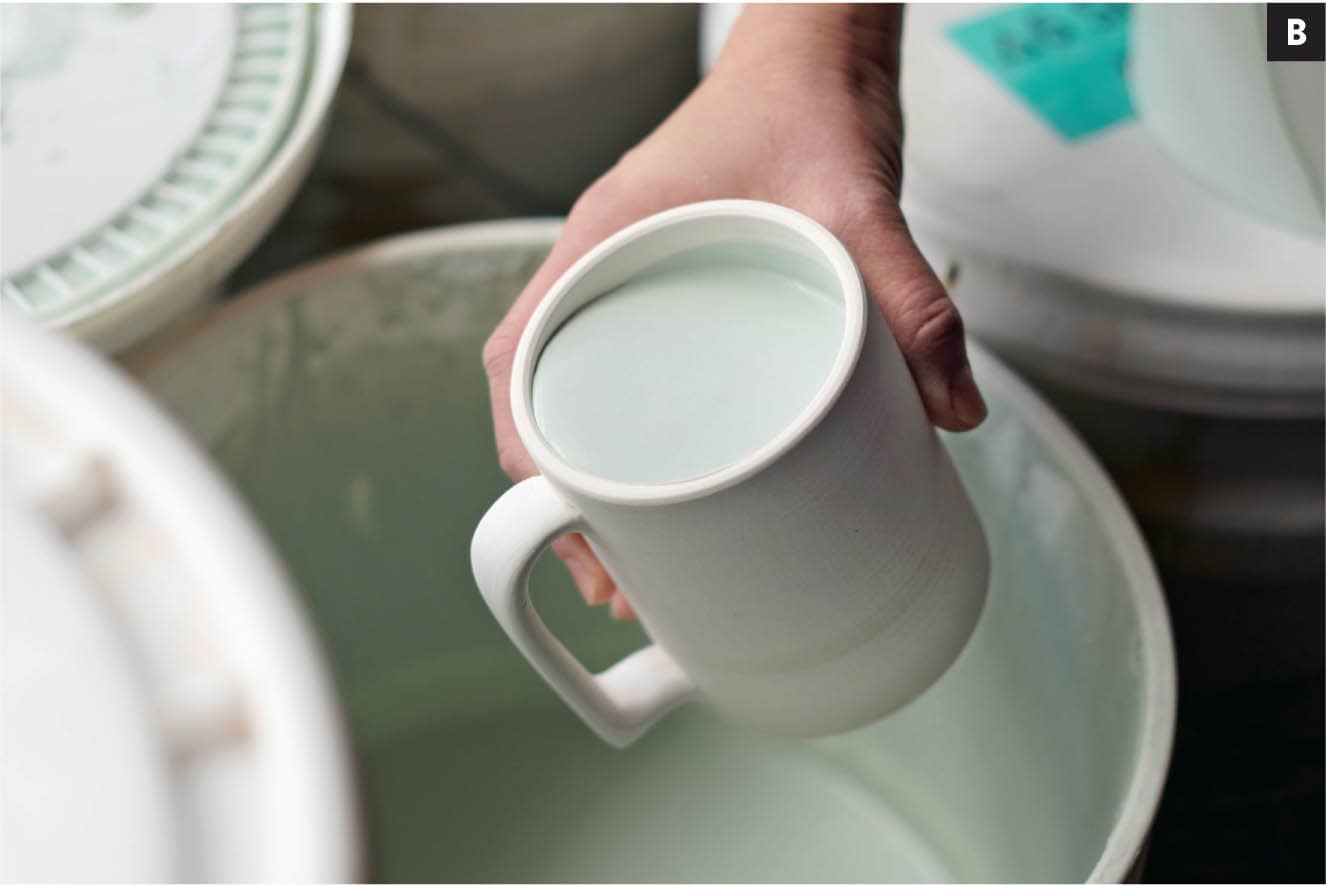
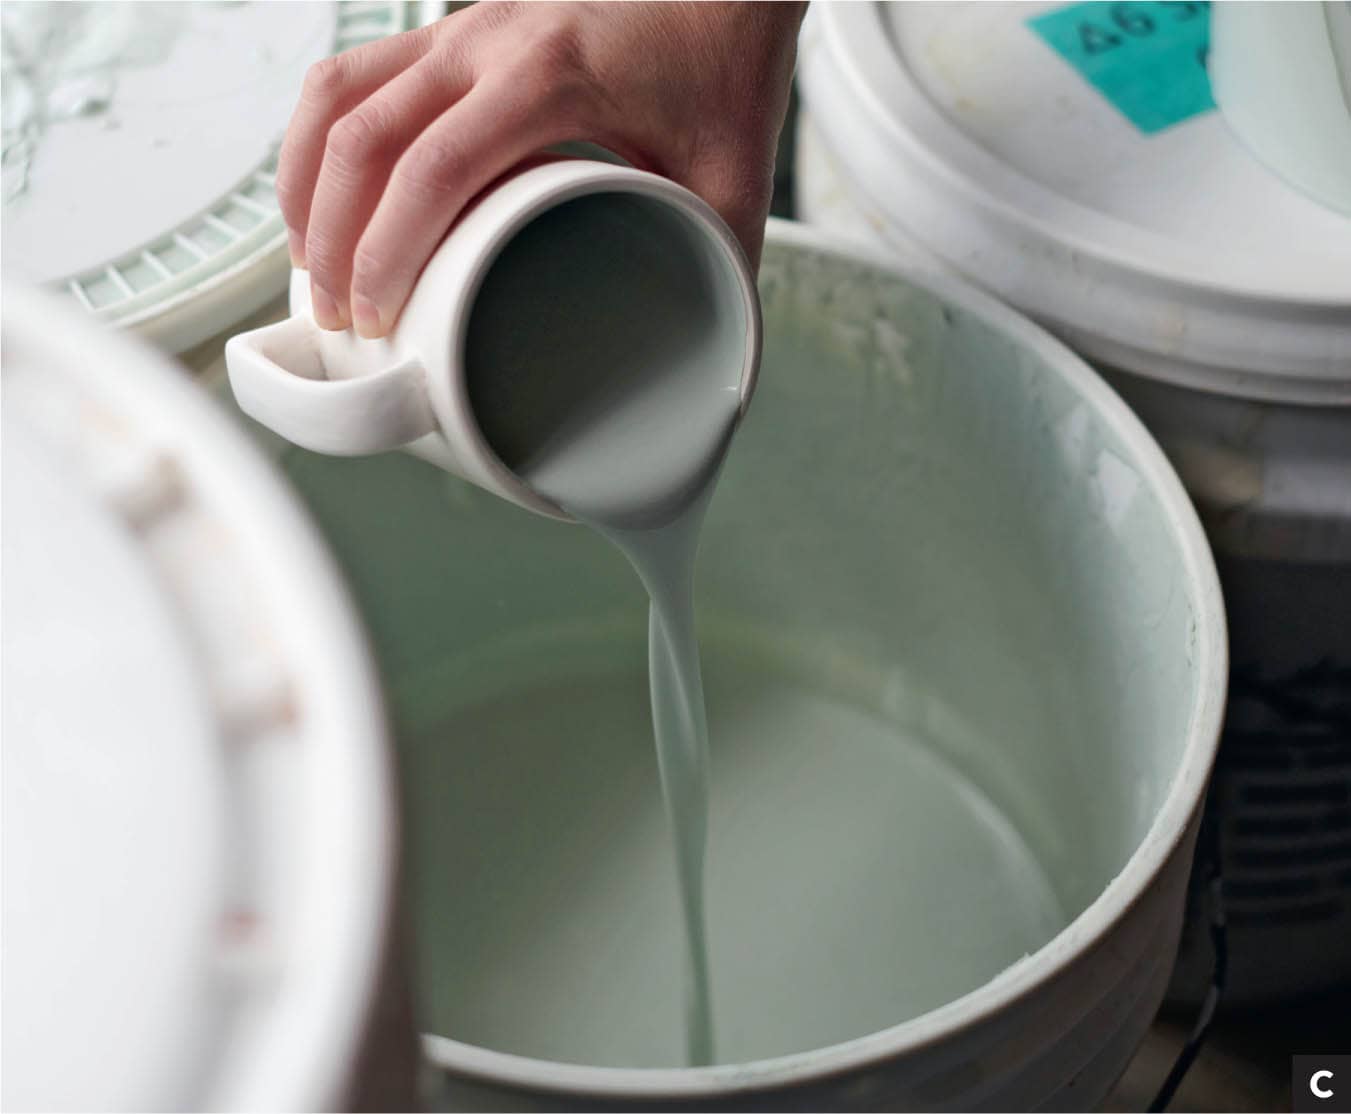
STEP 1 Fill your pitcher with glaze. Holding your pot over the glaze bucket, pour the glaze to just below the rim. If you pour right up to the rim, it might be more difficult to pour the glaze back out and might run down the sides. [A] STEP 2 Give the pot a swirl and dump the glaze back into the bucket. This should be a quick process. Don’t allow the glaze to sit inside the pot for too long or the glaze will accumulate. Glazes that are too thick may not fire properly. [B] [C] STEP 3 This step is optional. If you enjoy glaze drips on the rim and down the side of your pot, leave them. If you enjoy crisp lines, like me, wipe the drips and rim clean. [D] STEP 4 Glaze the outside of your pot. Unless your pot is very large, I recommend using the dipping technique. If your foot is substantial enough to hold onto, dip it fluidly in one motion upside down. If not, glaze it in two moves. STEP 5 Grab your pot by the rim and dip three-fourths of your pot into the glaze. Pull your pot out and shake off excess glaze. Let this dry to the touch before glazing the rim. STEP 6 Now that the glaze has dried, grab your pot by the foot and dip it upside down into the glaze bucket again. I give my pot a little swirl so the inside gets layered with the second glaze. [E] Pull your put out and shake off the excess glaze. You have successfully glazed a pot with two colors. Don’t forget to wipe the bottom free of glaze before firing.Instructions


In college I screen printed my own decals using china paints and a decal medium. The downside to this process is that it requires toxic materials to turn the china paint into a screen-printable medium, including harsh solvents to then clean the screen. Also, using this method I was limited to printing one color at a time. Talk about time-consuming! This was about the time I started researching decal printers. I discovered there were two main ways to print decals: using a standard laser jet printer and using a specialty china paint printer. Laser jet printers often contain red iron oxide in the ink. Red iron oxide is a common colorant used in clay and glaze recipes. It fires to a rich sepia tone. Laser jet printers are very popular in the decal world because they are affordable and easily accessible. The limitation is the color. Only the black ink contains red iron oxide, so you are limited to hues of sepia tone. These printers require waterslide decal paper specifically designed to harden the image so when you submerge the decal in water for application, it doesn’t dissolve. The thin membrane then lifts the image off the paper. Color decal printers can print in either CMYK or RGB format. They are graphic design printers that use china paint as toner instead of ink. In these special printers, the toner mixes with a powdered medium to print full color images on decal paper. They are gaining popularity in the ceramic world as technology advances but are still unattainable for many due to their high price. Don’t let this stop you, though. Several companies sell stock image decals and will even custom print your designs for you.
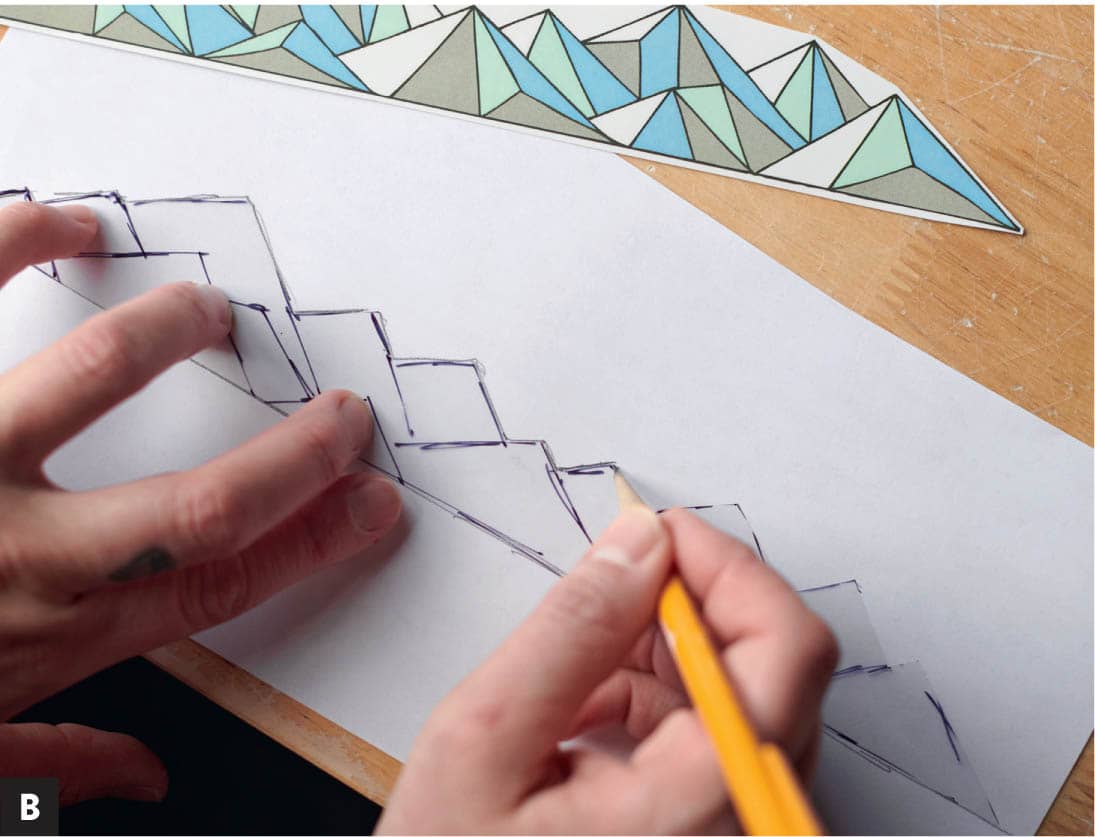
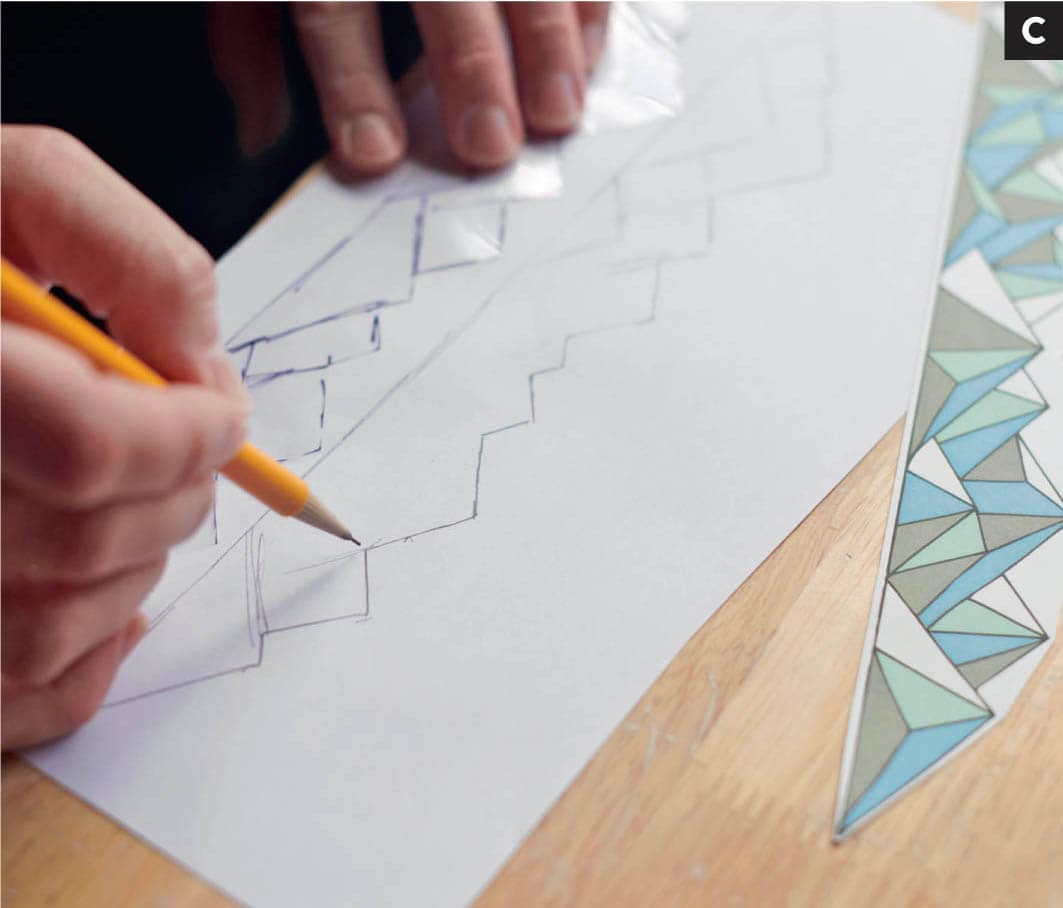
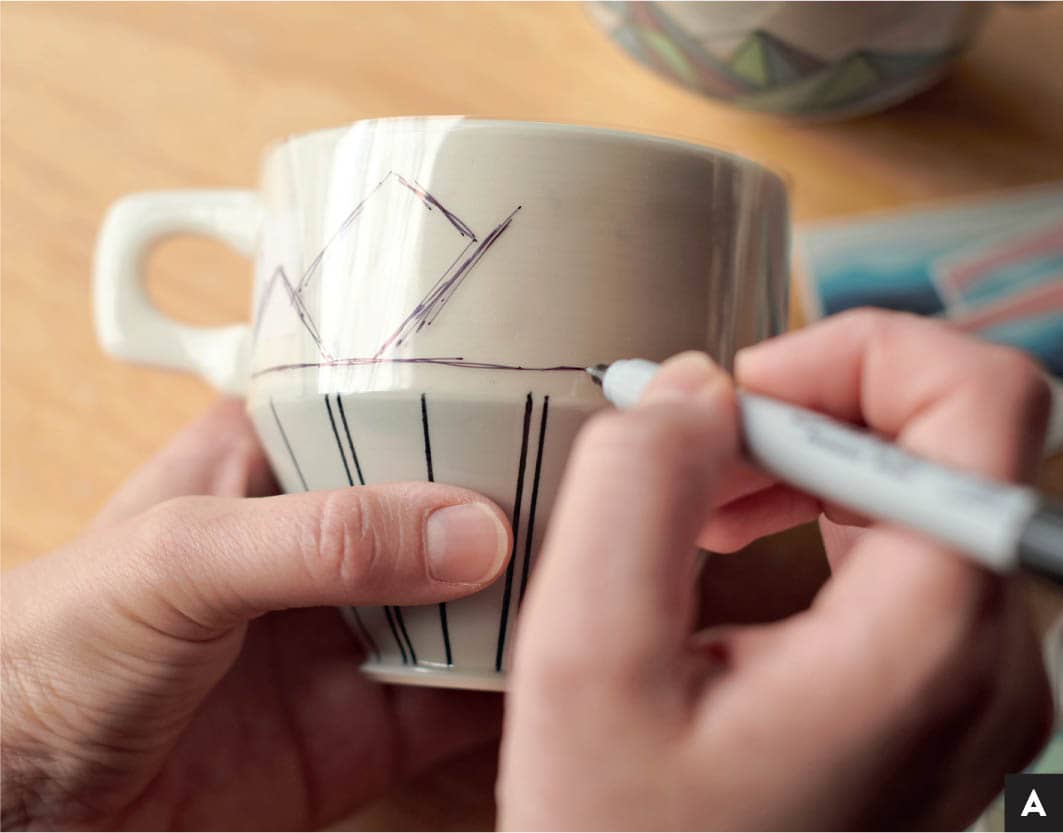
STEP 1 Hold your transparency paper up to the desired decal area and trace the margins. [A] STEP 2 Cut out the transparency and trace it on to blank paper. [B] STEP 3 Sketch your design with a pencil first. [C] STEP 4 Once you are happy with your design, go over the lines with a micron pen. Once the pen ink is dry, erase all remaining pencil marks. [D] STEP 5 Scan your image and work with it in your design program. When done with your image, create a print sheet. This will depend largely on where and how you intend to print your decals. Most companies have their own format stipulations for size and color profile, so it is a good idea to be aware of this before you get carried away. TIP Custom-printed decals are not cheap. Therefore, I recommend filling your print page to the margins. Allow enough space to cut out your image, but fill that page up.
Instructions

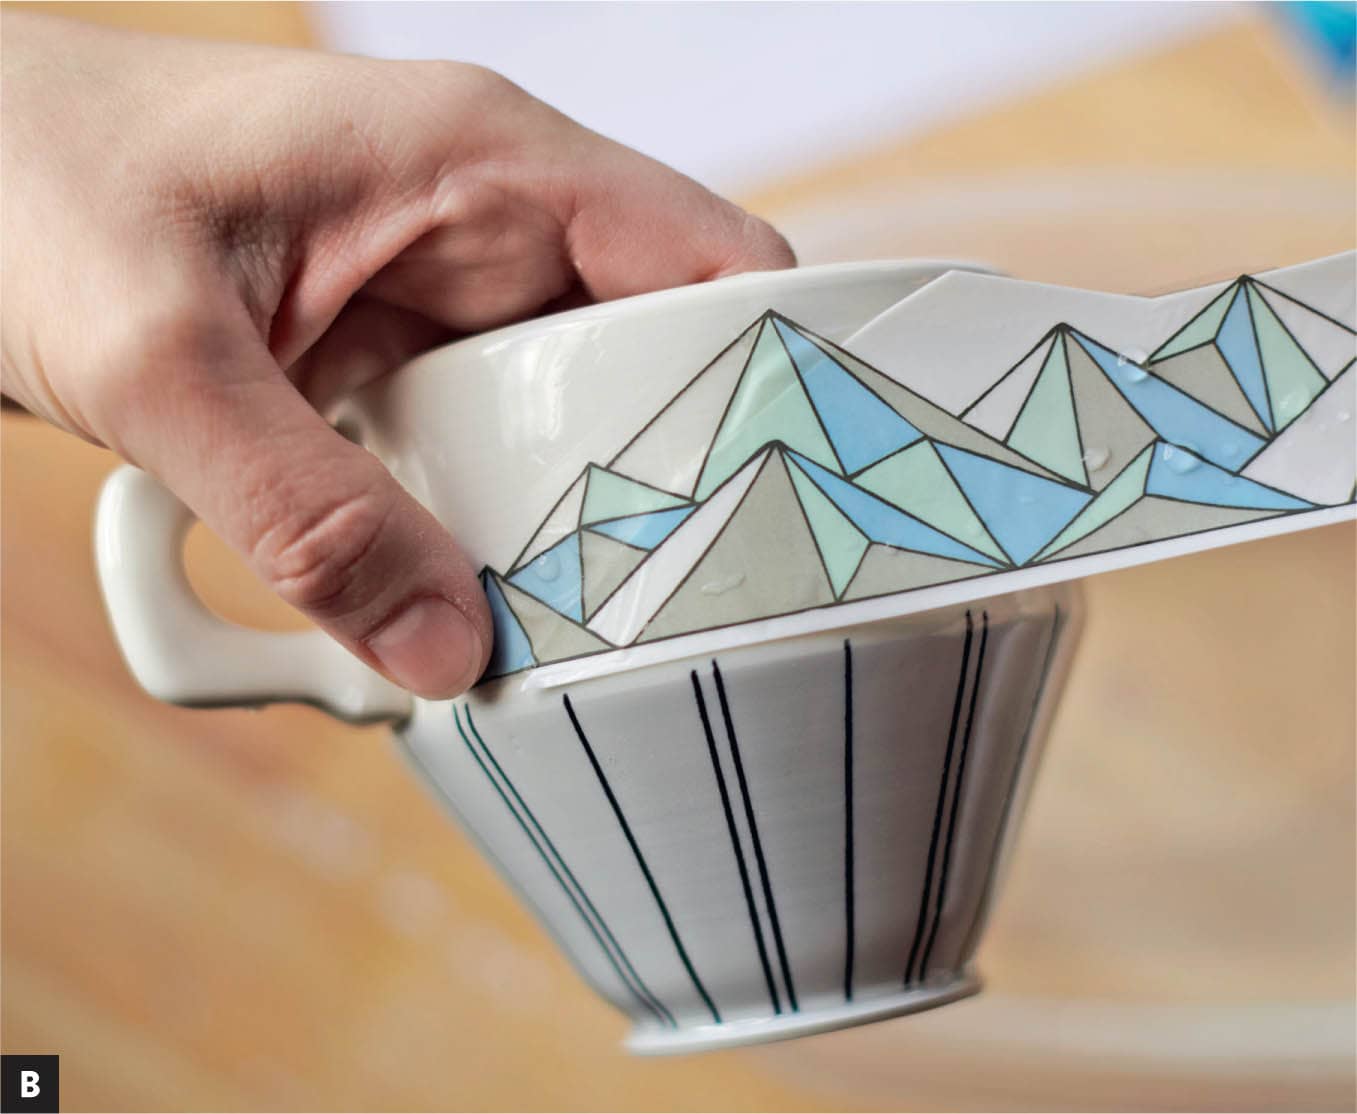
STEP 1 Before diving in, I recommend cleaning the surface of your pot with rubbing alcohol. This is an important step to ensure there is no dirt or dust that would hinder the glaze when re-fired to decal temperature. Dip a rag or paper towel in rubbing alcohol and wipe it down. You want the towel to be slightly dampened but not soaking wet. STEP 2 Now that your pots are clean, cut out your decal using scissors or an X-ACTO knife. Submerge your decal in warm water, which adds a little stretch. STEP 3 The decal may take anywhere from 15 to 60 seconds to lift off the paper depending on how warm your water is. When the decal starts to lift away from the paper, remove it from the water but keep it on the backing. This will add extra support to your decal, easing the transition from the water dish to the pot. [A] STEP 4 Slide the decal off the backing and onto your pot. [B] STEP 5 Gently remove excess water from under the decal by starting in the middle and working your way out. Use one hand to hold the decal in place while the other slides across the decal with a paper towel or sponge to absorb the water. [C] After all of the water has been properly removed, your pot can be fired now, but I recommend letting the decals sit overnight or at least a few hours to ensure they are completely dry. It is time to fire again. Decals have to be fired into the surface of the glaze to make them functional and durable. This requires a lower temperature than the bisque firing because you don’t want to completely re-melt your glaze. You want to soften it just enough so the decal sinks into the glaze. Most decal companies will give you a program or a specific cone to fire to, so follow the instructions. I also recommend test firing a few pieces first, as every kiln fires differently. Generally speaking, laser jet decals fire between cone 08 and cone 04, while china paint decals fire from cone 018 to cone 014.
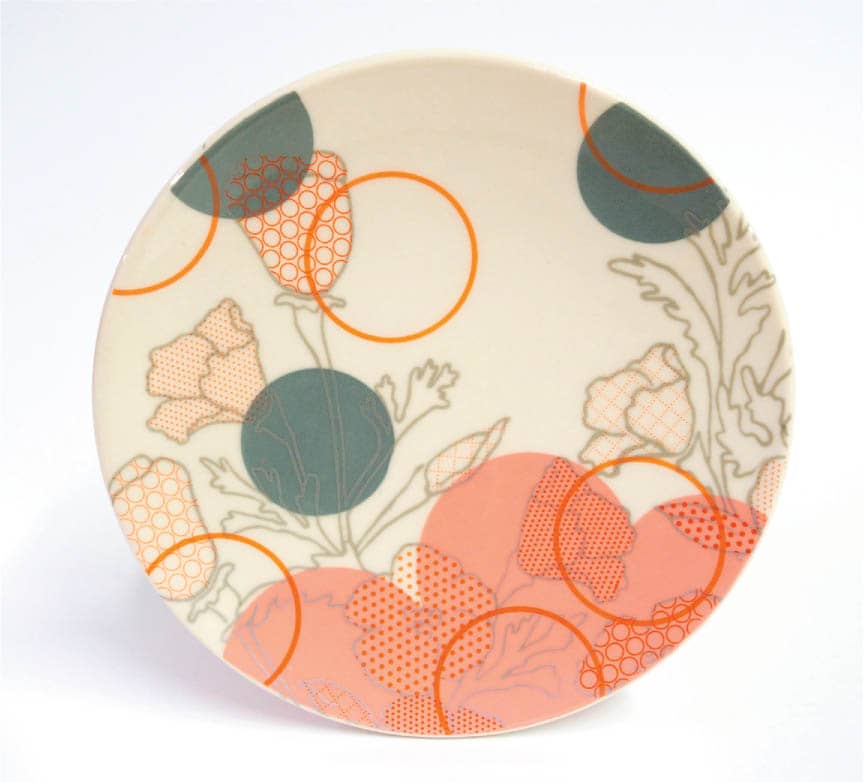
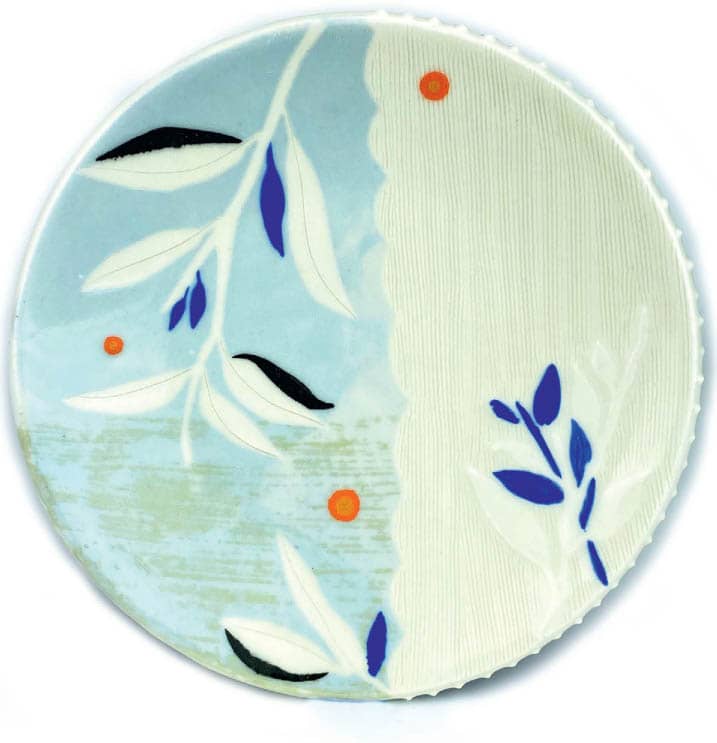
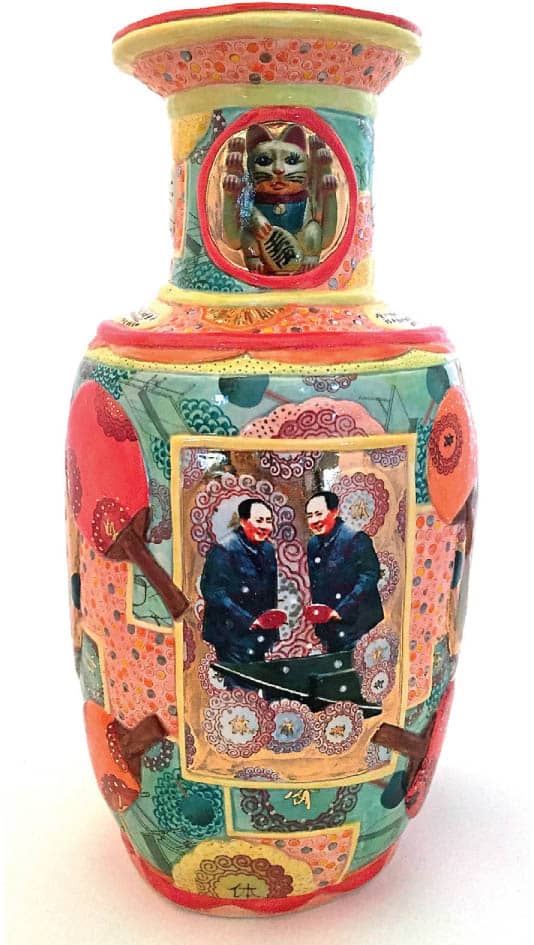
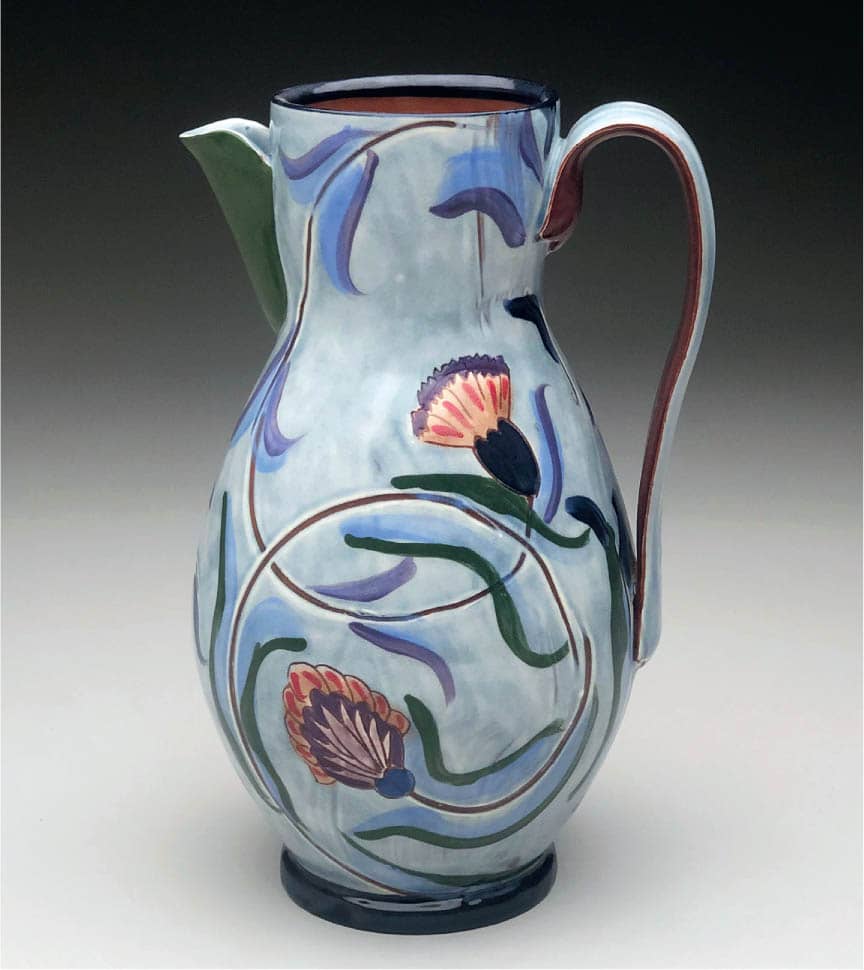
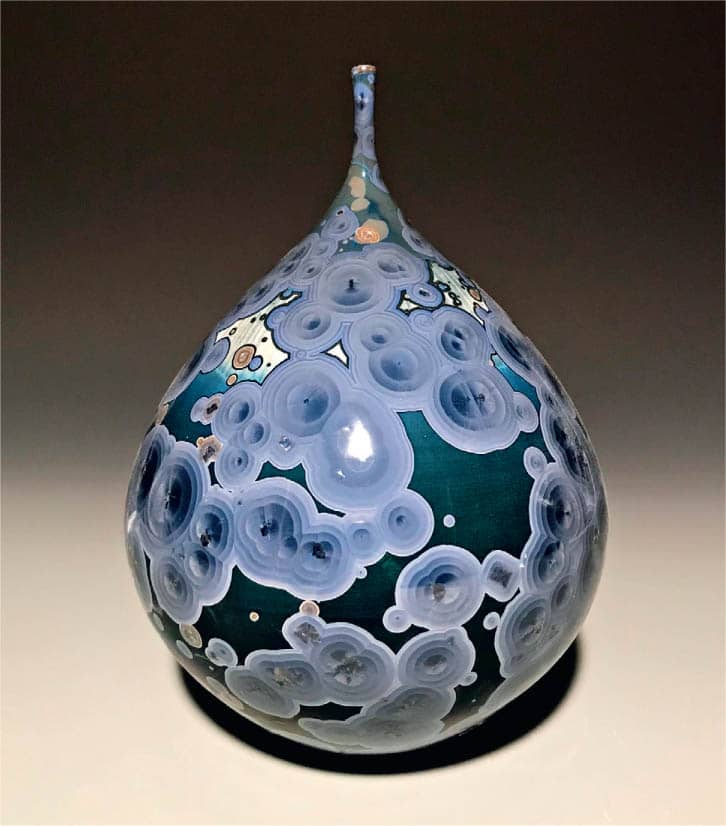
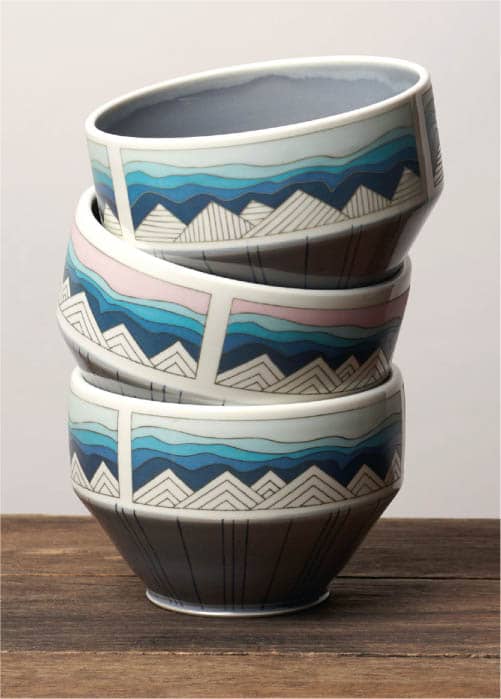
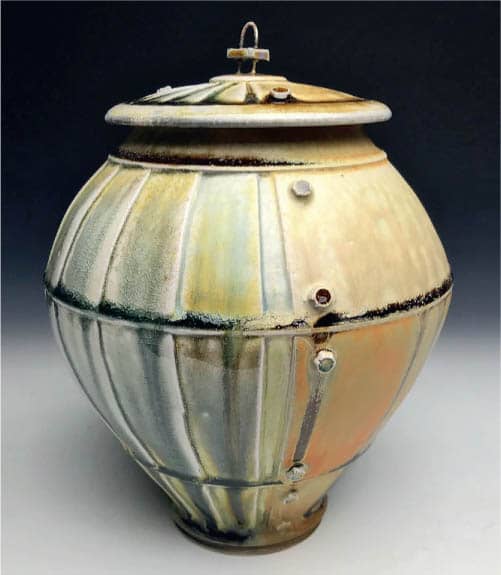
Meredith Host, Dot Floral Dessert Plate Liana Agnew, Plate Mariko Paterson, Xi Jinping Vase Ben Carter, Blue Swirl PitcherWheel-thrown and decorated with slip, underglaze, sgraffito and glaze before being fired to cone 4 in an electric kiln Ian Childers, Blue Crystalline VesselPorcelain Crystalline glazes require complex firing schedules where the temperature is held at specific intervals during the cooling process. Matthew Schiemann Gabriel Kline, TumblersCone 7 Gabriel uses a variety of methods to glaze but specializes in layering glazes.
Applying Decals

Firing Decals
GALLERY