
7 Post-Processing
7.1 Traditional
Darkroom work is time consuming and labor-intensive, but it’s also one of the most satisfying aspects of film photography. Even though the types of paper available for printing your scanned and digitally processed pictures are excellent these days, they don’t even come close to the haptic experience of a classic silver gelatin print on baryta paper.
Much of this satisfaction is due to creating a successful end result, but the interesting aspect of developing film is the process: retreating into a darkened room, working in dim, amber-colored light, and experiencing the moment when the first traces of a picture become visible on a print in the developer tray. There’s something magical in this ritual.
You need certain things to produce your own prints. We are going to deliberately restrict ourselves to black-and-white prints—creating color prints is much more elaborate.
7.1.1 The Enlargement—General Principle
In the simplest case—for a black-and-white enlargement—a negative picture is projected onto a piece of photographic paper by an enlarger and exposed. Then, the exposed paper undergoes three chemical baths. The exact length of the baths will vary depending on the photo chemicals you use.
The exposed paper is placed into the tray with developer solution for about two minutes. After developing, the paper goes into the tray with a stop bath to stop the developer action. Then comes the last bath with the fixer. This takes about eight to ten minutes. In the last step, the picture is washed thoroughly to remove the last traces of fixer and other chemical remnants that could limit the storage properties of the finished print.

The photo chemicals used for creating photo prints are not significantly different from the ones used for negatives. Only the dilution of the chemicals is different.
7.1.2 Equipment for a Black-and-White Laboratory
The key for making good prints lies in meticulous handiwork, not automation. You can use relatively simple lab equipment, if it is good quality.
In the dry area of the lab, you will need an enlarger with a suitable lens, an exposure timer, and a masking frame. The enlarger should be sturdy and have a sufficiently large baseboard. The negative carrier, lens, and baseboard should be parallel or easy to adjust so you can make them parallel. As an additional bonus, some enlargers have a head that can be rotated to horizontal. A color-mixing head makes working with variable contrast paper easier. You can get a multitude of lenses of different qualities in specialist shops or on the secondhand market. The focal length of the lens determines the level of magnification. The quality and suitability for larger formats increases with the number of integrated lens elements. Three-element lenses are quite rare these days—they are suitable only for enlargements up to 13×18cm. Usually, you will find four- or six-element lenses being offered for sale. If you value good-quality lenses for your camera, you should apply similar standards to the darkroom, too, so the quality of the enlargement matches that of the shot.
For the wet area, you need at least four sufficiently large laboratory trays that should always be one size bigger than the paper size you are using. For each tray, you need a pair of lab tongs. You should also get enough bottles and measuring cylinders so you always have a full set for each processing step. We would advise you to use each bottle and measuring cylinder for only one of the processing steps. Otherwise you risk cross contamination and spoiled solutions.
The requirements in terms of which room you use are fairly minimal. You must be able to darken the room, and you need to have electricity and water. That’s why some photo enthusiasts regularly turn their kitchen or bathroom into a darkroom. A dedicated room is perfect if it has enough space for a separate dry and wet area, plus enough storage space for photo papers and chemistry.
7.1.3 The Right Paper
As far as the emulsion carrier is concerned, there are two different types of black-andwhite paper: resin-coated paper and fiber-based baryta paper.
With resin-coated paper (RC), the paper base is sealed with polyethylene on both sides, which stops water and photo chemicals from penetrating to the core. The necessary processing time, final wash, and drying time are much shorter than for fiber-based baryta paper. The longtime storage qualities of RC paper depend on the quality of the substrate. High-quality papers such as Ilford Multigrade and ADOX MCP can be stored with no loss of image quality for 60 to 80 years (or longer under optimal storage conditions).
Fiber-based (FB) baryta paper is the classic photo paper for high-quality black-andwhite photos that can be archived and stored for many decades. It features a layer of barium sulfate (baryte) between the paper base and the emulsion. The paper core is not sealed, which is is the biggest disadvantage of baryta paper. Because it absorbs water and chemicals well, the final wash and drying time is much longer. The final wash can take up to an hour for optimum storage quality. The drying time is about 12 hours in open air. For making the greater processing effort, you are rewarded with the typical baryta sheen and a subjectively deeper and warmer looking picture.
The light-sensitive layer is the same for both types of paper. It consists of silver halides embedded in gelatin, just as with film. The silver halides are only sensitive to blue and violet light, which is why photo paper can be processed in safelight (yellow-green or amber light in the darkroom).
7.1.4 Grades
Black-and-white photo paper is manufactured as variable contrast paper or graded paper in different grades of hardness. Common grades are 0 (soft) to 5 (hard). By choosing the right grade, you can harmonize the contrast range of the negative and the photo paper. A negative with high contrasts needs a rather soft paper for optimal separation of tonal values. For a negative that has less pronounced contrasts, the opposite applies.
Variable contrast or multigrade papers are photo papers where the contrast behavior can be adapted. They have individual emulsions with different gradations. The silver halides in the harder grade layer are sensitized to other colors of light than those in the softer grade layer. Depending on the color with which you expose the paper, you can tease out a softer or harder grade.
Adapting the light in the corresponding spectrum can be done either with color foil filters or by setting a specific color of light in the color-mixing head.
7.1.5 The Contact Print
Especially today, when you can use hybrid processing (see page 195) to get excellent results, it makes sense to reserve working in the darkroom for those special pictures. Darkroom processing isn’t about making a large number of prints as quickly as possible; instead, it’s about achieving the best possible interpretation of your picture and creating a good print based on a specific negative.
The first step is creating a contact print. The contact print is your starting point for the pictures you are going to devote a lot of time to later. It helps with the decision of which picture you are going to use for printing, and which part of that picture will make it onto the print in which orientation.

Contact prints
Under a safelight, place a sheet of photo paper under the enlarger and put the individual negative strips directly on top of the paper. Cover the negatives with a glass plate to ensure they lie flat. If you keep your film strips in a transparent pocket, you don’t even have to take them out. Use softer-grade paper for the exposure so all areas of the negative show good detail. Here, it is more important to get clearly visible details in all image areas than to achieve the best exposure. To determine the exposure, you’ll prepare test strips later.
As soon as the contact print is dry, you can use it to mark which picture you like and which ones you like so much that you want to enlarge them later. With a special easel or a frame made of cardboard, you can cover up all the unimportant image areas on the contact print and find the part of the picture you want to print. You can either mark the desired area directly on the contact print or put the contact print into a transparent pocket and then draw on it with transparency pens—just in case you change your mind one day.
With the finished contact print, you have a decision-making tool for later processing steps in the darkroom. You can retreat back into your photographic red room with a clear idea of how the picture should look when it’s finished.
7.2 Hybrid Analog/Digital
These days, a large part of film photography is done in a hybrid process. In other words, it’s a combination of analog photography and digital processing. After development, the films are digitized, and then refined in image-editing programs.
7.2.1 Scanner Types
Most scanners used for digitizing films are those that scan the image line by line. With increasingly higher-resolution camera sensors, scanning methods that take a picture of the whole image are also a good idea.
Flatbed
Flatbed scanners are the generalists among the scanners and also the cheapest option. They can cope with scanning both reflective material (such as photos on paper) and transparent originals, such as negatives and transparencies.
For transparent originals, the scanner has a backlight unit that is usually integrated into its lid. Depending on the model, this unit is narrower or wider and can then either scan 35mm or medium format, and may even be wide enough to scan negatives in 4×5-inch format.

Epson V700 flatbed scanner
To scan large format negatives, a medium format scanner may be enough. You can just scan the picture section by section and then use the panorama function of your image-editing program to piece it back together. It’s important that the individual parts of the picture are scanned using identical settings.
Generally, we would advise you to buy a scanner with a wider transparency unit. We’ve already met many newbies who thought 35mm was enough for them—only to learn they’ve branched out to a Mamiya 645 medium format camera six months later.
In addition to Epson and Reflecta devices, it is worth taking a look at the Canon CanoScan 9000 Mark II, which produces great results and can be found for as little as $200 on the used market (some are still available new for around $550).
Sheet-Feed Scanner
Sheet-feed scanners pull the negative over rubber rollers past a scan element. These devices are particularly suitable with 35mm film for batch processing whole films. Also, they usually offer a higher resolution than flatbed scanners.

Reflecta RPS 7200
Scanners That Are Not Scanners
There is a group of negative scanners that are not really scanners. We are talking about devices that do not scan a picture line by line, but contain a backlight unit and a small digital camera that takes complete photos of the picture.
http://
This category of devices starts in a price class below $100 and usually offers the option of saving the pictures directly to a memory card. Most of these devices are limited to 35mm format; some can also manage 120 medium format. Personally, we don’t have any experience with these types of devices, but the low price suggests that you probably cannot expect an overly high dynamic range in the digital cameras or lenses used. Still, such a device can probably provide good results if you want to quickly capture negatives for a first overview, or if you’re scanning snapshots.
The Professionals
In the higher price market, you can find scanners that meet considerably higher expectations. For example, there are scanners that you feed with slide magazines just like the good old slide projectors, but these machines automatically scan the pictures instead of projecting them on a wall. There are also high-end scanners by Hasselblad or drum scanners, but these are far outside the normal household budget.
Do It Yourself
You do not necessarily need to use a purchased scanner. With digital equipment, many photographers already have everything they need for digitizing negatives: a camera with corresponding resolution, a tripod, and a macro lens or a normal lens with extension tubes. The only thing you still need for a successful DIY solution is a transparency unit in the form of a light area that needs to be as even as possible. With a tripod and a diffusely backlit surface, photographers have been able to create high-quality “scans.”
7.2.2 Scanner Parameters
Before buying a scanner, you are probably studying websites and data sheets. Some of the specifications you find there may be somewhat cryptic. Let’s try to bring light to the darkness.
Density and Density Range
The density of a negative or positive is basically the same as its level of transparency. The less transparent it is, the higher its density. Ultimately, it’s about how much light is absorbed by the dark areas in the image. The density range is the difference between the lowest density (Dmin ) and the highest density (Dmax ).

Negative with low density range

After scanning and developing

Negative with high density range

After scanning and developing
Dmin and Dmax
Dmin is the lowest density of the blank film that contains no silver and—in the case of color film—no color. Dmax designates the highest density and features the maximum degree of blackness in the image. Either way, the task of the scanner is still to record details both in the entirely blackened picture areas and in the bright areas that let a lot of light through. In principle, the scanner is comparable to a digital camera, in which the sensor can capture a certain dynamic range between the brightest and darkest parts of a scene.
To achieve the best possible exposure when scanning a negative, many scanners meter for exposure (generally as part of the preview scan). Some scanners are then able to adapt the exposure to the density of the film. Cheaper scanners are often unable to capture a large density range, which can result in highlights blowing out or shadows running into black during the scan even though there is enough information on the negative. This is why negatives that do not completely use the maximum density range of the film are a little easier for the scanner. Negatives with a high density range make it more difficult, particularly for scanners that manage a low density range only.
In order to increase the recordable density range, some types of scanning software support a multi-exposure mode in which several differently exposed scans can be combined. This method does, however, require a correspondingly longer scanning time.
(True) Resolution vs. Step Size
Caution: The resolution of flatbed scanners usually comes out lower than the data on the packaging suggests. Sometimes the data sheet lists a resolution of 6400 dpi (dots per inch), but in reality, the resolution test shows only 2000 dpi. The reason for this is that the manufacturers like to use the theoretically possible resolution of a scan line for their data sheets, without taking into account the optical system of mirrors and lenses that is between the negative and the scan line.
Another problem is that in the case of scanners, resolution is two-fold. On one hand, we have the (theoretically possible) resolution of the scan line, and on the other, the stepping motor that moves the image or the scan line. Both axes contribute to the resolution, one in terms of horizontal movement, the other in vertical. This is often specified as two numbers for the resolution, e.g., AAAA × BBBB. When in doubt, go with the lower number.
35mm Scan
A small calculation will make it clearer what all this means in practical terms of resolution: A 35mm negative measures 24×36mm (0.95×1.42 inches). At 6400 dpi, that would be 6080×9088 pixels or an impressive 55 megapixels. But if we estimate 2000 dpi (a much more realistic figure for flatbed scanners), that only leaves 1900×2840 pixels, which is about 5.4 megapixels.
Medium Format Scan
Let’s work it out for a medium format picture sized 6×7cm. If you convert centimeters to inches, the picture is 2.36×2.75 inches, which, at the same 2000 dpi resolution, results in 4720×5500 pixels or 25 megapixels. So with medium format and an affordable flatbed scanner, you are already within the resolution range of current digital cameras.
Large Format Scan
If we put a large format 4×5-inch negative onto the scanner at 2000 dpi, we get 8000×10,000 pixels, which equals 80 megapixels.
You can indeed select higher resolutions in the parameters of your scanning software, but in reality, this will have little effect on the sharpness of the resulting images. It just increases the time the scanner takes per picture.
The numbers quoted here are values that mainly refer to flatbed scanners, and are based on our personal experience. There are film feed scanners that can achieve higher resolutions.
7.2.3 Scanning Software
Due to the high number of different systems and manufacturers, we cannot discuss all types of scanning software in detail here; but there are currently two systems that either come with a corresponding scanner or can be used as universal program for many scanners: Silverfast and VueScan.
Silverfast
Many scanners these days come with a limited version of Silverfast. To get the full range of features, you usually have to pay for an upgrade. Silverfast is tied to a particular scanner. To use another scanner, you usually also have to purchase another version of Silverfast.
VueScan
According to the manufacturer, VueScan is compatible with more than 2500 different scanners and offers a large range of functions. However, it does require a bit of user know-how, especially for scanning films, and beginners may find it a bit confusing to use. You do have the option of testing the software with a free trial version.
Manufacturer-Specific Software
Some scanner manufacturers now rely entirely on Silverfast or VueScan and are no longer developing their own proprietary scanning software. But there are still manufacturers with proprietary software, such as Epson and its Epson Scan software.
7.2.4 Scanner Profiling
Just like monitors or digital cameras, scanners are subject to certain manufacturing tolerances and aging processes. These affect the exactness of the scanned colors and contrasts. For black-and-white scans, the process described here is sufficient. We personally do not work with special profiles for scanning black-and-white originals.
If, however, you want to balance out the tolerances even more or you want to achieve a greater accuracy in color, you will have to deal with the process of scanner profiling sooner or later.
7.2.5 Accessories
Certain accessories are useful for increasing the quality of your scans.
Brushes
“Lint is a film photographer’s biggest enemy.” —Michael Weyl
“So is cat hair.” —Monika Andrae
Negatives consist of plastic and gelatin, and sometimes have the tendency to become statically charged. That’s why they attract dust and fluff. With a good brush, you can effectively remove the dust before scanning.

Brush
Antistatic Wipes or Gloves
Antistatic wipes or gloves can also help keep dust off. We use the wipes for cleaning the scanner’s glass surface from fingerprints and dust.

Gloves
Antistatic gloves stop negatives from getting statically charged and prevent fingerprints ending up on your valuable pictures.
Negative Holder
Scanning on Glass
Generally it is possible to place the negatives directly onto the scanner’s glass surface to scan them. But this can cause problems. For one, placing the film directly on glass can result in Newton’s rings. These are ring-shaped interference patterns of alternating bright and dark rings caused by light reflection between the two smooth surfaces. Also, cheap scanners do not have an autofocus function. They are usually set to the distance the film would be at in the film holder supplied, not to the glass platen.
With the Epson V700 and up, you can switch the lens from “Film (with Film Holder)” to “Film (with Area Guide),” which results in shifting the focal plane to the glass plate. However, it also reduces the potential resolution.
Holders Supplied
All manufacturers supply film holders for scanning film; some can even hold mounted slides for scanning. Depending on the manufacturer, these inserts can be easy to use.

Negative holder for large format with additional glass inserts
Glass Inserts
For the flatbed scanners popular for medium and large format, an accessory market has evolved. Many products are available for making scanning easier and for improving results. For some scanner models by Epson, for example, the German company Monochrom and the website www
Alternatives
To scan negatives including the edges, the film holder DigitaLIZA, made by the company Lomography, comes in two sizes: 35mm and medium format. The holders pinch the negatives at the outermost edges and enable you to scan them complete with perforation, including the exposed image numbers on the edge.
7.2.6 The Scanning Process
Each type of scanning software offers various automatic modes that should do a lot of the work for you. They can set the exposure automatically, remove scratches, and smooth grain. Unfortunately, these auto modes rarely produce high-quality results. Overexposure and underexposure are common, scratch removal often messes up and removes important details from our valuable photos, and the automatic grain smoothing makes the picture “digitally smooth” again.
We can do much better. To get optimum results, we are going to show you the entire process, from inserting the negative to digital editing, using the example of a black-and-white medium format negative.
Overview of the Scanning Process
Example: Flatbed scan of a black-and-white medium format negative.
- 1. Dust and clean the glass platen with an antistatic cloth.
- 2. Place the negatives into the suitable film holder.
- 3. If you want the negatives to stay flat, you can use a suitable glass insert accessory.
- 4. Dust the negatives from both sides, with bellows or a brush, for example.
- 5. Close the scanner, and start the scan preview.
- 6. Set the scan area in the preview, or let the scanner determine it automatically.
- 7. Set the parameters for the scan. This includes settings for resolution, bit depth, sharpening, and automatic dust removal.
- 8. Use the histogram preview to set the correct exposure.
- 9. Specify the file type and location for saving your scan.
- 10. Start the scan.
We are using the Epson V750 scanner and the associated software, Epson Scan, on a Mac. As accessories, we are using the negative holders that came with the scanner and third-party glass inserts. Most of the steps shown here can also be applied to other scanners and software.
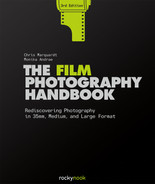
Dusting the Glass Surface
First, clean the scanner’s glass thoroughly with an antistatic cloth to remove fingerprints, dust, fluff, and cat hair.
Wiping the scanner’s glass with antistatic cloth
Wet Scanning: Here is another curiosity from the world of scanning. Back in the 1970s, some enthusiasts used to play their vinyl records wet. In the film scanning community of today, some swear by the wet method even when scanning film. Here, the film is mounted on a thin glass plate and wetted with “scan fluid” on the flatbed scanner. This definitely has a positive effect on the flatness of the film, which means that a more consistent sharpness can be achieved during scanning. In addition, dust and scratches are said to be less of an issue with this method.
The wet method originally comes from drum scanning, where sometimes the film was mounted wet on a round glass drum. With a flatbed scanner, special attention must be paid to the thickness of the thin glass pane, because this is now responsible for ensuring that the film lands exactly in the scanner’s plane of focus, a task that is normally performed by the film holder.
Note: The wet method is used to scan single images, so the film strips have to be cut up for this. To be honest, we personally are too lazy for this method and prefer to trust our film holders to achieve similarly good results with much less effort.
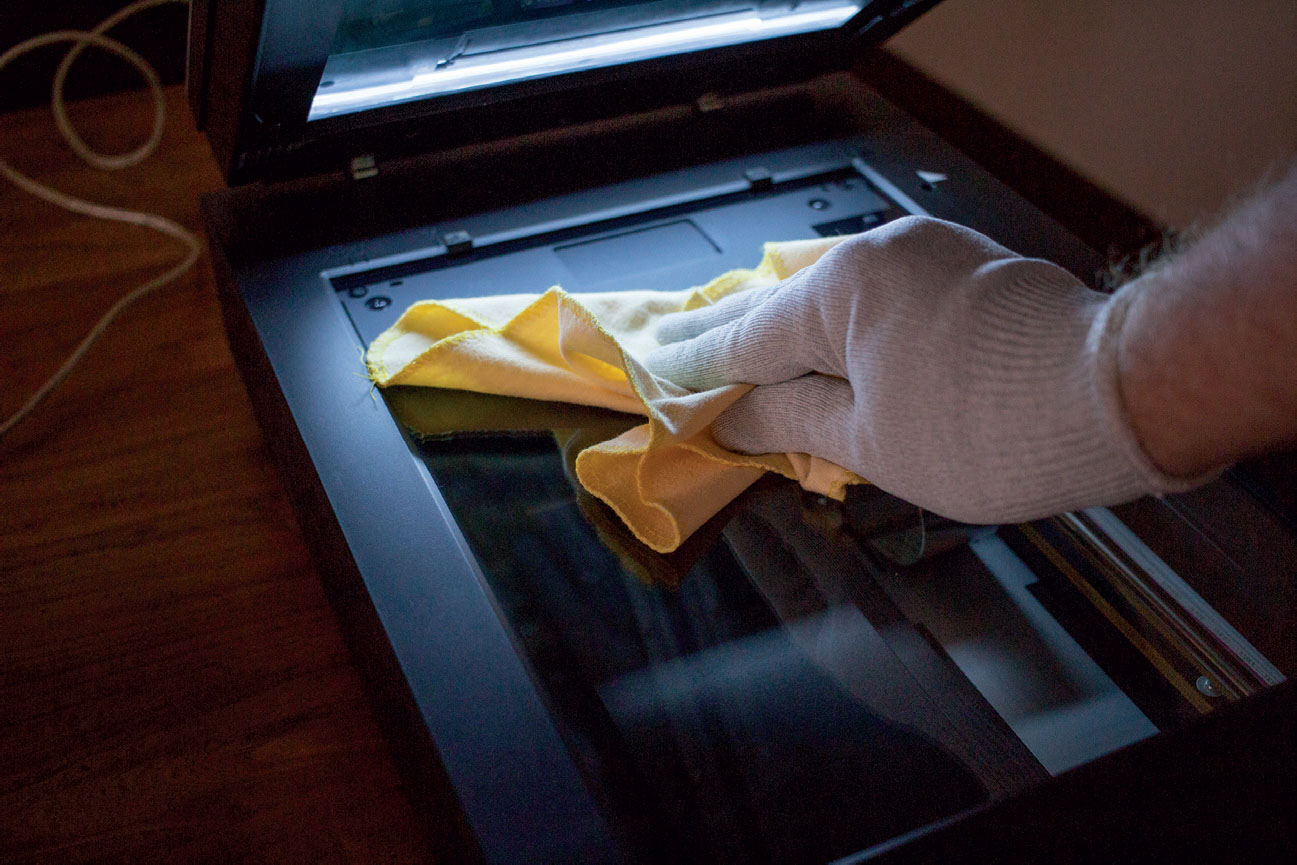
Inserting the Negative
Place the negative holder onto the scanner, and insert the negatives.
Inserting the negative
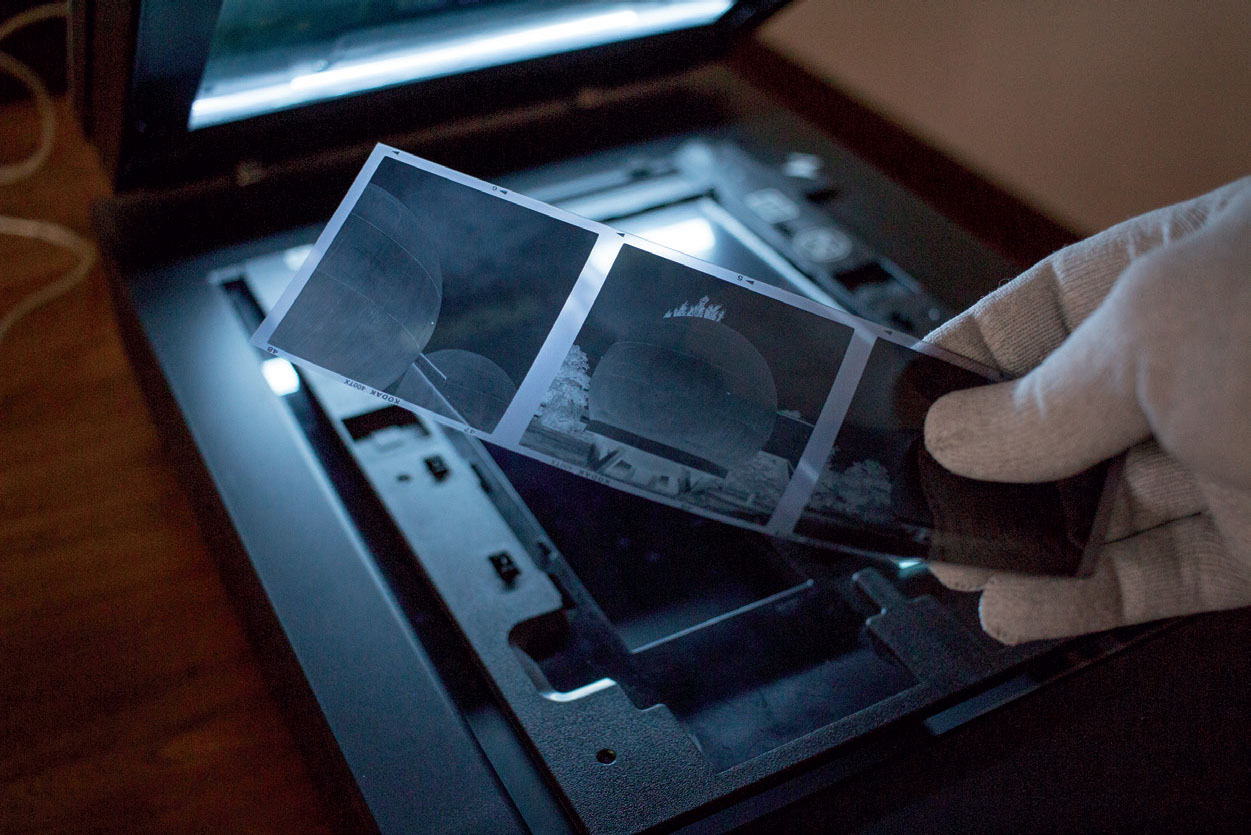
Adding the Glass Insert
We use Monochrom or betterscanning.com glass inserts. These are not obligatory, but they keep the negatives flat. Before you can use them, you need to remove the upper part (“lid”) of the negative holders. Wipe the glass inserts with an antistatic cloth, just as you did with the scanner glass surface.

If available: Use glass inserts to keep negatives flat.
Dusting the Negative
Either use a small bellows to remove dust from the negative or use a suitable brush. We consider this step mandatory, both before adding the glass insert and after.
Dusting negatives with brush
Preview
Now it’s time for the preview scan. After the scanner’s light source has warmed up…

Warm-up stage
…the preview scan only takes a few seconds. Depending on the scanner settings, it will try to automatically find the image for you and crop it.

Automatic preview
Or switch to normal preview to view the entire scan area.
Complete preview
Letting the software crop the image automatically only works properly if you have set the right image size in the configuration beforehand.
The auto crop sometimes removes too much from the image edges. That’s why we prefer to use the normal preview and select the scan areas a bit bigger, to be on the safe side. Any excess material can be easily removed later on.
Setting the Scan Area
Next, select the area you want to scan in the preview. We usually select it a bit larger than the size of the negative so we still have space later for cropping the edges neatly.

The scan area has been set manually.
Depending on the negative holder, you also have the option of scanning the edges of the negative. Sometimes this is done deliberately to show the viewers that they are looking at an uncropped analog picture. Not removing the edge can, of course, also be part of your artistic expression.

35mm scan with image edges and perforation
Selecting the scan area also has another function: For automatic exposure, it determines what is factored into the calculation and what is not. For example, if you have included many very bright areas outside of the picture, the scan may end up too dark in the end. In that case, we use manual control.
Settings
Before we start with the actual scan, let’s have a look at the main window of the Epson Scan software. First, switch to Professional Mode so you can see all the available options.

Switching to Professional Mode
Image Types
If you select B&W Negative Film for the Film Type, the software will automatically turn the negative into a positive image for you. In the Image Type setting, set the scan of black-and-white negatives to 16-bit Grayscale. This ensures that the highest possible resolution in the tonal values is achieved. For color scans, use 48-bit color. Then each of the three color channels is scanned at 16 bits for the highest possible number of brightness levels.

Epson Scan—main window
The fewer bits you scan with, the less leeway you have later when editing the contrasts. This is particularly important for “thin” negatives, which appear low in contrast after the scan.

Setting the image type
Resolution
The Epson V750 has a resolution of up to 2300 dpi, according to the relevant test reports. So we usually set the scan resolution to 2400 dpi. Our experiments with higher resolutions have shown that no additional detail is achieved with a resolution of 4800 dpi or more—it only makes the files much bigger. The scan times also get longer. 6×6cm medium format negatives at 2400 dpi yield files of about 30 megapixels.
Unsharp Mask
The Unsharp Mask setting instructs the scan software to digitally sharpen the image after scanning. But you can do a much better job of this in digital post-processing (if it is necessary at all). Turn this setting off.
Grain Reduction
The grain is an important component of the analog picture. The digital grain reduction gives the picture an unnaturally smooth finish during scanning. Turn this setting off.
Color Restoration
For black-and-white pictures, you do not need the Color Restoration setting. For scanning color negatives (keyword: orange mask), this function can help create more natural-looking colors. Old, faded negatives can also benefit from this feature. Turn this setting off for black-and-white scans.
Backlight Correction
The Backlight Correction function results in further digital changes to the picture that tend to cause more problems, especially if you have set the exposure properly. Turn this setting off.
Dust Removal
If you enable the Dust Removal option, the scan software tries to detect fluff and dust and remove it via the software. This rarely works very well and tends to have side effects; it can cause important image areas to be accidentally interpreted as dust, so they are removed. Turn this setting off.
Digital ICE
ICE stands for Image Correction and Enhancement. This procedure helps remove scratches and dust on negatives. It involves a second scan (in addition to the original one) with an infrared light source that makes only dust and scratches visible. This scan is then used to correct the first scan.
This method works well for color negative and slide film. For black-and-white film, the results are almost always worse, and the scan takes considerably longer to complete. Turn the Digital ICE setting off for black-and-white film.
Exposure and Contrasts
After selecting the scan area, you can either let the scanner determine the exposure and set the black point, white point, and contrast curve, or you can set these yourself. We prefer a mixed approach. We first turn off the auto-exposure in the configuration (continuous auto exposure: off). Then we click the button for automatic exposure.

Automatic exposure
In the picture, you see the (relatively narrow or thin) histogram of the preview. The three arrows (black, gray, and white) below the histogram show how the scanner has automatically selected the black point, midtones, and white point. Now you can adapt the black and white points without clipping the histogram.

Before

After
If in doubt, drag the arrows outward a bit further. This prevents overexposure and underexposure when scanning. The aim is to get a picture that is as complete as possible for editing, and that has as much information as possible, both in the highlights and the shadows.
You should change the sliders for Output from 10 and 200 to 0 and 255. This also ensures that the scan maintains the biggest possible contrast range for later editing.
Scanning
Before you click the Scan button, you should play it safe and take another look at the settings—particularly Unsharp Mask, which has the tendency to turn itself back on from time to time. Now you will be asked where you want to save the pictures, and in what format.

Many questions
Set the file location and file name. The file format is particularly important here. Because we are scanning with a depth of 16 bits, we need to select a format that can hold the corresponding amount of information. The most suitable is TIFF.
Now the scan process can start. Depending on the number of pictures and the resolution you chose, you have time to go stretch your legs or make a cup of coffee. The scanning process can take several minutes per individual picture. In our case, Epson Scan creates an uncompressed grayscale TIFF file from the 6×6cm medium format negative. The TIFF file has a color depth of 16 bits and an edge size of 5389×5257 pixels. This file is ideal for digital editing.
Editing
For digital editing, we use Adobe Lightroom. But you can carry out these steps with any common image-editing software that can handle 16-bit TIFF files.
Import

Importing
First, we import the picture into our software. There, we can see the histogram that we made wider by setting the black and white points after the scan. The picture is now considerably less “thin” than before the scan.
Crop

Cropping
If the scan area we set in the preview was too large, we can now crop the picture to its final format.
Adapt Contrasts

Adapting contrasts
After scanning, the pictures are often a bit low in contrast, too bright or too dark, and have to be adjusted. In this case, we adapt exposure, contrast, highlights, and shadows accordingly. This process approximately corresponds to choosing the paper grade and exposure in the analog darkroom.
Retouching
Now you will see how tidy your work was. Dust and fluff might have crept in after exposing during drying and scanning. In the past, scratches on negatives and on printed pictures had to be retouched using very fine brushes and albumen. Today we can do it more quickly and digitally.

Retouching #1
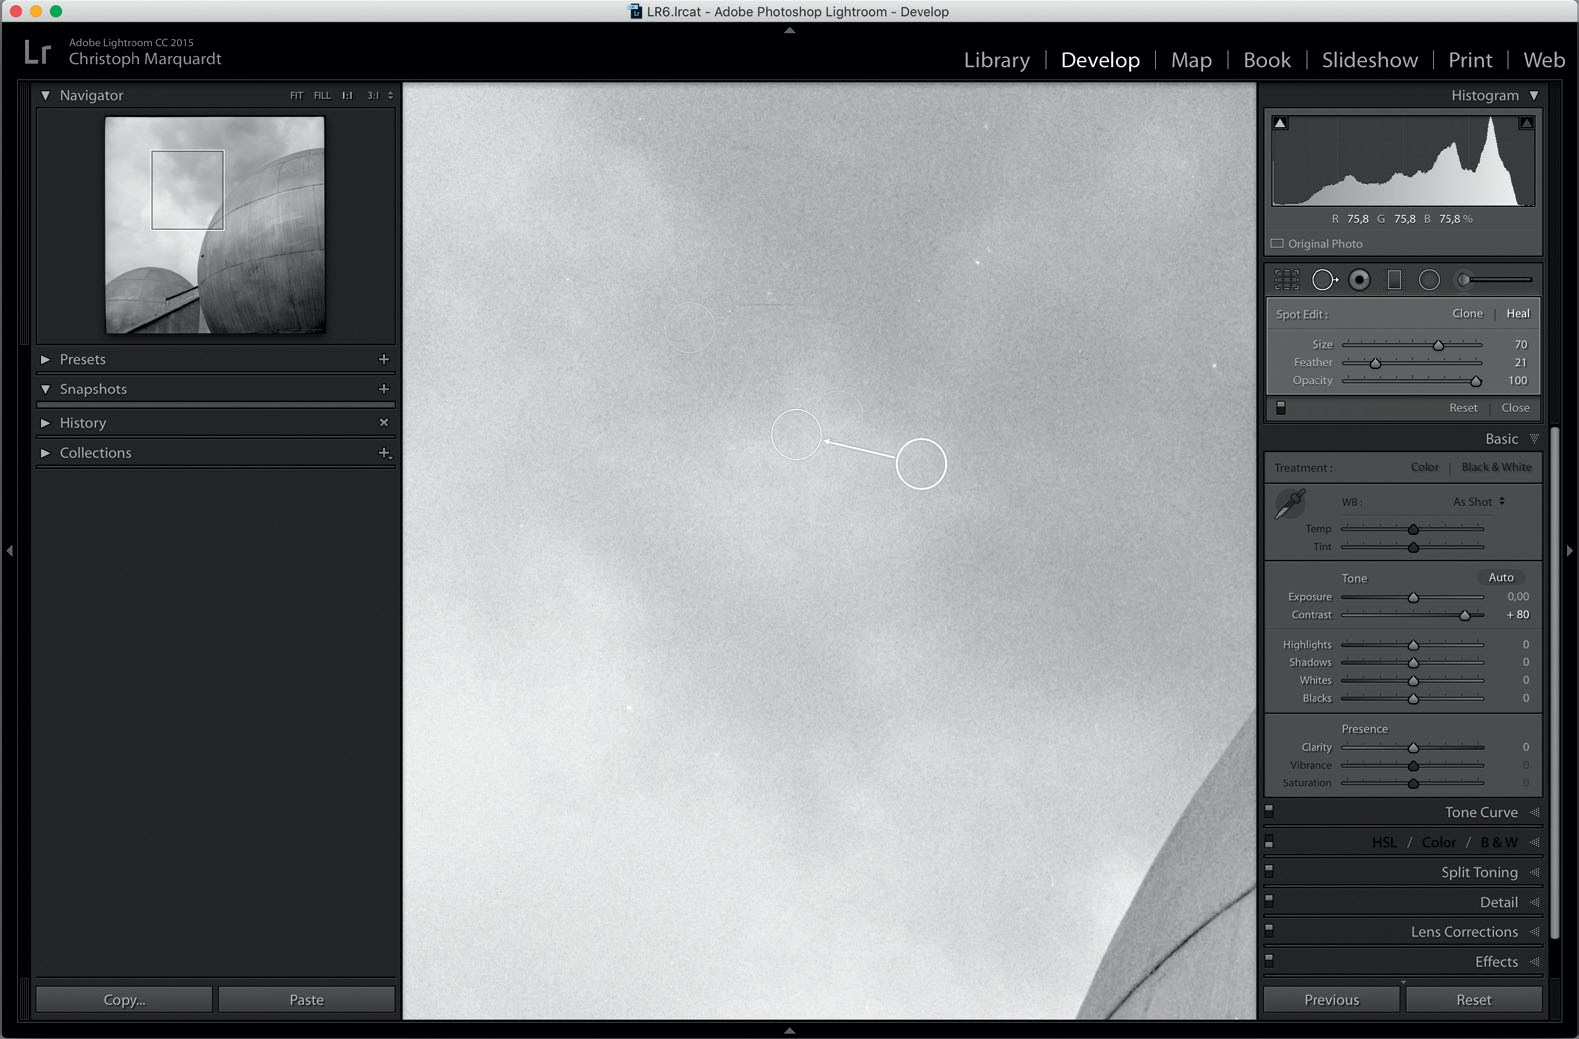
Retouching #2

Retouching #3
About 20 areas on this picture had to be repaired.
Split Toning
This step is optional. It corresponds to another method of the analog darkroom. The printed black-and-white picture is composed of two elements.

Split toning to taste
The bright photo components are the areas where the photo paper shines through. Depending on the paper tone, the highlights of the picture can take on warm, neutral, or cool tones. The shadows of the picture consist of silver. This, too, can take on a color tone during developing. The best-known example is sepia toning. But there are also toners that color the silver blue, golden, platinum, or copper.
With split toning, you can mimic this process in the digital workflow by coloring the highlights (the paper) and the shadows (silver) separately. In our case, we gave the highlights a warm tone and dipped the shadows to a light blue. The picture is now ready for sharing or printing.
7.2.7 Scanning Without a Scanner
Digital cameras offer ever-higher resolutions and the quality of current macro lenses can be phenomenal. This combination is also great for digitizing negatives and slides. Even smartphones with macro capability can be a viable option. This is not only faster than scanning, but also often provides better resolution than most flatbed scanners.

Photographing slides and negatives in good quality: Copy stand, camera with macro lens, light source, film mask, and dust brush
What You Need
■ A light source. You can find USB-powered light panels in the craft/copy supplies section, but of course also at photo supply stores. For black-and-white, the light quality is secondary. For color, we have had good experiences even with relatively inexpensive lights. As an alternative to the DIY approach, there are now suppliers who offer complete solutions.
■ A tripod. To get started, a normal tripod is sufficient, as long as you can align the camera to point straight down onto a table. A spirit level will be helpful with this. The more parallel you get the camera, the better the image sharpness of the “scans” will be. An alternative would be a copy stand. This consists of a base plate on which the light source is placed and a column to which the camera is attached so that it looks vertically down on the negative.
■ A macro lens. The better you can fill your frame with the negative, the less you’ll have to crop it later and the more resolution will be left in the end. As an alternative to a macro lens, you can also use extension tubes.
■ A negative mask. In the simplest case, you can make this yourself from black cardboard. The purpose of the mask is to block the stray light that radiates from the light source around the negative toward the lens. This improves contrast. The mask also helps keep the negative as flat as possible, improving sharpness.
■ A reasonably dark-ish room. Light in the room (for example, the bright ceiling) can be reflected by the negative and leave artifacts in the resulting image.
Chances are you already own a flat light source that you can use for this. It’s called a tablet. Most commercial light plates intended specifically for photographing are so fine in their surface structure that they do not leave any artifacts in the digitized image. If you use a tablet or smartphone as a light source instead, then note that the display pixels can end up as artifacts in your photos. That’s especially true if the negative rests directly on the glass surface. A film holder can help here. This puts some distance between the negative and the light source and moves the tablet pixels out of focus.

A macro lens reveals the pixel structure of a tablet
Commercial Film Holder Solutions
A selection:
■ pixl-latr: An affordable modular film holder that handles 35mm, medium format, and large format.
■ Negative Supply: Various kits and light sources for different sizes of negatives. High quality (and also somewhat high priced).
■ Essential Filmholder: Well-built film holder for various formats. Very good flatness.
■ Valoi 360: Another very neatly produced all-in-one solution that can be operated with its own light source.
■ Lomography DigitaLIZA+ and DigitaLIZA Max: Holds film in 35mm and medium format and comes with backlight. DigitaLIZA Max covers the same formats, but adds a column to the package, to which a smartphone or other camera can be attached for taking pictures.
Sources can be found in Appendix A.3 on page [289].

Medium format slide, photographed with DSLR and macro lens
Step by Step
- 1. Align the camera parallel to the light table.
- 2. Place the negative on the light table and cover the surroundings with the negative mask.
- 3. Set the camera to manual exposure mode (M).
- 4. Adjust the exposure on the camera so that neither underexposure nor overexposure is visible. The easiest way to do this is in Live View with the histogram and overexposure warnings turned on.
- 5. A medium aperture around f/8 will typically give you a good level of detail sharpness.
- 6. To avoid camera shake, trigger the camera wirelessly.
Post-Processing
■ Slides: Crop the photos and adjust the contrasts in your post-processing software. For color correction, we will look for an area in the image that is as color neutral as possible and set white balance off of that. With some advance planning, you can of course also photograph a gray card on one of the images as a neutral reference. This works especially well if all images on the roll of film were taken under the same lighting conditions.
■ Black-and-White Negatives: We manage and edit our negatives in Lightroom Classic. It’s possible to invert negatives by reversing the tone curve, but that’s a bit clunky as afterward the brightness and contrast controls no longer behave as usual. Instead, it has proven useful to first invert the negatives in other software (for example in Affinity Photo) before then importing them into Lightroom and adjusting them the same way we did for the slides.
■ Color Negatives: Inverting color negatives is a bit tricky. Thanks to its orange mask, color film processing requires special color correction. Generally, it’s easiest to do this is by using specialized software. Here are a few options:
■ Filmory: AI-supported photographing and inverting. Relatively low resolution. (iOS)
■ Film Scanner Pro: Free. (iPad)
■ FilmBox: Easy to use, good color conversion results. (iOS/Android)
■ FilmLab: One solution for all major platforms. (Windows/macOS/iOS/Android)
■ Kodak Mobile Film Scanner: Free. (iOS/Android)
■ Negative Lab Pro: A paid plug-in for Lightroom Classic. Gives you good results directly in Lightroom. Operation takes a little getting used to—the tutorial videos on their website help. (macOS/Windows)
Who Wins: Scan or Photo?
The traditional film scan will not go away. Digitizing using the photo method requires a few more steps, while scanning software will typically offer batch processing and direct conversion of images, which makes it easy to scan multiple negatives in one go. Also, with larger negatives like medium format or even 4x5", the resolution advantage will move farther toward scanning. Our rule of thumb is to use the photo method for 35mm (almost always), for medium format (sometimes unless we need really high resolution), and almost never for 4x5".
However, flatbed scanners also have their disadvantages. For one, they usually do not exceed 2000 dpi optically, despite claiming higher resolutions on the box. Those specs refer to the stepper motors and scan line and ignore the upstream optical system, in which lenses and mirrors contribute to the final image. So realistically, you can’t really expect more than 10 megapixels for a 35mm scan when done on a flatbed scanner. The camera method will basically provide you with the resolution of the camera sensor, minus some loss from cropping.
Scanners are also much slower, especially at higher resolutions. Just for fun, set your scanner to 6400 dpi and time how many minutes it takes to scan a 35mm negative. When using a camera, that gets reduced to seconds.
7.3 Digital Printing
Print your pictures! Or have them printed. Your best pictures need to be brought to light. Surround yourself with your work, and don’t let them gather virtual dust like the countless digital snapshots on your hard drive or in the cloud. This does not really suit the tactile process of developing. Pictures that we are physically holding in our hands have a significantly higher value than those we just scroll through on the screen.
Of course, not all pictures need to be printed on paper. Photographers who work with film exclusively usually print only the best of their pictures. We do the same for printing digitally.
You will learn more about your own photography if you have your pictures all around you. You learn more about your own photography by keeping it near you. It’s often enough to just pin a few photos to the pin board you walk past several times a day. In our house, we have professionally framed pictures hanging on the wall in the hallway, but we also have photos we’ve had printed via the online service taped to the kitchen door with sticky tape. In addition to high-quality prints from the Lambda printer, we also hang up photos from the cheapest postcard printer. It doesn’t always have to be champagne. The important thing is for the pictures to have a presence.
7.3.1 Having Photos Printed: By a Discounter
The easiest way of getting your pictures onto paper is ordering them via one of the many online services. Just upload your photos, and a few days later you get the prints in the mail. There are some differences in terms of quality, and you will not always have the option of influencing how your photos are printed. Usually you will have to make a compromise between quality of the results, price, and convenience.
Depending on which operating system you are using on your computer, you may already have a photo service. On Macs, for example, you can order prints directly from inside the Photos app. No matter how you proceed, the result is a printed photo on paper—or, depending on your taste and provider, even on a coffee mug, mousepad, or sofa cushion. Usually, online providers want files in JPG format with a high resolution and not much compression. It’s best to check first on the provider’s website.
If you have the option of setting the color space when exporting from your image management program, you should select sRGB—unless the provider specifies something else.
7.3.2 Having Photos Printed: At a Professional Lab
If you want to be able to hold your best shots in your hands as professional quality prints, you have a lot of options, including inkjet printers, printing with pigment ink (referred to as Giclée prints) on high-quality paper, or printing digital data on photo paper. Good professional labs are available in many places and often give you the option of uploading the image data via Internet platforms. For photos on paper or canvas, you do not need to have a printer at home. If you pass your image files to a professional photo lab, they will be printed either with a photographic printing machine or an inkjet printer.
Printing on Photo Paper
The photographic printing machine does not really print; it is, in fact, an exposure system. The exposure on photo paper produces photochemical prints. The printing machine transforms the information of the image file into signals, which determine how the machine’s red, green, and blue light gets a photographic image onto photo paper that contains silver.
These types of photographic printing machines are (very) large and expensive, and meant for professional use. You will find them in good professional laboratories.
Probably the best known photographic printer is the Durst Lambda, a machine that creates photo prints using laser light. These true photo prints are often referred to as Lambda prints. The latest generation of photographic printers work with LED light instead of lasers.
These photographic prints show a subtle, finely graded tonal reproduction. Most labs expose them onto photo paper coated with resin (RC). A disadvantage of photo prints is that a selection of different papers is not usually offered.
Inkjet Printer on Fine Art Paper
Compared to a traditional darkroom, the inkjet printer is a relatively new method for creating prints. With this method, ink is sprayed onto paper via a printer in a halftone dot pattern without the paper touching the print head. Purists think using a printer to get photos onto paper is the inferior method, but we disagree.
If you just try to lump all inkjet printers together and use your cheap inkjet printer and domestic PC as a reference point, you are comparing apples and oranges, and not doing inkjet printers justice. There are different types of inkjet printers, and a whole range of parameters is responsible for the results you get: the printer, the ink used, and the paper. To achieve high-quality, archive-standard fine-art prints, professional labs use large-scale inkjet printers that work with pigment inks in six or seven color cartridges and three or four different black levels. The large color space (gamut) of inkjet printing results in rich, intense colors and crisp contrasts.
A big advantage of these fine art prints, also referred to as Giclée prints, is that the selection of paper is greater than for photo prints. You can use the same subject and printing method to create completely different effects. Depending on whether you are using baryta-coated paper (e.g., Hahnemühle Baryta), heavy rag paper, or textured water-color paper, the contrasts and colors can come out with different intensity.
In contrast to prints from a simple inkjet printer for home-office use, archival-standard inkjet prints from a professional lab will keep for up to 200 years if the ink and paper have been matched well. As you can see, the decision whether to print your photo or have it printed as a fine-art print depends on what you want to use it for. It’s usually a matter of personal preference.
Current studies on the archival longevity of modern pigment ink in combination with fine art paper are being carried out, for example, by Wilhelm Research Inc., and can be accessed via the website: http://
7.3.3 Printing Photos Yourself
If you want to get your hands on your pictures more quickly, you can print them yourself. Many all-in-one office printers can also print photos these days. The results are similar in quality to cheap online services, but cost a bit more. However, they have the unbeatable advantage in terms of time.
Apart from the usual paper trays in A4 or Letter size, many printers also offer an additional tray for photo paper in postcard format. The paper is usually available from the printer manufacturer and can either be ordered online or purchased in large electronics stores and stationery stores. Often you can also get two-in-one packs of paper and suitable ink cartridges. In the end you just need to select the right paper tray when printing, and the printer does the rest.
A few more words on inks and paper: For financial reasons, it seems to make sense to buy cheap refill cartridges of ink and affordable photo paper from the discount store. For office use, that’s absolutely fine. But for photos, we would advise against it, because the cheaper alternatives often don’t have the same color fade resistance as a branded product by the manufacturer of your printer.
7.3.4 High-End Inkjet Prints
The smaller photo and office printers take many (often technical) decisions out of the users’ hands and provide results that are fine for everyday use. If you want to have full control over the print result, you will have to delve more deeply into topics such as color space, color management, printer and media profiles, and ink systems. The scope of this book does not allow us to explain all these topics in detail, but we will briefly mention a few.
Ink Systems
When it comes to printing photos, inkjet printing is the dominant system, and it uses primarily two ink systems: dye ink and pigment ink.
Dye Ink
With this ink system, the color particles are dissolved in liquid, just like the blue ink for fountain pens. The very homogenous solution is then sprayed onto the paper in fine droplets during printing. Because the ink is liquid, it soaks into the paper along the paper fibers. Depending on the paper type, this can cause fine structures to look slightly blurry. You particularly notice it with classic copier paper (20lb Bond Letter size/80gsm A4). High-quality office paper and photo paper have corresponding coatings to counteract the dye from running.
Pigment Ink
The higher-end printers use pigment ink. These types of ink do not contain dissolved colors but solid color particles. The pigment is suspended in the carrier solution, so it is floating in the liquid. During printing, the color pigments rest on top of the paper fibers, resulting in a clearer printed picture with stronger colors and higher contrasts.
Depending on the system, pigment ink tends to clump more, so the printer nozzles can clog up more easily. This is particularly the case if the printers are not used regularly. The manufacturers try to counteract it with electrostatic systems, but it can help to take the ink cartridges out of the printer from time to time or carry out a little nozzle test where the printer head is flushed through with a tiny quantity of ink.
Thermal Printing
With thermal transfer printing and dye-sublimation printing, the picture is not created by putting ink on paper. Instead, colors on a color foil are melted or evaporated via heating elements and transfered onto the photo paper. The print results are consistently very high and comparable to color photos. However, this method creates more waste compared to the ink methods, because a piece of color foil the size of the entire photo is used for each color component (cyan, magenta, yellow, black).
Paper Types
Depending on method and budget, there are many choices of media for printing.
Photo Paper
The normal print media are the many varieties of photo papers. There is photo paper with different types of surface finish, from matte to satin to high-gloss. It comes in weight categories from thin paper to heavy card stock.
Cotton-Based Paper
Depending on subject and printer, you can also use matte cotton paper. This type of paper, also referred to as photo rag, is particularly popular for fine-art prints and almost always printed with pigment inks. Cotton rag paper has a fine, matte finish.
Canvas
Printable canvas has a canvas texture and is coated for inkjet printing. Canvas prints are usually mounted on a stretcher frame, just like a painting.
Acrylic Glass, Aluminum, and Textiles.
In addition to paper and canvas, many other materials are available for printing. For example, sheets of acrylic glass can be printed on from the back with special dyes. The pictures have a very sculptural look with strong contrasts. Other materials that can be printed on and that have their very own effects are, for example, aluminum or textiles.
Manufacturers of high-quality print paper:
Hahnemühle: http://
Canson: http://
Museo: http://
Rauch: http://
7.3.5 Profiling
“Why don’t my prints look like the picture on the screen?”
There are several answers to this question. One, printed pictures never look like photos on a computer screen because we are dealing with two different systems. The computer screen is backlit, but the paper is a reflective medium. What it looks like depends on the light source used to illuminate it. Pictures on paper can be assessed most accurately in the best-quality light source we have available: daylight. Moreover, printers and screens are not always 100% true color. This is mainly due to the fact that the devices are subject to manufacturing tolerances and aging processes. It’s indeed possible for a monitor to develop a slight green cast over time, while a printer may overemphasize the color yellow.
Color profiles can help in this situation. A profile is meant to compensate for the tolerances between devices, and this applies to monitors, printers, and scanners.
Monitor Profiling
The most important profile is probably the one for the monitor. If the screen shows nonsense, such as the wrong colors and contrasts, then all corrections we make in image editing won’t be any good. We will not be able to tell if our digital image corrections are accurate.
Under the hood, a profile is nothing more than a correction chart inside the computer between the input and output device. If the computer wants to display, for example, a specific shade of green on the screen, it uses the profile to correct the color before displaying it.
Monitor profiling is done automatically these days via a colorimeter. These devices are placed onto the computer screen and connected to the USB port. The associated software then displays a series of color charts on the screen and the colorimeter measures them. The monitor profile is generated from the difference between display and measurement. The profiling software usually saves it into the system automatically.
Printer Profiling
Printing involves two aspects, but luckily they can be governed via a common profile. Every printer has certain production tolerances, and each type of paper has specific qualities that can be adapted via a profile. For example, if the medium itself has a warm tone, it can help to have the printer put less yellow or red onto the paper. Printer profiles always represent a combination of printer and paper.
Luckily, integrating the profiles is not too hard—at least, not if you are using the printer manufacturer’s brand of paper. You just have to select the right paper type in the printer driver, and the rest happens automatically. This gets you quite good results. If you want to use paper made by a third party, it becomes a bit more complicated. Depending on the printer, you may be able to find the suitable profile to download on the paper manufacturer’s website. You then need to install the profiles in your system before you can use them. The installation often happens directly via your printer driver.
It becomes even more complicated if you want to create profiles yourself, for example, for other types of paper or even more exotic materials. In that case, print a color chart first. Then measure the color fields in the chart with a spectrophotometer and the software generates a corresponding profile from the results.
Scanner Profiling
We deliberately did not go into much detail regarding scanner profiling because our main focus was on scanning black-and-white originals, for which scanner profiling is not essential. Generally, scanner profiling works the same for any other image-capturing device. First, you scan a card or transparency with different color fields (referred to as an IT8 target). This scan is then analyzed by corresponding software that generates a profile from it.
ICC profile: https://
7.3.6 Printing Workflow
Due to the multitude of systems and manufacturers, we can only discuss a few general settings here. The possible options can differ greatly depending on the printer driver and printer. In general, high-quality devices also offer more options.
Soft Proof
This step takes place during image editing. If your editing software supports the feature Soft Proof, you can get a simulated preview of the result via the printer/media profile of the output device. You can, for example, see if all colors of the picture can still be suitably represented in the (smaller) color space of the printer. Then you can correct colors that are too saturated for printing and improve your print results.
Color Management
Depending on manufacturer and system, you can choose if you want the device to take care of converting the color space between monitor and printer, or if your software should do this conversion itself. The default setting is conversion by the printer or printer driver. If you do not want to leave this task up to the printer, you need to use the suitable printer profile.
Paper
After setting the page size, you can select the type of paper you are going to print on in the printer driver. If you are using the printer manufacturer’s paper, the printer is automatically going to use the right profile with this setting. With the paper selection, the printer driver also sets other parameters; for example, which drying times are required between the individual passes so the corresponding medium can absorb the relevant amount of ink.
Quality
Here, you should experiment. On the lowest quality setting (Draft), the printer is going to use noticeably less ink and print quicker at the expense of quality. On the highest setting, printing takes longer and more ink is used. We tend to print with the Normal setting most of the time.
Profile
With professional printers, you can use the profile function to include profiles for third-party media.
To Scale or Not to Scale?
To avoid interpolation artifacts, purists sometimes scale their pictures exactly to the size they want to output. Printer drivers now do this scaling in very good quality, so we prefer to give the printer a high-resolution image, which is then automatically scaled to the output size in the printer driver.
To Sharpen or Not to Sharpen?
Some editing software enables you to sharpen images for the relevant output purpose, and sometimes even for the type of paper you are using (matte or glossy). Again, the printer drivers are now very good, so you do not really need to select anything here. If you are not sure, compare the results you get for different settings.
7.4 Historical Processes
There is a range of (usually) manual, photochemical reproduction processes that offer alternatives to the traditional positive prints created in the darkroom or hybrid prints from the inkjet printer. These processes usually involve a contact print where the negative is placed directly onto the paper during the exposure.
For many of these processes, you do not necessarily need analog photos nor a darkroom to experience the tactile pleasure of analog prints. You can use digital photos to create non-reproducible unique pictures that are a combination of painting and photography in one. The following sections will tell you how these work, using the examples of cyanotype and albumen print.
Although photo trays and a pair of lab tongs are quite useful, you can usually do the methods introduced here with household items—for example with scrapped kitchen utensils—and commercially available sets with chemicals and paper. If you do not have the right tools, a quick trip to the DIY store can help. Make sure you never use items you are still going to use for eating or cooking!
7.4.1 Cyanotype
The cyanotype process, invented in 1842 by astronomer Sir John Herschel, was the first photographic printing method that did not use silver. In this method, iron compounds are used to create the picture. The images in the book British Algae: Cyanotype Impressions (often referred to as the world’s first photo book) were created with this method in 1843 by British biologist and botanist Anna Atkins.
Because the procedure for cyanotype images was simple, relatively cheap, and produced sufficiently fast results, one version of this method was commercially successful for a while. The “blueprint method” was used for reproducing construction plans. Special, coated papers were commercially available starting in 1870. Later, this process was replaced by other, dry-copying methods, but the term blueprint is still used today.
Today, the cyanotype process is still a way of creating relatively inexpensive prints of selected photographs. The chemicals you need are available individually or as cyanotype sets—with or without suitable paper—in specialist photo shops. Pre-coated cyanotype paper is also available, for example, for greeting cards. The formula used to create cyanotypes has basically not changed since Herschel’s time, but the concentration of the solution you prepare will vary depending on your preferences.
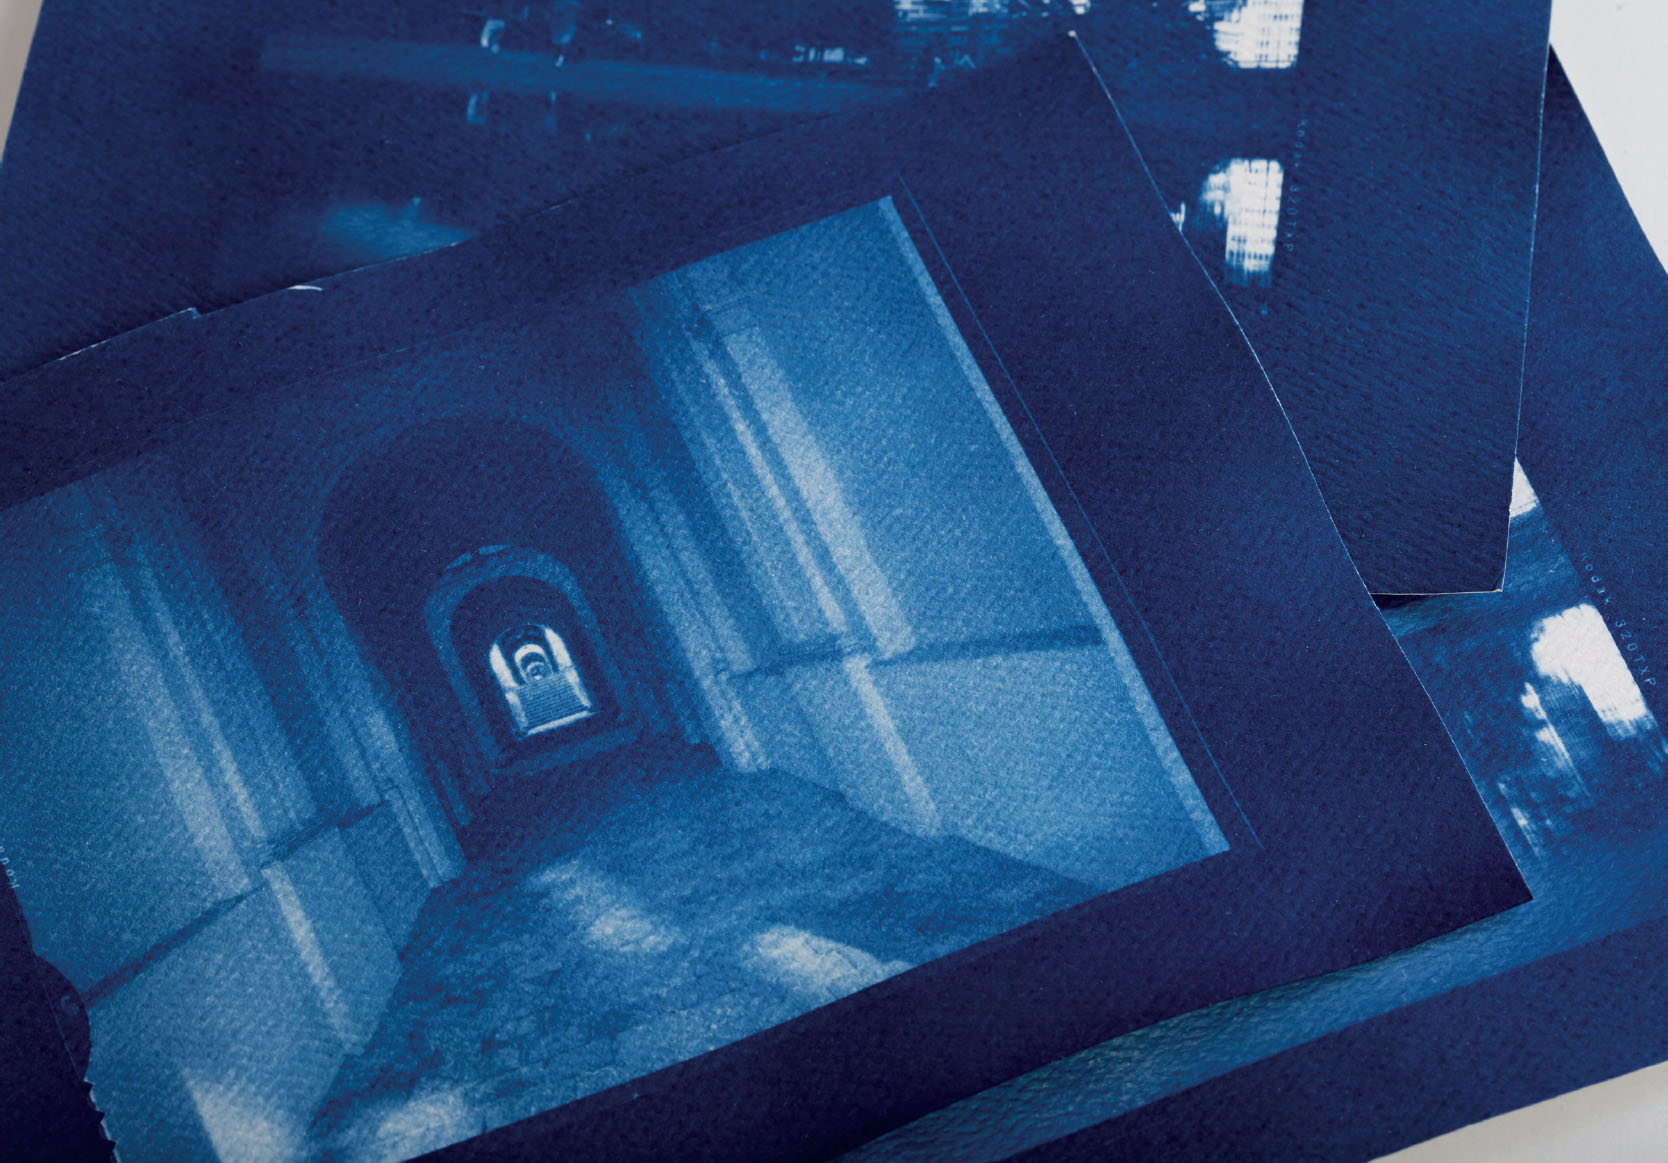
Cyanotype, contact prints of 4×5" large format negatives
Chemistry, Sample Recipe
■ 25 g ammonium iron (III) citrate
■ 16 g potassium ferricyanide (“prussian red,” “red prussiate of potash”)
■ (distilled) water
Both ingredients are dissolved separately in 100 ml of distilled water. The easiest way to prepare the solutions in in brown glass bottles, because then you can shake the bottles to mix the chemicals and also store the solution in them later. As long as the two separate solutions have not been mixed together, you can store them for a long time. You can prepare the solutions in daylight.

Cyanotype set by Monochrom
To sensitize the image medium—usually paper—mix small amounts of the individual solutions together in a ratio of 1:1. Because the finished mixture keeps for only a few hours or, at most, days, you should ideally use it immediately.
Paper
The picture is usually printed onto paper—but by experimenting a little, you can also print on wood or fabric (for example T-shirts or cotton bags). The paper is wet-coated, and the print is fixed under running water later, so you should use paper that can withstand rinsing and that dries without losing its shape. A heavy watercolor paper or handmade paper with a weight of about 250 gsm is usually quite good.
To sensitize the paper, coat it evenly in dim light with the mixture of the two solutions and then leave it to dry in a dark place. A large cardboard box with a lid is quite handy and protects the paper from light until it has dried completely. To apply the solution as evenly as possible, a wide brush or foam roller without a metal fitting is ideal. Depending on the thickness of the paper and how much mixture you have applied to it, air drying can take over an hour. If you use a hair dryer to speed things up a bit, you can get the paper dry in a few minutes.
Although you can coat the paper in dim light, the solution becomes sensitive to ultraviolet light while it dries. So, once you have sensitized the substrate material, you need to keep it in the dark until you are ready to expose it.
Preparing a Negative
You can expose a cyanotype either as a photogram using objects (parts of plants, feathers, etc.) as positive or the classic way via a negative. Because the cyanotype involves a contact exposure, the size of the negative also determines the size of the finished picture. It is not possible to enlarge during the exposure process. For this reason, large sheet film negatives are particularly well suited for this printing process. If you do not (yet) have any, digital technology is your ally in this instance. As long as you have editing software and a printer, you can manage entirely without analog negatives.
Pick one of your favorite pictures, and use your image-editing program to convert it to a high-contrast black-and-white picture. Then invert it and print the file onto a suitable transparency. Now you have a digital negative, so to speak.
Exposure
For the exposure, place the negative directly onto the sensitized substrate and cover it with a glass plate to keep it flat. A standard clear-glass, clip-type picture frame is handy, because it can serve as both base and cover. Then expose this “sandwich” to UV light. On a sunny day, just put it on the garden table in full sun. On cloudy days, you can use a facial tanner for UV rays. Depending on the light source and/or time of year, the exposure time is between 10 minutes and several hours. Time to experiment—cyanotype is no exact science. The good news is that real overexposures rarely happen. If the coated paper changes color in the shadows of the subject from greenish to dark grayish, and the highlights start turning pale blue, then the exposure process is complete.
Washing and Simultaneously Fixing
The next step is very easy. The paper is developed in water—in other words, washed thoroughly until the highlights look pure white. This is best done with the exposed side downwards in a large basin. In a room that is not too bright, you can also rinse under running water.
This step of the process has two purposes: one, it washes the iron salts out of the unexposed areas (which still look yellowy-green). Two, the washing starts the oxidization process of the coating in the areas that have been exposed to UV light, and the characteristic blue color forms. The development is finished once no more blue color runs off.
You must avoid damaging the sensitive coated side, so try not to touch it. If you want to increase the oxidization and blue coloring, you can give your cyanotype an acid bath in 2% citric acid or 0.3% hydrogen peroxide. After another wash, your print is ready for drying.
Drying
There are different ways to dry a finished cyanotype. First, remove surface water with blotting paper or several layers of newspaper. Then, you can hang up the print to dry, and press it flat afterwards.
Tip for keeping it flat: Let the paper dry by sticking it onto a sheet of glass, with the coated side up, held in place with wet-adhesive tape.
7.4.2 Albumen Print

Example albumen print: Photograph by Frank Meadow Sutcliffe, England. Courtesy of Preus Museum, Norway.
Until 1900, albumen prints were one of the most popular photographic reproduction methods. The technique was created around 1850 by Louis Désiré Blanquart-Evrard. It made very detailed reproductions possible and was more cost-effective than previously used methods, such as ambrotype or daguerreotype. Warm, usually brown-black tones are typical of an albumen print.
The question of what came first, the chicken or the egg, can be answered (at least as far as albumen prints are concerned). The traditional process of coating the paper used for this process starts almost like preparing a good meringue—with plenty of egg white (albumen). The egg white is mixed with salt and used for preparing a liquid to coat the paper with a glue-like layer. This seals the surface and ensures that the silver nitrate solution applied later does not penetrate into the paper. The hardened egg white layer also provides a glossy sheen and the rich detail and high contrasts.
You can create your own albumen liquid. The procedure is not difficult, but it takes a long time. The easier way, if not as inexpensive, is using albumen powder or complete albumen printing kits. Both are available in specialist retail shops.
A typical kit contains: silver nitrate in a brown glass bottle, albumen solution, powdered fixer for preparing your own working solution, eyedropper, flat brush, and sometimes a few sheets of special paper for printing. The most important steps are:
- 1. Preparing or selecting a suitable negative
- 2. Coating the paper with albumen
- 3. Sensitizing the paper
- 4. Contact exposure in sunlight or UV light
- 5. Washing and fixing
Preparing or Selecting a Suitable Negative
As with cyanotypes, you use contact exposure, so you need a negative in the same size as the finished picture you want to create. You can create a foil negative as described for cyanotypes. Pictures with a high contrast range are best for albumen printing.
Coating the Paper with Albumen
Prepare the albumen solution according to the packaging instructions, and pour it into a large, shallow bowl. Place a sheet of your selected paper onto the liquid so the paper is evenly wet. Try to avoid getting albumen onto the back of the paper—this will cause uneven density in the finished print. Let the paper float for about three minutes. You can also apply the liquid with a surface brush.
If you have coated the paper using the floating method, wait three minutes, then lift one corner of the paper carefully with a toothpick and pull the paper from the albumen liquid quickly and evenly. Hang it up to dry, and carefully remove large quantities from around the edges with a paper towel. This prevents uneven, thicker areas around the edges of your paper.
Albumen-coated paper has good storage stability. You can prepare it in advance and build up a supply.
Sensitizing the Paper
You can sensitize the paper immediately prior to the exposure only, because the combination of silver nitrate solution and the salts present in the albumen layer will only keep for a few hours.
Caution: Make sure you are working with chemical-resistant gloves (for example nitrile) and protective goggles. Splashes of silver nitrate can permanently damage your eyes!
The actual coating can be done under the light of a weak lightbulb, but ideally in safelight. Mix 37.5 g of silver nitrate with 250 ml of distilled water to create a 15% silver nitrate solution. The prepared solution becomes light-sensitive as soon as it comes into contact with organic materials—for example your skin or the albumen coating on the paper. Pour the liquid into a shallow bowl, for example a photo tray, and proceed with coating as described for applying the albumen. After three minutes, you can again lift off the paper and hang it up to dry.
Exposure
Expose as soon as the paper is fully dry. The longer you wait, the less sensitive the paper will become. The best way to expose is in direct sunlight on a warm day. If you want to work indoors, you need a strong UV light source such as a facial tanner.
Place the (transparency) negative onto the sensitized paper with the coated side down and weigh it down with a glass plate. If you do not have a frame for contact prints, you can use a clear-glass clip-frame. Place the sandwich you have created in the sun. Expose it until the highlights are starting to turn slightly violet, and the shadows look a bit bronze. Bear in mind that the print gets lighter during further processing.
Washing and Fixing
Wash the print thoroughly to remove surplus silver nitrate. As long as silver nitrate remains, the water that runs off will look milky. Once it runs clear—probably after about 15 minutes—you can fix the print.
Prepare a fixer bath. Pour it into the tray, and fix your print for usually no more than 60 seconds. The final wash of the finished print should take about an hour. After the final rinse, you can carefully remove surplus water with blotting paper or newspaper before hanging the print up to dry.
A Comment on Suitable Papers
The effect of an albumen print is strongly determined by the paper quality. Lightweight paper is usually more suitable because it absorbs less of the albumen solution, but the material needs to be stable enough to survive prolonged washing and long wet stages without falling apart. For an impression with the best sharpness, the albumen coating has to rest on top of the paper and should not soak in too much. Extremely pure watercolor papers made of rag are very suitable because they have a smooth, finely grained, closed surface.
In the mid-19th century, Dresden, Germany, was the main producer of albumen paper worldwide. Allegedly, the paper manufacturers used around 70,000 chicken eggs per day for making albumen paper.