PART IV: MONOCHROME DESIGNS

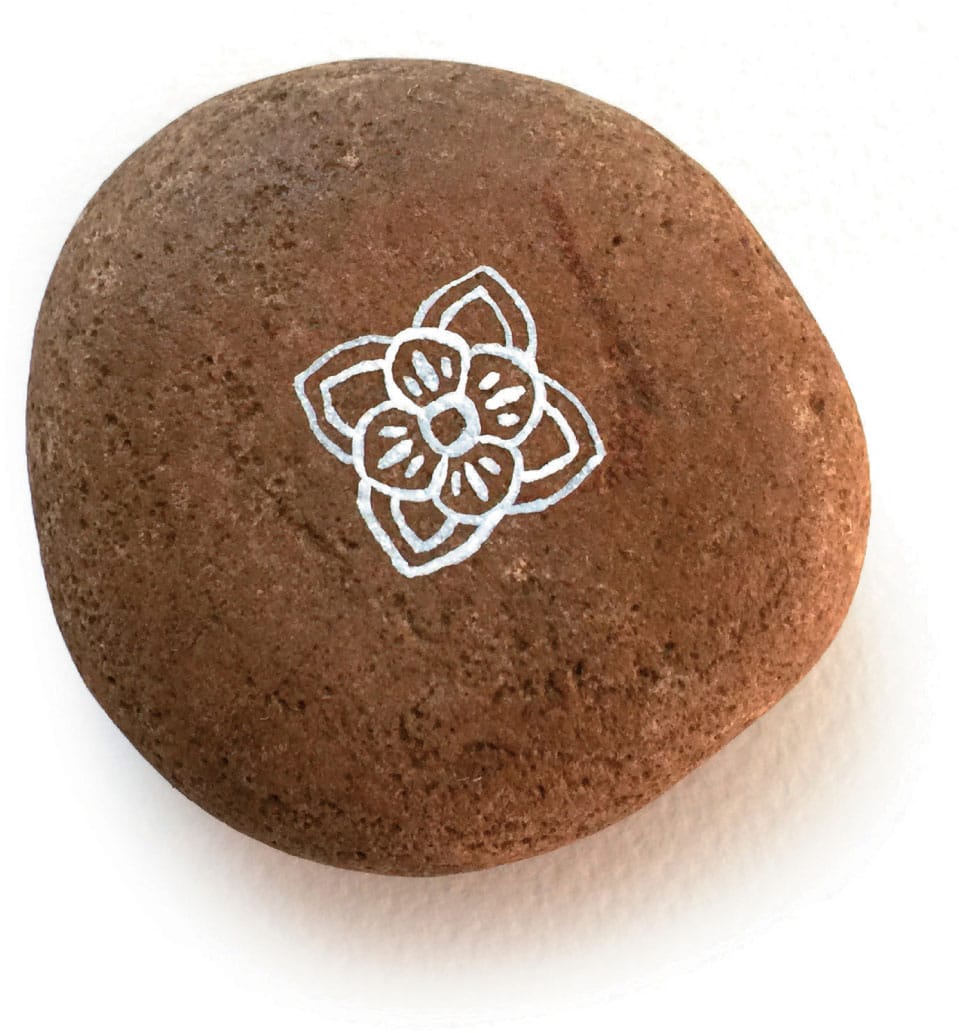
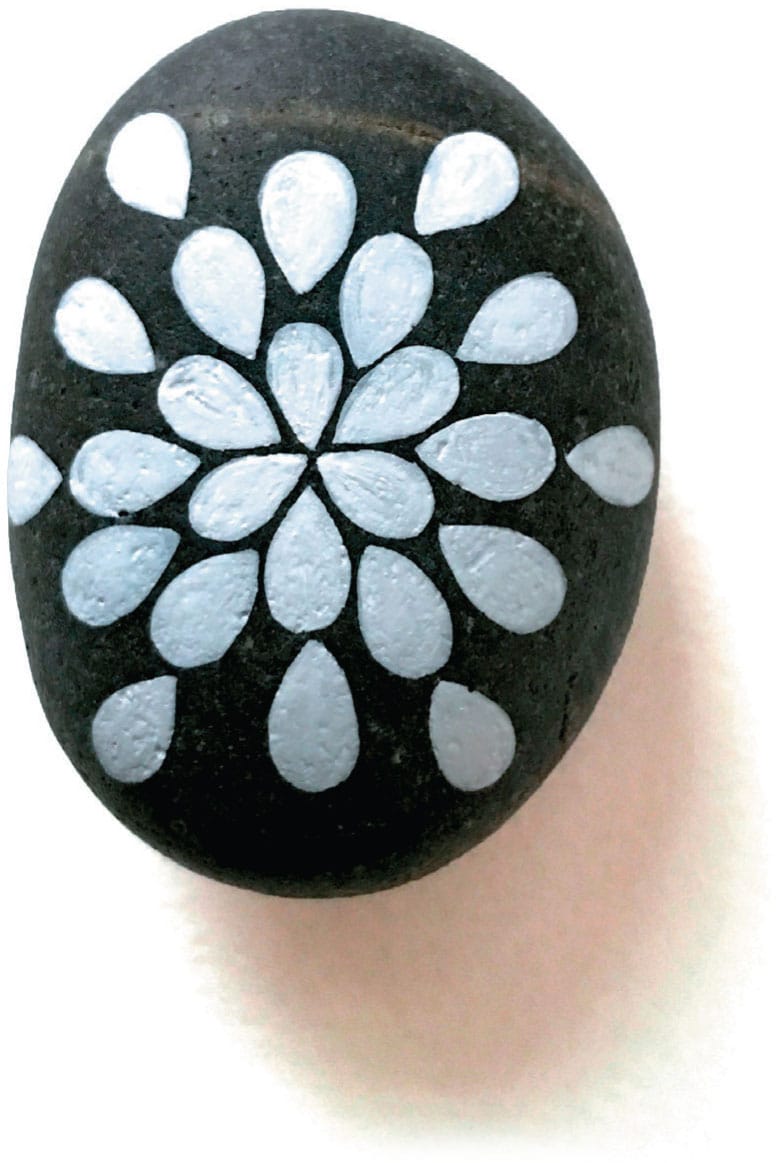
FLOWER

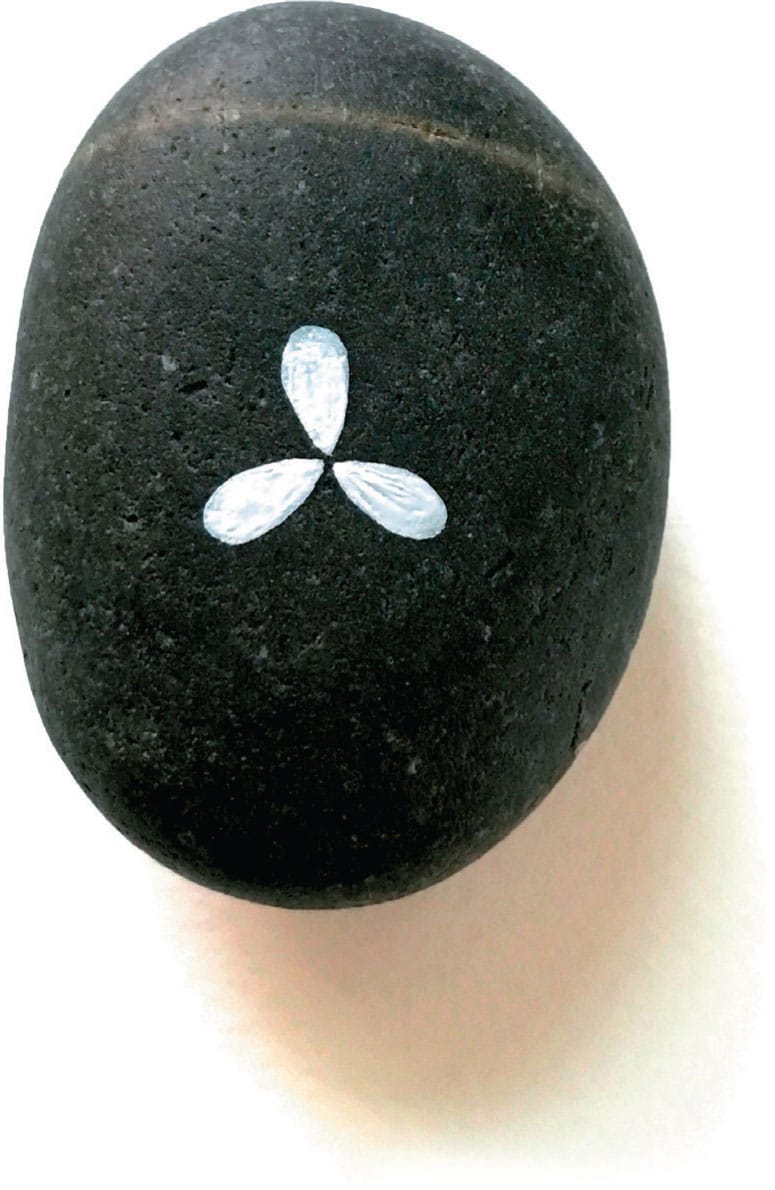
1 Choose a round rock. Apply a thin and even layer of varnish to your rock with a Filbert paintbrush. Once the varnish is dry, begin by painting a small circle in the center of your rock. Add four small flower petal shapes around the circle.

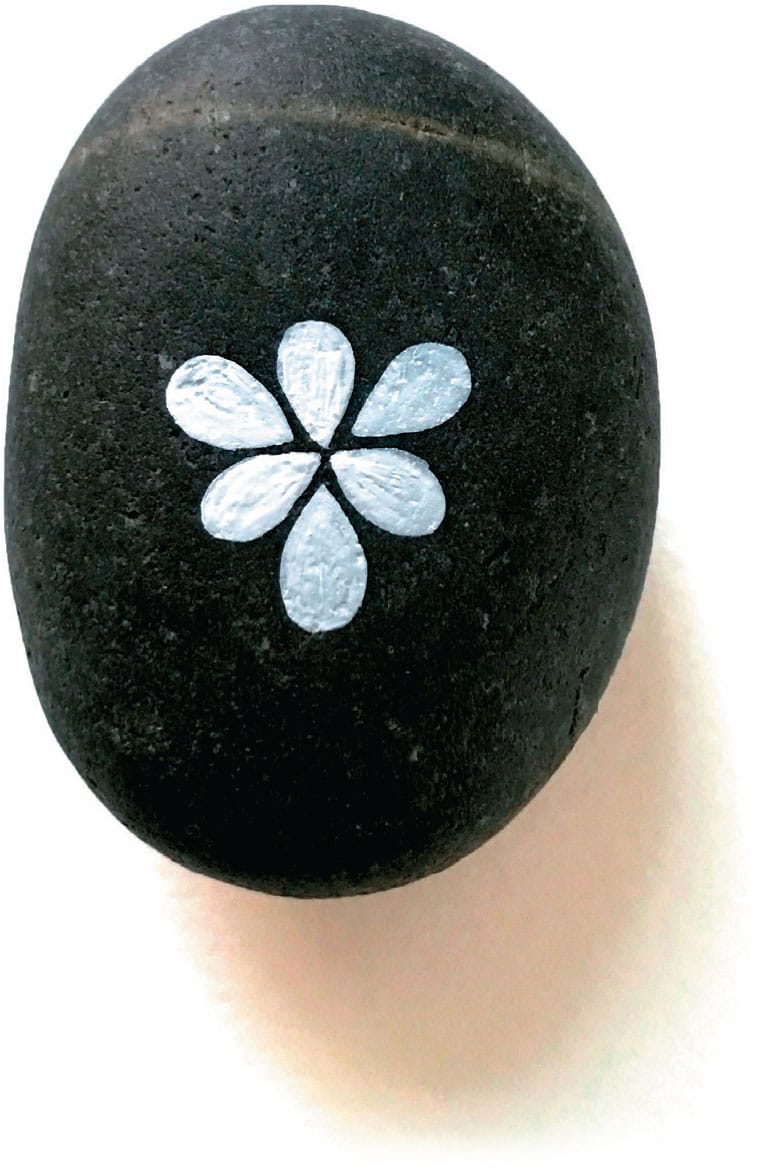
2 Add a little detail to the flower petal shapes, and then add another set of petals between each shape.
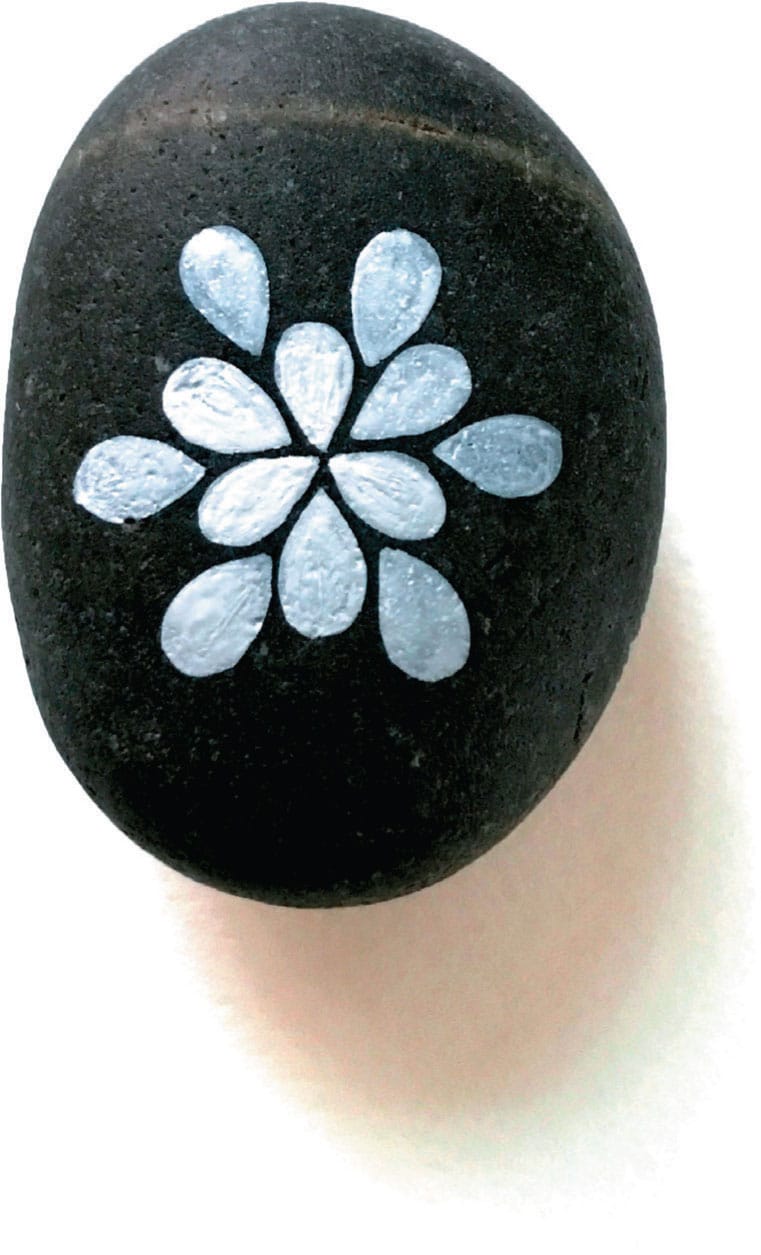
3 Add a second set of flower petals, and then paint long, U-shaped petals extending from the ends.

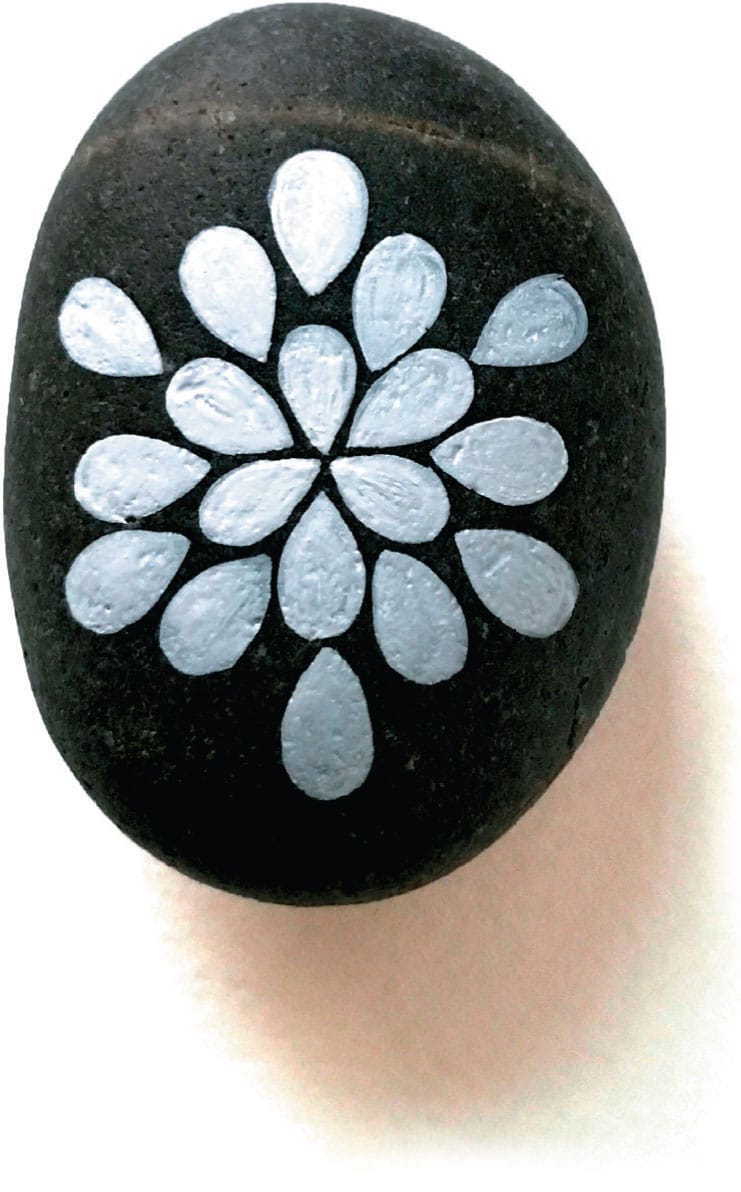
4 Paint larger flower petals around each U-shape, adding a slight wave to the end of each petal.

5 Fill the petals with decorative designs, dots, teardrops, lines, or any other shapes you prefer.
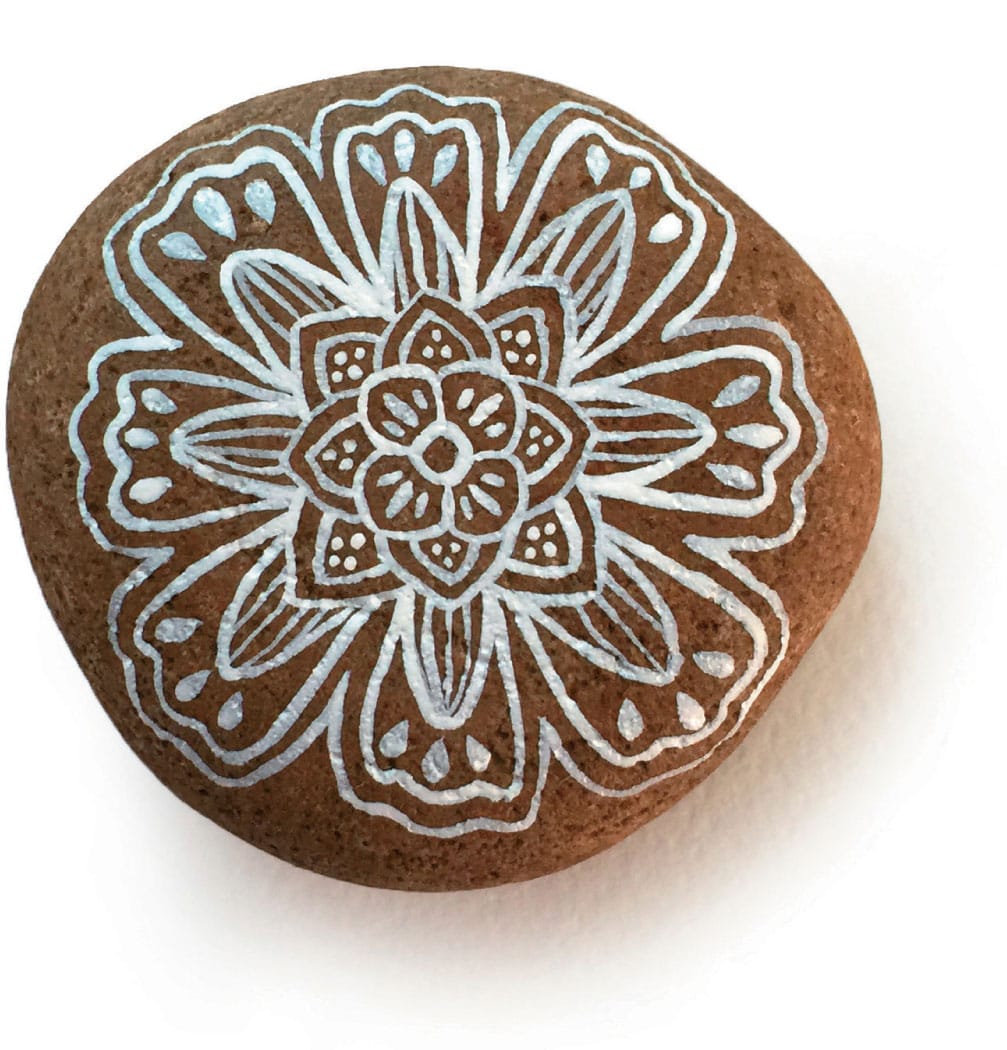
6 Paint a simple outline that borders the entire flower.
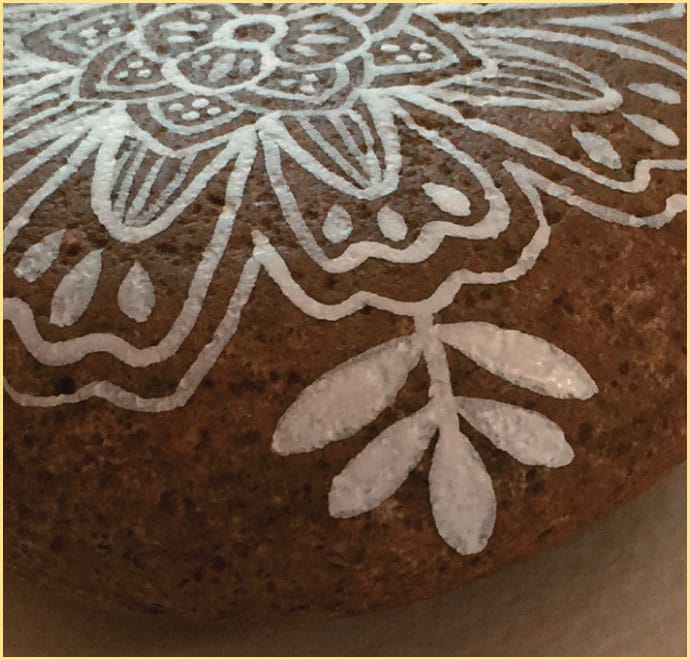
7 At the end of each outer petal, paint a small, leafy branch, each with five leaves.
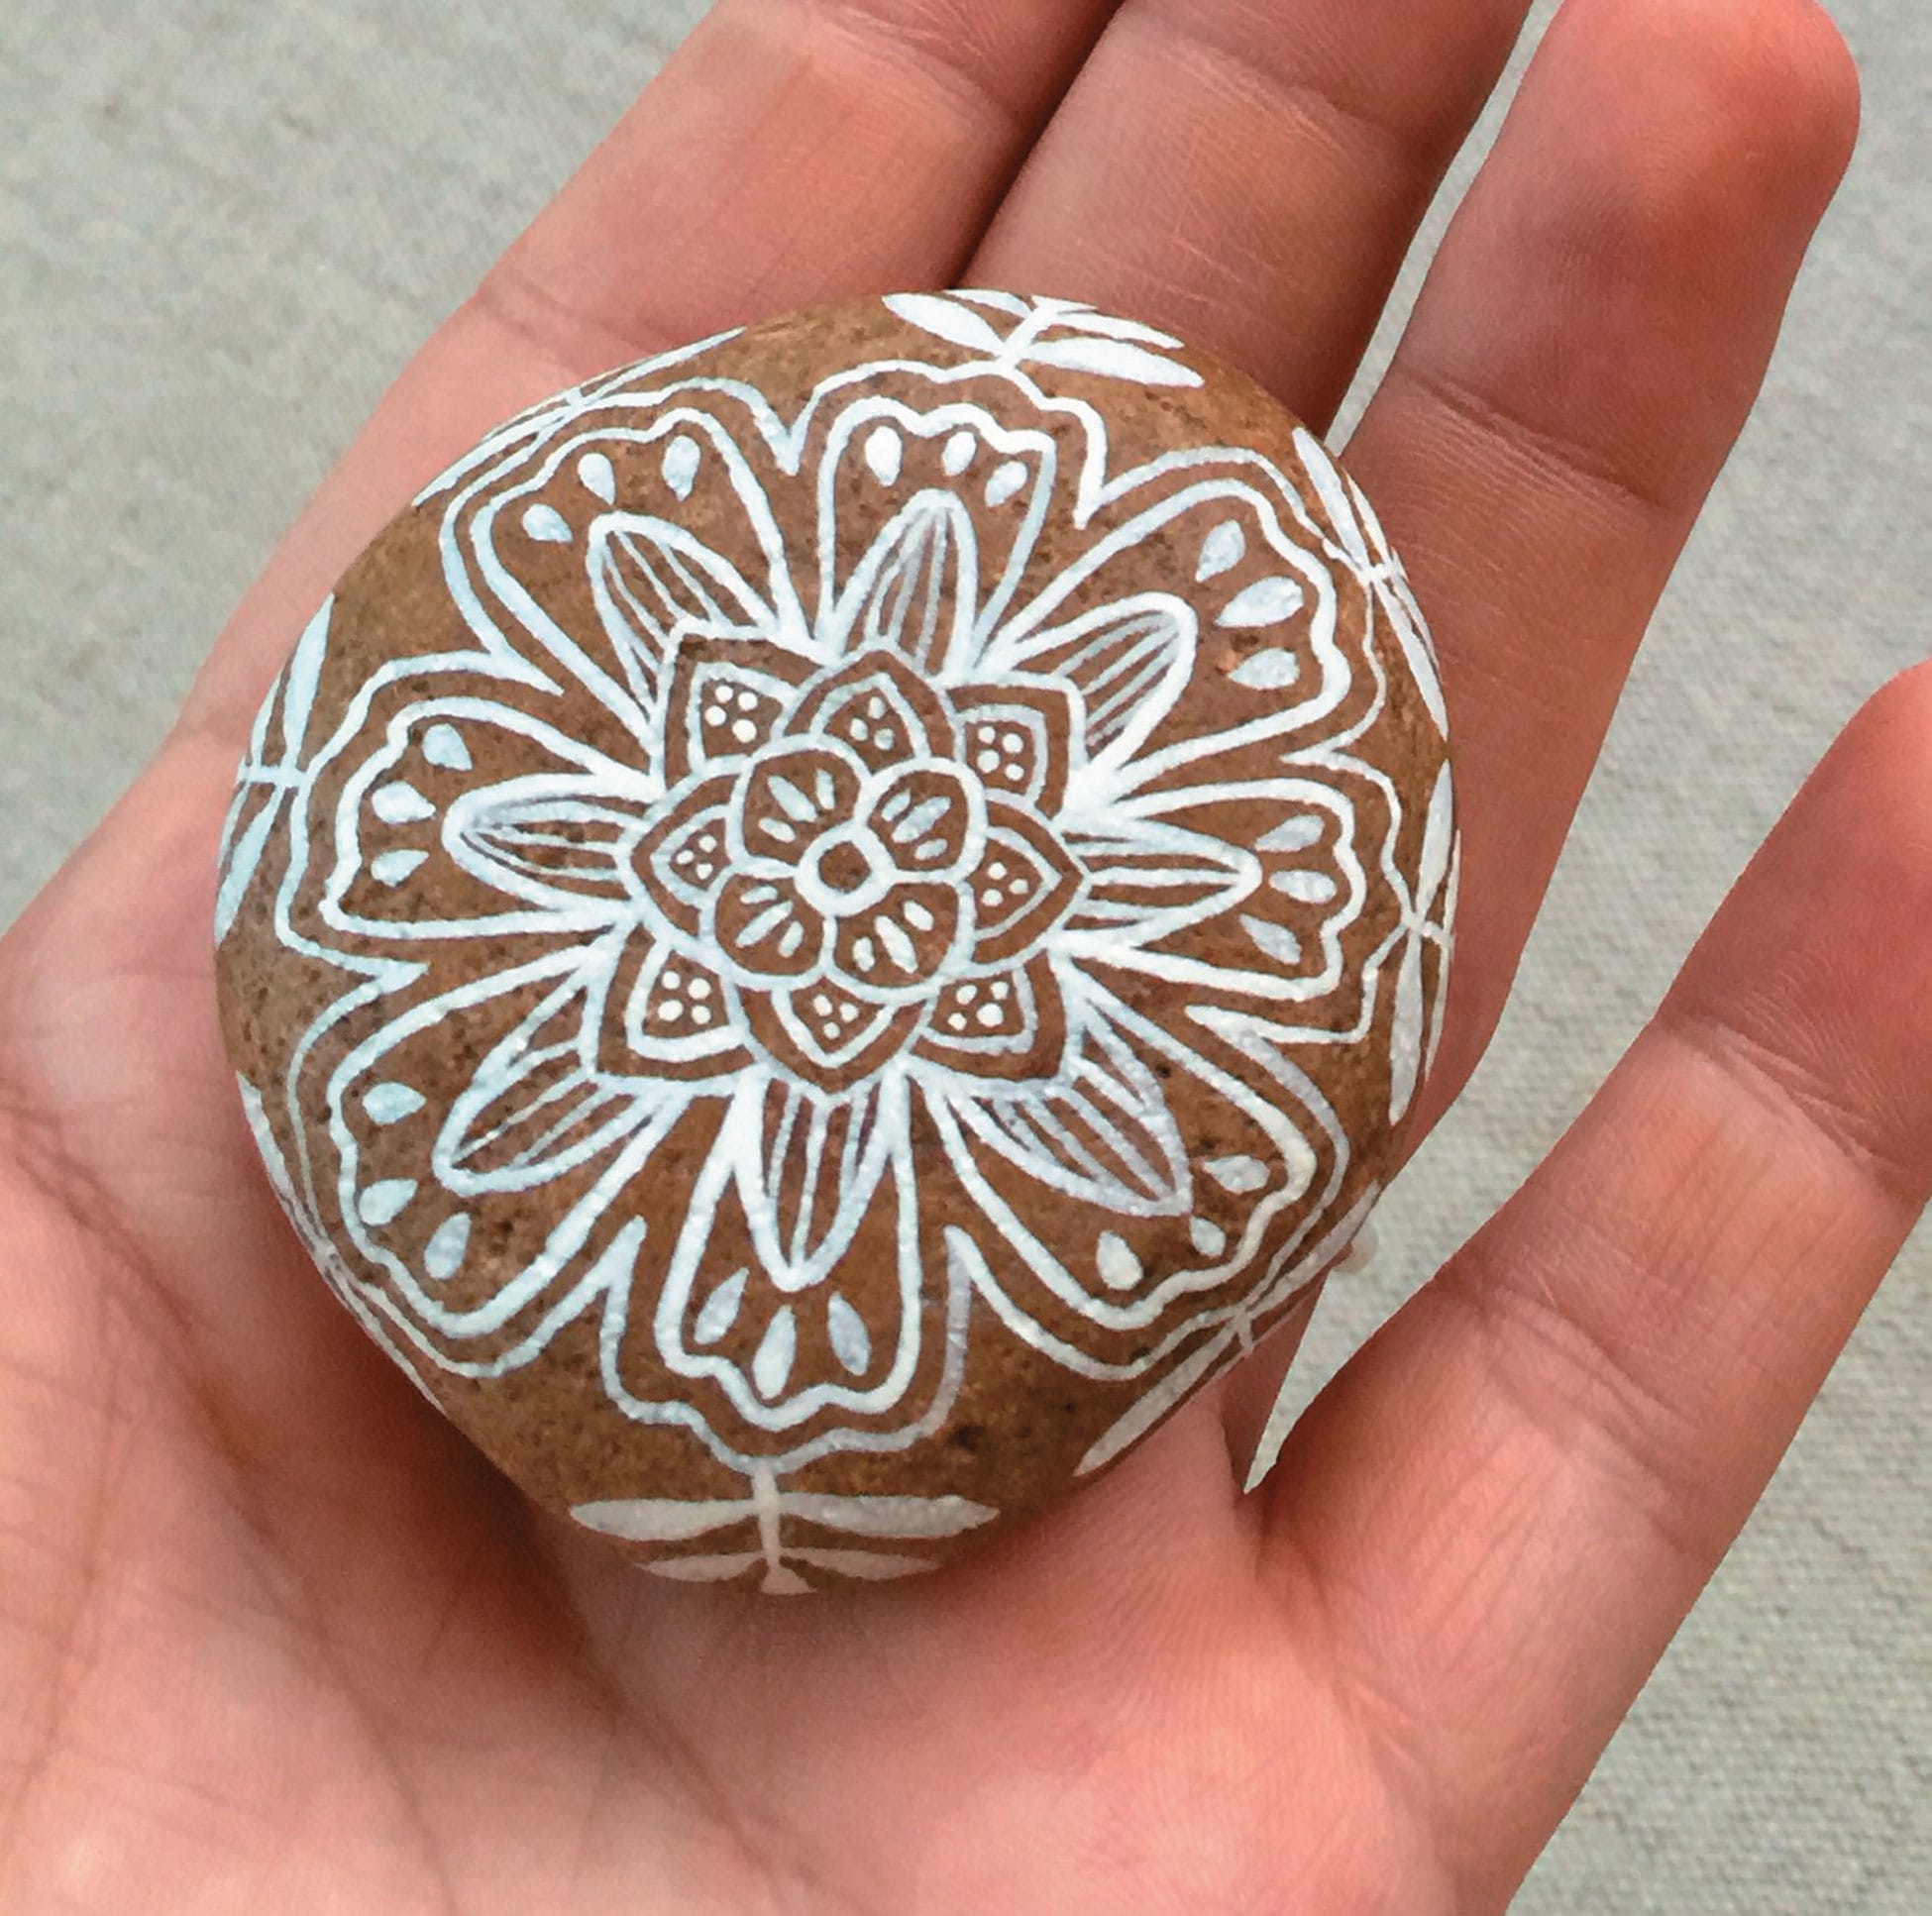
8 Refine the design of your flower wherever necessary. Adding a thin second layer of paint will make the whites brighter and more opaque. Let dry, and apply a thin layer of sealing varnish. Let dry, and add one more thin protective coat of varnish.
DANDELION

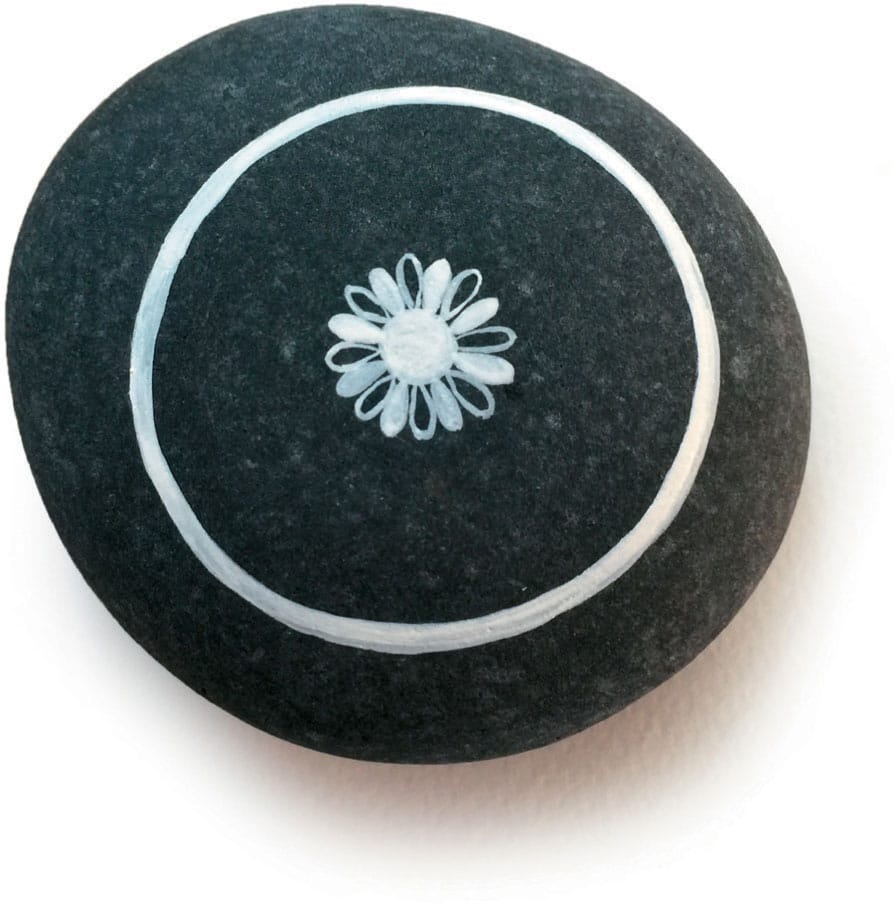
1 Apply a thin and even layer of varnish to your rock with your Filbert paintbrush. Once the varnish is dry, use a pencil to draw a light circle outline on your rock. Paint over your circle outline with a size 1 round paintbrush. Paint a dot in the center of the circle.

2 Begin painting 16 small dandelion spores around the dot with a size 00 paintbrush.
3 Fill every other spore in with paint.

4 Paint a straight, thin line from every other spore toward the outer circle, leaving a small space between the end of the line and the outer circle of the dandelion.

5 Fill the empty space with little dots.

6 Paint a single dot evenly between each line.
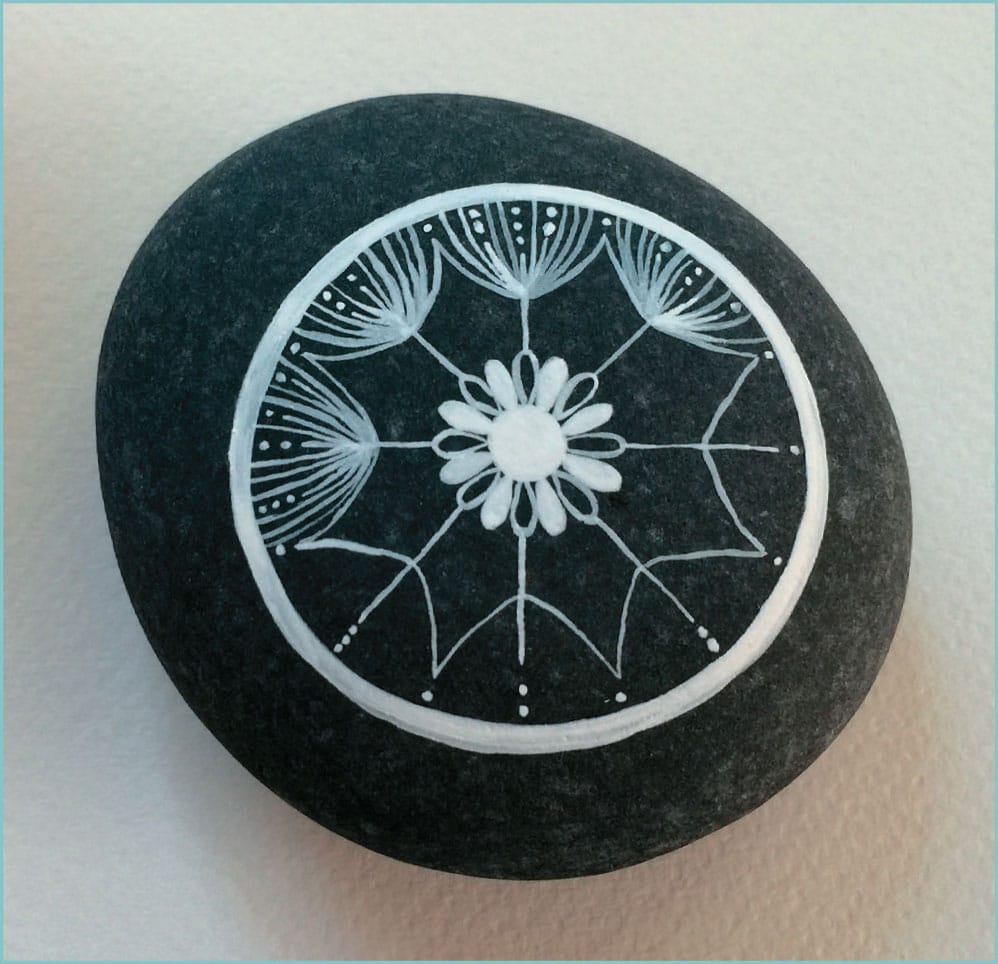
7 At the middle of each line, paint a curved line branching up to the outer circle. Repeat this process for each dandelion spore. Add small dot details to enhance your painting.

8 Touch up and refine the outer circle border of your dandelion, and anywhere else necessary. When your painting is finished, allow it to dry completely. Apply a thin layer of sealing varnish. Let dry, and add one more thin coat of varnish.
FEATHER
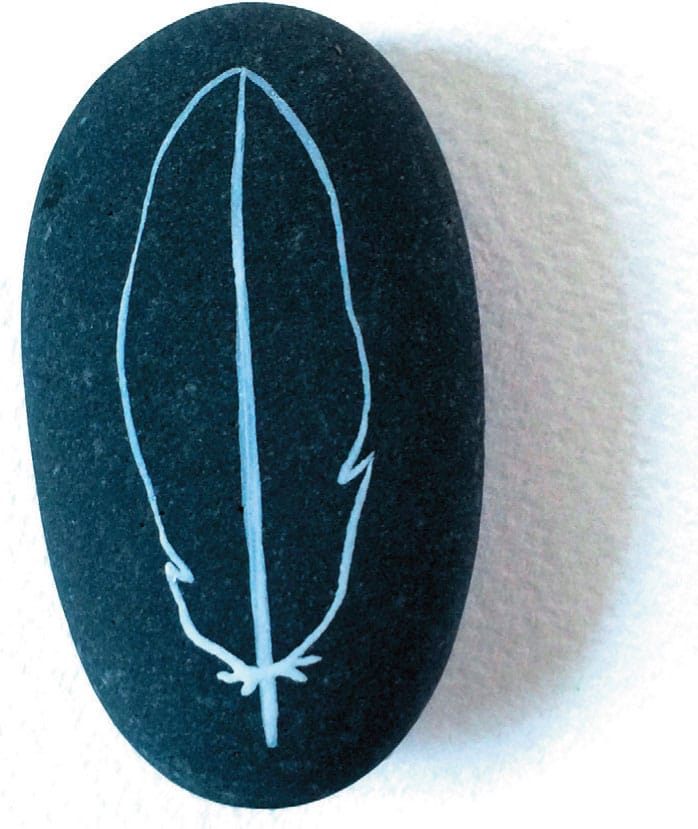
1 Choose an oval rock. Apply a thin and even layer of varnish to your rock with a Filbert brush. Once the varnish is dry, paint a thin, centered line on your rock with the size 1 round paintbrush. Paint a feather outline with a size 00 paintbrush. Use this brush for the remainder of the feather details.
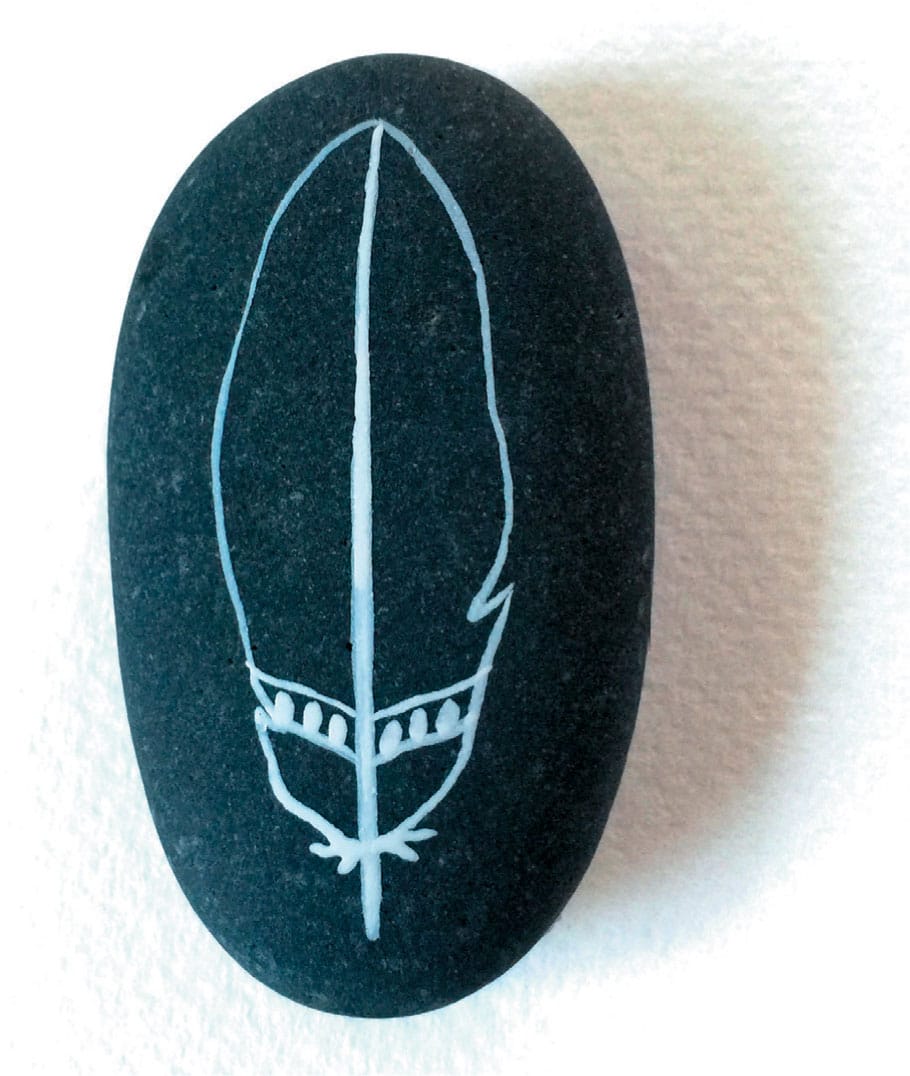
2 Begin your feather details at the base of the feather.
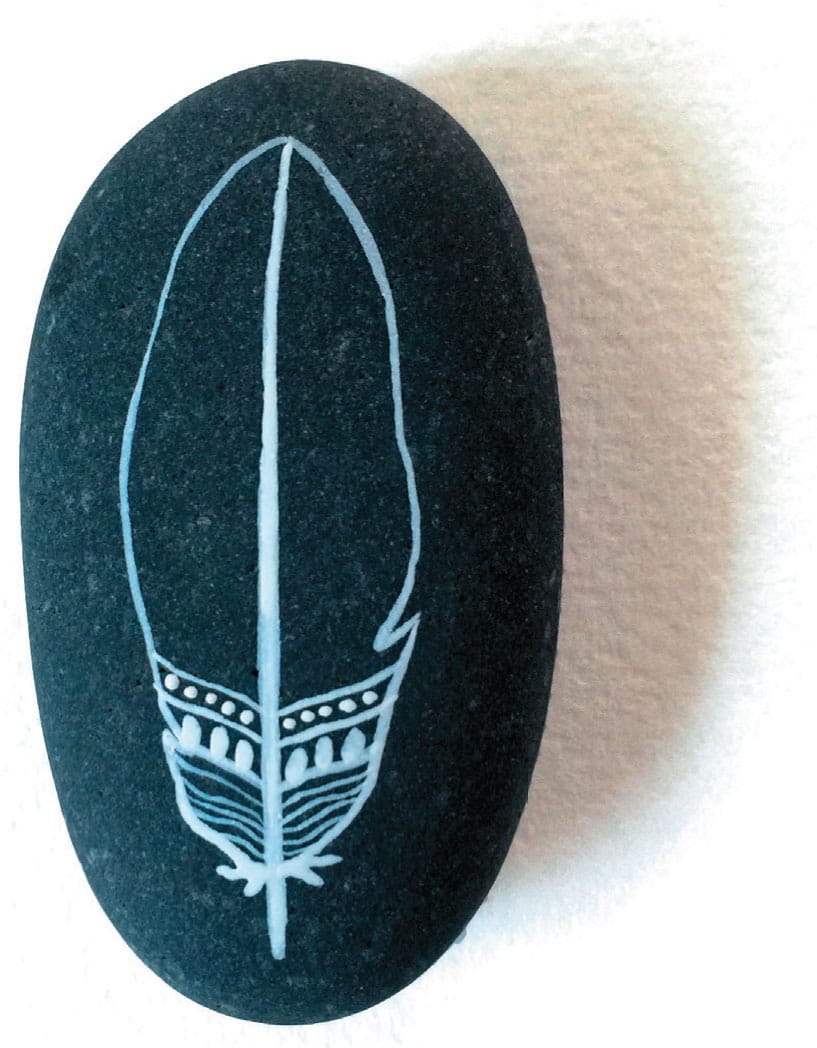
3 Continue to add small, decorative patterns to your feather, divided by sections, and work up to the middle of the feather.

4 Paint two triangular shapes at the center of the feather.

5 Add a few more lines to further divide the triangular shapes into additional sections.
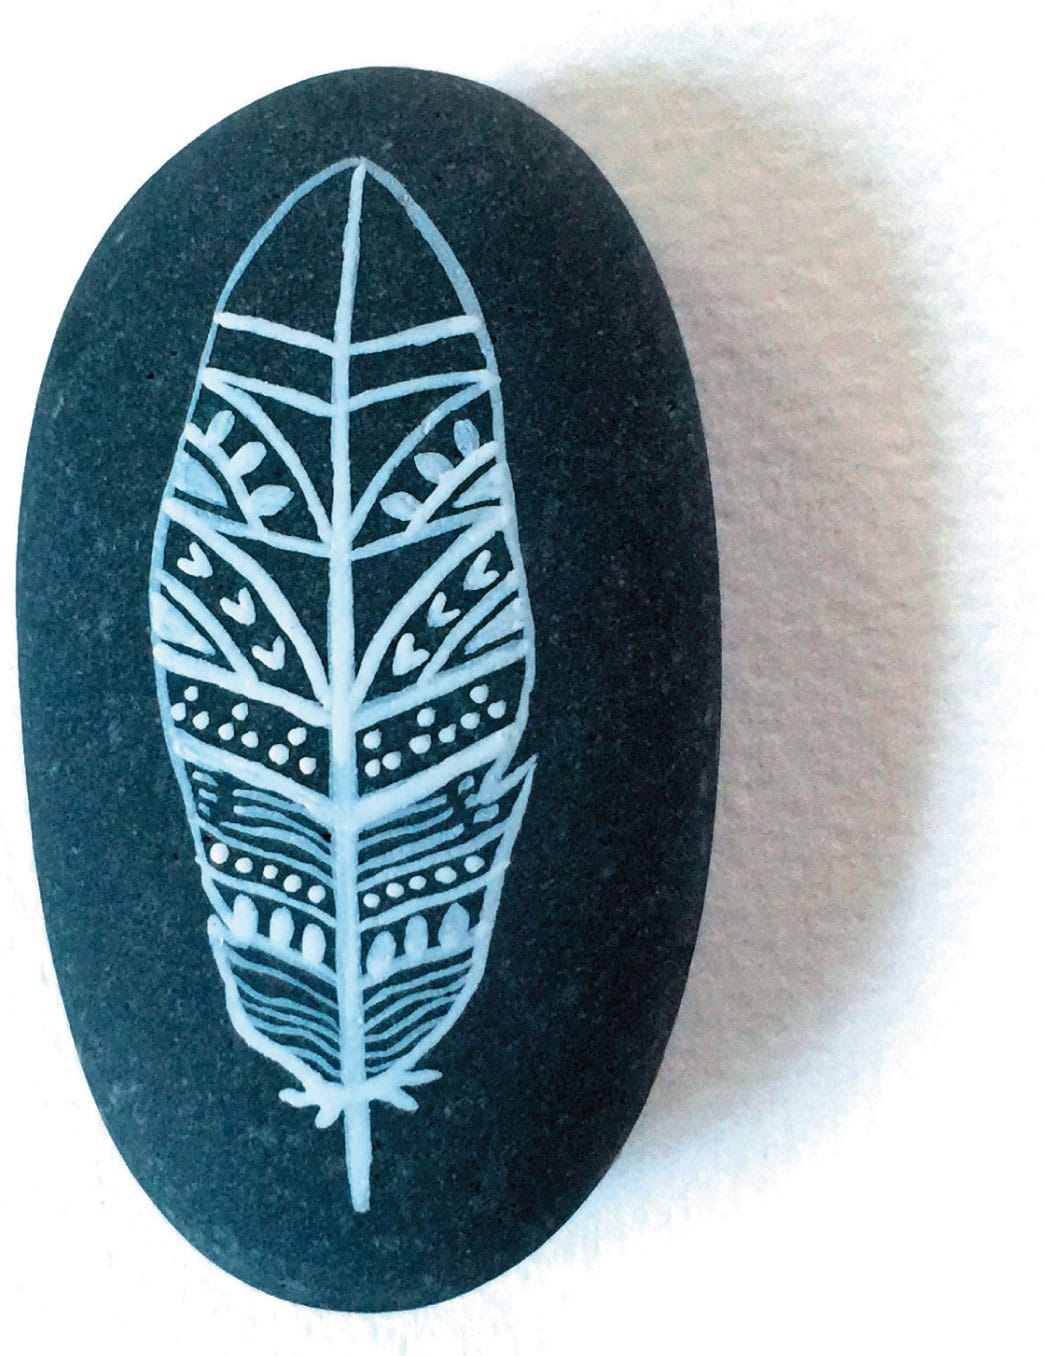
6 Paint decorative details within each section of the design.

7 Create your own unique feather by using various shapes (dots, triangles, and stars, for example).

8 Fill the tip of the feather with fine lines. When your painting is finished, allow it to dry completely. Apply a thin layer of sealing varnish. Let dry, and add one more thin coat of varnish.
RAINDROPS
1 Use a Filbert paintbrush to apply a thin and even layer of varnish to your rock. Once the varnish is dry, use a size 00 paintbrush to paint three equally spaced raindrops.
2 In the space between each raindrop, paint another set of three more raindrops.
3 Continue to add raindrops between each set.
4 Repeat this process three or four times, or more if you prefer to fill the rock.
5 Experiment and customize your rock by painting the drops in various sizes. Touch up and refine your painting with a thin second layer of paint. When your painting is finished, allow it to dry completely. Apply a thin layer of sealing varnish. Let dry, and add one more thin coat.
TREE RINGS

1 Choose a round rock. Apply a thin and even layer of varnish with a Filbert paintbrush. Once the varnish is dry, paint a circle on your rock using a size 1 paintbrush. Leave a bit of space and paint a second circle within the first using a 00 paintbrush.

2 Begin to paint circles within circles to look like the rings of a cut tree stump. The tree rings should be close together, but not touching.
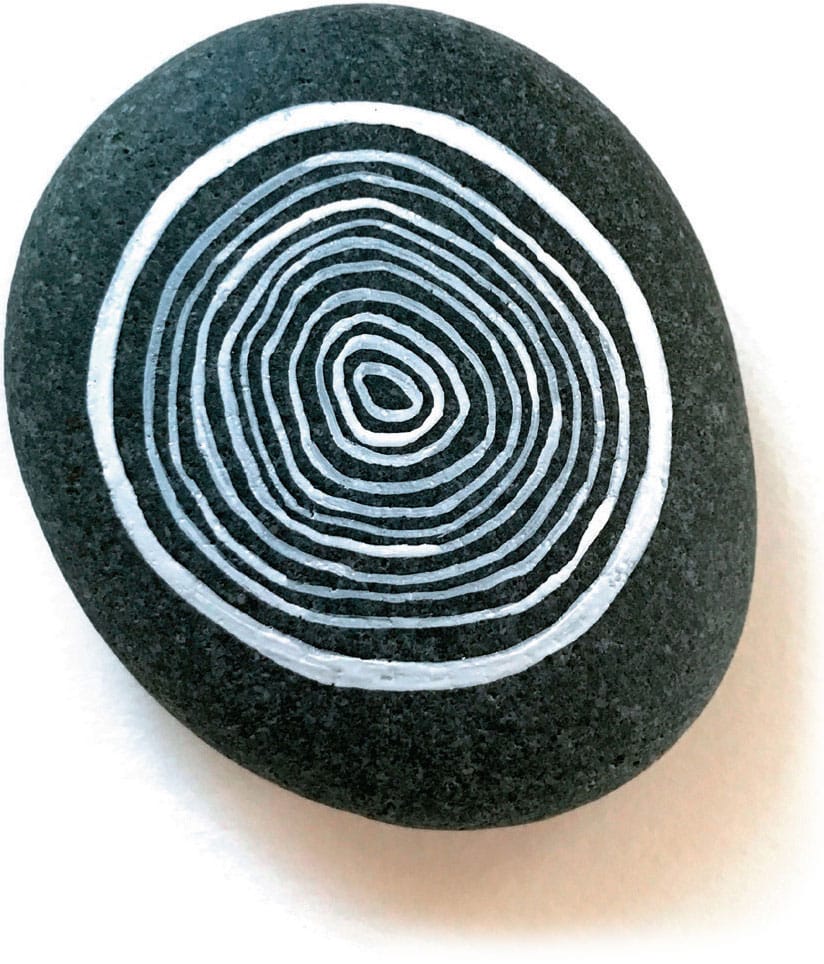
3 Continue to paint circles within circles until you’ve filled your tree stump with rings.
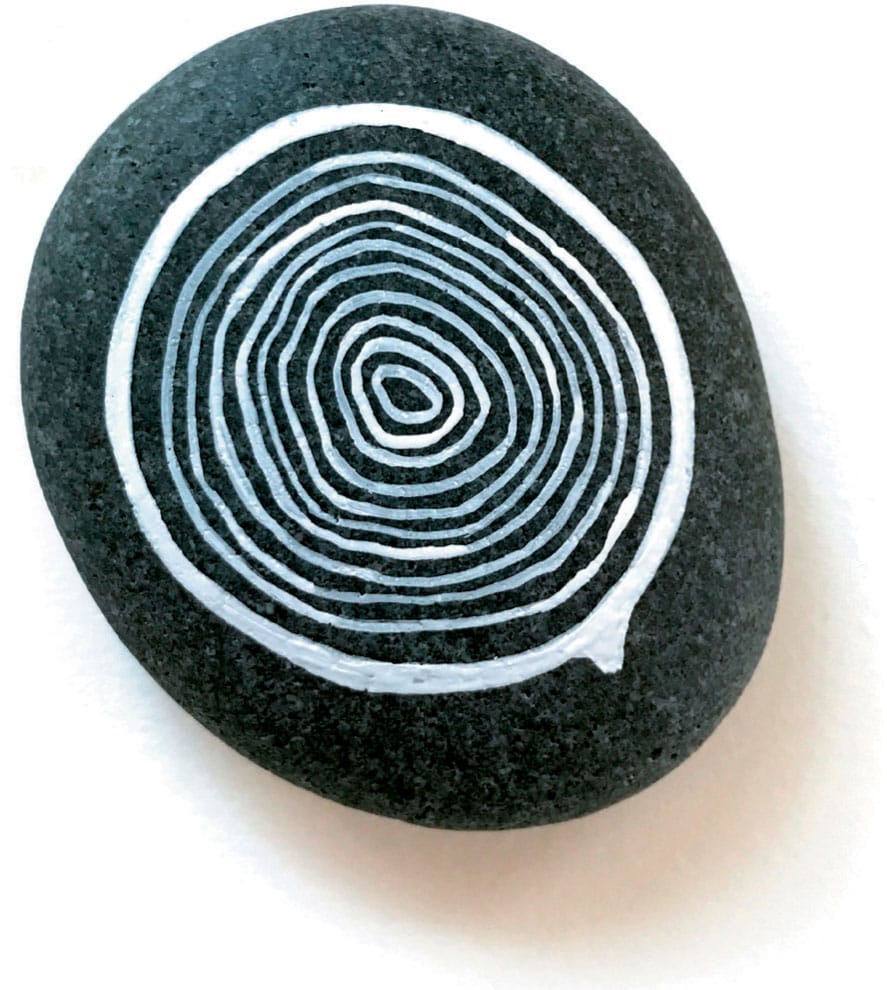
4 Paint a small branch from the outside of your circle.
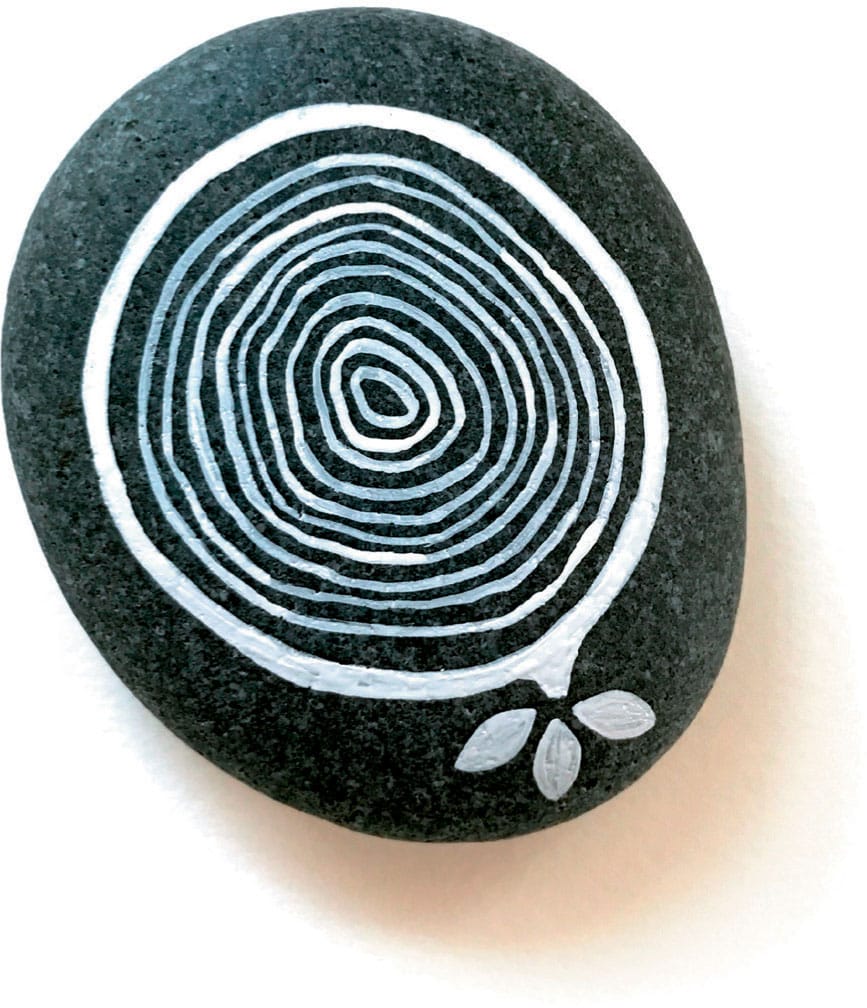
5 Add three small leaves growing from the branch. Touch up and refine the painting with a thin second layer of paint, wherever necessary. When your painting is finished, allow it to dry completely. Apply a thin layer of sealing varnish. Let dry, and add one more thin coat.
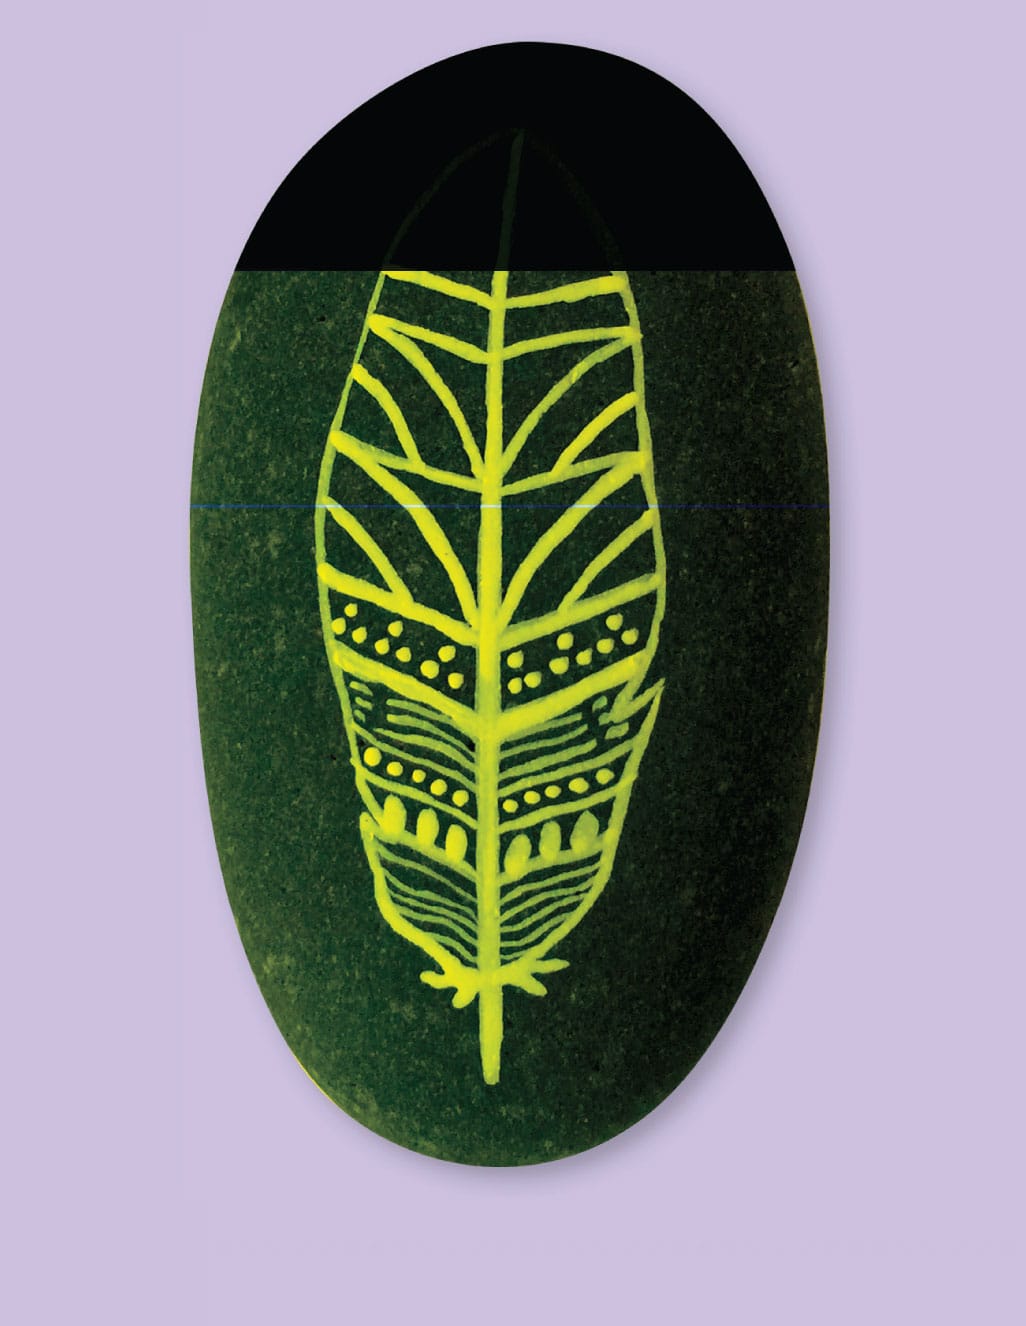
LEAF
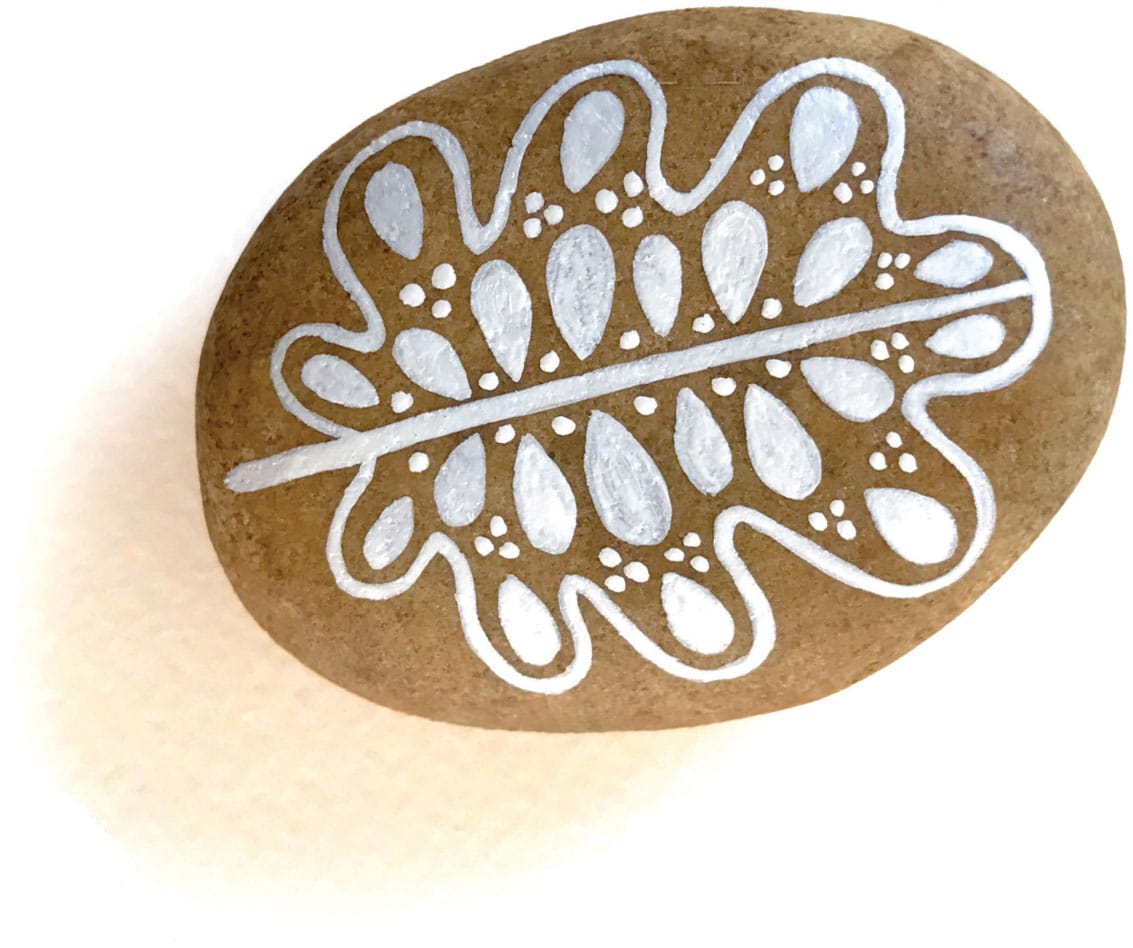

1 Choose an oval rock. Apply a thin and even layer of varnish to your rock with a Filbert brush. Once the varnish is dry, paint a straight line, centered on your rock, with a size 1 round paintbrush.

2 Paint a simple, curvy leaf outline.

3 Paint five teardrop shapes along each side of the leaf with a size 00 paintbrush.

4 Paint six teardrop shapes along each side of the center line of the leaf with a size 00 paintbrush.

5 Fill empty spaces on your leaf with small dots.
BUTTERFLY WING

1 Apply a thin and even layer of varnish to your rock with a Filbert paintbrush. When the varnish is dry, use your 00 paintbrush to paint a wing shape.
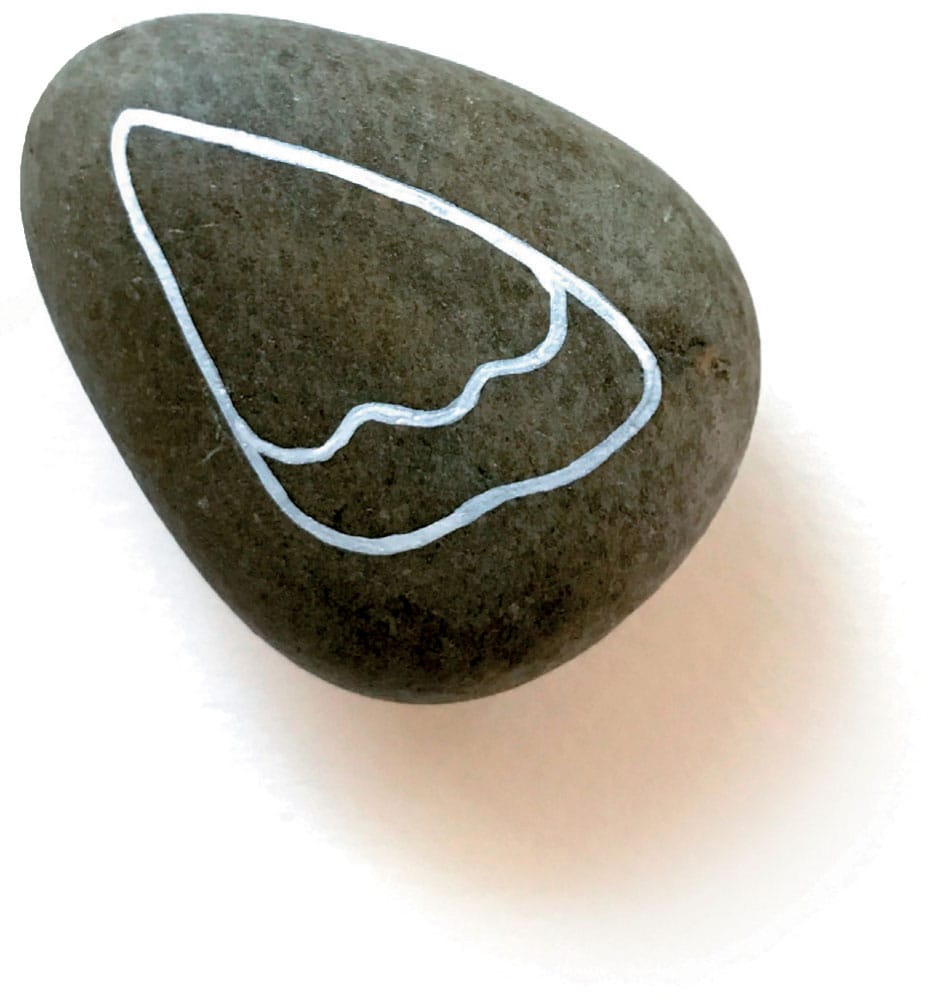
2 Paint a curvy line at the wide end of your wing that has three rounded points.

3 Add three small, U-shaped lines at the narrow tip of the wing.
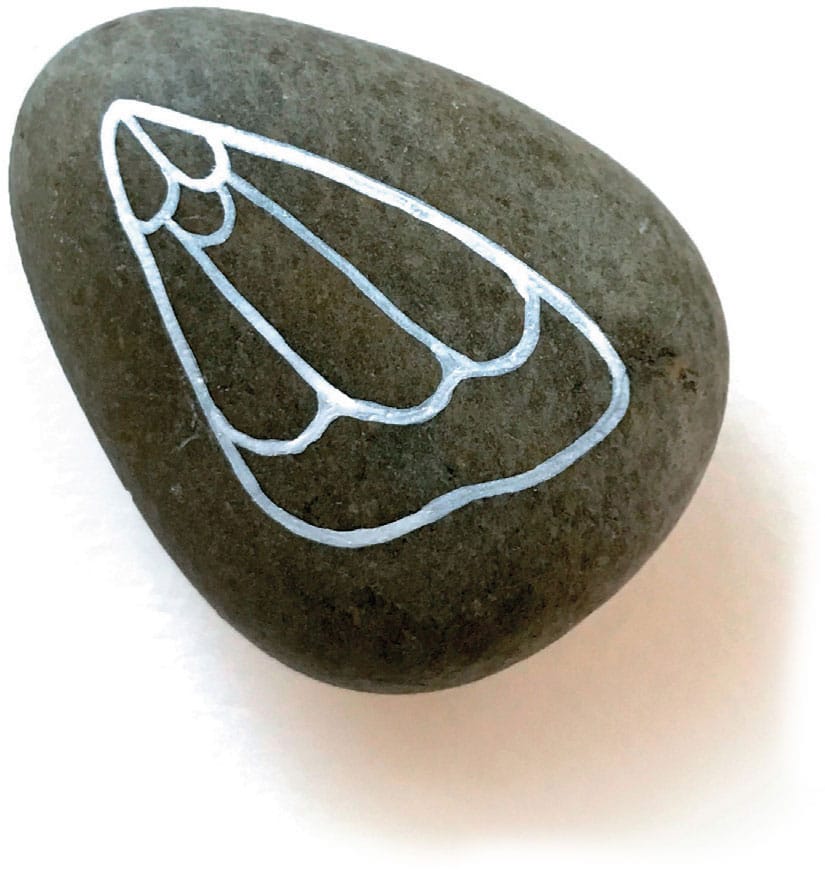
4 Paint two lines down the center of the wing, connecting the tip to the curved line at the wide end of the wing.

5 Paint circular shapes at the wide end of the wing. Once the space is filled, refine the design as you like.

6 Fill the middle section of the wing with natural-shaped lines.

7 Fill the middle section of the wing with tiny dots.
OWLET

1 Choose a smooth, oval-shaped rock and, after cleaning and drying, apply a single thin coat of varnish. Once the rock is dry, use a pencil to lightly outline your owl shape. Using your smallest round brush, paint over the pencil outline of your owl.

2 Paint your owl’s face and wing, as shown.

3 Using your smallest brush, take time to paint your owl’s eye. Every owl is unique; enjoy creating different expressions with your owl.
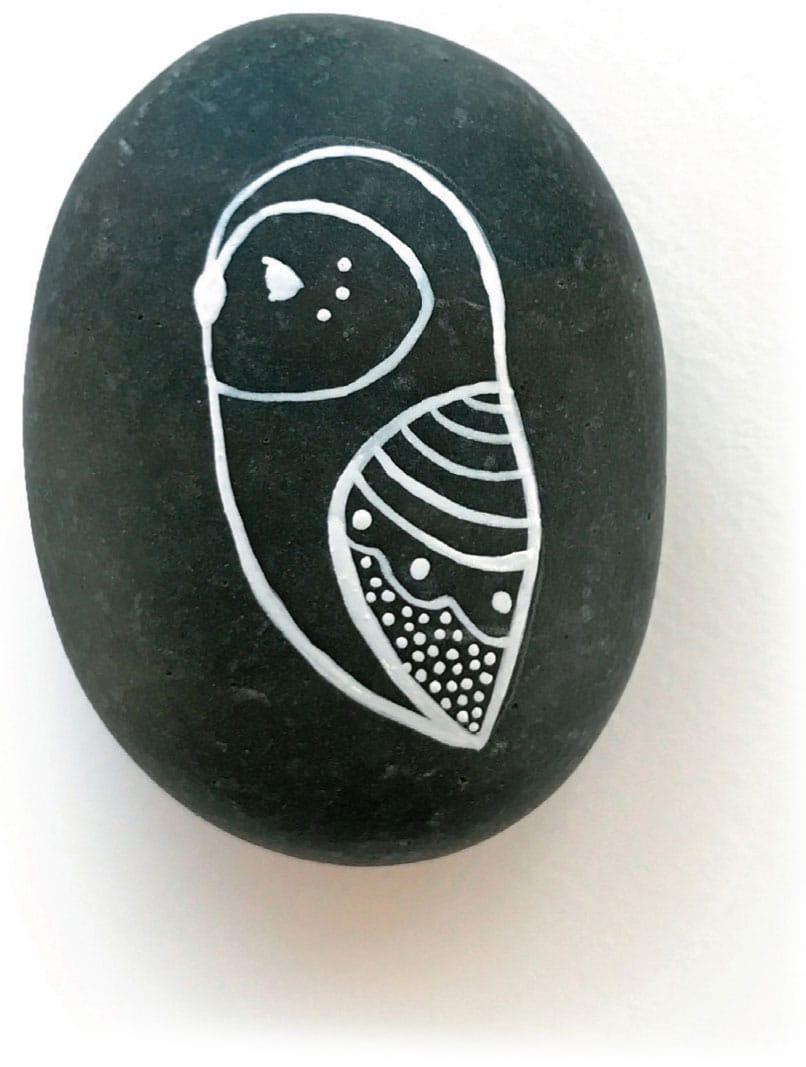
4 Begin adding fine details to your owl’s wing.

5 Fill in your owl’s body with paint, avoiding the face and wing.

6 Continue adding the final details to your owl’s wing. Create your own shapes and patterns and customize them to match your owl’s personality.