
TESTING
After you have created a Metro-style application, you can use Visual Studio to test it. As is the case with Windows Phone development, you have a couple of testing options.
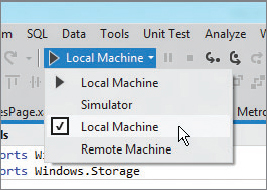
Visual Studio’s Standard toolbar has a drop-down that lets you select where you want to test the program. Figure 21-5 shows the drop-down expanded to show its choices: Local Machine, Simulator, and Remote Machine. Click the drop-down arrow on the right to make a selection and then click the body of the drop-down to start testing.
FIGURE 21-5: Use this drop-down in the Standard toolbar to determine where the application runs and to start it.
The Local Machine option makes the application fill your computer’s Metro interface. This is useful for testing the program as it would appear on your system.
The Simulator option makes the program run in the Microsoft Windows Simulator shown in Figure 21-6.
FIGURE 21-6: The Microsoft Windows Simulator lets you test Metro applications at different sizes and orientations.
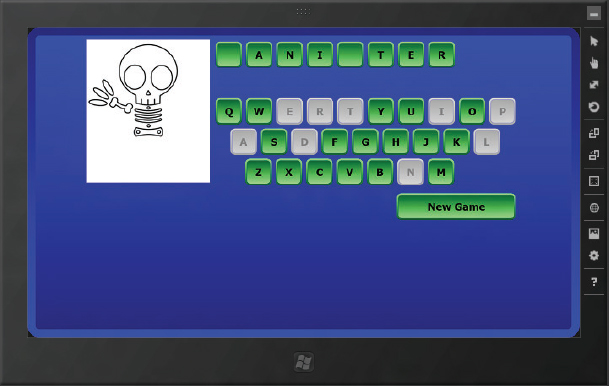
You can resize the simulator to see what your application would look like on different hardware platforms and you can use the simulator’s tools to test the application in different orientations.
The Microsoft Windows Simulator takes a while to start. When you try to close the simulator, it actually hides so Visual Studio can use it again when you test the program later.
The Remote Machine option lets you test an application on a machine other than the one where you are running Visual Studio. This is particularly useful for testing features that are not supported by your development machine. For example, you might be programming on a typical desktop system but want to test the program on a tablet that has a touch screen.