Internally, WPF leverages multithreading by executing the rendering and composition of elements on a separate thread from the UI thread. However, from the point of view of developers, it is fundamentally a single-threaded apartment (STA) model of threading, like the Windows Forms architecture. Initially, the WPF development team wanted to remove the dependency on the STA model, in favor of a mechanism of thread rental, whereby UI objects could be accessed on any thread. However, this design introduced substantial complexity for singlethreaded applications and made it more difficult to interoperate with existing services (such as the Win32 API, Clipboard, Internet Explorer, and so on).
The fact that WPF objects have STA threading means that they can be accessed only on the thread that created them. However, the .NET Framework provides great support for creating and using multiple threads, and the WPF team has exposed a number of useful classes and mechanisms to allow WPF developers to leverage multithreading within their applications.
The recipes in this chapter describe how to:
Schedule operations for execution on the UI thread (recipes 8-1, 8-2, and 8-3)
Check and ensure that code is running on the UI thread (recipes 8-4 and 8-5)
Execute a method asynchronously using a background thread (recipes 8-6, 8-7, 8-8, and 8-9)
Update the UI asynchronously on a thread-safe timer (recipe 8-10)
Show a continuous animation during an asynchronous process (recipe 8-11)
Show a progress bar while processing on a background thread (recipes 8-12, 8-13, and 8-14)
Implement
Application.DoEventsin WPF (recipe 8-15)Create a separate thread for each window in a multiwindow application (recipe 8-16)
Invoke the method on the Dispatcher property for a UI element, and specify a System.Windows.Threading.DispatcherPriority that is lower than the Render event (see Table 8-1).
In WPF, most objects ultimately derive from System.Windows.Threading.DispatcherObject, and only the thread that created a DispatcherObject may access that object. For example, a background thread cannot update the contents of a System.Windows.Controls.TextBox that was created on the UI thread.
The DispatcherObject has a method called BeginInvoke, which takes a System.Delegate as one of its parameters. When BeginInvoke is called, the Dispatcher will schedule this delegate for execution in its event queue. When it is due execution, the Dispatcher will execute this delegate on the same thread on which its owner was created. The BeginInvoke method is asynchronous and returns to the caller immediately.
The second parameter expected by BeginInvoke is a DispatcherPriority, which controls when the delegate is due execution. It does this by informing the Dispatcher of the priority of this event, relative to the other pending operations in the event queue. Events will be executed only when there are no higher priority events in the queue. This is useful for specifying that a certain process should be executed, for example, in the background or when the application is idle, but should not block more important events such as those concerned with loading or rendering the element.
Note
Microsoft Word accomplishes spell checking using this mechanism. Spell checking is done in the background using the idle time of the UI thread.
Table 8-1 shows the values of the DispatcherPriority enum in ascending order of priority. Because the Dispatcher executes the delegate in the same thread that was used to create the component, the code in the delegate can update and interact with the control. This is the simplest way possible of executing a method asynchronously, without exposing yourself to complex synchronization issues such as race conditions, deadlocks, live locks, and memory corruption. We will cover more advanced ways using the System.ComponentModel.BackgroundWorker later in this chapter.
Table 8-1. Dispatcher Priorities, Lowest to Highest
Name | Value |
|---|---|
| −1 |
| 0 |
| 1 |
| 2 |
| 3 |
| 4 |
| 5 |
| 6 |
| 7 |
| 8 |
| 9 |
| 10 |
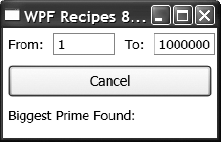
The following example demonstrates a simple application with a window containing a System.Windows.Controls.Button and a System.Windows.Controls.TextBlock. When the user clicks the Button, there is code in the code-behind that counts upward from 3, searching for prime numbers. When the program finds a prime number, it updates the TextBlock with the number. The user can click the Button again to stop the search.
The example schedules a prime number check on the window's Dispatcher property. It uses a DispatcherPriority of SystemIdle, which ensures that any pending UI events are processed in between each check.
The XAML for the window is as follows:
<Window x:Class="Recipe_08_01.Window1"
    xmlns="http://schemas.microsoft.com/winfx/2006/xaml/presentation"
    xmlns:x="http://schemas.microsoft.com/winfx/2006/xaml"
    Title="WPF Recipes 8_01" Width="220" Height="104" >
    <StackPanel Orientation="Vertical">
        <Button
            Click="StartStop_Click"
            Name="btnStartStop"
            Margin="5"
            Height="34">Start</Button>
        <StackPanel Orientation="Horizontal">
            <TextBlock Margin="5">Biggest Prime Found:</TextBlock>
            <TextBlock Name="txtBiggestPrime" Margin="5" />
        </StackPanel>
    </StackPanel>
</Window>
The code-behind for the window is as follows:
using System;
using System.Windows;
using System.Windows.Threading;
using Recipe_08_01;

namespace Recipe_08_01
{
    public partial class Window1 : Window
    {
        private bool continueCalculating = false;

        public Window1() : base()
        {
            InitializeComponent();
        }

        private void StartStop_Click(object sender, RoutedEventArgs e)
        {
            if(continueCalculating)
            {
                continueCalculating = false;
                btnStartStop.Content = "Start";
            }
            else
            {
                continueCalculating = true;
                btnStartStop.Content = "Stop";

                // Execute the CheckPrimeNumber method on
                // the current Dispatcher queue
                this.Dispatcher.BeginInvoke(
                    DispatcherPriority.Normal,
                    new Action<int>(CheckPrimeNumber), 3);
            }
        }

        public void CheckPrimeNumber(int current)
        {
            if(PrimeNumberHelper.IsPrime(current))
            {
                txtBiggestPrime.Text = current.ToString();
            }
if(continueCalculating)
{
// Execute the CheckPrimeNumber method
// again, using a lower DispatcherPriority
this.Dispatcher.BeginInvoke(
DispatcherPriority.SystemIdle,
new Action<int>(CheckPrimeNumber), current + 2);
}
}
}
}The code in the PrimeNumberHelper class that searches for prime numbers is omitted for the sake of brevity, but the full code is available with the online examples for this chapter.
Figure 8-1 shows the resulting window. If you resize the window whilst the calculation is running, you can see that whilst the calculation slows down, the repainting of the window does not. This is because the paint messages are given higher priority by the dispatcher queue.
You need to show a window or control that loads a lot of data and have it load the data after the control has finished loading and rendering correctly.
In the Loaded event of the window or control, execute the method to load the data by calling the BeginInvoke method of the System.Windows.Threading.DispatcherObject for the UI element, and specify a System.Windows.Threading.DispatcherPriority of Background.
Suppose you have a window or control that displays some data and it takes a noticeable amount of time to generate and display this data. If you execute the method that loads this data in the window or control's constructor, then the entire UI element will not be displayed until after the method has completed. Furthermore, if you execute the method in the Loaded event, then whilst the control or window will be displayed immediately, it will not be rendered correctly until the data has finished being loaded.
When you use the BeginInvoke method of a window or control's Dispatcher property, it adds the delegate to the Dispatcher's event queue but gives you the opportunity to specify a lower priority for it. This ensures that the Dispatcher processes all loading and rendering events before executing the delegate that loads the data. This allows the control or window to be displayed and rendered immediately, whilst the data waits in the background to be loaded.
The following example displays a window containing a System.Windows.Controls.TextBlock and a System.Windows.Controls.ListBox. In the code-behind for the window, there is a method called LoadNumbers, which generates a list of 1 million numbers and sets them as the ItemsSource for the ListBox.
The XAML for the window is as follows:
<Window x:Class="Recipe_08_02.Window1"
    xmlns="http://schemas.microsoft.com/winfx/2006/xaml/presentation"
    xmlns:x="http://schemas.microsoft.com/winfx/2006/xaml"
    Title="WPF Recipes 8_02" Height="200" Width="300"
    Loaded="Window_Loaded">
    <Grid>
        <Grid.RowDefinitions>
            <RowDefinition Height="24"/>
            <RowDefinition />
        </Grid.RowDefinitions>

        <TextBlock Margin="4">
            One Million Numbers:
        </TextBlock>

        <ListBox x:Name="listBox"
               Grid.Row="1"
               />
    </Grid>
</Window>
In the code-behind, there are comments that show three possible ways of calling the LoadNumbers method. If you uncomment any one of the three options and comment out the other two, you can see the effect on the loading and rendering of the window. Option 3 is the one that is uncommented by default, and it is the only option that allows the window to be loaded and rendered correctly, before trying to generate and display the million numbers.
It works by calling the BeginInvoke method of the window's Dispatcher property and setting a DispatcherPriority of Background. The code-behind is as follows:
using System.Windows;
using System.Windows.Threading;
using System.Collections.Generic;
namespace Recipe_08_02
{
    public partial class Window1 : Window
    {
        public Window1()
        {
            InitializeComponent();

            // Option 1.
            // If LoadNumbers is called here, the window
            // doesn't show until the method has completed.
            //
            // LoadNumbers();
        }

        private void Window_Loaded(object sender, RoutedEventArgs e)
        {
            // Option 2.
            // If LoadNumbers is called here, the window
            // loads immediately, but it doesn't display
            // properly until the method has completed.
            //
            // LoadNumbers();

            // Option 3.
            // If LoadNumbers is invoked here on the
            // window's Dispatcher with a DispatcherPriority of
            // Background, the window will load and be displayed
            // properly immediately, and then the list of numbers
            // will be generated and displayed once the
            // method has completed.
            //
            this.Dispatcher.BeginInvoke(
                DispatcherPriority.Background,
                new LoadNumbersDelegate(LoadNumbers));
        }

        // Declare a delegate to wrap the LoadNumbers method
        private delegate void LoadNumbersDelegate();

        // Load one million numbers into a list and
        // set it as the ItemsSource for the ListBox
        private void LoadNumbers()
        {
            List<string> numberDescriptions = new List<string>();
for(int i = 1; i <= 1000000; i++)
{
numberDescriptions.Add("Number " + i.ToString());
}
// Set the ItemsSource
listBox.ItemsSource = numberDescriptions;
}
}
}Figure 8-2 shows the resulting window.

You need to show a System.Windows.Controls.ListBox, or any System.Windows.Controls.ItemsControl, and load its data one item at a time, allowing the window to receive other input, binding, and rendering events whilst the items are loading.
In the Loaded event of the window or control, execute the method to load the first item of data by calling the BeginInvoke method of the System.Windows.Threading.DispatcherObject for the UI element, and specify a System.Windows.Threading.DispatcherPriority of Background. When this method has finished generating the data and adding it to the list, add the same method to the Dispatcher's queue recursively, each time adding just one item and then queuing the call to add the next one with a DispatcherPriority of Background.
Suppose you have a window or control that displays some data and it takes a noticeable amount of time to generate and display this data. If you have one method that loads all the data at one go, then none of the data will appear until the entire list has been loaded.
When you use the BeginInvoke method of a window or control's Dispatcher property, it adds the delegate to the Dispatcher's event queue but gives you the opportunity to specify a lower priority for it. By executing a method that loads just one item at a time, the window is given the chance to execute any other higher-priority events in between items. This allows the control or window to be displayed and rendered immediately and loads each item one at a time.
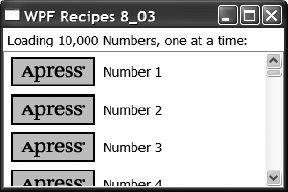
The following example displays a window containing a System.Windows.Controls.TextBlock and a System.Windows.Controls.ListBox. In the code-behind for the window, the ListBox is bound to a System.Collections.ObjectModel.ObservableCollection of strings. The ObservableCollection class represents a dynamic collection that provides notifications when items get added, when items get removed, or when the whole list is refreshed. There is a method called LoadNumber, which adds a number to this list, increments the number, and calls itself recursively 10,000 times. Each time LoadNumber is called, it is executed by a delegate that is added to the window's Dispatcher queue, using a priority of Background. This means any higher-priority events added to the queue while the list items are being generated, such as events concerned with input, loading, binding, or rendering, are executed first.
The XAML for the window is as follows:
<Window x:Class="Recipe_08_03.Window1"
    xmlns="http://schemas.microsoft.com/winfx/2006/xaml/presentation"
    xmlns:x="http://schemas.microsoft.com/winfx/2006/xaml"
    Title="WPF Recipes 8_03" Height="200" Width="300"
    Loaded="Window_Loaded">

    <Window.Resources>
        <DataTemplate
        x:Key="ListItemTemplate">
        <StackPanel
            Orientation="Horizontal">
            <Image
                Margin="4"
                Source="Apress.gif"
                />
            <TextBlock
                Margin="4"
                Text="{Binding}"
                VerticalAlignment="Center"
                />
        </StackPanel>
    </DataTemplate>
</Window.Resources>

<Grid>
<Grid.RowDefinitions>
<RowDefinition Height="24"/>
<RowDefinition />
</Grid.RowDefinitions>
<TextBlock
Margin="4">
Loading 10,000 Numbers, one at a time:
</TextBlock>
<ListBox
x:Name="listBox"
Grid.Row="1"
ItemTemplate=
"{StaticResource ListItemTemplate}"
/>
</Grid>
</Window>The code-behind is as follows:
using System.Collections.ObjectModel;
using System.Windows;
using System.Windows.Threading;

namespace Recipe_08_03
{
    public partial class Window1 : Window
    {
        // ObservableCollection of strings
        private ObservableCollection<string> numberDescriptions;

        public Window1()
        {
            InitializeComponent();
        }

        private void Window_Loaded(object sender, RoutedEventArgs e)
        {
            // Initialize an ObservableCollection of strings
            numberDescriptions =
                new ObservableCollection<string>();

            // Set it as the ItemsSource for the ListBox
            listBox.ItemsSource = numberDescriptions;
// Execute a delegate to load
// the first number on the UI thread, with
// a priority of Background.
//
this.Dispatcher.BeginInvoke(
DispatcherPriority.Background,
new LoadNumberDelegate(LoadNumber), 1);
}
// Declare a delegate to wrap the LoadNumber method
private delegate void LoadNumberDelegate(int number);
private void LoadNumber(int number)
{
// Add the number to the observable collection
// bound to the ListBox
numberDescriptions.Add("Number " + number.ToString());
if(number < 10000)
{
// Load the next number, by executing this method
// recursively on the dispatcher queue, with
// a priority of Background.
//
this.Dispatcher.BeginInvoke(
DispatcherPriority.Background,
new LoadNumberDelegate(LoadNumber), ++number);
}
}
}
}Figure 8-3 shows the resulting window.
You need to determine whether the code being executed is running on the UI thread. This is necessary, for example, if the code needs to interact with a UI element. In such a case, if the code is not running on the UI thread, it will cause a System.InvalidOperationException, with the error message "The calling thread cannot access the object because a different thread owns it."
System.Windows.UIElement inherits from System.Windows.Threading.DispatcherObject, which exposes a System.Windows.Threading.Dispatcher property. The Dispatcher class has a method called CheckAccess that returns True if the calling thread is the current thread and False if not.
Tip
This CheckAccess method is the WPF equivalent of the InvokeRequired property of the Control object in Windows Forms, which shares similar thread-affinity rules to WPF.
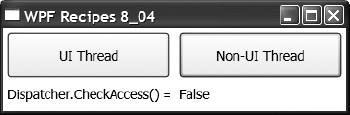
The following example displays a window containing two System.Windows.Controls.Button controls and a System.Windows.Controls.TextBox. In the code-behind for the window, there is a method called CheckAccess that calls the CheckAccess method of the TextBox's Dispatcher property. In the click event for the button on the left, this CheckAccess method is called on the UI thread. In the click event for the button on the right, the method is invoked asynchronously using the BeginInvoke method of a delegate. The result of the call to Dispatcher.CheckAccess is then displayed in the TextBox.
The XAML for the window is as follows:
<Window x:Class="Recipe_08_04.Window1"
    xmlns="http://schemas.microsoft.com/winfx/2006/xaml/presentation"
    xmlns:x="http://schemas.microsoft.com/winfx/2006/xaml"
    Title="WPF Recipes 8_04" Height="120" Width="364">
    <Grid>
      <Grid.ColumnDefinitions>
          <ColumnDefinition/>
          <ColumnDefinition/>
      </Grid.ColumnDefinitions>
<Grid.RowDefinitions>
<RowDefinition/>
<RowDefinition Height="30"/>
</Grid.RowDefinitions>
<Button
Grid.Column="0"
Click="ButtonTrue_Click"
Margin="4">
UI Thread
</Button>
<Button
Grid.Column="1"
Click="ButtonFalse_Click"
Margin="4">
Non-UI Thread
</Button>
<TextBlock
Grid.Row="1"
Margin="4">
Dispatcher.CheckAccess() =
</TextBlock>
<TextBlock
x:Name="txtResult"
Grid.Row="1"
Grid.Column="1"
Margin="4"
/>
lt;/Grid>
</Window>The code for the window is as follows:
using System.Windows;
using System.Windows.Threading;

namespace Recipe_08_04
{
    public partial class Window1 : Window
    {
        public Window1()
        {
            InitializeComponent();
        }
private void ButtonTrue_Click(object sender, RoutedEventArgs e)
{
// Call CheckAccess on the UI thread
CheckAccess();
}
private void ButtonFalse_Click(object sender, RoutedEventArgs e)
{
// Invoke a call to CheckAccess
// on a different thread
CheckAccessDelegate del =
new CheckAccessDelegate(CheckAccess);
del.BeginInvoke(null, null);
}
// Declare a delegate to wrap the CheckAccess method
private delegate void CheckAccessDelegate();
// Declare a delegate to wrap the SetResultText method
private delegate void SetResultTextDelegate(string result);
private void CheckAccess()
{
// Check if the calling thread is in the UI thread
if(txtResult.Dispatcher.CheckAccess())
{
SetResultText("True");
}
else
{
// The calling thread does not have access to the UI thread.
// Execute the SetResult method on the Dispatcher of the UI thread.
txtResult.Dispatcher.BeginInvoke(
DispatcherPriority.Normal,
new SetResultTextDelegate(SetResultText),
"False");
}
}
private void SetResultText(string result)
{
// Display the result of the CheckAccess method
txtResult.Text = result;
}
}
}Figure 8-4 shows the resulting window.
You need to verify that the code being executed is running on the UI thread and throw an exception if not.
System.Windows.UIElement inherits from System.Windows.Threading.DispatcherObject, which exposes a System.Windows.Threading.Dispatcher property. The Dispatcher class has a method called VerifyAccess that throws a System.InvalidOperationException if the calling thread is not the current thread.
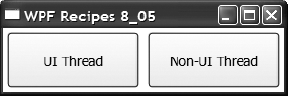
The following example displays a window containing two System.Windows.Controls.Button controls. In the code-behind for the window, there is a method called VerifyAccess that calls the VerifyAccess method of the window's Dispatcher property. In the click event for the button on the left, this VerifyAccess method is called on the UI thread. In the click event for the button on the right, the method is invoked asynchronously using the BeginInvoke method of a delegate. This results in an InvalidOperationException with an error message stating that "The calling thread cannot access this object because a different thread owns it."
The XAML for the window is as follows:
<Window x:Class="Recipe_08_05.Window1"
    xmlns="http://schemas.microsoft.com/winfx/2006/xaml/presentation"
    xmlns:x="http://schemas.microsoft.com/winfx/2006/xaml"
    Title="WPF Recipes 8_05" Height="100" Width="300">
<Grid>
<Grid.ColumnDefinitions>
<ColumnDefinition/>
<ColumnDefinition/>
</Grid.ColumnDefinitions>
<Button
Grid.Column="0"
Click="ButtonTrue_Click"
Margin="4">
UI Thread
</Button>
<Button
Grid.Column="1"
Click="ButtonFalse_Click"
Margin="4">
Non-UI Thread
</Button>
</Grid>
</Window>The code for the window is as follows:
using System.Windows;

namespace Recipe_08_05
{
    public partial class Window1 : Window
    {
        public Window1()
        {
            InitializeComponent();
        }

        private void ButtonTrue_Click(object sender, RoutedEventArgs e)
        {
            // Call VerifyAccess on the UI thread
            VerifyAccess();
        }

        private void ButtonFalse_Click(object sender, RoutedEventArgs e)
        {
            // Invoke a call to VerifyAccess
            // on a different thread
VerifyAccessDelegate del =
new VerifyAccessDelegate(VerifyAccess);
del.BeginInvoke(null, null);
}
// Declare a delegate to wrap the VerifyAccess method
private delegate void VerifyAccessDelegate();
private void VerifyAccess()
{
this.Dispatcher.VerifyAccess();
}
}
}Figure 8-5 shows the resulting window.
Create an instance of the System.ComponentModel.BackgroundWorker class, attach event handlers to its DoWork and RunWorkerCompleted events, and call the RunWorkerAysnc method to start the background thread.
The BackgroundWorker component gives you the ability to execute time-consuming operations asynchronously. It automatically executes the operation on a different thread to the one that created it and then automatically returns control to the calling thread when it is completed.
The BackgroundWorker's DoWork event specifies the delegate to execute asynchronously. It is this delegate that is executed on a background thread when the RunWorkerAsync method is called. When it has completed the operation, it calls the RunWorkerCompleted event and executes the attached delegate on the same thread that was used to create it.
The DoWork method takes an argument of type System.ComponentModel.DoWorkEventArgs, which allows you to pass an argument to the method. The RunWorkerCompleted event is passed an instance of the System.ComponentModel.RunWorkerCompletedEventArgs class, which allows you to receive the result of the background process and any error that might have been thrown during processing.
If the BackgroundWorker object is created on the UI thread, for example, in the constructor method for a window or control, then you can access and update the UI in the RunWorkerCompleted event without having to check that you are on UI thread again. The BackgroundWorker object handles all the thread marshaling for you.
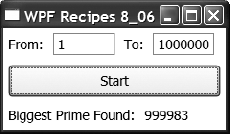
The following example creates a window with two System.Windows.Controls.TextBlock controls and a System.Windows.Controls.Button. The values in the TextBlock controls specify a range of numbers. In the constructor for the window, an instance of the BackgroundWorker class is created, and event handlers are attached to its DoWork and the RunWorkerCompleted events.
When the Button is clicked, the RunWorkerAsync method is called, which starts the BackgroundWorker and executes the DoWork event. In the code for this event, a PrimeNumberHelper class is used to search for the largest prime number within the range of numbers. When it finishes, the code for the RunWorkerCompleted event is executed, which updates a System.Windows.Controls.TextBlock on the window.
The XAML for the window is as follows:
<Window x:Class="Recipe_08_06.Window1"
        xmlns="http://schemas.microsoft.com/winfx/2006/xaml/presentation"
        xmlns:x="http://schemas.microsoft.com/winfx/2006/xaml"
        Title="WPF Recipes 8_06" Width="240" Height="140" >
        <StackPanel Orientation="Vertical">
        <StackPanel Orientation="Horizontal">
            <TextBlock Margin="5" VerticalAlignment="Center">From:</TextBlock>
            <TextBox Name="txtFrom" Margin="5" Width="64" Text="1" />
            <TextBlock Margin="5" VerticalAlignment="Center">To:</TextBlock>
            <TextBox Name="txtTo" Margin="5" Width="64" Text="1000000"/>
        </StackPanel>
        <Button
            Click="Start_Click"
            Name="btnStart"
            Margin="5"
            Height="34">Start</Button>
        <StackPanel Orientation="Horizontal">
            <TextBlock Margin="5">Biggest Prime Found:</TextBlock>
            <TextBlock Name="txtBiggestPrime" Margin="5" />
        </StackPanel>
    </StackPanel>
</Window>
The code-behind for the window is as follows:
using System;
using System.Windows;
using System.ComponentModel;
using Recipe_08_06;

namespace Recipe_08_06
{
    public partial class Window1 : Window
    {
        private BackgroundWorker worker;

        private long from;
        private long to;
        private long biggestPrime;

        public Window1()
            : base()
        {
            InitializeComponent();

            // Create a Background Worker
            worker = new BackgroundWorker();

            // Attach the event handlers
            worker.DoWork +=
                new DoWorkEventHandler(worker_DoWork);
            worker.RunWorkerCompleted +=
                new RunWorkerCompletedEventHandler(worker_RunWorkerCompleted);
        }

        private void Start_Click(object sender, RoutedEventArgs e)
        {
            try
            {
                if(!long.TryParse(txtFrom.Text, out from))
                    throw new ApplicationException("From is not a valid number");

                if(!long.TryParse(txtTo.Text, out to))
                    throw new ApplicationException("To is not a valid number");

                // Start the Background Worker
                worker.RunWorkerAsync();
btnStart.IsEnabled = false;
txtBiggestPrime.Text = string.Empty;
}
catch(Exception ex)
{
MessageBox.Show(
ex.Message, "Error",
MessageBoxButton.OK, MessageBoxImage.Error);
}
}
private void worker_RunWorkerCompleted(
object sender, RunWorkerCompletedEventArgs e)
{
btnStart.IsEnabled = true;
txtBiggestPrime.Text = biggestPrime.ToString();
}
private void worker_DoWork(
object sender, DoWorkEventArgs e)
{
// Loop through the numbers, finding the biggest prime
for(long current = from; current <= to; current++)
{
if(PrimeNumberHelper.IsPrime(current))
{
biggestPrime = current;
}
}
}
}
}Figure 8-6 shows the resulting window.
You need to track the progress of a background worker thread. This is useful to keep the user informed during a long-running process.
Create an instance of the System.ComponentModel.BackgroundWorker class to process an operation on a background thread. Set its WorkerReportsProgress property to True, and attach an event handler to its ProgressChanged event. Call the ReportProgress method from the DoWork event handler.
The BackgroundWorker component provides built-in support for tracking the progress of its operation. This is useful for displaying how much work has been completed on the UI. Three steps are involved. First, you need to set the BackgroundWorker's WorkerReportsProgress property to True. It is False by default. Second, you need to call its ReportProgress method during the operation, passing in the percentage of work that has been completed. Third, you need to attach an event handler to the ProgressChanged event, which is automatically raised each time the ReportProgress method is called.
The BackgroundWorker class executes the ProgressChanged event on the thread that created it, so if this is the UI thread, you can update the UI directly in this event handler.
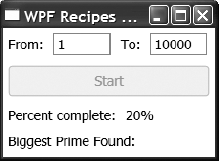
The following example creates a window that instantiates a BackgroundWorker object in its constructor and sets its WorkerReportsProgress property to True. It displays a number of controls, including a System.Windows.Controls.Button. When this Button is clicked, the BackgroundWorker starts an operation to search for the largest prime number within a range of numbers.
After each prime number is found, the ReportProgess method is called, passing in an estimated percentage of completion. This executes the code in the worker_ProgressChanged method, which displays the percentage in a System.Windows.TextBlock on the window.
The XAML for the window is as follows:
<Window x:Class="Recipe_08_07.Window1"
    xmlns="http://schemas.microsoft.com/winfx/2006/xaml/presentation"
    xmlns:x="http://schemas.microsoft.com/winfx/2006/xaml"
   Title="WPF Recipes 8_07" Width="228" Height="168" >
     <StackPanel Orientation="Vertical">
<StackPanel Orientation="Horizontal">
<TextBlock Margin="5" VerticalAlignment="Center">From:</TextBlock>
<TextBox Name="txtFrom" Margin="5" Width="60" Text="1" />
<TextBlock Margin="5" VerticalAlignment="Center">To:</TextBlock>
<TextBox Name="txtTo" Margin="5" Width="60" Text="10000"/>
</StackPanel>
<Button
Click="StartStop_Click"
Name="btnStartStop"
Margin="5"
Height="34">Start</Button>
<StackPanel Orientation="Horizontal">
<TextBlock Margin="5">Percent complete:</TextBlock>
<TextBlock Name="txtPercent" Margin="5" />
</StackPanel>
<StackPanel Orientation="Horizontal">
<TextBlock Margin="5">Biggest Prime Found:</TextBlock>
<TextBlock Name="txtBiggestPrime" Margin="5" />
</StackPanel>
</StackPanel>
</Window>The code-behind for the window is as follows:
using System;
using System.ComponentModel;
using System.Windows;
using Recipe_08_07;

namespace Recipe_08_07
{
    public partial class Window1 : Window
    {
        private BackgroundWorker worker;

        private long from;
        private long to;
        private long biggestPrime;

        public Window1()
            : base()
        {
            InitializeComponent();

            // Create a Background Worker
            worker = new BackgroundWorker();
            worker.WorkerReportsProgress = true;
// Attach the event handlers
worker.DoWork +=
new DoWorkEventHandler(worker_DoWork);
worker.RunWorkerCompleted +=
new RunWorkerCompletedEventHandler(worker_RunWorkerCompleted);
worker.ProgressChanged += worker_ProgressChanged;
}
private void StartStop_Click(object sender, RoutedEventArgs e)
{
try
{
if(!long.TryParse(txtFrom.Text, out from))
throw new ApplicationException("From is not a valid number");
if(!long.TryParse(txtTo.Text, out to))
throw new ApplicationException("To is not a valid number");
// Start the Background Worker
worker.RunWorkerAsync();
btnStartStop.IsEnabled = false;
txtBiggestPrime.Text = string.Empty;
}
catch(Exception ex)
{
MessageBox.Show(
ex.Message, "Error",
MessageBoxButton.OK, MessageBoxImage.Error);
}
}
private void worker_RunWorkerCompleted(
object sender, RunWorkerCompletedEventArgs e)
{
btnStartStop.IsEnabled = true;
txtBiggestPrime.Text = biggestPrime.ToString();
}
private void worker_DoWork(
object sender, DoWorkEventArgs e)
{
// Loop through the numbers, finding the biggest prime
for(long current = from; current <= to; current++)
{if(PrimeNumberHelper.IsPrime(current))
{
biggestPrime = current;
// Call report progress to fire the ProgressChanged event
int percentComplete = Convert.ToInt32(
((double) current / to)
* 100d);
worker.ReportProgress(percentComplete);
System.Threading.Thread.Sleep(10);
}
}
}
private void worker_ProgressChanged(
object sender, ProgressChangedEventArgs e)
{
// Update the progress bar
txtPercent.Text = e.ProgressPercentage.ToString() + "%";
}
}
}Figure 8-7 shows the resulting window.
Create an instance of the System.ComponentModel.BackgroundWorker class to process an operation on a background thread. Set its WorkerSupportsCancellation property to True, and call the CancelAsync method when the user wants to cancel the operation. In the DoWork event handler, check the CancellationPending property, and if this is True, use the Cancel property of System. ComponentModel.DoWorkEventArgs to notify the RunWorkerCompleted event handler that the operation was cancelled.
A few steps are involved in allowing an operation on a background worker thread to be cancelled. First, set the WorkerSupportsCancellation property of the BackgroundWorker to True. It is False by default. Second, you need to call its CancelAsync method when the user has requested the cancellation, for example, by clicking a System.Windows.Controls.Button marked Cancel. This doesn't automatically cancel the operation; it just sets the BackgroundWorker's CancellationPending property to True. So, the next thing you need to do is check the value of this property during the operation. When it is True, you must set the Cancel property of the DoWorkEventArgs parameter to True and exit the method. Finally, in the RunWorkerCompleted event handler, you can check the Cancelled property of the System.ComponentModel.RunWorkerCompletedEventArgs parameter. If it is True, you know that the operation was cancelled by the user.
The following example creates a window that instantiates a BackgroundWorker object in its constructor and sets its WorkerSupportsCancellation property to True. It displays a number of controls, including a System.Windows.Controls.Button. The first time this Button is clicked, it runs the BackgroundWorker, which starts an operation to search for the largest prime number within a range of numbers. It also sets the text on the Button to Cancel. When it is clicked again, it calls the CancelAsync method of the BackgroundWorker.
Each time the code in the DoWork method checks whether a number is prime, it also checks to see whether the BackgroundWorker's CancellationPending property is True. If it is, it sets the Cancel property of the DoWorkEventArgs parameter to True and exits the method. In the RunWorkerCompleted method, it checks the Cancelled property of the RunWorkerCompletedEventArgs parameter and displays a System.Windows.Messagebox if it is True.
The XAML for the window is as follows:
<Window x:Class="Recipe_08_08.Window1"
    xmlns="http://schemas.microsoft.com/winfx/2006/xaml/presentation"
    xmlns:x="http://schemas.microsoft.com/winfx/2006/xaml"
    Title="WPF Recipes 8_08" Width="230" Height="148" >
    <StackPanel Orientation="Vertical">
        <StackPanel Orientation="Horizontal">
            <TextBlock Margin="5" VerticalAlignment="Center">From:</TextBlock>
            <TextBox Name="txtFrom" Margin="5" Width="64" Text="1" />
            <TextBlock Margin="5" VerticalAlignment="Center">To:</TextBlock>
            <TextBox Name="txtTo" Margin="5" Width="64" Text="1000000"/>
        </StackPanel>
<Button
Click="StartStop_Click"
Name="btnStartStop"
Margin="5"
Height="34">Start</Button>
<StackPanel Orientation="Horizontal">
<TextBlock Margin="5">Biggest Prime Found:</TextBlock>
<TextBlock Name="txtBiggestPrime" Margin="5" />
</StackPanel>
</StackPanel>
</Window>The code-behind for the window is as follows:
using System;
using System.ComponentModel;
using System.Windows;
using Recipe_08_08;

namespace Recipe_08_08
{
    public partial class Window1 : Window
    {
        private BackgroundWorker worker;

        private long from;
        private long to;
        private long biggestPrime;

        public Window1()
            : base()
        {
            InitializeComponent();

            // Create a Background Worker
            worker = new BackgroundWorker();

            // Enable support for cancellation
            worker.WorkerSupportsCancellation = true;

            // Attach the event handlers
            worker.DoWork +=
                new DoWorkEventHandler(worker_DoWork);
            worker.RunWorkerCompleted +=
                new RunWorkerCompletedEventHandler(worker_RunWorkerCompleted);
        }
private void StartStop_Click(object sender, RoutedEventArgs e)
{
if(!worker.IsBusy)
{
try
{
if(!long.TryParse(txtFrom.Text, out from))
throw new ApplicationException(
"From is not a valid number");
if(!long.TryParse(txtTo.Text, out to))
throw new ApplicationException("To is not a valid number");
// Start the Background Worker
worker.RunWorkerAsync();
btnStartStop.Content = "Cancel";
txtBiggestPrime.Text = string.Empty;
}
catch(Exception ex)
{
MessageBox.Show(
ex.Message, "Error",
MessageBoxButton.OK, MessageBoxImage.Error);
}
}
else
{
// Cancel the Background Worker
worker.CancelAsync();
}
}
private void worker_RunWorkerCompleted(
object sender, RunWorkerCompletedEventArgs e)
{
if(e.Cancelled)
{
// The user cancelled the operation
MessageBox.Show("Operation was cancelled");
}
btnStartStop.Content = "Start";
txtBiggestPrime.Text = biggestPrime.ToString();
}private void worker_DoWork(
object sender, DoWorkEventArgs e)
{
// Loop through the numbers, finding the biggest prime
for(long current = from; current <= to; current++)
{
// Check if the BackgroundWorker
// has been cancelled
if(worker.CancellationPending)
{
// Set the Cancel property
e.Cancel = true;
return;
}
if(PrimeNumberHelper.IsPrime(current))
{
biggestPrime = current;
}
}
}
}
}Figure 8-8 shows the resulting window.
Reference the System.ComponentModel namespace in the XAML for your window, and define an instance of the BackgroundWorker in the Window.Resources collection.
When the window is initialized, the instance of the BackgroundWorker will be instantiated. You can set its properties and attach its event handlers using attributes in the XAML.
The following example demonstrates a window that declares a BackgroundWorker in the Window.Resources collection. It imports the System.ComponentModel namespace by referencing it in the Window attributes. The BackgroundWorker is given a key, has its properties set, and has delegates attached to its events, all in the inline XAML.
The window also declares a System.Windows.Controls.ProgressBar and a System.Windows.Controls.Button. When the Button is clicked, the BackgroundWorker that was declared in the Resources is started asynchronously and reports its progress to the ProgressBar.
In the window's constructor, the FrameworkElement.FindResource method is called to retrieve a reference to the BackgroundWorker declared in the XAML. This reference is then used to start and cancel the BackgroundWorker when the Button is clicked.
The XAML for the window is as follows:
<Window x:Class="Recipe_08_09.Window1"
   xmlns="http://schemas.microsoft.com/winfx/2006/xaml/presentation"
   xmlns:x="http://schemas.microsoft.com/winfx/2006/xaml"
   xmlns:ComponentModel="clr-namespace:System.ComponentModel;assembly=System"
   Title="WPF Recipes 8_09" Height="100" Width="200">

    <Window.Resources>
        <ComponentModel:BackgroundWorker
            x:Key="backgroundWorker"
            WorkerReportsProgress="True"
            WorkerSupportsCancellation="True"
            DoWork="BackgroundWorker_DoWork"
            RunWorkerCompleted="BackgroundWorker_RunWorkerCompleted"
            ProgressChanged="BackgroundWorker_ProgressChanged"
            />
    </Window.Resources>

    <Grid>
        <Grid.RowDefinitions>
            <RowDefinition/>
            <RowDefinition/>
        </Grid.RowDefinitions>

        <ProgressBar
            Name="progressBar" Margin="4"/>
<Button
Name="button"
Grid.Row="1"
Click="button_Click"
HorizontalAlignment="Center"
Margin="4"
Width="60">
Start
</Button>
</Grid>
</Window>The code-behind for the window is as follows:
using System.ComponentModel;
using System.Threading;
using System.Windows;
using System.Windows.Input;
namespace Recipe_08_09
{
public partial class Window1 : Window
{
private readonly BackgroundWorker worker;
public Window1()
{
InitializeComponent();
// Retrieve a reference to the
// BackgroundWorker declared in the XAML
worker = this.FindResource("backgroundWorker")
as BackgroundWorker;
}
private void button_Click(object sender, RoutedEventArgs e)
{
if(!worker.IsBusy)
{
this.Cursor = Cursors.Wait;
worker.RunWorkerAsync();
button.Content = "Cancel";
}
else
{
worker.CancelAsync();
}
}private void BackgroundWorker_DoWork(
object sender,
System.ComponentModel.DoWorkEventArgs e)
{
for(int i = 1; i <= 100; i++)
{
if(worker.CancellationPending)
break;
Thread.Sleep(100);
worker.ReportProgress(i);
}
}
private void BackgroundWorker_RunWorkerCompleted(
object sender,
System.ComponentModel.RunWorkerCompletedEventArgs e)
{
this.Cursor = Cursors.Arrow;
if(e.Error != null)
MessageBox.Show(e.Error.Message);
button.Content = "Start";
}
private void BackgroundWorker_ProgressChanged(
object sender,
System.ComponentModel.ProgressChangedEventArgs e)
{
progressBar.Value = e.ProgressPercentage;
}
}
}Use a System.Windows.Threading.DispatcherTimer that utilizes the Dispatcher object of the thread that creates it and raises the Tick event on the Dispatcher queue at a specified time and at a specified priority.
There are three timer classes in the .NET Framework Base Class Library (BCL): System.Threading.Timer, System.Timers.Timer, and System.Windows.Forms.Timer. Each of these timers is different, but essentially they all support specifying a time interval between ticks, as well as the code to run when this interval is reached. WPF introduces a new timer that is also designed specifically to utilize the threading model in WPF. It ensures that when the Tick event handler is raised, the delegate is added to the dispatcher queue of the thread that created it. So if the DispatcherTimer is created on the UI thread, the delegate added to the Tick event handler will automatically be executed on the UI thread.
The DispatcherTimer class has an overloaded constructor that allows you to specify a DispatcherPriority parameter. If this parameter is omitted, the default is Normal. It can be used to specify that the tick event should be fired in the background and not interfere with higher-priority events such as those to do with loading, binding, and rendering.
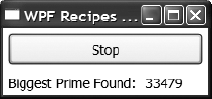
The following example creates a window with a System.Windows.Controls.Button and a System.Windows.Controls.TextBlock. When the Button is clicked, there is logic in the code-behind to initialize an instance of the DispatcherTimer class and to give it an interval of one second, and there is a Tick event handler that displays the current second in the TextBlock control. Because the DispatcherTimer is created on UI thread, there is no need for any special code in the Tick event handler to ensure it is being executed on the UI thread.
The XAML for the window is as follows:
<Window x:Class="Recipe_08_10.Window1"
xmlns="http://schemas.microsoft.com/winfx/2006/xaml/presentation"
xmlns:x="http://schemas.microsoft.com/winfx/2006/xaml"
Title="WPF Recipes 8_10" Height="100" Width="300">
<Grid>
<Grid.ColumnDefinitions>
<ColumnDefinition />
<ColumnDefinition />
</Grid.ColumnDefinitions>
<Button
x:Name="button"
Click="Button_Click">Start Timer</Button>
<TextBlock
x:Name="txtStatus"
Grid.Column="1"
Margin="4"
VerticalAlignment="Center"
HorizontalAlignment="Center">
</TextBlock>
</Grid>
</Window>The code-behind for the window is as follows:
using System;
using System.Windows;
using System.Windows.Threading;
namespace Recipe_08_10
{
public partial class Window1 : Window
{
private DispatcherTimer timer;
public Window1()
{
InitializeComponent();
}
private void Button_Click(object sender, RoutedEventArgs e)
{
if(timer == null || !timer.IsEnabled)
{
timer = new DispatcherTimer();
timer.Interval = TimeSpan.FromMilliseconds(1000);
timer.Tick += new EventHandler(timer_Tick);
timer.Start();
button.Content = "Stop Timer";
}
else
{
timer.Stop();
button.Content = "Start Timer";
}
}
private void timer_Tick(object sender, EventArgs e)
{
txtStatus.Text = DateTime.Now.Second.ToString();
}
}
}Create a System.Windows.Media.Animation.Storyboard to animate some visual elements, whilst processing an operation asynchronously using a System.ComponentModel.BackgroundWorker object. Set the RepeatBehavior property of the Storyboard to System.Windows.Threading. DispatcherTimer.Forever. Specify that the Storyboard should be interactively controllable by calling its Begin method with a value of True for the isControllable parameter. In the BackgroundWorker's RunWorkerCompleted event handler, call the Storyboard's Stop method.
Setting the RepeatBehavior property of the Storyboard class to Forever ensures that the animation runs continuously until explicitly stopped. It can then be started when the asynchronous process is begun and stopped when it completes.
Warning
If the Begin method of the Storyboard is not called with the isControllable parameter explicitly set to True, then calling the Stop method programmatically will not terminate the animation.
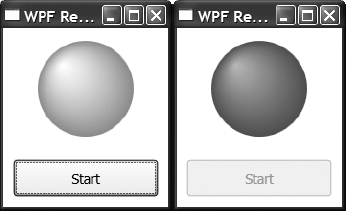
The following example demonstrates a window that displays a System.Windows.Shapes.Ellipse and a System.Windows.Controls.Button. A Storyboard is declared in the Resources collection of the Window, which changes the color of the Ellipse from gray to green when run.
In the code-behind for Button's Click event, the Storyboard is started, and a BackgroundWorker object is run asynchronously. It simulates a background process by calling System.Threading.Thread.Sleep a number of times. In the code for the RunWorkerCompleted event, the Storyboard is stopped.
The XAML for the window is as follows:
<Window x:Class="Recipe_08_11.Window1"
xmlns="http://schemas.microsoft.com/winfx/2006/xaml/presentation"
xmlns:x="http://schemas.microsoft.com/winfx/2006/xaml"
Title="WPF Recipes 8_11" Height="220" Width="180">
<Window.Resources>
<Storyboard x:Key="PulseStoryboard" AutoReverse="True" ><ColorAnimationUsingKeyFrames BeginTime="00:00:00"
Storyboard.TargetName="ellipse"
Storyboard.TargetProperty=
"(Shape.Fill).(GradientBrush.GradientStops)[0].(GradientStop.Color)">
<SplineColorKeyFrame KeyTime="00:00:00.5000000" Value="Lime"/>
</ColorAnimationUsingKeyFrames>
<ColorAnimationUsingKeyFrames BeginTime="00:00:00"
Storyboard.TargetName="ellipse"
Storyboard.TargetProperty=
"(Shape.Fill).(GradientBrush.GradientStops)[1].(GradientStop.Color)">
<SplineColorKeyFrame KeyTime="00:00:00.5000000" Value="Green"/>
</ColorAnimationUsingKeyFrames>
</Storyboard>
</Window.Resources>
<Grid x:Name="LayoutRoot" >
<Grid.RowDefinitions>
<RowDefinition Height="*"/>
<RowDefinition Height="60" />
</Grid.RowDefinitions>
<Ellipse
Width="100"
Height="100"
Margin="10"
Stroke="{x:Null}" x:Name="ellipse">
<Ellipse.Fill>
<RadialGradientBrush GradientOrigin="0.25,0.25">
<GradientStop Offset="0" Color="#A8FFFFFF"/>
<GradientStop Offset="1" Color="#FF9C9F97"/>
</RadialGradientBrush>
</Ellipse.Fill>
</Ellipse>
<Button Margin="10"
Content="Start"
Grid.Row="1"
x:Name="button"
Click="button_Click"/>
</Grid>
</Window>The code-behind for the window is as follows:
using System.Windows;
using System.Threading;
using System.ComponentModel;
using System.Windows.Media.Animation;
namespace Recipe_08_11
{
public partial class Window1 : Window
{
private Storyboard pulseStoryboard;
private BackgroundWorker worker;
public Window1()
{
InitializeComponent();
pulseStoryboard
= (Storyboard) this.Resources["PulseStoryboard"];
// Set the animation to repeat indefinitely
pulseStoryboard.RepeatBehavior = RepeatBehavior.Forever;
// Create a Background Worker
worker = new BackgroundWorker();
worker.DoWork +=
new DoWorkEventHandler(worker_DoWork);
worker.RunWorkerCompleted +=
new RunWorkerCompletedEventHandler(worker_RunWorkerCompleted);
}
private void button_Click(
object sender, RoutedEventArgs e)
{
// Begin the animation
pulseStoryboard.Begin(this, true);
// Start the Background Worker
worker.RunWorkerAsync();
button.IsEnabled = false;
}private void worker_RunWorkerCompleted(
object sender, RunWorkerCompletedEventArgs e)
{
button.IsEnabled = true;
// Stop the animation
pulseStoryboard.Stop(this);
}
private void worker_DoWork(
object sender, DoWorkEventArgs e)
{
for(int i = 1; i <= 50; i++)
{
Thread.Sleep(50);
}
}
}
}Figure 8-9 shows the resulting window.
You need to show a System.Windows.Controls.ProgressBar whilst processing an operation on a background thread.
Create a System.ComponentModel.BackgroundWorker object, set its WorkerReportsProgress property to True, and add an event handler to its ProgressChanged event. Call the ReportProgress method of the BackgroundWorker whilst processing the operation on the background thread, and in the code for this ProgressChanged event handler, update the Value property of a ProgressBar.
The BackgroundWorker class has a Boolean property called WorkerReportsProgress, which indicates whether the BackgroundWorker can report progress updates. It is set to False by default. When this is set to True, calling the ReportProgress method will raise the ProgressChanged event.
The ReportProgress method takes an integer parameter specifying the percentage of progress completed by the BackgroundWorker. This parameter is passed to the ProgressChanged event handler via the ProgressPercentage property of the System.ComponentModel. ProgressChangedEventArgs class.
The ProgressBar control sets the default value for its Maximum property to 100, which lends itself perfectly and automatically to receive the ProgressPercentage as its Value property.
The following example demonstrates a window that declares a ProgressBar control and a Button. An instance of the BackgroundWorker class is created in the window's constructor, and its WorkerReportsProgress property is set to True. Event handlers are added to the ProgressBar's DoWork, RunWorkerCompleted, and ProgressChanged events.
In the code-behind for the button's Click event, the BackgroundWorker is started asynchronously. This executes the worker_DoWork method on a background thread, which loops through 1 to 100, simulating some processing using Thread.Sleep and calling the ReportProgress method of the BackgroundWorker.
Each time ReportProgress is called, the worker_ProgressChanged method is executed, which sets the Value property of the ProgressBar to the ProgressPercentage property of the ProgressChangedEventArgs.
The XAML for the window is as follows:
<Window x:Class="Recipe_08_12.Window1"
xmlns="http://schemas.microsoft.com/winfx/2006/xaml/presentation"
xmlns:x="http://schemas.microsoft.com/winfx/2006/xaml"
Title="WPF Recipes 8_12" Height="100" Width="200">
<Grid>
<Grid.RowDefinitions>
<RowDefinition/>
<RowDefinition/>
</Grid.RowDefinitions>
<ProgressBar
Name="progressBar" Margin="4"/><Button
Name="button"
Grid.Row="1"
Click="button_Click"
HorizontalAlignment="Center"
Margin="4"
Width="60">
Start
</Button>
</Grid>
</Window>The code-behind for the window is as follows:
using System.ComponentModel;
using System.Threading;
using System.Windows;
using System.Windows.Input;
namespace Recipe_08_12
{
public partial class Window1 : Window
{
private BackgroundWorker worker;
public Window1()
{
InitializeComponent();
// Create a Background Worker
worker = new BackgroundWorker();
// Enable progress reporting
worker.WorkerReportsProgress = true;
// Attach the event handlers
worker.DoWork += new DoWorkEventHandler(worker_DoWork);
worker.RunWorkerCompleted +=
new RunWorkerCompletedEventHandler(
worker_RunWorkerCompleted);
worker.ProgressChanged += worker_ProgressChanged;
}
private void button_Click(object sender, RoutedEventArgs e)
{
// Start the Background Worker
worker.RunWorkerAsync();this.Cursor = Cursors.Wait;
button.IsEnabled = false;
}
private void worker_RunWorkerCompleted(
object sender, RunWorkerCompletedEventArgs e)
{
this.Cursor = Cursors.Arrow;
if(e.Error != null)
MessageBox.Show(e.Error.Message);
button.IsEnabled = true;
}
private void worker_DoWork(
object sender, DoWorkEventArgs e)
{
for(int i = 1; i <= 100; i++)
{
// Simulate some processing by sleeping
Thread.Sleep(100);
// Call report progress to fire the ProgressChanged event
worker.ReportProgress(i);
}
}
private void worker_ProgressChanged(
object sender, ProgressChangedEventArgs e)
{
// Update the progress bar
progressBar.Value = e.ProgressPercentage;
}
}
}Figure 8-10 shows the resulting window.
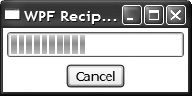
You need to show a System.Windows.Controls.ProgressBar whilst processing an operation on a background thread and allow the user to cancel the operation during processing.
Create a System.ComponentModel.BackgroundWorker object, and set its WorkerSupportsCancellation property to True. Add a System.Windows.Controls.Button to your window, and call the CancelAsync method of the BackgroundWorker in its Click event handler.
The BackgroundWorker class has a Boolean property called WorkerSupportsCancellation, which, when set to True, allows the CancelAsync method to interrupt the background operation. It is set to False by default.
In the RunWorkerCompleted event handler, you can use the Cancelled property of the RunWorkerCompletedEventArgs to check whether the BackgroundWorker was cancelled.
The following example demonstrates a window that declares a ProgressBar control and a Button. An instance of the BackgroundWorker class is created in the window's constructor, and its WorkerSupportsCancellation property is set to True.
When the Button is clicked, the code in the Click handler runs the BackgroundWorker asynchronously and changes the text of the Button from Start to Cancel. If it is clicked again, the IsBusy property of the BackgroundWorker returns True, and the code calls the CancelAsync method to cancel the operation.
In the RunWorkerCompleted event handler, a System.Windows.MessageBox is shown if the Cancelled property of the RunWorkerCompletedEventArgs parameter is True.
The XAML for the window is as follows:
<Window x:Class="Recipe_08_13.Window1"
xmlns="http://schemas.microsoft.com/winfx/2006/xaml/presentation"
xmlns:x="http://schemas.microsoft.com/winfx/2006/xaml"
Title="WPF Recipes 8_13" Height="100" Width="200">
<Grid>
<Grid.RowDefinitions>
<RowDefinition/>
<RowDefinition/>
</Grid.RowDefinitions><ProgressBar
Name="progressBar" Margin="4"/>
<Button
            Name="button"
            Grid.Row="1"
            Click="button_Click"
            HorizontalAlignment="Center"
            Margin="4"
            Width="60">
            Start
        </Button>
    </Grid>
</Window>
The code-behind for the window is as follows:
using System.ComponentModel;
using System.Threading;
using System.Windows;
using System.Windows.Input;
namespace Recipe_08_13
{
public partial class Window1 : Window
{
private BackgroundWorker worker;
public Window1()
{
InitializeComponent();
// Create a Background Worker
worker = new BackgroundWorker();
worker.WorkerReportsProgress = true;
// Enable support for cancellation
worker.WorkerSupportsCancellation = true;
// Attach the event handlers
worker.DoWork +=
new DoWorkEventHandler(worker_DoWork);
worker.RunWorkerCompleted +=
new RunWorkerCompletedEventHandler(worker_RunWorkerCompleted);
worker.ProgressChanged +=
worker_ProgressChanged;
}private void button_Click(
object sender, RoutedEventArgs e)
{
if(!worker.IsBusy)
{
this.Cursor = Cursors.Wait;
// Start the Background Worker
worker.RunWorkerAsync();
button.Content = "Cancel";
}
else
{
// Cancel the Background Worker
worker.CancelAsync();
}
}
private void worker_RunWorkerCompleted(
object sender, RunWorkerCompletedEventArgs e)
{
this.Cursor = Cursors.Arrow;
if(e.Cancelled)
{
// The user cancelled the operation
MessageBox.Show("Operation was cancelled");
}
else if(e.Error != null)
{
MessageBox.Show(e.Error.Message);
}
button.Content = "Start";
}
private void worker_DoWork(
object sender, DoWorkEventArgs e)
{
for(int i = 1; i <= 100; i++)
{
// Check if the BackgroundWorker
// has been cancelledif(worker.CancellationPending)
{
// Set the Cancel property
e.Cancel = true;
return;
}
// Simulate some processing by sleeping
Thread.Sleep(100);
worker.ReportProgress(i);
}
}
private void worker_ProgressChanged(
object sender, ProgressChangedEventArgs e)
{
progressBar.Value = e.ProgressPercentage;
}
}
}Figure 8-11 shows the resulting window.
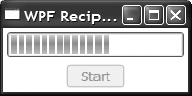
You need to show a continuous System.Windows.Controls.ProgressBar whilst processing an operation on a background thread, until the operation either completes or is cancelled by the user.
Create a System.ComponentModel.BackgroundWorker object, and add a ProgressBar to your window. Before calling the RunWorkerAsync method to start the BackgroundWorker, set the IsIndeterminate property of your ProgressBar to True. When the operation has completed, set the IsIndeterminate property to False again.
The ProgressBar class has a Boolean property called IsIndeterminate. When this property is True, the ProgressBar animates a few bars moving across the ProgressBar in a continuous manner and ignores the Value property. It continues indefinitely until IsIndeterminate is set back to False again.
The following example demonstrates a window that declares a ProgressBar control and a Button. When the Button is clicked, a BackgroundWorker object is run that simulates a long-running operation by counting from 1 to 500 and calling the System.Threading.Thread.Sleep method in between each number. When the BackgroundWorker is run, the IsIndeterminate property of the ProgressBar is set to True, which starts its animation. When the RunWorkerCompleted event is raised, IsIndeterminate is set back to False, and the ProgressBar stops.
The XAML for the window is as follows:
<Window x:Class="Recipe_08_14.Window1"
xmlns="http://schemas.microsoft.com/winfx/2006/xaml/presentation"
xmlns:x="http://schemas.microsoft.com/winfx/2006/xaml"
Title="WPF Recipes 8_14" Height="100" Width="200">
<Grid>
<Grid.RowDefinitions>
<RowDefinition/>
<RowDefinition/>
</Grid.RowDefinitions>
<ProgressBar
Name="progressBar" Margin="4"/>
<Button
            Name="button"
            Grid.Row="1"
            Click="button_Click"
            HorizontalAlignment="Center"
            Margin="4"
            Width="60">
            Start
        </Button>
    </Grid>
</Window>
The code-behind for the window is as follows:
using System.ComponentModel;
using System.Threading;
using System.Windows;
using System.Windows.Input;
namespace Recipe_08_14
{
   public partial class Window1 : Window
   {
      private BackgroundWorker worker;

      public Window1()
      {
          InitializeComponent();

          // Create a Background Worker
          worker = new BackgroundWorker();

          // Enable support for cancellation
          worker.WorkerSupportsCancellation = true;

          worker.DoWork +=
              new DoWorkEventHandler(worker_DoWork);
         worker.RunWorkerCompleted +=
            new RunWorkerCompletedEventHandler(worker_RunWorkerCompleted);
      }

      private void button_Click(
          object sender, RoutedEventArgs e)
      {
          if (!worker.IsBusy)
          {
              this.Cursor = Cursors.Wait;

              // Set the ProgressBar's IsInderterminate
              // property to true to start the progress indicator
              progressBar.IsIndeterminate = true;
              button.Content = "Cancel";

              // Start the Background Worker
              worker.RunWorkerAsync();
          }
          else
          {
              worker.CancelAsync();
          }
       }

       private void worker_RunWorkerCompleted(
           object sender, RunWorkerCompletedEventArgs e)
       {
           this.Cursor = Cursors.Arrow;
if (e.Error != null)
{
MessageBox.Show(e.Error.Message);
}
button.Content = "Start";
// Reset the ProgressBar's IsInderterminate
// property to false to stop the progress indicator
progressBar.IsIndeterminate = false;
}
private void worker_DoWork(
object sender, DoWorkEventArgs e)
{
for (int i = 1; i <= 500; i++)
{
if (worker.CancellationPending)
break;
Thread.Sleep(50);
}
}
}
}Figure 8-12 shows the resulting window.

You need to implement the Application.DoEvents method in Windows Forms in order to force the UI thread to process rendering events during a long-running process.
Use the Invoke method of the current System.Windows.Threading.Dispatcher to queue a placeholder delegate with a System.Windows.Threading.DispatcherPriority of Background.
Whereas the BeginInvoke method of Dispatcher is asynchronous, the Invoke method is synchronous. This means that the call to Invoke will not return until the event has been executed. If a dummy event is queued with a Background priority, then it will not be executed until all higher-priority operations have completed.
Warning
Using Application.DoEvents is not always advisable, and it must be used with caution. For example, consider the case where a call to DoEvents is followed by code that accesses a window's Controls collection. It is possible that one of the events processed during the DoEvents may have been the user clicking the window's Close button. This would result in a call to the window's Dispose method, which in turn would clear the Controls collection. If the code following the call to DoEvents makes assumptions about the existence of controls in the window, this would cause an exception.
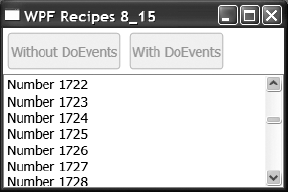
The following example displays a window containing two System.Windows.Controls.Button controls and a System.Windows.Controls.ListBox control. In the Click events for the buttons, a method called LoadNumbers is called that loads 10,000 numbers into the ListBox. When the button on the left is clicked, the window freezes whilst the numbers are loaded. It cannot receive any other events, and the numbers don't get displayed until all of them are added to the list.
However, when the button on the right is clicked, a method called DoEvents is called after each number is added to the ListBox. This ensures that the ListBox is updated between numbers and the window can still receive other input events.
In the code for DoEvents, an empty delegate is placed on the dispatcher queue using the Invoke method and given a DispatcherPriority of Background. This ensures the DoEvents method does not return until all the rendering events in the queue are processed.
The XAML for the window is as follows:
<Window x:Class="Recipe_08_15.Window1"
    xmlns="http://schemas.microsoft.com/winfx/2006/xaml/presentation"
    xmlns:x="http://schemas.microsoft.com/winfx/2006/xaml"
    Title="WPF Recipes 8_15" Height="200" Width="300">
    <Grid>

        <Grid.RowDefinitions>
            <RowDefinition Height="48"/>
            <RowDefinition/>
        </Grid.RowDefinitions>

        <StackPanel
            Orientation="Horizontal">
<Button x:Name="btnWithout"
Click="btnWithout_Click"
Margin="4">
Without DoEvents
</Button>
<Button x:Name="btnWith"
Click="btnWith_Click"
Margin="4">
With DoEvents
</Button>
</StackPanel>
<ListBox x:Name="listBox"
Grid.Row="1" />
</Grid>
</Window>The code for the window is as follows:
using System.Windows;
using System.Windows.Threading;

namespace Recipe_08_15
{
    public partial class Window1 : Window
    {
        public Window1()
        {
            InitializeComponent();
        }

        private void btnWithout_Click(
            object sender, RoutedEventArgs e)
        {
            LoadNumbers(false);
        }

        private void btnWith_Click(
            object sender, RoutedEventArgs e)
        {
            LoadNumbers(true);
        }
private void LoadNumbers(bool callDoEvents)
{
listBox.Items.Clear();
btnWithout.IsEnabled = false;
btnWith.IsEnabled = false;
// Load ten thousand numbers into a listbox
for(int i = 1; i <= 10000; i++)
{
listBox.Items.Add("Number " + i.ToString());
// Optionally call DoEvents
if(callDoEvents)
DoEvents();
}
btnWithout.IsEnabled = true;
btnWith.IsEnabled = true;
}
/// <summary>
/// Process all messages in the current dispatcher queue
/// </summary>
public static void DoEvents()
{
// Add an empty delegate to the
// current thread's Dispatcher, and
// invoke it synchronously but using a
// a Background priority.
// It won't return until all higher-priority
// events in the queue are processed.
Dispatcher.CurrentDispatcher.Invoke(
DispatcherPriority.Background,
new EmptyDelegate(
delegate{}));
}
private delegate void EmptyDelegate();
}
}Figure 8-13 shows the resulting window.
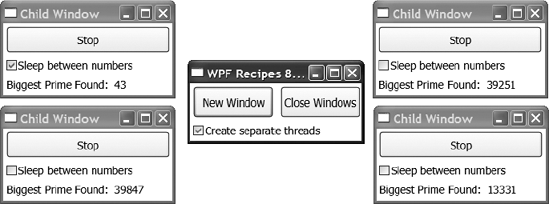
You have an application with multiple windows and need each window to have its own UI thread so that long-running operations in one window do not interfere with the rendering and operations in the other windows.
Instead of initializing and showing a new window from the UI thread of the main window, create a new System.Threading.Thread, and then create and show a new window from the starting point of this new thread.
If you create and show child windows from the UI thread of the main window in an application with multiple windows, then each window shares the same thread and System.Windows.Threading.Dispatcher object. This is perfectly fine for many applications, but it means that each window shares the same event queue for all its UI events. This means that if one window initiates a long-running operation, none of the other windows can receive their events until it is finished.
When you create a new thread, WPF automatically creates a new Dispatcher object to manage it. So if you create each new window from a new thread, they will get their own Dispatcher object and events in the Dispatcher queue because one window will not affect the processing of events in the other windows.
To create a new thread, instantiate a new Thread object, and specify a System.Threading.ThreadStart delegate as its starting point. In this method, create and show a new window and then call Dispatcher.Run to start processing events on the thread's Dispatcher queue.
The following example demonstrates a window that functions as the main window of a multiwindow application. There is a System.Windows.Controls.Button with the text New Window. When this is clicked, it launches a new window. If the Create Separate Threads System.Windows.Controls.CheckBox is checked, then it creates a new thread to spawn the new window. If it is not checked, then it creates it directly from the UI thread.
The new child windows contain a Button marked Start that, when clicked, executes a method that searches for prime numbers. To simulate a long-running blocking process, there is a CheckBox marked Sleep Between Numbers. If this is checked, the child window sleeps for 200 milliseconds between checking for each number.
To see the effects of creating each window on a separate thread, first create a few child windows with the Create Separate Threads CheckBox unchecked. If you then check the Sleep Between Numbers option on one of the child numbers, you will see that the simulated longrunning process affects the processing on all the child windows. By slowing down the operation on one child window, it slows down the processing of events on all the other windows too.
However, by checking the Create Separate Threads CheckBox before creating new windows, you will see that even when we slow down the operation on one or more of the child windows, the other ones are not affected. They still execute the search for prime numbers and process their rendering and painting events, just as quickly as if they were the only window.
The XAML for the main window is as follows:
<Window x:Class="Recipe_08_16.MainWindow"
    xmlns="http://schemas.microsoft.com/winfx/2006/xaml/presentation"
    xmlns:x="http://schemas.microsoft.com/winfx/2006/xaml"
    Title="WPF Recipes 8_16"
    Height="108"
    Width="230" >
    <StackPanel Orientation="Vertical">

        <StackPanel Orientation="Horizontal">
            <Button Content="New Window"
                Click="btnNewWindow_Click"
                Margin="4"
                Height="40"
                Width="104"/>
            <Button Content="Close Windows"
                Click="btnCloseWindows_Click"
                Margin="4"
                Height="40"
                Width="104"/>
        </StackPanel>

        <CheckBox x:Name="chkCreateThread"
                  Content="Create separate threads"
                  Margin="4"/>
    </StackPanel>
</Window>
The code-behind for the main window is as follows:
using System.Windows;
using System.Threading;
using System.Collections.Generic;

using Recipe_08_16;


namespace Recipe_08_16
{
    public partial class MainWindow : Window
    {
        private List<ChildWindow> windows = new List<ChildWindow>();
        private List<Thread> threads = new List<Thread>();

        public MainWindow()
        {
            InitializeComponent();
        }

        private void btnNewWindow_Click(object sender, RoutedEventArgs e)
        {
            if(chkCreateThread.IsChecked.Value)
            {
                // Create a new Thread
                // which will create a new window
                Thread newWindowThread =
                          new Thread(
                               new ThreadStart(
                                    ThreadStartingPoint));
                 newWindowThread.SetApartmentState(ApartmentState.STA);
                 newWindowThread.IsBackground = true;
                 newWindowThread.Start();

                 threads.Add(newWindowThread);
             }
             else
             {
                 // Create a new window
                 ChildWindow window = new ChildWindow();
                 window.Show();

                  windows.Add(window);
             }
          }
private void ThreadStartingPoint()
{
// Create a new window
ChildWindow window = new ChildWindow();
window.Show();
// Start the new window's Dispatcher
System.Windows.Threading.Dispatcher.Run();
}
private void btnCloseWindows_Click(object sender, RoutedEventArgs e)
{
foreach(ChildWindow window in windows)
{
window.Stop();
window.Close();
}
windows.Clear();
foreach(Thread thread in threads)
{
thread.Abort();
}
threads.Clear();
}
}
}The XAML for the child window is as follows:
<Window x:Class="Recipe_08_16.ChildWindow"
    xmlns="http://schemas.microsoft.com/winfx/2006/xaml/presentation"
    xmlns:x="http://schemas.microsoft.com/winfx/2006/xaml"
   Title="Child Window" Width="228" Height="128" >
    <StackPanel Orientation="Vertical">
        <Button
            Click="StartStop_Click"
            Name="btnStartStop"
            Margin="4"
            Height="34">Start</Button>
        <CheckBox x:Name="chkSleep"
                  Margin="4"
                  Content="Sleep between numbers"/>
<StackPanel Orientation="Horizontal">
<TextBlock Margin="4">Biggest Prime Found:</TextBlock>
<TextBlock Name="txtBiggestPrime" Margin="4" />
</StackPanel>
</StackPanel>
</Window>The code-behind for the child window is as follows:
using System;
using System.Windows;
using System.Windows.Threading;

namespace Recipe_08_16
{
    public partial class ChildWindow : Window
    {
        private bool continueCalculating = false;

        private PrimeNumberHelper primeNumberHelper
            = new PrimeNumberHelper();

        public ChildWindow()
            : base()
        {
            InitializeComponent();
        }

        private void StartStop_Click(object sender, RoutedEventArgs e)
        {
            if(continueCalculating)
                Stop();
            else
                Start();
        }

        public void Start()
        {
            continueCalculating = true;
            btnStartStop.Content = "Stop";

            // Execute the CheckPrimeNumber method on
            // the current Dispatcher queue
            this.Dispatcher.BeginInvoke(
                DispatcherPriority.Normal,
                new Action<int>(CheckPrimeNumber), 3);
        }
public void Stop()
{
continueCalculating = false;
btnStartStop.Content = "Start";
// Add an empty delegate to the
// current thread's Dispatcher, and
// invoke it synchronously but using a
// a Background priority.
// This ensures the Stop method won't return
// until the CheckPrimeNumber method has completed.
Dispatcher.CurrentDispatcher.Invoke(
DispatcherPriority.Background,
new EmptyDelegate(
delegate{}));
}
public void CheckPrimeNumber(int current)
{
if(primeNumberHelper.IsPrime(current))
{
txtBiggestPrime.Text = current.ToString();
}
if(continueCalculating)
{
// Execute the CheckPrimeNumber method
// again, using a lower DispatcherPriority
this.Dispatcher.BeginInvoke(
DispatcherPriority.SystemIdle,
new Action<int>(CheckPrimeNumber), current + 2);
if(chkSleep.IsChecked.Value)
System.Threading.Thread.Sleep(200);
}
}
private delegate void EmptyDelegate();
}
}Figure 8-14 shows the resulting windows. The child window with the Sleep Between Numbers option checked takes much longer to find the prime numbers. However, the other windows are not affected.