
In the last recipe, we discussed how the data binding is done at the element level. In this recipe, let's add some CLR Object and use the DataContext to link a Databound element and the property in the CLR Object.
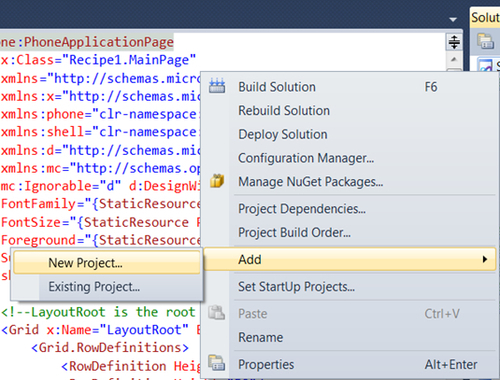
Let's create a new project for this recipe. Right-click on the last solution folder Ch1_Recipes and Add | New Project, select the Windows Phone Application Template, and name it Ch1_Recipe2.
Here, let's create a simple application to tie data elements with a CLR Object. A data class with just two properties is created and then initialized to some test data. Then, it is assigned to the data context.
- Right-click on Ch1_Recipe2 and Add | Class.
- Create the class, name it
DataClassand add just two string properties; one calledNameand the otherNotes:namespace Recipe2 { public class DataClass { public string Name { get; set; } public string Notes { get; set; } } } - Open the
MainPage.xamlfile and change theApplicationTitleandPageTitleas shown in the following code snippet:<!--TitlePanel contains the name of the application and page title--> <StackPanel x:Name="TitlePanel" Grid.Row="0" Grid.ColumnSpan ="2">> <TextBlock x:Name="ApplicationTitle" Text="Phone7 Recipes" Style="{StaticResource PhoneTextNormalStyle}"/> <TextBlock x:Name="PageTitle" Text="Object Bindings" Style="{StaticResource PhoneTextTitle1Style}"/> </StackPanel>
- In order to display two columns and three rows, we should change the Grid
ColumnDefinitionandRowDefinitionas illustrated in the followingXAMLsnippet:<!--LayoutRoot is the root grid where all page content is placed--> <Grid x:Name="LayoutRoot" Background="Transparent"> <Grid.RowDefinitions> <RowDefinition Height="Auto"/> <RowDefinition Height="50"/> <RowDefinition Height="*"/> </Grid.RowDefinitions> <Grid.ColumnDefinitions> <ColumnDefinition Width="74*"></ColumnDefinition> <ColumnDefinition Width="406*"></ColumnDefinition> </Grid.ColumnDefinitions>
- Let's add two
TextBlockcontrols to displayNameandNotes. Here theNameandNotesare referring to the properties of the ObjectDataClass. Add fourTextBlockelements inside theContentPanelgrid; here we will add binding information to display both elementstbNameContentandtbNoteContent. Binding objects tie a name to a control object without knowing where it comes from, as follows:<!--ContentPanel - place additional content here--> <Grid x:Name="ContentPanel" Grid.Row="1" Grid.RowSpan="2" Grid.ColumnSpan="2" Margin="0,0,0,-16"> <TextBlock x:Name ="tbName" Text ="Name:" Grid.Row="1" Grid.Column ="0"/> <TextBlock x:Name ="tbNameContent" Text ="{Binding Name}" Margin="74,0,6,567" /> <TextBlock x:Name ="tbNotes" Text ="Notes:" Height="43" VerticalAlignment="Top" Margin="0,85,412,0" /> <TextBlock x:Name ="tbNotesContent" Text ="{Binding Notes}" Margin="74,85,0,16" /> </Grid> - Press F5. Now you will see the two display items without any data, as follows:

- Open the
MainPage.xaml.csfile. First, create a private variable forDataClassbefore theMainPageconstructor. In theMainPageconstructor, initialize theDataClassobject with sample data using the object initializer as shown in the following code snippet. Finally,myDataobject is assigned toDataContext, which updates the text blocks with the data.namespace Recipe2 { public partial class MainPage : PhoneApplicationPage { private DataClass myData; // Constructor public MainPage() { InitializeComponent(); // Initialize data class myData = new DataClass() { Name = "Name 1", Notes = "Note 1" }; // Set the DataContext of the grid to DataClass Object LayoutRoot.DataContext = myData; } } } - Press F5. Now test data, which is initialized in the code behind the file, is displayed.

Initially, we set the Binding properties of the elements to DataClass property names. Here the binding enables us to set the property names without actually knowing how they will be assigned later. Magic happens through the DataContext. The DataContext of the elements allows inheriting the information about the data, used for data binding, from their parent elements. Hence, setting the DataContext of Layoutroot to the DataClass object automatically applied to the text block elements with its properties.
For more understanding of the DataContext class, check this MSDN resource online:
http://msdn.microsoft.com/en-us/library/system.windows.frameworkelement.datacontext.aspx
We will learn how to use Recipe2 as a template so you can easily reuse the project as a starter application for future projects. You can export any of the projects you are working on as a template for future use.
- Open the previous project
Recipe2. - Go to File | Export Template.

- Select the default project template as the option, which is
Recipe1.
- Fill in the Template Name
Ch1_Recipeand click on Finish. The template is saved to your project template folder. Now, all the files are copied as a part of the project templateCh1_Recipe.