
Chapter 14. Email
Email on your iPhone offers full formatting, fonts, graphics, and choice of type size; the use of attachments like photos, PDFs, .zip compressed files, and Word, Excel, PowerPoint, Pages, Numbers, and other documents; and compatibility with Yahoo Mail, Gmail, AOL Mail, iCloud mail, Microsoft Outlook, corporate Exchange mail, and any standard email account.
Dude, if you want a more satisfying portable email machine than this one, buy a laptop.
This chapter covers the basic email experience. If you’ve gotten yourself hooked up with iCloud, see Chapter 16 for details.
Setting Up Your Account
If you have a free email account from Google, AOL, Outlook, or Yahoo; an iCloud account (Chapter 16); or a Microsoft Exchange account run by your employer, then setup on the iPhone is easy.
From the Home screen, tap Settings → Passwords & Accounts → Add Account. Tap the colorful logo that corresponds to the kind of account you have (Google, Yahoo, or whatever).
On the page that appears, sign into your account. Tap Next.
Now you may see the list of non-email data the iPhone can show you (from iCloud, Google, Yahoo, Exchange, and so on): contacts, calendars, reminders, and notes. Turn off the ones you don’t want synced to your phone, and then tap Save.
Your email account is ready to go!
Tip
If you don’t have one of these free accounts, they’re worth having, if only as a backup to your regular account. They can help with spam filtering, too, since the iPhone doesn’t offer any. To sign up, go to Google.com, Yahoo.com, AOL.com, or iCloud.com.

POP and IMAP Accounts
Those freebie, brand-name, web-based accounts are super-easy to set up. But millions of people have more generic email accounts, perhaps supplied by their employers or internet providers. They’re generally one of two types:
POP accounts are the oldest type on the internet. (POP stands for Post Office Protocol, but this won’t be on the test.) A POP account can make life complicated if you check your mail on more than one machine (say, a PC and an iPhone), as you’ll discover shortly.
A POP server transfers incoming mail to your computer or phone before you read it, which works fine as long as you’re using only that machine to access your email.
IMAP accounts (Internet Message Access Protocol) are newer and have more features than POP servers, and they’re quickly putting POP out to pasture. IMAP servers keep all your mail online, rather than making you store it on your computer; as a result, you can access the same mail from any computer (or phone). IMAP servers remember which messages you’ve read and sent, and they even keep track of how you’ve filed messages into mail folders. (Yahoo, Gmail, iCloud, and corporate Exchange accounts are all IMAP. Gmail accounts can be POP, too.)
Tip
The iPhone copies your IMAP messages onto the phone itself, so you can work on your email even when you’re not online. You can, in fact, control where these messages are stored (in which mail folder). To see this, open Settings → Passwords & Accounts → [your IMAP account name] → [your IMAP account name again] → Advanced. See? You can specify where your drafts, sent messages, and deleted messages wind up on the phone.
The iPhone can communicate with both kinds of accounts.
Tap your way to Settings → Passwords & Accounts → Add Account. Tap Other, tap Add Mail Account, and then enter your name, email address, password, and an optional description. Tap Next.
Apple’s software attempts to figure out which kind of account you have (POP or IMAP) by the email address. If it can’t make that determination, then you arrive at a second screen, where you’re asked for such juicy details as the host name for incoming and outgoing mail servers. (This is also where you tap either IMAP or POP, to tell the iPhone what sort of account it’s dealing with.)
If you don’t know this stuff offhand, you’ll have to ask your internet provider, corporate tech-support person, or next-door teenager to help you. When you’re finished, tap Save.
To delete an account, open Settings → Passwords & Accounts → [account name]. At the bottom of the screen, you’ll find the Delete Account button.
Tip
You can make, rename, or delete IMAP or Exchange mailboxes (mail folders) right on the phone.
In the Mail app, view the mailbox list for the account and then tap Edit. Tap New Mailbox to create a new folder. To edit an existing mailbox, tap its name; you can then rename it, tap the Mailbox Location folder to move it, or tap Delete Mailbox. Tap Save to finish up.
Downloading Mail
If you have “push” email (Yahoo, iCloud, or Exchange), then your iPhone doesn’t have to check for messages; new messages show up on your iPhone as they arrive, around the clock.
If you have any other kind of account, then the iPhone checks for new messages automatically on a schedule—every 15, 30, or 60 minutes. It also checks for new messages each time you open the Mail program, or whenever you drag downward on the Inbox list.
You can adjust the frequency of these automatic checks or turn off the “push” feature (because it uses up your battery faster) in Settings; see “Passwords & Accounts”.
When new mail arrives, you’ll know it. You hear the iPhone’s little “You’ve got mail” sound, unless you’ve turned that off in Settings (or have the phone silenced).
A notification appears, too, even on the Lock screen (“The Lock Screen”).
You can actually process a message right from its notification banner. If you see at a glance that it’s junk, or if no response is necessary, then drag your finger down on it (or, if you have a 3D Touch model, hard-press it) to reveal two new buttons: Mark as Read (leave it in your inbox, no longer appearing as a new message) and Trash.

At the Home screen, Mail’s icon sprouts a circled number that tells you how many new messages are waiting. If you have more than one email account, it shows you the total number of new messages, from all accounts.
If you routinely leave a lot of unread messages in your inbox, and you don’t really care about this “badge,” you can turn it off. In fact, you can turn it off on a per-account basis, which is great if one of your accounts is sort of a junk account that you keep as a spare. Tap Settings → Notifications → Mail → [account name] → Badges.
In any case, once you know you have mail, tap the Mail icon on the Home screen to start reading it.
Tip
The Mail app, more than any other app, is designed to be a series of nested lists. You start out seeing a list of accounts; tap one to see a list of folders; tap one for a list of messages; tap one to open the actual message.
To backtrack through these lists, you can tap the button in the upper-left corner over and over again—or you can swipe rightward across the screen. That’s a bigger target and more fun.
The Unified Inbox
If you have more than one email address, you’re in luck. The iPhone offers a unified inbox—an option that displays all the incoming messages from all your accounts in a single place. (If you don’t see it—if Mail opened up to some other screen—keep swiping rightward, backing up one screen at a time, until you do.)
This Mailboxes page has two sections:
Unified inboxes (and other unified folders). All the incoming messages are consolidated into one unified box called All Inboxes. Below that, you see the inboxes for each of the individual accounts (next page, left).
This part of the main Mail list also offers unified folders for VIP and Flagged messages, which are described later in this chapter.
But what you may not realize is that you can add other unified folders to this section. You can, for example, add a folder called Unread, which contains only new messages from all accounts. (That’s not the same thing as All Inboxes, because that inbox can contain messages you have read but haven’t deleted or filed. Maybe a lot of them.)
You can also add a unified folder showing all messages where you were either the To or Cc addressee; this folder won’t include any mail where your name appeared on the Bcc (blind carbon copy) line, like mailing lists and, often, spam.
You can also add an Attachments folder here (messages with files attached), a Today folder, or unified folders that contain All Drafts, All Sent, or All Trash. (“All” means “from all accounts.”)
To hide or show these special uni-folders, tap Edit, and then tap the selection circles beside the names of the folders you want to appear. (You can also take this opportunity to drag them up or down into a pleasing sequence.) Tap Done.

Accounts. Farther down the Mailboxes screen, you see your accounts listed again. You can tap an account’s name to expand or collapse its list of traditional mail folders: Inbox, Drafts (emails written but not sent), Sent, Junk, Trash, and any folders you’ve created yourself (Family, Little League, Old Stuff, whatever). If you have a Yahoo, iCloud, Exchange, or other IMAP account, then the iPhone automatically creates these folders to match what you’ve set up online, as shown above at right.
Note
Not all kinds of email accounts permit the creation of your own filing folders, so you might not see anything but Inbox, Sent, and Trash.
The Message List—and Threading
If you tap an inbox’s name, you wind up face-to-face with the list of incoming messages. (To return to the Mailboxes list, tap ![]() Mailboxes, or swipe to the right.)
Mailboxes, or swipe to the right.)
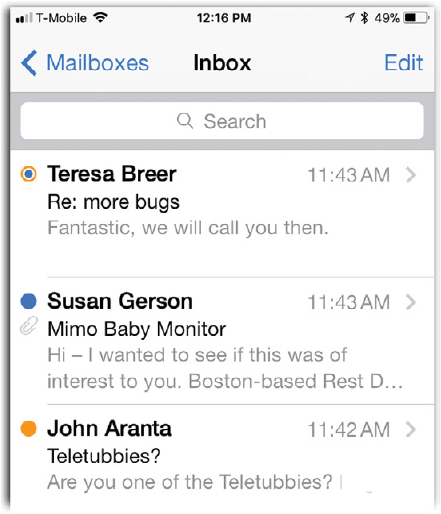
At first, you see only the subject lines of your messages, plus, in gray type, the first few lines of their contents; that way you can scan through new messages to see if there’s anything important. You can flick upward to scroll this list. Blue dots indicate messages you haven’t yet opened.
Each message bears a gray ![]() at the right side. That means “Tap this message’s row to read it in all its formatted glory.”
at the right side. That means “Tap this message’s row to read it in all its formatted glory.”
Here and there, though, you may spot a double arrow at the right side of the message list, like this: ![]() . That means you’re looking at some threaded messages.
. That means you’re looking at some threaded messages.
That’s where several related messages—back-and-forths on the same subject—appear only once, in a single, consolidated entry. The idea is to reduce inbox clutter and to help you remember what the heck people have been talking about.

When you tap a threaded message, you open what appears to be all the messages in this topic, scrolling and attached vertically as though they’re sheets of paper towel. Messages you’ve already seen appear collapsed, as shown at right on the previous page, to help you keep your bearings.
In general, threading is a nice feature. But if it bugs you, you can turn it off. Open Settings → Mail, scroll down, and turn off Organize By Thread. (While you’re there, notice the option called Collapse Read Messages. It’s responsible for the collapsing effect just described.)
(If you have an iPhone Plus or Max model, you can turn the phone 90 degrees to see the mini-tablet-like view shown below, with the message list and open message visible simultaneously.)

Filters
The iPhone offers one-click filters that hide or show all messages of a certain kind in the list—like ones you haven’t yet read.
See the ![]() button below the list of messages? When you tap it, you automatically turn on the first filter: Unread. All the messages in the list that you’ve read are hidden—until you hit
button below the list of messages? When you tap it, you automatically turn on the first filter: Unread. All the messages in the list that you’ve read are hidden—until you hit ![]() again to turn the filter off.
again to turn the filter off.
When the filter is on, you can click the word Unread to see a list of other ways to filter the list. You can tell Mail to show you only messages you’ve flagged; only messages to you (or that you were copied on); only the ones with attachments; or only the ones from people in your VIP list. You can also combine filters, if you want.

VIPs and Flagged Messages
You might notice, on the Mailboxes screen, two “email accounts” you didn’t set up: VIP and Flagged. They’re both intended to help you round up important messages from the thousands that flood you every day.
Each one magically rounds up messages from all your account inboxes, so you don’t have to go wading through lots of accounts to find the really important mail. (Note: That’s inboxes. Messages in other mail folders don’t wind up in these special inboxes, even if they’re flagged or are from VIPs.)
VIPs
In the real world, VIPs are people who get backstage passes to concerts or special treatment at business functions (it stands for “very important person”). In iOS, it means “somebody whose mail is important enough that I want it brought to my attention immediately when it arrives.”
So who should your VIPs be? That’s up to you. Your spouse, your boss, and your oncologist come to mind.
To designate someone as a VIP, proceed in either of these two ways:
On the accounts screen, carefully tap the
 next to the VIP item. Your master list of all VIPs appears (below, left). Tap Add VIP to choose a lucky new member from Contacts.
This is also where you delete people from your VIP list when they’ve annoyed you. Swipe leftward across a name, and then tap Delete. Or tap Edit and then tap each
 button; tap Delete to confirm.
Tip
You can set things up so that when a new message from a VIP comes in, the iPhone lets you know with a sound, a banner, an alert bubble, a vibration, and so on. Tap VIP Alerts to set them up. (That’s a shortcut to the Settings → Notifications → Mail → VIP screen.)
In a message from the lucky individual, tap his name in the From, To, or Cc/Bcc box. His Contact screen appears, complete with an Add to VIP button.
Once you’ve established who’s important, lots of interesting things happen:
The VIP inbox automatically collects messages from your VIPs.
VIP names in every mail list sprout a gray star (above, right).
If you use iCloud, the same person is now a VIP on all your other iPhones and iPads (running iOS 6 or later) and Macs (running OS X Mountain Lion or later).
Tip
You can hide the VIP inbox on the main Mailboxes screen—handy if you don’t really use this feature. Tap Edit, and then ![]() . Tap Done.
. Tap Done.
Flag It
Sometimes you receive email that prompts you to take some sort of action, but you may not have the time (or the fortitude) to face the task at the moment. (“Hi there, it’s me, your accountant. Would you mind rounding up your expenses for 2007 through 2017 and sending me a list by email?”)
That’s why Mail lets you flag a message, summoning a little flag icon or a little orange dot in a new column next to the message’s name. It can mean anything you like—it simply calls attention to certain messages.
Tip
The flag marker can be either a ![]() icon or an orange dot. You make your choice in Settings → Mail → Flag Style.
icon or an orange dot. You make your choice in Settings → Mail → Flag Style.
To flag an open message, tap ![]() at the bottom of the screen. When the confirmation sheet slides up (below, left), tap Flag.
at the bottom of the screen. When the confirmation sheet slides up (below, left), tap Flag.

You can also rapidly flag messages directly in a list (the inbox, for example). Just swipe leftward across the message—half an inch of finger sliding does the trick—to reveal the set of buttons shown above at right.
Tap Flag. (If you tap More, you get the option to Unflag.)
The dot or ![]() icon appears in the body of the message and next to the message’s name in your inbox. (In the image above, the top dot looks more like a bull’s-eye; that’s because it’s flagged and unread.) The flag appears even on the corresponding message in your Mac or PC email program, thanks to the miracle of wireless syncing.
icon appears in the body of the message and next to the message’s name in your inbox. (In the image above, the top dot looks more like a bull’s-eye; that’s because it’s flagged and unread.) The flag appears even on the corresponding message in your Mac or PC email program, thanks to the miracle of wireless syncing.
The Flagged mailbox appears in your list of accounts, making it easy to work with all flagged messages, from all accounts, in one place.
Tip
If you don’t use this feature, you can hide the Flagged folder. Tap Edit, and then tap the ![]() to turn it off. Tap Done.
to turn it off. Tap Done.
This might be a good time to point out another, newer way to draw attention to a message: Tell Siri to “Remind me about this later.” See ““Remind Me About This”” for details.
What to Do with a Message
Once you’ve opened a message, you can respond to it, delete it, file it, and so on. Here’s the drill.
Tip
If you have an iPhone 6s or later, the first thing to learn is that you can see what’s in a message without ever leaving the Inbox list—just by hard-pressing it. See “Peek and Pop” for more on peek and pop.
List View: Flag, Trash, Mark as Unread
It’s easy to plow through a teeming Inbox, processing messages as you go, without ever having to open them. All you have to do is swipe across a message in the list horizontally:
Full left-swipe delete. Swipe your finger leftward all the way across the message to delete it. That’s it: No confirmation tap required.
Partial left-swipe options. If you don’t swipe leftward all the way, you reveal a set of three buttons on the right: Trash (same as before, but now you have to tap again to confirm); Flag (described in the previous section); and More (opens up a raft of other options, like Reply, Forward, Flag, Move to Junk, and so on).
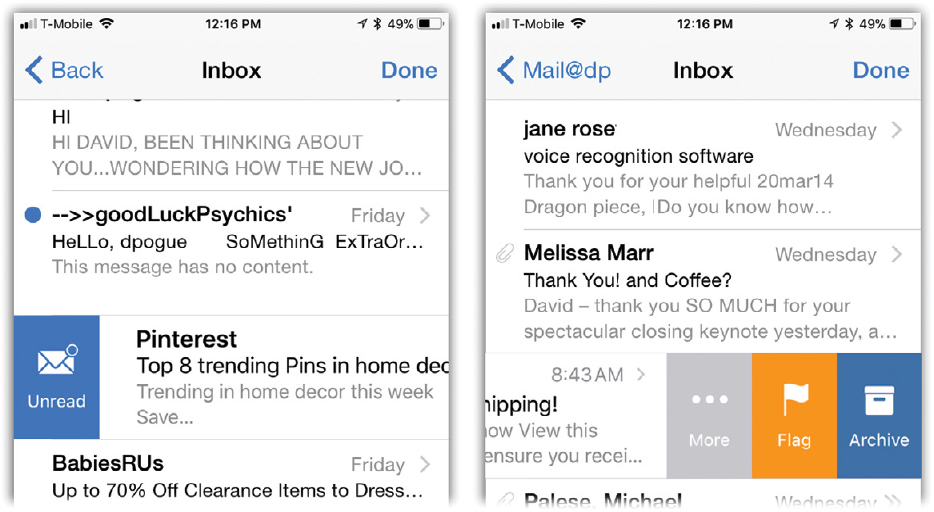
Full right-swipe. Swipe your finger to the right all the way across the message to mark it as new (unread). Great for reminding yourself to look at this message again later. Or, if it’s already unread, that swipe marks it as read.
To a certain extent, you can customize these gestures. You can turn off the right-swipe gesture. Or swap the positions of the Flag and Read options, for example, so that you flag a message when you swipe fully to the right and Read appears as a button when you swipe to the left. Or you can put the Archive button into the place of Flag when you swipe to the left.
To check out your options, open Settings → Mail → Swipe Options.
Tap Swipe Left to specify which button appears in the center of the three when you swipe partway leftward: None, Mark as Read, Flag, or Move Message. Tap Swipe Right to choose which function you want to trigger with a full rightward swipe (None, Mark as Read, Flag, Move Message, or Archive).
Read It
The type size in email messages can be pretty small. Fortunately, you have some great iPhoney enlargement tricks at your disposal. For example:
Spread two fingers to enlarge the entire email message.
Double-tap a narrow block of text to make it fill the screen, if it doesn’t already.
Drag or flick your finger to scroll through or around the message.
Choose a larger type size for all messages. See ???.
Links are “live” in email messages. Tap a phone number to call it, a web address to open it, a YouTube link to watch the video, an email address to write to it, a time and date to add it to your calendar, and so on.
Reply to It
To answer a message, tap the Reply/Forward icon (![]() ) at the bottom of the screen; tap Reply. If the message was originally addressed to multiple recipients, then you can choose Reply All to send your reply to everyone simultaneously.
) at the bottom of the screen; tap Reply. If the message was originally addressed to multiple recipients, then you can choose Reply All to send your reply to everyone simultaneously.
A new message window opens, already addressed. As a courtesy to your correspondents, Mail pastes the original message at the bottom of the window.

If you’d like to splice your own comments into the paragraphs of the original message, replying point by point, then use the Return key to create blank lines in the original message. (Use the loupe—“Making the Keyboard Work”—to position the insertion point at the proper spot.)
The brackets by each line of the original message help your correspondent keep straight what’s yours and what’s hers.
Tip
If you select some text before you tap Reply or Reply All, then the iPhone pastes only that selected bit into the new, outgoing message. In other words, you’re quoting back only a portion.
Before you tap Send, you can add or delete recipients, edit the subject line or the original message, and so on.
Forward It
Instead of replying to the sender, you may sometimes want to pass the note on to a third person. To do so, tap ![]() . This time, tap Forward.
. This time, tap Forward.
Tip
If there’s a file attached to the inbound message, the iPhone says, “Include attachments from original message?” and offers Include and Don’t Include buttons. Rather thoughtful, actually—the phone can forward files it can’t even open.
A new message opens, looking like the one that appears when you reply. You can precede the original message with a comment of your own, like, “Frank: I thought you’d be interested in this joke about your mom.” Finally, address and send it as usual.
Follow It
Your phone can notify you when anyone responds to a certain email conversation.
If you’re composing or replying to a message, tap in the subject line to make the ![]() appear; tap it. If you’re reading a message, tap
appear; tap it. If you’re reading a message, tap ![]() at the bottom of the screen, tap Notify Me, and confirm by tapping Notify Me again (previous page, left). In a list, swipe leftward, partly across a message; tap More; tap Notify Me. In each case, a
at the bottom of the screen, tap Notify Me, and confirm by tapping Notify Me again (previous page, left). In a list, swipe leftward, partly across a message; tap More; tap Notify Me. In each case, a ![]() icon appears beside the message (or thread) in the list (previous page, right).
icon appears beside the message (or thread) in the list (previous page, right).

When anybody replies, a notification banner appears on your screen, ready for swiping and reading.
File or Delete One Message
Once you’ve opened a message that’s worth keeping, you can file it into one of your account’s folders (“mailboxes”) by tapping the ![]() at the bottom of the screen. Up pops the list of your folders; tap the one you want.
at the bottom of the screen. Up pops the list of your folders; tap the one you want.
It’s a snap to delete a message you no longer want, too. If it’s open in front of you, tap ![]() or
or ![]() at the bottom of the screen. The message rapidly shrinks into the icon and disappears.
at the bottom of the screen. The message rapidly shrinks into the icon and disappears.
Note
If that one-touch deletion method makes you a little nervous, by the way, you can ask the iPhone to display a confirmation box before trashing the message forever. Visit Settings → Mail → Ask Before Deleting.
You can also delete a message from the message list—the inbox, for example—by swiping left.
Tip
Gmail doesn’t want you to throw anything away. That’s why swiping like this produces a button that says Archive, not Delete, and why the usual ![]() button in a message looks like a filing box. If you prefer to delete a message for good, hold down the
button in a message looks like a filing box. If you prefer to delete a message for good, hold down the ![]() until the Trash Message and Archive Message buttons appear.
until the Trash Message and Archive Message buttons appear.
There’s a long way to delete messages from the list, too, as described next. But for single messages, the finger-swipe method is much more fun.
Tip
There’s a handy Undo shortcut, too: Shake the phone lightly. Tap Undo Trash. The deleted message jumps back to the folder it just came from. (You can then shake again to undo the Undo!)
File or Delete Batches of Messages
You can also file or delete a bunch of messages at once. In the message list, tap Edit. A circle appears beside each message title. You can tap as many of these circles as you like, scrolling as necessary, adding a ![]() with each touch.
with each touch.
Finally, when you’ve selected all the messages in question, tap either Trash (or Archive) or Move.

If you tap Move, then you’re shown the folder list so you can say where you want them moved to. If you tap Trash, the messages disappear.
If you decide you’ve made a mistake, just shake the phone lightly—the iPhone’s undo gesture. Tap Undo Move to put the filed messages back where they just came from.
Note
When you delete a message, it goes into the Trash folder. In other words, it works like the Macintosh Trash or the Windows Recycle Bin. You have a safety net.
Email doesn’t have to stay in the Trash folder forever, though. You can ask the iPhone to empty that folder every day, week, or month. From the Home screen, tap Settings → Passwords & Accounts. Tap the account name of one of your accounts, and then tap it again on the next screen. Then choose Advanced → Remove. You can change the setting from Never to After one day (or one week, or one month).
Add the Sender to Contacts
When you get a message from someone new who’s worth adding to your iPhone’s Contacts address book, tap that person’s name (in blue, on the From line). You’re offered buttons for Create New Contact and Add to Existing Contact. Use the second button to add an email address to an existing person’s “card.”
Open an Attachment
The Mail program downloads and displays the icons for any kind of attachment—but it can open only documents from Microsoft Office (Word, Excel, PowerPoint), those from Apple iWork (Pages, Keynote, Numbers), PDFs, text, RTFs, VCFs, graphics, .zip files, and un-copy-protected audio and video files.
Just scroll down, tap the attachment’s icon, wait a moment for downloading, and then marvel as the document opens up, full screen. You can zoom in and out, flick, rotate the phone 90 degrees, and scroll just as though it were a web page or a photo.
Tip
If you hold your finger down on the attachment’s name, the Share sheet appears. It offers a list of ways you can send this attachment directly from your phone to someone else (by AirDrop, Messages, or Mail)—or open it in other apps.
If you tap a Word document, for example, you may be offered buttons for Mail, Dropbox, Evernote, and other apps that can open Word docs. If you tap a PDF document, you’ll see a button for Open in Books. (Quick Look means the same non-editable preview as you’d get with a quick tap.)
When you’re finished admiring the attachment, swipe rightward to return to the original email message.
Tip
iOS can handle the compressed folders known as .zip files, just as Macs and Windows computers can. When you tap a .zip attachment’s icon, the first file in it opens up. At that point, though, if you tap the ![]() icon, you get a list of every document in that zipped folder. You can tap each to view or share it.
icon, you get a list of every document in that zipped folder. You can tap each to view or share it.
Snag (or Send) a Graphic
If you get sent a particularly good picture, just hold your finger on it. You’re offered the Save sheet, filled with options like Save (into your Photo app’s Camera Roll), Copy, Print, and Assign to Contact (as a person’s face photo). All the usual sending methods are represented here, too, so you can fire off this photo via AirDrop, Messages, Mail, Twitter, and Facebook.
Snag a Contact or a Date
Mail can recognize contact information or calendar information from an incoming email message—and can dump it directly into Contacts or Calendar for you.
You’ll know when it’s found something—the block of contact information below somebody’s signature, for example—because you see a special gray banner at the top of the screen (shown on the facing page).
If it’s somebody worth tracking, tap add…. A new Contacts screen appears, ready to save.
Similarly, if the message contains a reference to a date and time, the same sort of banner appears, offering to pop the appointment onto your calendar. (This banner appears only when it’s really sure you’re being offered a date and time: e-invitations and airline-ticket confirmations, for example.)
iOS: saving you time since 2016.

Unsubscribe
Every now and then, when you open a piece of junk mail, Mail offers you an Unsubscribe button at the top (above, right). And sure enough: Tapping it (and then tapping Unsubscribe to confirm) gets you off that mailing list.
Now, before you uncork the champagne, keep in mind that this button appears only on some pieces of spam—from only the kind-hearted, legitimate senders who include an Unsubscribe link at the bottom of their messages. All Mail does is automate that process (and move the Unsubscribe button to the top).
View the To/From Details
When your computer’s screen is only a few inches tall, there’s not a lot of extra space. So Apple designed Mail to conceal header details (To, From, and so on) that you might need only occasionally. For example, you usually don’t actually see the word “From”—you typically see only the sender’s name, in blue. The To and Cc lines (???) may show only first names, to save space. And if there’s a long list of addresses, you may see only “Michael & 15 more”—not the actual list of names.
You get last names, full lists, and full sender labels when you tap More following the header information. Tap Hide to collapse these details.
Tip
When you tap a sender’s name in blue, you open the corresponding info card in Contacts. It contains one-touch buttons for calling someone back, sending a text message, or placing a FaceTime audio or video call—which can be very handy if the email message you just received is urgent.

Mark as Unread
In the inbox, any message you haven’t yet read is marked by a blue dot (![]() ). Once you’ve opened the message, the blue dot goes away.
). Once you’ve opened the message, the blue dot goes away.
If you slide your finger to the right across a message in the list, you trigger the Unread command—you make that blue dot reappear. It’s a great way to flag a message for later, to call it to your own attention. The blue dot can mean not so much “unread” as “un–dealt with.”
Move On
Once you’ve had a good look at a message and processed it to your satisfaction, you can move on to the next (or previous) message in the list by tapping ![]() or
or ![]() in the upper-right corner. Or you can swipe rightward to return to the inbox (or whatever mailbox you’re in).
in the upper-right corner. Or you can swipe rightward to return to the inbox (or whatever mailbox you’re in).
Search
Praise be—there’s a search box in Mail. The search box is hiding above the top of every mail list, like your inbox. To see it, swipe down or just tap the status strip at the top of the screen.
Tap inside the search box to make the keyboard appear, along with helpful canned searches like Flagged Messages and Messages with Attachments. As you type, Mail hides all but the matching messages; tap any one of the results to open it.
You don’t have to specify which fields to search (From, To, Subject, Body), or which folder. You’re searching everywhere.
Tip
If you want to restrict the search to just the folder you’re in, you can. After the search results begin to appear, tug downward on the screen. Two new buttons appear: All Mailboxes and Current Mailbox.

Wait long enough, and the search continues with messages that are still out there on the internet but are so old that they’ve scrolled off your phone.
Tip
If, after typing a few letters, you tap Search, the keyboard goes away and an Edit button appears. Tapping it lets you select a whole bunch of the search results—and then Mark, Move, or Trash them simultaneously.
Writing Messages
To compose a new piece of outgoing mail, open the Mail app, and then tap ![]() in the lower-right corner. A blank new outgoing message appears, and the iPhone keyboard pops up.
in the lower-right corner. A blank new outgoing message appears, and the iPhone keyboard pops up.
Here’s how you go about writing a message:
In the To field, type the recipient’s email address—or grab it from Contacts.
Often, you won’t have to type much more than the first couple of letters of the name or email address. As you type, Mail displays all matching names and addresses so you can tap one instead of typing. (It thoughtfully derives these suggestions by analyzing both your Contacts and people you’ve recently exchanged email with.)
As you go, the iPhone displays a list of everyone whose name matches what you’re typing (below, left). The ones bearing
buttons are the people you’ve recently corresponded with but who are not in your Contacts. Tap the to open a screen where you can add them to Contacts—or remove them from the list of recent correspondents, so Mail’s autocomplete suggestions will no longer include those lowlifes.Tip
When you address an email message, Mail even suggests clusters of people you tend to email together—“Erin and Sam,” “Erin and Andy,” and so on—to save you the trouble of reassembling these teams (below, right).
Similarly, if you type a subject you’ve used before, Mail suggests the names of people who’ve received this subject line. (For example, if you send “This month’s traffic stats” every month to three co-workers, then their names appear automatically when you type out that subject line.) You’ll get to go home from work that much quicker.

If you hold your finger down on the period (.) key, you get a pop-up palette of common email-address suffixes, like .com, .edu, .org, and so on, just as in Safari.
Alternatively, tap the
 to open your Contacts list. Tap the name of the person you want. You can add as many addressees as you like; just repeat the procedure.
Tip
There’s no Group mail feature on the iPhone, which would let you send one message to a predefined set of friends. But at groups.yahoo.com, you can create free email groups. You can send a single email message to the group’s address, and everyone in the group will get a copy. (You have to set up one of these groups in a web browser—but lo and behold, your iPhone has one!)
To send a copy to other recipients, enter the address(es) in the Cc or Bcc fields. If you tap Cc/Bcc, From, the screen expands to reveal two new lines beneath the To line: Cc and Bcc.
Cc stands for carbon copy. Getting an email message where your name is in the Cc line implies: “I sent you a copy because I thought you’d want to know about this correspondence, but I’m not expecting you to reply.”
Bcc stands for blind carbon copy. It’s a copy that goes to a third party secretly—the primary addressee never knows who else you sent it to. For example, if you send your co-worker a message that says, “Chris, it bothers me that you’ve been cheating the customers,” you could Bcc your supervisor to clue her in without getting into trouble with Chris.
Each of these lines behaves exactly like the To line. You fill each one up with email addresses in the same way.
Tip
You can drag people’s names around—from the To line to the Cc line, for example. Just hold your finger down briefly on the name before dragging it. (It puffs and darkens once it’s ready for transit.)
Change the email account you’re using, if you like. If you have more than one email account set up on your iPhone, you can tap Cc/Bcc, From to expand the form and then tap From to open up a spinning list of your accounts. Tap the one you want to use for sending this message.
Type the topic of the message in the Subject field. Leaving it blank only annoys your recipient. On the other hand, don’t put the entire message into the subject line, either.
Type your message in the message box. All the usual iPhone keyboard and dictation tricks apply (Chapter 3). Don’t forget that you can use Copy and Paste, within Mail or from other programs. Both text and graphics can appear in your message.
And here’s a fantastic trick: As you’re composing a message, you can refer to another email—maybe the one you’re responding to—without losing your place.
To do that, drag downward on the title bar, where it says New Message or whatever the reply’s title is; your message in progress collapses to the bottom of the screen. Now you can scroll through the message behind it—or you can navigate to any message in any Mail account or folder. This is great when, for example, you want to copy some text out of an earlier message.
Actually, you can collapse multiple outgoing messages like this, leaving them unfinished but still open. They pile up at the bottom of the screen. (Hold your finger down on them to “fan” them open.)

When you’re ready to resume writing, tap the title bar at the bottom of the screen; your composition window opens right back up.
Attach a photo, video, or drawing, if you like. Hold down your finger lightly anywhere in the body of the message until the Select buttons appear. Tap
 to reveal the Insert Photo or Video button (below, left).
When you tap it, you’re shown your iPhone’s usual photo browser so that you can choose the photos and videos you want to attach (below, middle). Tap the collection you want; you’re shown all the thumbnails inside. Tap the photo or video, and then tap Choose.
You return to your message in progress, with the photo or video neatly inserted (below, right). You can repeat this step to add additional photo or video attachments. When you tap Send, you’re offered the opportunity to scale down the photo to a more reasonable (emailable) size.
Tip
You can also email a photo or a video from within the Photos program; you can forward a file attached to an incoming piece of mail; and you can paste a copied photo or video (or several) into an open email message.

You can also insert a freehand drawing (or maybe the term is freefinger). Once again, hold down your finger until the Select buttons appear. Tap
a couple of times, to reveal the Insert Drawing button. When you tap it, you open the standard Markup tools—pen, highlighter, pencil, eraser, lasso, color picker, text box, arrows, geometric shapes, and Undo—exactly as described in “Marking Up Your Photos”.Tap Insert Drawing once your masterpiece is complete; it appears as an inserted image in your outgoing message.
Format the text, if you like. You can apply bold, italics, or underlining.
The trick is to select the text first (“Step 1: Select the Text”). When the button bar appears, tap the
 button to make the Bold, Italics, and Underline controls appear there; tap away. Not terribly efficient, but it works.
You can use the same trick to summon the Quote Level controls. Select some text or move the cursor to the paragraph you want; tap the
until you bring the Quote Level button into view; and tap it to reveal the Increase and Decrease buttons. These buttons indent or un-indent those cluttery blocks of quoted and re-quoted text that often appear when you’re replying to a message. (One tap affects the entire paragraph.)If you really can’t stand those quote indentations, you can stop the iPhone from adding them in the first place when you forward or reply to a message. The on/off switch for that feature is in Settings → Mail → Increase Quote Level.
Tap Send (to send the message) or Cancel (to back out of it). If you tap Cancel, the iPhone asks if you want to save the message. If you tap Save Draft, then the message lands in your Drafts folder.
Later you can open the Drafts folder, tap the aborted message, finish it up, and send it.
Tip
If you hold down the ![]() button for a moment, the iPhone presents a list of your saved drafts. Clever stuff—if you remember it!
button for a moment, the iPhone presents a list of your saved drafts. Clever stuff—if you remember it!
Oh, and by the way: You can begin composing a message on your phone, and then continue writing it on your Mac, without ever having to save it as a draft. Or go the other way. See “Instant Hotspot” for details on Handoff.
Signatures
A signature is a bit of text that gets stamped at the bottom of your outgoing messages. It can be your name, a postal address, or a pithy quote.
Unless you intervene, the iPhone stamps “Sent from my iPhone” at the bottom of every message. You may be just fine with that, or you may consider it the equivalent of free advertising for Apple—or it may just feel like gloating. In any case, you can change the signature if you want to.
From the Home screen, tap Settings → Mail → Signature. You can make up one signature for All Accounts, or a different one for each account (tap Per Account). A Signature text area appears, complete with a keyboard, so you can compose the signature you want. It can even include emoji!
Tip
You can use bold, italic, or underline formatting in your signature, too. Just follow the steps on the previous page for formatting a message: Select the text, tap the ![]() to bring the
to bring the ![]() button into view, and so on.
button into view, and so on.
Finish with a Phone Call
If you’re typing out some reply, and you realize that it’d be faster to wrap this up by phone, hold down the home button (or iPhone X-class side button) to trigger Siri and just say, “Call him” or “Call her.”
If the addressee has a phone number in Contacts, Siri knows who you mean; she dials the number for you, right from the Mail app!
Four Settings Worth Tweaking
The options awaiting you in Settings → Mail cover a huge range of email behaviors. Here are a few of the most useful:
Preview. Messages in your inbox are listed with the subject line in bold type and a couple of lines, in light-gray text, that preview the message itself. You can control how many lines of the preview show up here, from None (you see more message titles on each screen without scrolling) to 5 Lines.
Show To/Cc Labels. The iPhone can display a
 or
or  logo on each message. At a glance, it helps you identify which messages are actually intended for you. Messages without those logos are probably spam, newsletters, mailing lists, or other messages that weren’t specifically addressed to you.
Default Account. If you have several accounts, which one does the iPhone use when you send mail from other apps—like when you email a photo from Photos or a link from Safari?
It uses the default account, of course. You determine which one is the default account in Settings → Mail → Default Account.
Settings by account. The options that may differ by account are stored in a separate location: Settings → Passwords & Accounts. If you have more than one email account, here’s where you can tap one to delete it or just temporarily deactivate it (turn off Mail)—for example, to accommodate your travel schedule, or just because you’re really tired of dealing with email.