
5
Building the Single-Page App
In the previous chapter, we extended a basic React app with the tooling and setup that we require to build user interfaces. This means that in this chapter, we can focus on the functionality that will make up our single-page app. Specifically, we’ll add functionality that allows users to authenticate, manage their passwords, and manage their to-dos.
The user interface and functionality to manage user authentication and passwords is useful to any app and could be used directly in yours. While the to-do user interface is unlikely to match what you require in your own apps, the techniques will be applicable.
So, in this chapter, we will cover the following topics:
- Adding navigation
- Adding user authentication pages
- Adding password management pages
- Adding to-do pages
Technical requirements
The following additional folders are required in this chapter and should be created:
tozo
└── frontend
    └── src
        └── pages
To follow the development in this chapter using the companion repository, https://github.com/pgjones/tozo, see the commits between the tags r1-ch5-start and r1-ch5-end.
Adding navigation
The app we are building needs to allow logged-in users to navigate to the full to-do list, the page allowing them to change their password, and allow them to log out. For logged-out users, they need to navigate between login, register, and reset password pages.
Focusing on the needs of logged-in users, the Material Design system includes an app bar that exists at the top of the page. This will allow for links to the full to-do list (home page) and an account menu to change their password and log out.
A more complex navigation
Your app probably has more pages than the one we are building in this book. This means the navigation system needs to be able to link to more pages. While the account menu can be extended with more links relating to the user, it is not a good location for other links. Instead, a drawer is the best solution. Drawers slide in from the left and can have as many links as required.
The account menu needs to allow users to log out, which means it needs to query the backend via a mutation and then update the app’s local authentication context (state). To do so, the following code should be added to frontend/src/components/AccountMenu.tsx:
import axios from "axios";
import { useContext } from "react";
import { useQueryClient } from "@tanstack/react-query";
import { AuthContext } from "src/AuthContext";
import { useMutation } from "src/query";
const useLogout = () => {
  const { setAuthenticated } = useContext(AuthContext);
  const queryClient = useQueryClient();
  const { mutate: logout } = useMutation(
    async () => await axios.delete("/sessions/"),
    {
      onSuccess: () => {
        setAuthenticated(false);
        queryClient.clear();
      },
    },
  );
  return logout;
};
This code provides a logout function, which, when called, triggers the mutation thereby sending a DELETE /sessions/ request. If this request succeeds, the user is logged out, the local authentication context is set to false, and the data stored by React-Query is cleared. If the request fails, nothing will change, prompting the user to try again.
With this functionality in place, we now need to add the styled menu. We can do this by adding the following to the existing code in frontend/src/components/AccountMenu.tsx:
import Divider from "@mui/material/Divider";
import IconButton from "@mui/material/IconButton";
import Menu from "@mui/material/Menu";
import MenuItem from "@mui/material/MenuItem";
import AccountCircle from "@mui/icons-material/AccountCircle";
import React, { useState } from "react";
import { Link } from "react-router-dom";
const AccountMenu = () => {
  const logout = useLogout();
  const [anchorEl, setAnchorEl] = useState<null | HTMLElement>(null);
  const onMenuOpen = (event: React.MouseEvent<HTMLElement>) =>
    setAnchorEl(event.currentTarget);
  const onMenuClose = () => setAnchorEl(null);
  return (
    <>
      <IconButton
        color="inherit"
        onClick={onMenuOpen}
      >
        <AccountCircle />
      </IconButton>
      <Menu
        anchorEl={anchorEl}
        anchorOrigin={{ horizontal: "right", vertical: "top" }}
        keepMounted
        onClose={onMenuClose}
        open={Boolean(anchorEl)}
        transformOrigin={{           horizontal: "right", vertical: "top"         }}
      >
        <MenuItem
          component={Link}
          onClick={onMenuClose}
          to="/change-password/"
        >
          Change password
        </MenuItem>
        <Divider />
        <MenuItem onClick={() => {logout(); onMenuClose();}}>
          Logout
        </MenuItem>
      </Menu>
    </>
  );
};
export default AccountMenu;
This is standard MUI code for a menu that opens when the IconButton component is clicked.
We can now add the app bar itself, including a link to the home page, and the account menu if the user is logged in (authenticated) by adding the following to frontend/src/components/TopBar.tsx:
import AppBar from "@mui/material/AppBar";
import Box from "@mui/material/Box";
import Button from "@mui/material/Button";
import Toolbar from "@mui/material/Toolbar";
import React, { useContext } from "react";
import { Link } from "react-router-dom";
import { AuthContext } from "src/AuthContext";
import AccountMenu from "src/components/AccountMenu";
const sxToolbar = {
  paddingLeft: "env(safe-area-inset-left)",
  paddingRight: "env(safe-area-inset-right)",
  paddingTop: "env(safe-area-inset-top)",
}
const TopBar = () => {
  const { authenticated } = useContext(AuthContext);
  return (
    <>
      <AppBar position="fixed">
        <Toolbar sx={sxToolbar}>
          <Box sx={{ flexGrow: 1 }}>
            <Button color="inherit" component={Link} to="/">
              Tozo
            </Button>
          </Box>
          {authenticated ? <AccountMenu /> : null}
        </Toolbar>
      </AppBar>
      <Toolbar sx={{ ...sxToolbar, marginBottom: 2 }} />
    </>
  );
};
export default TopBar;
The additional padding styling (highlighted) that utilizes the safe-area-inset is required for the app bar to look correct on devices with a notch, such as the iPhone X.
The TopBar should be rendered in the Router within the BrowserRouter, by adding the following to frontend/src/Router.tsx:
import TopBar from "src/components/TopBar";

const Router = () => (
  <BrowserRouter>
    <ScrollToTop />
    <TopBar />
    <Routes>
      {/* Place routes here */}
    </Routes>
  </BrowserRouter>
);
The highlighted lines should be added to the existing code.
Once rendered, the app bar should look like Figure 5.1:
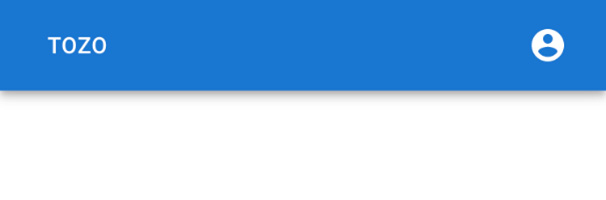
Figure 5.1: The app bar as displayed in a mobile browser
With the navigation complete, we can start adding the pages; we will begin by allowing users to register and log in.
Adding user authentication pages
On the first visit to our app, users will need to register, confirm their email, and log in. Whereas, on subsequent visits, they’ll just need to log in. Each of these actions will need to be a page in our app.
Registration
The first thing a new user needs to do when visiting our app is to register, so we’ll start by adding a registration page. To register, the user will need to enter their email and a password. Once the user has supplied these, we’ll use the members API to create the user and then redirect the user to the login page or, if the API call fails, display the relevant error.
We’ll start by adding this logic as a custom useRegister hook to frontend/src/pages/Register.tsx:
import axios from "axios";
import { FormikHelpers } from "formik";
import { useContext } from "react";
import { useNavigate } from "react-router";
import { ToastContext } from "src/ToastContext";
import { useMutation } from "src/query";
interface IForm {
  email: string;
  password: string;
}
const useRegister = () => {
  const navigate = useNavigate();
  const { addToast } = useContext(ToastContext);
  const { mutateAsync: register } = useMutation(
    async (data: IForm) => await axios.post("/members/", data),
  );
  return async (
    data: IForm,
    { setFieldError }: FormikHelpers<IForm>,
  ) => {
    try {
      await register(data);
      addToast("Registered", "success");
      navigate("/login/", { state: { email: data.email } });
    } catch (error: any) {
      if (
        error.response?.status === 400 &&
        error.response?.data.code === "WEAK_PASSWORD"
      ) {
        setFieldError("password", "Password is too weak");
      } else {
        addToast("Try again", "error");
      }
    }
  };
};
The function returned by the useRegister hook is designed to be used as a Formik onSubmit prop. This allows the function to add a specific error to the password field if the response from the backend indicates the password is too weak (as highlighted). Otherwise, if the registration succeeds, the app navigates to the login page.
Automatically logging in on registration
The flow we’ve implemented directs the user to the login page where they log in after registering, rather than automatically logging them in. While this isn’t the best user experience, it is done to mitigate account enumeration, and hence is a safe default. However, you may decide for your app that the user experience is more important. If so, the backend route will need to log the user in, and this page should direct the user to the home page after registering.
We now need to provide input fields for the user to enter their email and a strong password, which we can ensure by showing the password strength. The fields will be validated to inform the user of any mistakes and use the correct autocomplete values. The autocomplete values should encourage the browser to do most of the work for the user (e.g., by filling in their email address).
The registration page is therefore extended by adding the following code to the existing code in frontend/src/pages/Register.tsx:
import { Form, Formik } from "formik";
import { useLocation } from "react-router-dom";
import * as yup from "yup";

import EmailField from "src/components/EmailField";
import FormActions from "src/components/FormActions";
import LazyPasswordWithStrengthField from "src/components/LazyPasswordWithStrengthField";
import Title from "src/components/Title";
const validationSchema = yup.object({
  email: yup.string().email("Email invalid").required("Required"),
  password: yup.string().required("Required"),
});

const Register = () => {
  const location = useLocation();
  const onSubmit = useRegister();
  return (
    <>
      <Title title="Register" />
      <Formik<IForm>
        initialValues={{
          email: (location.state as any)?.email ?? "",
          password: "",
        }}
        onSubmit={onSubmit}
        validationSchema={validationSchema}
      >
        {({ dirty, isSubmitting, values }) => (
          <Form>
          <EmailField
            fullWidth label="Email" name="email" required
          />
            <LazyPasswordWithStrengthField
              autoComplete="new-password"
              fullWidth
              label="Password"
              name="password"
              required
            />
            <FormActions
              disabled={!dirty}
              isSubmitting={isSubmitting}
              label="Register"
              links={[
                {label: "Login", to: "/login/", state: { email:                   values.email }},
                {label: "Reset password", to: "/forgotten-                  password/", state: { email: values.email }},
              ]}
            />
          </Form>
        )}
      </Formik>
    </>
  );
};
export default Register;
As users often forget whether they have already registered, we’ve made it easier to navigate to the login and reset password pages via the FormActions links. In addition, as the user navigates between these pages, any value in the email field is persisted. This saves the user from having to type it in again, hence leading to a better user experience. This is done via the location.state, with the useLocation hook getting any current value, and the state part of the links prop of the FormActions component setting it.
Then we can add the page to the routing by adding the following to frontend/src/Router.tsx:
import { Route } from "react-router-dom";
import Register from "src/pages/Register";
const Router = () => (
  <BrowserRouter>
    <ScrollToTop />
    <TopBar />
    <Routes>
      <Route path="/register/" element={<Register />} />
    </Routes>
  </BrowserRouter>
);
The highlighted lines should be added to the existing code.
The completed Register page should look like Figure 5.2:
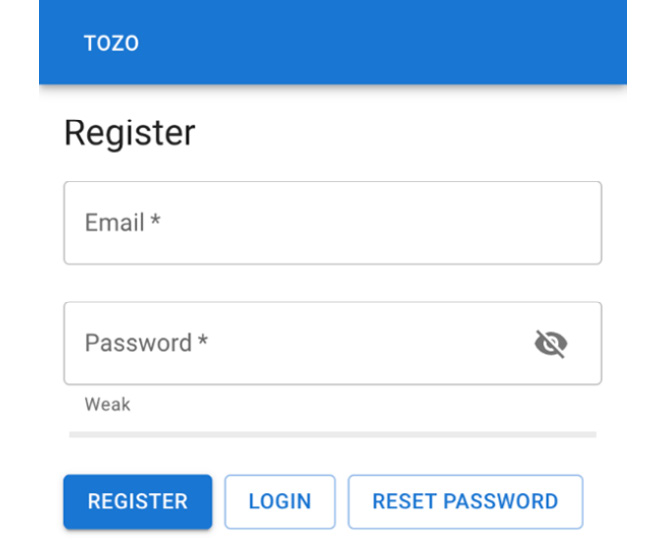
Figure 5.2: The registration page
With users now able to register, they’ll next need to confirm their email.
Email confirmation
On registration, users are sent an email with a link back to our app. Within the link is a token that identifies the user. By following the link, the user passes the token to us and proves that they are in control of the email address. Hence, we need a page that, when visited, sends the token to the backend and displays the result.
The link has the form /confirm-email/:token/ where :token is the actual user’s token (e.g., /confirm-email/abcd/). Therefore, we can extract the token using a route parameter by adding the following to frontend/src/Router.tsx:
import ConfirmEmail from "src/pages/ConfirmEmail";
const Router = () => (
  <BrowserRouter>
    <ScrollToTop />
    <TopBar />
    <Routes>
      <Route path="/register/" element={<Register />} />
      <Route
        path="/confirm-email/:token/" element={<ConfirmEmail />}
      />
    </Routes>
  </BrowserRouter>
);
The highlighted lines should be added to the existing code.
We can now build the ConfirmEmail page and utilize a useParam hook to extract the token from the path. To do so, the following code should be added to frontend/src/pages/ConfirmEmail.tsx:
import LinearProgress from "@mui/material/LinearProgress";
import axios from "axios";
import { useContext } from "react";
import { useParams } from "react-router";
import { Navigate } from "react-router-dom";

import { useQuery } from "src/query";
import { ToastContext } from "src/ToastContext";

interface IParams {
  token?: string;
}

const ConfirmEmail = () => {
  const { addToast } = useContext(ToastContext);
  const params = useParams() as IParams;
  const token = params.token ?? "";
  const { isLoading } = useQuery(
    ["Email"],
    async () => await axios.put("/members/email/", { token }),
    {
      onError: (error: any) => {
        if (error.response?.status === 400) {
          if (error.response?.data.code === "TOKEN_INVALID") {
            addToast("Invalid token", "error");
          } else if (error.response?.data.code === "TOKEN_            EXPIRED"){
            addToast("Token expired", "error");
          }
        } else {
          addToast("Try again", "error");
        }
      },
      onSuccess: () => addToast("Thanks", "success"),
    },
  );

  if (isLoading) {
    return  <LinearProgress />;
  } else {
    return <Navigate to="/" />;
  }
};

export default ConfirmEmail;
The highlighted lines show the token parameter being extracted from the path.
To ensure that the user knows that the app is working, a LinearProgress bar is shown while the frontend waits for the backend to respond; we can see this in Figure 5.3:
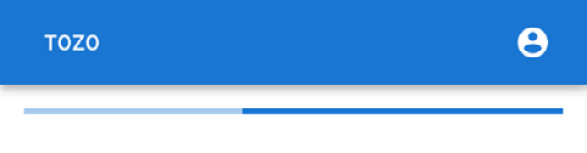
Figure 5.3: The Confirm Email page showing a LinearProgress bar to indicate processing is in progress
Finally, after registering and confirming their email, the user will need to log in.
Logging in
Users will need to log in to see and interact with their to-dos. To do so, the user will need to enter their email and a password. Once the user has supplied these, we’ll use the session API to create a session. If the login is successful, the user should then be redirected to the home page or to the page given by the from state if it is present. The from state redirects the user to the page they attempted to view without being logged in.
To do this, we’ll start by adding the following logic to frontend/src/pages/Login.tsx:
import axios from "axios";
import { FormikHelpers } from "formik";
import { useContext } from "react";
import { useLocation, useNavigate } from "react-router";
import { AuthContext } from "src/AuthContext";
import { ToastContext } from "src/ToastContext";
import { useMutation } from "src/query";
interface IForm {
  email: string;
  password: string;
}
const useLogin = () => {
  const location = useLocation();
  const navigate = useNavigate();
  const { addToast } = useContext(ToastContext);
  const { setAuthenticated } = useContext(AuthContext);
  const { mutateAsync: login } = useMutation(
    async (data: IForm) => await axios.post("/sessions/",      data),
  );
  return async (
    data: IForm,
    { setFieldError }: FormikHelpers<IForm>,
  ) => {
    try {
      await login(data);
      setAuthenticated(true);
      navigate((location.state as any)?.from ?? "/");
    } catch (error: any) {
      if (error.response?.status === 401) {
        setFieldError("email", "Invalid credentials");
        setFieldError("password", "Invalid credentials");
      } else {
        addToast("Try again", "error");
      }
    }
  };
};
With the login logic defined, we can now add the UI elements. This requires a form containing an email and password input, which should be added to the existing code in frontend/src/pages/Login.tsx:
import { Form, Formik } from "formik";
import * as yup from "yup";

import EmailField from "src/components/EmailField";
import FormActions from "src/components/FormActions";
import PasswordField from "src/components/PasswordField";
import Title from "src/components/Title";
const validationSchema = yup.object({
  email: yup.string().email("Email invalid").required("Required"),
  password: yup.string().required("Required"),
});

const Login = () => {
  const onSubmit= useLogin();
  const location = useLocation();
  return (
    <>
      <Title title="Login" />
      <Formik<IForm>
        initialValues={{
          email: (location.state as any)?.email ?? "",
          password: "",
        }}
        onSubmit={onSubmit}
        validationSchema={validationSchema}
      >
        {({ dirty, isSubmitting, values }) => (
          <Form>
            <EmailField
              fullWidth label="Email" name="email" required
            />
            <PasswordField
              autoComplete="password"
              fullWidth
              label="Password"
              name="password"
              required
            />
            <FormActions
              disabled={!dirty}
              isSubmitting={isSubmitting}
              label="Login"
              links={[
                {label: "Reset password", to: "/forgotten-                  password/", state: { email: values.email }},
                {label: "Register", to: "/register/", state: {                   email: values.email }},
              ]}
            />
          </Form>
        )}
      </Formik>
    </>
  );
};
export default Login;
The highlighted code shows that the form submission is disabled until the form is dirty. This helps the user as it ensures that they can’t submit the form until they have made changes to it. This is a pattern we’ll use on all of the forms.
We can now add the page to the routing by adding the following to frontend/src/Router.tsx:
import Login from "src/pages/Login";
const Router = () => (
  <BrowserRouter>
    <ScrollToTop />
    <TopBar />
    <Routes>
      <Route path="/register/" element={<Register />} />
      <Route
        path="/confirm-email/:token/"        element={<ConfirmEmail />}
      />
      <Route path="/login/" element={<Login />} />
    </Routes>
  </BrowserRouter>
);
The highlighted lines should be added to the existing code.
The completed Login page should look like Figure 5.4:

Figure 5.4: The Login page
Users can now register and then log in to our app. They can’t manage their password though, which we’ll focus on next.
Adding password management pages
We need to allow users to manage their passwords. This is quite involved as users often forget their password and hence a secure mechanism to reset the password is also required.
Changing a password
For the user to change their password, they have to supply their existing password and a strong replacement password. Therefore, the frontend needs to send both to the backend and display relevant errors if the current password is incorrect or the new one is too weak. This logic is contained in the following code, which should be added to frontend/src/pages/ChangePassword.tsx:
import axios from "axios";
import { FormikHelpers } from "formik";
import { useContext } from "react";
import { useNavigate } from "react-router-dom";
import { ToastContext } from "src/ToastContext";
import { useMutation } from "src/query";
interface IForm {
  currentPassword: string;
  newPassword: string;
}

const useChangePassword = () => {
  const { addToast } = useContext(ToastContext);
  const { mutateAsync: changePassword } = useMutation(
    async (data: IForm) =>
      await axios.put("/members/password/", data),
  );
  const navigate = useNavigate();

  return async (
    data: IForm,
    { setFieldError }: FormikHelpers<IForm>,
  ) => {
    try {
      await changePassword(data);
      addToast("Changed", "success");
      navigate("/");
    } catch (error: any) {
      if (axios.isAxiosError(error)) {
        if (error.response?.status === 400) {
          setFieldError("newPassword", "Password is too weak");
        } else if (error.response?.status === 401) {
          setFieldError("currentPassword", "Incorrect             password");
        }
      } else {
        addToast("Try again", "error");
      }
    }
  };
}
With the logic defined, we can now add the UI elements. This requires a form containing a plain password field and password strength field as shown here, which should be added to the existing code in frontend/src/pages/ChangePassword.tsx:
import { Form, Formik } from "formik";
import * as yup from "yup";
import FormActions from "src/components/FormActions";
import LazyPasswordWithStrengthField from "src/components/LazyPasswordWithStrengthField";
import PasswordField from "src/components/PasswordField";
import Title from "src/components/Title";

const validationSchema = yup.object({
  currentPassword: yup.string().required("Required"),
  newPassword: yup.string().required("Required"),
});

const ChangePassword = () => {
  const onSubmit = useChangePassword();
  return (
    <>
      <Title title="Change Password" />
      <Formik<IForm>
        initialValues={{ currentPassword: "", newPassword: "" }}
        onSubmit={onSubmit}
        validationSchema={validationSchema}
      >
        {({ dirty, isSubmitting }) => (
          <Form>
            <PasswordField
              autoComplete="current-password"
              fullWidth
              label="Current password"
              name="currentPassword"
              required
            />
            <LazyPasswordWithStrengthField
              autoComplete="new-password"
              fullWidth
              label="New password"
              name="newPassword"
              required
            />
            <FormActions
              disabled={!dirty}
              isSubmitting={isSubmitting}
              label="Change"
              links={[{ label: "Back", to: "/" }]}
            />
          </Form>
        )}
      </Formik>
    </>
  );
};
export default ChangePassword;
Then we can add the page to the routing by adding the following to frontend/src/Router.tsx:
import RequireAuth from "src/components/RequireAuth";
import ChangePassword from "src/pages/ChangePassword";
const Router = () => (
  <BrowserRouter>
    ...
    <Routes>
      ...
      <Route
        path="/change-password/"
        element={<RequireAuth><ChangePassword /></RequireAuth>}
      />
    </Routes>
  </BrowserRouter>
);
In the code block, ... represents code that has been omitted for brevity.
The completed Change Password page should look like Figure 5.5:
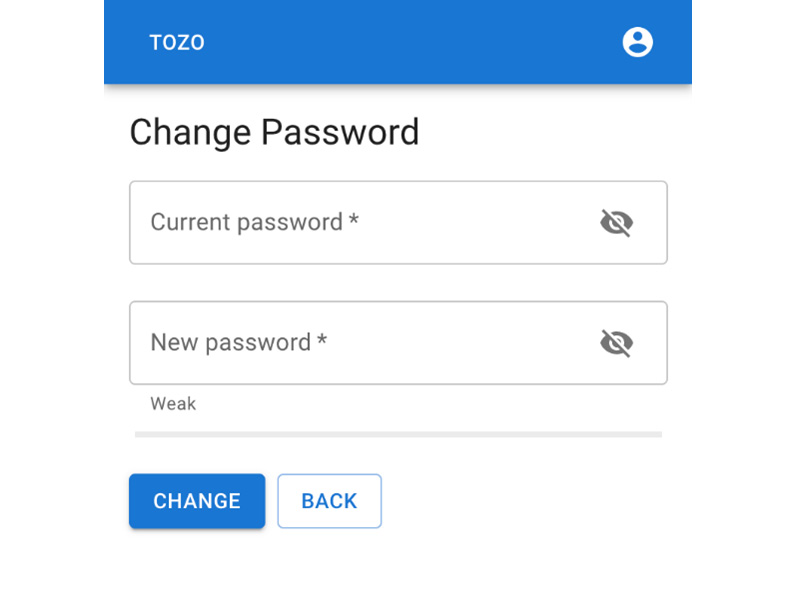
Figure 5.5: The Change Password page
Users can now change their password while logged in. Next, we will allow users to request a password reset link when they have forgotten it.
Forgotten passwords
When a user forgets their password, they’ll need to reset it by requesting a reset link. To do so, the user needs to enter their email and then we’ll use the members API to send them a password reset email or, if that fails, display a generic error.
The following code to do this should be placed in frontend/src/pages/ForgottenPassword.tsx:
import axios from "axios";
import { useContext } from "react";
import { useNavigate } from "react-router";

import { useMutation } from "src/query";
import { ToastContext } from "src/ToastContext";
interface IForm {
  email: string;
}

const useForgottenPassword = () => {
  const navigate = useNavigate();
  const { addToast } = useContext(ToastContext);

  const { mutateAsync: forgottenPassword } = useMutation(
    async (data: IForm) =>
      await axios.post("/members/forgotten-password/", data),
  );
  return async (data: IForm) => {
    try {
      await forgottenPassword(data);
      addToast("Reset link sent to your email", "success");
      navigate("/login/");
    } catch {
      addToast("Try again", "error");
    }
  };
};
With the logic defined, we can now add the UI elements. This requires a form containing an email field as shown here, which should be added to the existing code in frontend/src/pages/ForgottenPassword.tsx:
import { Form, Formik } from "formik";
import { useLocation } from "react-router";
import * as yup from "yup";

import EmailField from "src/components/EmailField";
import FormActions from "src/components/FormActions";
import Title from "src/components/Title";

const validationSchema = yup.object({
  email: yup.string().email("Email invalid").required("Required"),
});

const ForgottenPassword = () => {
  const onSubmit = useForgottenPassword();
  const location = useLocation();

  return (
    <>
      <Title title="Forgotten password" />
      <Formik<IForm>
        initialValues={{
          email: (location.state as any)?.email ?? ""
        }}
        onSubmit={onSubmit}
        validationSchema={validationSchema}
      >
        {({ dirty, isSubmitting, values }) => (
          <Form>
            <EmailField
              fullWidth label="Email" name="email" required
            />
            <FormActions
              disabled={!dirty}
              isSubmitting={isSubmitting}
              label="Send email"
              links={[
                {label: "Login", to: "/login/", state: { email:                   values.email }},
                {label: "Register", to: "/register/", state: {                   email: values.email }},
              ]}
            />
          </Form>
        )}
      </Formik>
    </>
  );
};

export default ForgottenPassword;
Then we can add the page to the routing by adding the following to frontend/src/Router.tsx:
import ForgottenPassword from "src/pages/ForgottenPassword";
const Router = () => (
  <BrowserRouter>
    ...
    <Routes>
      ...
      <Route
        path="/forgotten-password/"
        element={<ForgottenPassword />}
      />
    </Routes>
  </BrowserRouter>
);
In the code block, ... represents code that has been omitted for brevity.
The completed Forgotten password page should look like Figure 5.6:
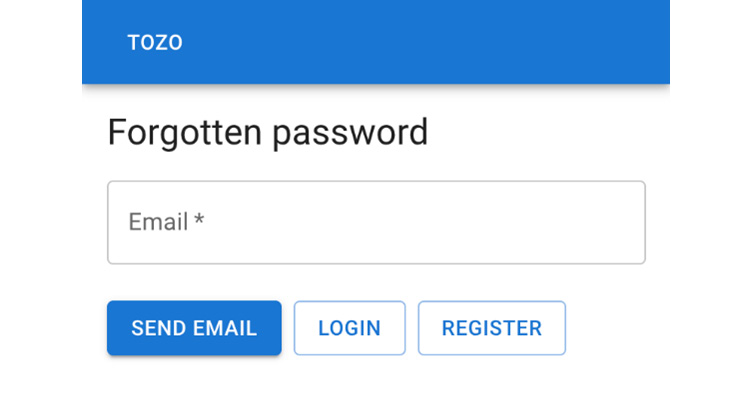
Figure 5.6: The Forgotten password page
Next, we need to add a page for the user to visit to actually reset their password.
Resetting a password
The email sent to the user via the forgotten password page will contain a link to the reset password page. This link will contain a token that identifies the user, in the same way as the email confirmation process described earlier. This page will need to allow the user to enter a new strong password and send it with the link’s token to the backend. The logic to do this is shown in the following code, which should be placed in frontend/src/pages/ResetPassword.tsx:
import axios from "axios";
import { FormikHelpers } from "formik";
import { useContext } from "react";
import { useNavigate, useParams } from "react-router";

import { useMutation } from "src/query";
import { ToastContext } from "src/ToastContext";
interface IForm {
  password: string;
}
interface IParams {
  token?: string;
}

const useResetPassword = () => {
  const navigate = useNavigate();
  const params = useParams() as IParams;
  const token = params.token ?? "";
  const { addToast } = useContext(ToastContext);

  const { mutateAsync: reset } = useMutation(
    async (password: string) =>
      await axios.put(
        "/members/reset-password/", { password, token },
      ),
  );
  return async (
    data: IForm,
    { setFieldError }: FormikHelpers<IForm>,
  ) => {
    try {
      await reset(data.password);
      addToast("Success", "success");
      navigate("/login/");
    } catch (error: any) {
      if (error.response?.status === 400) {
        if (error.response?.data.code === "WEAK_PASSWORD") {
          setFieldError("newPassword", "Password is too weak");
        } else if (error.response?.data.code === "TOKEN_           INVALID") {
          addToast("Invalid token", "error");
        } else if (error.response?.data.code === "TOKEN_           EXPIRED") {
          addToast("Token expired", "error");
        }
      } else {
        addToast("Try again", "error");
      }
    }
  }
};
With the logic defined, we can now add the UI elements. This requires a form containing a password field that shows the password's strength. We can do this by adding the following code to the existing code in frontend/src/pages/ResetPassword.tsx:
import { Form, Formik } from "formik";
import * as yup from "yup";

import LazyPasswordWithStrengthField from "src/components/LazyPasswordWithStrengthField"
import FormActions from "src/components/FormActions";
import Title from "src/components/Title";

const validationSchema = yup.object({
  email: yup.string().email("Email invalid").required("Required"),
});

const ResetPassword = () => {
  const onSubmit = useResetPassword();
  return (
    <>
      <Title title="Reset password" />
      <Formik<IForm>
        initialValues={{ password: "" }}
        onSubmit={onSubmit}
        validationSchema={validationSchema}
      >
        {({ dirty, isSubmitting, values }) => (
          <Form>
            <LazyPasswordWithStrengthField
              autoComplete="new-password"
              fullWidth
              label="Password"
              name="password"
              required
            />
            <FormActions
              disabled={!dirty}
              isSubmitting={isSubmitting}
              label="Reset password"
              links={[{label: "Login", to: "/login/"}]}
            />
          </Form>
        )}
      </Formik>
    </>
  );
};

export default ResetPassword;
Then we can add the page to the routing by adding the following to frontend/src/Router.tsx:
import ResetPassword from "src/pages/ResetPassword";
const Router = () => (
  <BrowserRouter>
    ...
    <Routes>
      ...
      <Route
        path="/reset-password/:token/"
        element={<ResetPassword />}
      />
    </Routes>
  </BrowserRouter>
);
In the code block, ... represents code that has been omitted for brevity.
The completed Reset password page should look like Figure 5.7:
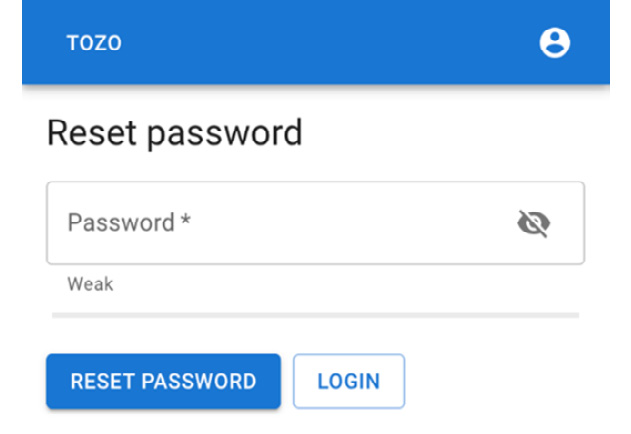
Figure 5.7: The Reset password page
Users can now manage their passwords, which means we can focus on pages to manage their to-dos.
Adding to-do pages
Users will need to manage their to-dos via the app, including creating, editing, and viewing their to-dos. These equate to different pages, which we will add.
First, let’s create the specific React-Query queries we will need to fetch to-dos from the backend. We can do this by adding the following code to frontend/src/queries.ts:
import axios from "axios";
import { useQueryClient } from "@tanstack/react-query";
import { Todo } from "src/models";
import { useQuery } from "src/query";
export const STALE_TIME = 1000 * 60 * 5;  // 5 mins
export const useTodosQuery = () =>
  useQuery<Todo[]>(
    ["todos"],
    async () => {
      const response = await axios.get("/todos/");
      return response.data.todos.map(
        (json: any) => new Todo(json)
      );
    },
    { staleTime: STALE_TIME },
  );
export const useTodoQuery = (id: number) => {
  const queryClient = useQueryClient();
  return useQuery<Todo>(
    ["todos", id.toString()],
    async () => {
      const response = await axios.get(`/todos/${id}/`);
      return new Todo(response.data);
    },
    {
      initialData: () => {
        return queryClient
          .getQueryData<Todo[]>(["todos"])
          ?.filter((todo: Todo) => todo.id === id)[0];
      },
      staleTime: STALE_TIME,
    },
  );
};
The change to the staleTime option (highlighted) ensures that react-query doesn’t continually refetch the to-do data, but rather considers it valid for 5 minutes. This improves the user experience by reducing their internet data usage. In addition, the useTodoQuery will helpfully use the cached to-do data as the initialData if it is available, thereby saving a request to the backend and improving the user’s experience.
Which user’s to-dos?
It may not be clear that the useTodosQuery defined previously will only return the currently authenticated user’s to-dos. This is because we’ve set up the backend to only return to-dos belonging to the currently authenticated user. It is vital that the authentication decisions are made in the backend as the user is able to alter the frontend code and hence potentially bypass checks.
Next, we need to add the mutations to update the to-do data in the backend by adding the following to frontend/src/queries.ts:
import { useMutation } from "src/query";
export interface ItodoData {
  complete: boolean;
  due: Date | null;
  task: string;
}
export const useCreateTodoMutation = () => {
  const queryClient = useQueryClient();
  return useMutation(
    async (data: ItodoData) => await axios.post("/todos/",       data),
    {
      onSuccess: () => queryClient.invalidateQueries(["todos"]),
    },
  );
};
export const useEditTodoMutation = (id: number) => {
  const queryClient = useQueryClient();
  return useMutation(
    async (data: ItodoData) =>
      await axios.put(`/todos/${id}/`, data),
    {
      onSuccess: () => queryClient.        invalidateQueries(["todos"]),
    },
  );
};
export const useDeleteTodoMutation = () => {
  const queryClient = useQueryClient();
  return useMutation(
    async (id: number) =>
      await axios.delete(`/todos/${id}/`),
    {
      onSuccess: () => queryClient.        invalidateQueries(["todos"]),
    },
  );
};
All three of these mutations will invalidate the [“todos”] query data thereby requiring the to-do queries defined previously to fetch the new data, rather than return the outdated data.
With these queries available, we can now create the actual visual elements (i.e., pages for the user to interact with).
Showing to-dos
The first page we need is one to show all the user’s to-dos, which is effectively the user’s home page. Alongside showing the to-dos, it needs to provide actions to create a to-do and edit and delete any existing ones.
The actions to edit or delete a to-do can be linked to the to-do directly by either clicking on it or a delete button associated with it. However, creating a to-do is a primary action for the page and hence is best suited to a floating action button. Therefore, the to-dos page should look like Figure 5.8:
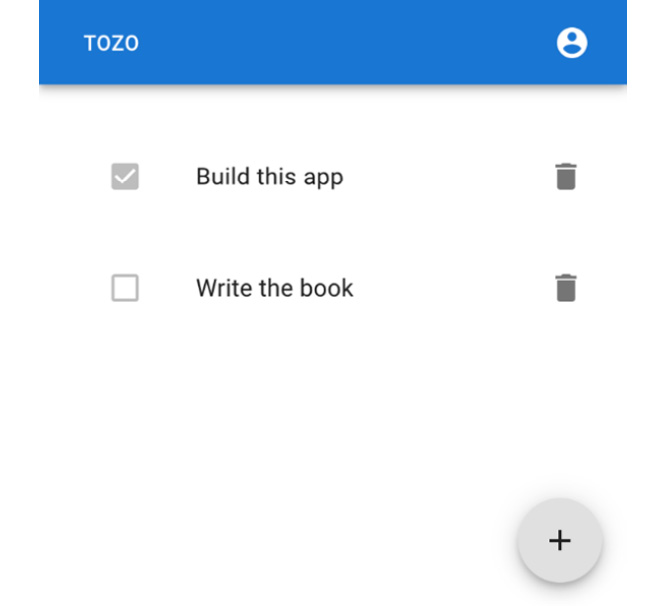
Figure 5.8: The home page showing to-dos, along with the floating action button
First, let’s create a component that shows an individual to-do by adding the following to frontend/src/components/Todo.tsx:
import Checkbox from "@mui/material/Checkbox";
import IconButton from "@mui/material/IconButton";
import ListItem from "@mui/material/ListItem";
import ListItemButton from "@mui/material/ListItemButton";
import ListItemIcon from "@mui/material/ListItemIcon";
import ListItemText from "@mui/material/ListItemText";
import Skeleton from "@mui/material/Skeleton";
import DeleteIcon from "@mui/icons-material/Delete";
import { format } from "date-fns";
import { Link } from "react-router-dom";
import { Todo as TodoModel } from "src/models";
import { useDeleteTodoMutation } from "src/queries";
interface IProps { todo?: TodoModel }
const Todo = ({ todo }: IProps) => {
  const { mutateAsync: deleteTodo } = useDeleteTodoMutation();
  let secondary;
  if (todo === undefined) {
    secondary = <Skeleton width="200px" />;
  } else if (todo.due !== null) {
    secondary = format(todo.due, "P");
  }
  return (
    <ListItem
      secondaryAction={
        <IconButton
          disabled={todo === undefined} edge="end"
          onClick={() => deleteTodo(todo?.id!)}
        >
          <DeleteIcon />
        </IconButton>
      }
    >
      <ListItemButton
        component={Link} disabled={todo === undefined}
        to={`/todos/${todo?.id}/`}
      >
        <ListItemIcon>
          <Checkbox
            checked={todo?.complete ?? false}
            disabled disableRipple edge="start" tabIndex={-1}
          />
        </ListItemIcon>
        <ListItemText
          primary={todo?.task ?? <Skeleton />}           secondary={secondary}
        />
      </ListItemButton>
    </ListItem>
  );
}
export default Todo;
This Todo component will render skeletons if the todo prop is undefined. We can use this to improve the user experience as the to-dos are fetched from the backend.
Skeleton loading
Fetching data from the backend will take a noticeable amount of time, during which the user will wonder what the app is doing. It is therefore best to show the user that the app is working (loading the data). We’ll do this by using skeletons, which are gray animated blocks arranged with the same layout as the completed page. The gray arrangement looks like a skeleton, which gives them their name.
The full home page, which shows all the to-dos the user has, is then finished by adding the following to frontend/src/pages/Todos.tsx:
import Fab from "@mui/material/Fab";
import List from "@mui/material/List";
import AddIcon from "@mui/icons-material/Add";
import { Link, Navigate } from "react-router-dom";
import Todo from "src/components/Todo";
import { useTodosQuery } from "src/queries";
const Todos = () => {
  const { data: todos } = useTodosQuery();
  if (todos?.length === 0) {
    return <Navigate to="/todos/new/" />;
  } else {
    return (
      <>
        <List>
          {todos !== undefined ?
            todos.map((todo) => <Todo key={todo.id} todo={todo} />)
            : [1, 2, 3].map((id) => <Todo key={-id} />)
          }
        </List>
        <Fab
          component={Link}
          sx={{
            bottom: (theme) => theme.spacing(2),
            position: "fixed",
            right: (theme) => theme.spacing(2),
          }}
          to="/todos/new/"
        >
          <AddIcon />
        </Fab>
      </>
    );
  }
};
export default Todos;
Then we can add the page to the routing by adding the following to frontend/src/Router.tsx:
import Todos from "src/pages/Todos";
const Router = () => (
  <BrowserRouter>
    ...
    <Routes>
      ...
      <Route
        path="/"
        element={<RequireAuth><Todos /></RequireAuth>}
      />
    </Routes>
  </BrowserRouter>
);
In the code block, ... represents code that has been omitted for brevity.
Now that we can display the to-dos, we need to be able to create and edit them.
Creating to-dos
We will need to provide pages for users to create new to-dos and edit any existing ones. Both these pages will require a form to enter and edit the to-do data. Rather than repeat this form code for each page, we’ll create a TodoForm component, starting by defining the form validation by adding the following to frontend/src/components/TodoForm.tsx:
import * as yup from "yup";
const validationSchema = yup.object({
  complete: yup.boolean(),
  due: yup.date().nullable(),
  task: yup.string().required("Required"),
});
With the validation schema and form structure defined, we can add the component itself. This component needs only to render the relevant fields within a Formik form. The following code should be added to frontend/src/components/TodoForm.tsx:
import { Form, Formik } from "formik";

import CheckboxField from "src/components/CheckboxField";
import DateField from "src/components/DateField";
import FormActions from "src/components/FormActions";
import TextField from "src/components/TextField";
import type { ITodoData } from "src/queries";

interface IProps {
  initialValues: ITodoData;
  label: string;
  onSubmit: (data: ITodoData) => Promise<any>;
}

const TodoForm = ({ initialValues, label, onSubmit }: IProps) => (
  <Formik< ITodoData>
    initialValues={initialValues}
    onSubmit={onSubmit}
    validationSchema={validationSchema}
  >
    {({ dirty, isSubmitting }) => (
      <Form>
        <TextField
          fullWidth label="Task" name="task" required
        />
        <DateField fullWidth label="Due" name="due" />
        <CheckboxField
          fullWidth label="Complete" name="complete"
        />
        <FormActions
          disabled={!dirty}
          isSubmitting={isSubmitting}
          label={label}
          links={[{ label: "Back", to: "/" }]}
        />
      </Form>
    )}
  </Formik>
);

export default TodoForm;
We can then use the TodoForm in a page to create a to-do task, by adding the following to frontend/src/pages/CreateTodo.tsx:
import { useContext } from "react";
import { useNavigate } from "react-router-dom";

import TodoForm from "src/components/TodoForm";
import Title from "src/components/Title";
import type { ITodoData } from "src/queries";
import { useCreateTodoMutation } from "src/queries";
import { ToastContext } from "src/ToastContext";

const CreateTodo = () => {
  const navigate = useNavigate();
  const { addToast } = useContext(ToastContext);
  const { mutateAsync: createTodo } = useCreateTodoMutation();
  const onSubmit = async (data: ITodoData) => {
    try {
      await createTodo(data);
      navigate("/");
    } catch {
      addToast("Try Again", "error");
    }
  };

  return (
    <>
      <Title title="Create a Todo" />
      <TodoForm
        initialValues={{           complete: false, due: null, task: ""         }}
        label="Create"
        onSubmit={onSubmit}
      />
    </>
  );
};

export default CreateTodo;
Then we can add the page to the routing by adding the following to frontend/src/Router.tsx:
import CreateTodo from "src/pages/CreateTodo";
const Router = () => (
  <BrowserRouter>
    ...
    <Routes>
      ...
      <Route
        path="/todos/new/"
        element={<RequireAuth><CreateTodo /></RequireAuth>}
      />
    </Routes>
  </BrowserRouter>
);
In the code block, ... represents code that has been omitted for brevity.
The completed Create a Todo page should look like Figure 5.9:
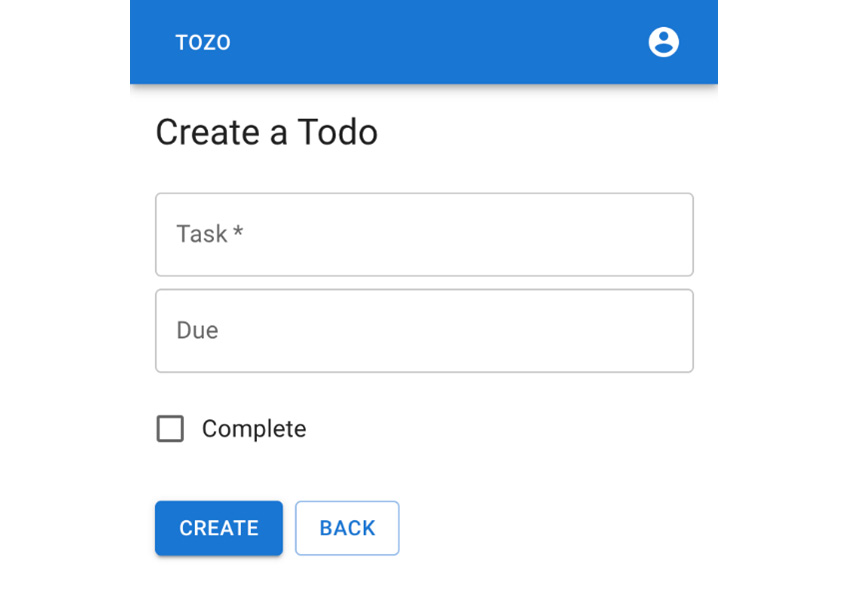
Figure 5.9: The Create a Todo page showing the to-do form
Users will want to be able to edit their to-dos after creating them, which we’ll add next.
Editing to-dos
Finally, for the to-do pages, we need to allow users to edit their to-dos; you can do this via the following code, which should be added to frontend/src/pages/EditTodo.tsx:
import Skeleton from "@mui/material/Skeleton";
import { useContext } from "react";
import { useNavigate, useParams } from "react-router";

import TodoForm from "src/components/TodoForm";
import Title from "src/components/Title";
import type { ITodoData } from "src/queries";
import { useEditTodoMutation, useTodoQuery } from "src/queries";
import { ToastContext } from "src/ToastContext";

interface Iparams {
  id: string;
}

const EditTodo = () => {
  const navigate = useNavigate();
  const params = useParams<keyof Iparams>() as Iparams;
  const todoId = parseInt(params.id, 10);
  const { addToast } = useContext(ToastContext);
  const { data: todo } = useTodoQuery(todoId);
  const { mutateAsync: editTodo } = useEditTodoMutation(todoId);

  const onSubmit = async (data: ITodoData) => {
    try {
      await editTodo(data);
      navigate("/");
    } catch {
      addToast("Try again", "error");
    }
  };

  return (
    <>
      <Title title="Edit todo" />
      {todo === undefined ? (
        <Skeleton height="80px" />
      ) : (
        <TodoForm
          initialValues={{
            complete: todo.complete,
            due: todo.due,
            task: todo.task,
          }}
          label="Edit"
          onSubmit={onSubmit}
        />
      )}
    </>
  );
};

export default EditTodo;
Then we can add the page to the routing by adding the following to frontend/src/Router.tsx:
import EditTodo from "src/pages/EditTodo";
const Router = () => (
  <BrowserRouter>
    ...
    <Routes>
      ...
      <Route
        path="/todos/:id/"
        element={<RequireAuth><EditTodo /></RequireAuth>}
      />
    </Routes>
  </BrowserRouter>
);
In the code block, ... represents code that has been omitted for brevity.
The completed Edit todo page should look like Figure 5.10:
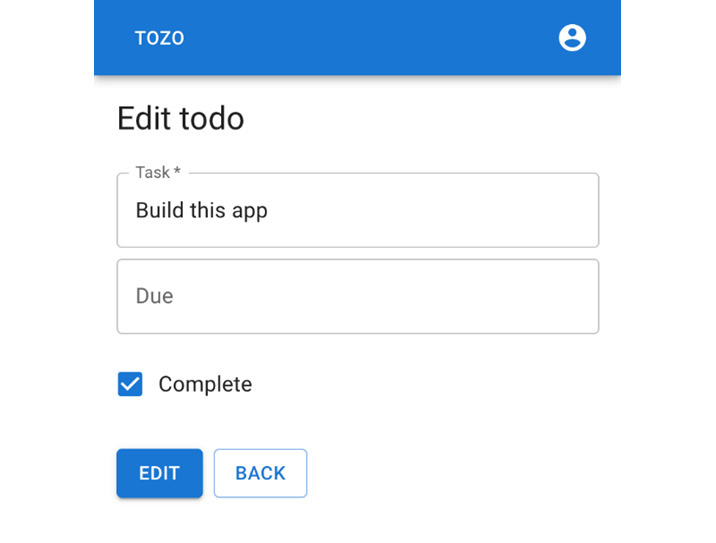
Figure 5.10: The Edit todo page
This completes the frontend functionality we need for our to-do app.
Summary
In this chapter, we’ve created a user interface that allows users to authenticate, manage their passwords, and manage their to-dos. This completes the development version of the app, which we can now use locally to manage to-dos.
The user authentication and password management user interfaces are useful to any app and could be used directly in your apps, and the to-do user interface could be adapted or used as a reference for other functionality.
In the next chapter, we’ll deploy this app to production, allowing users to access and use it.
Further reading
To further enhance your app, I recommend you read more about good UX practices, for example, via https://builtformars.com. Also, to improve your frontend styling skills, I’d recommend https://css-tricks.com.