9. Working with Styles
Lesson overview
In this lesson, you’ll learn how to do the following:
Create and apply paragraph styles.
Create and apply character styles.
Nest character styles inside paragraph styles.
Create and apply object styles.
Create and apply cell styles.
Create and apply table styles.
Globally update styles.
Import and apply styles from other InDesign documents.
Experiment with style packs.

This lesson will take about 60 minutes to complete. To get the lesson files used in this chapter, download them from the web page for this book at adobepress.com/InDesignCIB2023. For more information, see “Accessing the lesson files and Web Edition” in the Getting Started section at the beginning of this book.
With Adobe InDesign, you can create styles—sets of formatting attributes—and apply them in one step to text, objects, tables, and table cells. Any changes to a style automatically affect all the text or objects to which the style is applied. Styles offer a quick, consistent method for formatting layouts.
Getting started
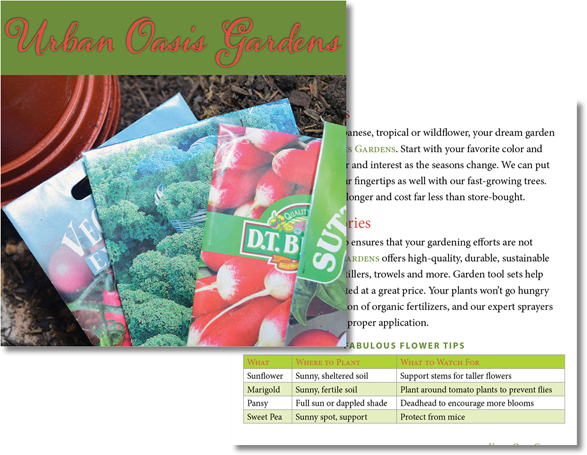
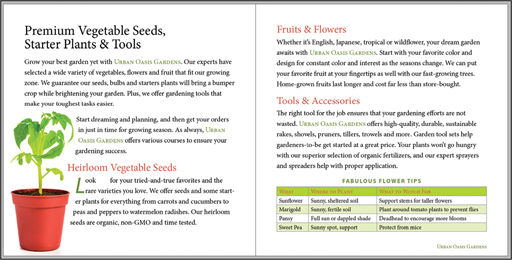
In this lesson, you’ll create and apply styles for a few pages of a catalog for the Urban Oasis Gardens. Styles are collections of attributes that allow you to quickly and consistently apply formatting to text, tables, and objects throughout a document. (For example, a Body Text paragraph style specifies attributes such as font, size, leading, and alignment.) The catalog pages here contain text, tables, and objects that you will manually format and then use as the basis for creating styles. Later, if you were to place more catalog content, you could use styles to format the new text, tables, and objects with one click.
To ensure that the preferences and default settings of your InDesign program match those used in this lesson, move the InDesign Defaults file to a different folder following the procedure in “Saving and restoring the InDesign Defaults file” on pages 3–4.
 Note
NoteIf you have not already downloaded the project files for this lesson to your computer from your Account page, make sure to do so now. See “Getting Started” at the beginning of the book.
Start InDesign.
The InDesign Home screen displays. Click Open at the left. (If the Home screen does not display, choose File > Open from the InDesign menu bar.)
Open the 09_Start.indd file in the Lesson09 folder, located inside the Lessons folder within the InDesignCIB folder on your hard disk.
Choose File > Save As, rename the file 09_Styles.indd, and save it in the Lesson09 folder.
Confirm that Window > Workspace > Essentials is selected, and then choose Window > Workspace > Reset Essentials.
If you want to see what the finished document will look like, open the 09_End.indd file in the same folder. Choose Layout > Next Spread and Layout > Previous Spread to explore all the pages. You can leave this document open to act as a guide as you work.
When you’re ready to resume working on the lesson document, click its tab in the upper-left corner of the document window.

Understanding styles
InDesign provides styles for automating nearly all text, table, and object formatting. Creating, applying, modifying, and sharing styles works the same way for all types of styles: paragraph, character, object, table, and cell styles. You can open any Styles panel from the Styles submenu of the Window menu. The panel icons and panel menu options are similar for all the Styles panels.
Icons across the bottom of each Styles panel let you create a new style group, clear overrides, create a new style, and delete the selected style. Point at each icon to see its tool tip. Some Styles panels have additional, feature-specific icons as well.
Basic styles
The default formatting of everything in a new InDesign document is determined by its respective “basic” style. For example, when you create a new text frame, its formatting is determined by the [Basic Text Frame] object style. Therefore, if you wanted to specify that all new text frames have a 1-pt stroke, you would modify [Basic Text Frame]. To create a new default for all new InDesign documents, modify the “basic” style when no documents are open. Whenever you find yourself repeating a formatting task, stop and think about whether it makes sense to modify the relevant basic style or create a new style.
Creating styles
The various styles panels all include a New Style command on the panel menu and a Create New Style icon (![]() ) at the bottom of the panel. Three different strategies work for specifying the formatting for the style.
) at the bottom of the panel. Three different strategies work for specifying the formatting for the style.
The most visual and flexible way to create a style is to format a sample of the text, table, table cells, or object. Then, you can create a new style based on the selected sample. This approach lets you use any controls you prefer, such as the Swatches panel and the Character panel.
The Options dialog for creating each type of style has a Preview option. First, select Preview, and then change options until you are happy with the style. Because the Options dialog are large, you may need to drag them out of the way to see the changes.
You also can create styles from scratch with no text, table, table cells, or object selected in the document. This method relies on you to visualize how the formatting might look.
Once you have a rough idea of how you want text, objects, and tables to look, you can start creating styles and applying them. Then, as you experiment with a design and make changes, you can simply modify styles to update the formatting.
Applying styles
Applying a style is as simple as making a selection and then clicking a style name in the relevant Styles panel. For example, to format a table, you select the table and then click a style name in the Table Styles panel. You can set up keyboard shortcuts for applying styles as well. Paragraph and character styles also may be applied during a search-and-replace operation (Edit > Find/Change).
Using Quick Apply
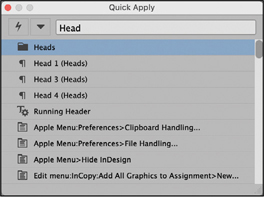
An easy way to apply styles without lifting your hands from the keyboard is by using Quick Apply. To use it, press Ctrl+Enter (Windows) or Command+Return (macOS). In the Quick Apply dialog, start typing the name of the style until it’s recognized. Use the arrow keys to select it in the list, and then press Enter (Windows) or Return (macOS). Other ways to display the Quick Apply dialog include choosing Edit > Quick Apply or clicking the Quick Apply (![]() ) button in the Control panel.
) button in the Control panel.
Assigning keyboard shortcuts to apply styles
You can assign keyboard shortcuts to all styles to expedite formatting. Here are a few tips for creating keyboard shortcuts:
If you have an extended keyboard, create keyboard shortcuts that use the numbers on the number pad. This will give you less chance of creating keyboard shortcuts that conflict with other InDesign shortcuts or system shortcuts.
Keyboard shortcuts are especially handy for formatting text. A quick way to remember shortcuts is to include a hierarchical number in the style name. For example, if you create a paragraph style named “1 Headline” with the shortcut Ctrl+Shift+1, it’s easy to remember the shortcut because it’s often the first style you apply.
Modifying and redefining styles
A primary benefit of using styles is the ability to apply formatting consistently and make global changes quickly. To modify a style, double-click its name in its respective Styles panel; this displays its Options dialog so that you can make changes. You can also modify the formatting of text, a table, or an object with a style applied and then choose Redefine Style from the respective Styles panel menu.
Creating and applying paragraph styles
Paragraph styles let you apply and globally update text formatting to speed up formatting and create a more consistent overall design. Paragraph styles incorporate all elements of text formatting, including character attributes such as font, size, style, and color, along with paragraph attributes such as indents, alignment, tabs, and hyphenation. Paragraph styles differ from character styles in that they are applied to entire paragraphs, not just to selected characters.
![]() Tip
Tip
When working on longer documents, such as books and catalogs, using styles can save hours of time in manual formatting. A common way to get started is to select all the text in a document and apply a “body text” paragraph style with one click. You can then go through the text and apply heading paragraph styles and character styles with keyboard shortcuts. You also can automate text formatting to some degree with style packs, which are discussed later in this lesson.
Creating a paragraph style
In this exercise, you’ll create a paragraph style and apply it to selected paragraphs. First, you will manually format the text in the document locally (that is, not based on a style). Then, you will have InDesign pick up this formatting and build it into a new paragraph style.
Navigate to page 2 in the 09_Styles.indd document. Adjust the view scale and scroll as necessary so that you can easily see the text.
Using the Type tool (
 ), drag to select the “Heirloom Vegetable Seeds” subhead, which follows the introductory paragraph on page 2.
In the Appearance area of the Properties panel at the right, click the character Fill box (
 ) and click the Red-Tomato swatch. Note
To better view the interface onscreen or in print, the screen captures in this book reflect the Medium Light interface rather than the default setting of Medium Dark. In addition, some screen captures illustrate User Interface Scaling for a closer look at interface elements. You can modify interface settings in Preferences.
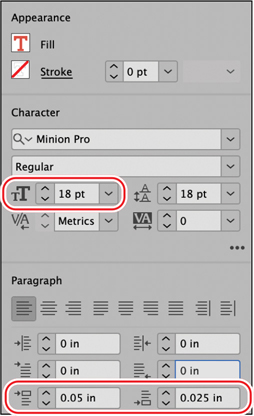
In the Character area, enter 18 pt in the Font Size field.
In the Paragraph area of the Properties panel, click the More Options (
 ) button. Increase the Space Before (
 ) to .05 in, and decrease the Space After (
 ) to .025 in.
Now you’ll create a paragraph style using this formatting so that you can use it to format the other subheads in the document.
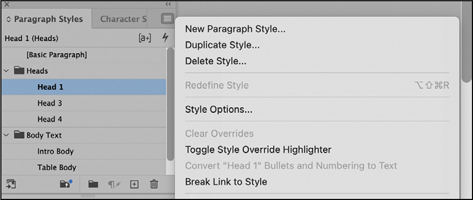
Make sure that the “Heirloom Vegetable Seeds” subhead is still selected. Open the Paragraph Styles panel by choosing Type > Paragraph Styles. Tear the Paragraph Styles panel off the dock for easier access to it.
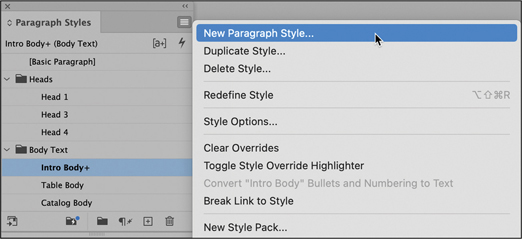
In the Paragraph Styles panel, create a new paragraph style by choosing New Paragraph Style from the panel menu. The New Paragraph Style dialog opens, displaying the formatting you just applied to the subhead in the Style Settings section.
NoteIn this document, the Paragraph Styles panel already has a few styles provided for you, including the default, [Basic Paragraph].
In the Style Name field at the top of the dialog, type Head 2 to name this style as the second largest headline.
Below the Style Name field, notice that the new style is based on the Intro Body style. Since Intro Body was applied to the subhead when you created the style, the new style is automatically based on Intro Body. By using the Based On option in the General section of the New Paragraph Style dialog, you can use an existing style as a starting point for a new style. In this case, the Intro Body formatting is unrelated to the heading style, so you will change the Based On style to No Style.
Select [No Paragraph Style] from the Based On menu.
To speed up text formatting while typing in InDesign, you can specify a Next Style for a paragraph style. Each time you press Enter or Return, InDesign automatically applies the Next Style. For example, your headline style might be followed by your body paragraph style.
Select Intro Body from the Next Style menu, because this is the style used for the text following each Head 2 headline.
You can also create keyboard shortcuts for easily applying styles in InDesign.
Click in the Shortcut field, hold down Shift (Windows) or Command (macOS), and press 9 on your keyboard. (InDesign requires the use of a modifier key for style shortcuts.)
Select Apply Style To Selection to apply this new style to the text you just formatted.
NoteIf you don’t select Apply Style To Selection, the new style appears in your Paragraph Styles panel but is not automatically applied to the selected text you used to create the style.
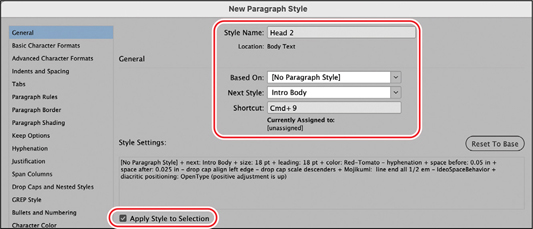
Click OK to close the New Paragraph Style dialog.
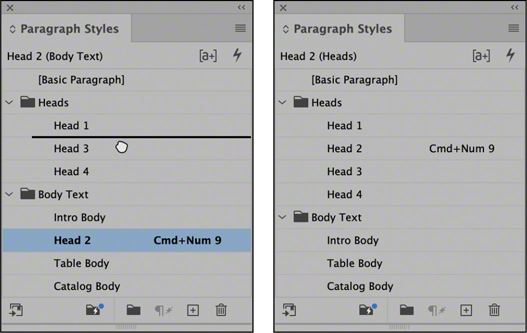
The new Head 2 style appears in the Paragraph Styles panel and is highlighted to indicate that it’s applied to the selected paragraph.
In the Paragraph Styles panel, click the triangle next to the Heads style group to open it. Then, drag the Head 2 style up between Head 1 and Head 3.
Choose Edit > Deselect All, and then choose File > Save.
Applying a paragraph style
Now you’ll apply your paragraph style to other paragraphs in the document.
If necessary, scroll to the right to see the right page of the spread.
Using the Type tool (
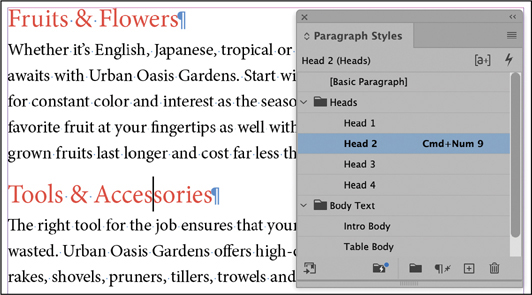
), click to place an insertion point anywhere within “Fruits & Flowers.”Click the Head 2 style in the Paragraph Styles panel to apply the style to the paragraph. The text attributes change to reflect the paragraph style.
NoteYou can use the keyboard shortcut you defined earlier (Shift+9 or Command+9) to apply the Head 2 style as well. To apply styles in Windows, be sure the Num Lock key on the keypad is down.
Repeat steps 2 and 3 to apply the Head 2 style to “Tools & Accessories” on page 3.
When a paragraph style is applied to text, you can continue to change the text formatting. These formats are referred to as “local overrides.” In some cases, local overrides are acceptable, and in other cases you will want to remove them so that the formatting exactly matches the style definition. In the next steps, you will apply, view, and remove local overrides.
 Tip
TipWhen you are formatting text with styles and something doesn’t look quite right, local overrides often are the culprit. See the “Best practices when working with styles” sidebar later in this lesson for more information.
Using the Type tool, triple-click to select “Tools & Accessories.”
In the Appearance area of the Properties panel at the right, click the character Fill box (
) and click the Green-Medium swatch.Click once in the “Tools & Accessories” paragraph to keep the paragraph selected and see the type color.
In the Paragraph Styles panel, note the plus sign (+) next to the style name, indicating local overrides. Point at the style name to see how the selected text deviates from the paragraph style definition.
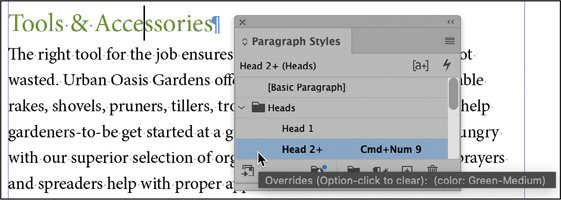
Click Clear Overrides In Selection (
 ) at the bottom of the Paragraph Styles panel. The text reverts to the style definition.
Choose Edit > Deselect All, and then choose File > Save.
Creating and applying character styles
In the previous exercise, paragraph styles allowed you to apply character and paragraph formatting to text with a single click or a keystroke. Similarly, character styles are a way to apply multiple attributes—such as font, size, and color—to text using a single action. Unlike paragraph styles, which format the entire paragraph, character styles apply formatting only to selected characters such as a word or phrase.
![]() Tip
Tip
Character styles are helpful for lead-in characters such as bullet characters, numbers in numbered lists, and drop caps. They are also useful for emphasizing text within body copy—for example, stock symbols (investments) are often formatted in bold and small caps.
Character styles include only differences, such as italic, from the attributes specified in the paragraph style. The benefit of this is that you can use the same character style with different paragraph styles. For example, say that a newsletter’s style is to italicize the names of books and movies. The newsletter has a body text style in Minion Pro and a sidebar body text style in Myriad Pro. You need only one character style that specifies Italic for use with both paragraph styles. InDesign will know to use the italic version of the correct font.
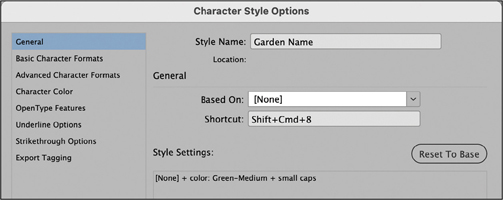
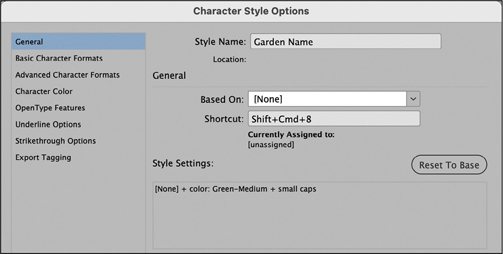
The Character Style Options dialog provides easy access to all character formatting controls. In the General tab shown here, the Style Settings area summarizes the character style definition.
Creating a character style
Now you will create and apply a character style to selected text in the document. In this exercise, you can see how using character styles ensures more efficient and consistent formatting.
Scroll to view the first paragraph on page 2 at the left.
If it’s not already visible, open the Character Styles panel by choosing Type > Character Styles. Tear the Character Styles panel off the dock for easier access to it. If you prefer, you can dock it with the Paragraph Styles panel.
The only style listed in this panel is the default, [None]. As you did with the paragraph style in the previous section, you’ll build a character style based on existing text formatting. This approach lets you see the formatting before you create the style. In this case, you’ll format the Urban Oasis Gardens name and build it into a character style so that it can be reused efficiently throughout the document.
Using the Type tool (
), select the first instance of the words “Urban Oasis Gardens” in the first paragraph on page 2.In the Appearance area of the Properties panel at the right, click the character Fill box (
) and click the Green-Medium swatch.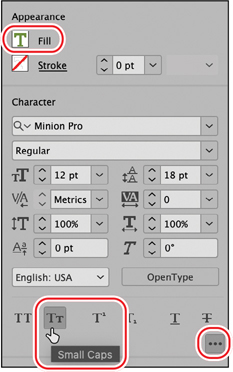
In the Character area of the Properties panel, click the More Options (
) button to see additional character formatting controls. Click Small Caps ( ).
).Now that the text is formatted, you’ll create a new character style.
Click Create New Style (
 ) at the bottom of the Character Styles panel.
Double-click the new Character Style 1 that displays in the Character Styles panel. The Character Style Options dialog opens.
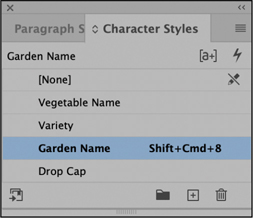
In the Style Name field at the top of the dialog, type Garden Name to define the style’s purpose.
As you did for the paragraph style you created, now you’ll create a keyboard shortcut to easily apply this character style.
Click in the Shortcut field, and press Alt+Shift+8 (Windows) or Shift+Command+8 (macOS) on your keyboard.
TipIf you have an extended keyboard, create keyboard shortcuts that use the numbers on the number pad. That way, you will have less chance of creating keyboard shortcuts that conflict with other InDesign shortcuts or system shortcuts.
Notice the character style formatting listed in the Style Settings box.
Click OK to close the Character Style Options dialog. The new Garden Name style appears in the Character Styles panel and is now applied to the text.
Choose Edit > Deselect All, and then choose File > Save.
Applying a character style
You’re ready to apply your character style to selected text in the document. As with paragraph styles, using character styles prevents you from having to manually apply multiple type attributes to each instance of text.
![]() Tip
Tip
You can use Find/Change (Edit menu) to search for all instances of a word or phrase and then apply a character style to it.
Using the Type tool (
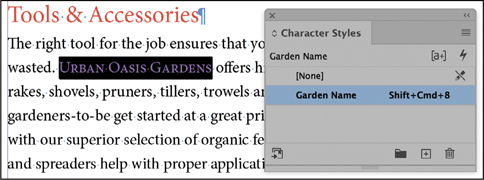
), select the words “Urban Oasis Gardens” in the second paragraph of body text on the left page of the spread.To maintain a consistent look for the company name, you’ll apply the Garden Name character style.
In the Character Styles panel, click the Garden Name style to apply it to this text. You should see the text change to reflect the character style you created.
Scroll to the right to view the right page of the first spread.
Using the Type tool, select the words “Urban Oasis Gardens” in the first paragraph of body text on the right page of the spread.
In the Character Styles panel, click the Garden Name style to apply it to this text.
In the second body paragraph, select the words “Urban Oasis Gardens.” Press Alt+Shift+8 (Windows) or Shift+Command+8 (macOS) to apply the Garden Name character style.
Leave the Character Styles panel open for the next exercise.
Choose Edit > Deselect All, and then choose File > Save.
Nesting character styles inside paragraph styles
To make the use of styles more convenient and powerful, InDesign lets you nest character styles within paragraph styles. These nested styles allow you to apply distinct character formatting to specific portions of a paragraph—such as the first character, the second word, or the first line—at the same time you apply a paragraph style. This makes nested styles ideal for creating run-in headings, where the first portion of a line or paragraph is styled differently from the rest of the line or paragraph. In fact, whenever you can define a pattern of formatting within a paragraph, such as applying an italic type style until reaching the first period, you can automate the formatting with a nested style.
Creating character styles for nesting
To create a nested style, you need to first create both a character style and a paragraph style in which to nest it. In this section, you’ll create two character styles for nesting and then nest them within the paragraph style Catalog Body, which already exists.
![]() Tip
Tip
You can use the powerful nested styles feature to automatically apply different formatting within a paragraph according to a specific set of rules. For example, in a table of contents, you can automatically apply bold to the text, change the tracking in the tab leader (the dots that lead to the page number), and change the font and color of the page number.
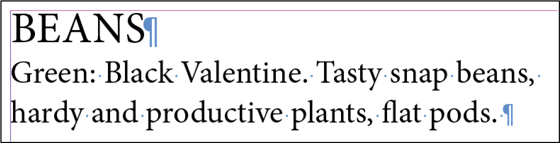
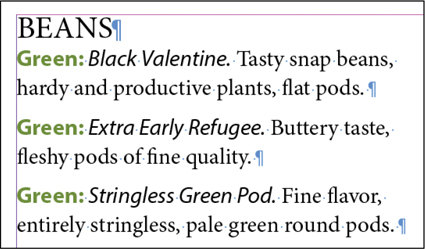
Double-click page 4 in the Pages panel, and then choose View > Fit Page In Window. If the body copy is too small to view, zoom in to the first paragraph under the “Beans” heading, beginning with “Green: Black Valentine.”
Review the text and punctuation.
In this exercise, you’ll create two nested styles to distinguish the vegetable’s variety from its name.
A colon (:) separates the vegetable’s variety and name.
A period appears after the name and before the description.
These characters will be important when creating your nested styles later in this section.
Using the Type tool (
), select the first instance of “Green” and the colon following it.In the Character Styles panel, choose New Character Style from the panel menu.
In the Style Name field at the top of the dialog, type Variety to define the text to which the style will be applied. Select Apply Style To Selection.
To make the name of each vegetable variety stand out more, you will change the font, style, and color.
From the categories on the left side of the dialog, click Basic Character Formats.
From the Font Family menu, select Myriad Pro. From the Font Style menu, select Bold.

From the categories on the left side of the dialog, click Character Color.
In the Character Color settings that appear on the right side of the dialog, select the Green-Medium swatch.
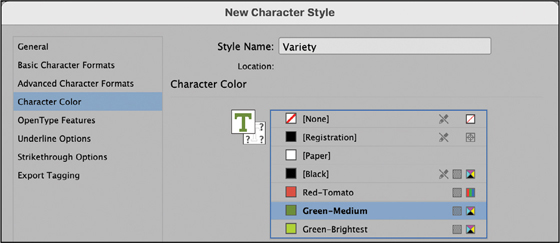
Click OK to close the New Character Style dialog. The new Variety style appears in the Character Styles panel.
Now you’ll create a second character style for nesting.
Select the text “Black Valentine” and the period after it. Using the Type menu in the Appearance area of the Properties panel, change the font to Myriad Pro and the font style to Italic.
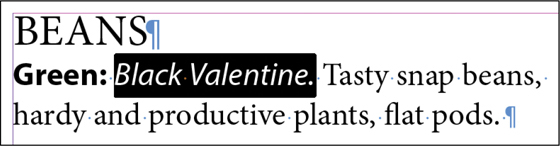
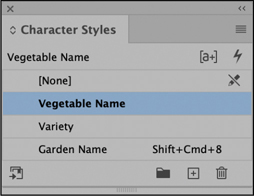
With “Black Valentine.” still selected, choose New Character Style from the Character Styles panel menu.
Type Vegetable Name in the Style Name field.
Select Apply Style To Selection.
Click OK to create the character style based on the formatting applied in step 11.
Choose Edit > Deselect All, and then choose File > Save.
You have created two new character styles. Using these along with the existing Catalog Body paragraph style, you are ready to create and apply the nested style.
Creating a nested style
When you create a nested style within an existing paragraph style, you’re basically specifying a secondary set of rules for InDesign to follow while formatting a paragraph. In this exercise, you’ll build a nested style into the Catalog Body style using the character styles you created in the previous exercise.
![]() Tip
Tip
In addition to nested styles, InDesign provides nested line styles. These let you specify formatting for individual lines in a paragraph—such as a drop cap followed by small caps, which are common in the lead (first) paragraphs of magazine articles. If the text is edited, InDesign adjusts the formatting to encompass only the specified lines. The controls for creating nested line styles are in the Drop Caps And Nested Styles panel of the Paragraph Style Options dialog.
If necessary, double-click page 4 in the Pages panel to center the page in the document window.
If the Paragraph Styles panel is not visible, choose Type > Paragraph Styles.
In the Paragraph Styles panel, double-click the Catalog Body style to open the Paragraph Style Options dialog.
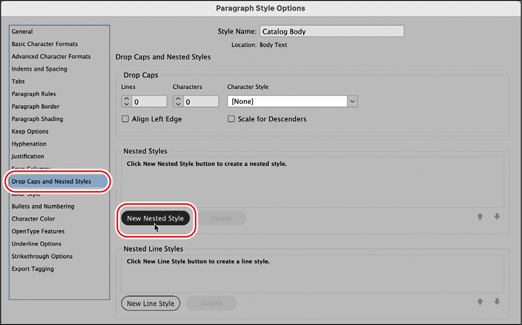
From the categories on the left side of the dialog, select Drop Caps And Nested Styles.
In the Nested Styles section, click the New Nested Style button to create a new nested style.
A nested style that applies the [None] character style through 1 Words appears.
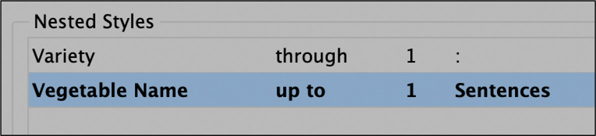
Click [None] to display a menu of character styles. Select the Variety character style; this is the first nested style in the sequence.
Click the word “through” to reveal another menu. This menu contains only two choices: Through and Up To. The Variety character style needs to be applied through the first colon (:) after Green, so select Through. Leave the third option at the default setting (1).
Click Words to reveal a text field and menu. Click the menu button to the right of the field to view elements to which the style can be applied, including sentences, characters, and spaces. Double-click Words to select it, and press Backspace (Windows) or Delete (macOS). Type a colon (:) in the field.
TipUsing nested styles can automate some very tedious formatting. When making style decisions for longer documents, think about establishing a pattern that will enable automatic formatting through nested styles.

In the lower-left corner, select Preview. Move the Paragraph Style Options dialog so that you can see the columns of text.
Now you’ll add another nested style to format the vegetable names.
Click the New Nested Style button.
Repeat steps 6 through 8 to set up an additional nested style with the following formatting:
First option: Choose Vegetable Name.
Second option: Choose Up To.
Third option: Leave at the default setting (1).
Fourth option: Select Sentences to apply the formatting up to a period.
Review the changes in the text, and then click OK.
Choose Edit > Deselect All, and then choose File > Save. Close the Paragraph Styles and Character Styles panels if they are in your way.
Best practices when working with styles
InDesign styles offer many sophisticated features for streamlining formatting by organizing styles, sharing styles among documents, and ensuring styles are applied properly.
Basing styles on existing styles
All styles can be based on an existing style; the existing style serves as a starting place for the new style. If you change the style on which other styles are based—for example, by changing the font in a paragraph style—the changes update all styles based on that style. Basing styles on other styles is helpful when you’re creating a series of related styles, such as Body Copy, Body Copy Indent, Bulleted Body Copy, and so on. If the font of the Body Copy style changes, InDesign updates the font in all related styles as well. Unique characteristics of styles based on other styles are maintained.
Breaking the link to a style
If you have a specific instance of text, tables, table cells, or objects that you no longer want associated with a style, you can break its link to the style. You might do this for a highly designed headline for a magazine article, for example. Each Styles panel has a Break Link To Style command in the panel menu.
Sharing styles among documents
Styles are shared among documents frequently to ensure a consistent look across an organization’s media. On all the Styles panels, the panel menu provides a Load command for importing styles from other InDesign documents. You can also share paragraph styles and character styles with a workgroup through InDesign CC Libraries. To do this, select a style in the Paragraph Styles panel or Character Styles panel and click Add Selected Style To My Current CC Library at the bottom of the panel. To use this style in another document, apply it to selected text from the CC Library. The style is automatically added to the document’s Paragraph Styles or Character Styles panel.
Organizing styles in style groups
All of the InDesign Styles panels let you group similar styles in folders called “style groups.” To create a style group, click the Create New Style Group button at the bottom of the panel. Click in the group’s folder to name it. You can drag styles into the folder to organize them, and you can drag styles up and down in the list to organize them.
Overriding manual formatting
In most cases, you will want text, tables, table cells, and objects to precisely match the applied style’s specifications. To achieve this, sometimes you need to override any manual formatting. If a selection does not precisely match its style, a plus sign appears next to the style name. This is referred to as a “style override.” For example, if a paragraph style specifies left-aligned paragraphs but you decide to center a paragraph, the centering is a style override. To see and manage style overrides:
To see how the formatting in the selection varies from the style, point at the style name in the Styles panel; a tool tip describes the overrides applied.
Most Styles panels have a Clear Overrides control at the bottom, indicated by an icon and a plus sign. Move your mouse over the icon to learn how to clear overrides in the selection.
Note that if you are having trouble clearing overrides while applying a paragraph style, check to see whether a character style is applied to the text.
InDesign indicates style overrides to alert you to inconsistent formatting. In some cases, however, manual overrides are necessary, and you may leave the style overrides as is.

The Overrides tool tip shows how the formatting of the selected text varies from the formatting specified in the paragraph style. In this case, the tracking of the text is different. Small amounts of tracking often are used for copyfitting purposes, so this is an override you may leave alone.
Understanding paragraph styles and character styles
A paragraph style includes all text formatting attributes—such as font, size, and alignment—and applies to all the text in a paragraph. You can select a paragraph for formatting by clicking in it, highlighting any part of it, or highlighting all of it. A character style includes only character attributes—such as font style (bold, italic, condensed, etc.) and color—and applies only to selected text within a paragraph. Character styles typically are applied to call attention to specific text within a paragraph. In general, you will apply paragraph styles to most text and then apply character styles to variations.
A common strategy for applying styles is to select all the text in the document and then apply the most commonly used paragraph style. For example, if you were designing a book, you might have a body text paragraph style that applies to most of the paragraphs. Then, you go through the pages and apply chapter heads, subheads, captions, character styles, and more. You also can automate text formatting to some degree with style packs, which are discussed later in this lesson.
Creating and applying object styles
Object styles let you apply and globally update formatting to objects, such as frames. Combining formatting attributes—including fill, stroke, transparency, and text wrap options—into object styles helps create a more consistent overall design and speeds up tedious production tasks.
Formatting an object for a style
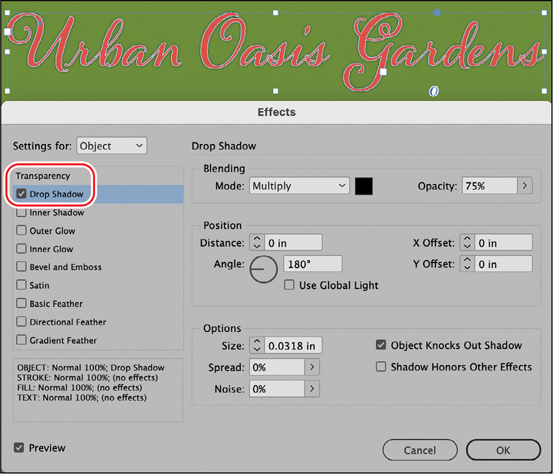
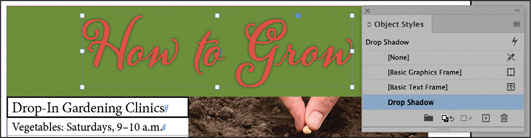
In this section, you will create an object style that quickly applies a drop shadow to objects. In this catalog design, the decorative headlines are actually objects created by selecting text and choosing Type > Create Outlines. With outlines, you no longer need the font active on your system, and you have more flexibility, such as importing images into the shape.
Double-click page 1 in the Pages panel to center the page in the document window.
Using the Selection tool (
 ), click “Urban Oasis Gardens” to select the text-shaped object.
Choose Object > Effects > Drop Shadow.
Notice that Drop Shadow is selected in the list at the left. Leave the other options at their default settings.
Select Preview to see the changes, and click OK.
Choose Edit > Deselect All to see the effect, and choose File > Save.
Creating an object style
Now that the object is formatted properly, you are ready to create the object style from its formatting.
Using the Selection tool (
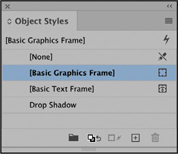
), click “Urban Oasis Gardens” with the drop shadow effect.Choose Window > Styles > Object Styles to open the Object Styles panel.
In the Object Styles panel, hold down the Alt (Windows) or Option (macOS) key while you click Create New Style in the lower-right corner.
TipJust as with paragraph and character styles, you can base an object style on another object style. Changes made to the Based On style update all object styles based on that style. (Unique characteristics of styles based on other styles are maintained.) The controls for basing a style on another are in the General panel of the New Object Style dialog.
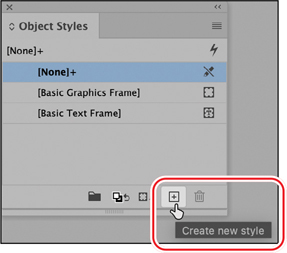
When you Alt-click or Option-click the Create New Style button, the New Object Style dialog opens automatically. The selected boxes on the left side of this dialog indicate which attributes will be applied when this style is used.
In the Style Name field at the top of the New Object Style dialog, type Drop Shadow to describe the purpose of the style.
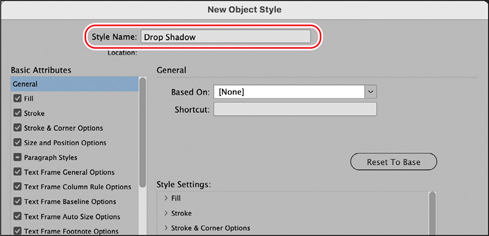
In the list at the left, click through the options you can set for an object style. In addition to basic formatting attributes such as stroke and fill, object styles can include size (width, height) and position options (X, Y).
Select Apply Style To Selection at the bottom, and click OK.
Applying an object style
Now you’ll apply your new object style to the headline on the back page of the catalog. Remember, the advantage to using styles is that when you modify a style, the text, table, or objects to which the style is applied will update automatically.
Double-click the page 6 icon on the Pages panel to display the last page in the document window.
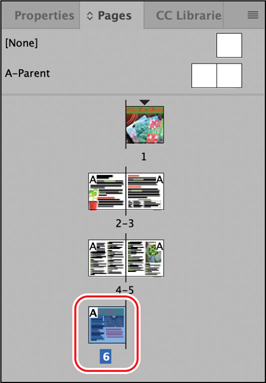
If necessary, choose View > Fit Page In Window.
Using the Selection tool (
), select the “How to Grow” text-shaped object.As with the previous headline, this text has been converted to curves using Type > Create Outlines.
Click Drop Shadow in the Object Styles panel.
If the formatting does not match the new style, choose Clear Overrides from the Object Styles panel menu.
Choose Edit > Deselect All, and then choose File > Save.
Creating and applying table and cell styles
Table and cell styles let you format tables with the same convenience and consistency you get from formatting text with paragraph and character styles. Table styles let you control the visual attributes of the table, including the table border, space before and after the table, row and column strokes, and alternating fill patterns. Cell styles let you control cell inset spacing, vertical justification, individual cell strokes and fills, and diagonal lines. You’ll learn more about creating tables in Lesson 10, “Creating Tables.”
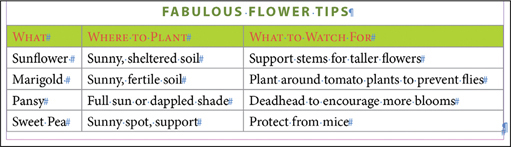
In this exercise, you’ll create and apply a table style and two cell styles to tables in the catalog document to help distinguish the tips on planting each flower.
Creating cell styles
You’ll begin by creating a cell style for the header row of the table at the bottom of page 3. Later, you’ll nest this style inside the table style, a process similar to how you nested character styles inside a paragraph style earlier in this lesson. You’ll now create a cell style.
Double-click page 3 in the Pages panel.
Using the Zoom tool (
 ), zoom in on the table at the bottom of the page to make it easily visible.
Using the Type tool (
), point at the left edge of the first row of the table, starting with “What.” When the horizontal arrow ( ) displays, click to select the entire row.
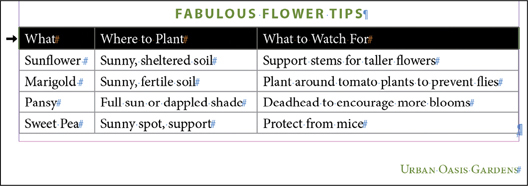
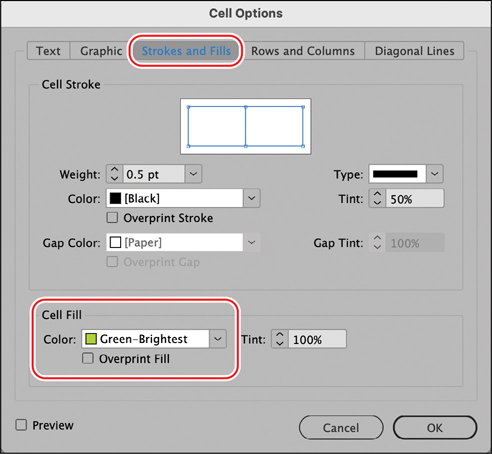
Choose Table > Cell Options > Strokes And Fills. For Cell Fill, select the Green-Brightest swatch. Click OK.
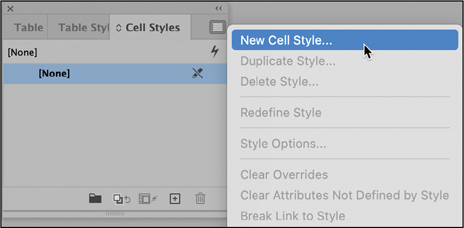
With the cells still selected, open the Cell Styles panel by choosing Window > Styles > Cell Styles.
From the Cell Styles panel menu, choose New Cell Style.
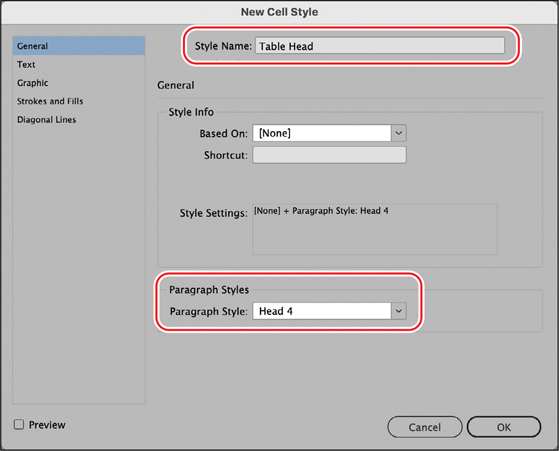
The cell formatting you applied to the selected cells is displayed in the Style Settings box. You’ll also notice additional cell formatting options on the left side of the dialog. In this exercise, you will specify the desired paragraph style to use for the text within the header row.
In the Style Name field at the top of the New Cell Style dialog, type Table Head.
From the Paragraph Style menu, choose Head 4. This paragraph style was already created in the document. Click OK.
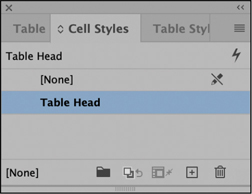
The new cell style appears in the Cell Styles panel.
With the header row still selected, click Table Head in the Cell Styles panel to apply it.
If a plus sign (+) displays next to the Table Head style (indicating that the formatting does not exactly match the style), select the entire header row, and choose Clear Overrides from the Cell Styles panel menu.
Choose Edit > Deselect All to see the results.
Choose File > Save.
Creating a table style
Now you’ll create a table style that formats the overall look of the table and applies the cell style you just created to the header row.
Using the Type tool (
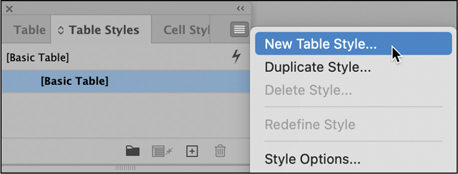
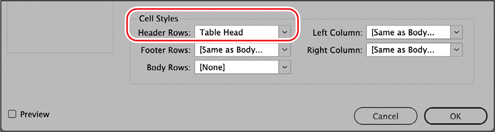
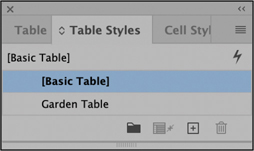
), click anywhere in the table to select it.Click the Table Styles tab in the Cell Styles panel group or choose Window > Styles > Table Styles. From the Table Styles panel menu, choose New Table Style.
In the Style Name field, type Garden Table.
In the Cell Styles section, select Table Head from the Header Rows menu.
You’ll now set up the table style to apply alternating rows of color to the body rows.
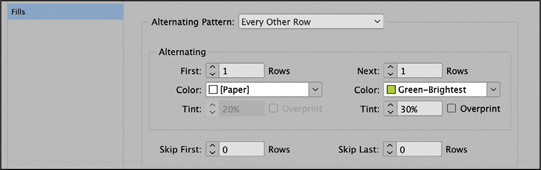
Select the Fills category on the left side of the New Table Style dialog.
Choose Every Other Row from the Alternating Pattern menu. The options for alternating rows appear.
Specify the following Alternating options in the list at the left:
First Rows: 1
Color: Paper
Specify the following Alternating options in the list at the right:
Next Rows: 1
Color: Green-Brightest
Tint: 30%
Click OK. The new table style, Garden Table, appears in the Table Styles panel.
Choose Edit > Deselect All, and then choose File > Save.
Applying a table style
Now you’ll apply the table style you just created to the two tables in the document.
![]() Tip
Tip
You can apply a table style when creating a new table using the Table > Create Table or Table > Convert Text To Table command.
With the table still easily visible onscreen, select the Type tool (
).Click to place an insertion point anywhere in the table, and choose Table > Select > Table.
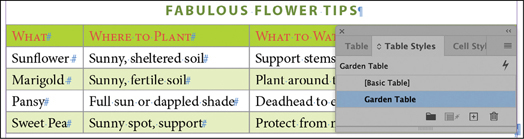
In the Table Styles panel, click the Garden Table style. Click once in the table to see the formatting, which matches the table and cell styles you created.
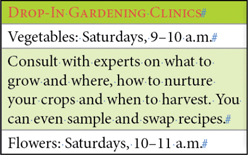
Double-click page 6 in the Pages panel, and then choose View > Fit Page In Window. Click to place an insertion point anywhere in the “Drop-In Gardening Clinics” table, and then choose Table > Select > Table.
In the Table Styles panel, click the Garden Table style. The table is reformatted with the table and cell styles you created.
If a plus sign (+) displays next to the Garden Table style (indicating that the formatting does not exactly match the style), choose Clear Overrides from the Table Styles panel menu. Click once in the table to see the final formatting.
Choose Edit > Deselect All, and then choose File > Save.
Globally updating styles
InDesign features two ways to update paragraph, character, object, table, and cell styles. The first way is to open a style options dialog and make changes to the formatting options. The other way to update a style is to use local formatting to modify some formatting and then redefine the style based on the updated formatting. In either case, formatting is updated wherever the style is applied. In this exercise, you’ll make a change to the Head 3 style to include a paragraph rule below it.
Double-click page 4 in the Pages panel, and then choose View > Fit Page In Window.
Using the Type tool (
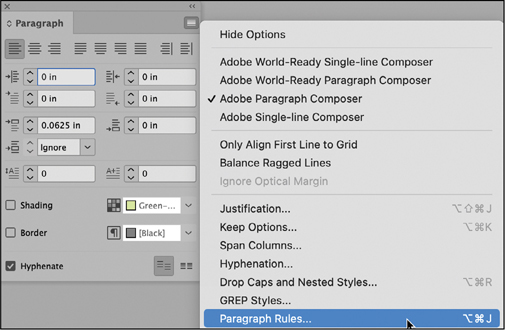
), double-click in the “Beans” subhead at the top of the first column.Choose Type > Paragraph to display the Paragraph panel. Choose Paragraph Rules from the panel menu.
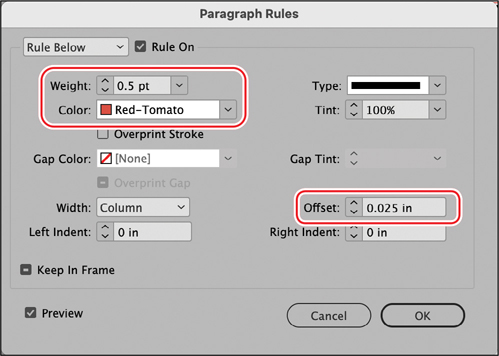
In the Paragraph Rules dialog, choose Rule Below from the menu at the top of the dialog, and select Rule On. Make sure that Preview is selected, and move the dialog so that you can see “Beans” on your screen.
Format the rule using the following settings:
Weight: .5 pt
Color: Red-Tomato
Offset: .025 in
Leave all other settings at their defaults.
Click OK. A thin red line now appears below “Beans.”
If it’s not already visible, choose Type > Paragraph Styles to view the Paragraph Styles panel.
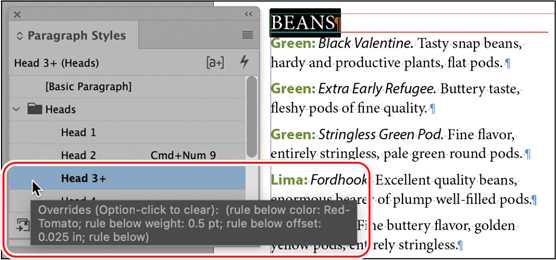
In the Paragraph Styles panel, notice that the Head 3 style is selected, indicating that it is applied to the selected text. You will also see a plus sign (+) next to the Head 3 style name. This indicates that the selected text has local formatting applied to it, which is overriding the applied style.
Now you’ll redefine the paragraph style so that the local changes are incorporated in the paragraph style definition and automatically applied to all the headings previously formatted with the Head 3 style.
In the Paragraph Styles panel menu, choose Redefine Style.
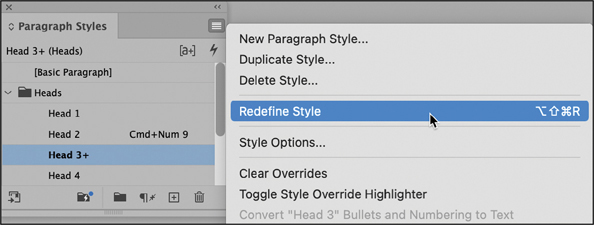
The + should no longer appear next to the Head 3 style name. All headlines in the document that have been styled with Head 3 should globally update to reflect the changes you made.
Choose View > Fit Spread In Window to see the changes.
Choose Edit > Deselect All, and then choose File > Save.
Loading styles from another document
Styles are available in the document in which you create them. For consistency among documents for the same client or campaign, you can share styles between InDesign documents. In this exercise, you’ll import a paragraph style and character style from the finished document 09_End.indd and apply the style to the first body paragraph on page 2.
![]() Tip
Tip
In addition to loading styles from another document, you can share paragraph and character styles among multiple documents through CC Libraries. To do this, select a style in the Paragraph Styles panel, and click Add Selected Style To My Current CC Library at the bottom of the panel. To use this style in another document, apply it from the CC Library. It is then automatically added to the document’s Paragraph Styles panel.
Double-click page 2 in the Pages panel, and then choose View > Fit Page In Window.
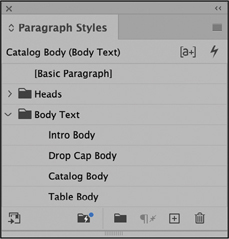
If it’s not already visible, choose Type > Paragraph Styles to view the Paragraph Styles panel.
Choose Load All Text Styles from the Paragraph Styles panel menu.
In the Open A File dialog, double-click 09_End.indd in the Lesson09 folder. The Load Styles dialog displays.
Click Uncheck All; you do not need to import all the styles because most already exist in this document.
Check the box to the left of the paragraph style Body Text: Drop Cap Body to select it. Scroll down and note that the character style that Drop Cap Body uses (Drop Cap) is automatically selected.
NoteThe style group name displays in front of the paragraph style name in the Load Style dialog. In this case, look for Body Text: Drop Cap Body.
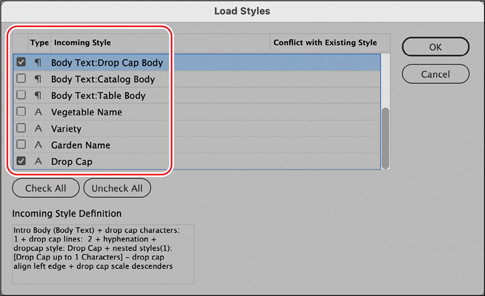
Because the selected paragraph style uses the Drop Caps And Nested Style feature to automatically apply the Drop Cap character style, this style is also selected.
Click OK to import the two styles.
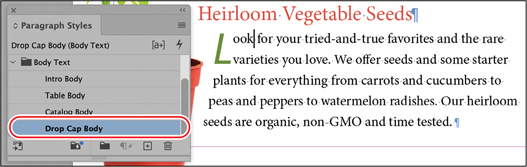
Using the Type tool (
), place an insertion point in the third body paragraph, which starts with “Look for your tried-and-true favorites.”Click the new Drop Cap Body style in the Paragraph Styles panel.
The initial “L” in “Look” becomes a light green drop cap in Myriad Pro Italic.
Choose Edit > Deselect All, and then choose File > Save.
Finishing up
As a final step, you’ll preview the document in its finished state.
At the bottom of the Tools panel, select Preview.
Choose View > Fit Spread In Window.
Press Tab to hide all the panels and review the results of your work.
Press Tab again to restore the panels.
Congratulations! You have now completed this lesson.
Exploring on your own
InDesign styles are designed to streamline formatting and ensure consistency. This lesson focuses on creating styles, but you can acquire premade styles in many ways, including in InDesign templates and from CC Libraries. Once you have styles in a document, spend a few minutes fine-tuning and organizing styles so you—and users of the document—can easily find and use the styles. For longer documents, formatting text can be one of the more tedious tasks. InDesign now provides the Style Packs panel to expedite this process.
Downloading free templates with styles
Adobe provides free InDesign document templates that you can download and modify or use as is. Many of these templates include styles. If you are logged into your Creative Cloud account, visit stock.adobe.com, click Royalty-Free Templates, and download a template to explore.
Fine-tuning styles for a template
When you’re creating a long document or a template to use as the basis for other documents, you want to take full advantage of all features related to styles. To fine-tune the styles further, try the following:
Rearrange styles in the Paragraph Styles panel. For example, drag the new Drop Cap Body style into the Body Text group.
Add keyboard shortcuts to the existing styles.
Applying styles automatically
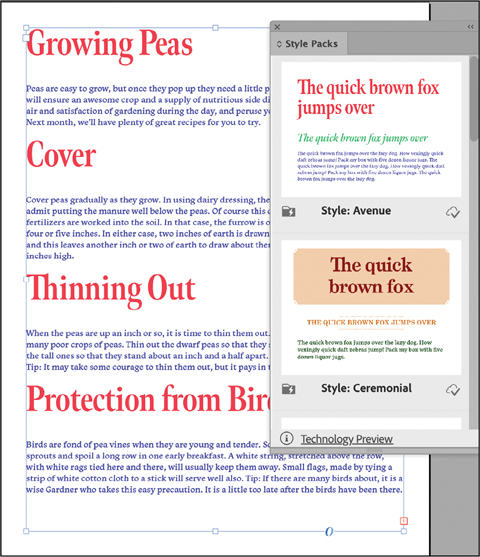
To simplify the process of formatting text, InDesign provides paragraph-style themes in the Style Packs panel. The Style Packs feature analyzes any selected text and applies paragraph styles to headings, body paragraphs, and bulleted lists.
Choose File > New > Document.
In the New Document dialog, click Print across the top, and then click Letter.
Click Create.
Choose File > Place.
In the Place dialog, select 09_Gardening.docx and click Open.
Position the loaded text icon (
 ) in the upper-left corner where the guides intersect. For proper placement, watch for the black arrow in the loaded text icon to turn white.
Click to create a text frame within the page margins; the text flows into it.
Choose Window > Styles > Style Packs.
Click an option in the Style Packs panel to see how InDesign automatically formats the text.
NoteIf you are logged into Creative Cloud, InDesign automatically activates any fonts needed in the paragraph styles. If the fonts are not activated, the text is highlighted in pink.
Choose Type > Paragraph Styles to see how the paragraph styles from the selected style pack are added to the document.
Experiment with other style packs to see the different text formatting.
Once the base paragraph styles are applied, you can modify text formatting and update the styles.
Review questions
1 How can using object styles speed up your workflow?
2 What must you create before you can create a nested style?
3 What are the two ways to globally update a style you’ve applied in an InDesign document?
4 How would you import styles from another InDesign document?
5 What are the primary ways to apply styles?
Review answers
1 Object styles save time by allowing you to group formatting attributes and quickly apply them to frames and lines. If you need to update the formatting, you don’t have to change each object formatted with the style individually. Instead, you can simply modify the object style to automatically update all the objects to which it is applied.
2 The two prerequisites for creating a nested style are that (1) you have first created a character style and (2) you have built a paragraph style in which to nest it.
3 InDesign offers two ways to update styles. The first is to edit the style itself by making changes to the formatting options. The other is to use local formatting to change an instance and then redefine the style based on that instance.
4 From any Styles panel (Paragraph, Object, Cell, etc.), choose Load Styles from the panel menu. Locate the InDesign document from which you want to load the styles. You can then select the styles to load.
5 To apply styles, first make a selection in the document (paragraphs, characters, objects, table cells, tables). You can then click the style name on the associated Styles panel, use the Quick Apply feature, or use a keyboard shortcut assigned to the style. Paragraph and character styles can be applied during a search-and-replace operation as well (Edit > Find/Change).