
Lesson Files | Lessons > Lesson_01 > 01Presentation1_Stage3.key Lessons > Lesson_01 > 01Sustainability_Stage2.key Lessons > Lesson_01 > Sustainability Outline.pages |
Time | This lesson takes approximately 60 minutes to complete. |
Goals | Build a basic presentation using outline view Choose a theme and master slides Modify text in the Fonts window, format bar, and Text inspector Work with the Inspector window Add a shape to contain text Add a table and perform data calculations Check for spelling errors |
These days, presentations are a part of life. No longer relegated to just the world of business reports, presentations are used to share everything from photography slideshows and school projects to product information in a self-playing retail kiosk.
Keynote ’09 lets you create truly dynamic presentations. The application makes it easy not just to arrange text, images, and charts, but also to add audio and video, customize professionally designed backgrounds, and insert cool transitions between slides. It also lets you animate elements so that, for example, your bullet points can sashay jauntily onscreen one by one. Learning to integrate a variety of elements is essential to building a captivating, coherent presentation that informs and entertains your audience.
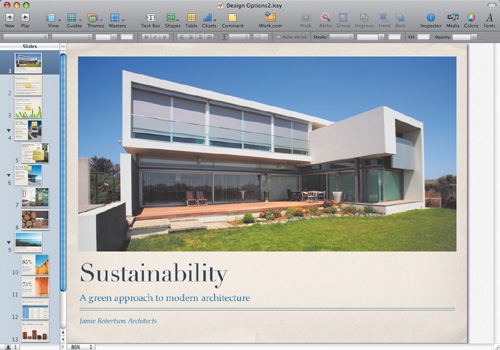
In this lesson, we’ll start with the basics. We’ll create a straightforward presentation for a fictitious firm that specializes in sustainable architecture. We’ll start by choosing a theme for the presentation, and then add structure by outlining and adding text. Next, we’ll format the text using the format bar, Inspector window, and other tools. Finally, we’ll use Keynote to catch spelling errors before giving the presentation in front of an (equally fictitious) audience.
The exercises in this lesson require that you have both the iWork ’09 suite installed on your computer and the lesson files copied to your hard drive from the DVD included with this book. You’ll find instructions for copying the lesson files in “Getting Started,” the introduction to this book.
You can open Keynote in three ways:
Keynote ships with 44 Apple-designed themes that contain coordinated fonts, colors, textures, and styles. You’re not limited to using the built-in themes; you can customize themes, create your own, or acquire others from online vendors.
When you first open Keynote, you’ll see the Theme Chooser, where you can browse the available themes. Let’s start by choosing a theme and a slide size for our Sustainability presentation.
Tip
Before you select a theme, decide on a size for your slides based on the resolution of the projector or display you’ll use during the presentation. Some Keynote themes have only two resolutions available: 800 × 600 or 1024 × 768. These are the two most common resolution settings for projectors and presentations.
Newer Keynote themes offer three additional sizes. The 1280 × 720 and 1920 × 1080 resolutions match the two most common sizes for HD displays. The other option, 1680 × 1050, is a common resolution setting for Apple Cinema displays.
If necessary, open Keynote by clicking the Keynote application icon in the Dock.
If the Theme Chooser is not visible, choose File > New from Theme Chooser.
The Theme Chooser opens, displaying the themes included with Keynote.
Browse the available themes by scrolling through the Theme Chooser.
Themes contain multiple master slides that serve special purposes such as displaying bulleted text or photos. A representative thumbnail is displayed for each theme (generally of a title slide).
Click the thumbnail for the Editorial theme to select it.
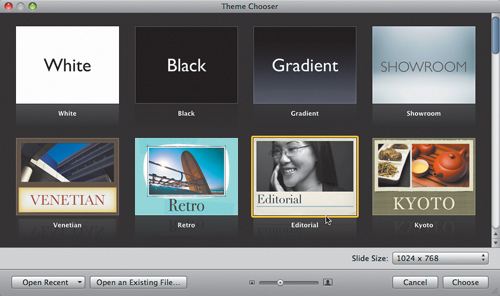
Make sure the Slide Size pop-up menu is set to 1024 × 768.
This is the size you’ll use for this presentation. You can always modify the slide size in the Document inspector if you have to reformat a presentation.
Click Choose to select the theme and create a new document.
Choose File > Save. Name your file Sustainability.key and save it to your computer’s hard drive.
Each theme includes several master slides. A master slide is a preset layout for your slide. You can select a master slide based on personal preference and a slide’s intended content. For instance, a slide that includes photos or a chart will likely require a layout different from a slide that contains bullet points of information.
In the toolbar, click the Masters button to see a list of master slides.

Choose the Photo – Horizontal master.
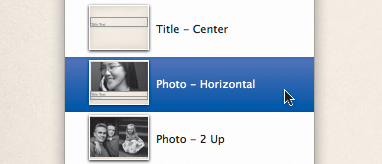
The slide layout changes to the new master. You will use this layout for your first slide.
Note
Don’t worry about the placeholder photos for now. You’ll replace all of the photos in the next lesson.
Now that you’ve picked the theme and your first slide is ready, let’s add some text.
When building a presentation, many users jump right in and start creating slides. They add text, artwork, and animation one slide at a time. Although this approach is valid, it usually works better to start by creating an outline.
Tip
Pages offers several useful templates for organizing your thoughts. Be sure to explore the Outlines templates for outlining a presentation.
A presentation is often more coherent when you build it in stages. Think of the process as being similar to that of building a house. You could build and finish one room at a time, but most contractors like to start with blueprints, lay a foundation, build a frame, and move forward from there.
Keynote has a robust outline view that is an excellent tool for setting up your presentation’s content. In this exercise, you will create a multislide presentation using outline view.
In the toolbar, click the View button and choose Outline.

As you work with a presentation, you will often change your view to better suit specific tasks. To make more room for typing in your current view, you can expand the slide navigator.
Move your pointer over the resize handle at the bottom of the slide navigator.
The pointer changes to a resize pointer to indicate that you can drag to resize the navigator.

Drag to the right to expand the viewable area for the slide navigator.
Now it’s time to begin structuring the order of the slides. We’ll add some text to the first slide to accomplish two things: create a detailed outline that’s easy to modify and share, and learn to quickly build slides with text content.
In the Outline pane, click to the right of the slide thumbnail (slide 1). The area turns light blue, and the insertion point blinks.

Type the following title into the slide: Sustainability.
Press Return. A new slide is created.
This quick shortcut adds a new slide. However, you really want a subpoint for slide 1 in this position. You can easily turn the new slide into that subpoint.

Press Tab to indicate that there should be secondary information for the previous slide.
Note
If you change your mind about making a subpoint or text bullets, you can press Shift-Tab to “outdent” your text.
The insertion point moves to an indented location underneath the Sustainability title. The next text you type will become additional text for slide 1.

Type the following text into the outline: A green approach to modern architecture.

A third text box is present on the slide. Only the first two levels of text appear in outline view, so let’s manually modify this text.
Click the third text box on the slide (currently labeled Date) and type Jamie Robertson Architects.

Choose File > Save to capture your progress so far. You’ve successfully built your first slide. Let’s add several more slides to the presentation.
For the following slides, we’ll use a different master because we want to present a bulleted list. Keynote provides master slides specifically for that purpose.
Now let’s add some text. In the real world, it’s not uncommon to pull text for a slideshow from another file, such as an email or a Pages document. Keynote makes it easy to paste that text into your slides.
In this exercise, instead of typing text into the presentation, we’ll paste an outline from Pages.
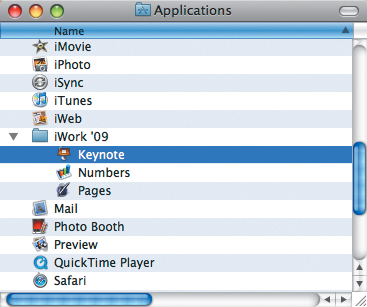
In the Finder, open the Lesson_01 folder on your computer’s hard drive.
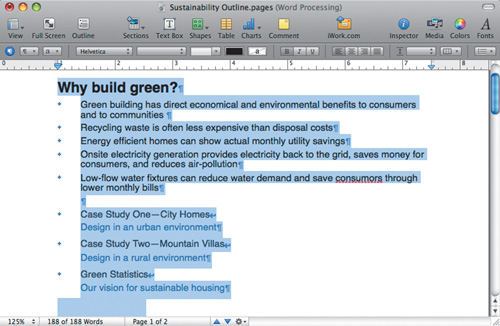
Double-click the file Sustainability Outline.pages. The file opens in Pages.
This document contains the remaining text for the presentation. We’ll copy it to the Clipboard to use it in Keynote.
Choose Edit > Select All to select all the text in the document; then choose Edit > Copy to copy the text to the Clipboard.
Close Pages (without saving changes) and return to Keynote.
In outline view, click the empty area next to slide 2. Then choose Edit > Paste and Match Style.
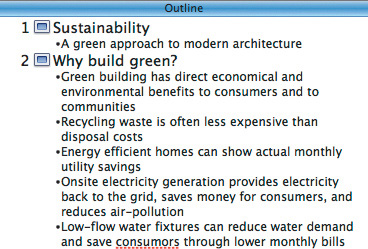
The copied text is pasted into the Keynote presentation and matches the formatting of the current theme. (Keynote discards the original text formatting.)
When you add the text, a new slide is created for each paragraph. This presentation requires several styles of slides to present information. Let’s adjust the master layout for some of the slides.
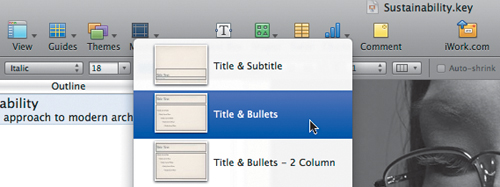
Click slide 3. This slide lacks a title for its bullet points, so let’s change its layout.
In the toolbar, click the Masters button, and choose Bullets.
Before

After
The layout changes to better match the slide content. The next three slides are similar in structure and can use the same master slide.
Click slide 4 to select it; then Shift-click slide 6 to select three slides.
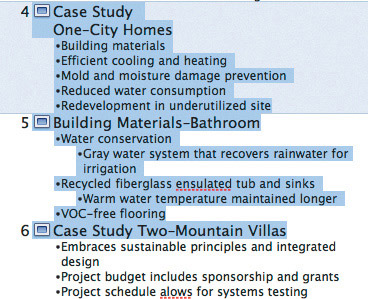
You have selected slides 4, 5, and 6 and can apply a slide master to all three slides with one click.
In the toolbar, click the Masters button and choose Title, Bullets & Photo.
All three slides update to the same layout.
Note
The next two slides use photo layouts that you will work with in Lesson 2.
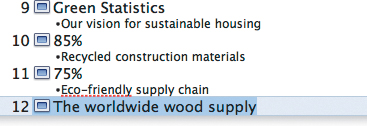
Click slide 10 to select it. This slide includes secondary information for slide 9.

Press Tab to indent the slide and convert it to a bullet point on slide 9. When text is joined to slide 9, slide 9 is selected.

Click the Masters button and choose Photo – Horizontal.
Click slide 11 to select it.
This slide includes secondary information for slide 10.
Press Tab to indent the slide and convert it to a slide 10 bullet point.
Click the Masters button and choose Photo – Vertical.
This layout will work well as you enter a new section of the presentation. It has room for a very large photo as well as a large title.
Repeat the slide formatting for the next two slides (11 and 12) using the technique you just learned.
Select slide 12 and choose the Title – Top master. This layout works well, as you will add a chart later in this lesson.
When you’re done, save your work by choosing File > Save. Then check your work by comparing it with 01Sustainability_Stage2.key.
Now that we’ve got the outline and text into the slides, it’s time to format the text. It’s always a good idea to start with clean, good-looking text—the bones of your presentation—before you dress it up with photos and animations. Good presentations start with good text.
The format bar —located at the top of your document window just below the toolbar—is a handy tool that lets you quickly format all content within a presentation. You can use it to format text, tables, charts, and images.
Keynote ’09 has a contextual format bar that displays various tools based on the task you’re working on and the objects you’ve selected. For example, if you select text, you’ll see controls for changing its font and formatting; but if you select a table, you’ll see controls for rows and columns.
If the format bar isn’t visible, choose View > Show Format Bar.
The Inspector window contains inspectors with many of the advanced controls you will use to stylize and animate your presentation.
You may find the format bar more convenient for making most formatting changes, but the inspectors offer an additional level of control.
If the Inspector window is closed, click the Inspector button on the toolbar. To switch between inspectors for particular tasks, click the appropriate button at the top of the Inspector window.
The Inspector window gives you access to these inspectors and their functions:
Document—. Set your slideshow properties as well as Spotlight comments.
Slide—. Create transitions between slides and control a slide’s appearance.
Build—. Animate the text and other slide elements.
Text—. Format the layout of text and bullets on the slide canvas.
Graphic—. Control the properties and appearance of graphics.
Metrics—. Size and position elements.
Table—. Create and format tables to hold data.
Chart—. Control the properties of charts and graphs.
Hyperlink—. Add web links, links to slides, and webpages to your presentation.
QuickTime—. Control the properties of QuickTime files in your document.
In this lesson, we start off by using the format bar. We’ll use some of the inspectors as we refine the presentation project in Lesson 2, and we’ll be working with all of the inspectors throughout this book.
Designing Great Slideshows
Great presentations start with strong ideas, creative writing, and thorough outlines. The rule of thumb is: Think first, design second, and then present. With that in mind, follow these presentation dos and don’ts:
<division> <title>Keep It Simple</title>
Clear, simple slides lead your audience through your presentation like welcome signs on an unfamiliar highway. The messages should be brief. Don’t distract your viewers with several images that compete for their attention. Next time you are on a highway, notice that the simplest billboards are often the most effective.
A consistent look and feel helps your audience focus on your content and not its changing background color. Font colors, sizes, and styles should remain uniform throughout your presentation. If you customize Keynote themes as you build your show, use a consistent design. You can quickly check that your presentation has a uniform design by reviewing your slides using the light table view.
Think of yourself as the anchorperson on the evening news: you’re delivering the story, and the slides behind you provide “speaker support,” reinforcing your key points.
A good presenter breaks down complex ideas to their simplest elements. Charts with tons of arrows pointing in all directions will confuse your audience. Lengthy paragraphs of text on a slide will tempt people to read the slide instead of listening to you. If you can’t avoid long text, break it up between several slides.
If you can’t avoid a complex slide, pause your slideshow and give your audience a silent moment to read the slide without your commentary. You can then resume presenting and you’ll have their attention.
A picture can be a much more effective way of communicating complex information than too much text. Every Keynote theme offers multiple slide masters with places for images.

Even the best presenters come across audience members who zone out or become distracted. You can help avoid that by keeping your messages brief and punchy. Make sure your audience can quickly grasp your bullet points and instantly understand where your presentation is headed. Use just a few words to convey a clear, complete thought.
Not all fonts include a bold style, but the Keynote themes tend to use fonts that offer both bold and italic styles. Let’s emphasize some text by making it bold.
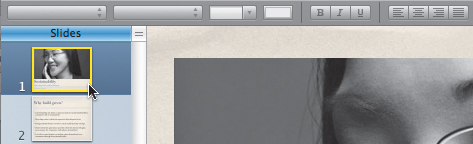
Choose View > Navigator.
Navigator view is useful for browsing and modifying your presentation. In navigator view, the slide navigator appears to the left of the document window, and the slide canvas is displayed to the right.
Click the thumbnail for slide 1 to select it.
Let’s make the presentation title stand out more clearly.
On the slide canvas, double-click the slide’s title to select it. The text is highlighted in light blue, indicating that it is active and ready for modification.

In the format bar, click the Bold button.
Sometimes you’ll have too much text to fit into a selected slide layout. You can fix this problem by reducing the amount of text, reducing the point size of the text, or doing both.
Let’s quickly format some text to fit a slide layout.
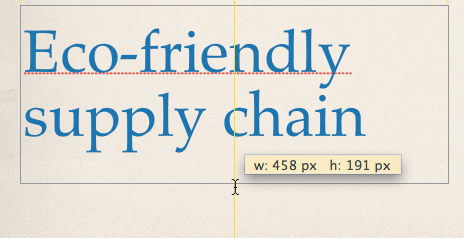
In the slide navigator, click the thumbnail for slide 4 to select it.

The text in the title is too big, so at least one word is not visible. The + (plus sign) at the bottom of the box indicates this.
Click the text box to select it; then Control-click or right-click the title text box and choose Auto-shrink Text.
Tip
You can also select the Auto-shrink checkbox in the format bar to reduce the size of text to fit it in a box.

Before

After
The text sizes down to fit the text box.
Apply the Auto-shrink Text command to slides 5 and 6 to fit their titles.
If a slide doesn’t have a lot of information on it, you may choose to make its text larger to fill up the slide and visually balance the information. Using a larger point size is also useful if you want to add emphasis.
Let’s adjust the font size on two slides where the text is too small.
In the slide navigator, click the slide 10 thumbnail to select it.
Select the top text box (85%).
In the format bar, enter a point size of 200 and press Return.
Click the Bold button.

Now we’ll reuse this formatting on the next slide.
Triple-click to highlight the entire paragraph of text and choose Format > Copy Style.
In the slide navigator, click the slide 11 thumbnail to select it.
Triple-click to select the text in the top text box (75%).
Choose Format > Paste Style.
The text is resized to match the text box in slide 10.
Return to slide 10.
Triple-click the text Recycled construction materials to select it.
Change the font size to 64 points. The text grows larger but is cut off because the text box is too small.
In the format bar, click the Line Spacing button and choose 0.8.

Press Command-Return to stop editing the text box, then resize the text box to accommodate the text by dragging the bottom selection handle.

Highlight the text in the second text box, and choose Format > Copy Style.
Switch to slide 11.
Click in the second text box, then drag to select the text and choose Format > Paste Style.
In the format bar, click the Line Spacing button and choose 0.8.
Resize the text box to accommodate the text by dragging the bottom selection handle.
Choose File > Save to store your work.
So far, you’ve modified text within existing slide layouts. However, Keynote lets you add as many text boxes to a slide as you need. You can add text by inserting a new text box or by inserting a shape.
Putting text inside a shape is a great way to make it stand out. Let’s create a new slide and add a shape to contain text.
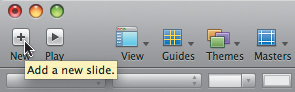
In the slide navigator, select slide 12.
In the toolbar, click the New button to add another slide to your presentation.
Click the Masters button and choose Blank.
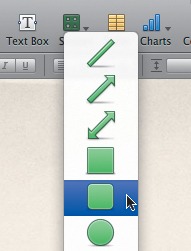
In the toolbar, click the Shapes button and choose the rounded rectangle.
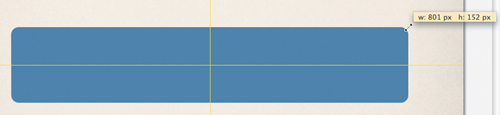
The rectangle is added to the center of the slide, in a color dictated by the theme you have chosen. Let’s make it larger so that it can hold text.
Option-drag a corner selection handle until the shape is 800 px (pixels) wide and 152 px tall.
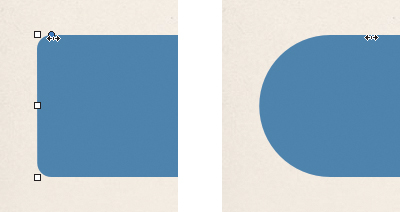
Now that the shape is sized, you can adjust the roundness of the corners.
Drag the blue editing point to the right to round the shape’s corners.
You have successfully added a shape to the slide.
Now that we’ve created the rounded rectangle, let’s place some text inside it.
Double-click inside the shape.
Type Thank you.
Highlight the text and press Command-B to format it as bold.

Let’s size the text so that it fills the shape.
In the format bar, locate the Font Size field, enter 100, and press Return.

With the text selected, select the Shadow checkbox in the format bar. This helps the text stand out a bit.

Press Command-Return to apply the text, then choose Edit > Deselect All.
This deselects any object you have selected on your slide and exits the formatting of the shape.

If you want to further enhance a shape, you can use the format bar to add a drop shadow or a reflection.
Tip
It is generally considered bad taste to apply both a drop shadow and a reflection. For an attractive look, you should use only one or the other on an object.
If the change is not made to step 6 above, you will have to insert to click on the background then click the blue shape to select it.
The format bar offers another effect to enhance the shape.
In the format bar, select the Reflection checkbox.

A reflection is added to the rounded rectangle.
Press Command-S to save your work.
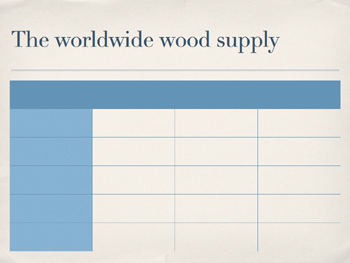
Slide 12 is intended to contain information comparing the worldwide wood supplies in the years 2000 and 2010. A table is a good way to present data in a clear, precise manner.
In the slide navigator, select slide 12.
In the toolbar, click the Table button.

Keynote automatically opens the Table inspector and adds a 3-by-3 table to your slide.
In the format bar, click the Header Row button.

A new row is added to the top of the table. Header row cells contain labels for columns. The header column is also formatted to help the labels stand out and be easily read.
In the format bar, click the Header Column button.
A new column is added to the side of the table. A header column contains the labels for the table.
In the format bar, change the number of rows to 6 (5 rows and 1 header row).
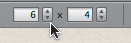
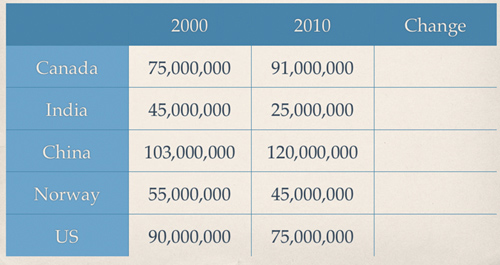
The table is now set to compare the performance of five countries over two decades and show the change in value.
A table header row identifies the contents of a table, helping viewers to quickly understand the data.
Click in the second cell of the header row.
Type 2000.

Press Tab to move to the next cell.
Type 2010, and press Tab to apply the text and move to the next cell.
Type Change to label the final column.

The header row is filled in. Now let’s adjust the header column.
Click in the second cell of the header column.
Type Canada and press the Down Arrow key.
Enter the following text into the next four cells, one country per cell.
India
China
Norway
US

You’ve successfully labeled the table. Now let’s insert some numerical values.
Now that the table is properly set up, you can populate it with data to communicate information to your audience. Additionally, you can insert calculations to perform mathematical operations on the contents of the table.
Enter the information from the following figure into your table.
Note
These values are millions. Enter six zeros after the initial number. For simplicity, the numbers have been rounded to the nearest million-dollar amount.
Let’s format the cells to display the dollar amounts more clearly.
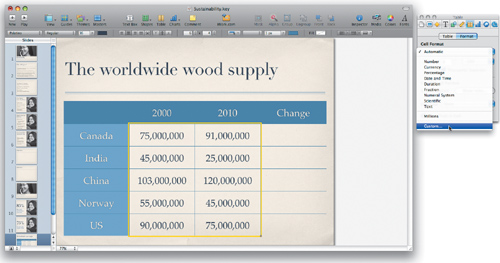
Drag to select all the numbers in the table.
In the Table inspector, click the Format button.
You can now create a number format to adjust the data display.
From the Cell Format pop-up menu, choose Custom.
The custom format dialog opens.
In the Name field, enter Millions.
Make sure that Number & Text is chosen in the Type pop-up menu.
Drag the currency symbol (the dollar-sign icon) into the first position of the format field.
The second element, integers (#,###), is already in place. This determines how many digits are shown.
Drag the scale element (the K icon, representing thousands) into the third position.
Use this element to size the display value of a number. In this case, setting the scale to millions will simplify 123,000,000 to 123.
Click the scale element disclosure triangle and choose Millions (M).
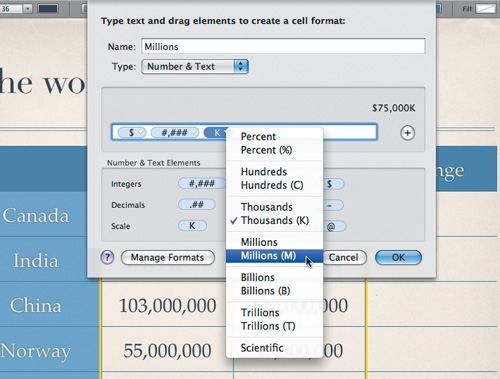
Click OK to store the custom number format.
The formatting is applied, and the custom number format is stored for later use.
iWork ’09 can perform calculations within tables. In the current table, you can tell iWork to calculate the change in value between the years 2000 and 2010, and you don’t need to leave Keynote to perform a calculation.
Click the table to select it; then click the second cell in the fourth column (just below the word Change).

Type = (the equal sign).
The Formula Editor opens. Along the top and left sides of the table, you can see the reference tabs (the letters and numbers that identify the columns and rows of the table). You are going to enter a formula so that Keynote will automatically calculate the difference between the years 2010 and 2000.
Click the cell for the 2010 Canada value (this is cell C2, which is the intersection of column C and row 2).
Press the – (minus sign) key to subtract the next value.

Click cell B2 to select the 2000 Canada value.

The Formula Editor displays = 2010 Canada – 2000 Canada. It will subtract the numbers in column B from column C and place the result in column D.
Press Return to apply the formula.
The formula does its work and correctly calculates values for the first cell in column D. The formula can now be applied to the remaining cells.
Click to select the first cell containing the formula.
Drag the blue Fill handle to the bottom of the table.

The values in all five cells are calculated.
In the Table inspector, from the Cell Format pop-up menu, choose Millions.

The custom format you created is now applied to these new cells.
Choose File > Save to save your work.
Spelling errors are common when creating any text-based document, and Keynote makes it easy to fix them in your presentation before it goes in front of an audience.
The text you copied earlier has a few spelling errors to work with.
In the slide navigator, click slide 1.
Let’s use the Spelling window to correct those spelling errors.
Choose Edit > Spelling > Spelling.
The Spelling window opens. It allows you to browse spelling errors and choose a suggested replacement word.
The first spelling error on slide 2 is consumors. To fix the error, select consumers from the Guess list and click Change.

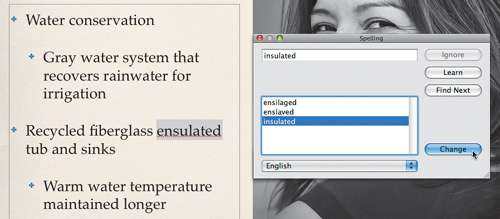
The next spelling error is ensulated. From the Guess list, select insulated and click Change.
The next spelling error is alows. From the Guess list, select allows and click Change.
The next word is Eco-friendly. Because it is spelled correctly, click Ignore.
Clicking Ignore tells Keynote to skip the word in this document (but not add it to the dictionary on your computer).
There are no additional errors in this document, so you can close the Spelling window.
Choose File > Save to store your work.
You can check your work by comparing it with 01Presentation1_Stage3.key in the Lesson_01 folder on your computer.