
CHAPTER 5:
Alternative Surfaces
Aside from traditional paper, canvas, and panels, you can create art on a variety of surfaces, including natural wood, metal, stone, glass, ceramic, and Mylar™. Alternative supports often need to be cleaned and prepped for paint. Following are some tips for experimenting with these unusual supports, as well as examples of the beautiful results you can achieve.

NATURAL WOOD
Painting on natural wood is similar to painting on raw wood panel; you must seal it to prevent impurities from leaching into your paint and to keep moisture from rotting the wood. However, you don’t have to prime it with ground or white gesso before painting. Some artists enjoy painting on the light, warm tones and subtly ringed surface of natural wood. In this silhouette demonstration, you can see how simple it is to prepare a raw slice of tree trunk for acrylic or oil paint.
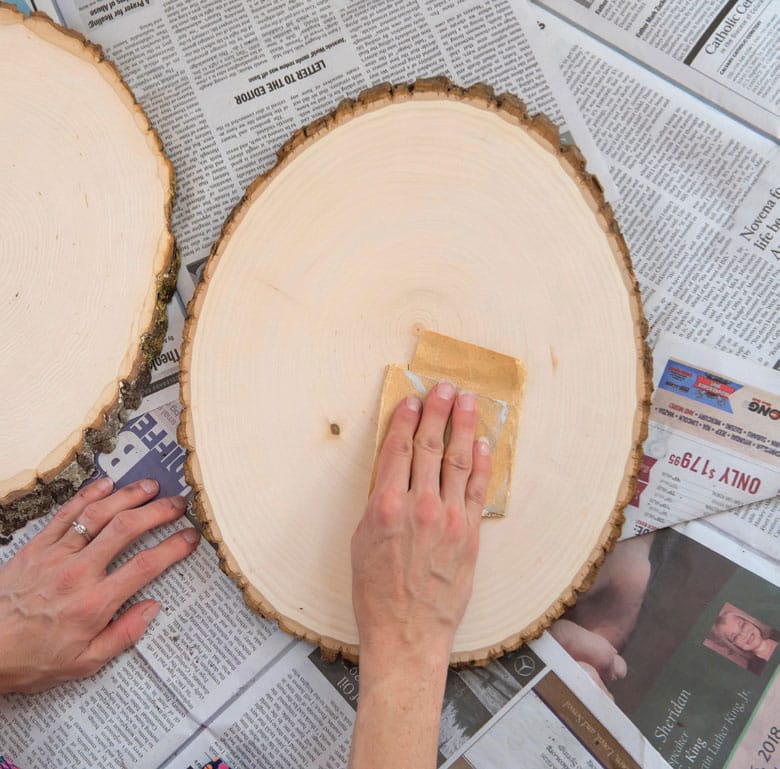
STEP 1
Using sandpaper, smooth out any surface irregularities on the wood that might interfere with your brushstrokes. Then use a large brush (such as a house brush) to remove bits of wood and dust, followed by a damp rag that won’t leave behind lint. Allow the wood to dry.
STEP 2
To seal the wood, apply a couple coats of a clear polymer emulsion (acrylic based) or PVA glue (latex based). These milky substances will dry to a clear finish, allowing the natural grains of the wood to show unaffected. You can use any large brush to apply the seal—a house or chip brush are great options.

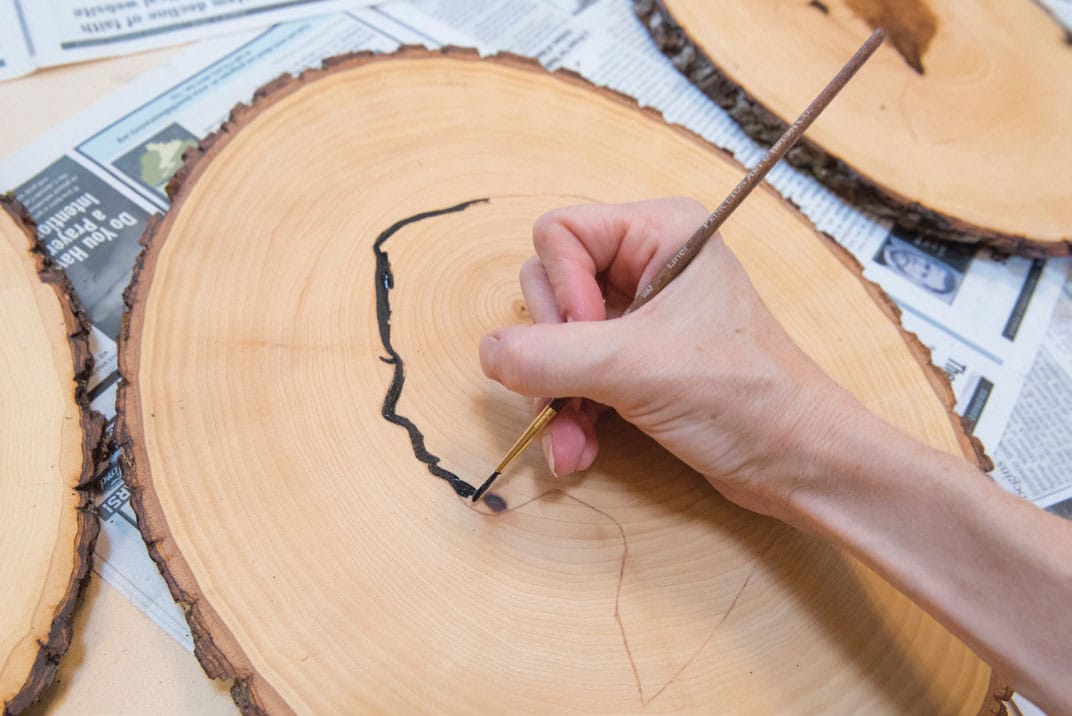
STEP 3
If desired, sketch your subject before applying any paint. For this demonstration, you can cut silhouettes from paper using a craft knife. Then use a non-staining watercolor pencil (such as raw sienna) to trace onto the wood. (This pencil can be wiped away from the silhouette edges using a damp, lint-free cloth, once the paint is dry.)

STEP 4
Use a small round or liner brush and paint that has been thinned a bit to follow the silhouette lines faithfully.
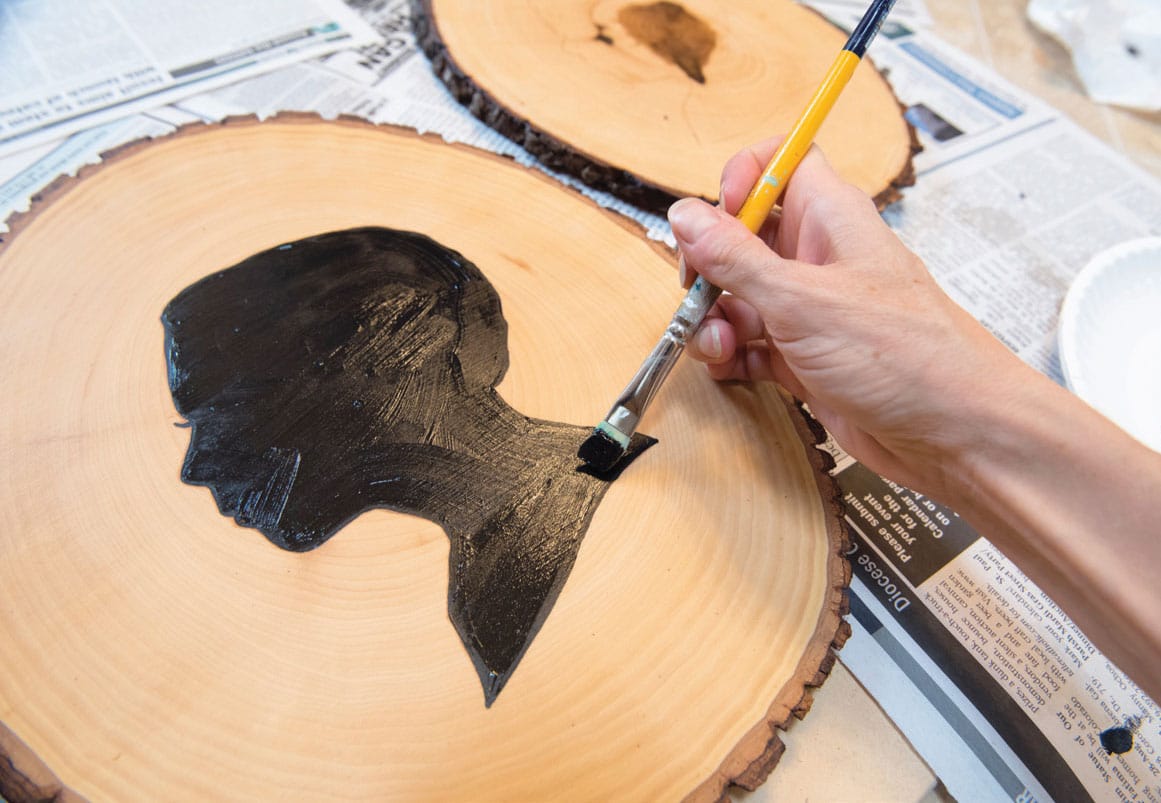
STEP 5
Once the more delicate edges are in place, fill in the bulk of the silhouette with a larger brush and smooth strokes. Once dry, apply your chosen varnish to protect the painting.
TIP
You can also stain or bleach wood to change its tone before using it as a painting surface. Simply apply the treatment—and allow the wood to fully dry—before you apply the seal.

METAL
Metal is a very hardy, archival surface that can give your paintings a unique glow. Sheet metal is available from various sources: online, scrap metal yards, or even some art-supply stores. Steel, aluminum, and copper are good options; however, if you use steel, be sure to remove any rust before cleaning the surface and applying paint. Below are tips for preparing a metal surface for painting:
• Use oil or vinegar to clean the surface well and remove any oil or dirt.
• Rough up or scratch the surface to produce a tooth that will hold your medium. Use sandpaper, a wire brush, or a steel sponge pad.
• Consider a clear seal or primer, which will create a barrier between the metal and paint and help prevent rust. Good choices for this include clear acrylic dispersion medium or PVA dispersion.

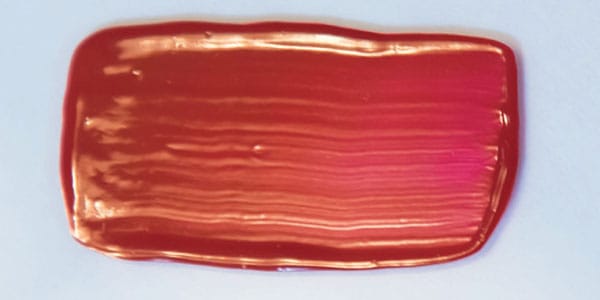
Copper is a reflective metal that boasts bright orange, red, and cream tones, as seen in this artwork by Candice Bohannon. The luminous quality of the copper seems to come through the paint, offering a great background for flesh and portrait paintings. Artists usually prepare copper by roughing up the surface with fine sandpaper and cleaning it with rubbing alcohol or acetone. Some artists also rub down the surface with raw garlic to further etch (see here).

PREPARING ALUMINUM FOR PAINT
Acrylic paint is the best choice for painting on aluminum sheet, as it is most likely to flex with the surface.
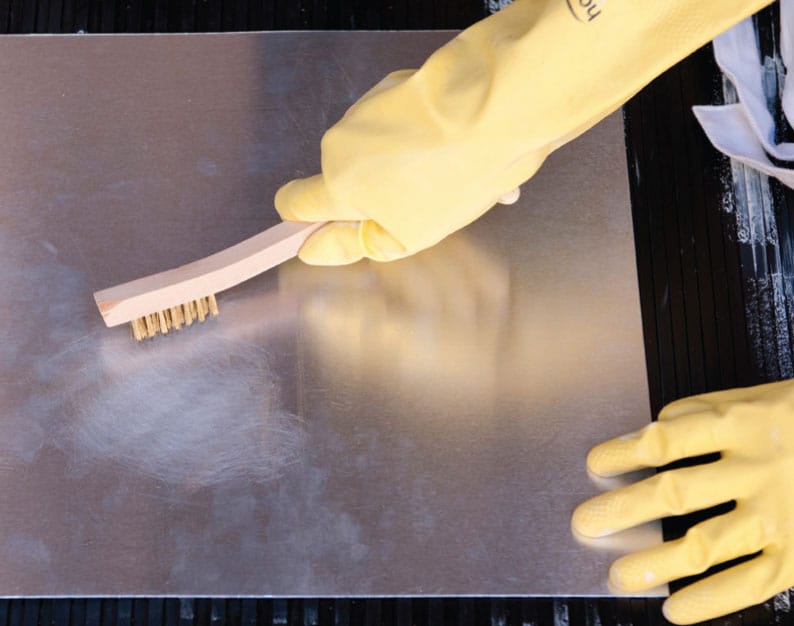
STEP 1 Wearing a mask, goggles, and rubber or latex gloves, use a wire brush or pad to score the surface of your aluminum sheet, working in small, circular movements.

STEP 2 Clean the aluminum to remove all dirt and oil, using a soft cloth and rubbing alcohol.

STEP 3 Some artists paint directly on the aluminum, but you can also apply a clear layer of seal using acrylic gel medium, followed by a clear acrylic dispersion primer. Use a soft-haired brush or a foam brush to spread the medium or primer evenly over the surface in parallel strokes.

STEP 4 Your surface is ready to paint. Apply the paint using soft-haired brushes to avoid large streaks left behind by coarse bristles.
TIP
Limit the amount of water added to acrylic paint when working with metal. Thinned strokes and washes can appear streaky and irregular.
COPPER WITH CANDICE BOHANNON
In this demonstration, you’ll learn how artist Candice Bohannon prepares and applies oil paints to copper plate.
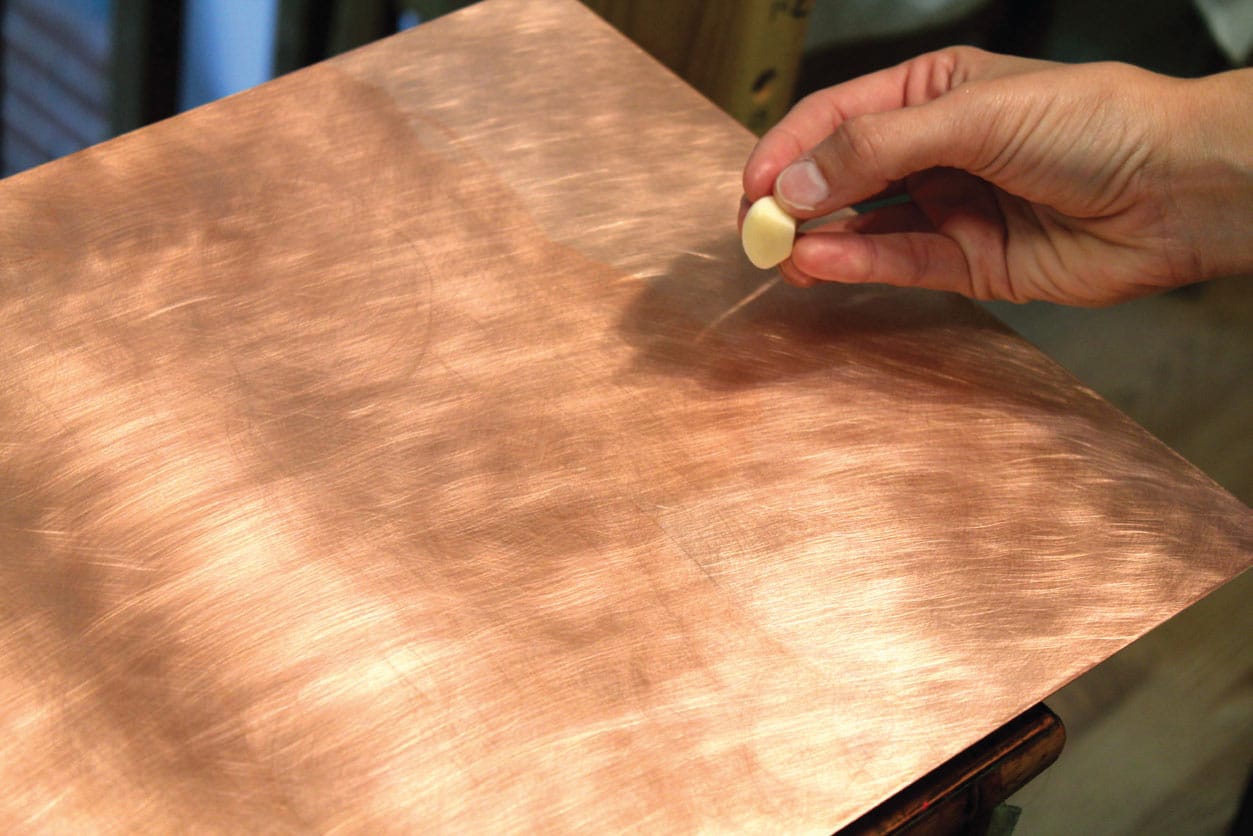
Because copper plate is flexible, you’ll want to glue it (PVA glue works well) to a hard substrate, such as MDF board. Then seal the substrate to prevent moisture from warping it. Similar to prepping aluminum for paint, you’ll want to sand or use a steel brush to rough up the copper surface and provide tooth for the paint; then wash and wipe it clean. To further etch the surface, rub a raw piece of cut garlic over the copper. This allows for a chemical bond to form between the copper and the lead in your white primer or paint.
TIP
Use gloves as you work to prevent the oils of your skin from transferring to the copper surface. If you’re working without a primer, be sure to cover all areas of copper to prevent it from turning green over time due to exposure to the air.

Place your mounted copper plate on an easel, and you’re ready to begin! You can choose to apply paint directly on the copper or add a primer first.

Candice blocks in the darkest shapes of her scene with thinned oil paints, building up layers with thicker, more opaque layers to create this foggy landscape scene.
STONE
Stone is the oldest painting surface used by man. Cave and rock paintings offer glimpses into human life that stretch back more than 10,000 years, when charcoal and pigments were used to depict animals, weapons, and humans. Today, stone is still a surface of choice for many artists. It’s heavy and can be a challenge to transport and display, but its irregular textures, striations, speckles, and edges give it a unique earthy quality that makes it all worthwhile.
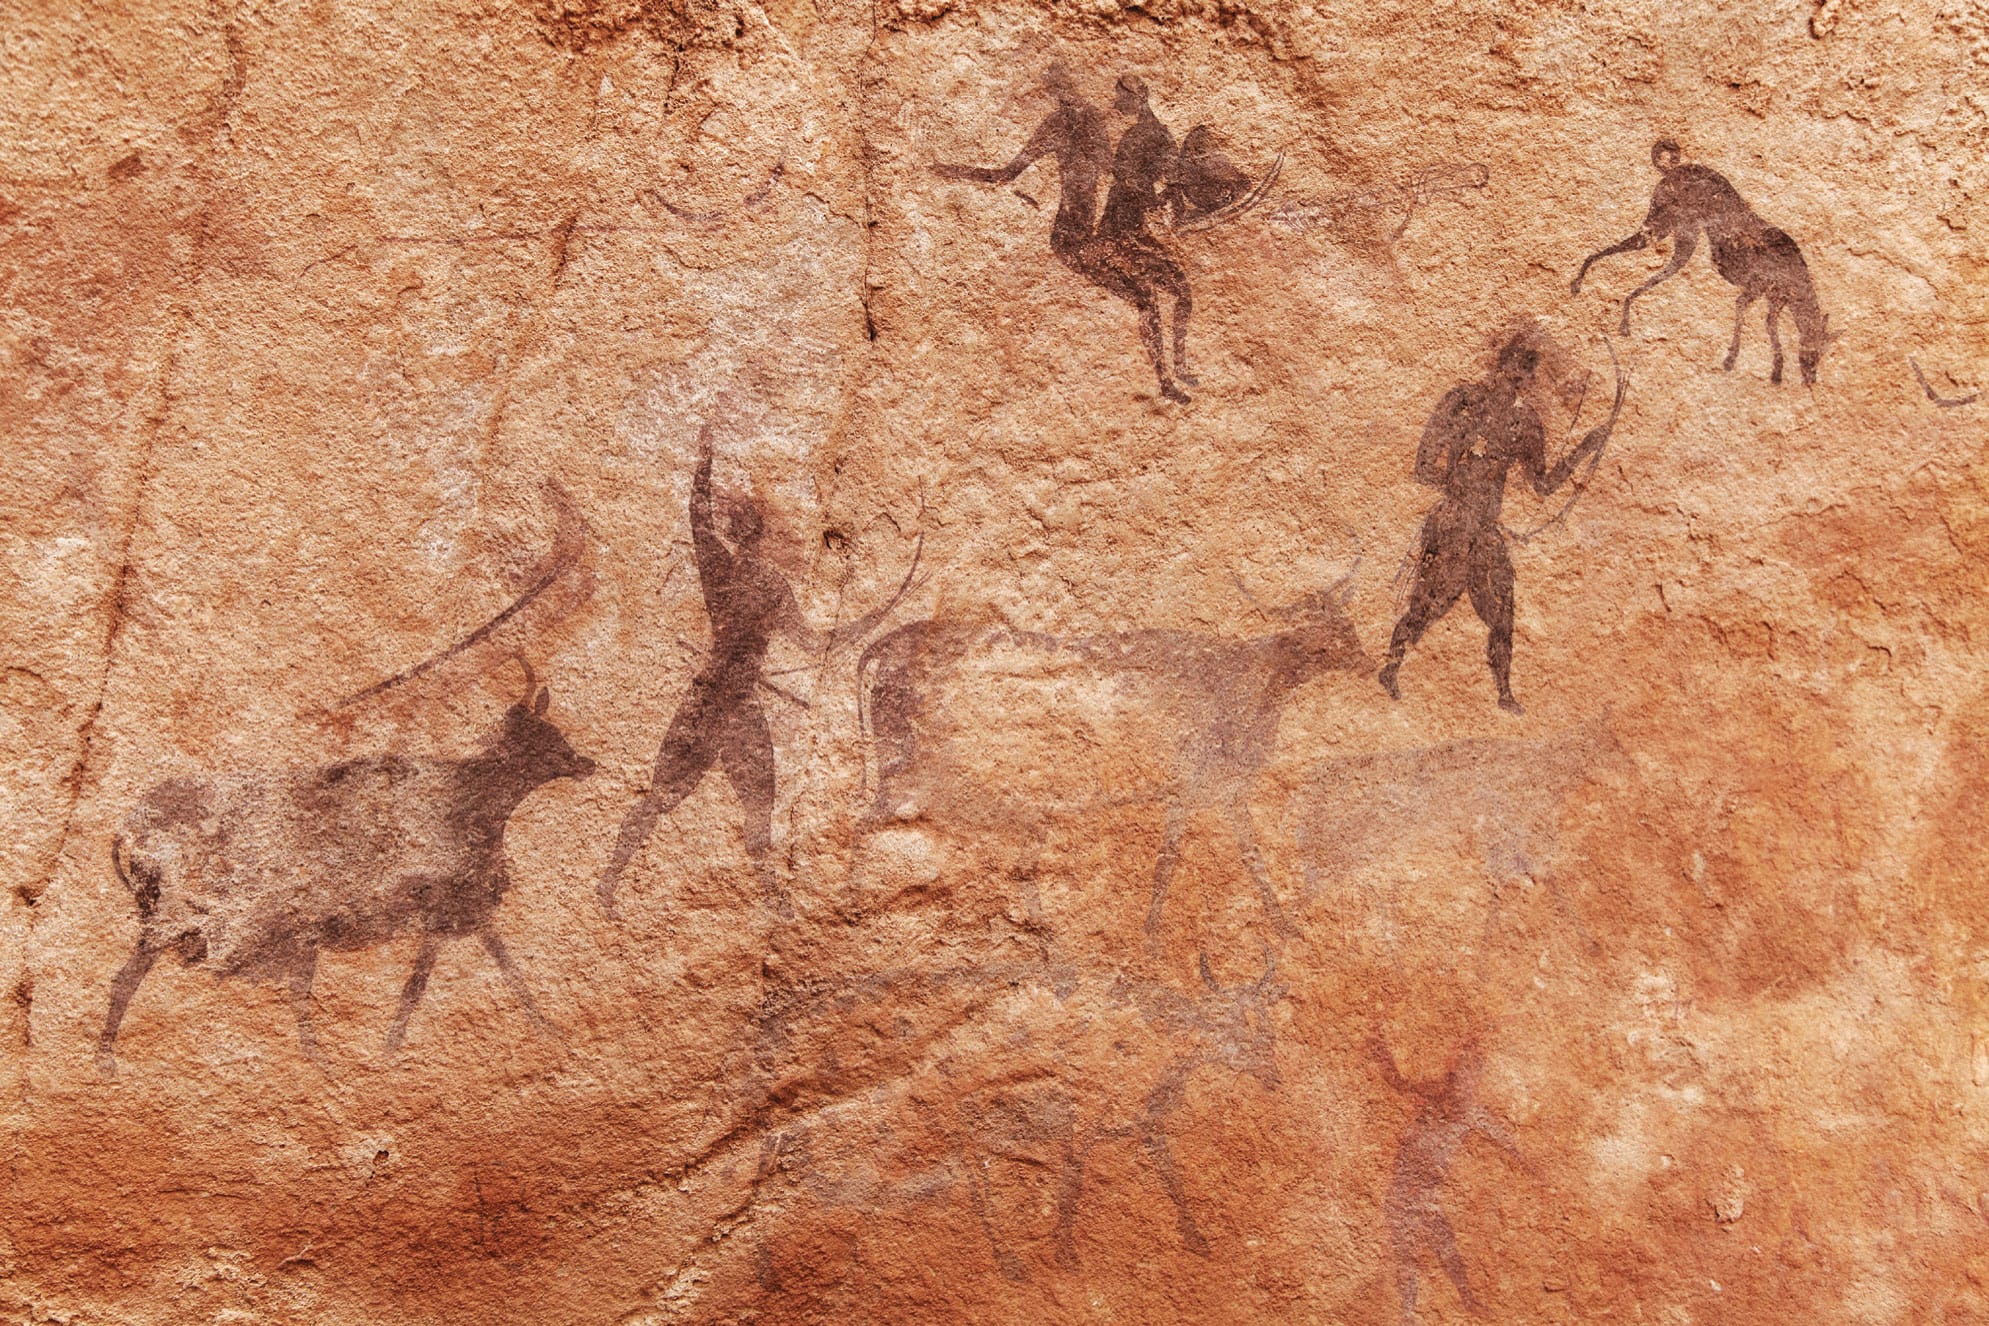
Prehistoric cave paintings in Tassili n’Ajjer, Algeria.
PREPARING A STONE SURFACE
Stone is a viable surface for both acrylic and oil paints. Prepare your rocks by thoroughly removing dirt and oil using a brush, soap, and warm water. Then apply an alkyd resin (such as Liquin™), a clear acrylic dispersion ground, or a stone sealant before painting. This will protect the rock from absorbing moisture and discoloring over time, and it will give the paint something to grab onto. To protect the paint, always finish by sealing with varnish.
TYPES OF STONE
Many artists like to paint on rocks and stones they discover in nature. However, you can buy slabs of specific types of stone (and often discounted scraps) online and at building-supply stores. The chart below features some of the most common types of stone used for painting.
Stone |
Qualities |
Appearance |
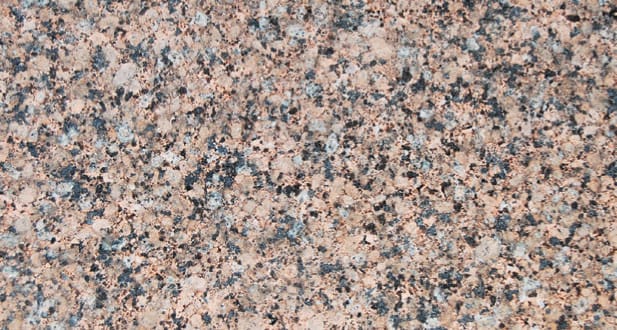
Granite |
Hard and chip-resistant with veining and flecks. Colors range from grays and creams to oranges, blues, and greens. |
|
Marble |
Slightly softer than granite. Features light, marbled veining. Generally white, gray, or pink in color. |
|
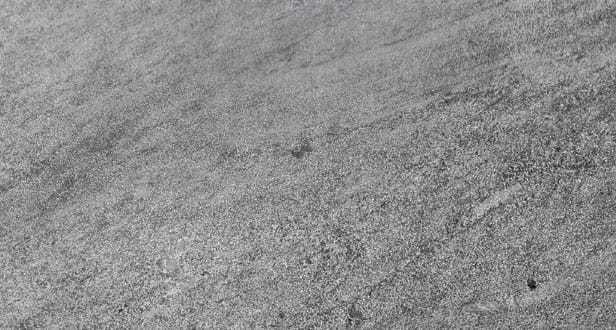
Slate |
Fine-grained stone that is generally gray with subtle variations in color. |
|
Soapstone |
Talc-based rock with a soft, smooth feel. A favorite stone for carving. Colors range from gray tones to browns. Nonporous and resistant to changes from acids. |
|
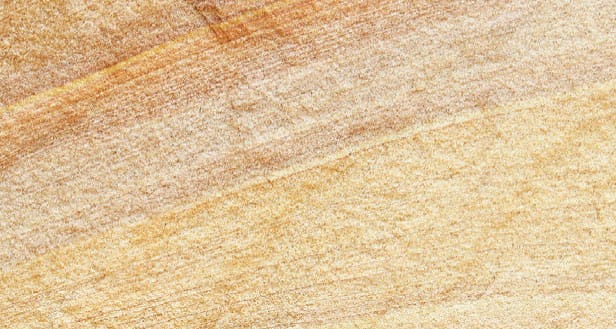
Sandstone |
Coarse rock with a variable density. Features visible layers and undulating striations. Generally warm in color, it can be any combination of orange, red, yellow, cream, brown, or even purple. |
|
Travertine |
Soft but dense stone. Generally cream, peach, pink, white, or silver. |
|


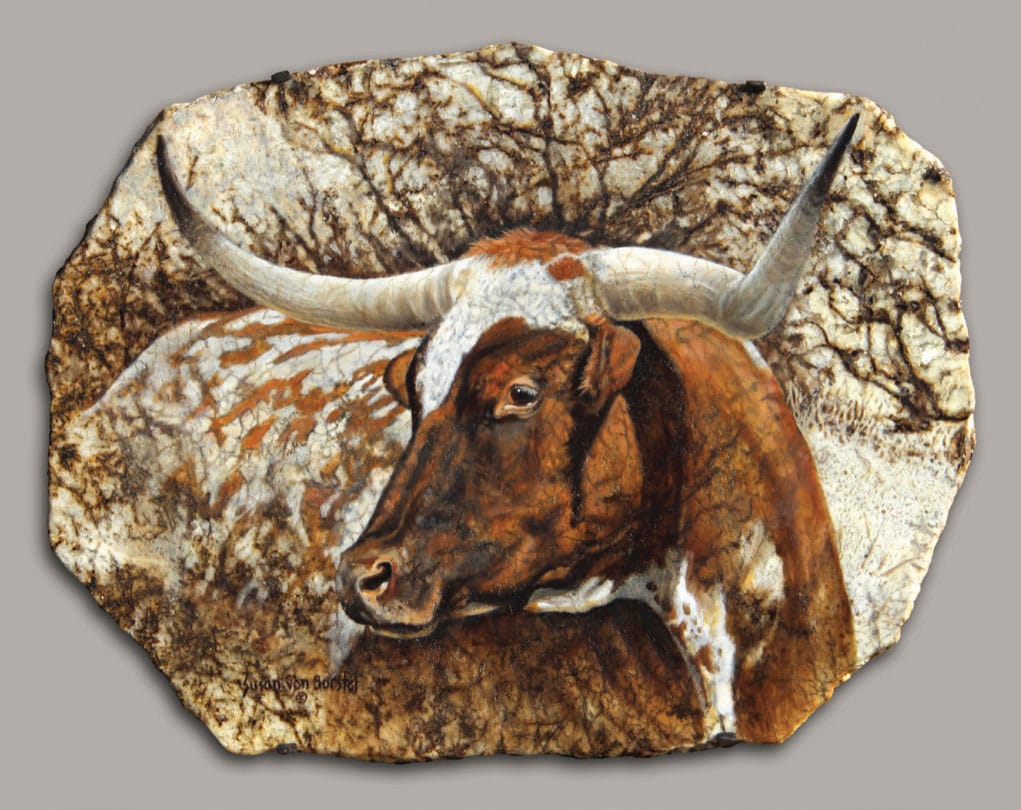
PAINTING ON STONE WITH SUSAN VON BORSTEL
Artist Susan von Borstel uses oil paint on stone to create stunning works of art that blend natural patterns with representational painting. First she looks at the patterns on a slab of stone to see what they resemble, and then she slowly brings out her subject. She compares the process of painting on stone to working in a photo darkroom, watching as the subject emerges. Susan tries to leave as much of the natural pattern as possible, noting that the less paint she applies to the stone, the more it appeals to viewers.
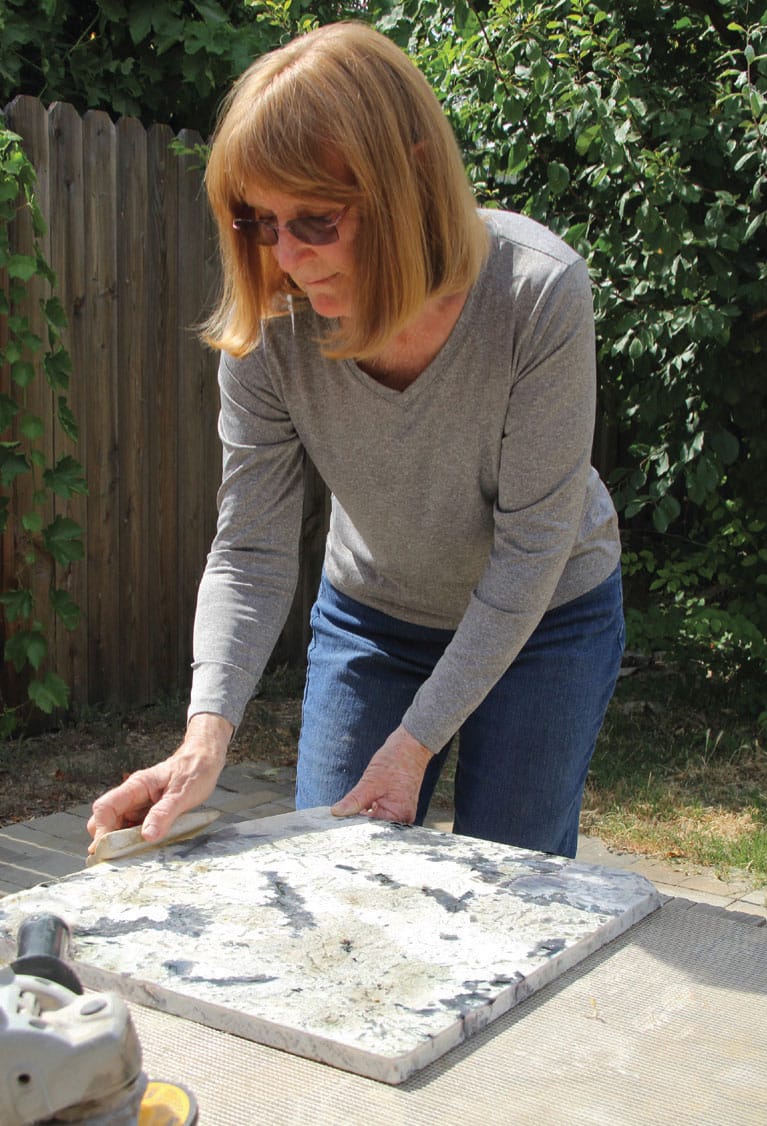
Susan uses a hard sanding block to smooth any broken edges of her stones, such as this granite slab. She also cleans the faces of her stones and then seals them with Liquin before applying any paint.
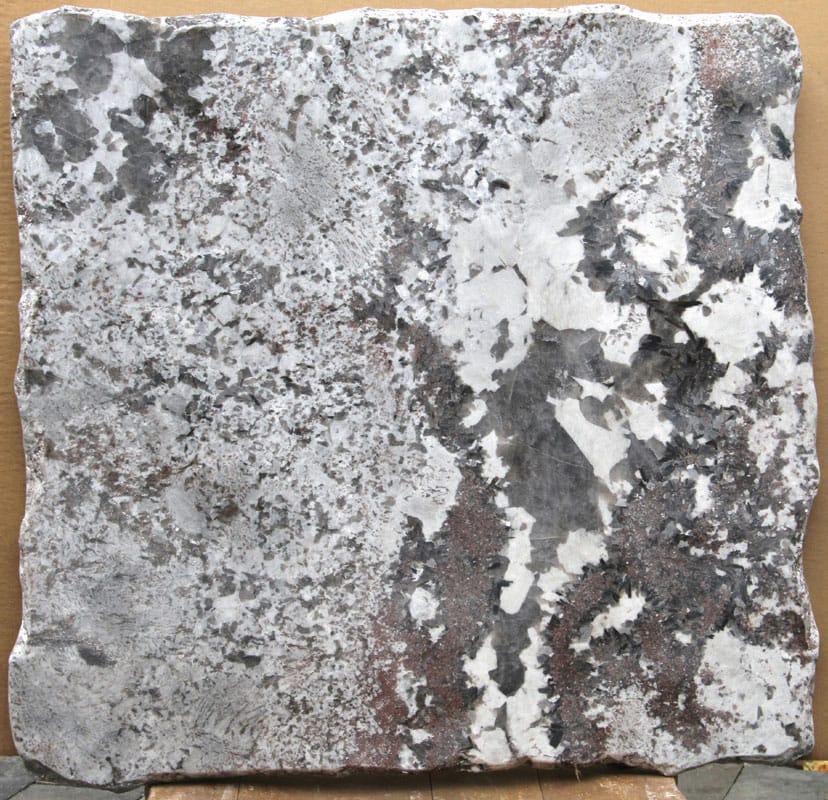
This slab of granite features interesting areas of contrast that lend themselves well to the subject. See how Susan used the naturally occurring shapes to form the horse and background trees, in particular.

Nice Catch by Susan von Borstel. Oil on granite.

Above is a peek at the quartz surface used for Light and Magic at right. The soft, light marbling is an elegant base for depicting creamy horse coats and manes.
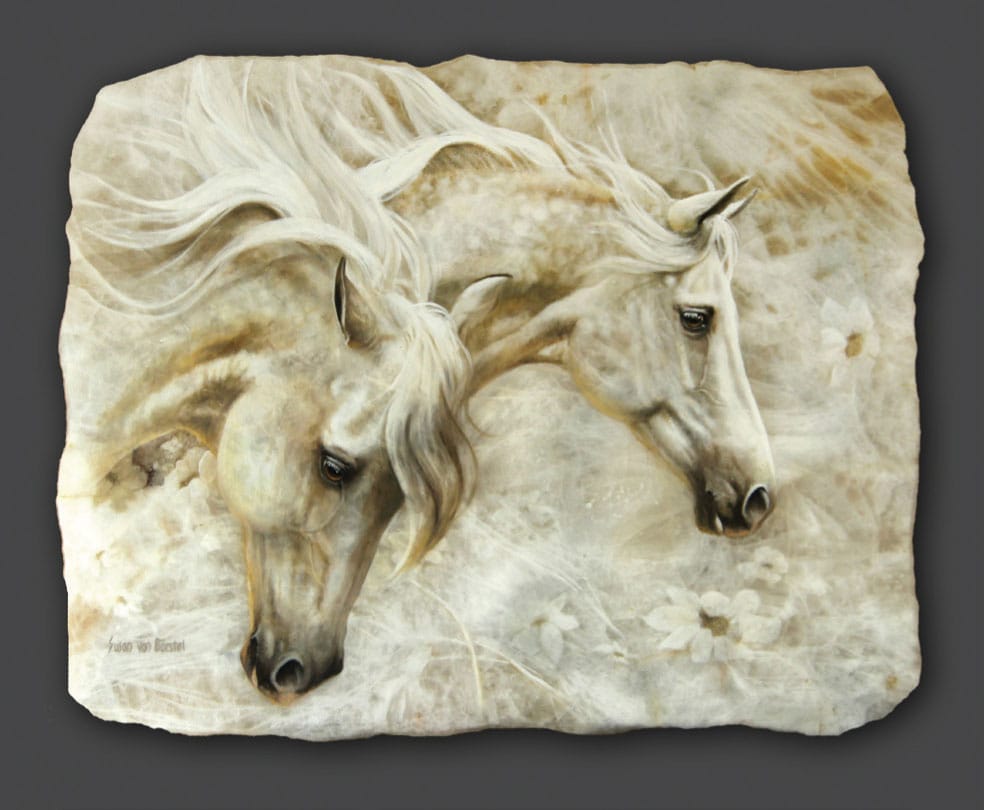
Light and Magic by Susan von Borstel. Oil on quartz.
Goodlookin’ by Susan von Borstel. Oil on granite.
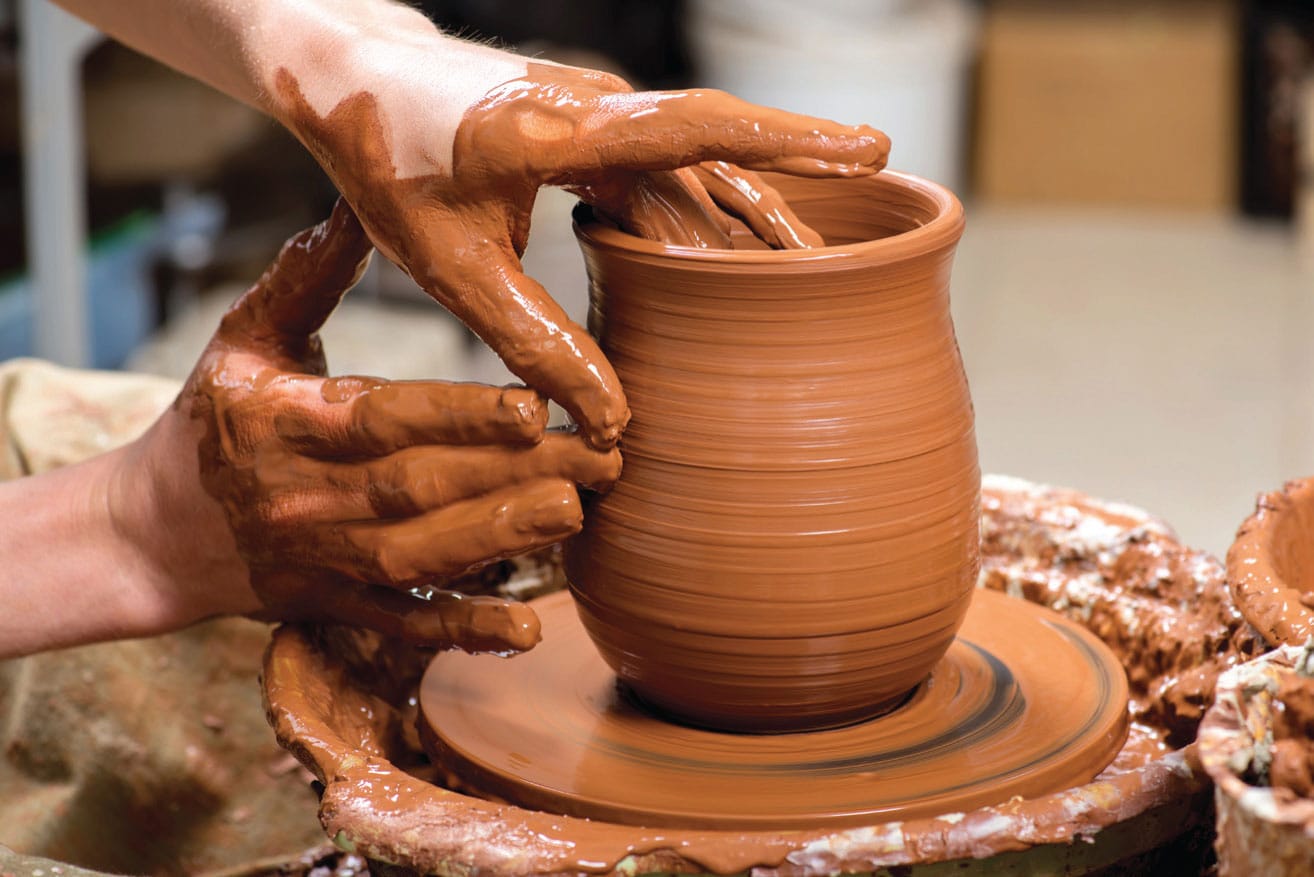
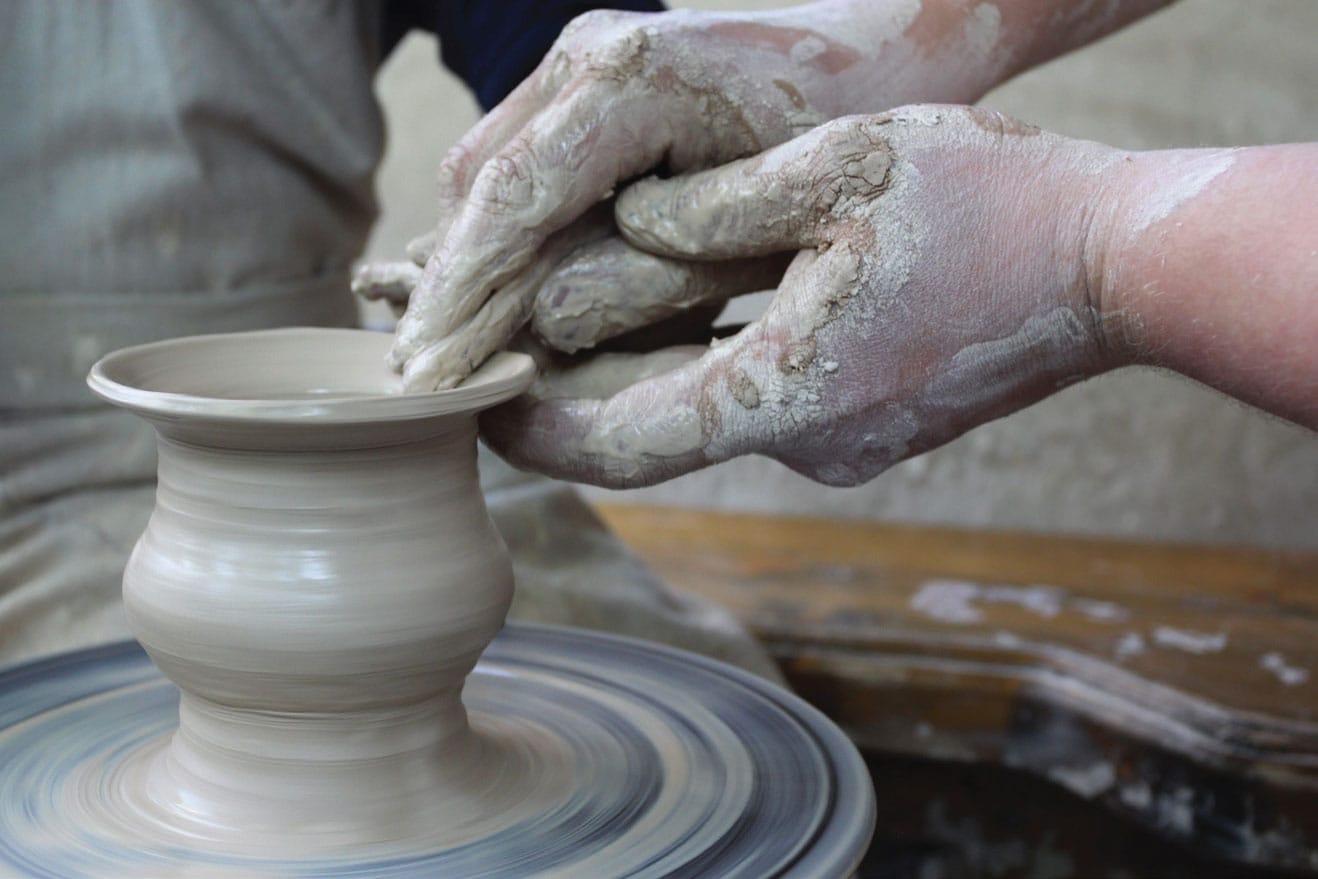
CERAMIC
Ceramic is a rocklike material made of clay hardened by heat. Some artists use ceramic plates, vases, bowls, or drinkware as a surface for creating colorful patterns, designs, and even scenes or portraits. Ceramic is heavy and fragile and requires an investment in time and materials, but it can serve as a base for dramatic pieces that provide function as well as form.
The main types of clay used by ceramic artists include earthenware (above), stoneware, firing clay, and kaolin clay (which makes porcelain; below). Each type of clay has its own color ranges and requires different firing temperatures.
THE FIRING PROCESS
Typically, a ceramic piece is bisque fired after the artist completes the clay form. Bisque firing involves baking the pieces at a low temperature (depending upon the clay) to remove moisture, organic impurities, and air bubbles. Firing takes place in a kiln, which is a chamber or oven that holds heat. Many kilns use actual fire as a source of heat, but electric kilns (which allow for greater control over temperature) are becoming more common in the field of ceramics.

Traditional firing kiln

Electric kiln

Shown are examples of bisque-fired pieces awaiting the glazing process. Once glazed, the pieces will move on to the final round(s) of firing, which will give color and a hard, glass-like finish to the pieces.
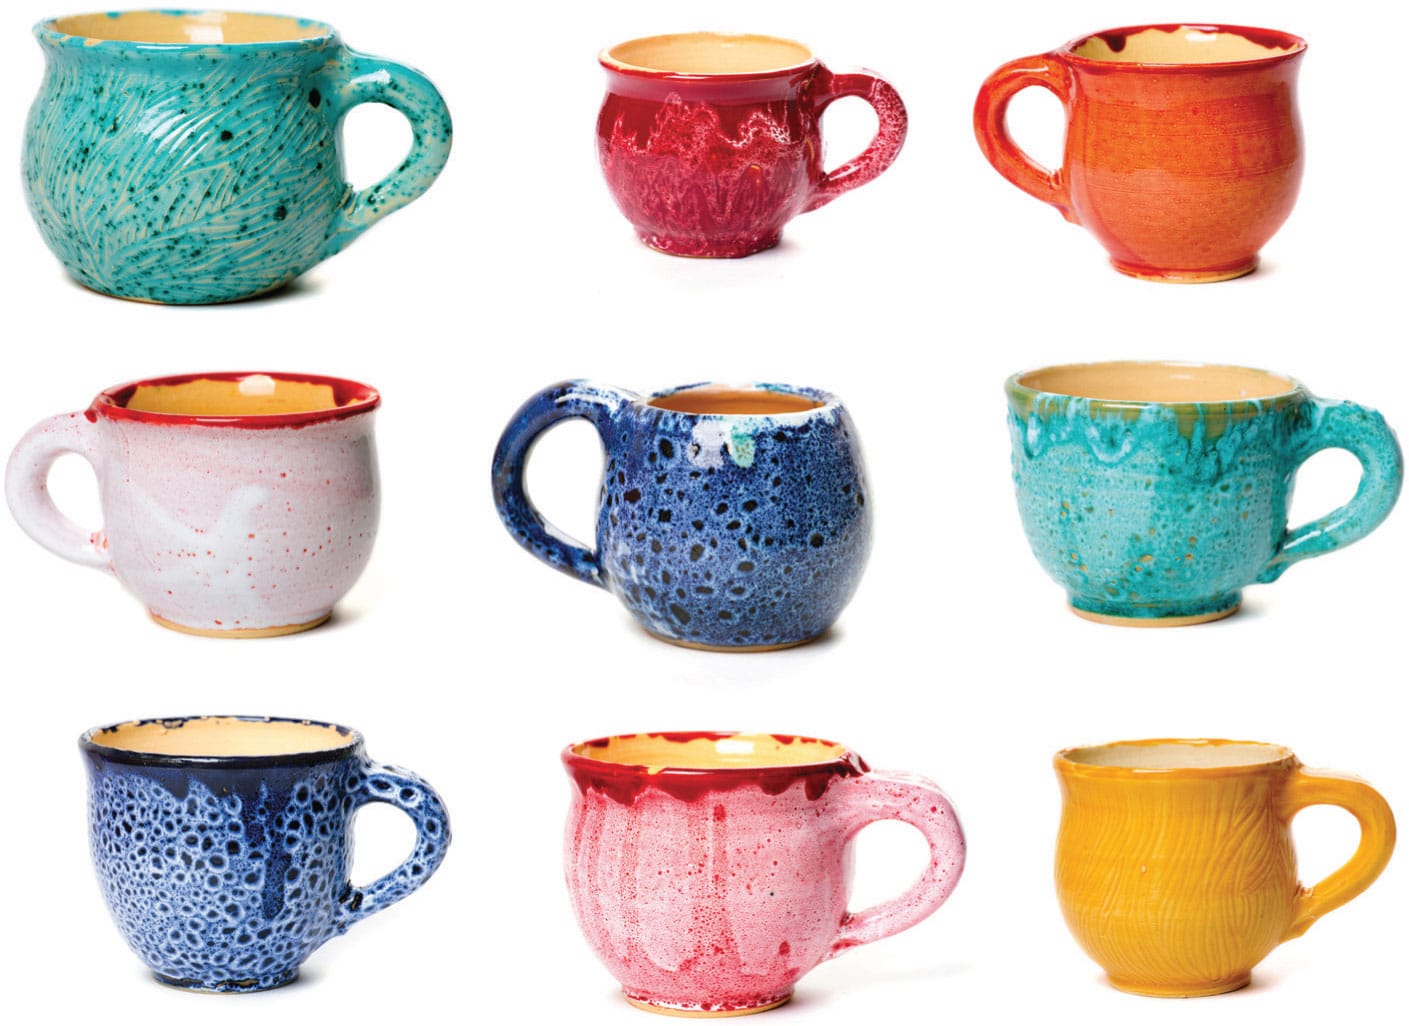
GLAZES & UNDERGLAZES
Although some artists use acrylic paints formulated for use on dry ceramic, most ceramic artists create their art using glazes and underglazes rather than paints. Most glazes are liquid mixtures of silica (which melts into glass), alumina (a stabilizer that keeps the glaze in place), flux (such as sodium, which helps melt the glass), and colorant (such as copper oxide, which interacts with the firing process to create color). Underglazes are similar to glazes but contain slip (or liquid clay), allowing them to shrink with the piece during the firing process and stay in place for more detailed design work.

Prior to firing, liquid glazes and underglazes have the appearance of opaque, chalky paint. They yield a variety of colors with a range of qualities to consider, such as gloss, matte, satin, opalescent, and mottled finishes.
TIP
Ceramic artists rely on a pyrometric cone system (which gauges heat) to mature their glazes and underglazes. Cone numbers are associated with temperatures; for example, a cone 6 glaze matures at 2232 degrees Fahrenheit. Always keep in mind that each glaze and underglaze calls for its own firing temperature.

Large, soft brushes (such as hake) are great for coating a piece with glaze. Typically, you’ll want to apply six brushed coats of glaze (or two dipped coats) before firing.
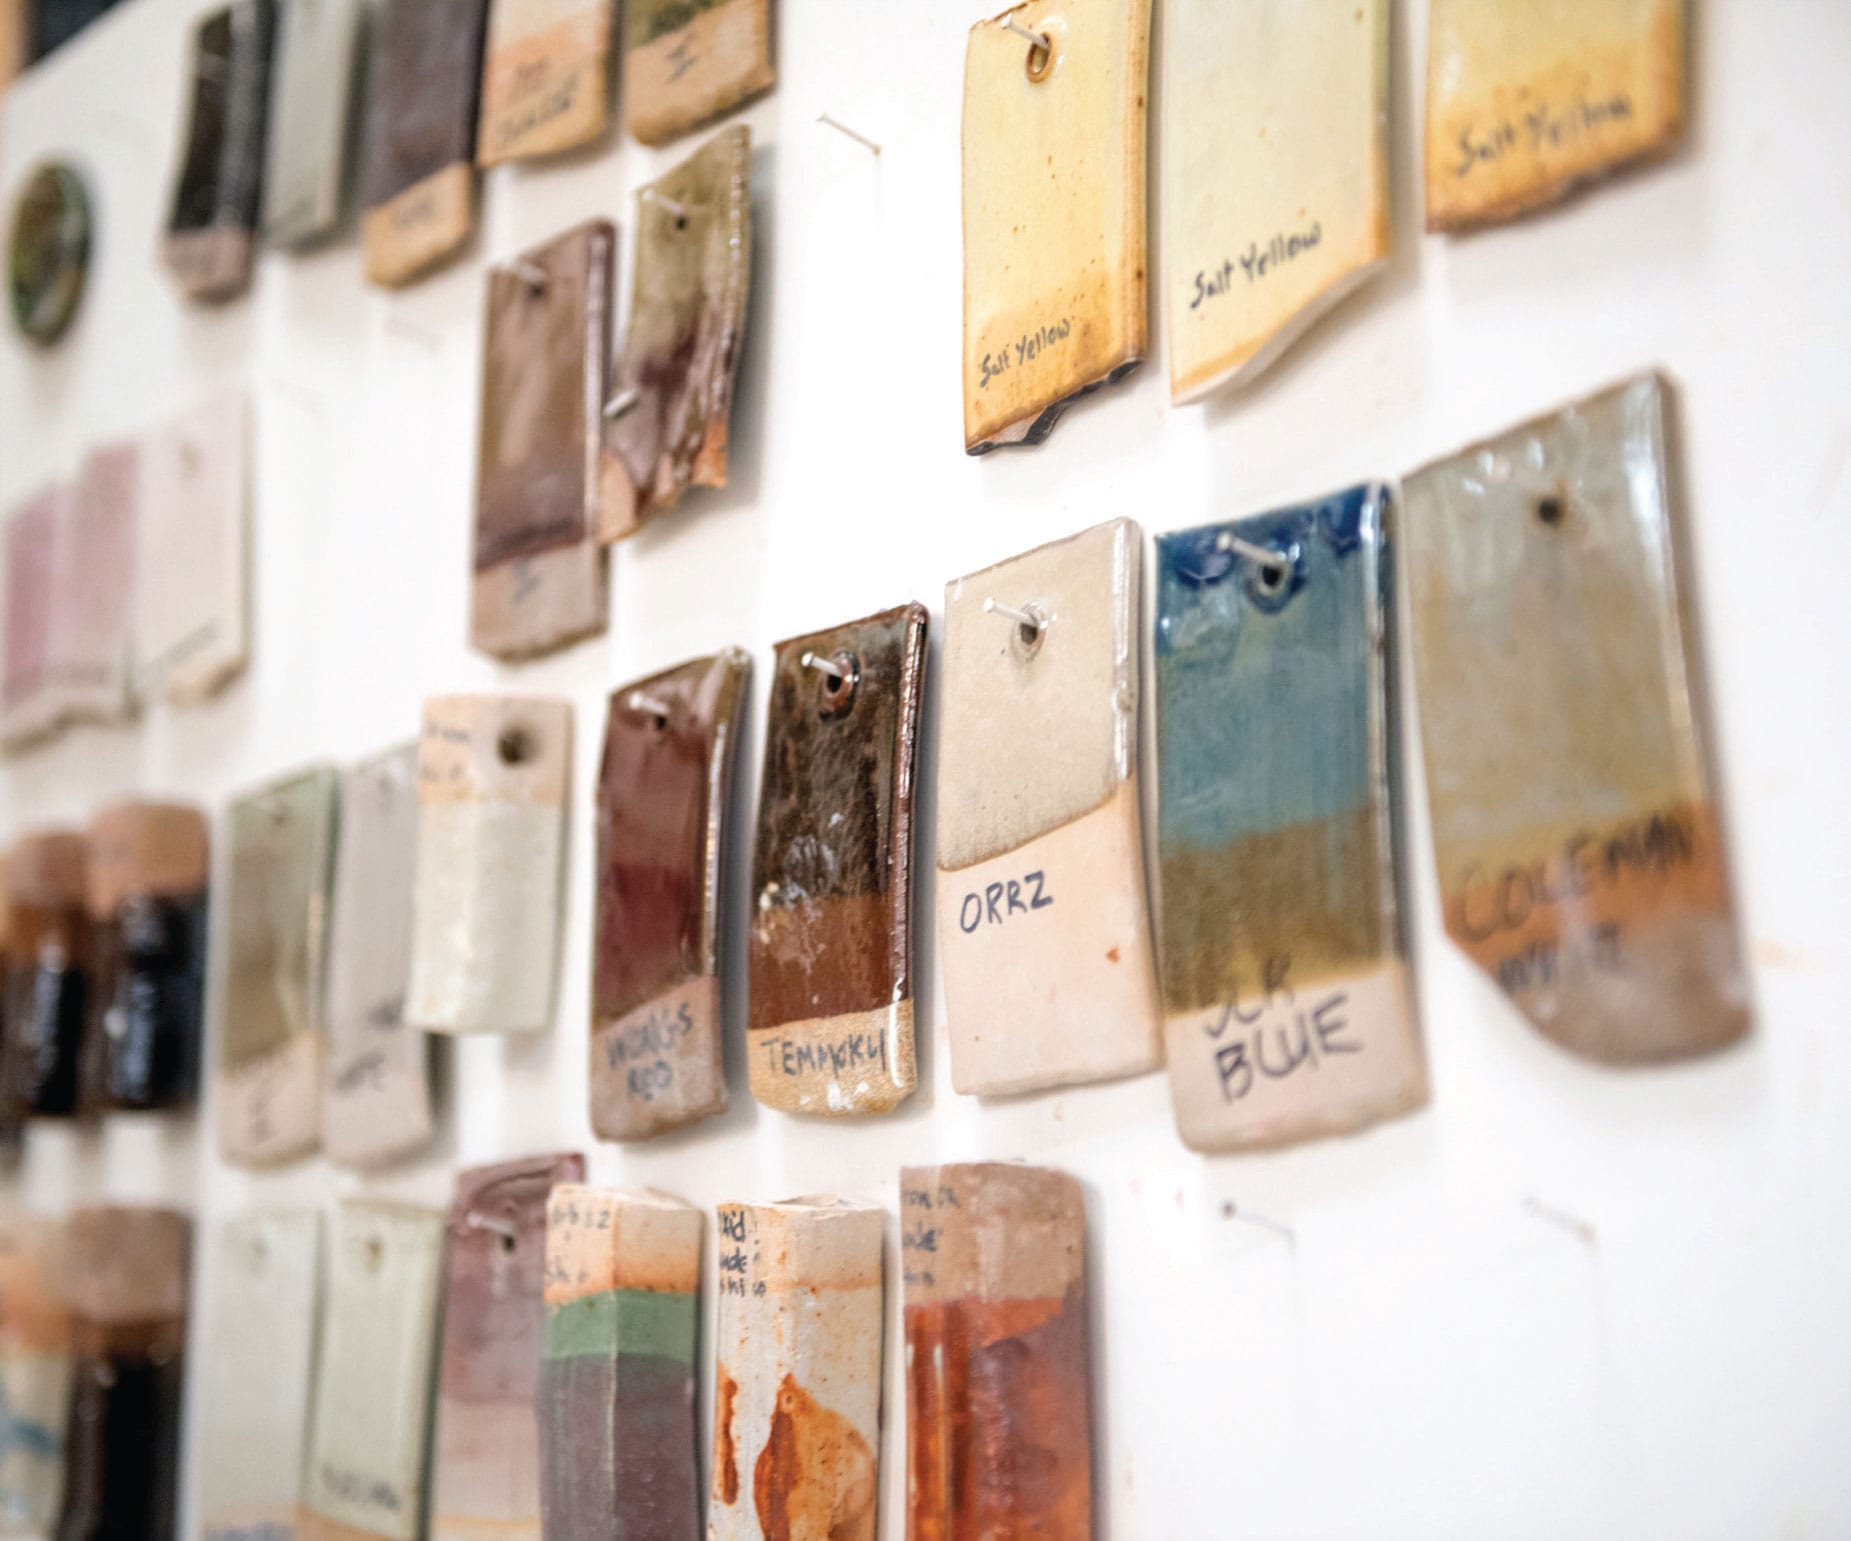
Because glazes can look so different before firing, it’s a good idea to store or display samples of each finished glaze.

Crystalline glazes create unique and unexpected shapes. These crystals are the result of additives such as zinc oxide or titanium dioxide (referred to as “seeds”), which create interesting formations at specific temperatures.

Raku—a Japanese method of firing—involves removing the piece from the kiln while it is still hot and glowing. This method calls for a special Raku kiln and additional tools, such as gloves and tongs. It can result in metallic glazes with unique markings from the smoke and flames.
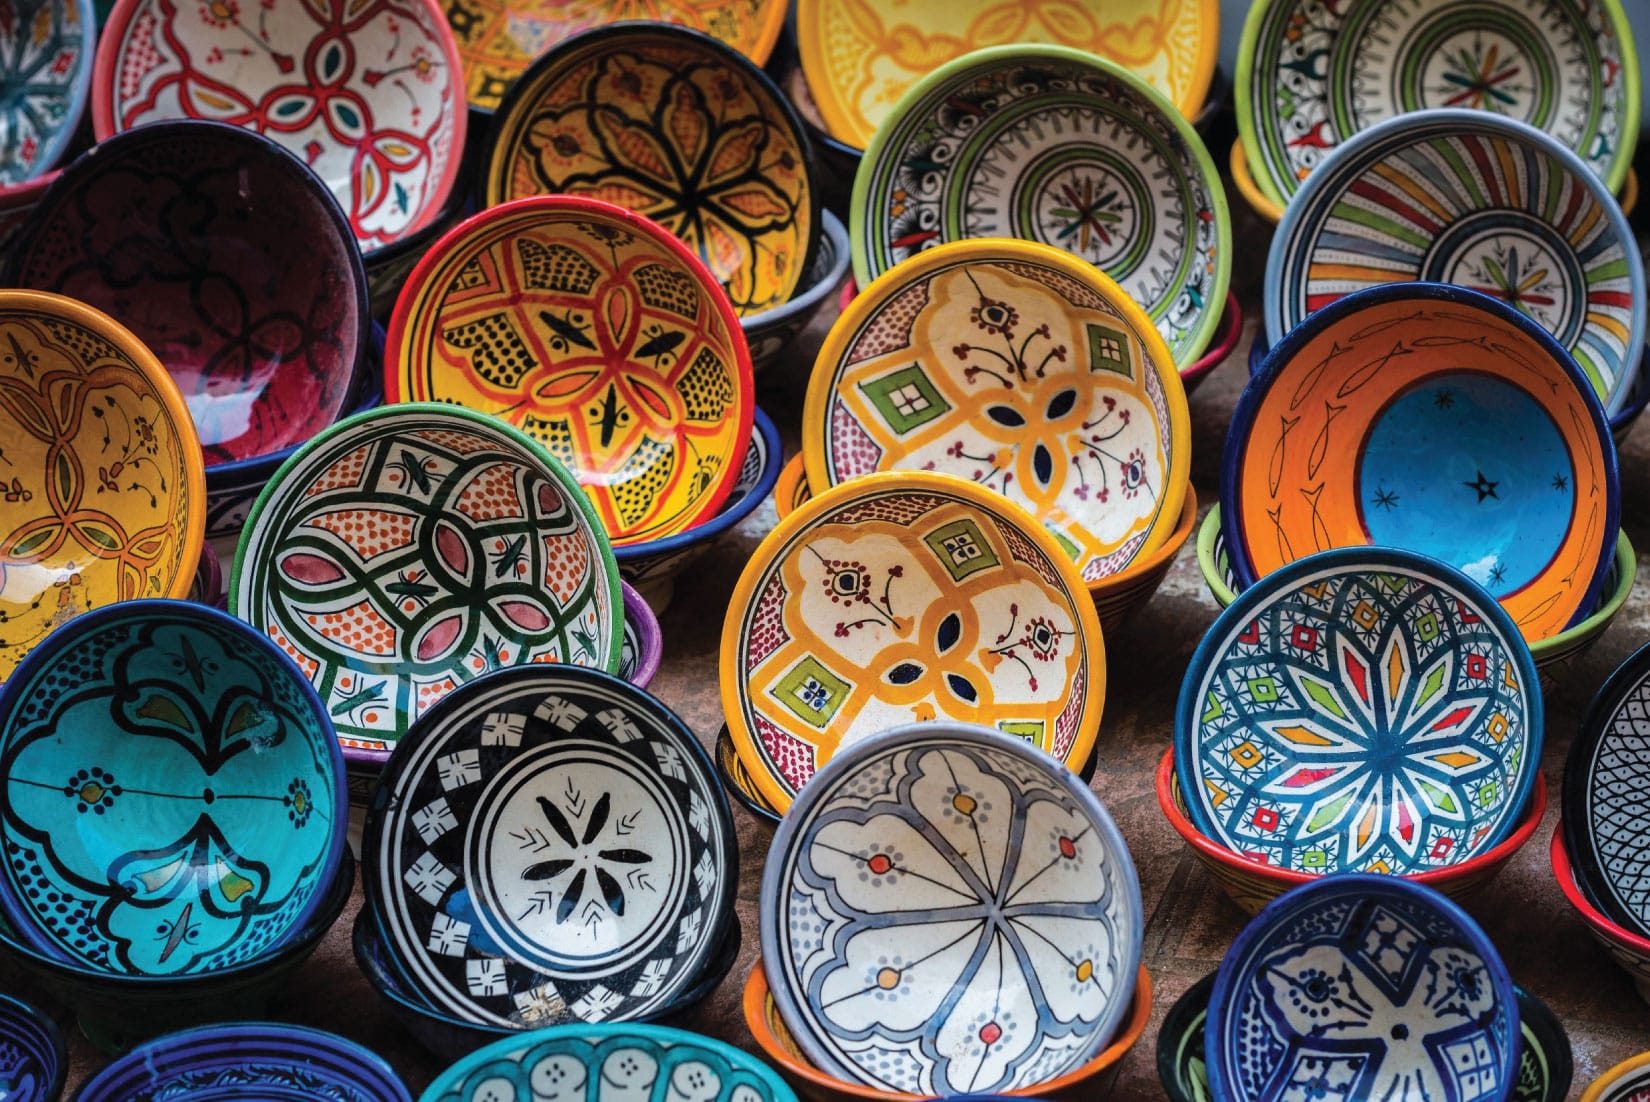
Moroccan-style pottery and tiles showcase detailed designs made with fine brushes and underglazes that are fired at low temperatures, which keeps the lines and colors from blending into one another. Underglazes that bake to a dry finish are typically coated with a clear glaze for a finished, glossy appearance.
The process of glazing and firing ceramics involves an element of surprise. You never know exactly how a piece will turn out! Variations in texture and color are inevitable, making each piece a unique treasure.
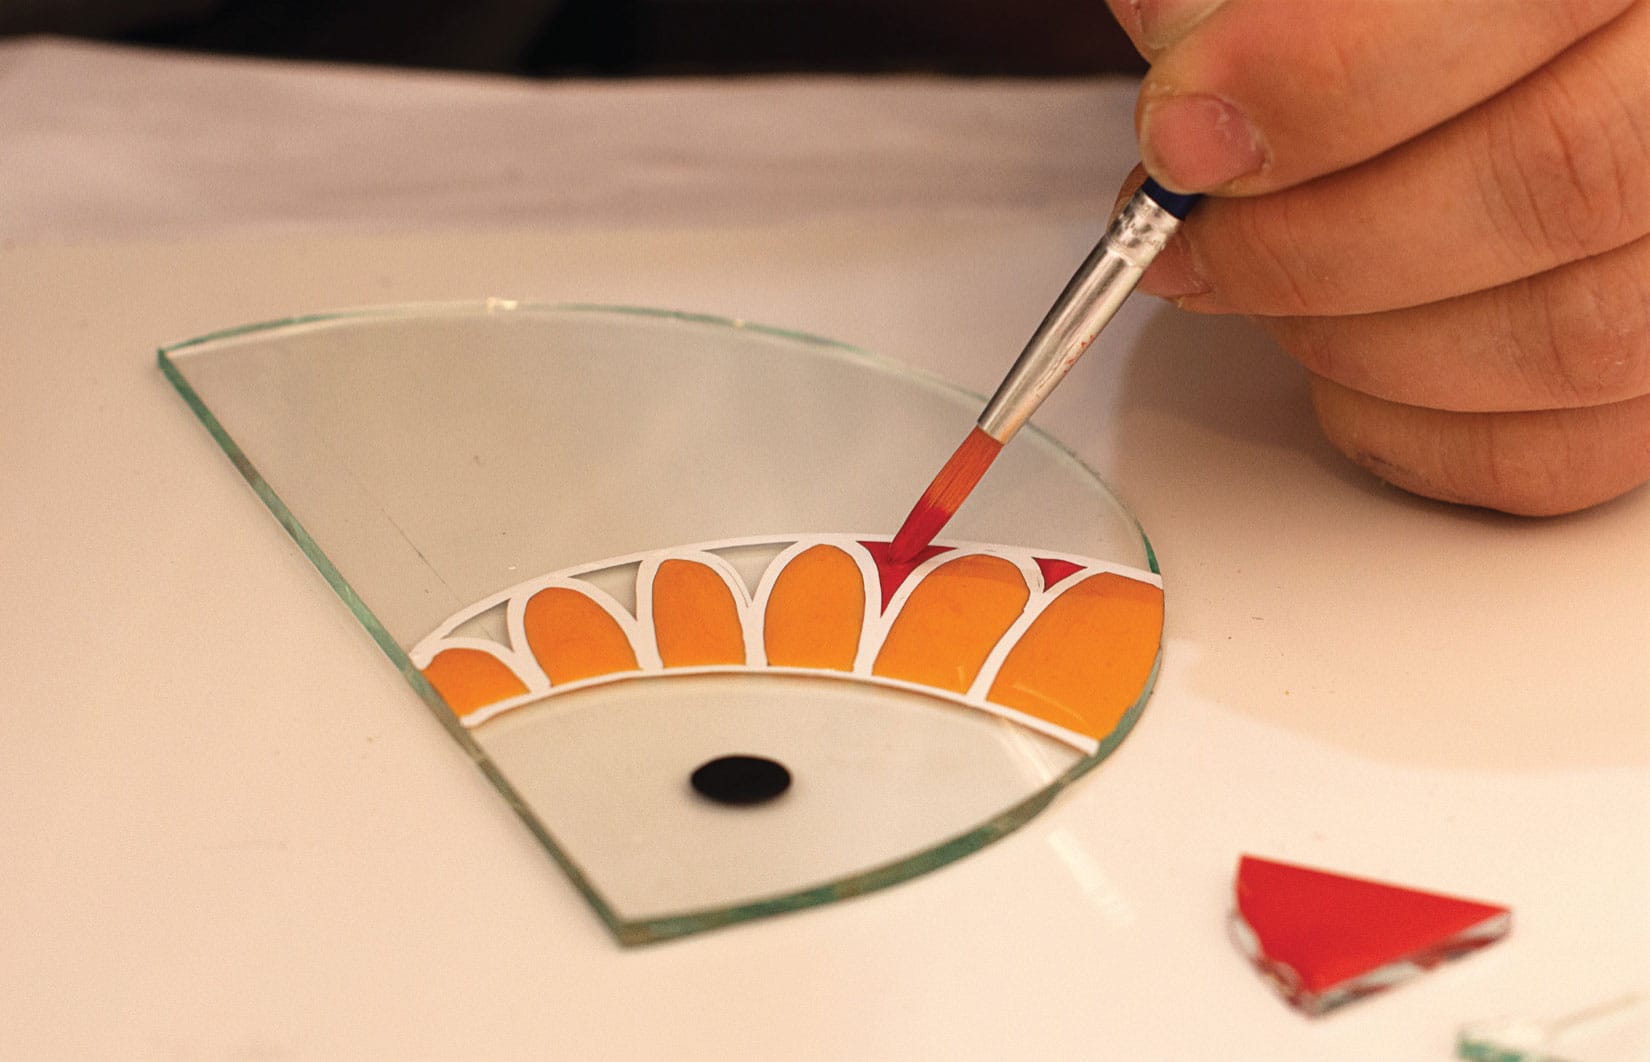
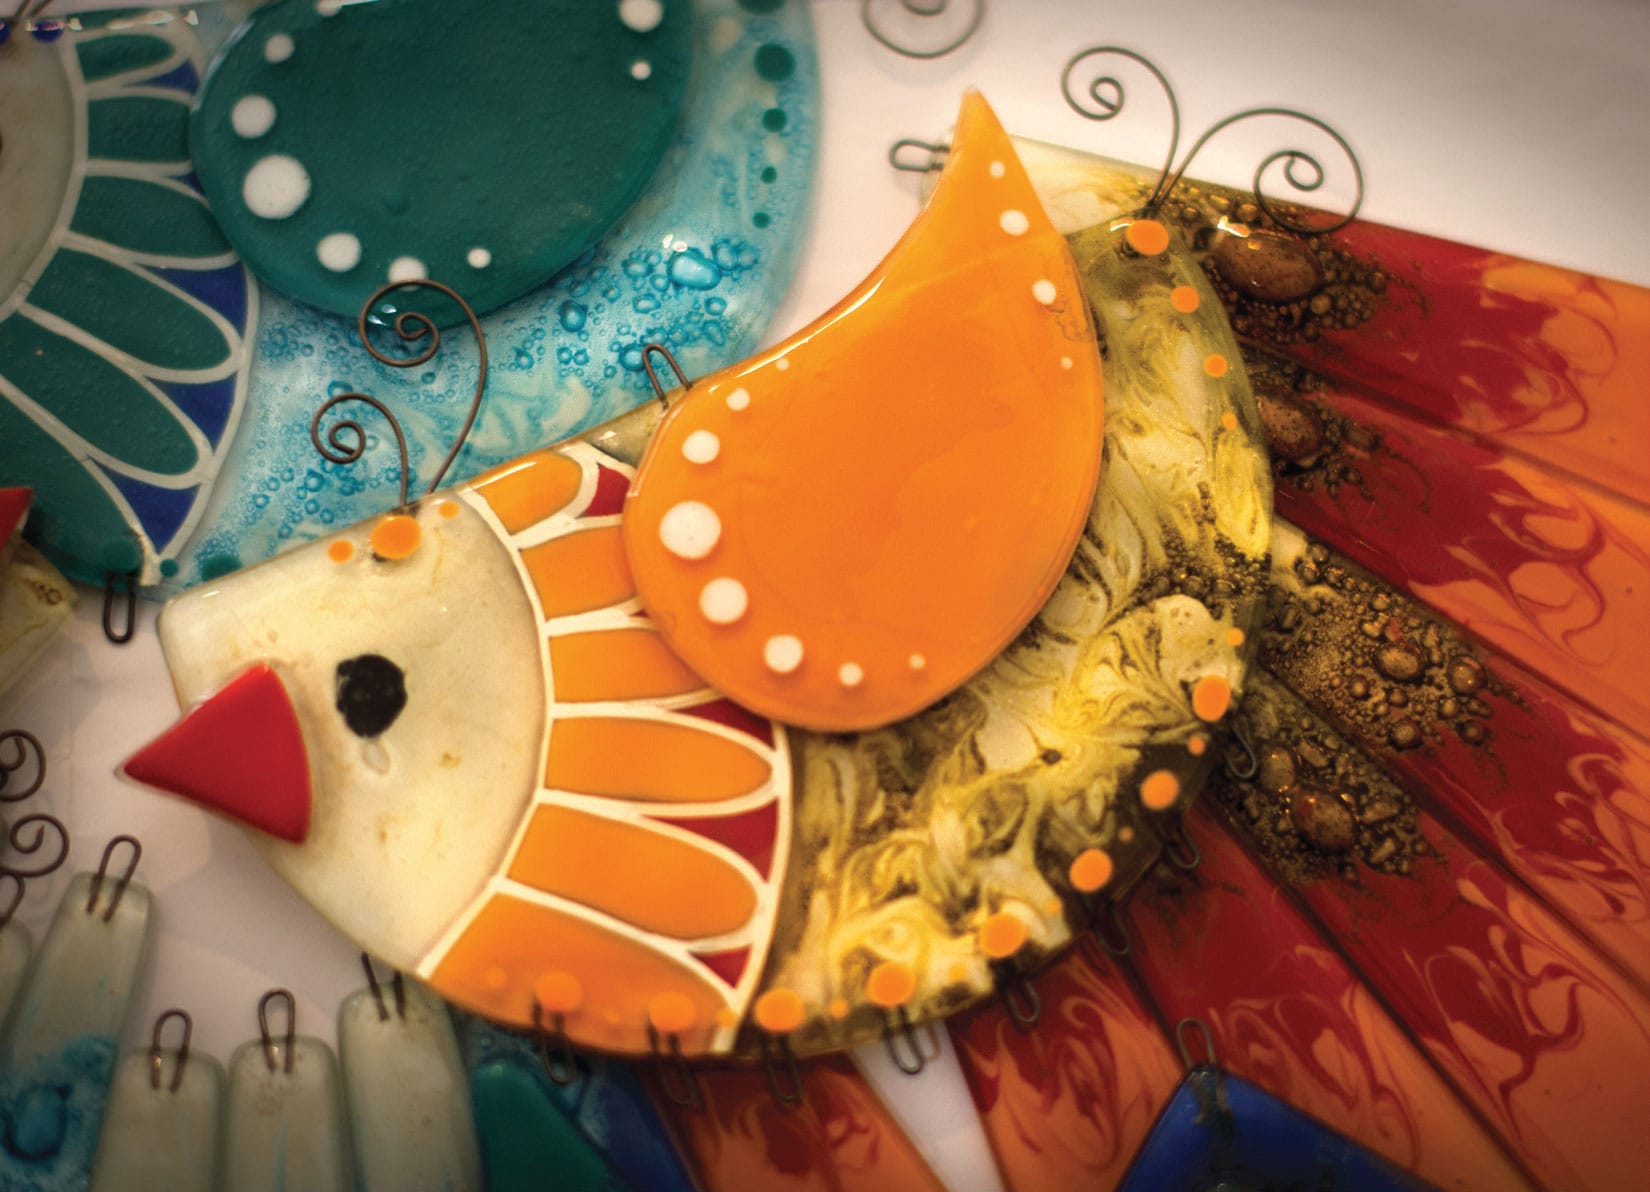
GLASS
Glass can serve as a transparent painting surface for artists who like working with light, as well as those who enjoy painting on functional objects, such as drinkware, plates, and candlesticks. Although it’s fragile and challenging to transport, glass is readily available and allows for luminous strokes of bright, rich colors.
TIP
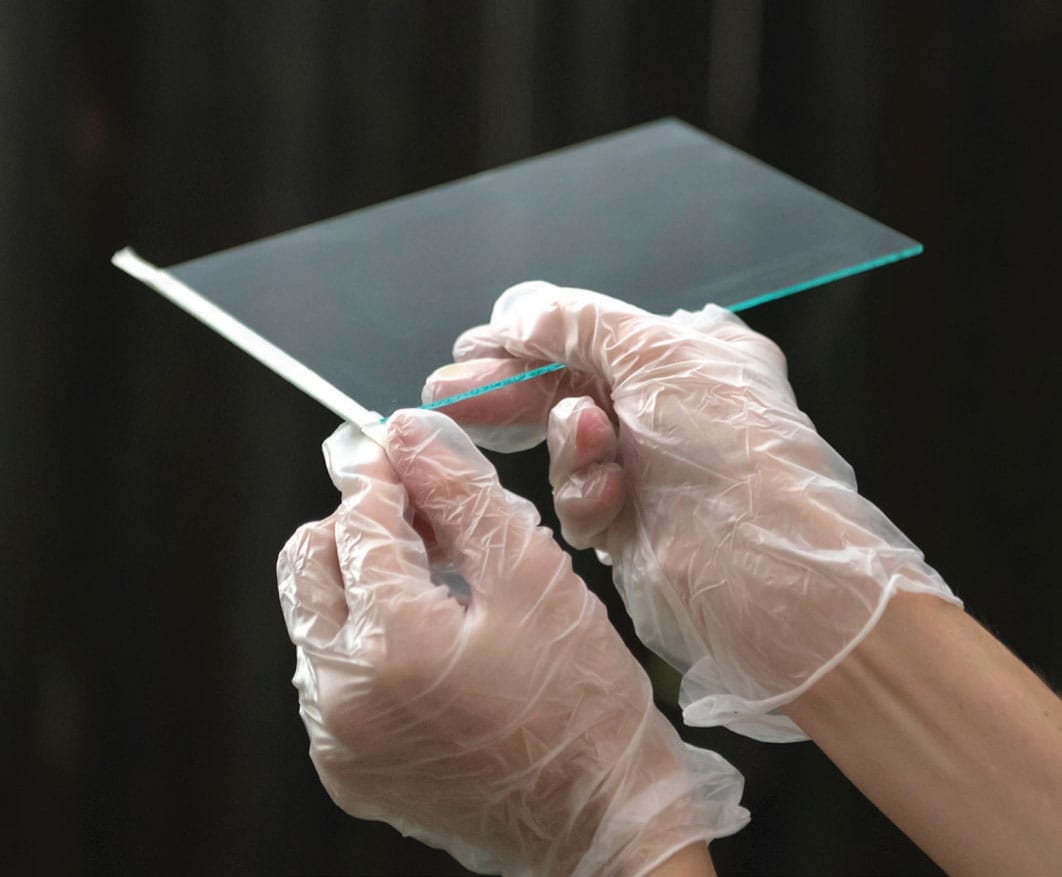
When working with raw edges of glass, cover the sharp edges and corners with artist’s tape to reduce the risk of getting cut. You might also want to invest in protective gloves when moving sheets.
PREPARING THE GLASS
Clean the glass with rubbing alcohol and a cotton ball. While cleaning the glass, wear latex gloves to prevent any fingerprints from making their way to the surface. The oil from your skin will prevent the paint from adhering properly. (You may want to paint while wearing latex gloves too!) Before you apply any paint to the glass, be sure it’s dry and streak free.

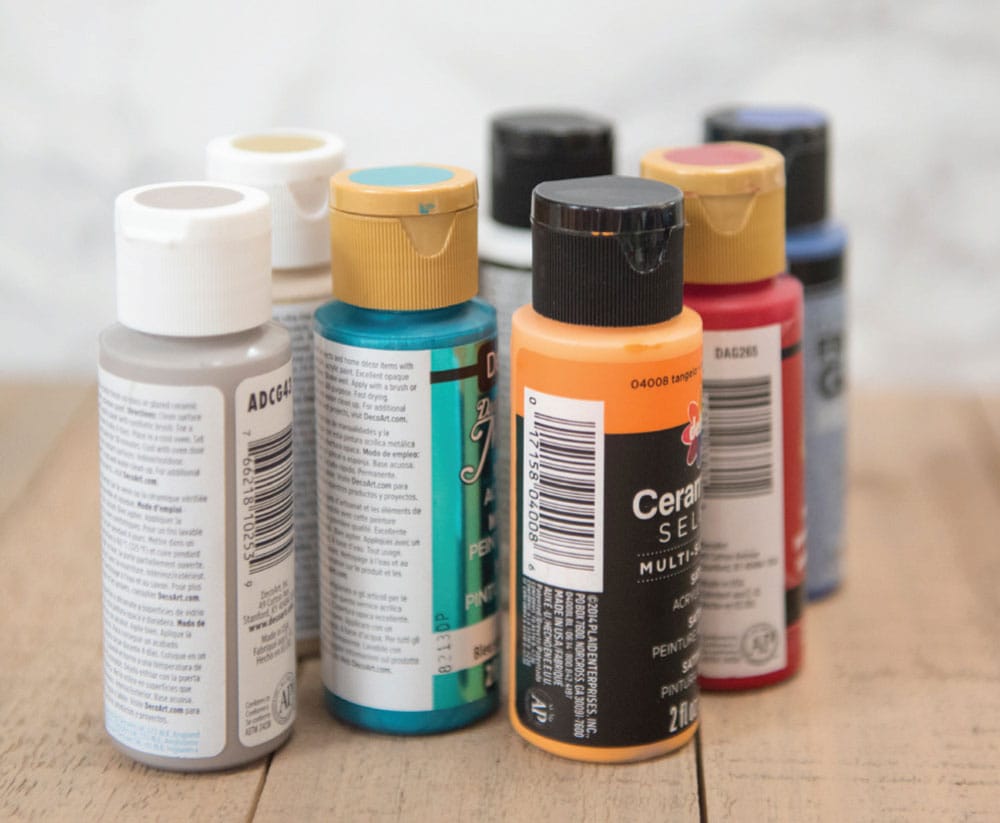
GLASS PAINTS
Almost all glass painters use acrylics formulated specifically for working on glass or multiple surfaces. These paints often come in squeeze bottles and are available in a variety of sheens and finishes, including glossy, chalky, or frosty. After application, glass paints need to cure (or fully harden) for an extended amount of time. You can accelerate this process by baking your painted glass. Refer to your paint manufacturer’s instructions for specifics.

Satin

Metallic
Gloss
Chalk
Frost

Glitter
TIP
Synthetic, soft-haired brushes work well with these acrylic paints. The softer the hairs, the less textured your strokes will be, and the more even your paint coverage. Some artists enjoy the dramatic streaks you can achieve with bristle brushes. Try both!
Remember that you’re not limited to squares or rectangles! Uniquely shaped glass pieces and scraps can serve as a base for whimsical paintings and mixed-media works.

Painted Fruit Bowl designed by Gigi Wright-Shattler. Courtesy of DecoArt®.
Bring life to a glass serving bowl with brightly colored fruits. You can blend the acrylics to create realistic gradations, such as the orange-to-buttermilk blend within the peach slice. Detail your pieces with small round and liner brushes.

Modern Impressionist Glass Set designed by PLA Schneider. Courtesy of DecoArt®.
Use a medium round brush to apply short, horizontal strokes of varying colors across the surface of the glass, keeping like colors near each other. These loose, rhythmic strokes echo the feel of impressionist paintings, such as those of Claude Monet.

Faux Pressed Leaves designed by Felicity Greiner. Courtesy of DecoArt®.
Use small flat and round brushes to create delicate leaf shapes on your glass (or even plexiglass). Use variations of greens, yellows, and browns to create highlights, shadows, stems, and veins. These paintings create the appearance of pressed and preserved leaves, but they’ll never turn brown!
MYLAR™
Mylar, a polyester film that is acid-free and archival is available from Grafix®. Grafix makes a variety of plastic “drafting” films, available in pads, rolls, and packs. It looks similar to tracing paper, but it’s thicker and doesn’t tear, rip, or yellow with age. There are several types of Dura-Lar™ film available from Grafix, including the following:
• Clear Dura-Lar is a great surface for permanent inks and markers.
• Matte Dura-Lar has a matte translucent drawing surface on both sides. It will accept lead, ink, charcoal, paint, and colored pencil.
• Wet Media Dura-Lar is specially coated on both sides to accept water-based media, markers, and inks without beading or running.
• Metallized Dura-Lar has a thin coating of aluminum.
FEATHER IN COLORED PENCIL
Artist Mindy Lighthipe used colored pencils to draw this beautiful peacock feather. She worked on both sides of the double-frosted Mylar to develop layers of color and dimension.

ARTICHOKE IN PEN & INK
Double-frosted Mylar is also a great surface for pen and ink. Mindy Lighthipe illustrated this artichoke with a dip pen and ink.
