
Chapter 4
User Interface Basics
The Hello World application was great for introducing the BlackBerry development environment and the basics of a BlackBerry application, but it was certainly not what you’d usually think of a as a fully developed application. It lacked the ability to interact with the user, and its user interface was very limited. In the next couple of chapters, you’ll explore the BlackBerry user interface in much greater detail and build an application that really shows off what you can do with the BlackBerry.
The BlackBerry API includes a rich framework for building user interfaces for your applications. This chapter will build on the concepts covered in the last two chapters to show you how to use the full range of BlackBerry UI components to build an application with a couple of screens and several controls that respond to user input. You’ll also equip the application with a couple of menu items besides the defaults that are provided. And to spice up your UI, you’ll also learn to build a screen that displays images in a carousel.
If you’re familiar with Java’s Abstract Window Toolkit (AWT) Swing, Windows Forms, or another object-oriented user interface toolkit, you’ll have no problem learning the BlackBerry UI API. The key point here is that user interfaces for Java-based BlackBerry applications are built in code: there are no configuration files or external metadata to worry about. This situation has positive aspects (for example, all UI information is centralized in the Java code) and negative aspects (for example, you have no visual tools for building your UI).
Ready? Let’s dive in and start building the application.
The UI Fun Application
You want an application that will show off what the BlackBerry UI can do. You’ll build just such an application over the course of this chapter (and improve it in later chapters), but having the end goal in mind before you start will be helpful.
To show off a few of the available controls and have something with some amount of interactivity, you’ll construct a simple login screen. When you’re done, the main screen of your application will look like the one shown in Figure 4–1.

Figure 4–1. Your goal application for this chapter
There’s a plain-text field for the username, a hidden-text password field, a drop-down list that lets the user choose a domain, a check box to ask the application to remember the password, and a couple of buttons that will log in the user and clear the text fields. For good measure, there’s an image at the top of the screen, and you’ll add a couple of menu items, too.
For this application, there will be no networking; clicking Login will display a simple screen that lets you know that the button has been pressed and shows the credentials the user has entered.
The Components of a BlackBerry UI
All the visible elements on screen in a BlackBerry application are of one of the three types:
- Fields: These are the basic building blocks of the UI. Generally, each control, such as a button or text field, corresponds to an instance of a field. The
Fieldclass draws the control and handles user input. - Managers: These arrange fields on the screen. Each field must belong to one and only one manager. Each manager is also a field, meaning managers can contain other managers, allowing for some pretty intricate UI layouts.
- Screens: There’s one active screen per application at any time. Screens handle field layout through a delegate manager and provide additional functionality like menus.
Fields are all derived from net.rim.device.api.ui.Field. There are a lot of useful prebuilt fields available in the net.rim.device.api.ui.component package.
Managers are derived from net.rim.device.api.ui.Manager, which is a subclass of net.rim.device.api.ui.Field. Several useful managers are defined in the net.rim.device.api.ui.container package.
Screens all derive from net.rim.device.api.ui.Screen, which is a subclass of Manager, and therefore of Field. You’ll also find the default screens in the net.rim.device.api.ui.container package.
NOTE: Though Screen is ultimately descended from Field, you can’t add a Screen to a Manager. The hierarchy in this case represents functionality—a Screen does things that a Field and Manager do, such as painting itself, handling user input, and managing fields, but it is not actually a drop-in replacement for a Field the way a Manager is.
Right now, or sometime soon, you may want to browse through the Javadocs for the packages mentioned in this section. These can give you an idea of what’s possible with the BlackBerry and maybe help with some ideas for your own applications. In this chapter, all the fields, managers, and screens you’ll use are those provided with the JDE. You’ll learn how to make your own in the next chapter.
Creating the Application
In Eclipse, create a new BlackBerry Application project called UiFun. You’ll create the application class and main screen class as before. The main application class will be the same as the simple first version you created a couple of chapters ago. You’ll use the package com.beginningblackberry.uifun and call the application and main screen classes UiFunApplication and UiFunMainScreen. You should know enough to create these classes now, but for reference the source code follows:
package com.beginningblackberry.uifun;

import net.rim.device.api.ui.UiApplication;


public class UiFunApplication extends UiApplication {

    public UiFunApplication() {

        UiFunMainScreen mainScreen = new UiFunMainScreen();

        pushScreen(mainScreen);

    }


    public static void main(String[] args) {

        UiFunApplication app = new UiFunApplication();

        app.enterEventDispatcher();

    }

}
Here’s the source code for the UiFun application class:
package com.beginningblackberry.uifun;
import net.rim.device.api.ui.container.MainScreen;


public class UiFunMainScreen extends MainScreen {

    public UiFunMainScreen() {


    }

}
Adding the Logo Image
The first field you add will be an instance of net.rim.device.api.ui.component.BitmapField to show the image at the top of the screen.
The BlackBerry can use PNG, GIF, or JPEG images, but most applications use PNGs because of their reduced size, high quality, and support for transparencies. When creating images for use in your application, always consider compressing your image as much as possible using your graphics program or a PNG optimizer (several good free ones are available), because large images can very quickly increase the size of your application. You can download the logo image from the book’s web site at www.beginningblackberry.com.
Adding the Image to the Project
Add the image file to your Eclipse project under the folder called res at the same level as your source folder (see Figure 4–2), copying the image into that folder and from your Eclipse workspace by right-clicking your project and clicking Refresh. You can put images in whatever folder you want, but for this example use the default resources folder named res.

Figure 4–2. This Eclipse workspace with the apress_logo.png image added
Adding the Image to the Screen
BitmapField takes a Bitmap object as an argument in its constructor, so you’ll need to load the image before constructing the field. You’ll import net.rim.device.api.system.Bitmap and add the following line to UiFunMainScreen’s constructor to load the bitmap from the image resource you just added:
Bitmap logoBitmap = Bitmap.getBitmapResource("apress_logo.png");
The path for loading bitmaps, and all other resources, is relative to the location of your project’s res folder. You put the bitmap in the root of the res folder so you don’t have to specify the path.
Finally, you want to center the bitmap horizontally at the top of the screen. MainScreen lays out fields vertically top to bottom in the order that they’re added, so the BitmapField will automatically appear at the top of the screen. But to horizontally center it, you need to specify the Field.FIELD_HCENTER style in its constructor. You’ve also elected to make the BitmapField a member field instead of just declaring it locally in the constructor. You’ll follow this pattern for all your fields—making your user interface components member fields will become important as you start to handle user input.
Now, constructing the bitmap field and adding it to the screen is easy. On the UiFunMainScreen, simply add the imports to Bitmap, Field, BitmapField and add the BitmapField to the UiFunMainScreen constructor to make the complete UiFunMainScreen code look like this:
package com.beginningblackberry.uifun;


import net.rim.device.api.system.Bitmap;

import net.rim.device.api.ui.Field;

import net.rim.device.api.ui.component.BitmapField;

import net.rim.device.api.ui.container.MainScreen;


public class UiFunMainScreen extends MainScreen {

    BitmapField bitmapField;


    public UiFunMainScreen() {

        Bitmap logoBitmap = Bitmap.getBitmapResource("apress_logo.png");

        bitmapField = new BitmapField(logoBitmap, Field.FIELD_HCENTER);

        add(bitmapField);

    }

}
And when this code is run, you’ll see the screen shown in Figure 4–3.
Figure 4–3. The BitmapField centered at the top of the screen
Field Style Flags
Almost all fields and managers have a constructor that takes a style parameter. The style is a mask of various style flags concatenated with the bitwise or operator (|). These flags are defined throughout the API, although most are in Field and Manager, and they can influence many different aspects of field appearance, positioning, and behavior. You can apply any style to any field, but whether the style has an effect depends on the field and sometimes the manager that contains that field. Generally, anything defined within the Field class is applicable to any field (including managers); anything defined within the Manager class is applicable to any manager, and anything defined within the Screen class is applicable to any screen. Flags defined within a specific subclass of field usually only apply to that field and any field that subclasses it; examples include the ButtonField.CONSUME_CLICK style and the various styles associated with TextField, BasicEditField, and their subclasses.
There are, unfortunately, no guarantees about how a specific style flag will affect different fields. Generally, flags work the way you’d expect them to, but remember that just setting a particular alignment flag on a field doesn’t guarantee that you’ll get exactly what you want. For example, some managers ignore the alignment flags, which will become clear when you build your own manager later on. The Javadocs provide more information for specific fields.
Adding a Few More Fields
Next, you’ll add your screen’s remaining controls: the username and password fields, the domain drop-down list, the check box, and the Login and Clear buttons.
Creating the Username and Password Fields
You’ll use an EditField for the username and a PasswordEditField (which automatically hides characters as they are typed) for the password field. Each of these fields can display its own label, specified in the constructor. You don’t need to apply any special styles to these fields.
Add the following import statement to the top of UiFunMainScreen.java, just under the other import statements:
import net.rim.device.api.ui.component.EditField;

import net.rim.device.api.ui.component.PasswordEditField;
Then, add the following declarations to the top of the UiFunMainScreen class:
EditField usernameField;

PasswordEditField passwordField;
And add the following lines go in the constructor:
usernameField = new EditField("Username:", "");

passwordField = new PasswordEditField("Password:", "");

add(usernameField);

add(passwordField);
Creating the Domain Field and Check Box
The Domain field should be a drop-down list. For the BlackBerry, this is accomplished by an instance of net.rim.device.api.ui.component.ChoiceField. You can implement the interface directly, but for this application, the net.rim.device.api.ui.component. ObjectChoiceField component will do just fine; it allows you to specify an array of Objects, which will be used to populate the field (the toString method will be used for the display string). If you want a list of numbers, net.rim.device.api.ui.component.NumericChoiceField is also often useful.
You’ll add the imports for both of these fields first.
import net.rim.device.api.ui.component.CheckboxField;

import net.rim.device.api.ui.component.ObjectChoiceField;
Then you add the declaration of the member variables, again at the top of the UiFunMainScreen class.
    ObjectChoiceField domainField;

    CheckboxField rememberCheckbox;
Because you’re just using hard-coded values for this application, instantiating your ObjectChoiceField is easy.
domainField = new ObjectChoiceField("Domain:", new String[] {"Home", "Work"});

add(domainField);
And by this point, you can probably figure out how to use net.rim.device.api.ui.component.CheckboxField to create a check box on screen; there’s nothing special to note about CheckboxField except that you have to specify the state of the check box (true for checked or false for unchecked) when you instantiate it, like so:
rememberCheckbox = new CheckboxField("Remember password", false);

add(rememberCheckbox);
Creating the Buttons
To create the Login and Clear buttons that go beneath these text fields, you’ll use—as you might expect—the ButtonField class. A warning with ButtonFields: when creating a ButtonField, you should always specify the style ButtonField.CONSUME_CLICK. If you don’t, the click event will be passed onto the screen, and a menu will open when the user clicks the button, though your button will still cause an action to be performed.
First, you’ll import ButtonField.
import net.rim.device.api.ui.component.ButtonField;
Next, you add the declarations for your two buttons.
    ButtonField clearButton;

    ButtonField loginButton;
Finally, the following lines go in the UiFunMainScreen constructor.
clearButton = new ButtonField("Clear", ButtonField.CONSUME_CLICK);

loginButton = new ButtonField("Login", ButtonField.CONSUME_CLICK);

add(clearButton);

add(loginButton);
If you run the application, you’ll see something similar to Figure 4–4.

Figure 4–4. The fields for the UiFun application
You’re pretty close to being done! But you want those two buttons to be beside each other instead of one on top of the other.
Arranging the Buttons Horizontally
Remember that MainScreen (which UiFunMainScreen is derived from) lays out its fields vertically. To put two fields beside each other, you need to place them in an instance of net.rim.device.api.ui.container.HorizontalFieldManager and add that manager to the screen. You’ll give the HorizontalFieldManager the Field.FIELD_RIGHT style; this puts the buttons on the right side of the screen.
Add the following import:
import net.rim.device.api.ui.container.HorizontalFieldManager;
Erase the two add calls for the buttons, and replace them with this:
HorizontalFieldManager buttonManager = new HorizontalFieldManager(Field.FIELD_RIGHT);

buttonManager.add(clearButton);

buttonManager.add(loginButton);

add(buttonManager);
You’ll also add a couple of instances of net.rim.device.api.ui.component.SeparatorField, which draws a horizontal line across the screen, and of LabelField, which contains your login instructions. The full code for the UiFunMainScreen constructor at this point follows (remember to add an import statement for SeparatorField and LabelField):
public UiFunMainScreen() {


        Bitmap logoBitmap = Bitmap.getBitmapResource("apress_logo.png");

        bitmapField = new BitmapField(logoBitmap, Field.FIELD_HCENTER);

        add(bitmapField);

        add(new SeparatorField());

        add(new LabelField("Please enter your credentials:"));


        usernameField = new EditField("Username:", "");

        passwordField = new PasswordEditField("Password:", "");

        add(usernameField);

        add(passwordField);


        domainField = new ObjectChoiceField("Domain:", new String[] {"Home", "Work"});

        add(domainField);


        rememberCheckbox = new CheckboxField("Remember password:", false);

        add(rememberCheckbox);


        add(new SeparatorField());


        clearButton = new ButtonField("Clear", ButtonField.CONSUME_CLICK);

        loginButton = new ButtonField("Login", ButtonField.CONSUME_CLICK);


        HorizontalFieldManager buttonManager =

          new HorizontalFieldManager(Field.FIELD_RIGHT);

        buttonManager.add(clearButton);

        buttonManager.add(loginButton);

        add(buttonManager);

}
Running the application, you’ll see your screen looking the way you intended it, as Figure 4–5 illustrates.

Figure 4–5. The final look for the Login screen
Handling User Interaction
Now you have a screen that looks the way you want it to, but it doesn’t do anything yet—well, you can move the focus between controls, type in the text fields, and change the check box and the choice field, but the application doesn’t really do anything yet. Let’s get those buttons to work!
Handling UI Events
The BlackBerry API uses an observer pattern to dispatch events. All fields can have a listener attached to them, and that listener is notified when a change event happens. The exact trigger for a change event varies from field to field.
In the case of ButtonField, the change event happens when the button is clicked by the trackball or a touch on the touch screen, or when the Enter key is pressed while a button is highlighted. For CheckboxField, a change event happens when the check box is checked or unchecked, and for ChoiceField, an event happens whenever the user selects a different choice.
You attach a listener using the Field.setChangeListener method. Note that the BlackBerry provides a unicast event model: there is only ever at most one change listener for a field. If you use Field.setChangeListener, you replace whatever listener may have been there already, preventing it from receiving events. This makes a lot of sense for a mobile platform where resources and application scope are limited, but it may be different from what you’re used to with desktop or server application development.
A listener must implement the FieldChangeListener interface. In this case, you’ll make your UiFunMainScreen implement net.rim.device.api.ui.FieldChangeListener by changing the class declaration and implementing the listener method in UiFunMainScreen.
public class UiFunMainScreen extends MainScreenimplements FieldChangeListener {

public void fieldChanged(Field field, int context) {

}
Remember to add an import for net.rim.device.api.ui.FieldChangeListener to the top of the Java file.
The field parameter is a reference to the field that originated the change, in this case, one of your ButtonField instances (once you’ve added them). The context can mean different things: when you define your own fields, you can use it to pass along additional information about the field change event. For this application, ignore the context parameter.
Handling the Clear Button
You’ll hook up the Clear button first. Add the following line in the constructor, just after instantiating the button:
clearButton.setChangeListener(this);
Now, when the user clicks on the clear button, you’ll receive an event in UiFunMainScreen.fieldChanged. You can test this with a simple dialog by importing the net.rim.device.api.ui.component.Dialog class and using the inform static method of the class to display a message:
public void fieldChanged(Field field, int context) {

    if (field == clearButton) {

        Dialog.inform("Clear Button Pressed!");

    }

}
The Dialog class is a handy way of displaying simple messages to the user. Run the application, and click Clear to see that you’re correctly handling and receiving the event (see Figure 4–6).

Figure 4–6. An event from the Clear button
Of course, what you actually want the Clear button to do is remove all text from your fields. Let’s define a method to do this. Add the following to UiFunMainScreen:
private void clearTextFields() {

     usernameField.setText("");

    passwordField.setText("");

}
And change the fieldChanged method to call your new method, like so:
public void fieldChanged(Field field, int context) {

     if (field == clearButton) {

        clearTextFields();

    }

}
Now, clicking Clear will erase the text from both fields (see Figure 4–7).

Figure 4–7. When the fields are populated (as in the image on the left), clicking the Clear button removes the text from the fields (as shown in the image on the right).
Handling the Login Button
The Login button does two things: checks that both fields have some text in them and displays a warning dialog if they don’t. If both have been filled in, it displays a new screen informing the user that login was successful.
Defining a New Screen
To keep the flow of everything fairly logical, let’s define the login success screen now. It will be a simple screen with three label fields, one each to show a successful login, the username, and the selected domain. You’ll pass the username and domain in the constructor of the screen. The entire code for LoginSuccessScreen is as follows:
package com.beginningblackberry.uifun;


import net.rim.device.api.ui.component.LabelField;

import net.rim.device.api.ui.container.MainScreen;


public class LoginSuccessScreen extends MainScreen {

    public LoginSuccessScreen(String username, String domain) {

        add(new LabelField("Logged in!"));

        add(new LabelField("Username: " + username));

        add(new LabelField("Domain: " + domain));

    }

}
You display the new screen in the same way as you displayed UiFunMainScreen from UiFunApplication, but here, you have to get a reference to your UiApplication instance first. UiApplication.getUiApplication() will give you that; in fact, it’s a reference to the very same instance of UiFunApplication that you created in your main method. The code will look something like this:
LoginSuccessScreen loginSuccessScreen = new LoginSuccessScreen(…)

UiApplication.getUiApplication().pushScreen(loginSuccessScreen);
As you did with the Clear button, you’ll define a method to perform the login logic described previously. You need the name of the selected domain to pass to the new screen; you can get the index of the currently selected item in domainField by calling domainField.getSelectedIndex(), and you can get the choice associated with that index by calling domainField.getChoice(int). The getChoice method returns an Object. However, because all the objects you passed into the constructor for domainField were Strings, you can safely cast the result of getChoice back to a String. The full code for UiFunMainScreen.login follows:
    private void login() {

        if (usernameField.getTextLength() == 0 || passwordField.getTextLength() == 0) {

            Dialog.alert("You must enter a username and password");

        }

        else {

            String username = usernameField.getText();

            String selectedDomain =

              (String)domainField.getChoice(domainField.getSelectedIndex());

        LoginSuccessScreen loginSuccessScreen =

                new LoginSuccessScreen(username, selectedDomain);

            UiApplication.getUiApplication().pushScreen(loginSuccessScreen);

        }

    }
Notice that UiApplication is flagged as error by Eclipse, so add an import statement to net.rim.device.api.ui.UiApplication.
You’ll also have to modify fieldChanged to handle the login button as well.
public void fieldChanged(Field field, int context) {

    if (field == clearButton) {

        clearTextFields();

    }

    else if (field == loginButton) {

        login();

    }

}
Finally, remember to add the change listener to loginButton in UiFunMainScreen’s constructor.
loginButton.setChangeListener(this);
When you run the application now, you’ll see the result shown in Figure 4–8.

Figure 4–8. Clicking Login without a username a password (left) and with a username and password (right)
Creating Menus
Menus are everywhere in a BlackBerry application; in fact, you should try to provide menu options for most major functionality, because the menu is easier to access on most BlackBerry devices than buttons on the screen.
The screen handles displaying menus, and menu items contain their own logic for performing actions.
Understanding Menu Items
Individual items in a menu are instances of net.rim.device.api.ui.MenuItem. This class is abstract and implements Runnable (it has a run method that you need to implement). The run method is executed on the event thread when the user clicks the menu item, so you can safely modify the UI from within the run method. As mentioned in Chapter 3, the UI API is single-threaded. And it is paramount that you don’t execute any heavy processing or networking in the UI event thread without starting a separate thread or the user will find that their BlackBerry is freezing up until your process is done.
Each menu item has three pieces of information associated with it: text to display, a priority, and an ordinal. The priority determines which menu item is initially highlighted when the menu is first displayed; the item with the lowest value for priority will be highlighted when the menu is first opened. The ordinal determines where the item will appear in the menu relative to other menu items. A menu item will appear above menu items with higher ordinal values and below menu items with lower ordinal values. Two menu items with the same ordinal will appear in the order they were added to the menu, top to bottom.
Implementing the Login and Clear Menu Items
You’ll implement two menu items for your application corresponding to the Login and Clear actions of UiFunMainScreen. But first, let’s add the following imports to UiFunMainScreen.
import net.rim.device.api.ui.Menu;

import net.rim.device.api.ui.MenuItem;

import net.rim.device.api.util.StringProvider;
You’ll create a new class for each menu item and declare these as inner classes within UiFunMainScreen—because you’ll only use them here and to give them access to UiFunMainScreen’s private login and clearTextFields methods.
public class UiFunMainScreen extends MainScreen implements FieldChangeListener {

    class LoginMenuItem extends MenuItem {

        public LoginMenuItem() {


            super(new StringProvider("Login"), 20, 10);

        }


        public void run() {

            login();

        }

    }


    class ClearMenuItem extends MenuItem {

        public ClearMenuItem() {


            super(new StringProvider("Clear"), 10, 20);

        }


        public void run() {

            clearTextFields();

        }

    }

}
Notice the arrangement of the ordinal and priorities with the menu items. ClearMenuItem has a lower ordinal value and higher priority value than LoginMenuItem. Therefore, Clear will appear above Login on the menu, but Login will be highlighted by default. This arrangement lets you mirror the order of the buttons on screen, but makes the most likely user choice the default one, saving your users a bit of time.
There are a couple of places where you can add menu items. One is in the screen’s constructor, by calling getMenu and adding items to the Menu object you get back. The other is by overriding makeMenu in your screen class. You’ll do the latter, because makeMenu is useful when creating context sensitive menus (menus whose items may change depending on the state of the screen). The makeMenu method in UiFunMainScreen should look like this:
    protected void makeMenu(Menu menu, int instance) {

        super.makeMenu(menu, instance);

        menu.add(new LoginMenuItem());

        menu.add(new ClearMenuItem());

    }
It’s very important to have the super.makeMenu call here; otherwise, the default menu items for the screen will not be added. Specifically, you’d lose the Close item that MainScreen automatically adds for you. There are times when you might want to change that, but not for this application, so you’ll be sure to make the super.makeMenu call.
One final tip—you declared the menu items explicitly as classes in this example to present things in a clear order, but you’ll usually see menu items declared as anonymous inner classes instead. Using an anonymous inner class is more succinct, and you generally use each menu item class only once in a given application. So instead of using the preceding implementation, you could have omitted the declarations for LoginMenuItem and ClearMenuItem and instead done the following in makeMenu:
    protected void makeMenu(Menu menu, int instance) {

        super.makeMenu(menu, instance);

        menu.add(new MenuItem(new StringProvider("Login"), 20, 10) {

            public void run() {

                login();

            }

        });

        menu.add(new MenuItem(new StringProvider("Clear"), 10, 20) {

            public void run() {

                clearTextFields();

            }

        });

    }
In fact, you’ll be using this form throughout the rest of this book.
Using Reusable Command
Notice that your login method is both called by clicking loginButton or through LoginMenuItem. Starting from version 6.0 of the BlackBerry API, RIM introduced a more elegant way of providing a reusable Command and CommandHandler classes that you can attach to a UI field like ButtonField and MenuItem. Command and CommandHandler classes become an action handler for the UI field. Command class can be reused within an application or when registered to RemoteCommandRegistrarConnection becomes available to other applications.
You’re not going to change the functionality of your app, but to illustrate how to use a Command and CommandHandler classes within an application, you’ll tweak your code to use a common handler for both loginButton and Login MenuItem. First in UiFunMainScreen, add the following import statements:
importnet.rim.device.api.command.Command;

importnet.rim.device.api.command.CommandHandler;

importnet.rim.device.api.command.ReadOnlyCommandMetadata;
Next, add the handler inner class, like so:
    class LoginCommandHandler extends CommandHandler

    {

       public void execute(ReadOnlyCommandMetadata metadata, Object context)

       {

           login();

        }

    }
Note that the LoginCommandHandler class will be calling the existing login method. So, you should expect the same behavior when this handler executes. Now, you need to attach this handler to both loginButton and Login MenuItem. In the UiFunMainScreen constructor, right below the code where you instantiate loginButton, add the following:
loginButton.setCommand(new Command(loginHandler));
The handler is now attached to loginButton but to avoid executing login method twice, comment out the code that assigns a listener to loginButton, like so:
//loginButton.setChangeListener(this);
Finally, in the makeMenu method, comment out the part where you add Login MenuItem and add the following new code for adding same Login MenuItem and attaching the handler to it:
/*

menu.add(new MenuItem(new StringProvider("Login"), 20, 10) {

    public void run() {

        login();

    }

});

*/


MenuItem loginMenu = new MenuItem(new StringProvider("Login"), 20, 10);

loginMenu.setCommand(new Command(loginHandler));

menu.add(loginMenu);
That’s it. If you run the app, you should notice the same behavior when you click the login button or use the login menu item.
Supporting Different Menu Instances
The instance parameter is used to identify which menu you’re supposed to show. BlackBerry applications display a few slightly different menus depending on how the menu is displayed and the context of the screen and controls. The defined instances follow:
Menu.INSTANCE_CONTEXT: The menu is displayed by clicking the trackball. Usually, this menu is a subset of only the items available in the default menu that are applicable to the currently focused control or section of the screen. For example, Close won’t show up here. The BlackBerry automatically adds a Full Menu item to this menu, which causesmakeMenuto be called withINSTANCE_DEFAULTas the instance parameter.Menu.INSTANCE_CONTEXT_SELECTION: This is the same asINSTANCE_CONTEXT, but the menu is displayed while the user has some text selected. You can use this to display items that may only apply when you can copy text.Menu.INSTANCE_DEFAULT: In this case, menu is displayed by pressing the menu key. This menu should contain all the items in the context menu, in addition to any items that apply to the application as a whole. Close would show up here.
In your application, you want Login and Clear to show up no matter which control has focus, since everything is related to logging in. Effectively, you can ignore the instance parameter in makeMenu, as the BlackBerry will automatically take care of putting the Close item only in the appropriate menu instance. This is why the makeMenu method is so simple.
With that discussion out of the way, you can now run the application and see your menu items, which should look like the ones in Figures 4–9 and 4–10.
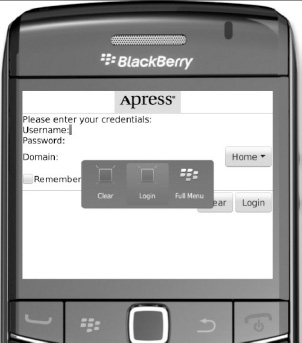
Figure 4–9. In the context menu, notice the Login is selected, and the Full Menu item is present.
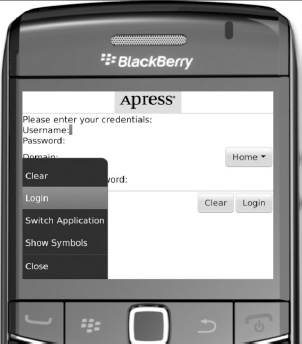
Figure 4–10. In the default menu, notice the Login is selected, and many more menu items are present.
You’ll notice that the instance menu can only show up when the currently focused control doesn’t consume the click. The ButtonFields have the ButtonField.CONSUME_CLICK style flag set, so the instance menu won’t show up when you click the trackball while they’re focused, which is how you’d expect buttons to behave. The CheckboxField and ObjectChoiceField also consume the trackball click, so you’ll see the context menu only when you click the trackball on one of the text fields.
Clicking either the Clear or Login menu item will have the same effect as clicking the Clear or Login button.
Displaying Images
A need common to many applications is allowing users to browse images on the screen. The photo carousel is what comes to mind immediately. On the BlackBerry, a photo carousel can be easily achieved using the PictureScrollField class. This section will describe how to use the PictureScrollField class and how to override some of its methods. You’ll tweak your UiFun application to display a screen that shows images in a carousel format. Remember, that in the UiFun app, you display the LoginSuccessScreen after the user enters login credentials and clicks the Login button. For this exercise, instead of displaying the LoginSuccessScreen, you’ll display an album screen.
Start by adding images to your project. For this purpose, you’ll use three PNG images and store them under the res folder of the UiFun project. All the source code (including the images used in the apps described in this book) is available from both Apress web site and from our web site. You can download the images or you can choose your own. If you choose your own images, just make sure you resize the image to 196 × 327. Name it pic1.png, pic2.png, and pic3.png (as shown in Figure 4–11).
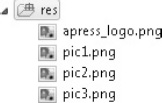
Figure 4–11. Sample images needed for the Album screen
Next, create the Album screen and on the constructor load the images you added to the project. Each image will be an entry to your PictureScrollField. And to construct a ScrollEntry, you also supply the label and the tooltip that each image displays. So your Album class with its constructor will look like this:
package com.beginningblackberry.uifun;


import net.rim.device.api.system.Bitmap;

import net.rim.device.api.ui.Color;

import net.rim.device.api.ui.TouchEvent;

import net.rim.device.api.ui.component.Status;

import net.rim.device.api.ui.container.MainScreen;

import net.rim.device.api.ui.extension.component.PictureScrollField;

import net.rim.device.api.ui.extension.component.PictureScrollField.ScrollEntry;


public class Album extends MainScreen {

    public Album () {


        Bitmap[] images = new Bitmap[3];

        String[] labels = new String[3];

        String[] tooltips = new String[3];


        ScrollEntry[] entries = newScrollEntry[3];


        for (int i = 0; i < entries.length; i++)

        {

                int imgIndex = i+1;

                images[i] = Bitmap.getBitmapResource("pic" + imgIndex + ".png");

                labels[i] = "Label for image " + imgIndex;

            tooltips[i] = "Tooltip for image " + imgIndex;

            entries[i] = new ScrollEntry(images[i], labels[i],tooltips[i]);

        }


    }

}
The extra imports you see will be needed as you progress on the Album class. And at this point, this screen won’t display anything yet since you haven’t added the PictureScrollField instance. Instead of instantiating PictureScrollField, extend the class so that you can override its methods later. Copy the private PictureScroll class below inside the Album class, like so:
private class PictureScroll extends PictureScrollField {

        private final ScrollEntry[] _entries;

        PictureScroll(ScrollEntry[] entries) {

                super(196,327);

                _entries = entries;

                this.setData(entries, 0);


this.setHighlightStyle(HighlightStyle.ILLUMINATE_WITH_SHRINK_LENS);

                  this.setHighlightBorderColor(Color.BLUE);

                  this.setLabelsVisible(true);

        }

}
The PictureScroll class constructor accepts an array of ScrollEntry field and uses it to set its data. You customized its behavior by illuminating or highlighting briefly the center image as the user scrolls from image to image. You also tell it to display a label underneath the picture. Lastly for this Album class, in the bottom of the constructor, use the following line of code to instantiate and add to the screen PictureScroll.
add(new PictureScroll(entries));
The Album class is now ready to display a carousel. But before you run the app, you need to replace the portion of the code of the login method in the UiFunMainScreen. Under the else statement, comment out the code that instantiate and display the LoginSuccessScreen and replace it with Album. That portion of the code should read like this:
//        LoginSuccessScreenloginSuccessScreen =

//                new LoginSuccessScreen(username, selectedDomain);

//            UiApplication.getUiApplication().pushScreen(loginSuccessScreen);

            UiApplication.getUiApplication().pushScreen(new Album());
Now you can save and run UiFun in the simulator. If you are using the images from the code download, your screen will be similar to Figure 4–12.
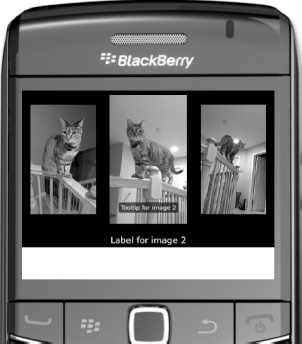
Figure 4–12. Displaying images using the PictureScrollField
What if you want to do something when a user clicks or touches on the image? Remember that your own PictureScroll class is an extension of PictureScrollField. So, in theory, you can override methods inside the class. For implementing a listener on the click or touch event of the field, all you need to do is override the touchEvent method like this:
protected boolean touchEvent(TouchEvent message) {

                    if(message.getEvent() == TouchEvent.CLICK)

                    {

                        if(this.isFocus())

                        {

                            Status.show("You selected item " +


_entries[this.getCurrentImageIndex()].getLabel());

                            return true;

                        }

                    }


                    return super.touchEvent(message);

                }
This code checks for an actual touch or click. It also makes sure that the field is in focus and displays a message. Of course, you can write elaborate code of what to do here but this illustrates how you would go about catching a click or touch event. If you run the app again with the code above and click on one of the image, you’ll see a message displayed like the one shown in Figure 4–13.

Figure 4–13. Displaying a message when an image is clicked
One last point before we wrap up this section. At times, images can differ in sizes and will look weird in the carousel. In that case, you may need to resize your images. The Bitmap class has the scaleInto method for that purpose and you’ll need to code something like:
 Bitmap resizedBitmap = new Bitmap(300,350);

originalBitmap.scaleInto(resizedBitmap,Bitmap.FILTER_BILINEAR);
This code will resize originalBitmap to 300 × 350 and store it into resizedBitmap variable.
Summary
Congratulations, you’ve created your first multiscreen, interactive BlackBerry application! Although the application was simple, we covered a lot of ground in this chapter. You should now understand how to construct a BlackBerry UI using screens, managers, and fields and how to support user interaction through controls and menus.
The concepts that we covered are basically the same as those you’ll use to construct UIs of any complexity in Java-based BlackBerry applications, and they are fundamentally important to any BlackBerry developer. So, if there was anything you didn’t understand fully, go back and review that section. Moving on from this chapter with a gap in your understanding will slow you down as we get into creating more advanced applications in later chapters. Also, the fields we used in this chapter only touch the tip of net.rim.device.api.ui package iceberg. We can’t cover all of the classes available, so spend some time exploring the API documentation. You’ll find other classes that might be appropriate for your application. For instance, you could use BrowserField for displaying a web page, a GLField for writing an OpenGL application, or a MapField to display a map.
Using just what you’ve learned so far, you can construct some fairly complex applications, although they’d be a bit limited in usefulness without networking or persistent storage. We’ll tackle both of those topics in later chapters, but before that, the next chapter will go even deeper into the API and create some custom fields, managers, and screens to really remove any limits and let you create almost any user interface you can design and imagine.