Chapter 7
Creating a Squarespace Blog
In This Chapter
![]() Setting up your Squarespace account
Setting up your Squarespace account
![]() Creating content on Squarespace
Creating content on Squarespace
![]() Customizing your Squarespace blog
Customizing your Squarespace blog
In a blogging world that for a time was dominated by Blogger and WordPress, Squarespace (www.squarespace.com) has made a splash as another viable blogging platform option. Squarespace blogs come with many of the features that bloggers on other platforms are required to add with special themes or additional plug-ins. For example, your Squarespace account provides you with website analytics (see Chapter 19 to learn more about blog analytics), social media integration, and automatically mobile-ready designs.
If you would like to customize the look of your blog by editing the Cascading Style Sheets (CSS), which are your blog template's style sheets, you can do that with Squarespace. If you just want to select a blog template and get right to blogging, you can do that with Squarespace. And because Squarespace allows bloggers to try its platform for free for 14 days, there's no real danger in giving this platform a try if you read through this chapter and feel that it might be right for you.
Creating a Squarespace Account
Like test driving a vehicle before purchase or dating before marriage, the best way to begin your Squarespace blogging experience is through the 14-day free trial offered by this blogging platform. Should you choose to stay with Squarespace for the long term, however, you should know that unlike Blogger and Tumblr, this platform does not remain free. Prices begin at $8 per month when billed annually and go up to $30 per month for business sites.
To begin the creation of your Squarespace account, visit the platform at www.squarespace.com and click Get Started, as shown in Figure 7-1.
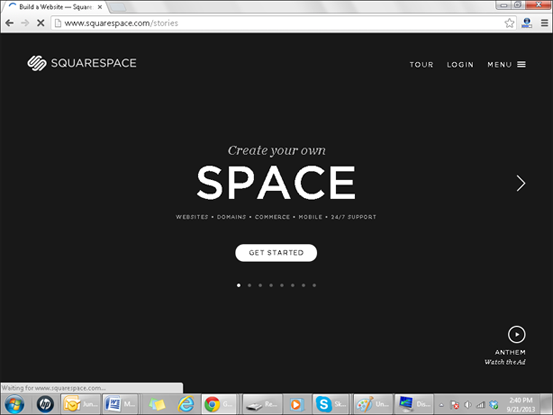
Figure 7-1: To create your Squarespace account, click Get Started.
Selecting a template
 Because of the way Squarespace presents template options, I suggest that you narrow down the focus of your blog before selecting a template.
Choose a template to begin the creation of your Squarespace blog. Although you may select any template you like, Squarespace categorizes templates that might specifically suit the following categories:
- Businesses
- Portfolios
- Stores
- Restaurants
- Personal
Before selecting a template, you may choose to view that template both as a screenshot and as a live preview, which allows you to dive deeper into the features of the template before making a selection. To choose the template you'd like to use, simply click that design and then select “Start with this design,” as shown in Figure 7-2.
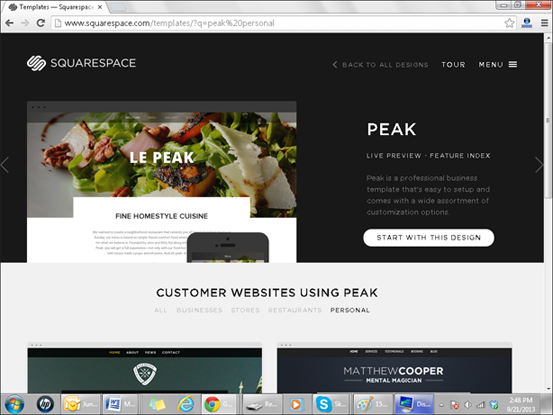
Figure 7-2: Select a site template to begin blogging on Squarespace.
It's time to create your account! Provide the following information and select Finish & Create Site to finish your initial account setup:
- First name
- Last name
- E-mail address
- Password
Choosing a site name
Congratulations, you have a Squarespace blog account! It's now time to select a name for your blog and dive into creating content. On your main account page, select the gear icon on the left sidebar to select a blog name, as shown in Figure 7-3.
 Deciding on the best name for your Squarespace site? Now is a great time to visit or revisit Chapter 3 to learn more about selecting and registering a domain name. Squarespace can also help you with this process!

Figure 7-3: The gear icon in the Squarespace sidebar allows you to choose a site name.
Use this Basic Information area in your settings to customize the following:
- Site Name
- Site Description
- Meta Description: Use this area to describe your site in one or two short sentences that will appear in search engines.
- Logo Image
- Browser or Favicon Image
- Blog Subject or Type
- Contact Phone Number
- Contact E-mail
- Physical Location
Adding Blog Content
There are nearly countless customizations that you can make to your Squarespace blog — some of which are covered in the following sections — but you can feel free to dive right into content creation if you choose.
To begin adding content to your blog, select the content manager icon in your Squarespace sidebar, as shown in Figure 7-4. Squarespace provides you with a sample Welcome Page, which you can edit by clicking the gear icon. In contrast to other blog platforms, Squarespace pages are comprised of blocks of content. You can change the look of your pages by adding, removing, and altering those content blocks. During the editing process, feel free to give this page any title you want, including keeping the Welcome heading.

Figure 7-4: The Squarespace Content Manager allows you to add content to your blog.

Figure 7-5: Add Page allows you to create new content, including image galleries, static pages, and blog posts.
Ready to create your first original blog post? To begin blogging, select Add Page from your Content Manager menu (see Figure 7-5) and then select Blog.
After you've titled your blog, select Add Post in the upper-right corner, as shown in Figure 7-6. You can now title your post and add content using a WYSIWYG (what you see is what you get) format similar to most blog platforms. From this location, you can also elect to do the following:
- Allow comments
- Add tags or categories
- Add a thumbnail image
- Change the author name
- Create a post excerpt
- Choose to make the post featured content
- Link the post title to an external location
- Add your geographical blogging location
- Choose which social media accounts should automatically promote the blog post after it's published

Figure 7-6: Select Add Post to begin blogging on Squarespace.
Uploading images
In contrast to some blog platforms, Squarespace allows you to upload images directly to the content where you want the image to appear. For example, if you're creating a Squarespace gallery, page, or blog post, you simply add the image directly to the block or area where you want it to appear rather than having to upload the image to a special location just for media.
To add any content other than text to your blog post, including images, select the plus (+) button in the bottom-right corner of your editing window. To add an image to your post, select the image block from the plus (+) button menu, as shown in Figure 7-7. You are now able to either drag and drop your image into the content block or upload an image file. When your image has been added, you can choose to do any of the following before selecting Save:
- Add an image caption
- Name the image file
- Change the size of the image
- View the image in a lightbox
- Connect a URL to the image

Figure 7-7: The plus (+) button menu allows you to add additional content to your blog posts.
The drag-and-drop option to add images is becoming more and more popular. If you're used to uploading files to add graphics to your content, now may be a great time to give the drag-and-drop method a try!
Importing content from other platforms
One of the most exciting features of the Squarespace platform is the ability to import content from other blog platforms. For example, should you choose to move from a Blogger blog to a Squarespace site, Squarespace has methods in place to make that happen quite easily.
To import content from another platform, you need to access your settings menu by selecting the gear icon on your sidebar:
- Select Import/Export.
- Click the Import Site button in the upper-right corner.
- Select the platform from which you want to import content.
- Follow the steps specific to your particular platform and select Begin Importing.
Should you choose to move your Squarespace blog to a different platform for any reason, you can export your content using the same menu.
Squarespace offers a free, 14-day trial and the option to export your content elsewhere should you decide to move your blog to a different platform.
Customizing and Connecting
One of the best reasons to consider a Squarespace blog is the variety of customizations available to you through the Squarespace sidebar as well as the ease of connectivity to social media. Although getting your blog up and running is clearly your focus, after you've done so you'll want to take a look at both linking to your favorite social networks and utilizing the tools at your fingertips thanks to Squarespace.
Linking your social networks
Social media, covered in more depth in Chapters 17 and 18, provides bloggers with an amazing tool to promote their content and grow their online community. One of the easiest ways to utilize this tool is to connect your blog directly to the social media platforms where you are already active.
To get started linking your social media accounts to your blog, select the gear icon on the left sidebar and choose Connected Accounts (see Figure 7-8). This area is the social media hub of the Squarespace platform and will allow you to connect your site to the most popular social media services on the web.
Figure 7-8: The Connected Accounts menu allows bloggers to connect their site to social media services.
To choose which accounts to connect to your blog, click the Add Account button in the upper-right corner of the page. A menu of social media sites appears, as shown in Figure 7-9. Continue to click Add Account as often as you'd like until you have added all the social media accounts you want to connect to.

Figure 7-9: Use the Add Account menu to select which social media accounts to connect to your Squarespace blog.
Linking your content to your social media channels to promote your content is a great start, but you may also want to allow your readers to share your content on their social media as well. Squarespace provides share buttons for the following social media platforms that can be integrated into your blog:
- Google+
- StumbleUpon
- Tumblr
Using the Squarespace sidebar
As you may have noticed by now, the Squarespace sidebar is an integral part of your Squarespace blogging experience. Not only is this where you can go to change everything from your basic account information to your billing preferences, but the sidebar also allows you to customize your website from top to bottom. Some of the features of the sidebar include:
- Activity Menu: This area allows you to monitor your blog's traffic, traffic sources, most popular content, search queries that have brought traffic to your blog, and the comments left by your readers.
- Settings: Want to try your hand at editing your blog's code? Ready to change the look of your site? This is where you go to make these changes. This menu is where you find the general information associated with your site, too. It is also important to note that this menu contains the Squarespace Help section.
- Commerce: Blog monetization is a hot topic and one that is covered in detail in Part VI. Squarespace provides you with a way to sell goods and services directly from your site by building an online store that can be integrated with your blog.
- Preview: If you want to get a glimpse of what your readers are seeing while you make changes to your blog, select the eye icon to take you to the blog preview screen.