Botanical Filler Elements
This series of botanical filler elements provides some simple ways to add realistic details with minimal effort. Botanical elements are piped details that include flower buds, foliage, and branches. They can be used both to fill gaps or define the shape of your arrangement.
Easy Leaves
Unlike the leaves featured in chapter 3, The Leaf Technique (see here to here), these leaves are much simpler, easier to produce, and require little effort. They can be piped in at the last minute to fill in spaces within any size arrangement on cakes and cupcakes. They also help break up dense clustering of color to provide balance.
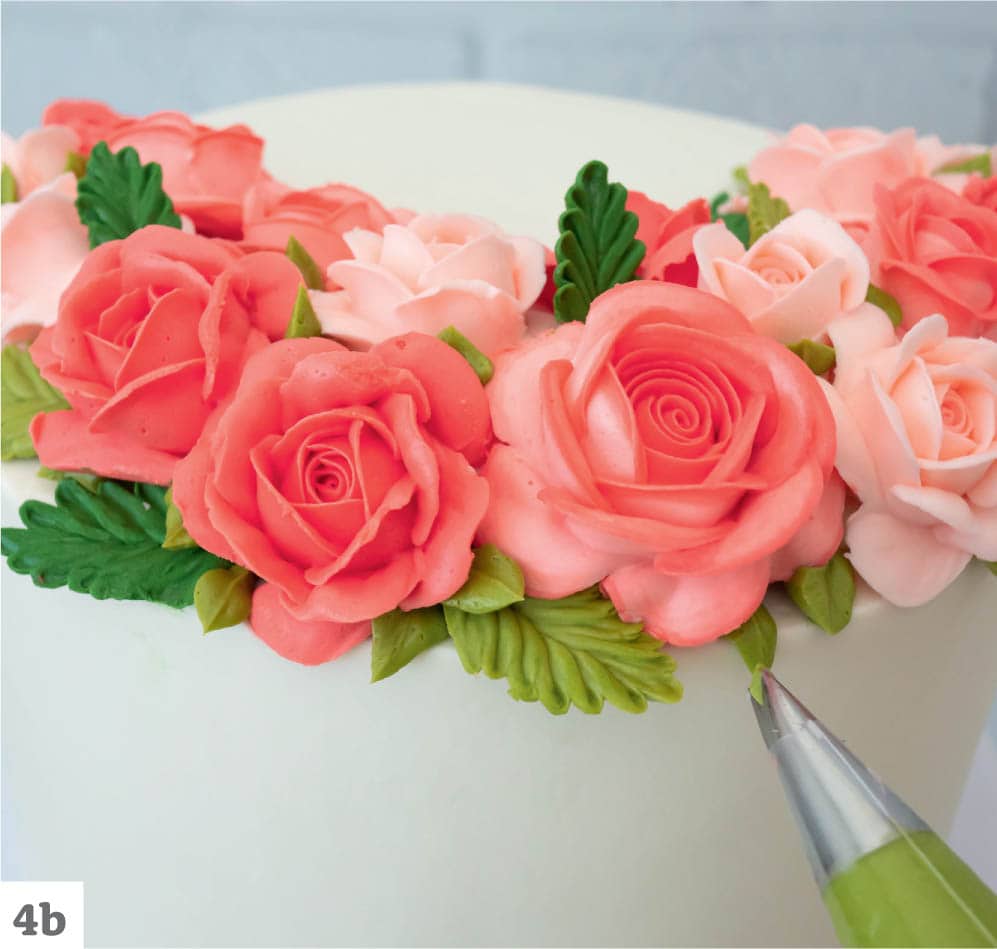
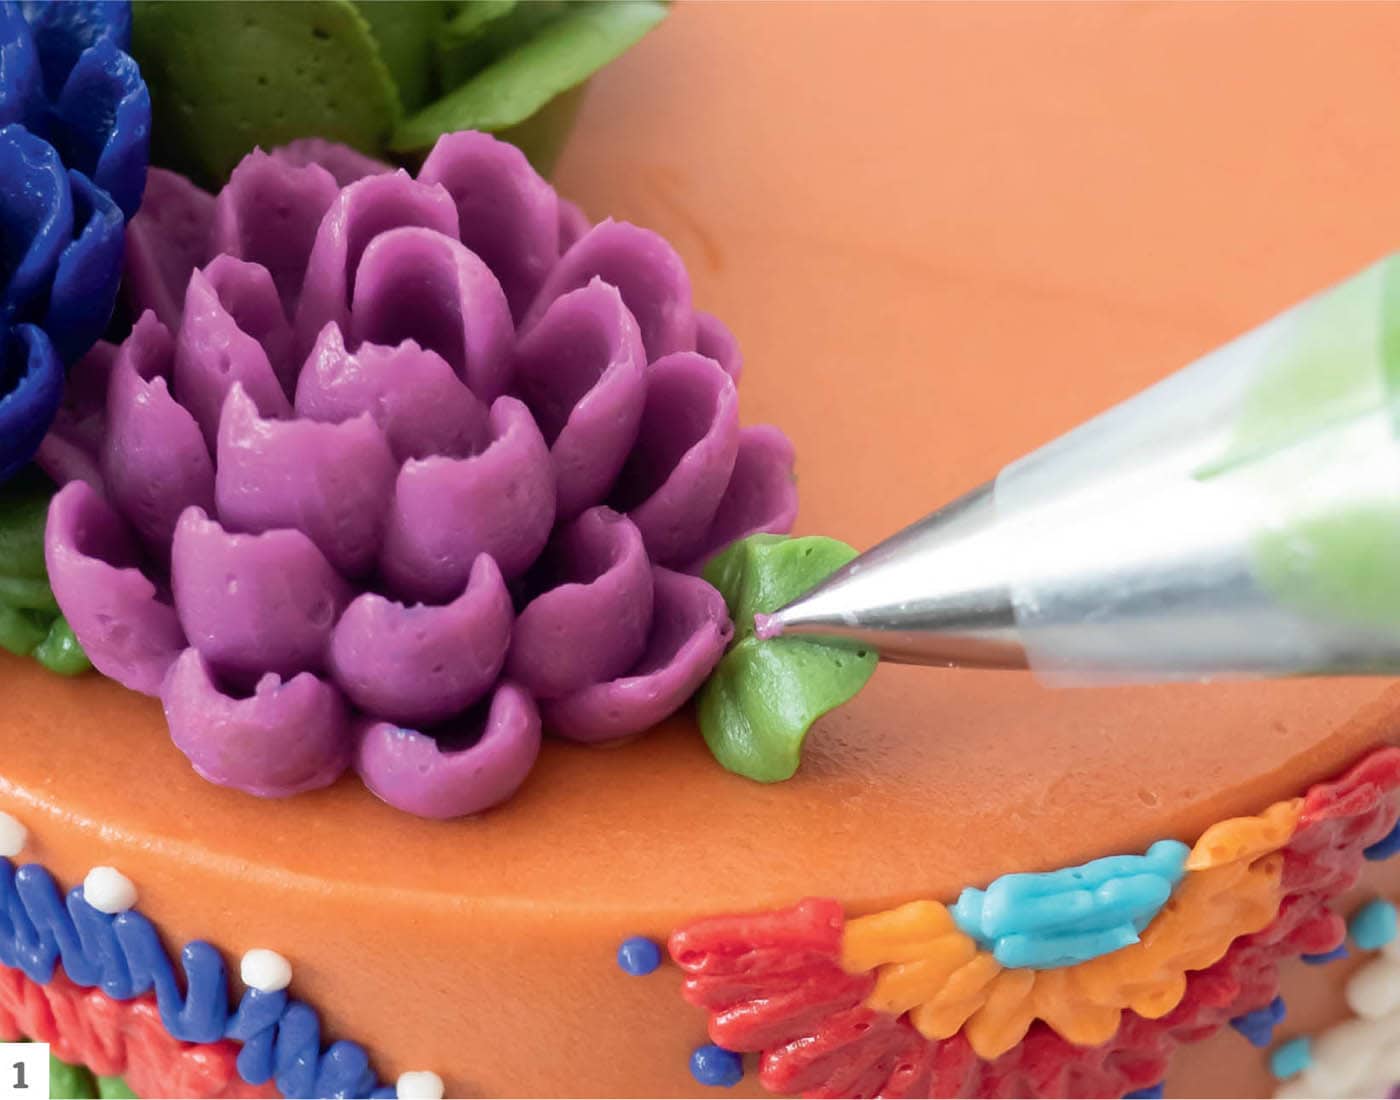
- 1Prepare a batch of colored buttercream. Fit a piping bag with the leaf tip and fill it with the buttercream. Choose the area to which you’d like to add leaves and insert the piping tip into that space.
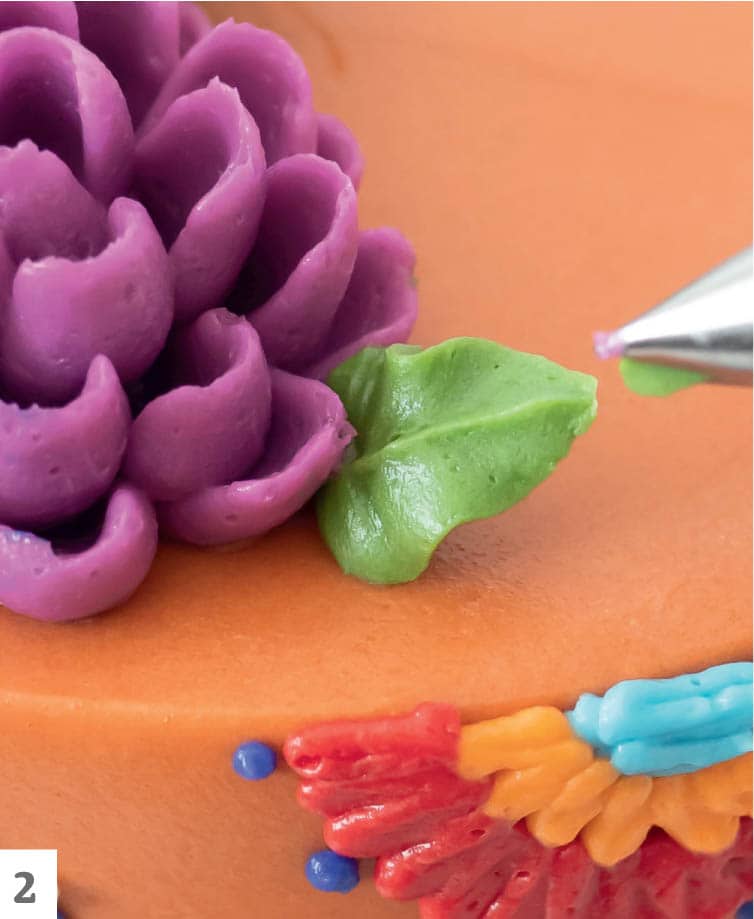
- 2Squeeze the piping bag and gradually pull the tip away, releasing pressure to produce a single pointed leaf. Create more leaves as desired.
Flower Buds
For a charming addition of color and texture, enter flower buds. Buds add realism and an organic feel to any arrangement as they resemble not-yet-opened flowers. These round buds are the perfect space filler to complement any flower.
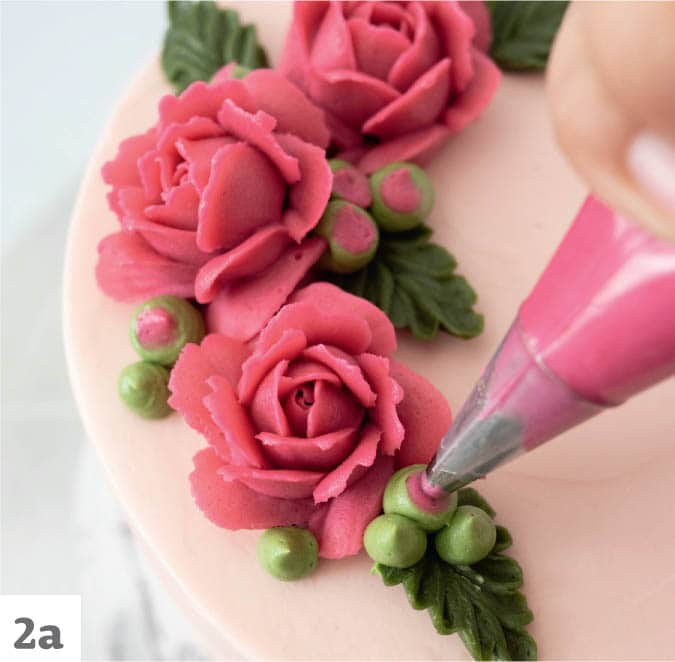
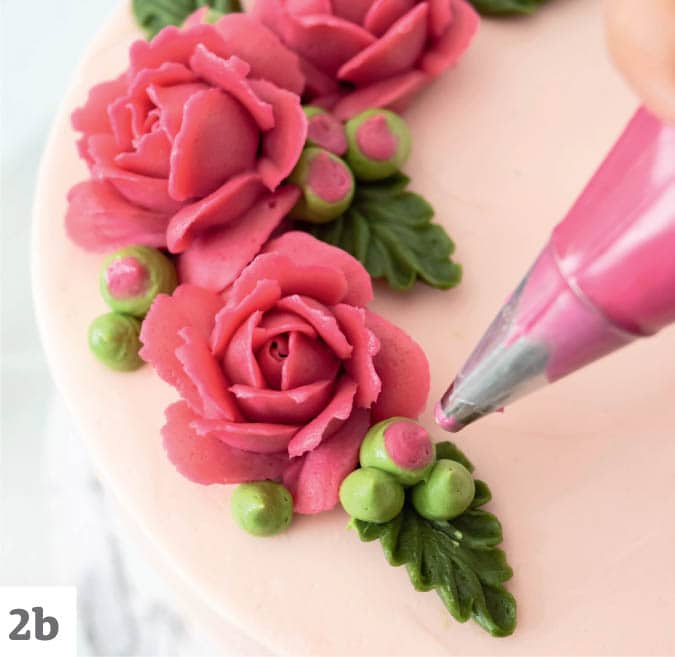
- 1Prepare a batch of green and burgundy buttercreams. Fit one piping bag with the #8 piping tip and fill it with the buttercream for the green buds, and fit the other bag with the #6 tip and fill it with the burgundy buttercream for the flower buds. Locate the gaps within the arrangement for placement of the flower buds. Using the #8 tip, pipe a round pearl of buttercream.
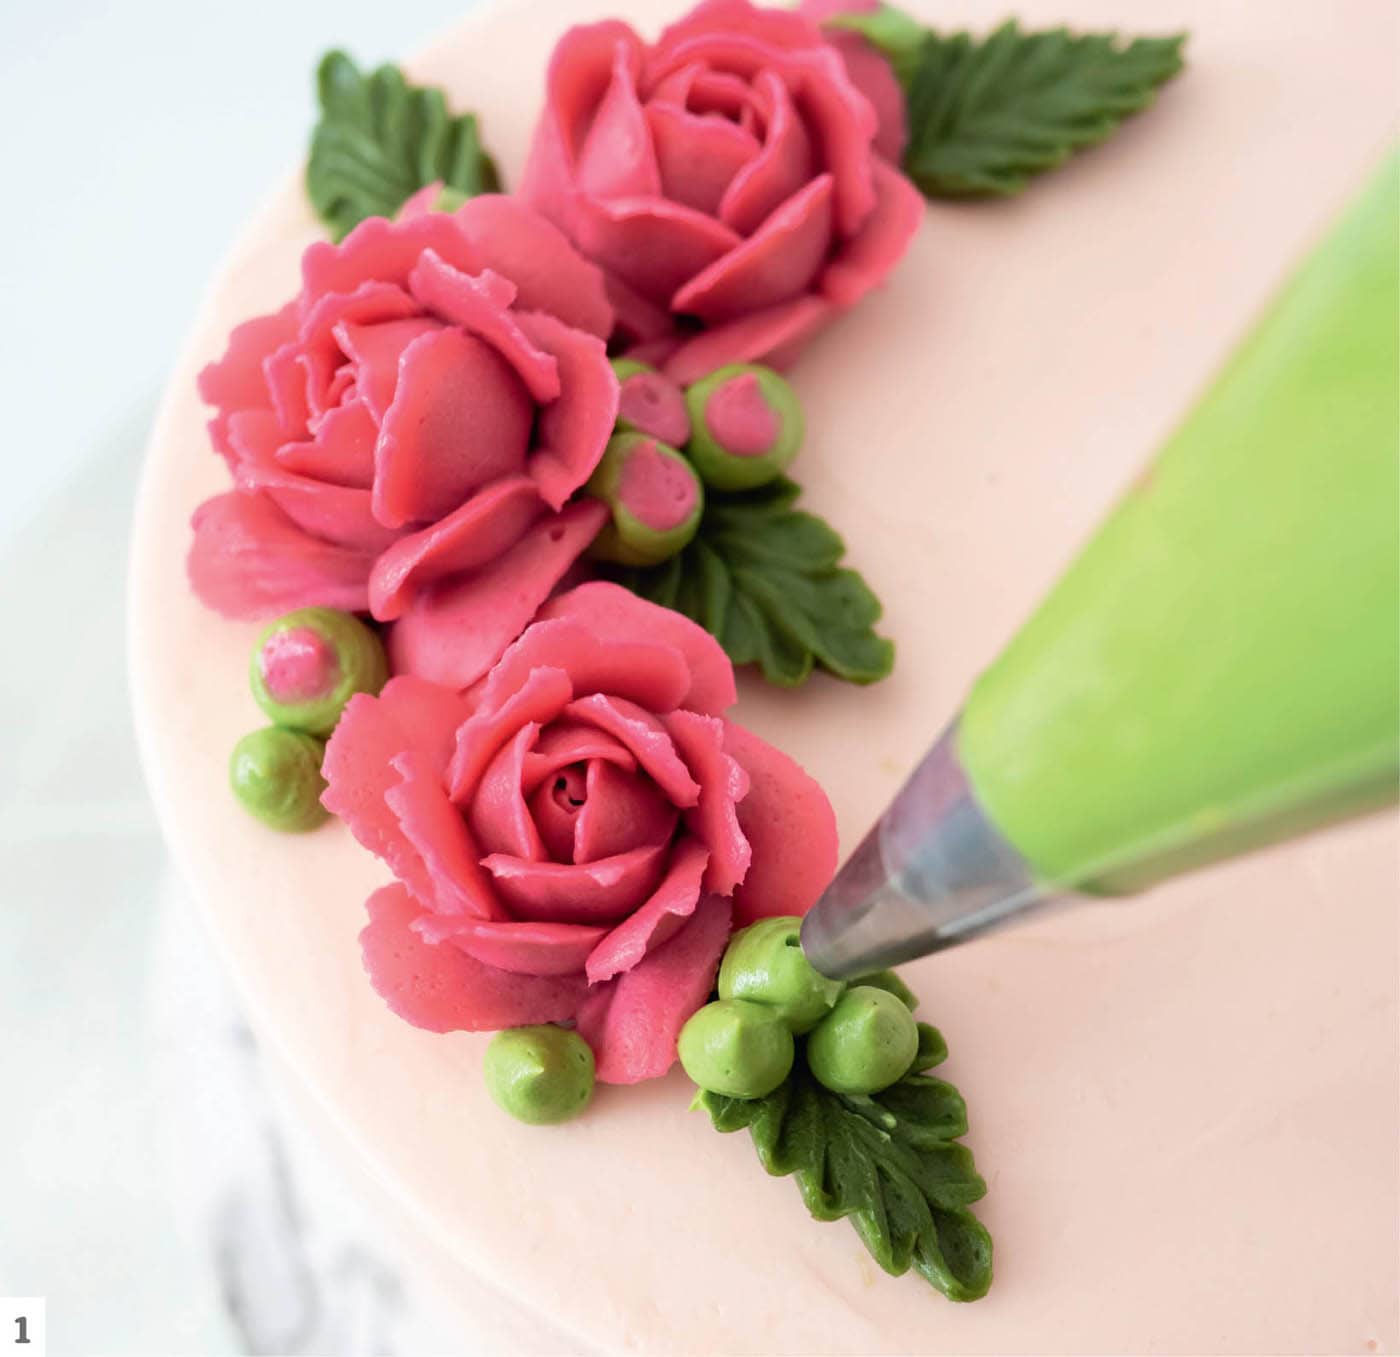
- 2Using the #6 tip, touch the tip of the pearl you just created and gently insert the end of the piping tip (a). Pipe a second, smaller pearl inside the first. The first pearl will slightly expand to expose the color of the bud (b).
Branches
Piped tree branches add movement and shape to botanical displays. They can extend the shape of an arrangement and fill in an empty surface, making them ideal for cakes. Branches can also give buttercream designs a rustic and woodsy feel.
- 1Prepare a batch of colored buttercream. Fit a piping bag with the #4 tip and fill it with the buttercream. Pipe lines extending from the botanical arrangement. Hold the piping bag about ¼" (6 mm) above the cake surface and squeeze the bag to allow the line of buttercream to drop and fall into place. For the first branch, pipe one line starting from the edge of the buttercream botanical arrangement and extending about 3" (7.5 cm) or more, depending on how much space you’d like to fill. For these branches, straight lines are discouraged and imperfections are encouraged to add a touch of realism.

- 2Add shorter branches to the main buttercream lines and smaller, finer branch accents.

Other Filler Elements
Nonpareil Sprinkles
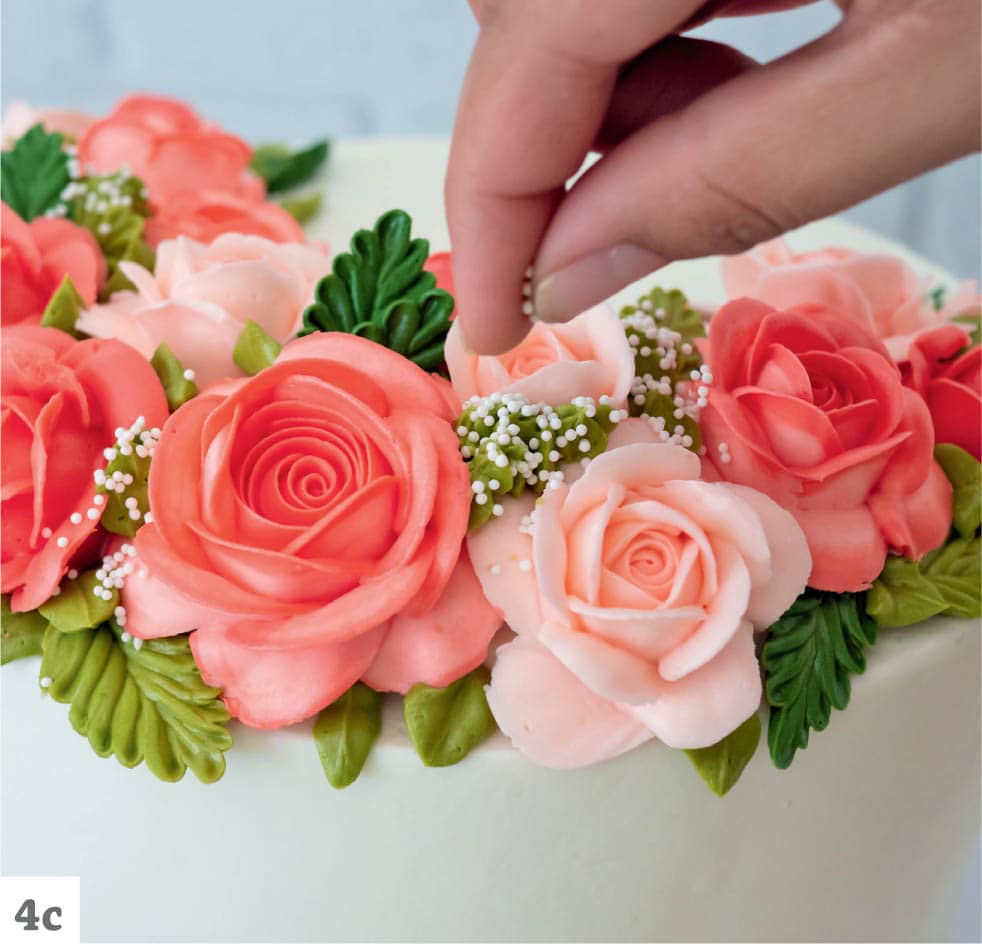
These tiny white sprinkles are often my secret weapon for adding texture, balance, and contrast to my arrangements. White nonpareils are my go-to addition for botanical arrangements that need a little something extra.
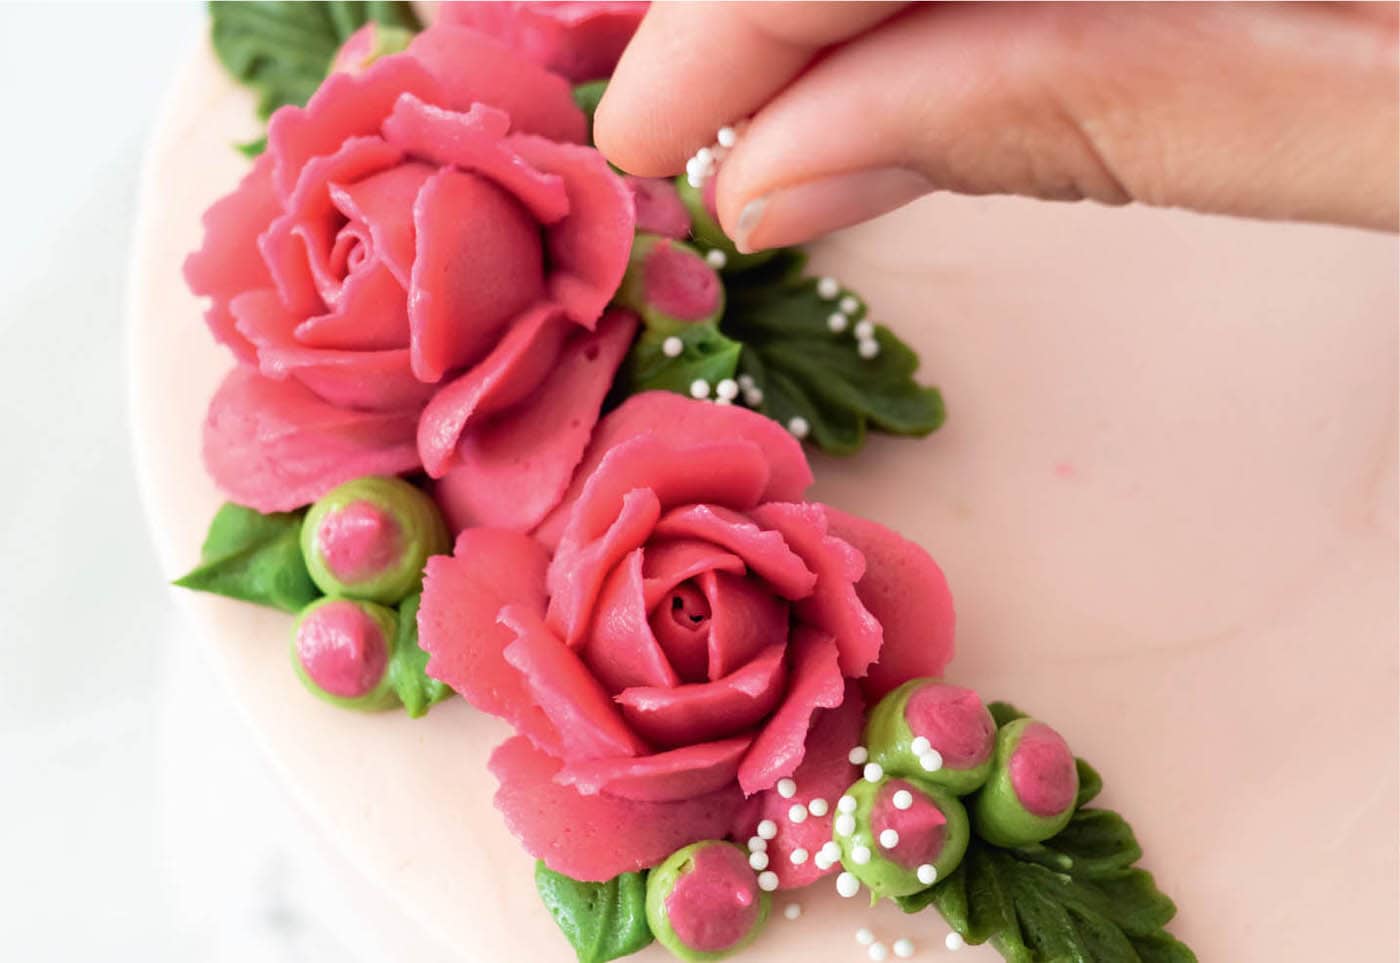
- 1To add nonpareils to a grouping of botanicals, take a small amount of sprinkles between your thumb and index finger and move your fingers back and forth to let the sprinkles fall in the desired area (they stick best on freshly piped buttercream). Here, they resemble baby’s breath.
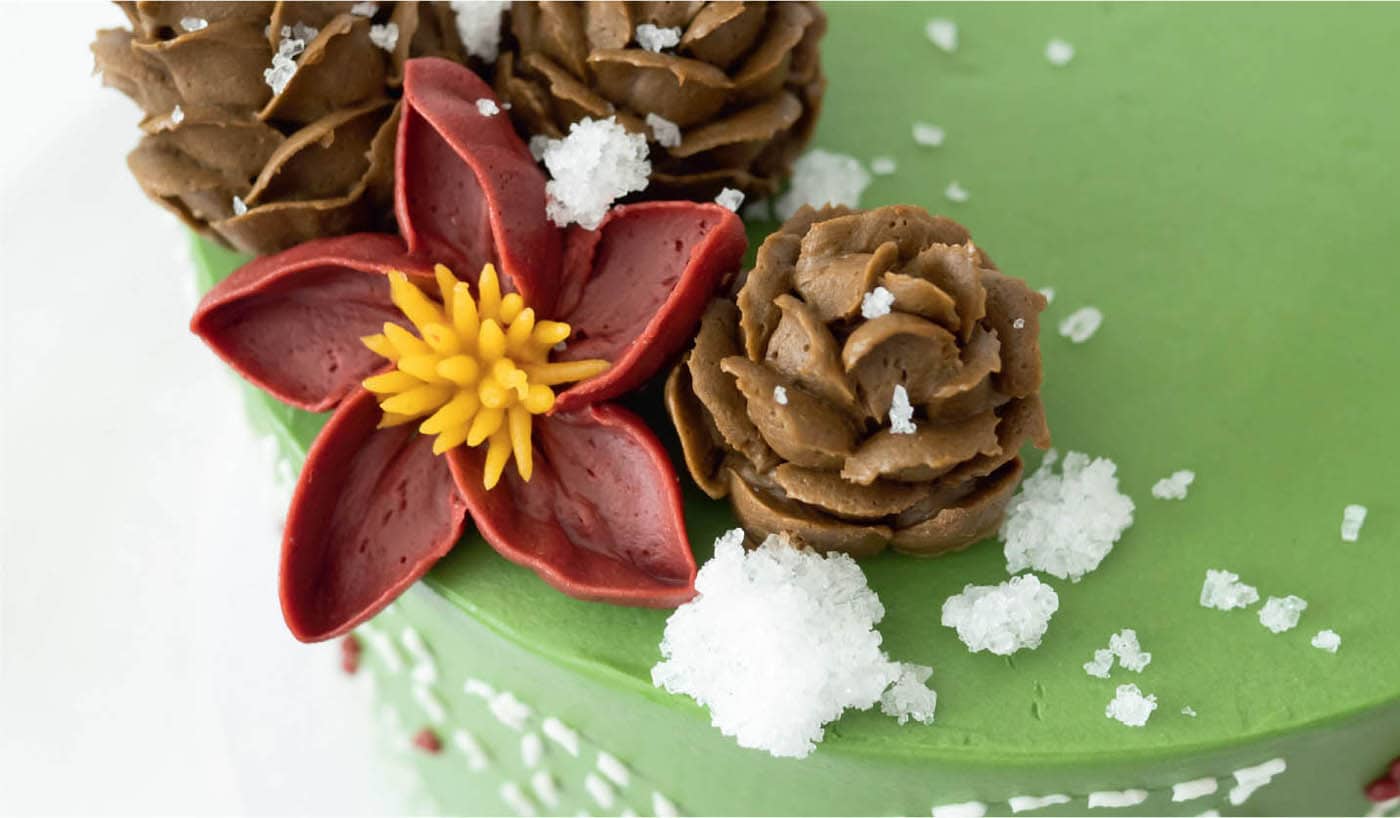
Icy Sugar Snow
This easy recipe for icy sugar snow can be stored indefinitely and added to any winter- or holiday-themed arrangement. Using two textures or different size granules is key to getting the perfect look of icy snow clusters.
- 1Combine the sugars in a bowl or container.
- 2Add the water. Mix the sugars and water until the sugar crystals are moist enough to form a coarse consistency with some clumps. If no clumps form, add a third teaspoon or more of water until the sugar binds together and clumps form.
- 3Empty the mixture onto a parchment paper–lined tray. Spread the sugar unevenly, encouraging clumps in various sizes to form. Allow to dry for several hours or overnight in a dry area. Store the snow in a lidded container.
Selecting Botanical Elements for Arrangements
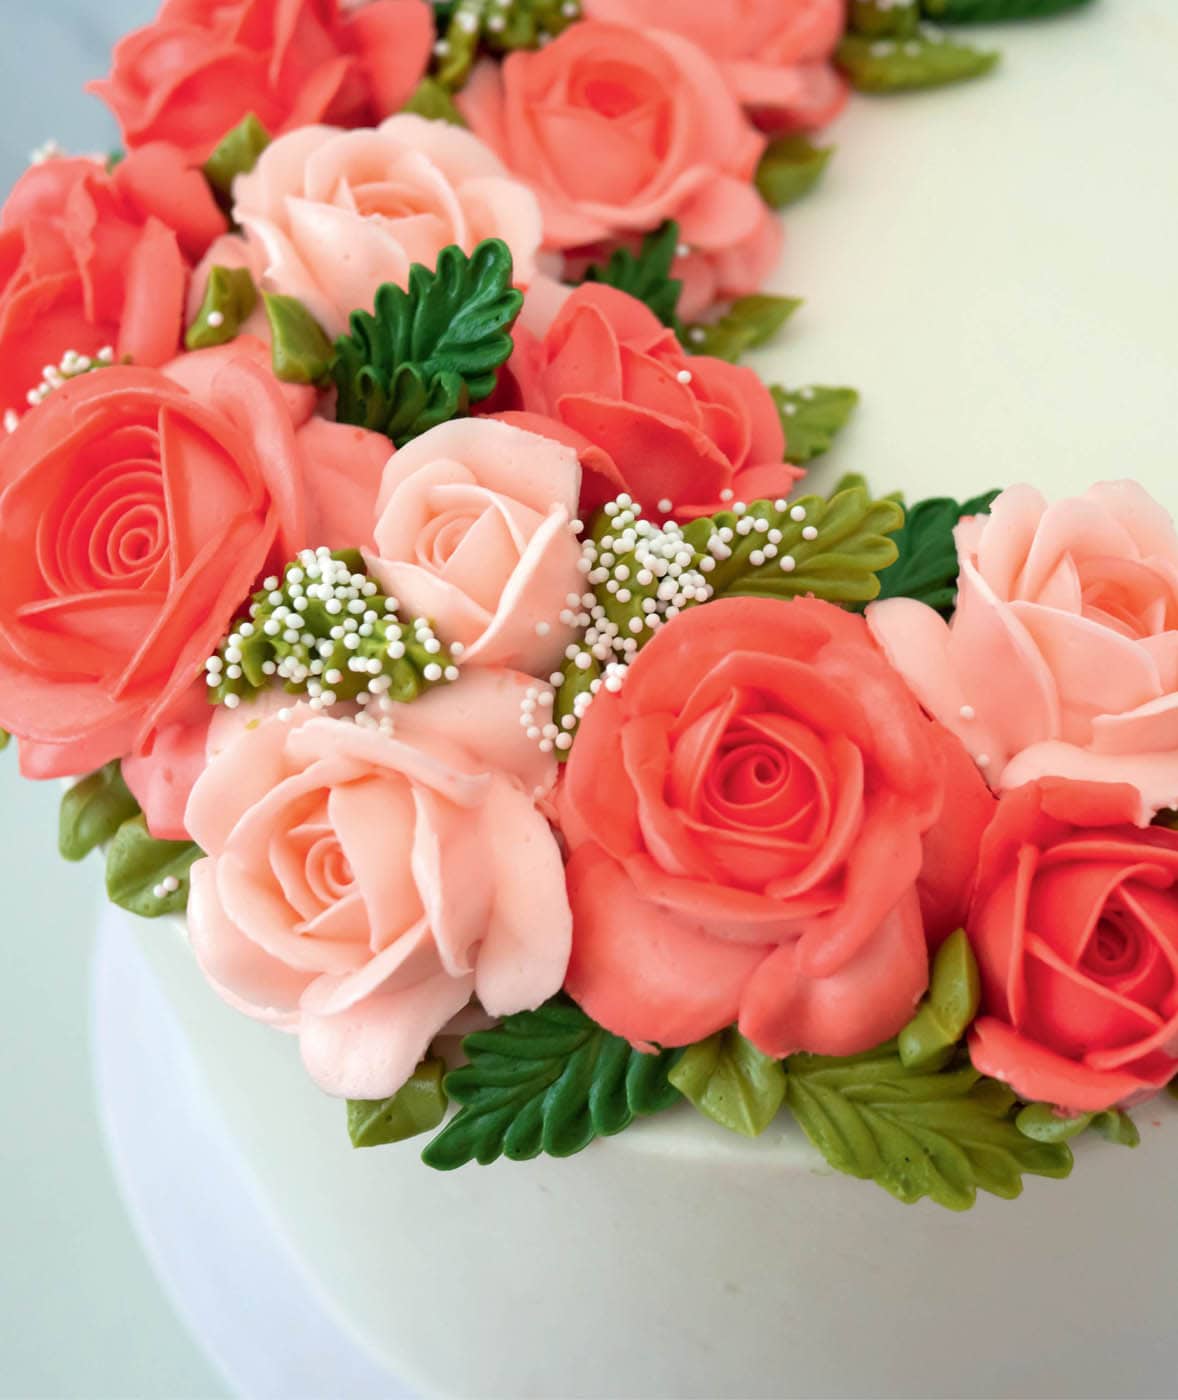
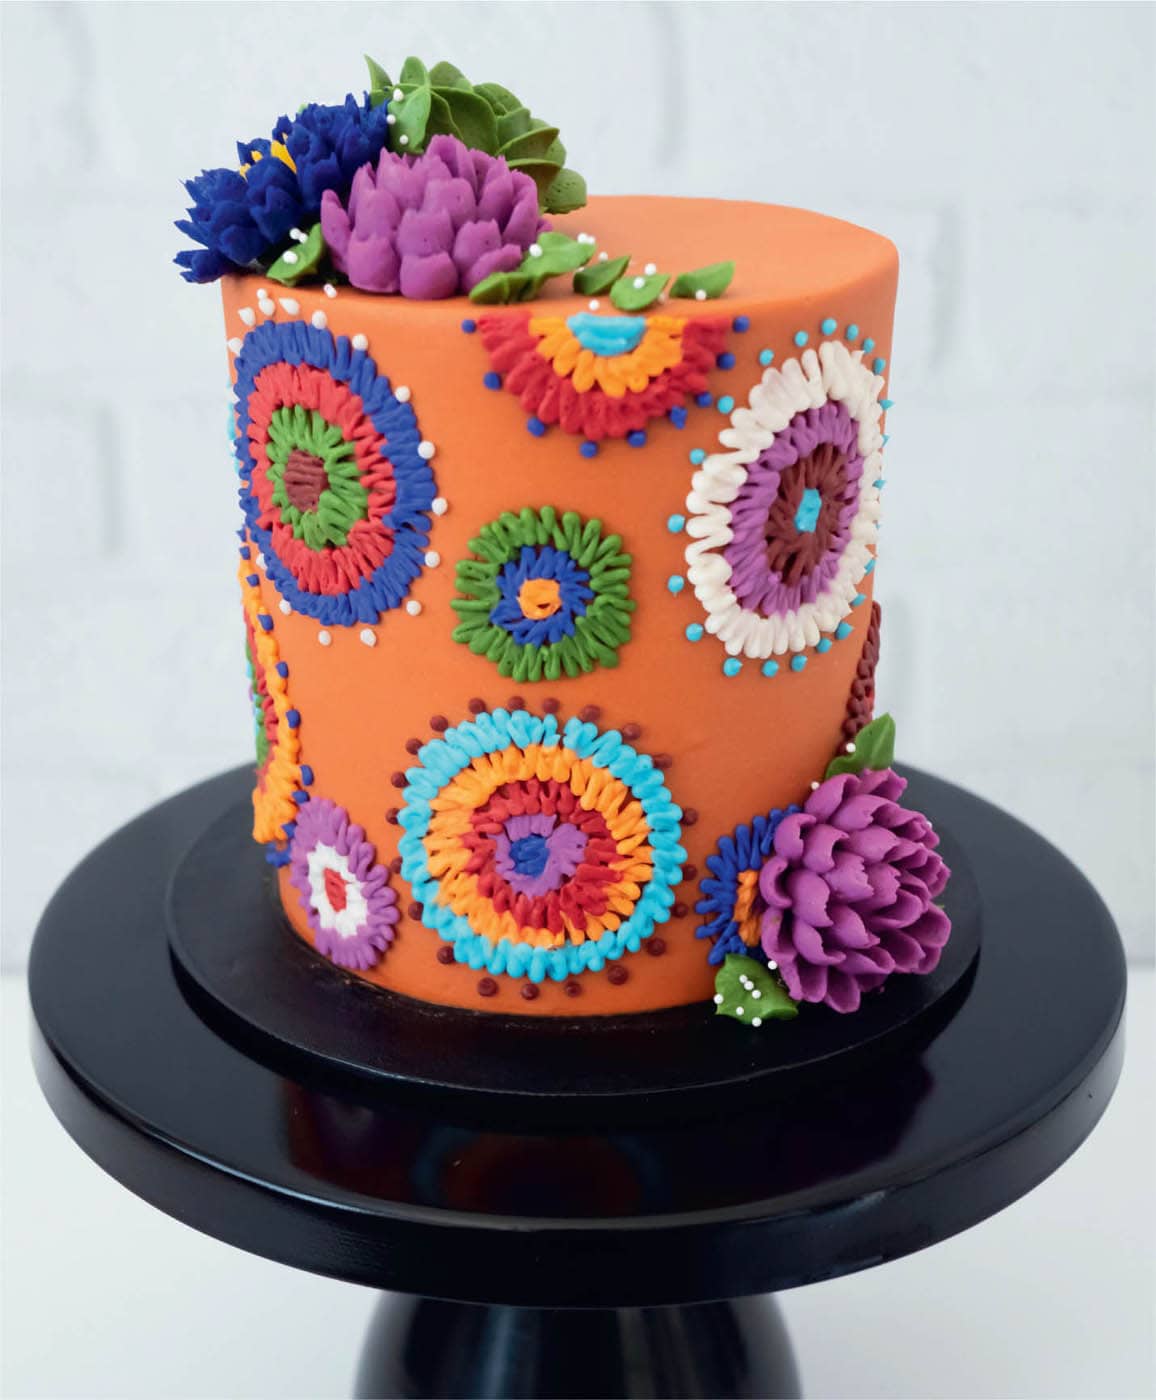
When selecting buttercream botanical elements for my arrangements, I first consider my desired aesthetic. For arrangements with a romantic feel, I often choose botanicals with lots of ruffles and volume, such as peonies and roses, and opt for a soft color palette of creams or neutrals with hints of soft peach and blush. For complex designs with lots of color and texture, I go for a bold color palette and choose a wide variety of botanicals. Whatever aesthetic you choose, these simple guidelines will help you achieve a balanced arrangement.
- Select at least three elements for a well-balanced grouping. Begin by choosing at least one botanical variety to be the main element, then choose two more elements to support the main element. Leaves and fillers can be considered elements. For an arrangement of classic roses, for example, the roses would be the main element, and the other two elements could be leaves and baby’s breath. Alternatively, roses with two different varieties of leaves would also work.
- Variety is key. Choose a selection of elements that vary in color, texture, and/or size. Too much of one element within an arrangement, such as a bouquet of one color and size of dahlia, can make it difficult to determine where one flower ends and another begins. Adding variety with color or size or including other botanical elements creates definition and is more pleasing to the eye.
- When using a diverse color palette, distribute the boldest colors evenly throughout the arrangement, either as single botanicals or as clusters. The most vivid colors draw the eye first, so distributing them evenly creates balance. Fill in spaces with lighter colors.
- Don’t forget the greenery. Including leaves or green elements adds a defining quality to arrangements. Greens break up the color palette and alleviate any heaviness.
- Extras such as flower buds, baby’s breath, and branches are optional (see here to here), but they’re attractive and provide simple ways to fill in unwanted gaps and create a nice flow that helps shape your buttercream arrangements.
Preparation
Before arranging any botanical buttercreams on a cake or cupcake, make sure they’ve been piped and are frozen. Freezing botanicals helps them keep their shape as you handle and arrange them. Because my buttercream recipe is not a crusting buttercream, freezing is a necessary step. American-style buttercreams often contain shortening and a large ratio of sugar, giving them a firm consistency. When sitting at room temperature for a period of time, they develop a firm crust on the exterior. However, my buttercream recipe doesn’t contain any shortening, and the ratio of sugar is much less than American-style buttercream. The consistency is softer and easier to pipe, and the buttercream stays soft and malleable at room temperature. Frozen botanicals should feel cold and solid to the touch. If your finger leaves an indent, continue to freeze until they’re hard. Usually 20 minutes in the freezer is the minimum amount of time for botanicals to solidify enough for handling.
Prepare your canvas of choice (see chapter 4, here). I used an 8-inch (20 cm) round cake iced in white buttercream. You can go in any direction with your canvas, such as rustic and simplistic or bold and intricate. As I mentioned earlier, I like to think about the overall aesthetic of the cake before I prepare the canvas. I usually keep my canvas simple to allow the buttercream botanicals to take center stage, choosing white, cream, or a muted shade of icing with a smooth or textured finish. For occasions that call for a statement look, I opt for bold color. Make sure your cake is iced and chilled before you begin creating your arrangement.

Think about the general form your arrangement will take, such as a semicircle or complete circle around the cake top. Then, pipe a mound, or platform, of room-temperature buttercream in roughly the shape of the composition.
For a crescent-shaped arrangement, for example, use a piping bag with a wide-snipped opening (no piping tip needed) and pipe a platform of room-temperature buttercream in a crescent shape. This mound should be wide and tall at the center and tapered at both ends. The overall size of the platform should match the size of your arrangement. The platform serves three purposes:
- 1.It provides a template to help you visualize where the botanicals will be placed.
- 2.It provides a platform for the botanicals that gives the arrangement volume and dimension.
- 3.It acts as glue for adhering the chilled botanicals to the cake canvas.
Once the buttercream platform has been piped, remove the trays of botanicals from the freezer. As they sit at room temperature (ideally 68°F to 75°F [20°C to 24°C]), they’ll begin to defrost and soften, so it’s best to work quickly.
Creating an Arrangement
Once you have selected your botanical elements and prepared your canvas, you are ready to complete your design. Whether you choose to create a crescent-shaped arrangement, a bouquet, or a wreath, follow these simple steps to achieve your beautifully designed botanical arrangement.
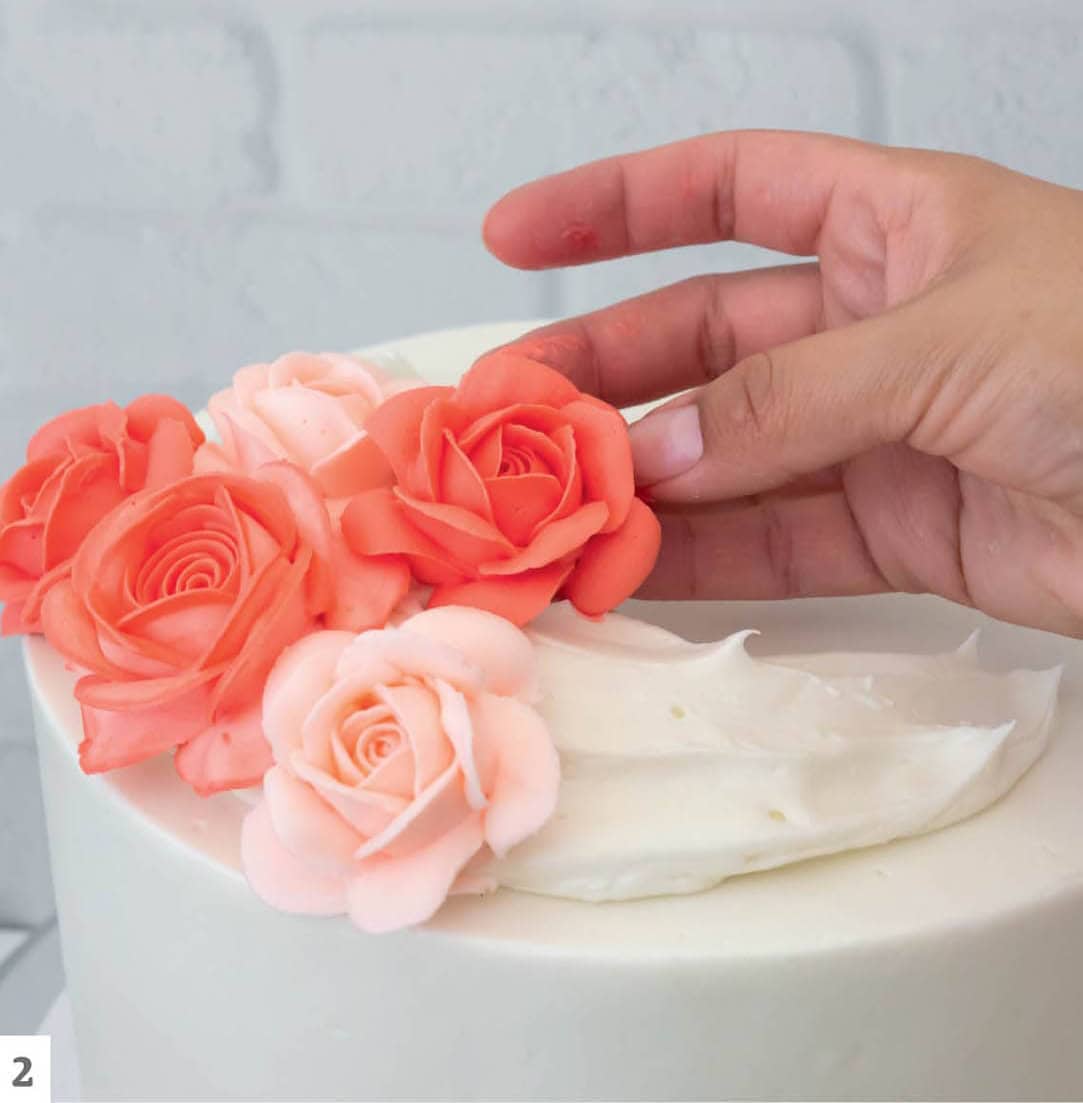
- 1Carefully peel the parchment paper away from each botanical piece and place the piece on the desired area on the cake or cupcake.

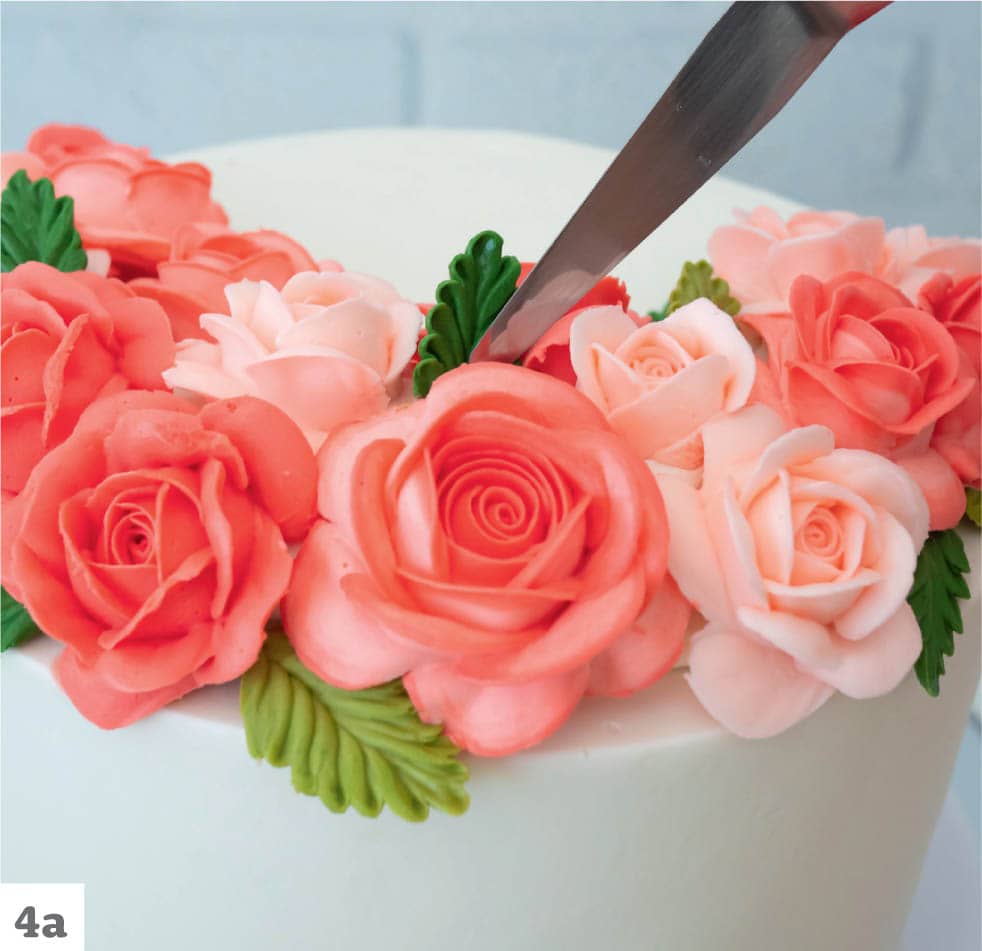
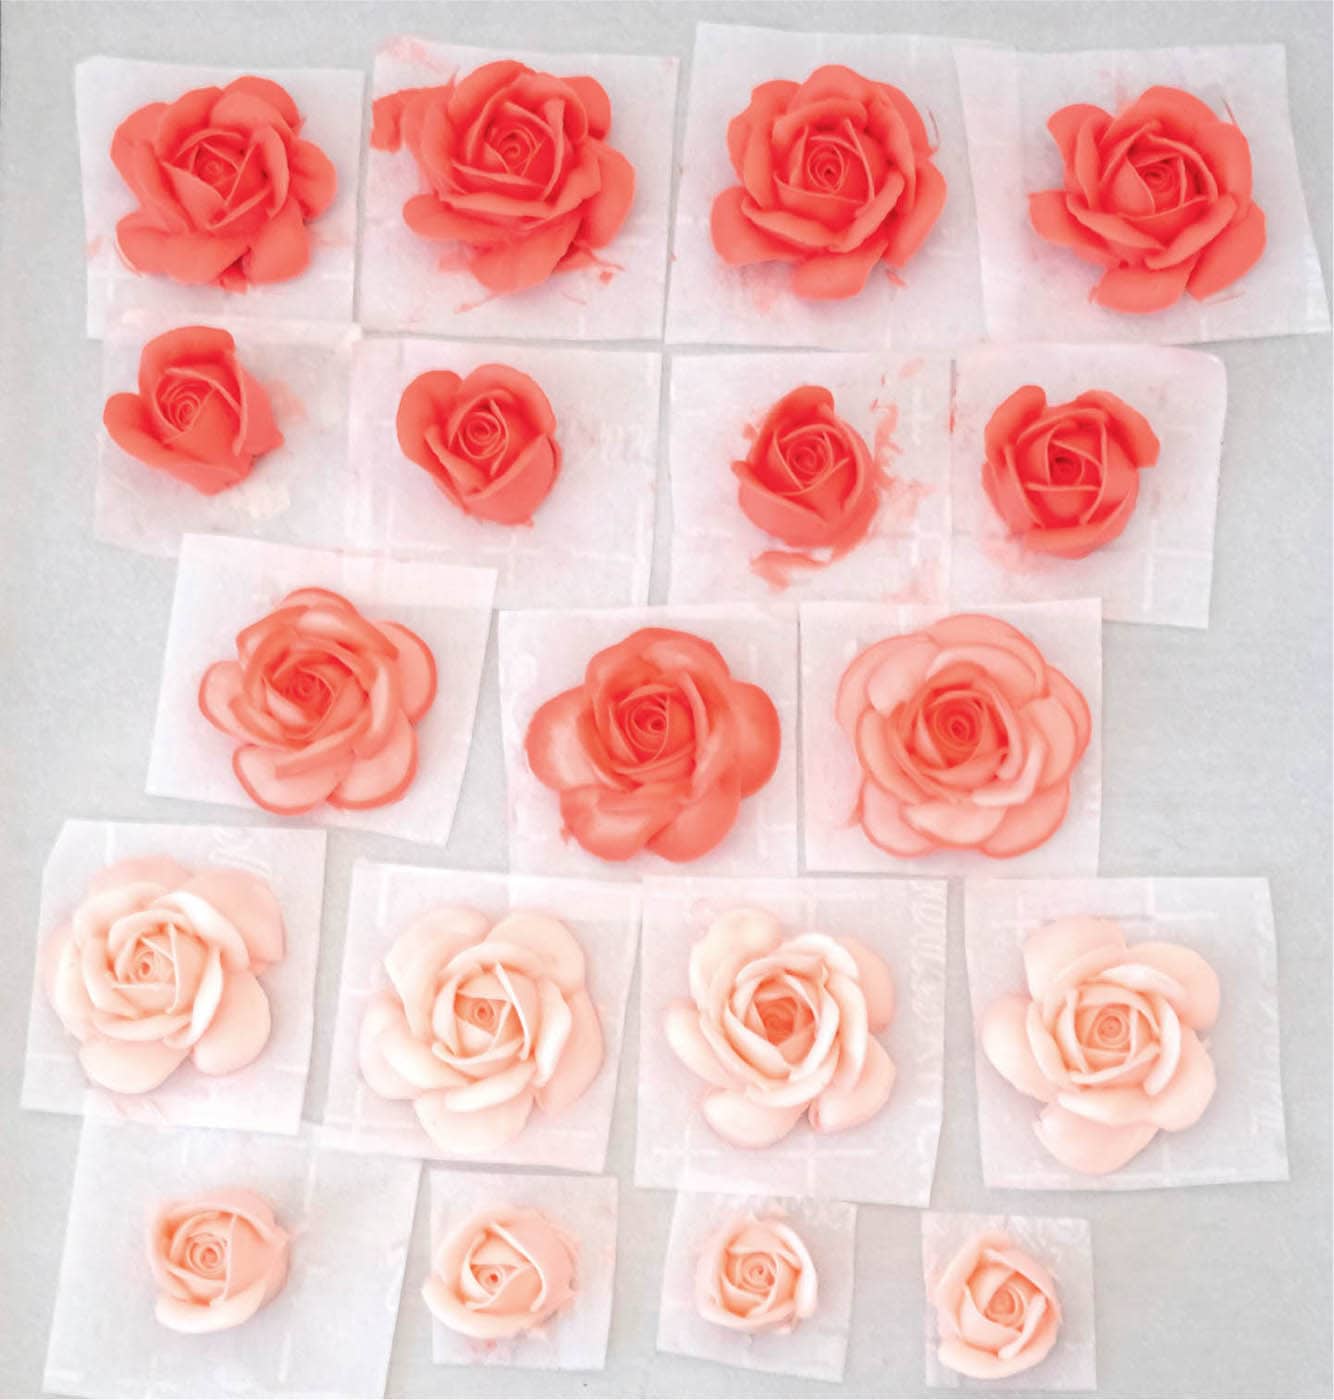
- 2Determine the focal point of the arrangement and place the key botanicals there. Work your way out as you place the other pieces. For this crescent-shaped grouping of roses, I placed the largest flowers in the center of the crescent (the widest part) and worked outward toward the tapered ends. If you have a few varieties of botanicals in various sizes, place the largest pieces first and then fill in with smaller ones, placing some of the smaller botanicals at the ends to finish the arrangement.
- 3Gently secure the piece in place by applying enough pressure to the lower sides of the botanical to attach it to the buttercream mound, being careful not to break the petals or leaves. Wearing gloves and using a small offset metal spatula to help secure the botanicals can be helpful. Repeat with the remaining botanicals to build the arrangement.

- 4Leaves and other optional fillers (see chapter 5, here) should be placed last as the finishing touches of your arrangement. Once the pieces are arranged, the cake should be refrigerated to further secure them in place.
This arrangement may look complex, but when broken down into steps, it’s quite simple to create. Thinking and planning ahead goes a long way in creating a cohesive composition. This grouping includes one type of flower, the classic rose, but when piped in different colors, it adds a wow factor to the cake.