
In This Chapter
Dealing with separately compiled assemblies
Writing a class library
More access-control keywords:
protected, internal, protected internalWorking with namespaces
C# gives you a variety of ways to break code into meaningful, workable units.
You can use a method to divide a long string of code into separate, maintainable units. Use the class structure to group both data and methods in meaningful ways to further reduce the complexity of the program. Programs are complex already, and we simple humans become confused easily, so we need all the help we can get.
C# provides another level of grouping: You can group similar classes into a separate library. Beyond writing your own libraries, you can use anybody's libraries in your programs. These programs contain multiple modules known as assemblies. I describe libraries and assemblies in this chapter.
Meanwhile, the access-control story in Chapter 5 of this minibook leaves a few untidy loose ends — the protected, internal, and protected internal keywords — and is slightly complicated further by the use of namespaces, another way to group similar classes and allow the use of duplicate names in two parts of a program. I cover namespaces in this chapter as well.
Note
The program examples mentioned in this chapter are part of the chapter download. You can also download them separately on the Example Code page of the Web site at csharp102.info or csharpfordummies.net.
The programs in this book are only for demonstration purposes. Each program is no more than a few dozen lines long and contains no more than a few classes. An industrial-strength program, complete with all the necessary bells and whistles, can include hundreds of thousands of lines of code, spread over a hundred or more classes.
Consider an airline ticketing system: You have the interface to the reservations agent whom you call on the phone, another interface to the person behind the gate counter, the Internet (in addition to the part that controls aircraft seat inventory plus the part that calculates fares, including taxes); the list goes on and on. A program such as this one grows huge before it's all over.
Putting all those classes into one big Program.cs source file quickly becomes impractical. It's unreasonable, for these reasons:
You have to keep the classes straight. A single source file can become extremely difficult to understand. Getting a grip on modules such as these, for example, is much easier:
Aircraft.csFare.csGateAgent.csGateAgentInterface.csResAgent.csResAgentInterface.cs
They also make the task of finding things easier.
The work of creating large programs is usually spread among numerous programmers. Two programmers can't edit the same file at the same time — each programmer needs her own source file or files. You may have 20 or 30 programmers working on a large project at one time. One file would limit 24 programmers to one hour of editing a day, around the clock. If you break the program into 24 files, you could, with difficulty, have each programmer edit at the same time. If you break up the program so that each class has its own file, orchestrating the same 24 programmers becomes much easier.
Compiling a large file may take a considerable length of time. You can draw out a coffee break for only so long before the boss starts getting suspicious.
You certainly wouldn't want to rebuild all the instructions that make up a big system just because a programmer changed a single line. Visual Studio 2010 can rebuild the single modified file in a multifile program and then stack all the object files together.
For these reasons, the smart C# programmer divides a program into multiple .cs source files, which are compiled and built together into a single executable .exe file.
Note
A project file contains the instructions about which files should be used together and how they're combined.
You can combine project files to generate combinations of programs that depend on the same user-defined classes. For example, you may want to couple a write program with its corresponding read program. That way, if one changes, the other is rebuilt automatically. One project would describe the write program while another describes the read program. A set of project files is known as a solution. (I could have handled the FileRead and FileWrite programs covered in Book III as a single combined solution, but I didn't.)
Tip
Visual C# programmers use the Visual Studio Solution Explorer to combine multiple C# source files into projects within the Visual Studio 2008 environment. I describe Solution Explorer in Book IV.
In Visual Studio, and in C#, Visual Basic .NET, and the other .NET languages, one project equals one compiled module — otherwise known as an assembly in .NET.
Note
The words module and assembly have somewhat different technical meanings, but only to advanced programmers. In this book, you can just equate the two terms.
C# can produce two basic assembly types:
Executable (
.EXE): A program in its own right that contains aMain()method. You can double-click a.EXEfile in Windows Explorer, for example, and cause it to run. This book is full of executables in the form of console applications. Executable assemblies often use supporting code from libraries in other assemblies.Class library (
.DLL): A compiled library of functionality that can be used by other programs. All programs in this book also use libraries. For example, theSystemnamespace (the home of classes such asString, Console, Exception, Math, andObject) exists in a set of library assemblies. Every program needsSystemclasses. Libraries are housed in DLL assemblies.
Note
Libraries aren't executable — you can't make them run directly. Instead, you must call their code from an executable or another library. The Common Language Runtime (CLR), which runs C# programs, loads library assemblies into memory as needed.
The important concept to know is that you can easily write your own class libraries. I show you how in the later section "Putting Your Classes into Class Libraries."
Assemblies, which are the compiled versions of individual projects, contain the project's code in a special format, along with a bunch of metadata, or detailed information about the classes in the assembly.
I introduce assemblies in this section because they round out your understanding of the C# build process — and they come into play in my discussion of namespaces and access keywords such as protected and internal. (I cover namespaces and these two access keywords later in this chapter.) Assemblies also play a big part in understanding class libraries. It's all covered in the later section "Putting Your Classes into Class Libraries."
Note
The C# compiler converts the project's C# code to Common Intermediate Language (usually called IL) that's stored in the appropriate type of assembly file. IL resembles assembly language (one step beyond the 1s and 0s used in machine language) that hardcore programmers have used for decades to get down "close to the metal" because their higher-level languages couldn't do what they needed or the compilers couldn't produce the most efficient code possible.
One major consequence of compiling from .NET to IL, regardless of language, is that a program can use assemblies written in different languages. For example, a C# program can call methods in an assembly originally written in Visual Basic or C++ or the C# program can subclass a VB class.
You can take a look at some IL by running the Ildasm.exe tool in the .NET Software Development Kit (SDK) or the Reflector tool that I point you to at csharp102.info. Select a .EXE or .DLL assembly file to view its code as IL. A Visual Studio solution can contain any number of projects.
You can run executable assemblies in a variety of ways:
Run them in Visual Studio: Choose Debug

Double-click the assembly file (
.EXE) in Windows Explorer.Right-click the file in Windows Explorer and choose Run or Open from the pop-up menu.
Type the assembly's name (and path) into a console window.
If the program takes arguments, such as filenames, from the command line, drag the files to the executable file in Windows Explorer. I show you this process in the article "Passing Arguments to a Program" at
csharp102.info; click the Articles tab and look in the section "C# Techniques."
Note
A solution in Visual Studio can contain multiple projects — some .DLL and some .EXE. If a solution contains more than one .EXE project, you must tell Visual Studio which project is the start-up project: That one runs from the Debug menu. To specify a start-up project, right-click that project in Solution Explorer and choose Set As Startup Project. The start-up project's name appears in boldface in Solution Explorer.
Think of a solution containing two .EXE assemblies as two separate programs that happen to use the same library assemblies. For example, you might have in a solution a console executable and a Windows Forms executable plus some libraries. If you make the console app the start-up project and compile the code, you produce a console app. If you make the Windows Forms app the start-up — well, you get the idea.
A class library contains one or more classes, usually ones that work together in some way. Often, the classes in a library are in their own namespaces. (I explain namespaces later in this chapter.) You may build a library of math routines, a library of string-handling routines, and a library of input/output routines, for example.
Sometimes, you even build a whole solution that is nothing but a class library, rather than a program that can be executed on its own. (Typically, while developing this type of library, you also build an accompanying .EXE project, or driver, with which to test your library during development. But when you release the library for programmers to use, you release just the .DLL [not the .EXE] — and documentation for it that's generated by the XML comments are described in Book IV, which is all about Visual Studio.)
The next section shows you how to write your own class libraries (and drivers).
Note
The simplest definition of a class library project is one whose classes contain no Main() method. Can that definition be correct? It can and is. The existence of Main() distinguishes a class library from an executable. C# libraries are much easier to write and use than similar libraries were in C or C++.
The following sections explain the basic concepts involved in creating your own class libraries. Don't worry: C# does the heavy lifting. Your end of it is quite simple.
Tip
Even the free Visual C# 2010 Express Edition can now create class libraries. It used to require a small hack to make it work.
You can create the files for a new class library project and its driver in either of two ways:
Create the class library project first and then add the driver project to its solution. You might take this approach if you were writing a stand-alone class library assembly. I describe how to create the class library project in the next section.
Create a driver program first and then add one or more library projects to its solution. Thus you might first create the driver program as a console application or a graphical Windows Forms (or Windows Presentation Foundation) application. Then you would add class library projects to that solution.
This approach is the one to take if you want to add a supporting library to an ongoing application. In that case, the "driver" could be either the ongoing program or a special driver project added to the solution just to test the library. For testing, you set the driver project as the start-up project as described in the earlier section "Executables."
If your whole purpose is to develop a stand-alone class library that can be used in various other programs, you can create a solution that contains a class library project from scratch — here's how simple it is:
Create a new project.
When you pick the template to base it on in the New Project dialog box, select Class Library (rather than, say, Console Application).
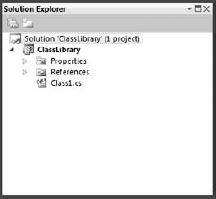
Figure 10-1 shows what Solution Explorer looks like at this point.
After you have a class library project, you can add a driver project (or a unit test project or both) using the approach described in the next section.
If you have an existing solution — whether it's an ongoing application or a class library project such as the one described in the previous section — you can easily add a second project to your solution: either a class library project or an executable project, such as a driver. Follow these steps:
After your existing solution is open in Visual Studio, right-click the solution node (the top node) in Solution Explorer.
From the pop-up menu, choose Add
In the New Project dialog box, select the type of project you want to add.
Select a class library, a console application, a Windows Forms application, or another available type on the right side of the dialog box.
Use the Location box to navigate to the folder where you want the project.
The location you navigate to depends on how you want to organize your solution. You can put the new project's folder in either of two places:
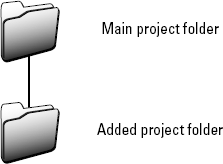
All-in-one-folder: Navigate into the main project folder, making the added project a subfolder. (See Figure 10-2.)
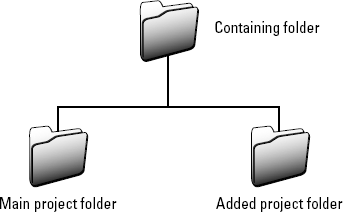
Side-by-side: Navigate to the folder that contains the main project folder so that the two projects are at the same level. (See Figure 10-3.)
Name your project and click OK.
If the new project is a library project, choose its name carefully — it will become the name of the library's
.DLLfile and the name of the namespace containing the project's classes.
Tip
If you need to give the library project the same name as another project or even the main project, you can distinguish it by appending the suffix Lib, as in MyConversionLib.
If the project you're adding is intended to stand on its own and be usable in other programs, use the side-by-side approach.
The ClassLibrary example in this section (like most examples in this book) takes the all-in-one-folder approach. The point is that although the folders don't have to be in the same place, putting them there can be convenient.
The task of selecting the location is independent of adding the new project directly to the ClassLibrary solution. The two project folders can be in the same solution while still being located in different places.
After you have a class library project, create the classes that make up the library. The following ClassLibrary example shows a simple class library — I show you some driver code for it after the example:
Note
// ClassLibrary -- in a Class Library project
// File: Program.cs in ClassLibraryDriver project
// ClassLibrary -- A simple class library and its driver program
using System;
namespace ClassLibrary
{
  public class MyLibrary
  {
    public void LibraryFunction1()
    {
      Console.WriteLine("This is LibraryFunction1()");
    }
    public static int LibraryFunction2(int input)
    {
      Console.WriteLine("This is LibraryFunction2(), returning {0}", input);
      return input;  // Just parrot the input.
    }
  }
}
Libraries can contain any C# type: class, structure, delegate, interface, and enumeration. I cover structures (structs) in Book I, delegates in Chapter 9 of this minibook, interfaces in Chapter 8 of this minibook, and enumerations (enums) in the article "Enumerating the Charms of the Enum" on csharp102.info.
Note
In class library code, you normally shouldn't catch exceptions. Let them bubble up from the library to the client code that's calling into the library. Clients need to know about these exceptions and handle them in their own ways. I cover exceptions in Book II.
By itself, the class library doesn't do anything, so you need a driver program, a small executable program that "drives" the library to test it during development by calling its methods.
In other words, write a program that uses classes and methods from the library. You see this behavior in the NamespaceUse program example later in this chapter (and other programs in this book) — for example, when you call the WriteLine() method of class Console from the .NET Framework class libraries. (Console is in the System namespace, in the library file mscorlib.dll.)
The following chunk of code continues the previous code listing. This one adds a new project with one class that contains a Main() method, and you can write code to exercise your library inside Main():
// ClassLibrary driver program

// In a separate Console Application project:
// File: Program.cs in ClassLibraryDriver project
using System;
using ClassLibrary;
namespace ClassLibraryExample
{
  class Program
  {
    static void Main(string[] args)
    {
      // Create a library object and use its methods.
      MyLibrary ml = new MyLibrary();
      ml.LibraryFunction1();
      // Call its static methods through the class.
      int result = MyLibrary.LibraryFunction2(27);
      Console.WriteLine(result.ToString());
      // Wait for user to acknowledge the results.
      Console.WriteLine("Press Enter to terminate...");
      Console.Read();
    }
  }
}
To run and test the library through the driver, add a reference to the library in the driver project references, mark the driver project as the start-up project (as described earlier, in the "Executables" section), and run the program the same as you run all console applications in this book.
Tip
You can test your library in another, even better way, too — using the unit testing features of Visual Studio. In Book IV, and a little in Book V, I cover testing using the unit testing framework of Visual Studio.
Here's the output from the test driver:
This is LibraryMethod1()
This is LibraryMethod2(), returning 27
27
Press Enter to terminate...
Tip
Libraries often provide only static methods. In that case, you don't need to instantiate the library object. Just call the methods through the class.
From any program you ever write, just include using directives for your class library's namespaces and add a reference to the .DLL file that contains the library (providing a path to wherever it lives). Then use the classes in the library in your program. This strategy is exactly how other programs in this book use classes from the .NET Framework libraries. Note that the compiler copies the libraries into your project's build directories.
Dividing a program into multiple assemblies, as discussed in the previous sections, has a bearing on which code in AssemblyB you can access from AssemblyA.
The access control examples in Chapter 5 of this minibook do a good job (I hope) of illustrating the public and private keywords. But that chapter doesn't say a lot about the other access keywords: protected, internal, and the combination protected internal. I rectify that situation in this section, assuming that you understand inheritance and method overriding as well as public and private.
To ensure that this section makes sense, you might need to read (or reread) Chapter 5.
Suppose that a program has these two projects:
InternalLimitsAccess: An executable whose classCongresscontains theMain()method that kicks off program execution. (No law requires theMain()class to be named Program.)CIAAssembly: The class library project.
You can see this setup in the InternalLimitsAccess example on the Web.
In real life, the U.S. Congress has the annoying habit of expecting the Central Intelligence Agency (CIA) to reveal its secrets — just to members of Congress and senators, of course. ("We won't leak your secrets — honest.") Meanwhile, those overly secretive spooks at the CIA have secrets they would prefer to hang on to. (Maybe they know the secret formula for Coca-Cola or Colonel Sanders's secret herbs and spices or a more sinister entity.) Exactly what Secret X is doesn't matter here, but the CIA wants to keep Secret X, well, secret.
There's a problem, though. Everybody at the CIA needs to know Secret X. In the InternalLimitsAccess example, the CIA is divided into several classes — class GroupA and class GroupB, for example. Think of them as sections of the CIA that (sometimes) communicate and share with each other. Suppose that GroupA is the holder of Secret X, so the group marked it private. The code looks something like this:
// In assembly InternalLimitsAccess:
class Congress
{
  static void Main(...)
  {
    // Code to oversee CIA
  }
}

// In assembly CIAAssembly:
public class GroupA
{
  private string _secretFormulaForCocaCola; // Secret X
}
public class GroupB
{
  public void DoSomethingWithSecretX()
  {
    // Do something with Secret X, if only you could access it.
  }
}
Now GroupB can't see Secret X, but suppose that it has a legitimate need to know it. GroupA can, of course, bump Secret X to public status, but if it does, the secret isn't much of a secret any more. If GroupB can see the secret, so can those snoops over in Congress. Even worse, CNN knows it too, not to mention Fox, ABC, and other networks. And you know how well those folks keep secrets. Oh, right — Russia can see Secret X too.
Note
Luckily, C# also has the internal keyword. Using internal is just one step down from public and well above private. If you mark the GroupA class and its "public" methods — the ones that are visible outside the class — with the internal keyword instead, everybody at the CIA can see and access Secret X — as long as you either mark the secret itself (a data member) as internal or provide an internal property to get it with, as shown in this version:
// In assembly CIAAssembly:internalclass GroupA { private string _secretFormulaForCocaCola; // Secret Xinternal string SecretX { get { return _secretFormulaForCocaCola; } }} public class GroupB { public void DoSomethingWithSecretX() {// Do something with Secret X, now that we can see it:Console.WriteLine("I know Secret X, which is {0} characters long, but " +"I'm not telling.", GroupA.SecretX.Length);} }
Now class GroupB has the access it needs — and it isn't giving up the secret (even under threat of waterboarding). All it tells Congress, over in Main(), is that it knows secret X and secret X has 11 characters. Here's that chunk of code:
class Congress
{
  static void Main(string[] args)
  {
    // Code to oversee CIA
    // The following line doesn't compile because GroupA isn't accessible
    // outside CIAAssembly. Congress can't get at GroupA over at CIA.
     // CIAAssembly.GroupA groupA = new CIAAssembly.GroupA();

    // Class Congress can access GroupB because it's declared public.
    // GroupB is willing to admit to knowing the secret, but it's
    // not telling -- except for a small hint.
    GroupB groupB = new GroupB();
    groupB.DoSomethingWithSecretX();

    // Wait for user to acknowledge results.
    Console.WriteLine("Press Enter to terminate...");
    Console.Read();
  }
}
From Main(), GroupA is now invisible, so an attempt to construct an instance of it doesn't compile. But because GroupB is public, Main() can access it and call its public method DoSomethingWithSecretX().
Wait! CIA does have to talk to Congress about certain topics, I'm happy to report — but on a need-to-know basis, limited to selected members of Congress and senators, of course. They can do so already, via GroupB, as long as they present the proper credentials, although you need to add them to the code:
public string DoSomethingWithSecretXUsingCredentials(string credentials)
{
   if (credentials == "congressman with approved access")
   {
     return GroupA.SecretX;
   }
   return string.Empty;
}
Note
The internal keyword makes classes and their members accessible only inside their own assembly. But within the assembly, the internal items are effectively "public" to all local classes.
Note
You can mark a method inside an internal class as public, though it isn't truly public. A class member can't be more accessible than its class, so the so-called "public" member is just internal.
CIA can still keep its deepest, darkest secrets ultra-hush-hush by declaring them private inside their owning class. That strategy makes them accessible only in that class.
The main purpose of private is to hide information. In particular, private hides a class's internal implementation details. (Classes who know classes too intimately aren't the luckiest classes in the world. In fact, they're the unluckiest.) Classes with a lot of implementation details are said to be "too tightly coupled" with the classes they know too much about. If class A is aware of the internal workings of class B, A can come to rely too much on those details. If they ever change, you end up having to modify both classes.
The less the other classes — and assemblies — know about how class B performs its magic, the better. In Chapter 5 of this minibook, I use the example of a BankAccount class. The bank doesn't want forgetful folks like me — or forgetful classes such as class A — to be able to change a balance directly. That balance is properly part of the BankAccount class's implementation. It's private. BankAccount provides access to the balance — but only through a carefully controlled public interface. In the BankAccount class, the public interface consists of three public methods:
Balance: Provides a read-only way to find out the current balance. You can't useBalanceto modify the underlying balance.Deposit(): Lets someone outside the class add to the balance in a controlled way.Withdraw():Lets someone (presumably the account owner) subtract from the balance, but within carefully controlled limits.Withdraw()enforces the business rule that you can't withdraw more than you have.
Access control considerations other than private and public arise in programming. I explain in the previous section how the internal keyword opens a class — but only to other classes in its own assembly.
However, suppose that the BankAccount class has a subclass, Savings Account. Methods in SavingsAccount need access to that balance defined in the base class, of course, although other classes, even in the same assembly, probably don't. Luckily, SavingsAccount can use the same public interface, the same access, as outsiders: using Balance, Deposit(), and Withdraw().
Sometimes, though, the base class doesn't supply such access methods for its subclasses (and others) to use. What if the _balance data member in BankAccount is private and the class doesn't provide the Balance property?
Note
Enter the protected keyword: If the _balance instance variable in the base class is declared protected rather than private, outsiders can't see it — it's effectively private to them. But subclasses can see it just fine.
Tip
An even better solution is to mark _balance private in BankAccount as before and then provide a Balance property marked protected. Subclasses such as SavingsAccount can access _balance by using the Balance property. But the balance is invisible to outsiders, which protects the BankAccount implementation even from its subclasses.
If the balance does indeed need to be accessible (read-only) to outsiders, you should, of course, provide the public Balance property to get the balance (read-only). However, you may still need to set the balance from inside SavingsAccount itself. To do that, you can give the set accessor of Balance protected access — accessible from SavingsAccount and other subclasses but inaccessible to outsiders. The discussion of properties in Chapter 5 of this minibook shows how to do it, and here's what the code looks like:
// In BankAccount:publicdecimal Balance { get { return _balance; } // Publicprotectedset { _balance = value; } // Not public }
The ProtectedLimitsAccess example on the Web illustrates using the protected keyword as just described.
Tip
You can even subclass BankAccount in a different assembly and the subclass has access to anything declared protected in BankAccount. The ProtectedLimitsAccess example also illustrates this process.
The example has two subclasses of BankAccount: one in the same assembly as BankAccount and one in a different assembly. What's interesting with respect to protected is that either BankAccount subclass can access any item in BankAccount marked protected. The subclass doesn't have to be in the same assembly as its base class.
Note
The ability to extend (subclass) a class from outside the base class's assembly has implications for security, which is why many classes should be marked sealed. Sealing a class prevents outsiders from gaining access by subclassing it. That's why you're advised to make classes extendable (nonsealed) only if they need to be subclassable. One way to give other code in the same assembly access to a base class's members — including a subclass in the same assembly — is to mark those members internal rather than protected. That way, you gain the desired level of access from a local subclass while preventing access from an external subclass. Of course, access is then allowed from other classes in the assembly. This solution may not be ideal, but it should be more secure — if that's a consideration.
Making items in the BankAccount base class protected internal, rather than just protected, simply adds a new dimension to the accessibility of those items in your program. Using protected alone allows a subclass (in any assembly in the program) to access protected items in the base class. Adding internal extends the items' accessibility to any class, as long as it's in the same assembly as BankAccount or at least a subclass in some other assembly.
In the ProtectedInternalLimitsAccess example on csharp102.info, you can see this effect. The class AnotherClass that's defined within BankAccount's own assembly can access the protected internal set accessor in the Balance property. However, the nearly identical AnotherClass in a different assembly cannot access Balance's set accessor to set the balance.
Note
Make items as inaccessible as possible. Start with private. If some parts of your code need more access than that, increase it selectively. Maybe just protected will work (that's all a subclass needs). Maybe other classes in the same assembly truly do need access. If so, increase it to internal. If subclasses and other classes in the same assembly need access, use protected internal. Use public only for classes (and their members) that should be accessible to every class in the program, regardless of assembly.
Tip
The same advice that applies to whole classes also applies to class members: Keep them as inaccessible as possible. Little helper classes, or classes that support the implementation of more public classes, can be limited to no more than internal.
If a class or other type needs to be private, protected, or protected internal, nest it, if you can, inside the class that needs access to it.
Namespaces exist to put related classes in one bag and to reduce collisions between names used in different places. For example, you may compile all math-related classes into a MathRoutines namespace.
// In file A.cs:
namespace One
{
}
namespace Two
{
}
More commonly, you group multiple files. For example, the file Point.cs may contain the class Point, and the file ThreeDSpace.cs contains class ThreeDSpace to describe the properties of a Euclidean space (like a cube). You can combine Point.cs and ThreeDSpace.cs and other C# source files into the MathRoutines namespace (and, possibly, a MathRoutines library assembly). Each file would wrap its code in the same namespace. (It's the classes in those files, rather than the files themselves, that make up the namespace. Which files the classes are in is irrelevant for namespaces. Nor does it matter which assembly they're in: A namespace can span multiple assemblies.)
// In file Point.cs: namespaceMathRoutines{ class Point { } } // In file ThreeDSpace.cs: namespaceMathRoutines{ class ThreeDSpace { } }
Note
If you don't wrap your classes in a namespace, C# puts them in the global namespace, the base (unnamed) namespace for all other namespaces. A better practice, though, is to use a specific namespace.
The namespace serves these purposes:
A namespace puts oranges with oranges, not with apples. As an application programmer, you can reasonably assume that the classes that comprise the
MathRoutinesnamespace are all math related. By the same token, when looking for just the perfect math method, you first would look in the classes that make up theMathRoutinesnamespace.Namespaces avoid the possibility of name conflicts. For example, a file input/output library may contain a class
Convertthat converts the representation in one file type to that of another. At the same time, a translation library may contain a class of the same name. Assigning the namespacesFileIOandTranslationLibraryto the two sets of classes avoids the problem: The classFileIO.Convertclearly differs from the classTranslationLibrary.Convert.
You declare a namespace using the keyword namespace followed by a name and an open and closed curly-braces block. The classes (and other types) within that block are part of the namespace:
namespace MyStuff
{
  class MyClass {}
  class UrClass {}
}
In this example, both MyClass and UrClass are part of the MyStuff namespace.
Note
Namespaces are implicitly public, and you can't use access specifiers on namespaces, not even public.
Besides classes, namespaces can contain other types, including these:
delegateenuminterfacestruct
A namespace can also contain nested namespaces, to any depth of nesting. You may have Namespace2 nested inside Namespace1, as in this example:
namespaceNamespace1{ // Classes in Namespace1 here ... // Then the nested namespace: namespaceNamespace2{ // Classes in Namespace2 public class Class2 { public void AMethod() { } } } }
To call a method in Class2, inside Namespace2, from somewhere outside Namespace1, you specify this line:
Namespace1.Namespace2.Class2.AMethod();
Imagine these namespaces strung together with dots as a sort of logical path to the desired item.
Note
"Dotted names" such as System.IO look like nested namespaces, but they name only one namespace. So System.Data is a complete namespace name, not the name of a Data namespace nested inside System. This convention makes it easier to have several related namespaces, such as System.IO, System.Data, and System.Text and make the family resemblance obvious. In practice, nested namespaces and namespaces with dotted names are indistinguishable.
Note
Prefixing all namespaces in a program with your company name is conventional — making the company name the front part of multiple segments separated by dots: MyCompany.MathRoutines. (That statement is true if you have a company name; you can also use just your own name. I could use either CMSCo.MathRoutines or Sphar.MathRoutines.) Adding a company name prevents name clashes if your code uses two third-party code libraries that happen to use the same basic namespace name, such as MathRoutines.
Tip
The Visual Studio New Project dialog box runs an Application Wizard that puts all code it generates in namespaces. The wizard names these namespaces after the project directory it creates. Look at any of the programs in this book, each of which was created by the Application Wizard. For example, the AlignOutput program is created in the AlignOutput folder. The name of the source file is Program.cs, which matches the name of the default class. The name of the namespace containing Program.cs is the same as that of the folder: AlignOutput.
(You can change any of those names, though. Just do it carefully and thoroughly. You can change the overall namespace name for a project in the project's Properties window. Rather than try to rename everything, I sometimes create a new program using the correct names and then import the class files from the original program — after which I scrap the original.)
Note
In addition to helping package your code into a more usable form, namespaces extend the notion of access control presented in Chapter 5 of this minibook (which introduces the public, private, protected, internal, and protected internal keywords). Namespaces extend access control by further limiting which members of a class you can access from where.
However, namespaces affect visibility more than accessibility. By default, classes and methods in NamespaceA are invisible to classes in NamespaceB, regardless of their access-control specifiers. But you can make one namespace's classes and methods visible to another namespace in a couple of ways. The bottom line is that you can access only what's visible to you and "public enough."
I define "public enough" as having a strong enough access specifier from the viewpoint of Class1, the caller. This issue involves access control, extended earlier in this chapter and covered in the discussion of access specifiers in Chapter 5 of this minibook.
To determine whether Class1 in NamespaceA can call NamespaceB.Class2.AMethod(), consider these two questions:
Is
Class2over inNamespaceBvisible to the calling class,Class1?This issue involves namespace visibility, discussed at the end of this list.
If the answer to the first question is True, are
Class2and its AMethod() also "public enough" forClass1to access?If
Class2is in a different assembly fromClass1, it must bepublicforClass1to access its members.Class2, it's in the same assembly, needs to be declared at leastinternal. Classes can only bepublic, protected, internal, orprivate.Likewise, the
Class2method must have at least a certain level of access in each of those situations. Methods add theprotected internaloption to the list of access specifiers that classes have. Chapter 5 in this minibook and the earlier section "Going Beyond Public and Private: More Access Keywords" supply the gory details.
You need to answer Yes to both questions before Class1 can call the Class2 method.
C# provides two ways to make items in NamespaceB visible in NamespaceA:
Fully qualify names from
NamespaceBwherever you use them inNamespaceA. This method results in code such as the following line, which starts with the namespace name and then adds the class and lists the method:System.Console.WriteLine("my string");Eliminate the need for fully qualified names in
NamespaceAby giving the namespace files a using directive forNamespaceB:using System;
using NamespaceB;
Programs throughout this book make items in NamespaceB visible in NamespaceA with the using directive. I discuss full qualification and using directives in the next two sections.
Note
If the items in NamespaceB are in other assemblies, choose Project
The namespace of a class is a part of the extended class name, which leads to the first way to make classes in one namespace visible in another. This example doesn't have any using directives to simplify referring to classes in other namespaces:
namespace MathRoutines // Broken into two segments -- see below.{ class Sort { public void SomeMethod(){} } }namespace Paint{ public class PaintColor { public PaintColor(int nRed, int nGreen, int nBlue) {} public void Paint() {} public static void StaticPaint() {} } }namespace MathRoutines // Another piece of this namespace{ public class Test { static public void Main(string[] args) { // Create an object of type Sort from the same namespace // we're in and invoke a method. Sort obj = new Sort(); obj.SomeMethod();// Create an object in another namespace -- notice that the// namespace name must be included explicitly in every// class reference.Paint.PaintColor black = newPaint.PaintColor(0, 0, 0); black.Paint();Paint.PaintColor.StaticPaint(); } } }
In this case, the two classes Sort and Test are contained within the same namespace, MathRoutines, even though they appear in different declarations within the file (or in different files). That namespace is broken into two parts.
Note
Normally, Sort and Test would be in different C# source files that you build together into one program.
The method Test.Main() can reference the Sort class without specifying the namespace because the two classes are in the same namespace. However, Main() must specify the Paint namespace when referring to PaintColor, as in the call to Paint.PaintColor.StaticPaint(). This process is known as fully qualifying the name.
Notice that you don't need to take any special steps when referring to black.Paint(), because the class of the black object is specified, namespace and all, in the black declaration.