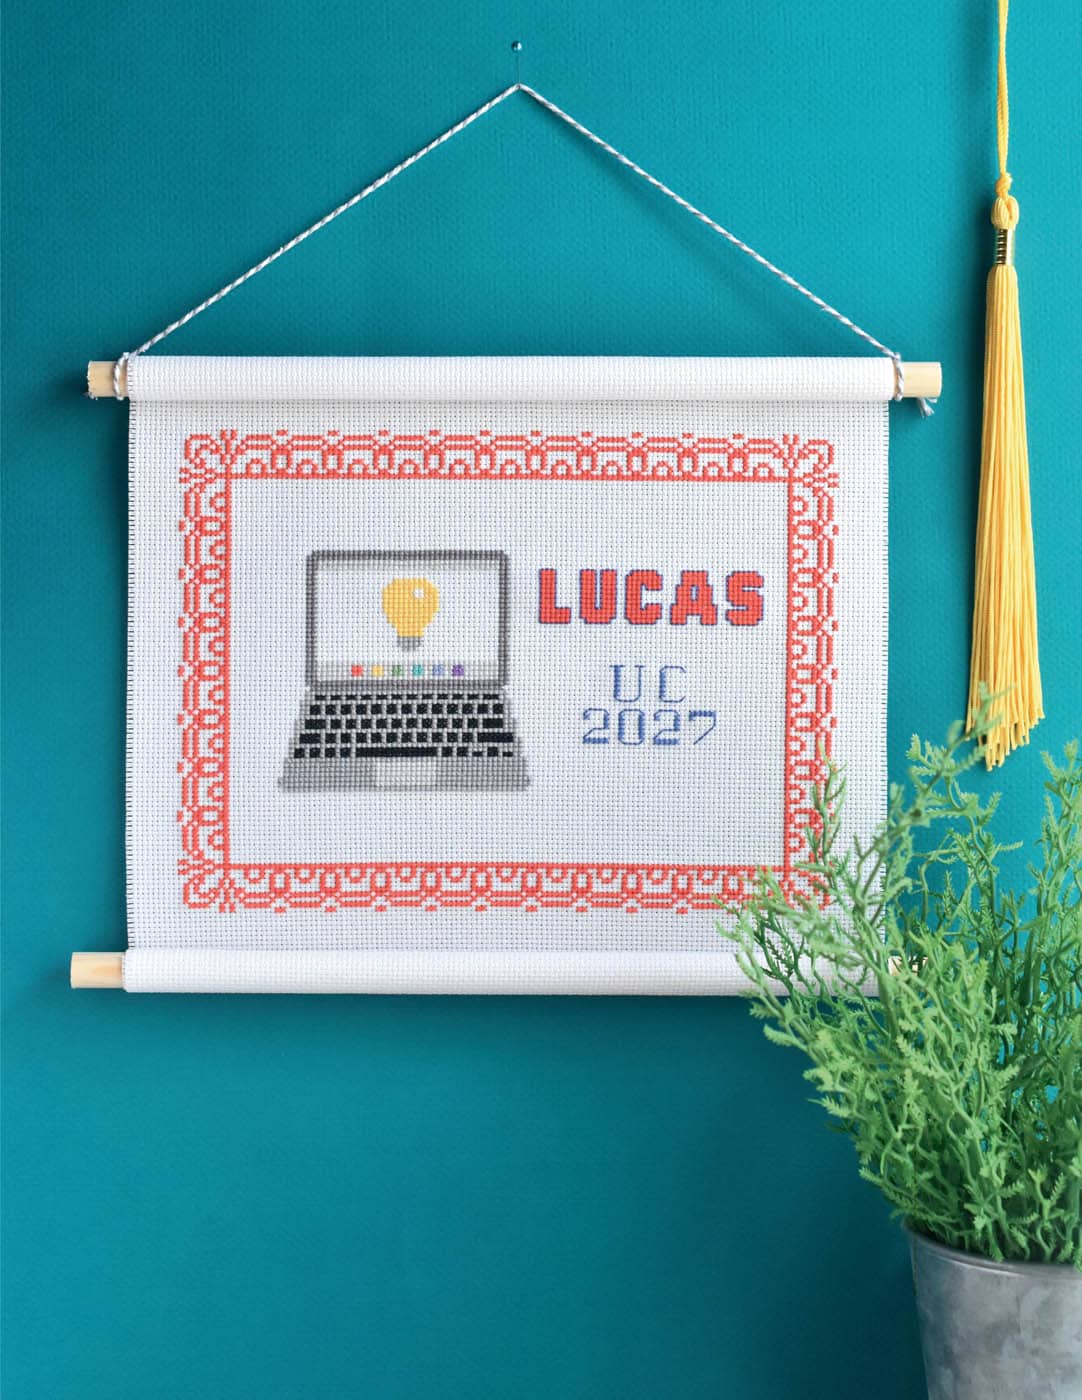
SCROLL WALL HANGING
Create a specially stitched graduation certificate with classic scroll styling to display on a wall. The top and bottom are rolled like a diploma, giving it a structure that hangs perfectly. It’s a great way to show off a fully customized design, complete with border, graduation pattern, name, and date.

|
|
|
|
|
|
|
|
|
|
|
|
|
|
 351 (DMC)
 02 (DMC)
 743 (DMC)
 03 (DMC)
 989 (DMC)
 04 (DMC)
 958 (DMC)
 310 (DMC)
 156 (DMC)
 B5200 (DMC)
 3807 (DMC)
 208 (DMC)
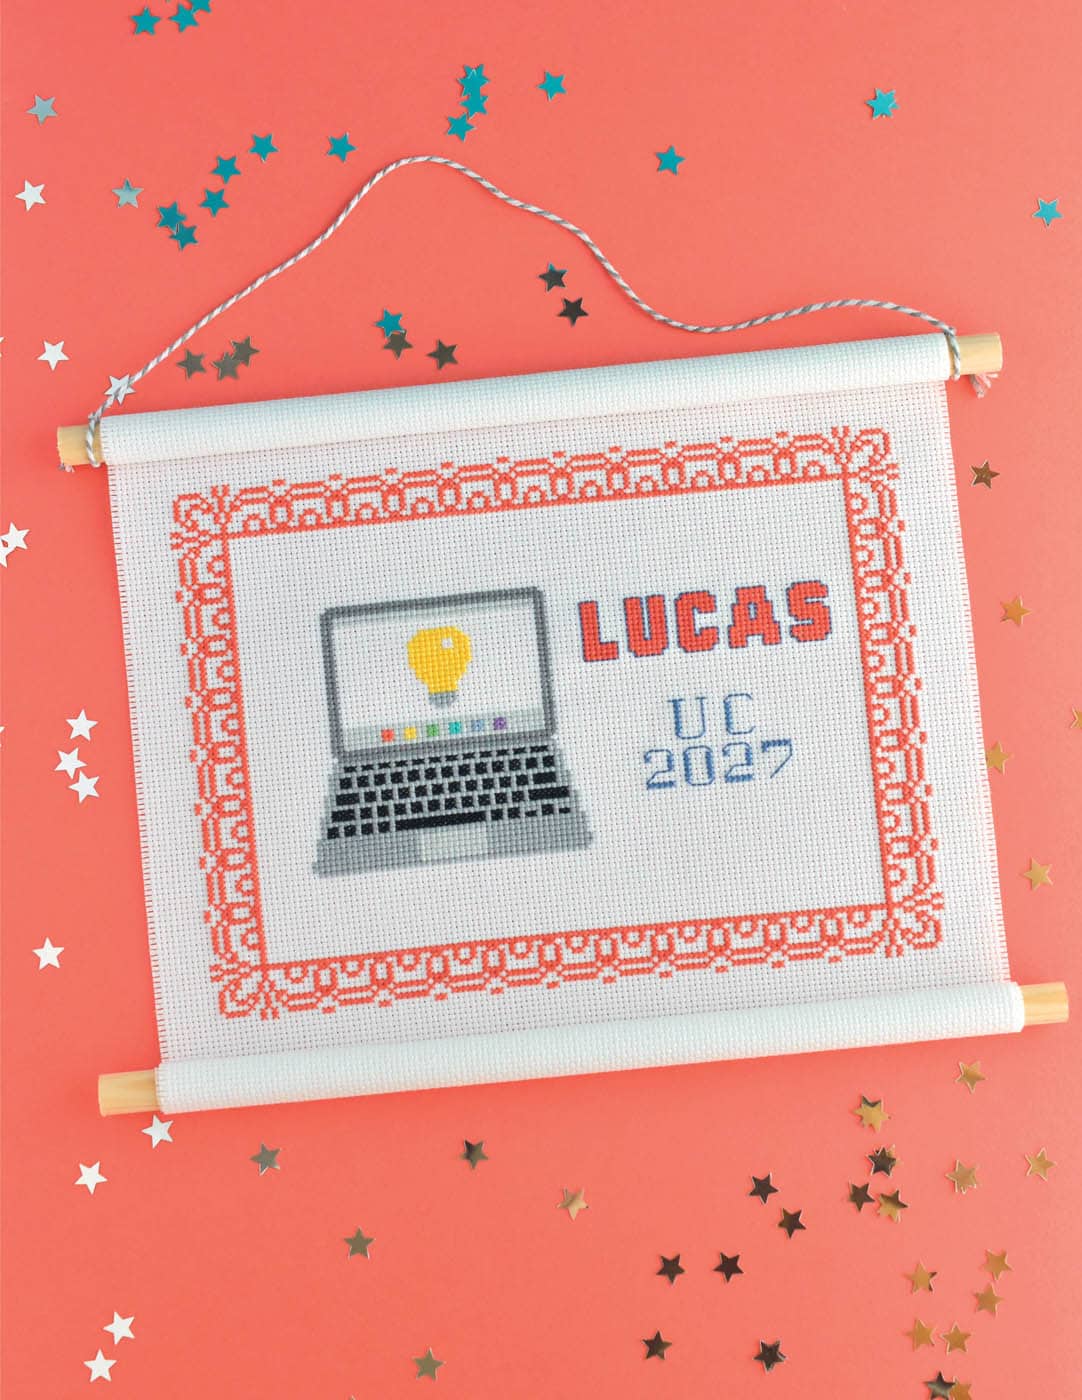
About the Sample Design
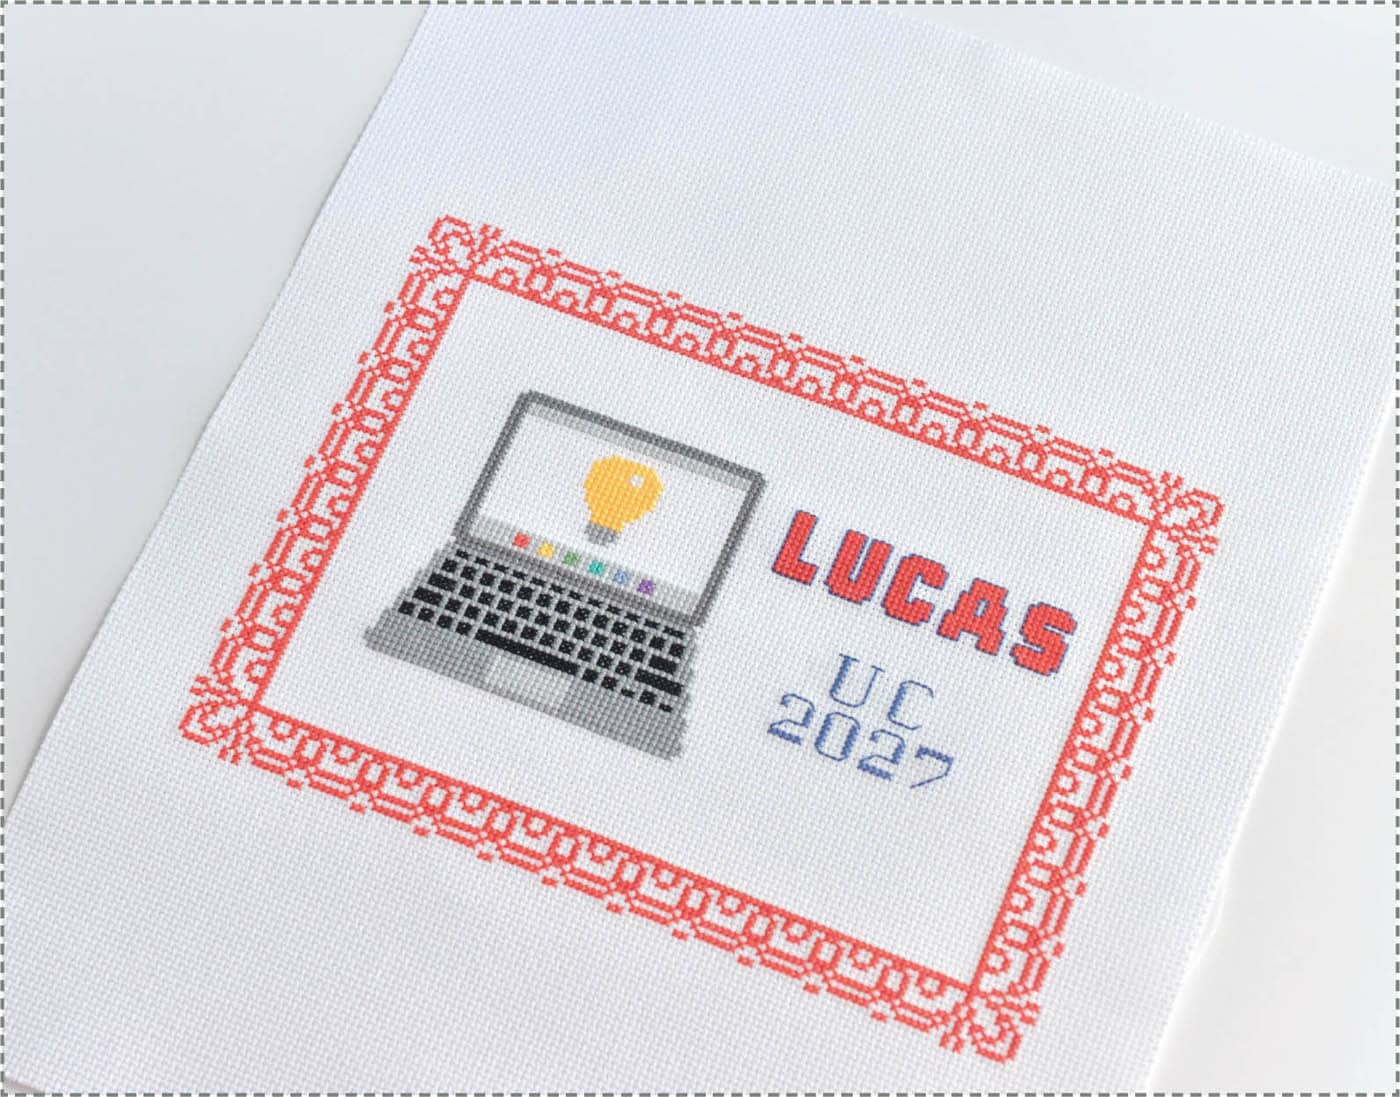
This project uses the Fancy Scroll Border (here) stitched using the same color as the original, but with the chart turned sideways. The laptop has a lightbulb on the screen (with the face left off), which is perfect for someone doing online learning or any kind of digital design.
The name is stitched with the Varsity Alphabet (here), and to give it an extra touch, there is backstitch in a contrasting color around each letter. School initials and the graduation year are centered below the name, all stitched with the Serif Alphabet (here). The sample still allows plenty of room for other information too, but this keeps it simple. The whole design fits within an 8" x 10" display area.

STEP 1
Create the design for the cross-stitched certificate. Be sure to leave at least 1" of Aida cloth on the left and right and 4" at the top and bottom of the design. After you stitch the piece, wash and iron your cross stitch.
STEP 2
Trim the fabric down so there are 10 rows of Aida on the two sides and about 4" at the top and bottom.
STEP 3
Pull and remove the threads of one row on the left and right. This will finish the edge of the Aida enough so you don’t need to hem the fabric. You don’t need to do this for the top and bottom.
STEP 4
Cut the dowel into two pieces that are about 1.5 inches longer than the width of your project. For this, each wooden dowel is 12 inches long. Run a line of glue along the bottom edge of the fabric and center the dowel rod on the glue.
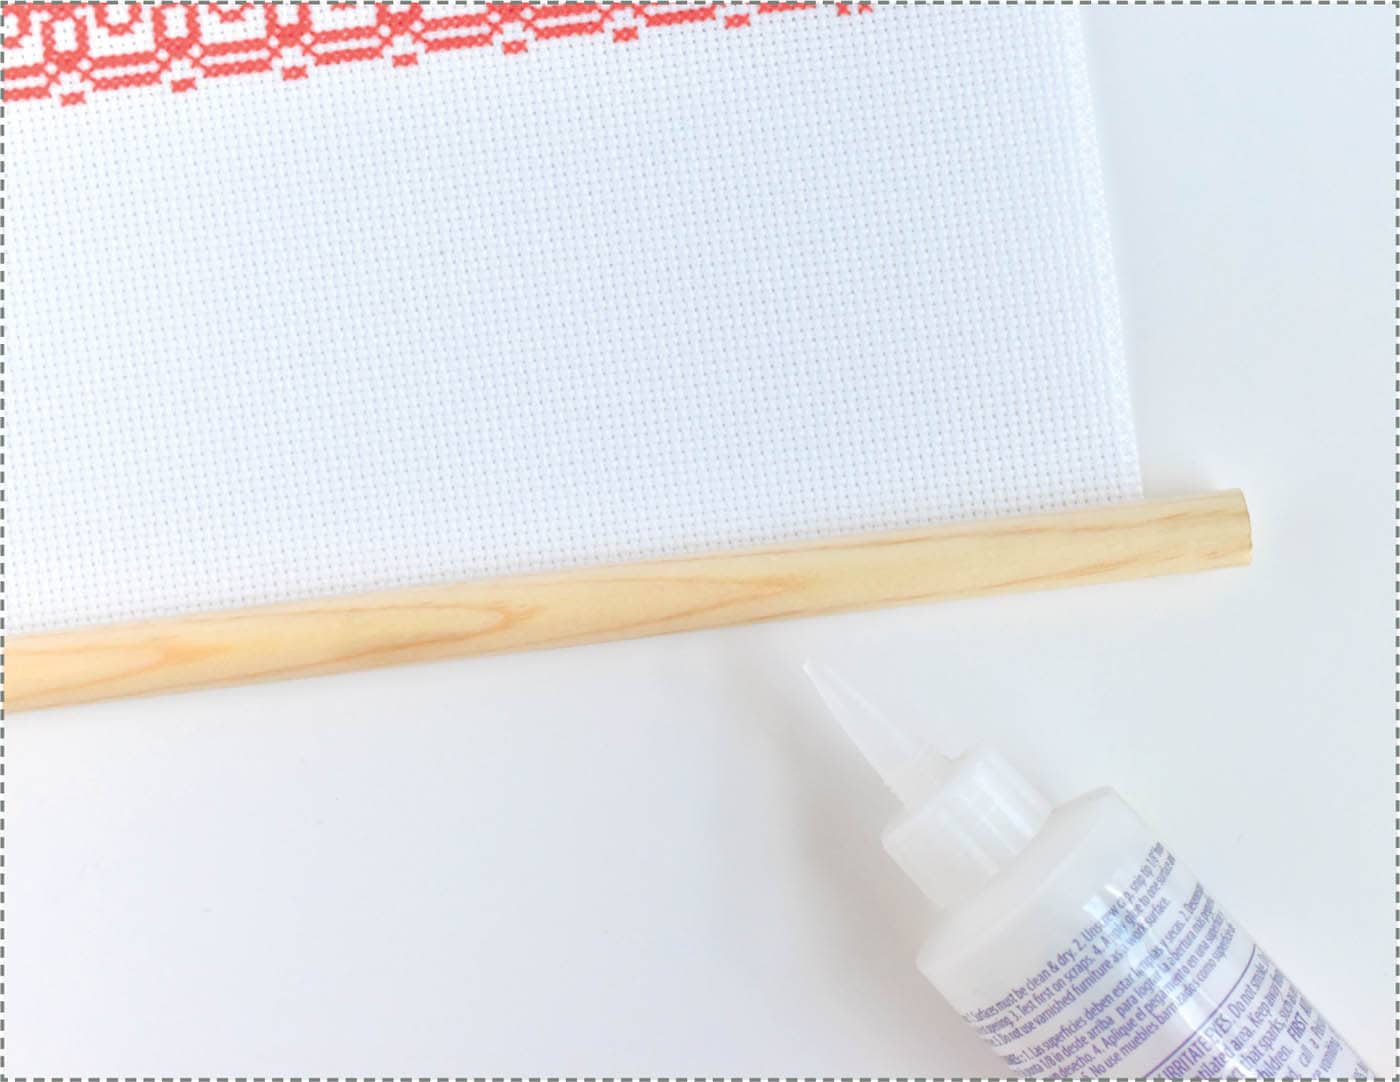
STEP 5
Run another line of glue across the fabric about 10 rows down from the stitching.
STEP 6
Roll the fabric around the dowel rod until it reaches this line of glue.

STEP 7
Repeat steps 4 to 6 at the top of the project. Let the glue dry.

STEP 8
Cut a piece of string that’s about 20 inches long. Tie it to each end of the upper dowel rod. You may need to shorten the string if you’re making a vertical hanging scroll.