
Programming in JavaScript
In this chapter, we'll build our JavaScript foundation by getting the syntax of the language down. For example, you can make decisions based on your data values with the JavaScript if statement. In this code, I'm comparing the value 143 to 719, and if 719 is greater than 143, displaying the message The first value is greater than the second.
<HTML>
    <HEAD>
        <TITLE>
            Using the JavaScript if Statement
        </TITLE>

    </HEAD>

    <BODY>

        <SCRIPT LANGUAGE="JavaScript">
            if(719 > 143){
                document.writeln(
                    "The first value is greater than the second."
                )
            }
        </SCRIPT>

        <CENTER>
            <H1>
                Using the JavaScript if Statement
            </H1>
        </CENTER>

    </BODY>

</HTML>
You can see this Web page at work in Figure 6.3—as indicated in that page, 719 is indeed greater than 143.

We're going to see statements such as the if statement in the remainder of this chapter—and put them to work in the next two chapters.
Working with Data in JavaScript
Using data is basic to nearly any JavaScript program, and JavaScript supports quite a number of different data types: numbers, Boolean values, text strings, and so on. You store data values in variables in JavaScript.
As with other programming languages, variables are simply named locations in memory that you use to store data. You create variables in JavaScript with the var statement; when a variable has been created, it's ready for you to store and retrieve data in.
Here's an example; I'm creating a new variable named temperature and storing a value of 72 in it using the assignment operator (=). When I use this variable in code, JavaScript will replace it with the value 72, so I can display the temperature like this:
<HTML>

    <HEAD>
        <TITLE>
            Using Variables in JavaScript
        </TITLE>

    </HEAD>

    <BODY>

        <SCRIPT LANGUAGE="JavaScript">
            var temperature
            temperature = 72
            document.writeln("The temperature is "
            +  temperature
            + " degrees.")
        </SCRIPT>

        <CENTER>
            <H1>
                Using Variables in JavaScript
            </H1>
        </CENTER>

    </BODY>

</HTML>
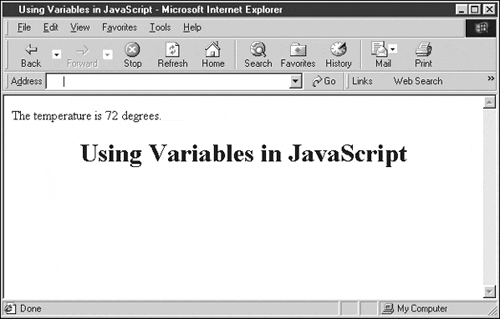
Note the text I'm passing to the document.writeln method this time: "The temperature is " + temperature +" degrees.". In this case, I'm using the JavaScript addition operator, +, to join these three expressions into one string. The temperature variable is replaced with the value this variable contains, which is 72, as shown in Figure 6.4.
You can also create a variable and assign a value to it at the same time with the var statement. Here's what that looks like:
var temperature = 72
document.writeln("The temperature is "
+  temperature
+ " degrees.")
Besides storing numbers in JavaScript variables, you can also store text strings. In this next example, I store the entire text The temperature is 72 degrees. in the variable named weatherReport and then display the text like this:
<HTML>
    <HEAD>
        <TITLE>
            Using Variables in JavaScript
        </TITLE>
    </HEAD>

    <BODY>

        <SCRIPT LANGUAGE="JavaScript">
        <!--
            var weatherReport
            weatherReport = "The temperature is 72 degrees."
            document.writeln(weatherReport)
        //-->
        </SCRIPT>

        <CENTER>
            <H1>
                Using Variables in JavaScript
            </H1>
        </CENTER>

    </BODY>

</HTML>
This code produces the same display as in Figure 6.4.
Note the name weatherReport here. The convention in JavaScript is to use lowercase names for variables. If you create a name by joining several words, you must capitalize the first letter of the second word, the third word, and so on. Names for JavaScript variables obey the same rules as the names for XML elements. Here are a few examples:
counter
numberOfLinks
countLeftUntilFinished
oneOfThoseVeryVeryVeryLongVariableNames
Commenting Your JavaScript
As with HTML and XML, you can add comments to JavaScript code; in JavaScript, you use a double forward slash (//) to start a comment. The JavaScript interpreter in the browser stops reading anything on a line past //, so you can comment your code like this:
<HTML>
    <HEAD>
        <TITLE>
            Using Variables in JavaScript
        </TITLE>
    </HEAD>

    <BODY>

        <SCRIPT LANGUAGE="JavaScript">
        <!--
            //Create the weatherReport variable
            var weatherReport
            //Assign a value to weatherReport
            weatherReport = "The temperature is 72 degrees."
            //Display the value in weatherReport
            document.writeln(weatherReport)
        //-->
        </SCRIPT>

        <CENTER>
            <H1>
                Using Variables in JavaScript
            </H1>
        </CENTER>

    </BODY>

</HTML>
Working with JavaScript Operators
What if you want to manipulate your data in JavaScript code? Say, for example, that you need to multiply 219 by 45—how would you do it? In JavaScript, you can use the multiplication operator (*). Here's an example showing how this works:
<HTML>

    <HEAD>
        <TITLE>
            Using Operators In JavaScript
        </TITLE>
    </HEAD>

    <BODY>

        <SCRIPT LANGUAGE="JavaScript">
            var result
            result = 219 * 45
            document.writeln("219 * 45 = " +  result)
        </SCRIPT>

        <CENTER>
            <H1>
                Using Operators In JavaScript
            </H1>
        </CENTER>

    </BODY>

</HTML>
Figure 6.5 shows the results of this code.

As you might expect, many operators are available in JavaScript. For example, you can use the increment operator, ++, to add 1 to a numeric value; for example, if counter holds 400, then after you apply the ++ operator—as in ++counter—counter will hold 401.
Prefix Versus Postfix OperatorsAs C, C++, Perl, Java, and JavaScript programmers will know, you can apply the ++ increment and -- decrement operators as prefix or postfix operators: ++counter or counter++. Prefix operators are applied before the rest of the statement or expression is evaluated, and postfix operators are applied after the rest of the statement is evaluated. |
Table 6.2 lists the JavaScript operators. (As with the rest of the material in this chapter, check the JavaScript documentation for more details.)
Besides the operators in this list, you can put together a number of combination operators from two operators. For example, counterValue += 101 adds 101 to the value in counterValue. The combination operators in JavaScript are +=, -=, *=, /=, %=, &=, |=, ^=, <<=, >>=, and >>>=.
It's also worth noting that a number of these operators have to do with comparisons, and you use them to make decisions in code. We've already seen the greater than comparison operator, >, like this:
if(719 > 143){
    document.writeln(
        "The first value is greater than the second."
    )
}
What's really going on here? In this case, I'm using the if statement to compare two numbers. The if statement is fundamental to JavaScript, and it's the next step up from using simple operators.
Creating JavaScript if Statements
You use the if statement in JavaScript to test your data and to execute some code if the test is true. Here's the basic form of the if statement:
if (condition) {
    code
}
Here, condition is the test that you want to make, and code is the code that you want to execute if the condition is true. One thing to note here is that you must enclose the code to execute in curly braces, { and }.
So what kind of conditions can you check, and how do you do so? To construct a condition to test, you use the comparison operators, such as < (less than), > (greater than), == (equal to), <= (less than or equal to), or >= (greater than or equal to).
Here's an example; in this case, I'm making sure that the value in a variable named temperature is greater than 32:
<HTML>
    <HEAD>
        <TITLE>
            Using the JavaScript if Statement
        </TITLE>
    </HEAD>

    <BODY>

        <SCRIPT LANGUAGE="JavaScript">
            var temperature
            temperature = 45
            if (temperature > 32) {
                document.writeln("We're above freezing.")
            }
        </SCRIPT>

        <CENTER>
            <H1>
                Using the JavaScript if Statement
            </H1>
        </CENTER>

    </BODY>

</HTML>
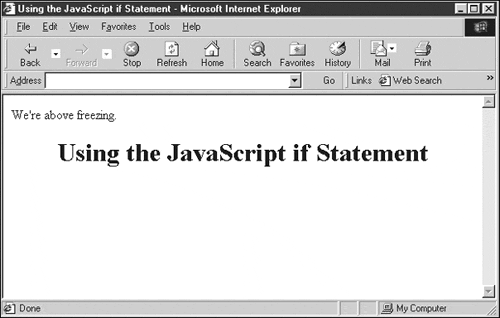
You can see the results of this code in Figure 6.6.
Here are some other if statement examples:
if (year == 2001) {
    document.writeln("The year is 2001.")
}

if (color == "red") {
    document.writeln("Stop the car.")
}

if (price < 2000.00) {
    document.writeln("Be careful, the price has fallen too low!")
}
Besides using the comparison operators, you can also use the and operator, &&, and the or operator, ||, to combine conditions. Here's how you can use the && operator:
if (temperature < 75 && temperature > 65) {
    document.writeln("We're in the comfort zone.")
}
Here, the value in the temperature variable must be less than 75 and greater than 65 for the code to be executed. If the temperature is indeed in that range, the message We're in the comfort zone. is displayed.
In this example, both conditions must be true for the overall condition to be considered true. However, you can use the || operator as well to connect conditions. Here's an example:
if (temperature < 65 || temperature > 75) {
    document.writeln("Outside the comfort zone!")
}
In this case, if the value in temperature is less than 65 or greater than 75, the overall condition is considered true and the code is executed, which means that the message Outside the comfort zone! is displayed in the Web page.
Creating JavaScript if…else Statements
In fact, the more general form of the if statement also has an else clause, which can also hold code. The else clause is optional, but if you include it, the code in that clause is executed if the condition in the associated if statement is false. Here's how the if…else statement looks in general:
if (condition) {
    code executed if condition is true
}
else {
    code executed if condition is false
}
Here's an example showing how this works; in this case, I'm elaborating on our previous example that made sure the temperature is above freezing. I've added an else clause that is executed if the temperature is less than 32°, and the code in that clause displays the message Time to drain the pool.
<HTML>
    <HEAD>
        <TITLE>
            Using the JavaScript else Clause
        </TITLE>
    </HEAD>

    <BODY>

        <SCRIPT LANGUAGE="JavaScript">
            var temperature
            temperature = 5
            if (temperature > 32) {
                document.writeln("We're above freezing.")
            }
            else {
                document.writeln("Time to drain the pool.")
            }
        </SCRIPT>

        <CENTER>
            <H1>
                Using the JavaScript else Clause
            </H1>
        </CENTER>

    </BODY>

</HTML>
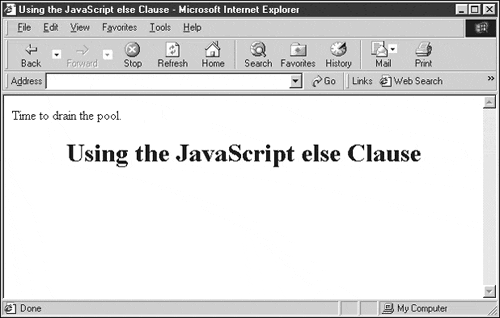
You can see the results of this code in Figure 6.7.
Creating switch Statements
The JavaScript switch statement is the next step up in decision-making after the if statement. You use the switch statement if you have a large number of cases that you want to test and don't want to construct a long ladder of if…else statements.
Here's how it works—you compare a test expression against a number of values. If one of those values matches, the code associated with the value is executed until the JavaScript interpreter finds a break statement. Here's what the switch statement looks like in outline:
switch(test){
    case value1:
          .
          .
          .
        code executed if test matches value1
          .
          .
          .
        break;
    case value2:
          .
          .
          .
        code executed if test matches value2
          .
          .
          .
        break;
    case value3:
          .
          .
          .
        code executed if test matches value3
          .
          .
          .
        break;
    default:
          .
          .
          .
        code executed if test doesn't matches any case
          .
          .
          .
        break;
}
Here, you list the possible values to match against with the case statement. When a value given in a case statement matches, the corresponding code (that is, the code that follows the case statement up to a break statement) is executed.
You might also note that I've added a default statement to the end of the list of case statements. If no case statement's values have matched the text expression, the code in the default statement is executed in case you want to make sure that some code is executed. The default statement is optional.
Here's an example putting the switch statement to work. In this case, I'm checking user input, which I've stored in a variable named userInput, against various test strings. Then I'm displaying messages to match the various possibilities:
switch(userInput){
    case "EDIT":
        document.writeln("Now entering EDIT mode.")
        break;
    case "HELP":
        //This response should look familiar to users…
        document.writeln("Sorry, no help is available.")
        break;
    case "QUIT":
        document.writeln("Are you sure you want to quit?")
        break;
    default:
        document.writeln("I do not understand that response.")
        break;
}
Creating JavaScript for Loop Statements
Using loops, you can execute code as many times as you want—which is one of the things computers excel at. The most basic loop is the for loop statement, and here's what this statement looks like in general:
for (initialization; test; increment) {
    code
}
Here's what's happening: You place an expression in the initialization part of the for loop (which often initializes a variable, called a loop index, to 0), and then you place a test condition in the test part of the loop to be tested each time the code in the loop has been executed. If the test is false, the loop ends (often the test condition checks whether the value in the loop index exceeds a specified maximum value). On the other hand, if the test condition is true, the body of the loop is executed and the code in the increment part of the loop is executed to get the loop ready for the next iteration (often by incrementing the loop index).
Here's an example to make this clear. In this case, I'll set up a loop to execute 10 times, and each time it will print out the value in a loop index. This example works by setting a loop index variable named loopIndex to 0 to start, and then increments it each time when the loop code has executed (using the increment operator, ++) and checks to make sure that the loop index does not exceed 10. When the loop index does exceed 10, the loop terminates. Here's the code (the HTML <BR> element, short for break, makes the Web browser skip to the next line):
<HTML>
     <HEAD>
        <TITLE>
            Using the for Statement
        </TITLE>
    </HEAD>

    <BODY>

        <SCRIPT LANGUAGE = JavaScript>
            for(var loopIndex = 1; loopIndex <= 10; loopIndex++){
                document.writeln("The loop index value is " +
                loopIndex + "<BR>")
            }
        </SCRIPT>

        <CENTER>
            <H1>
                Using the for Statement
            </H1>
        </CENTER>

    </BODY>

</HTML>
Here's another thing to note in this example: Because loopIndex is a variable that we're using in our code, we must declare it. JavaScript gives you the shortcut of declaring a variable like this right in the for loop itself, and you can see the var statement inside the initialization part of the for loop. This is a common practice, and I'm including it here because you'll see it often.
When you open this page in a browser, you'll see a message displaying the value of the loop index from 1 to 10, as shown in Figure 6.8.

Creating while Loop Statements
There are other loops besides the for loop in JavaScript, such as the while loop. The while loop tests a condition each time the loop is executed. If the condition is true, it executes the code in the loop. Here's what this loop looks like in outline:
while (condition){
    code
}
For example, here's how you write the example we used for for loops as a while loop:
<HTML>
     <HEAD>
        <TITLE>
            Using the while Statement
        </TITLE>
    </HEAD>

    <BODY>

        <SCRIPT LANGUAGE = JavaScript>
            var loopIndex = 0

            while(loopIndex < 10){
                loopIndex++
                document.writeln("The loop index value is " +
                loopIndex + "<BR>")
            }
        </SCRIPT>

        <CENTER>
            <H1>
                Using the while Statement
            </H1>
        </CENTER>

    </BODY>

</HTML>
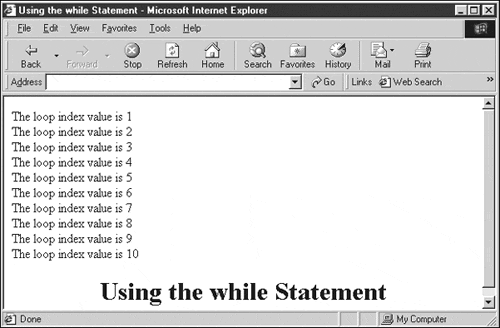
You can see the results of this code in Figure 6.9.
Creating do…while Loops
There's another form of the while loop available: the do…while loop. This loop is much like the while loop, except that it checks the loop condition at the end, after the code in the loop has been executed, not at the beginning. Here's what this loop looks like in outline:
do {
    code
} while (condition)
Actually, there's a big difference between the while and do…while loops in programmatic terms—the code in a do…while loop is always executed at least once, although that's not true of a while loop. Take a look at this example:
var number = 25
do {
    document.writeln("The reciprocal of "
    + number + " is "
    + 1/number + "<BR>")
    --number
} while (number > 0)
Here I'm displaying a sequence of reciprocal values, from 1/25 up to 1/1, using a do…while loop. However, this would be a problem if number were initialized to 0, because the first reciprocal the code would attempt to calculate is 1/0:
var number = 0
do {
    document.writeln("The reciprocal of "
    + number + " is "
    + 1/number + "<BR>")
    --number
} while (number > 0)
A better choice is to use the while loop here, which checks the value in number first and won't attempt to calculate a reciprocal if that value equals 0:
var number = 25
while (number > 0) {
    document.writeln("The reciprocal of "
    + number + " is "
    + 1/number + "<BR>")
    --number
}
Both forms of the while loop have their places, however—for example, if you need to execute the body of the loop before testing to see whether the loop should continue, use the do…while loop.
Creating Functions in JavaScript
Functions are a crucial part of JavaScript programming. With a function, you can wrap some code into a programming construct, a function, and you call that function to execute that code.
You create functions with the function statement. Here's how that statement looks in outline:
function functionname([argument1 [, argument2 [, …argumentn]]])
{
    code
}
In this case, I'm passing the values argument1, argument2, and so on to this function. The code in the function has access to these values. A function can also return a value; to do that, you use the return statement.
Here's an example; in this case, I'm creating a function named getTime, which will return the current time. Notice the syntax of the function statement here—I'm adding an empty set of parentheses after the name of the function. Those parentheses are always necessary, and when we pass values to a function, they'll be listed in the parentheses. The getTime function doesn't accept any passed values, so the parentheses are empty:
function getTime()
{
    var now = new Date
    var returnValue = now.getHours() + ":"
    + now.getMinutes()
    return(returnValue)
}
In this case, we're using the JavaScript Date class and creating a new object of that class named now using the new operator. I can use the getHours and getMinutes methods of this new object (these methods are built into the Date class) to get the current time.
In fact, methods are just functions built into objects. If you continue on in JavaScript to creating your own classes and objects, the functions that you add to a class will be called methods.
In this example, I place the current time into a string named returnValue. That string is what I return from the function, using the return statement. After creating this function, you're free to use it in your code. Here's how I place that function in a <SCRIPT> element—note that the code in functions is not run automatically when the page loads; it's run only when the function is actually called:
<HTML>
    <HEAD>
        <TITLE>
            Using JavaScript Functions
        </TITLE>

    </HEAD>

    <BODY>

        <SCRIPT LANGUAGE = JavaScript>
            document.writeln("The time is " + getTime()
            + " right now.")

            function getTime()
            {
                var now = new Date
                var returnValue = now.getHours() + ":"
                + now.getMinutes()
                return(returnValue)
            }
        </SCRIPT>

        <CENTER>
            <H1>
                Using JavaScript Functions
            </H1>
        </CENTER>

    </BODY>

</HTML>
You can see this page in Internet Explorer in Figure 6.10. As you can see there, things have worked out as we expected—when the page is loaded, the document.writeln statement is executed, which means that the call to the getTime function is also executed. The getTime function returns the current time as a string, which is incorporated into the text that's displayed in the page.

We've seen how to write a function that returns a value now, but what about passing values to functions so that they can work on them? I'll take a look at how that works next.
Passing Values to Functions
The values that you pass to functions are called arguments. When you pass data in arguments to a function, the code in the function has access to those values. When you create a function, you specify which arguments are to be passed to the function in an argument list.
Here's an example; in this case, I'll create a function named adder that will add two values and return their sum. Here's how I start creating adder:
function adder()
{
    .
    .
    .
}
This time, we're going to pass arguments to the function, so we list the arguments that we'll pass by giving them names in the argument list, which is enclosed in the parentheses following the function name. Here, I'll call the two arguments passed to adder value1 and value2:
function adder(value1, value2)
{
    .
    .
    .
}
Note that, by default in JavaScript, what's really passed to functions are not the actual arguments themselves, but copies of those arguments. This process is named calling by value.
Now you're free to refer to the passed values by the names you've given them in the argument list. To return the sum of value1 and value2, all I have to do is to add those values and use the return statement, like this:
function adder(value1, value2)
{
    return(value1 + value2)
}
To make use of this function, you pass values to it in parentheses, like this, where I'm finding the sum of the values 47 and 99:
<HTML>
    <HEAD>
        <TITLE>
            Passing Arguments to Functions in JavaScript
        </TITLE>
    </HEAD>

    <BODY>

        <SCRIPT LANGUAGE = JavaScript>
            document.writeln("47 + 99 = " +  adder(47, 99))

            function adder(value1, value2)
            {
                return(value1 + value2)
            }
        </SCRIPT>

        <CENTER>
            <H1>
                Passing Arguments to Functions in JavaScript
            </H1>
        </CENTER>

    </BODY>

</HTML>
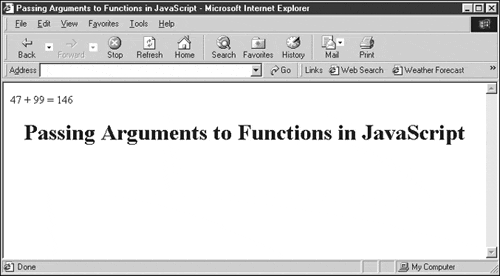
That's all it takes; now we're passing arguments to the adder function. You can see the results in Figure 6.11. As you see there, everything is working perfectly; the sum of 47 and 99 is displayed as it should be. (You might also note that even though the value returned from the adder function is a number, JavaScript is smart enough to treat that number as a text string when it's time to print it out with document.writeln.)
Creating Objects in JavaScript
As we already know, JavaScript comes with a number of built-in objects ready for you to use, such as the document, location, navigator, and history objects. JavaScript also comes with many classes built in, including classes such as the Date class, which handles dates and times, and the Math class, which has many built-in methods such as min and max to compare numbers. You can use built-in classes (and those that you create yourself, although we're not going to do that here) to create objects using the new operator.
You can think of a class as an object's type because, using the new operator, you create objects from classes. Objects can have methods and properties built into them—in fact, most do. We'll be using the new operator in the next chapter to create objects that will let us handle XML documents. We've already seen new at work in this chapter in this example:
<HTML>
    <HEAD>
        <TITLE>
            Using JavaScript Functions
        </TITLE>

    </HEAD>

    <BODY>

        <SCRIPT LANGUAGE = JavaScript>
            document.writeln("The time is " + getTime()
            + " right now.")

            function getTime()
            {
                var now = new Date
                var returnValue = now.getHours() + ":"
                + now.getMinutes()
                return(returnValue)
            }
        </SCRIPT>

        <CENTER>
            <H1>
                Using JavaScript Functions
            </H1>
        </CENTER>

    </BODY>

</HTML>
The new operator uses the Date class's constructor, which is a special method that classes use to create and return objects. In this case, we didn't pass any arguments to the Date class's constructor, so the object it returns and that we call now will reflect the current date. On the other hand, you could pass a date to the Date class's constructor when you use the new operator, and the Date object returned will reflect that date instead. Here's what that might look like:
var then = new Date("10/15/2001")
How do you know what kind of values you can pass to a JavaScript class's constructor? Take a look at the JavaScript documentation; what arguments, and what order you pass them in, varies by class.
One important class that's built into JavaScript is the String class, which you use to handle text strings. To get a better idea of how classes, objects, and constructors work, I'll take a look at that class next.
Using String Objects in JavaScript
You handle text strings in JavaScript using the String class. This class enables you to create objects that can hold text strings, and it provides you with plenty of methods to let you work on those strings. Following are the JavaScript methods of this class:
anchor
big
blink
bold
charAt
charCodeAt
concat
fixed
fontcolor
fontsize
indexOf
italics
link
match
replace
search
slice
small
split
strike
sub
substr
substring
sup
toLowerCase
toSource
toUpperCase
toString
valueOf
These are the JScript methods of the String class:
anchor
big
blink
bold
charAt
charCodeAt
concat
fixed
fontcolor
fontsize
indexOf
italics
lastIndexOf
link
match
replace
search
slice
small
split
strike
sub
substr
substring
sup
toLowerCase
toString
toUpperCase
valueOf
Here's an example; in this case, I'll create an object of the String class. Then I'll use the object's italics method to display it in italics, and its length property to find its length:
<HTML>
    <HEAD>
        <TITLE>
             Using the String Class
        </TITLE>
    </HEAD>

    <BODY>

        <SCRIPT LANGUAGE = JavaScript>
            var string1 = new String("JavaScript and XML are a good mix")

            document.writeln("The text string, " + string1.italics() +
            ", is " + string1.length + " characters long.")
        </SCRIPT>

        <CENTER>
            <H1>
                Using the String Class
            </H1>
        </CENTER>
    </BODY>

</HTML>
In this case, I'm passing the text I want in this string, JavaScript and XML are a good mix, to the String class's constructor. That constructor creates a new String object with that text in it and returns it. Now I'm able to use the new object's italics method to display the string in italics, and the length property to determine the string's length. You can see the results in Figure 6.12.

Here's another important aspect of the String class: JavaScript treats this class in a special way, which means that you can actually use it without the new operator. You can declare an object of the String class as a normal variable (without using the new operator or even mentioning the String class), and JavaScript will know just what you mean—behind the scenes, it uses the String class, but you never need know it, as in this code:
<HTML>
    <HEAD>
        <TITLE>
             Using the String Class
        </TITLE>
    </HEAD>

    <BODY>

        <SCRIPT LANGUAGE = JavaScript>
            var string1 = "JavaScript and XML are a good mix"

            document.writeln("The text string, " + string1.italics() +
            ", is " + string1.length + " characters long.")
        </SCRIPT>

        <CENTER>
            <H1>
                Using the String Class
            </H1>
        </CENTER>
    </BODY>

</HTML>
Using the Array Class to Create Arrays
Arrays are programming constructs that can hold a set of data items that you access item by item with a numeric index. Arrays are perfect for programming because, using the array index, you can reach each item in the array so that you can easily iterate over every item in the array using a loop.
To create arrays, you use the JavaScript Array class. The following list shows the methods of this class:
These are the methods of the JScript Array class:
concat
join
reverse
slice
sort
toString
valueOf
Let's see an example to make this concrete. In this case, I'll create an array that will hold the student scores from an exam. I'll use a for loop to add them all, finding the average score by dividing the total by the number of elements in the array.
I start by creating a new array named scores to hold the student scores, and a variable named runningSum to hold the sum of all the scores:
var scores = new Array()
var runningSum = 0
    .
    .
    .
You can refer to the first item in the scores array as scores[0], the next as scores[1], and so on, so I can store the students' scores in the scores array like this. (You can also pass those values to the Array class's constructor.)
var scores = new Array()
var runningSum = 0


scores[0] = 43
scores[1] = 87
scores[2] = 92
scores[3] = 70
scores[4] = 55
scores[5] = 61
    .
    .
    .
Now I can add the scores in a for loop this way:
var scores = new Array()
var runningSum = 0

scores[0] = 43
scores[1] = 87
scores[2] = 92
scores[3] = 70
scores[4] = 55
scores[5] = 61

for(var loopIndex = 0; loopIndex < scores.length; loopIndex++){
    runningSum += scores[loopIndex]
}
    .
    .
    .
All that's left is to divide the total of all the scores by the number of elements in the array, and you can find the length of an array with its length property, this way:
var scores = new Array()
var runningSum = 0

scores[0] = 43
scores[1] = 87
scores[2] = 92
scores[3] = 70
scores[4] = 55
scores[5] = 61

for(var loopIndex = 0; loopIndex < scores.length; loopIndex++){
    runningSum += scores[loopIndex]
}

document.write("The average student score is " +
    runningSum / scores.length)
Here's the final code in a Web page:
<HTML>

    <HEAD>
        <TITLE>
            Using Arrays in JavaScript
        </TITLE>
    </HEAD>

    <BODY>

        <SCRIPT LANGUAGE = JavaScript>
            var scores = new Array()
            var runningSum = 0

            scores[0] = 43
            scores[1] = 87
            scores[2] = 92
            scores[3] = 70
            scores[4] = 55
            scores[5] = 61

            for(var loopIndex = 0; loopIndex < scores.length; loopIndex++){
                runningSum += scores[loopIndex]
            }

            document.write("The average student score is " +
                runningSum / scores.length)
         </SCRIPT>

        <CENTER>
            <H1>
                Using Arrays in JavaScript
            </H1>
        </CENTER>

    </BODY>

</HTML>
You can see the results of this JavaScript in Figure 6.13, where you see that the average score is 68.

Working with Events
One important aspect of JavaScript is interacting with the user, and you do that through events. As discussed earlier, when the user takes some action, such as clicking a button, dragging the mouse, or typing keys, an event happens. In the next chapter, we'll handle not only ordinary events such as button clicks, but also the events that occur as an XML document is loaded into the browser and parsed.
Events are handled tag by tag in browsers, and you use special event attributes to connect code, such as JavaScript code, to an event. For example, when the user presses the mouse button in a Web page, the code connected to the <BODY> element with that element's onMouseDown attribute is executed. Refer to Table 6.1 in the earlier section, "Using Events in JavaScript," for a list of common events that JavaScript can handle. (Each one is an event attribute that you can use in an HTML tag.)
You can see the complete list of events for various HTML tags in Tables 6.3 for Internet Explorer and 6.4 for Netscape.
Let's put this technology to work. In this case, I'll use events with two HTML controls (which are what you call the buttons, text fields, lists, and so on in HTML pages)—buttons and text fields. When the user clicks the button, the JavaScript code in the page displays the message Welcome to event handling. in the text field.
You create both button and text field controls with the HTML <INPUT> element, setting this element's TYPE attribute to "text" to create a text field and to "button" to create a button. You can also give the button a caption with this element's VALUE attribute, the text field a length (in characters) with the LENGTH attribute, and a name with the NAME attribute. When you give a control a name, you can refer to it in code.
You must create controls inside an HTML form to use them, and you create an HTML form with the <FORM> element. (A form is just a programming construct and does not appear in the Web page—when you click a Submit button, if there is one, all the data from the controls in a form is sent back to the Web server.) Here's how I add a button and a text field to an HTML page:
<HTML>
    <HEAD>
        <TITLE>
            Working With Events in JavaScript
        </TITLE>
    </HEAD>

    <BODY>

        <CENTER>
            <FORM name = "form1">
                <H1>
                    Working With Events in JavaScript
                </H1>
                <BR>
                <H2>
                    Click the button!
                </H2>
                <BR>
                <INPUT TYPE = "text" NAME = "Text" SIZE = "60">
                <BR>
                <BR>
                <INPUT TYPE="button" VALUE="Click Here">
            </FORM>
        </CENTER>

    </BODY>

</HTML>
The next step is to connect the button to some JavaScript code so that when the button is clicked, a JavaScript function named displayMessage is called. In that function, I'll add the code that we need to display the message Welcome to event handling. in the text field. To connect the displayMessage function to the button, I set the button's onClick event attribute to the JavaScript I want executed when the button is clicked—"displayMessage()", which will call the displayMessage function:
<HTML>
    <HEAD>
        <TITLE>
            Working With Events in JavaScript
        </TITLE>
    </HEAD>

    <BODY>

        <CENTER>
            <FORM name = "form1">
                <H1>
                    Working With Events in JavaScript
                </H1>
                <BR>
                <H2>
                    Click the button!
                </H2>
                <BR>
                <INPUT TYPE = "text" NAME = "Text" SIZE = "60">
                <BR>
                <BR>
                <INPUT TYPE="button" VALUE="Click Here"
                    onClick="displayMessage()">
            </FORM>
        </CENTER>

    </BODY>

</HTML>
All that we need to do now is to create the JavaScript function named displayMessage that places the message Welcome to event handling. in the text field. So how do you actually access the text in a text field? All the items in a Web page can be accessed as subobjects of the document object. In particular, I've given the text field the name Text by setting the <INPUT> element's NAME attribute to "Text"; it's in the <FORM> element, which I've given the name form1. This means that you can refer to the text field object as document.form1.Text. The actual text in the text field object appears in its value property, so you can refer to that text as document.form1.Text.value like this:
<HTML>
    <HEAD>
        <TITLE>
            Working With Events in JavaScript
        </TITLE>

        <SCRIPT LANGUAGE= "JavaScript">
            function displayMessage(e)
            {
                document.form1.Text.value = "Welcome to event handling."
            }

        </SCRIPT>
    </HEAD>

    <BODY>

        <CENTER>
            <FORM name = "form1">
                <H1>
                    Working With Events in JavaScript
                </H1>
                <BR>
                <H2>
                    Click the button!
                </H2>
                <BR>
                <INPUT TYPE = "text" NAME = "Text" SIZE = "60">
                <BR>
                <BR>
                <INPUT TYPE="button" VALUE="Click Here"
                    onClick="displayMessage()">
            </FORM>
        </CENTER>

    </BODY>

</HTML>
That's all it takes—now when the user clicks the button, the message is displayed in the text field, as you can see in Figure 6.14.

Getting Event Information
You might have noticed that I declared the function displayMessage as displayMessage(e) in the previous example. Why did I indicate that this function would be passed an argument? The answer is that it is passed an argument in Netscape. This argument is an object of the event class, and you can get information about the event (such as where a mouse click occurred) using this object, which I've named e. You'll find the properties of the event class in Netscape in Table 6.5.
However, Internet Explorer handles things differently, of course. In Internet Explorer, event-handling functions are not passed an event object (JavaScript is flexible enough that even if you declare a function as we have here to handle both browsers as though it does receive an argument—although it really doesn't—there's no problem). Instead of an event object that's passed to event-handling functions, you use the window.event object (that is, the event subobject of the window object), which is available globally in code and doesn't have to be passed to a function. You'll find the properties of the window.event property in Internet Explorer in Table 6.6.
For an example that uses the event objects in Tables 6.5 and 6.6, see the next section.
Handling Mouse Events
I'll close this chapter with a reasonably full-scale example that uses the mouse. You can use this in either Netscape or Internet Explorer (even though event handling works differently in those two browsers). The way that I determine which browser the user has is by checking the appName property of the navigator object; the two possible values of navigator.appName are "Microsoft Internet Explorer" or "Netscape" in these two browsers.
Here are the JavaScript events that this program will use:
When you press or release the mouse button in this page, the code reports the location of the mouse. To find the (x,y) location of the mouse, you use the window.event.x and window.event.y properties in Internet Explorer, and e.pageX and e.pageY properties (where e is the name I've given the event object passed to the mouse event-handler function) in Netscape.
There's one more point I should mention: In Internet Explorer, you connect the mouseDown and mouseUp events to the <BODY> element this way:
<BODY onMouseDown = "mouseDownHandler()" onMouseUp = "mouseUpHandler()">
In Netscape, however, the <BODY> element does not support the onMouseDown and onMouseUp event attributes. In Netscape, you connect mouse event handlers using the document.onMouseDown and document.onMouseUp properties in the <SCRIPT> element, like this:
    <SCRIPT LANGUAGE= "JavaScript">

    document.onMouseDown = mouseDownHandler
    document.onMouseUp = mouseUpHandler
        .
        .
        .
Here's what the full code looks like for this example:
<HTML>

    <HEAD>

    <TITLE>
        Using JavaScript and the Mouse
    </TITLE>

    <SCRIPT LANGUAGE= "JavaScript">

    document.onMouseDown = mouseDownHandler
    document.onMouseUp = mouseUpHandler

    function mouseDownHandler(e)
    {
        if (navigator.appName == "Microsoft Internet Explorer") {

            document.form1.Text.value = "Mouse button down at: " +
            window.event.x + ", " + window.event.y
        }

        if(navigator.appName == "Netscape") {

            document.form1.Text.value = "Mouse button down at: "
            + e.pageX + ", " + e.pageY
        }
    }

    function mouseUpHandler(e)
    {
        if (navigator.appName == "Microsoft Internet Explorer") {
            document.form1.Text.value = "Mouse button up at: " +
            window.event.x + ", " + window.event.y
       }

       if(navigator.appName == "Netscape") {
           document.form1.Text.value = "Mouse button up at: "
           + e.pageX + ", " + e.pageY
        }
    }
    </SCRIPT>

    </HEAD>

    <BODY onMouseDown = "mouseDownHandler()" onMouseUp =
        "mouseUpHandler()">

        <CENTER>
            <FORM name = "form1">

            <H1>
                Using JavaScript and the Mouse
            </H1>

            <BR>
            Click the mouse.
            <BR>
            <BR>
            <BR>
            <INPUT TYPE = "text" name = "Text" SIZE = 60>
            </FORM>

        </CENTER>

    </BODY>

</HTML>
You can see this example at work in Figure 6.15. If you press or release the mouse button in the page, the JavaScript code will let you know what's going on—and where it's going on, as you see in the figure.

That brings us up to speed in JavaScript, and we're ready to put it to work in the next chapter. Using a scripting language like JavaScript is how you gain access to XML in a document in the browser. I'll turn to that now.