
ESSENTIAL PREPRODUCTION
There's one thing we've learned in our years of making video—without a plan, you're likely to fail. Despite this hard reality, many people often do everything they can to avoid preproduction. Most creative types would rather get their hands on a video camera or a nonlinear edit system than sit down and do paperwork, budgeting, or risk analysis.
We're right there with you. We enjoy the act of creation as well. But proper preproduction brings an increased likelihood of financial and professional success—two things that you will need if you'd like to survive in the world of video production. In this chapter, we'll focus on practical advice and techniques that are easy to implement.
We know you want to rush into the act of creation. Think of this as the courtship stage. You're going to find your good idea, make a great plan, and then achieve success.
Determining Production Needs
The greatest challenge in creating a good web video is the planning it takes to get the show out of the “big idea” stage and into production. Web videos and podcast series can be amorphous; you'll face several challenges as you try to pin down what a show is about and how to pull it off.
Matters are made worse by the relatively level playing field. After all, producing a hit show is within the reach of a first-time podcaster or web video producer. Combine this anticipation with the mandate to succeed that clients often demand, and you've got a giant hairball.

The Work Breakdown Structure
Our advice is simple: divide and conquer. No, we're not talking about barbarian hordes or cellular reproduction. Rather we mean good old project management. The easiest way to determine how to produce your show is to divide it into smaller parts. We often find that a web video series is easier to plan for when we first take the time to identify all of the elements that are going into it.

For example, let's take a look at a potential new video series we are developing to teach Microsoft PowerPoint. In this case, there are five general things an audience member will experience. These include the following:
- A show host who keeps the viewer interested and gives the show its personality
- The screen captures that show the software application being used
- Show graphics that provide brand identity
- Music that helps create mood and pacing
- Compelling subject matter that must be developed through scripting or outlining
As you can see in the figure, each element needed can be further refined into a more detailed list of ingredients or tangible items. By continuing to identify and specify, you can eventually develop an accurate list of requirements and items that will allow you to develop a budget and schedule.
This process of dividing a project into smaller pieces is called a work breakdown structure (WBS). A WBS analysis works well for both budgeting and project planning.
Let's revisit the food analogy. What you would do if you had to cook a 10-course meal? How much would it cost? How would you plan for it? The first step would be to identify what the 10 courses were. Next you would identify the ingredients for the 10 courses. This would give you a much better idea of what that 10-course meal would cost and how long it would take to prepare. The work breakdown structure is relatively simple to use and implement. We strongly recommend making it part of your budgeting process.
Determining Proper Crew Size
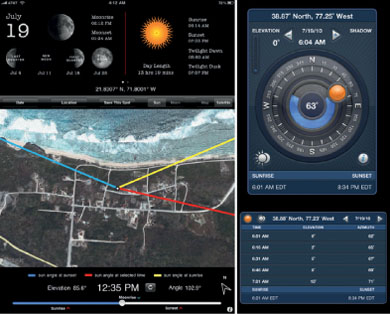
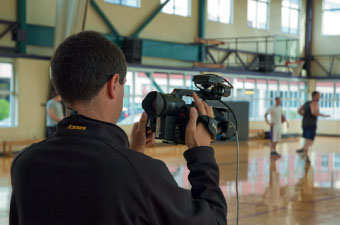
For most web videos we've produced, our budgets allowed for crews as large as five. The flip side is that we've had web videos where we've done it all with a crew of one (and if it were possible, the client would have requested a robotic camera). Our web video crews usually include two or three media professionals (we try to have one more crewperson than we do cameras on set).

A member of a three-person crew focuses on his or her respective tasks. Each camera has an operator, and a dedicated audio engineer tries to control the audio from three microphones in a very noisy room for a webcast.
The Risks of a One-Man Band
If you try to run with a “one-man-band” approach, you'll likely miss critical action. Be sure to staff appropriately for your shoots.
Thanks to shrinking budgets, we are asked to send out one-person crews all the time. Believe us, we've tried it (after all, you can't say you don't like Brussels sprouts if you've never eaten them). What we've found out is that it's a terrible idea to shoot alone. So many things can go wrong that if you're by yourself it is impossible to get the job done.
Consider the issues a single-person crew would face:
- Who will watch the gear if you have to unload and then park?
- If you do have to fly somewhere for a shoot, excess baggage charges are often more than a second ticket.
- During the course of a shoot, how will you handle basic biological needs like food and restroom breaks? Walk away and leave your gear unattended and it will likely not be in the same condition when you come back.
- If you blow a circuit breaker or have talent go missing, the second crewperson can resolve the issue.
- With a one-person crew, if that person gets sick or injured, the shoot is over.

So even if it just means hiring a warm body that's not going to steal from you, do so. We'll contact local grip houses, universities, or in a pinch use Craigslist. Spend the $125 and get somebody to be a babysitter of your gear and a gopher for the many needs that arise on set.
Our standard approach is this: We try to use a three-person crew. We send two people from our office and hire one person locally. The local person will usually show up with things like lights and grip gear (which are affordable to rent locally). Our crew shows up with audio and camera equipment, which we know works and we're familiar with.
Depending on the style of video projects you normally work on, this size crew may strike you as normal or woefully understaffed. What it really comes down to is having the right people and equipment in the field. Multitalented crews are essential; you will need individuals that are comfortable shooting, lighting, and recording audio.
Instead of saving money by cutting crew, try to look at other costs. Can you save money on travel expenses? We often look for liberal baggage policies and flexibility for schedule changes. By cutting costs on travel, we can usually preserve crew size (and hence quality and sanity). We also consider the extra time that will likely be spent editing and fixing problem footage. Cut things too close, and you will bleed.
Performing a Site Survey
Video professionals know the worst situation is to go into a shoot blind. If at all possible, you want to go and look at the location you'll be shooting in before the shoot. Ideally this will be soon enough that you have time to refine and adjust your plans based on what you've seen. By visiting the locations you plan to use during your project before the day of shooting, you can dodge potential problems.
As you visit your potential shoot locations, try to view them with both a technical and a creative eye. Think about problems that may arise and gear you'll need. You'll also want to look for great shooting angles and attractive locations that will improve the quality of your video.

Don't Skip the Site Survey

The site survey is a big step toward forming a shooting plan. You need to be prepared to answer questions from all your crewmembers. It's a big waste of time and money to just keep people standing around. Remember, just doing a web search won't cut it. You can't rely on secondhand reports to truly tell you what you can expect.
We bring a few key pieces of gear on our site surveys:
- Digital camera. Bring along a still or small video camera. You'll want to document important information about the location. You also may choose to capture shots that let you experiment with camera angles and potential shooting locations.
- Digital audio recorder. We'll bring an audio recorder on set to capture the sound of the location. This helps analyze potential sound problems. It can also be used to record discussions on the survey or to take notes. We find that our smart phone's voice recorder works fine for both tasks.
- An Internet-connected device. Questions are going to come up while shooting. You may also need to look up a contact or check project details.
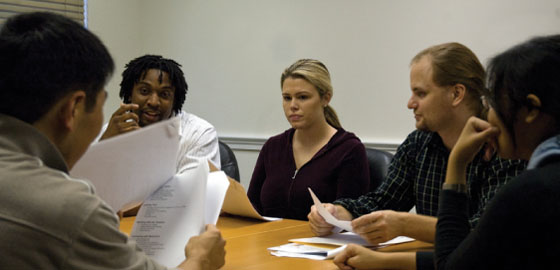
- Compass and SunPath calculator. When shooting video, you're going to deal with the sun. A compass will help you keep your bearings and know if the sun is going to ruin your shot or help it. A SunPath calculator application can be loaded on your phone and allow you to look up where (and when) the sun will be for your shooting location.
- Circuit tester. A simple circuit tester from any hardware store is a key item as you plan your lighting. You'll want to know if outlets actually work whether or not they are grounded.
We find LightTrac for iPad (left) to be incredibly useful for understanding where the sun will be throughout an outdoor shoot. If you're an iPhone or iPod Touch user, then look at Focalware (right) for a smaller but still useful toolset.
Site Survey Checklist
When you visit your shooting location, try to accomplish these tasks before you call it a day.
Indoor
![]() Find the main power box or circuit breaker.
Find the main power box or circuit breaker.
![]() Locate the building engineer.
Locate the building engineer.
![]() Examine fuses and identify maximum load for circuits.
Examine fuses and identify maximum load for circuits.
![]() Check if wall sockets are grounded.
Check if wall sockets are grounded.
![]() Check wall outlets with circuit testers.
Check wall outlets with circuit testers.
![]() Determine cable runs and the number of extension cords needed.
Determine cable runs and the number of extension cords needed.
Outdoor
![]() Determine the sun path for given shoot day.
Determine the sun path for given shoot day.
![]() Identify sunrise, twilight, dusk, and sunset.
Identify sunrise, twilight, dusk, and sunset.
Sound
![]() Listen for extraneous sounds that may be present on shoot day.
Listen for extraneous sounds that may be present on shoot day.
![]() Record room tone for analysis.
Record room tone for analysis.
![]() Determine if you have control over the HVAC system.
Determine if you have control over the HVAC system.
![]() Evaluate control via scheduling time of day.
Evaluate control via scheduling time of day.
Logistics
![]() Determine where you park production vehicles.
Determine where you park production vehicles.
![]() Determine where gear will be staged.
Determine where gear will be staged.
![]() Identify bathrooms.
Identify bathrooms.
![]() Identify food or craft services options.
Identify food or craft services options.
![]() Determine if any additional permissions are needed.
Determine if any additional permissions are needed.
![]() Determine the schedule for access to the location.
Determine the schedule for access to the location.
Creative
![]() Perform basic blocking of camera positions.
Perform basic blocking of camera positions.
![]() Create a basic lighting plan.
Create a basic lighting plan.
![]() Identify the additional props needed.
Identify the additional props needed.
![]() Document basic shooting order and schedule.
Document basic shooting order and schedule.
Picking an Acquisition Format
Choosing the right acquisition format involves balancing several factors. You need to examine the equipment you already own and measure against the benefits of new formats. This is an issue we explore more deeply when we look at cameras in Chapter 5.
We have encountered a lot of production companies and clients who are confused about high-definition (HD) video and the web. There are several pros and cons to using HD for web production, and we encourage you to consider both when you make a decision. We say make sure that you have a compelling reason to shoot HD.
The Benefits of HD
First, you should have some other purpose for the acquired footage, such as it will be distributed via Apple TV, TiVo HD, or as HD content on YouTube. It might also be that you intend to use the video files with a traditional video project that is being shot in high definition.
Ask yourself, does the content need to be preserved for an HD future? In other words, is the subject matter timeless or significant enough that there is value in spending the extra money to ensure that the footage can be used in an HD workflow for future projects or delivery? HD acquisition is considered “future proof,” whereas standard definition cameras shoot legacy formats.
There is an increased demand for HD content. Many websites spotlight HD content (as it's rarer than lower-quality, user-generated content). There is also increased demand as many consumers are bringing HD web video into their living rooms with TiVo HD, Apple TV, Microsoft XBOX, and Sony PlayStation devices.
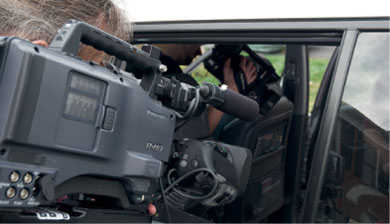
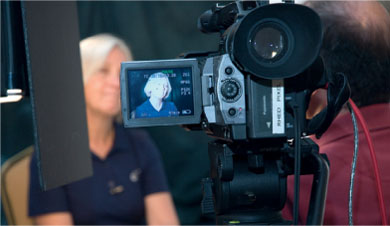
This professional P2 camera from Panasonic can shoot several flavors of HD at progressive frame rates (which work best for web productions).
You'll also find that HD cameras tend to be much more flexible. These cameras often shoot direct to hard drive or have removable memory, which makes the files easier to load and edit. The HD spec also supports progressive frame rates (such as 24p). These frames avoid the traditional interlaced signal of older video cameras, which makes for a cleaner image on computer monitors, portable media players, and cell phones.
The Drawbacks of HD
Choosing a high-definition workflow can involve potential cost increases. You may need to invest in additional editing equipment. HD video needs more storage and more processing power for your computer. Do you have an HD monitor so you can see your video at its native size?
You'll also find an increase in render times for video editing and motion graphics. When you choose to encode video for the web, you'll likely need to make several different sizes for multiple delivery devices. The HD video will take longer to encode here as well.
Also, don't forget about distribution. Are your consumers really willing to wait up to eight times longer for the files to download? Are you prepared to pay more to host those files?
Make the Call
We can't tell you which method is right for your program. We can say that we're choosing to shoot in HD about 65% of the time (and this number has been steadily increasing). Standard definition acquisition is most common for our live streaming or live-switched events. In this case, the extra resolution is often overkill.
Don't be discouraged; just be sure that you can afford to give people what they want and that they are willing to wait for that larger size. Some producers take the “easy” way out and offer multiple sizes. Many video-sharing sites will even do this for you. For example, if you upload HD video to YouTube or Vimeo, those sites will encode additional sizes for delivery to smaller screens or through slower connections.
Mapping the Production

Although it may seem counterintuitive, spending money on crew and the right equipment can save you money in the long run. We're not talking about a craft services table with lobster bisque and imported beer; rather we mean having the right gear and a multitalented crew.
The mantra of “fix it in post” should rarely be heard on a web video set. We have found that relying on the “fix it later” philosophy can consume up to three or four times the cost of taking the time to make adjustments during field production.
The guiding principle here is that you never want to miss an opportunity to capture content because you didn't have the right gear or crew. This may sound contradictory to the electronic news gathering (ENG) comments made earlier, but it's not. What we are emphasizing is the need to balance the size of your crew and equipment so they are fully utilized without being pushed to the point of breaking.
Planning for Multiple Shows
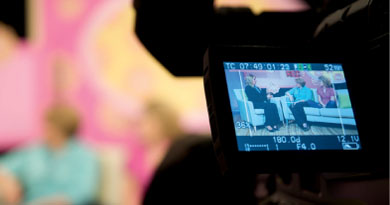
For MommyCast, the hosts prepare multiple interviews for a single day. This works best for their schedules and helps control costs.
It's a very good idea to determine your rollout plan early on. Remember, podcasts and many web videos are serialized, which means that there is some sort of plan for when they come out. Will you release new episodes daily, weekly, monthly, bimonthly, biweekly, on an emergency basis as needed, when inspiration hits? Whatever the decision, it's important that you determine what the schedule is going to be and that the client agrees.
The frequency of release is one of the greatest impacts on financial cost. Another way to contain costs is to shoot multiple episodes at a time. It takes a lot of effort to get all of the gear, crew, and talent in one location. Try to record a few episodes at a time so you can save time and money.
Maximizing the Day
We typically build our production days around a 10-hour schedule. This allows about 7 hours of time for shooting, and the other 3 hours are used for setup, breaks, and teardown. The important thing here is to pace yourself. Make sure you know what you want to accomplish each hour you're on set so you can measure progress or take corrective action.

A clapboard can help keep your shots organized during a busy shoot day. it's also a great way to synchronize multiple camera angles with an audio cue.
Although we try to maximize the day, we don't try to kill the crew. There's a difference:
- Make sure you have enough help to load gear in and out so you get off to a good start. For that matter, be sure to use a rolling cart to cut down on wear and tear on your body and speed up moving times between locations.
- Be sure to allow time for meal breaks. Keeping people from eating will only make them cranky and less productive. Try to bring some snacks and drinks on the set to keep people comfortable and from wandering off.
- Keep the schedule reasonable. We try to not to let the client schedule the first interview for 8 a.m. We've often had to convey to the client, “If you schedule this for 8 a.m., it means we have to leave our houses at 4:30 a.m. in order to have everything set up on time.”
- We routinely have to remind clients that an eight-hour day does not mean eight hours of interviews. We also have to point out that it is a contiguous eight hours. You can't schedule a crew to start at 9 a.m., then give them a five-hour break in the middle of the day, and want them tape something that goes until 10 at night.
- Be sure to work with your clients and gently educate them. Sometimes we've had to say, “Yes, we can do this. But we're going to have two crews and we're going to have a changeover period here and the second crew will step onto the set and continue into the night.” Be smart: Respect your clients and your crew if you want the best results.
Lessons Learned
A big part of budgeting is time estimation—how long will this take me to do this? One of the best sources of information is to look at time records from earlier projects. Learn from your mistakes by looking at your past budgets and time logs.

Maximizing Locations
Every time you move equipment, you will lose at least 30 minutes (if not much more). It takes time to cool the lights down (move them hot and the bulbs will break). You also need to gather up everything, load it onto a cart, get to the next location, and set it all up again.

We try to design our lighting setups before we shoot to speed up production time. OmniGraffle is used here to create a diagram for the set.
You want to minimize crew movement unless it is essential. We have four techniques for maximizing shoot time when locations are involved:
- Look for locations that can easily provide multiple shooting opportunities. When selecting a practical location, we try for one where small changes in the camera placement or framing result in a new look.
- If we are creating a set, we often just change the color of the backdrop, which can quickly result in a new look.
- If we have to move, then we try to bring one extra crewperson and a few lights. This person can go to the next location and start to set up lights (usually the slowest part of moving).
- Shooting green screen is also an option. We'll often shoot multiple interviews on the same green screen. We'll then go out and shoot multiple video background plates that we can key behind the subject. Be sure you frame these shots with the camera at the same height. You'll also want these plates to be slightly out of focus to create the appropriate depth of field.
Multicamera Coverage

It is becoming increasingly common to shoot web videos with two or three cameras. This is possible because the cost of quality video cameras has plummeted in recent years. The reason for multicamera shooting is largely to make postproduction tasks like editing significantly easier.
Many nonlinear editing systems, including those by Adobe, Apple, Avid, and Sony, offer multicamera editing. By shooting a web video from multiple angles in real time, you have options during the edit. This works especially well for subjects like concerts, theatrical performances, hosted interviews, and how-to demonstrations. We'll explore this style of productions in more detail throughout the book.
Units such as this FireStore allow for a DV camera to record to both tape and hard drive at the same time. These save a lot of time for the postproduction stages of the project.

Tapeless Acquisition
We have found that shooting direct-to-disk can be a big timesaver. This can be as simple as adding a special hard drive unit to your FireWire-based camera or switching to new formats like Sony's XDCAM or Panasonic's P2. Shooting tapeless can save time on the post-production side. It also allows for instant playback of a take when in the field. We often use it as a way to quickly drop a shot into a nonlinear editing application so we can check audio levels or try a color grading or compositing task.
Essential Planning Documents
We know that you're itching to start shooting, so we'll keep our comments brief. Successful web videos rarely just happen. You've logged a lot of hours developing, refining, and planning a production. Wouldn't it be a real shame if everything fell apart as soon as you rolled cameras?
We offer some final preproduction advice. Here are three documents you need to use for successful web video projects. You can download templates for each from the book's web-site at www.hypersyndicate.com. The documents will save you time and money—two things we can all use more of.
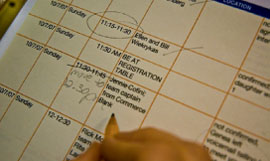
Documents (like this call sheet) smooth out potential bumps in the road for your web video productions.
Shot List
We highly recommend making a shot list ahead of time, as it can serve as a checklist during the shoot. You'll want to give some thought ahead of time and plan out coverage for your web video. What supporting footage (called b-roll) Do you need to tell your story? Do you need multiple angles to properly document your technical demonstration?
Send the Crew PDF Files
We've learned the hard way that your crew or client might not have the same software. Instead of sending native Microsoft Office or Apple iWork files, send PDF files. This makes it easier for others to open the documents and can avoid any formatting errors caused by missing fonts.
We generally fill this information into a spreadsheet. Using a program like Microsoft Excel or Apple Numbers makes it easy to sort and sift information based on the contents of the list. Both programs help keep your shot list consistent and improve the speed at which you can build it.
Call Sheet
The call sheet serves as both a master schedule and a contact list for all the cast and crew for a video production. This single document has the most important logistical information included, such as flight or travel information, addresses for each location, and multiple ways to contact key crew.

The call sheet also offers a detailed schedule for the shoot. It's important to have a detailed schedule on set so you can coordinate the arrival of clients and talent. It also can assist in keeping a project on budget because it lets the crew know how much time is allotted for each shot or scene.
Shooting at Large Events
If you are taping at a large event (such as a concert), you'll want to explore inserting a general release into the event registration or ticket purchase process. This way you don't need to worry about capturing releases from all the people who appear on camera. However, you should still get the more detailed release signed for on-camera interviews.
We also recommend posting signs at the door. Use language like this to alert people that you are taping. “By entering this facility, you grant [production company name] the right to film, videotape, or photograph you at this location for any reason without payment or consideration.”
Release Form
The final piece of essential paperwork is the talent release form. It is considered a good idea to obtain a release from each person who appears on camera. The form is your way of proving that the person appeared willingly and does not require additional compensation. There is no such thing as a standard release form, because legal requirements can vary from state to state or country by country.
We try to avoid the all-encompassing forms that ask talent to release all future rights to their performance. Rather we favor a clear release form that states how the video will be used and in what context. We also point out that the talent will not have a say in how their image is used and that they will receive no additional compensation for their involvement. We recommend you look at the provided sample form and customize it to your needs. If you have access to a lawyer, it's a good idea to get your release forms looked at. Once you have your forms locked in, be sure to print out enough and load them onto a clipboard for your shoot.
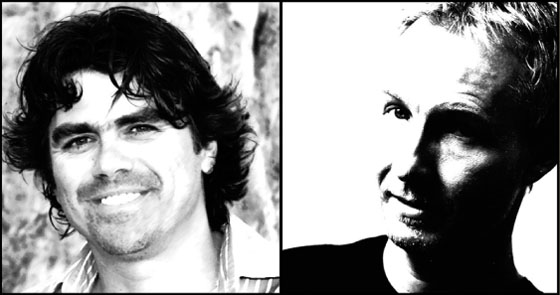
PROfile: Culture Catch |
Culture Catch is a smart culture community that was launched in July 2005. Based in New York City, the company was founded by Richard Burns and Dusty Wright. While Culture Catch (www.CultureCatch.com) is a well-known web video series, the company also produces various live events that let their members interact. There are over 1 million people that visit the CC Website, attend its live events around the world, download its audio and video content, and engage with the community.
Culture Catch currently shoots two video episodes per week. The show has conducted interviews with cultural notables like David Lynch, Wynton Marsalis, Laura Dern, Richard Branson, Duncan Sheik, Henry Rollins, Bob Costas, Les Paul, Russell Simmons, Donovan, Gore Vidal, Kevin Bacon, and many more, all of which are available on the site, or on iTunes.
Wright and Burns were drawn to podcasting after multiple attempts to launch similar shows via traditional broadcasting avenues.
“We got tired of all the gatekeepers in conventional media telling us that our show ideas were too smart, or too long, or expensive, or not the right fit,” said Wright. “Podcasting is so liberating on so many levels. It's refreshing to meet so many different folks creating niche programming and really burning with the passion to produce it.”

Burns added that web video lets him focus more on the creative aspects of filmmaking that he enjoys so much.
“As a filmmaker, when a project ended so did your employment. I was spending 90% of my time looking for work or money to create films and 10% creating films, which seemed very stupid,” said Burns. “Now I spend 75% of my time creating and 25% on the business of podcasting. Much better ratio for an artist.”

Podcasting and web video have become a full-time job for both Wright and Burns. Their show, website, and events attract enough interest and sponsorship that they can focus on Culture Catch.
“This is my fulltime gig and I love it,” said Wright. “It has allowed me to streamline my productions, too. I think about our shoots like a field reporter. I carry just the bare essentials unless we're really looking for some serious production value and then we might bring in a third cameraperson. But normally we look at each interview situation and determine how we want to shoot it before we hit record.”
Culture Catch regularly shoots with two cameras. This gives Burns more flexibility when he edits the podcasts. Both Wright and Burns fill multiple technical and creative roles during shoots.
“A low budget production like a podcast requires the podcaster to wear all hats (or at least many),” said Burns. “In my case, that's audio, video, grip, director, editor, production manager, craft services, director of photography, make-up, etc. Thus, prepare and accept that you'll make some really stupid mistakes.”
Wright emphasized the need to assume the worst and constantly check for problems.
“I once interviewed Daniel Lanois and didn't check my audio levels before I started the interview,” said Wright. “I had a bad cable. I couldn't use any of it. I wasted one of the greatest interviews I've ever conducted. He talked about producing U2 and Dylan and Emmylou Harris. It makes me sick to think that I didn't take the extra few minutes to check things out.”

Burns agreed with Wright's warning.
“Always check audio and picture before recording. What you see and hear on the camera monitor isn't always what you are recording,” said Burns.

Both Wright and Burns emphasized that being passionate is the key to succeeding at webcasting.
“Dare to be different. Dare to push the creative envelope,” said Wright. “Don't let others tell you that you're wasting your time. If you feel your niche content can reach 60,000 other like-minded individuals, then go for it. If you're looking to reach the masses, it's possible you might. Grab your camera and mic and go… you'll know soon enough if it's working or not. And if it's not, tweak it until it is.”
“The industry needs more personal voices and experts,” said Burns. “Make your show very personal and niche. Big networks can't do that kind of programming. They are about broadcasting to a wide variety of people. Podcasting is about reaching a specific audience, owning the audience and developing a business model that services that audience.”
Gear list
- Two Sony 950 3-CCD Mini DV cameras
- Two Sony EL 77B lavaliere microphones
- Four EV mics (1 RE635, 1 RE50ND, 2 RE16s)
- Two Shure (Beta 58s) mics
- Three Element Labs LED lights (brilliant lights, don't get hot, don't burn out, can use a remote to program color correction, etc.)