
Chapter 19: The Office Web Applications
What’s In This Chapter?
- Overview of OWA
- Deploying OWA
- Installing OWA
- OWA PowerShell Activation
Office Web Applications (OWA) are the web browser–based companions to the Office 2010 suite of desktop products for Word, Excel, PowerPoint, and OneNote. These applications enable users to access documents, and view, edit, and share content with other users across personal computers, mobile phones, and the Web using various web browsers. They are available on Windows Live at no cost to users as an ad-supported service, and for enterprise users, they can be hosted on SharePoint 2010. When enabled, these applications enhance the experience of the SharePoint user and greatly expand the possibility of collaboration.
Office Web Applications can be deployed to a SharePoint farm that has either SharePoint Foundation Services or the full SharePoint Server 2010 product installed. As the topic of this book is SharePoint Server 2010, we will be discussing the deployment of the OWA to the SharePoint Server 2010 product. This chapter begins with an overview of the OWA architecture, then walks you through the steps an administrator must take to get the OWA installed and configured. We also briefly discuss the OWA features to ensure that administrators are familiar with OWA’s capabilities and its impact on the SharePoint environment.
Before you dive into the installation and configuration process, we will briefly discuss web technologies that OWA utilizes, the components that make-up the OWA architecture and how they work.
Web Technology Utilized by OWA
The Office Web Applications provide the capability to view and edit your documents in the web browser. This is accomplished using three technology components that are fundamental to Web 2.0 and Rich Interactive Applications (RIA) — Asynchronous JavaScript (AJAX), Silverlight, and XML — plus good old HTML. These technologies are not unique, or specific to OWA, but OWA utilizes them to provide an enhanced user experience.
AJAX
For those readers who aren’t familiar with Web 2.0 and RIA, AJAX is not a new programming language, but a new way to use the existing JavaScript and HTTP standards to create a better, faster, and more interactive web application. AJAX provides a dynamic mechanism for updating a web page without doing a complete page reload. This is accomplished using asynchronous data transfer (HTTP requests) between the browser and the web server, allowing web pages to request small bits of information from the server instead of whole pages. Overall, this reduces postbacks to the server, which makes the user interface more responsive.
Silverlight
Silverlight is a plug-in that installs into the browser. It provides new capabilities for the web browser, such as high-performance multimedia and animation. This functionality extends the web application capability far beyond the limitations of HTML and JavaScript. Silverlight works equally well on the Windows and Macintosh platforms and with Internet Explorer, Firefox, and Safari web browsers. Silverlight is not required for the OWA to function, but the user’s experience will be much better with Silverlight installed. For example, the Word 2010 web application offers the following viewing experience benefits from Silverlight:
- Documents are loaded faster because, typically, fewer bytes need to be downloaded before displaying the document.
- Text fidelity is improved across zoom levels, including better text spacing and rendering.
The PowerPoint 2010 web application will provide smoother animations and better slide scaling with changes to the browser’s window size. You can download and install the Silverlight plug-in from http://www.microsoft.com/silverlight/get-started/install/default.aspx. The administrator can deploy Silverlight across the enterprise using a number of different approaches, all of which are covered in the “Silverlight Enterprise Deployment Guide” located at http://download.microsoft.com/download/7/8/d/78da8ec9-8801-42e5-89e5-3809386f1316/Silverlight%20Deployment%20Guide.doc.
Browser Compatibility
The Office Web Applications will work with a diverse set of web browsers but three different browsers are officially supported:
- Internet Explorer 7 and 8 on Windows
- Firefox 3.5 on Windows, Macintosh, and Linux
- Safari 4 on Macintosh
Keep in mind that different browsers have different functionality, so the user experience will not necessarily be the same even within the supported list of browsers. For example, with Internet Explorer you can copy text using the Copy button on the ribbon, but Firefox doesn’t support copying to the clipboard through mouse actions so the user will be required to use keyboard shortcuts. For an up-to-date listing of browser support, refer to the following link: http://technet.microsoft.com/en-us/library/cc263526(office.14).aspx.
Accessibility Features
The Office Web Applications have been designed to ensure that they are accessible to people with disabilities. Specifically, they have been designed to support people who are blind or have reduced vision, and people with limited mobility. Therefore, the focus has been on three objectives:
- Enable screen reader support.
- Ensure that all functionality is keyboard accessible.
- Ensure that the applications are high contrast and support different zoom modes.
Screen Reader Support
Screen reader support is based on XHTML compliance and Accessible Rich Internet Applications (ARIA) standards. ARIA, an initiative of the World Wide Web Consortium (W3C), defines a way to make web content and web application functionality more accessible to people with disabilities. Specifically, it helps with dynamic content and advanced user interface controls developed with AJAX, HTML, JavaScript, and related Web 2.0 technologies. ARIA markup has been included in the OWA so that browsers and screen readers that support the ARIA standard can provide an experience that is comparable to a fully accessible desktop application.
The Word, OneNote, and Excel web applications are XHTML Strict compliant and use cascading style sheets (CSS) for document layout. In addition, the PowerPoint and Word application viewers render documents as images, or use Silverlight if it is installed. Clearly, an image represents a challenge to a screen reader, so a text-based version of the document is also provided that contains both the text and the structure of the content contained in the image. Word documents can also be opened as a tagged PDF document, allowing the PDF viewer that is compatible with the user’s screen reader to be used. A structured outline of the PowerPoint presentation is also provided that contains the text content of the presentation organized by slide. It includes list hierarchy and tabular data in simple HTML that a screen reader can interpret.
Keyboard Accessibility
The set of most frequently used Office desktop suite shortcuts (Ctrl+B, Ctrl+S, and Ctrl+C) all work as expected in the web applications. Also, the Ctrl+F6 shortcut enables the user to navigate between different regions or areas in the OWA view, such as between the ribbon, the navigation pane, and the content.
Architecture
The Office Web Application’s architecture utilizes the SharePoint Web Front End (WFE) and a set of services which reside on the application server to generate the browser-based representation of the document.
- Web Front End — The WFE consists of the OWA web pages and the ASP.NET page handlers that are responsible for generating and returning the HTML that represents the document to the browser. These components may also rely on assistance from the service applications when generating the HTML representation of the document. The PowerPoint web application also provides the Broadcast Slide Show (BSS) functionality, which is a new feature in the desktop version of PowerPoint 2010. BSS enables presenters to broadcast a slide show from PowerPoint 2010 to remote viewers who watch in a web browser. We discuss BSS later in this chapter.
- Service Applications — The OWA installation adds the Word Viewing Service application, the Excel Calculation Service application, and the PowerPoint Service application to the list of available SharePoint service applications (see Chapter 7 for details on the service application architecture). These services are responsible for performing Excel calculations and generating the image representation for Word and PowerPoint. Additional SharePoint services are not required to edit in Word or OneNote files.
From an architecture and deployment point of view, these components can be installed either on a single physical server or on multiple servers where the different layers reside on different physical servers. With that basic understanding of the OWA, let’s turn to deployment.
OWA deployment consists of a series of steps that must be completed after SharePoint Server 2010 has been installed. A few of the more pertinent steps in the server installation process are reviewed in this chapter. The steps required for OWA deployment can be categorized into several phases:
- Installation
- Service activation
- Feature activation
We start this section with a brief overview of each of these phases and then turn to the specific steps involved in the installation and configuration.
The install process you should follow for OWA will vary according to the status of your SharePoint 2010 Server install. Determine which of the following describes your status:
- You have not yet installed the SharePoint 2010 Server, or have already installed the SharePoint 2010 Server but have not yet run the Configuration Wizard.
- You have already installed the SharePoint 2010 Server and have run the Configuration Wizard.
For either type of install, you should start with the information in the following section and then proceed to the appropriate instructions for your situation.
Chapter 4 covers the SharePoint 2010 Server installation; look there for more details if you still need to install the server.
Installing SharePoint 2010 Server and Preparing for OWA
The OWA can be installed on a single standalone server or on multiple servers in the farm. Let’s start with some review of the SharePoint Server installation process covered in Chapter 4. Recall that during the initial steps of installing the server product, the user is prompted to choose between the Server Farm and Standalone type of installation, as shown in Figure 19-1.

You should choose the Server Farm option; the Standalone option should not be used unless you are creating a single-server development environment installation on Windows 7 or Windows Vista. See Chapter 4 for a thorough explanation of why to avoid the Standalone option. Also keep in mind that a single-server development environment is not a supported environment for running SharePoint in production; it is only for developers needing a desktop development environment.
The capability to install SharePoint server on the Windows desktop operating system is new for the 2010 server product. The Server Farm installation is used for installing either a single-server or multi-server SharePoint farm. Both types of installations require that the OWA setup application (WCSetup.exe) be installed on each SharePoint server that will be involved in hosting the OWA.
The next step in the SharePoint server installation requires you to choose between a Complete install and a Stand-alone, as shown in Figure 19-2.

Choose the Complete install option because you will want to use a separate installation of SQL Server and not the SQL Server 2008 Express Edition.
Once setup is complete, you are prompted with the Run Configuration Wizard dialog, as shown in Figure 19-3.

At this point in the typical installation, you would want to run the wizard to complete the installation of the farm. Because the Office Web Application software is not a part of the SharePoint Server 2010 install, it needs to be installed separately, so you should postpone the execution of the wizard until after the web applications are installed. If you are installing the server now, make sure the “Run the SharePoint Products and Technologies Configuration Wizard now” checkbox is not checked. Close this dialog and then proceed to install the OWA, as described in the “OWA Installation” section.
It is still possible to install the OWA software even after the configuration wizard has already been run, but that requires additional steps to complete the OWA configuration. This scenario is covered in the “OWA PowerShell Activation” section later in the chapter.
Service Activation
Recall that as part of the SharePoint Server 2010 installation in Chapter 4, the Post Setup Configuration Wizard application (PSConfig) or the SharePoint Farm Configuration Wizard may have been run to complete the installation. These two wizards alter the state of the SharePoint farm. Therefore, activating the OWA service applications for either the single-server or multi-server farm installation will depend on the state of the SharePoint farm when the OWA are installed.
For the single-server installation or farm installation, if PSConfig or the Farm Configuration Wizard have not been run, then running the corresponding wizard will automatically activate the required service instances, service applications, and service application proxies during an OWA installation. The setup application and PSConfig will install the SharePoint binary code, configure security permissions, configure the registry, create and configure the configuration and content database, and install the Central Administration web site.
Next, the Farm Configuration Wizard will configure the SharePoint farm, allow the administrator to select the specific services to use in the farm, and create the first site collection. All of this configuration can be done manually if you prefer, as described in the “Manual Activation” section.
If the wizards have already been run prior to installing the OWA, then the OWA service instances, service applications, and proxies must be created, started, and activated manually, or using PowerShell commands, as described in the “OWA PowerShell Activation” section later in this chapter.
Manual Activation
It is important for the administrator to know how to manually install any service and not have to rely on the wizard. This knowledge provides a much deeper understanding of what is involved, which will be helpful during troubleshooting. Manual activation requires that the OWA service instances be started and the service applications and proxies be created. Service instances are started using the Services on Server web page in SharePoint Central Administration, or by running a Windows PowerShell script. The Services on Server web page can be accessed using the Manager Services on Server link on the Central Administration home page. Service applications and their associated proxies can be created by using the Manage service applications page in SharePoint Central Administration, or by running a Windows PowerShell script (provided later in this chapter). Once created, the service applications will start running on each service instance automatically.
Feature Activation
Each site collection that will host the OWA functionality needs to be configured. This is accomplished by activating the OWA feature. The activation process can be done manually by browsing to each and every site collection’s Site Collection Features page and activating the feature or by running a Windows PowerShell script. It is also possible to activate the feature for every site collection in the farm at once using a PowerShell script.
The following installation instructions assume that SharePoint Server 2010 has not been installed yet, or that you have begun the installation but have not yet run the Configuration Wizard. If you have already run the Configuration Wizard, proceed to the “OWA PowerShell Activation” section at the end of the chapter.
Single-Server Farm Install
Install SharePoint Server 2010 according to the instructions in Chapter 4 and using the settings described earlier for the Server Farm and Complete Install options. In the dialog shown in Figure 19-3, leave the checkbox to automatically run PSConfig blank. This will postpone running PSConfig; the administrator may choose to run it later after the OWA are installed.
Installing the Office Web Applications
1. Make sure the user performing the installation is logged on with the built-in administrator account.
2. Extract the OWA files to a folder on your system by using the /extract:c:OWAfiles switch, where c:OWAfiles is the location to extract the files.
3. At the root of the OWAfile folder, run the OWA setup application setup.exe, which will display the Enter your Product Key dialog, shown in Figure 19-4.

4. After your key has been verified, click Continue to display the Microsoft Software License Terms dialog. Check the box to accept the terms and then click Continue.
5. On the Choose a file location dialog, shown in Figure 19-5, click Install Now to install to the default location. The Installation Progress dialog will be displayed during the installation.

6. The setup process should take only a few minutes. Once it is complete, the Run Configuration Wizard dialog (refer to Figure 19-3) will be displayed. Be sure that the “Run the SharePoint Products and Technologies Configuration Wizard now” checkbox is selected, and then click Close to start the configuration wizard.
Step 6 assumes that the SharePoint Post-Setup Configuration Wizard has not been run after the original SharePoint server setup. If the wizard has already been run, then the OWA services need to be created and activated, either manually as described in Chapter 7 or using the PowerShell scripts provided at the end of this chapter.
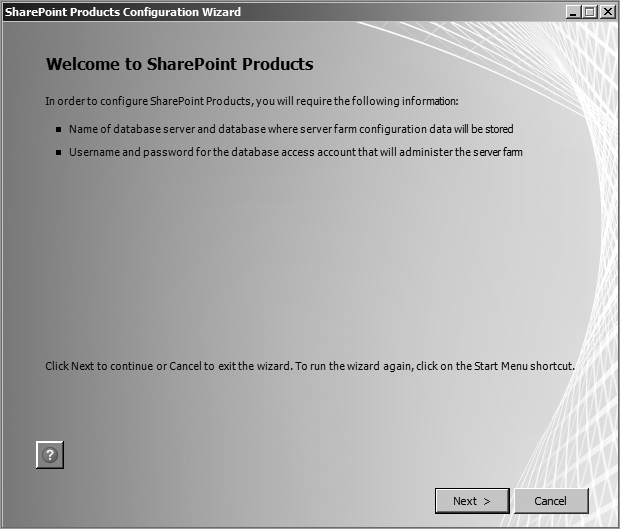
7. The configuration wizard’s Welcome to SharePoint Products page, shown in Figure 19-6, is displayed. Click Next to continue.
8. The next dialog notifies you that some services might need to be restarted or reset during configuration. Click Yes to continue.
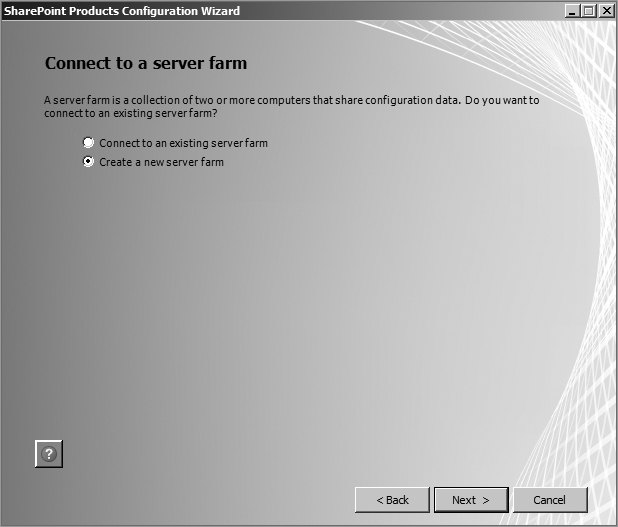
9. The Connect to a server farm dialog (see Figure 19-7) is shown next. Make sure the Create a new server farm option is selected, and then click Next.
10. The Specify Configuration Database Settings dialog (see Figure 19-8) appears. Enter the appropriate value for the name of the database server, accept the default configuration database name or enter your own choice, enter the access account information for the administrator account, and click Next.

11. The Specify Farm Security Settings dialog shown in Figure 19-9 asks you to enter a passphrase. The purpose of the passphrase is to ensure that no other SharePoint servers can join the farm unless they have the proper credentials. Enter whatever you like here or enter something like the administrator account password. You can change this password later if you choose.

12. Figure 19-10 shows that the administrator can define a specific port for the Central Administration web application or utilize a randomly generated port number. The option to choose NTLM or Kerberos is also presented. It is usually best to choose Kerberos for SharePoint web sites but NTLM will suffice for the administration web site. Enter the appropriate information and click Next.

13. The next screen, shown in Figure 19-11, summarizes the information that you entered. Review the information and click either Next to begin the configuration process or Back to make any changes.

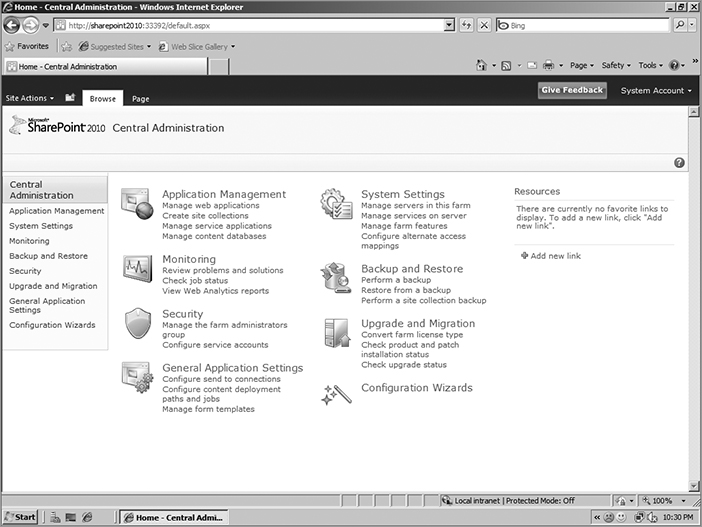
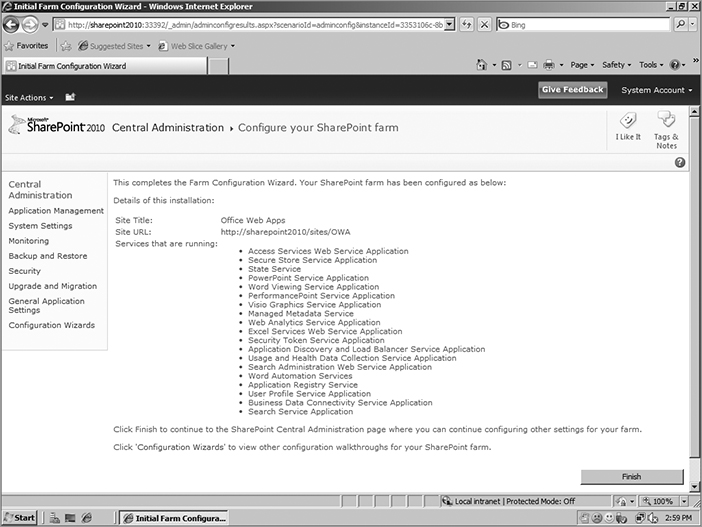
14. The Configuring SharePoint Products screen displays the progress for the configuration process. Once configuration is complete, you will receive confirmation stating that the configuration was successful. Click Finish on the Configuration Successful dialog to display the Central Administration dialog shown in Figure 19-12. This completes the configuration.
Open SQL Server Management Studio and view the two different databases that have been created, SharePoint_Config and SharePoint_Admincontent, which represent the configuration database and the Central Administration web site databases, respectively.
Service Activation
From the Central Administration web site, click the “Manage servers in this farm” link located beneath the System Settings heading to see the Servers in Farm information shown in Figure 19-13. You can see that SharePoint Server 2010 and the Office Web Applications are installed. The next step is to create and configure the necessary services to support the web applications. You can do this task using the Farm Configuration Wizard, via manual configuration, or using PowerShell commands.

The following steps take you through the Farm Configuration Wizard. This procedure must be completed only if the wizard has not been previously run. If the wizard has already been run, the OWA can be activated using the PowerShell scripts at the end of the chapter.
You can also configure the services manually. See the “Manual Activation” section earlier in this chapter.
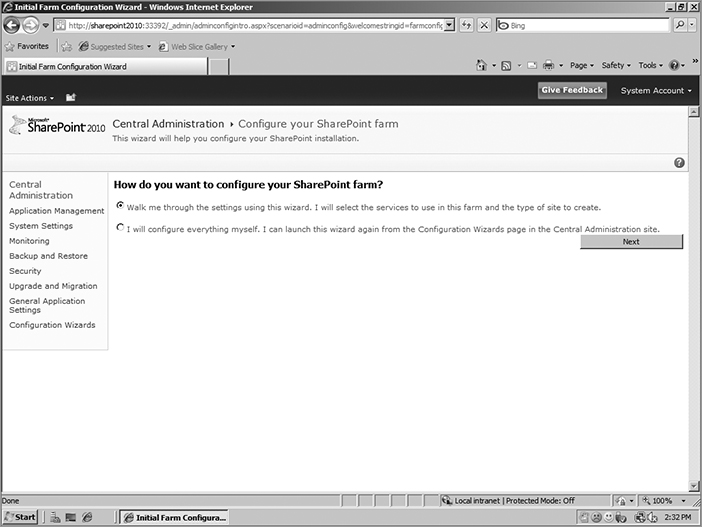
1. On the SharePoint Central Administration home page, click the Configuration Wizards hyperlink in the lower right-hand corner of the page. On the Configuration Wizards page, shown in Figure 19-14, click Launch the Farm Configuration Wizard hyperlink.

2. The Farm Configuration Wizard welcome page is shown in Figure 19-15. Choose “Walk me through the settings using this wizard,” and then click Next.
3. The purpose of running the wizard is to configure the desired services. On the Configure your SharePoint Farm page, in the Service Account section, make sure “Create new managed account” is selected and type a username and password for the service account. If you have not previously created an account specifically for services, then create the following account in Active Directory for use as your service account: contososp_admin.
4. The contents of the Configure your SharePoint farm web page are shown in Figure 19-16 and Figure 19-17. In the Services section, select as many services as you would like, but specifically ensure that the PowerPoint service application and the Word Viewing Service checkboxes are selected. For this install, select all the checkboxes except the one for the Lotus Notes Connector and then click Next.


The next screen displayed indicates that processing is in progress. Service instances and their corresponding proxies are being created during this time.
5. At this point, the services have been created and the administrator now has the option to create a new top-level web site. On the Create Site Collection page, shown in Figure 19-18, add the necessary information and click OK when you are finished.

6. On the Configure your SharePoint Farm page, shown in Figure 19-19, review the list of services and click Finish.
This completes the OWA setup. Next you will proceed with testing the web applications to ensure they are working.
The installed service application instances can be viewed from the Manage Service Applications web page in Central Administration. Make sure that the PowerPoint service application and proxy instances are listed and the services are started. Also, make sure the Word Viewing Service and proxy instances have been created and started.
Feature Activation and OWA Testing
The last step in the installation and configuration is to activate the Office Web Apps feature at the site collection level and ensure that the apps are functioning properly.
1. Using the newly created site collection as the test case, navigate to the Features page for the site collection and confirm that the Office Web Apps feature has been activated, as shown in Figure 19-20.

2. The administrator should also confirm that the Shared Documents library that has been provisioned as part of the new web site in the site collection has been configured to open documents in the browser by default, as shown in Figure 19-21. Do this by navigating to the Advanced Settings page for the Shared Documents library.

3. Add a document to the Shared Documents library so that the View in Browser functionally can be tested. You can do this by either creating a new document from scratch and then saving the document to the Shared Documents library or uploading a document to the library directly. Then select the View in Browser menu option from the drop-down menu, as shown in Figure 19-22. This will open the document in the web browser using the Office Web Application functionality.

4. If everything has been configured properly, the Word document will open in the browser (see Figure 19-23), indicating that the Word web application is functioning properly. The browser may also display the banner shown here above the document, indicating that the Word viewing experience can be improved by installing the Silverlight plug-in. To do so, click the link and complete the steps on the corresponding web pages.

You should test the Excel and PowerPoint web applications in the same way to confirm that they are configured properly.
If the OWA have been installed on a single server that is also functioning as an Active Directory domain controller, you will likely encounter the error shown in Figure 19-24. To fix the error and complete the configuration of the Word web application, you need to run the PowerShell commands using the following steps.

1. Open the SharePoint 2010 Management Shell from the Start menu in the Microsoft SharePoint 2010 Products heading. Type and execute the following two sets of commands:
See Chapter 10 for a refresher on running PowerShell commands.

Get-SPServiceApplication
$e = Get-SPServiceApplication | where {$_.TypeName.Equals("Word
Viewing Service Application")}
$e.WordServerIsSandboxed = $false
$e.WordServerIsSandboxed
Code file Chapter19_code.txt
The first command, Get-SPServiceApplication, will provide a list of the installed service application instances. This command needs to be run first so that the correct names of the service application instances can be determined. Keep in mind that in different languages, service application names could be localized. These service application names are then utilized in the second set of PowerShell commands. In this case, the Word Viewing Service and PowerPoint service application are the services of interest.
2. Type and execute the following two PowerShell commands to activate the PowerPoint service application. Respond to the prompts with a “Y” for yes after each command is executed, as shown in Figure 19-25. (Each of these commands belongs on a single line; they are broken here to fit on the page.)
Get-SPPowerPointServiceApplication | Set-SPPowerPointServiceApplication -
EnableSandboxedViewing $false
Get-SPPowerPointServiceApplication | Set-SPPowerPointServiceApplication -
EnableSandboxedEditing $false

3. Navigate to the following location:
c:windowssystem32inetsrvconfigapplicationHost.config
Add the following XML to the end of the dynamicTypes section:
<add mimeType="application/zip" enabled="false" />
4. Execute an IISRESET command.
This completes the manual configuration necessary to activate the OWA on a server that is also functioning as a domain controller. Proceed with testing the Excel and PowerPoint web applications to ensure that they are functioning properly.
Keep in mind that installing the OWA on a domain controller is not a supported configuration for a production environment. It is to be used as a development environment only.
PowerPoint Broadcast Slide Show
The Office 2010 Broadcast Slide Show (BSS) capability enables presenters to broadcast a PowerPoint 2010 slide show to remote users who can view the slide show using their web browser. The BSS service is hosted on a SharePoint server with the OWA installed and utilizes the PowerPoint service application. You create one or more broadcast services by creating sites that use the PowerPoint Broadcast site template, and set permissions for those individuals who can use the service through group membership on the site.
Installation and Configuration
The BSS requires that the PowerPoint service application be created and started. As demonstrated earlier, this is accomplished by running the Farm Configuration Wizard after the OWA have been installed. OWA installation adds the PowerPoint Broadcast site template to the server. A SharePoint site collection created from this template is required to utilize the BSS capability. Users who will utilize the BSS connect to the URL of this site collection to start a broadcast, and attendees also utilize this link to view the presentation in their browser. Multiple BSS sites may be created, each with its own URL.
As part of the OWA installation, a default BSS site collection is created within the default web application at http://<default web application>/sites/broadcast, which may be this URL: http://<server name>/sites/broadcast, where <server name> refers to the name of the server. In our specific installation, Figure 19-26 displays this default site collection’s home page.

Specific SharePoint groups are automatically created to help manage user access permissions. You can view these groups by clicking the Groups hyperlink on the left-hand side of the site, as shown in Figure 19-27. The groups include the following: Broadcast Administrators, Broadcast Presenters, Broadcast Attendees, and Broadcast Content Access Users. The Windows group NT Authority/Authenticated Users is automatically added to the Broadcast Presenters and Broadcast Attendees groups of this default site, granting all users access to create and view broadcasts. Also notice that the Administrator account is added to the Broadcast Administrators group.

BSS sites can also be created manually by creating a new site collection using the PowerPoint Broadcast Site template as described in the following steps.
1. From the Central Administration web site home page, click the Create site collections hyperlink. This displays the Create Site Collection page shown in Figure 19-28.

2. Create a new site collection using the PowerPoint Broadcast Site template, which is located on the Enterprise tab of the Template Selection section, shown in Figure 19-29. Once the new site collection has been created, the administrator should confirm that no permissions are granted by default, and assign permissions manually.

3. The broadcast site administrator must assign users permissions to broadcast and attend slide show broadcasts as recommended below. Permission assignment is done from the People and Groups web page (refer to Figure 19-27).
- Users who need to broadcast should be added to the Broadcast Presenters group.
- Users who need to attend a broadcast should be added to the Broadcast Attendees group.
- Users who need to administer the site and change group membership should be added to the Broadcast Administrators group.
Once security is configured, the broadcast service needs to be made available to individual PowerPoint 2010 users. Presenters can connect to the site and start a broadcast from their desktop PowerPoint 2010 application, and viewers can see the presentation from their browsers. Group policy can also be used to advertise the service to users so they don’t need to enter the broadcast site URL manually. Those interested in using group policy should download the PowerPoint 2010 Administrative template and follow the instructions in the article “Enforce settings by using Group Policy in the 2007 Office System,” located at http://technet.microsoft.com/en-us/library/cc179081.aspx. Group policy can also be used to disable the broadcast capability.
4. Open a PowerPoint slide deck. On the Slide Show tab, click the Broadcast Slide Show button on the ribbon to display the Broadcast Slide Show dialog, shown in Figure 19-30.

5. Click the Change Broadcast Service button, and then click the Add a new service… link. Type the URL of the new site in the Add Broadcast Service dialog and click the Add button. The result of adding the http://sharepoint2010/sites/broadcast site is shown in Figure 19-31.

6. Click the Start Broadcast button. The Connecting to SharePoint2010 dialog will appear as shown in Figure 19-32.

7. The final screen before starting the slide show provides the presenter with an option to copy the URL of the broadcast site or send an e-mail so that attendees can be informed. This screen is shown in Figure 19-33. To start the slide show, click the Start Slide Show button.

8. The slide show should begin, as shown in Figure 19-34. The presenter can press the Escape key to exit the presentation but won’t be able to edit it until the broadcast is ended. This completes the configuration.

Multiple-Server Farm Install
The multiple-server install process is exactly the same as the single-server install except that the setup application must be executed on every server in the server farm that will host the Office Web Application functionality. The other difference is that the PowerShell commands for activating the services on a single server that is also a domain controller may not need to be executed because in a multiple-server install the domain controller is usually a separate physical server.
PowerShell commands can also be used to create and activate the OWA service applications. The PowerShell commands can be executed from any server in the farm that has the OWA installed. SharePoint administrators are likely to be only now becoming familiar with PowerShell, as SharePoint 2010 is the first SharePoint version to recommend use of the technology.
PowerShell Permissions
Historically, SharePoint administrators have used Central Administration and the command-line tool STSADM for administering the SharePoint farm. One of the challenges of using these tools was the specific permissions that were required.
The SharePoint administrator needed to be a Farm Administrator to access the Central Administration (CA) web site; this meant that the administrator had to be a member of the Farm Administrators Group. This membership gave the administrator access to use the CA web site to execute operations against the configuration database through the CA web application. These operations were executed in the security context of the application pool account for the web application, not the administrator. This situation differs with the STSADM command environment and PowerShell.
STSADM and PowerShell commands are run in the security context of the user executing the commands. The good news is that this enables commands to be run from any server in the farm because CA is not required. The challenge is that this requires the user to have the necessary permissions to complete the operation the commands are implementing. With STSADM, the user is required to be a local administrator, a SharePoint Farm Administrator, and have specific SQL Server permissions.
In general, PowerShell simplifies this because the administrator or user who is executing the PowerShell commands against the SharePoint 2010 farm only requires PowerShell and SQL Server permissions. Obviously, because each PowerShell command utilizes the SharePoint object model, additional permissions may be necessary for specific PowerShell commands, such as installing SharePoint 2010, Windows file system manipulation, and registry changes. Therefore, in general, administrators need to have the following two permissions to execute PowerShell commands:
- The user must be a member of the Windows group WSS_ADMIN_WGP on the server being used to execute the commands.
- The user must be a member of the SQL Server role called SharePoint_Shell_Access on the configuration database.
At this point in the installation, the administrator should confirm that the WSS_ADMIN_WGP group exists and that the Administrator account has been added to the group. The SharePoint_Shell_Access role exists on the configuration database but does not show any members, but keep in mind that the Administrator account is the owner of the role.
A PowerShell command called SPShellAdmin has been added to the list of preconfigured SharePoint commands to simplify the management of these roles. SPShellAdmin will add and remove Shell Administrators. Let’s take a look at this command.
1. From the Start menu, type PowerShell, right-click the Windows PowerShell ISE option from the list, and click Run as administrator. The PowerShell Integrated Scripting Environment (ISE) is displayed, as shown in Figure 19-35. This environment provides a better approach to using and investigating PowerShell commands.
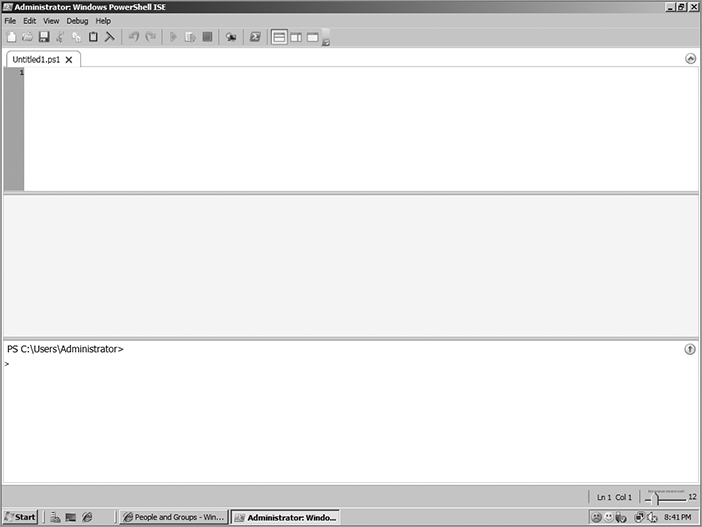
Unfortunately, the SharePoint 2010 PowerShell commands are not automatically loaded and registered into the environment like they are when you click the SharePoint 2010 Management Shell shortcut, so the SharePoint commands must be added manually.
2. At the PS C:UsersAdministrator prompt inside the ISE window, type the following command to register the SharePoint commands:
Add-PSSnapin Microsoft.SharePoint.Powershell
3. Type Get-Help SPShellAdmin at the shell prompt in the window as before. Three separate commandlets are listed, along with their synopses (summaries of their parameter requirements):
Get-SPShellAdmin
Add-SPShellAdmin
Remove-SPShellAdmin
These three commands have a database parameter that allows the administrator to designate a specific database, because by default the SharePoint_Shell_Access role allows access only to the configuration database. Each additional database access required must be given individually. Try adding a user to the SharePoint_Shell_Access role using the SPShellAdmin commandlet. Keep in mind that the syntax for the Add-SPShellAdmin commandlet is as follows:
Add-SPShellAdmin [-UserName] <String> [-database <SPDatabasePipeBind>]
4. Before you can execute the Add-SPShellAdmin commandlet, you need the SPDatabasePindBind value for the SharePoint_config database. This is obtained by executing the following command:
Get-SPDatabase
The Name, Id, and Type property information should be displayed in the ISE. The value of the Id is the SPDatabasePipeBind value that you will need to include in the Add-SPShellAdmin commandlet.
5. Type and execute the following command. Copy the Id value for the SharePoint_config database into the command. Make sure the sp_admin account exists or utilize another account. The command should add the sp_admin account to the SharePoint_Shell_Access role in the SharePoint_config database. The results are shown in Figure 19-36.
add-spshelladmin -username "contososp_admin"
-database 67256615-0d6f-467f-b17a-9de983c71563

After this brief tutorial, you should be ready to use PowerShell to manually create and activate the OWA service applications, as discussed in the next section.
Service Creation and Activation
Manual activation of the Office Web Applications is only required if the Farm Configuration Wizard has already been executed, as this process creates and registers the service and proxy instances. Before executing the PowerShell commands, it is advised that you check the state of your SharePoint farm services and service applications in the Manage services on server and Manage service applications pages in SharePoint Central Administration. If the OWA services are not running, or the service applications do not exist, you will need to perform the following steps.
1. Verify that the user executing the PowerShell commands meets the following minimum requirements:
- Is a member of the SharePoint_Shell_Access role on the configuration database
- Is a member of the WSS_ADMIN_WPG local group on the computer where SharePoint 2010 is installed
2. Open the PowerShell ISE with administrator privileges. You can also open the shell environment by using the SharePoint 2010 Management Shell if you prefer.
3. In the PowerShell console, at the command prompt, type and execute the following command as described in the previous section so that the SharePoint commandlet library is available:
Add-PSSnapin Microsoft.SharePoint.Powershell
4. The environment needs to be configured to execute PowerShell scripts in an unrestricted manner. Execute the following command to set policy. When prompted with the Execution Policy Change dialog, click Yes.
set-executionpolicy unrestricted
5. Next, the service instances must be started for each server that is executing the OWA service applications. Execute the following script. Replace the sharepoint2010 and server2 names with your specific server names, adding additional servers as appropriate:
$machinesToActivate = @("sharepoint2010", "server2")
$serviceInstanceNames = @("Word Viewing Service", "PowerPoint Service",
"Excel Calculation Services")
foreach ($machine in $machinesToActivate) {
foreach ($serviceInstance in $serviceInstanceNames){
$serviceID = $(Get-SPServiceInstance | where
{$_.TypeName -match $serviceInstance} | where
{$_.Server -match "SPServer Name="+$machine}).ID
Start-SPServiceInstance -Identity $serviceID
}
}
6. The next step is to create the service applications and proxies after the service instances have been started. The applications and proxies connect the WFE to the service applications. Execute the following script to create the applications and proxies:
$appPool = Get-SPServiceApplicationPool -Name "SharePoint Web Services Default"
New-SPWordViewingServiceApplication -Name "WdView" -ApplicationPool $appPool |
New-SPWordViewingServiceApplicationProxy -Name "WdProxy"
New-SPPowerPointServiceApplication -Name "PPT" -ApplicationPool $appPool |
New-SPPowerPointServiceApplicationProxy -Name "PPTProxy"
New-SPExcelServiceApplication -Name "Excel" -ApplicationPool
$appPool
7. The OWA feature can be manually activated on specific site collections in the farm or activated across all site collections using the following script:
$webAppsFeatureId = $(Get-SPFeature -limit all | where {$_.displayname
-eq "OfficeWebApps"}).Id
Get-SPSite –limit ALL |foreach{
Enable-SPFeature $webAppsFeatureId –url $_.URL }
8. Once the OWA feature is activated, documents will be opened using the corresponding web application, not the desktop application. This can be reconfigured so that documents are opened in the desktop application but not the web application. The following two sets of scripts reconfigure the default behavior for all site collections and all document libraries in the finance site, respectively. This completes the manual OWA activation. You can proceed with testing the install as previously discussed in the “Feature Activation and OWA Testing” section.
$webAppsFeatureId = $(Get-SPFeature -limit all | where {$_.displayname
-eq "OpenInClient"}).Id
Get-SPSite –limit ALL |foreach{
Enable-SPFeature $webAppsFeatureId –url $_.URL }
Get-SPWeb –site http://www.demo.com/sites/finance |% {}{$_.Lists}{$_.Update()
}|% {$_.DefaultItemOpen = $false}
The Office Web Applications enhance the productivity of SharePoint users and information workers by providing the capability to access, create, and edit Word, Excel, PowerPoint, and OneNote documents using a web browser. These applications are deployed to SharePoint Server 2010 and can be installed in single-server or multiple-server SharePoint farms.
The installation requires three phases. First, the OWA are installed using a setup application. Second, the service applications that support this functionality must be created and activated. Finally, the OWA feature must be activated for each site collection in the farm that will utilize the functionality. SharePoint administrators can rely on the configuration wizards to assist in the configuration of the second and third phases, or use PowerShell commands for these phases.