7 Digital Processing and Printing
In the previous sections we looked at how to successfully create your own digital pictures (with camera or scanner), so let’s now take a deeper look at how to process, edit, enhance, and produce and share these images.
Introducing the digital
photography tools
The image editing program
An image editing application is a computer program that can be loaded onto your machine and then used to change and enhance your digital pictures. There are many different programs available for installation on your computer. Some are used for word processing, chart creation or working out the family budget, but it is those that are specifically designed for manipulating pixels and fixing up digital photographs that we will look at here.

Figure 7.1 There are many different software packages on the market that are designed to edit and enhance your pictures.
A lot of image retouching programs combine features that can be used for everything from web design, manipulating photographs, converting your RAW files, creating posters and flyers for your business to making titles for your home movies. Such software can range in price and functionality (see Figure 7.1). So which program is a good choice for you?
Simply considered, image retouching/manipulation software can be placed in three application levels: enthusiast, semi-pro and professional. Enthusiast programs are generally easier to use but at times limited, whilst professional packages are designed for sophisticated image retouching and manipulation in a professional working environment. For most of us, however, it’s the ‘semiprofessional’ packages in the mid-price range that give the best value, performance and room for growth.
Entry-level applications
At the base level, you can get your hands on simple image editing software for free (see Figure 7.2). Both the Windows and Macintosh platforms come with basic, though comparatively limited, photo tweaking capabilities and more and more web-based editors are now available.
As you may already know, desktop scanners and cameras often come bundled with several different application programs, one of which is always a simple image editing package. Most of these ‘free’ inclusions are very good and though they may not fulfil all your imaging needs, they are a good place to start.
What retouching software can do for photos
• Improve/change the color, contrast, brightness, hue and saturation (intensity).
• Change color images to black and white.
• Change black and white to duotone (two colors), tri-tone (three colors) or quad tone (four colors).
• Change mono (black and white) to color using hand coloring tools.
• Remove dust specks, scratches and other damage.
• Invisibly remove parts of an image.
• Repair damaged sections and reduce the effects of ageing in old photos.
• Apply effects to the whole picture or just parts of it.
• Alter images to create stunning artworks.
• Add 2D or 2D text effects.
• Include your images in calendars, cards, report covers, school projects, business cards, letterheads, invitations and more.
• Save to different file formats suitable for web, print and desktop publishing.
• Convert photos into a web page complete with links and animated effects.
• Create special web page buttons and animations.
• Create index or contact sheets.
• Convert your pictures to different color spaces, e.g. CMYK, LAB color, RGB and Grayscale.
• Add artistic effects.

Figure 7.2 Entry-level programs like Google’s Picasa use a simple, easy to follow interface designed to get users editing their pictures quickly.
Besides purely edit-based programs, you will also see a range of products targeting the younger digital imager: programs for morphing one photo into another and liquid paint programs used for creating cool effects. These are tremendous fun but limited in their scope. No detailed restoration or retouching is possible with these!
Semi-professional programs (see Figure 7.3)
In the mid-range category, Adobe Photoshop Elements is definitely a favorite, being essentially a cut-down version of Photoshop, the world-class standard in image retouching programs. Designed to compete directly with the likes of Corel’s Paintshop Pro and PhotoImpact from Nova Development, Adobe’s mid-range package gives desktop photographers top quality image editing tools that can be used for preparing pictures for printing or web work.
Tools like the panoramic stitching option, called Photomerge, and the File Browser via the Organizer are favorite features. The color management and text and shape tools are the same robust technology that drives Photoshop itself, but Adobe has cleverly simplified the learning process by providing a range of levels of editing including step-by-step interactive guided edits for common image manipulation tasks. These, coupled with other helpful features like Shadow/Highlights, Adjust Color for Skin Tones and the Red Eye Brush tool, make this package a digital photographer’s delight.

Figure 7.3 Semi-professional packages, like Photoshop Elements, give high-quality results with slightly reduced feature sets and an easier to use interface than the professional programs.
The mid-range price category (US $60–100) has seen the greatest improvements, often producing results as professional as something created with software costing US $500 or more.
Professional programs (see Figure 7.4)
The top end of town gives you everything that a mid-range program can provide plus sophisticated productivity enhancing features with complete editablilty. Programs like Photoshop are designed for total integration with other Adobe products (InDesign, Illustrator, Flash and Dreamweaver). An enthusiast will find it hard to justify spending much more on a program that’s unlikely to produce any better inkjet print results than programs like PaintShop Pro, Adobe Photoshop Elements or PhotoImpact.

Figure 7.4 For the absolute best quality and greatest control over your pixels, you can’t better the industry leader Adobe Photoshop.
What you get for your money
Entry level
• Support for a limited number of file formats.
• Basic tool and feature set.
• Limited file saving options.
• Some preset special effects or filters.
• Plenty of template-based activities, such as magazine covers, calendars and cards.
Semi-professional
• Wide range of file formats supported.
• The use of separate image layers.
• Reasonably unlimited file saving options.
• Wide range of special effects filters.
• Support for third-party plug-in programs to add extra features to the software.
• Inclusion of web-based design features, including image slicing, image optimization and animation.
• Drag and drop web page creation.
Professional
• multiple file format support.
• Integration with other programs.
• Fully editable layers.
• Fully editable paths.
• Combination of scalable vector and bitmap graphics.
• Sophisticated special effects filters.
• Complex web design features.
• Wide range of editable pro paint and drawing tools.
• Wide range of darkroom manipulation tools.
• Wide range of specialist image adjustment features.
• Support for third-party plug-in programs to add extra features to the software.
The differences between high-end programs and entry-level products are really noticeable in a high turnover production business, especially in the prepress or publishing environment. The array of functions and the level of editability of the files are something that cheaper programs just don’t provide in any depth.
Parts of image editing programs
Most editing programs contain a look and feel that is very familiar and pretty much the same from one program to the next. This remains true even if the packages are created by different manufacturers.
The interface is the way that the software package communicates with the user. Each program has its own style, but the majority contain a workspace, a set of tools laid out in a toolbar and some menus. You might also encounter some other smaller windows around the edge of the screen. Commonly called dialog boxes and palettes, these windows give you extra details and controls for tools that you are using (see Figure 7.5).

Figure 7.5 The program’s interface is the gateway to the editing of your photographs.
Programs have become so complex that sometimes there are so many different boxes, menus and tools on screen that it is difficult to see your picture. Photographers solve this problem by treating themselves to bigger screens or by using two linked screens – one for tools and dialogs, and one for images. Most of us don’t have this luxury, so it’s important that, right from the start, you arrange the parts of the screen in a way that provides you with the best view of what is important – your image. Get into the habit of being tidy.
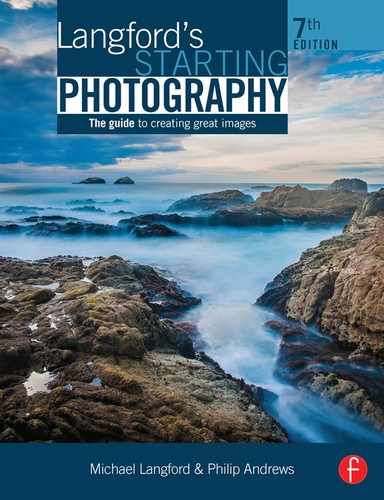
Know your tools
Over the years, the tools in most image editing packages have been distilled to a common set of similar icons that perform in very similar ways. The tools themselves can be divided up into several groups, depending on their general function.
Drawing tools (see Figure 7.6)
Designed to allow the user to draw lines or areas of color onto the screen, these tools are mostly used by the digital photographer to add to existing images. Those readers who are more artistically gifted will be able to use this group to generate masterpieces in their own right from blank screens.
Most software packages include basic brush, eraser, pen, line, spray paint and paint bucket tools. The tool draws with colors selected and categorized as either foreground or background.
Selecting tools (see Figure 7.7)
When starting out, most new users apply functions like filters and contrast control to the whole of the image area. By using one, or more, of the selection tools, it is also possible to isolate part of the image and restrict the effect of such changes to this area only.
Used in this way, the three major selection tools – lasso, magic wand and marquee – are some of the most important tools in any program. Good control of the various selection methods in a program is the basis for many digital photography production techniques.
Text tools (see Figure 7.8)
Adding and controlling the look of text within an image is becoming more important than ever. The text handling within all the major software packages has become increasingly sophisticated with each new release of the product. Effects that were only possible in text layout programs are now integral parts of the best packages.
Viewing tools (see Figure 7.9)
This group includes the now infamous magnifying glass for zooming in and out of an image and the move tool used for shifting the view of an enlarged picture.

Figure 7.6 Drawing tools.

Figure 7.7 Selecting tools.

Figure 7.8 Text tools.

Figure 7.9 Viewing tools.
Others (see Figure 7.10)
There remains a small group of specialist tools that don’t fit into the categories above. Most of them are specifically related to digital photography. In packages like Photoshop Elements they include a ‘Red Eye Remover’ tool specially designed to eliminate those evil-eyed images that plague compact camera users. Photoshop, on the other hand, supplies both ‘dodging’ and ‘burning-in’ tools. Most packages also include a variety of tools for repairing or retouching work. The most well known of these is the Clone Stamp or Rubber Stamp tool but Photoshop and Elements also include Healing brushes.
Figure 7.10 Other tools.
Making a menu selection (see Figure 7.11)
Features not activated via a tool can be found grouped under headings in the menu bar. Headings such as File, Edit, View and Help are common to most programs, but picture editing packages also display choices such as Image, Layer, Select and Filter. Navigating your way around the many choices and remembering where certain options are found takes practice, but after a little while finding your favorite features will become almost automatic.
When writing about how to select a particular option in a menu, authors often use a style of menu shorthand. For instance, ‘Image > Image Size’ means select the ‘Image Size’ option, which can be found under the ‘Image’ menu.

Figure 7.11 As well as the standard menus found in most programs image editing applications also contain specialist menus that list features used for modifying your photos.
Transferring pictures
from the camera to computer
There are several different ways to transfer or download your photos from camera to computer. Some photographers love to connect their cameras directly to the computer, others who use multiple memory cards, employ a dedicated card reader to transfer their files.
Camera to computer
When connecting your camera to the computer it is important to ensure that any drivers that are required to recognize the camera are installed before plugging in the cables. These little pieces of software are generally installed at the same time that you load the utility programs that accompanied the camera. If you haven’t yet installed any of these applications then you may need to do this first before the computer will recognize and be able to communicate with the camera. During the installation process follow any on-screen instructions and, if necessary, reboot the computer to initialize the new software.
Once the drivers are correctly installed you may also need to change the basic communications set-up on the camera before connecting the unit. This need is largely based on the operating system (and version) that you are using. Typically you will have a choice between connecting your camera as a mass storage device (the most common option) or via PTP (Picture Transfer Protocol). Check with your camera documentation which works best for your set-up and then use the mode options in the camera’s set-up menu to switch to the transfer system that you need.

Figure 7.12 There are two main ways to transfer your files from camera to computer – via a card reader (top) or directly by connecting the camera to the computer (bottom). Some newer camera models now also include the ability to connect via WIFI for wireless transfer of files (middle).
The next step is to connect the camera to the computer via the USB/Firewire cable. Make sure that your camera is switched off, and the computer on, when plugging in the cables. For the best connection and the least chance of trouble it is also a good idea to connect the camera directly to a computer USB/Firewire port rather than an intermediary hub.
Now switch the camera on. Some models have a special PC or connect-to-computer mode – if yours is one of these then change the camera settings to the PC connection mode. Most cameras no longer require this change, but check with your camera manual just in case. If the drivers are installed correctly the computer should report that the camera has been found and the connection is now active and a connection symbol (such as PC) will be displayed on the camera (see Figure 7.13). If the computer can’t find the camera try reinstalling the drivers and, if all else fails, consult the troubleshooting section in the manual. To ensure a continuous connection use newly charged batteries or an AC adaptor.

Figure 7.13 After installing the drivers that are supplied with your camera, your computer will automatically recognize the camera when you connect it.

Figure 7.14 Many modern card readers can be used with multiple card types, making them a good solution if you have several cameras in the household or office.

Figure 7.15 Make sure that your camera or card reader is disconnected properly from your computer using the preferred method for Macintosh or Windows systems.
Camera to computer via WIFI
With some cameras it is now possible to connect to a computer or wireless ‘hotspot’ via the camera’ own WIFI functionality. The connection is created by navigating to the Wireless, or Network options, in the system menu of the camera, locating the Hotspot name (sometimes called the SSID) and inputting a password. With the camera connected, photos can be transferred to a computer connected to the same Hotspot or to online photo sharing services such as Flickr.
Card reader to computer
Like attaching a camera, some card readers need to be installed before being used. This process involves copying a set of drivers to your machine that will allow the computer to communicate with the device. Other readers do not require extra drivers to function and simply plugging these devices into a free USB or Firewire port is all that is needed for them to be ready to use (see Figure 7.14).
After installing the reader, inserting a memory card into the device registers the card as a new removable disk or volume. Depending on the imaging software that you have installed on your computer, this action may also start a download manager or utility designed to aid with the task of moving your photo files from the card to hard drive.
Failing this, Windows users will be presented with a Removable Disk pop-up window containing a range of choices for further action. One of the options is ‘Copy pictures to a folder on my computer’. Choosing this entry will open the Microsoft Scanner and Camera Wizard which acts as a default download manager for transferring non-RAW-based picture files. If your card contains RAW files then some versions of the wizard will report that there are no photos present on the card. This situation will change as the Windows software becomes more RAW-aware, but for the moment the solution is to open folder to view files and manually copy the pictures into a new folder on your hard drive.
Cards inserted into a Macintosh connected reader will appear as a new volume on the computer’s desktop. Users can then copy or move the picture files from this volume to a new folder on their hard drive.
The important last step on both Macintosh and Windows platforms is to ensure that the card or camera is correctly disconnected from the system. Macintosh users will need to drag the volume to the Wastebasket or Eject icon, whereas Windows users can use the Safely Remove Mass Storage Device feature accessed via a button in the Taskbar (bottom right of the screen) (see Figure 7.15).
Fast Cards means Fast Downloads
It seems to be stating the obvious to say that the faster your memory card, the less time it will take to download your files, but photographers who regularly take hundreds of photos, will gain real benefits from investing in the fastest cards they can afford. As sensor resolution increases, so too does the size of the capture files. A typical shoot can now amass gigabytes of photos prompting the need for efficient and speedy downloading.
The latest incarnation of fast memory cards require equally fast card readers in order to take advantage of the increased speed. In the case of the CFast cards from Lexar that are capable of 3400× download speeds, the fast transfer performance is only possible when using the matched card reader and connection. USB 3.0 is the fastest of all the plugable connections and is necessary if the upper limit of the card/reader combination download speed is to be reached and, more importantly, sustained.
For Macintosh and Windows users working on a recently released models, the USB 3.0 connection is not a problem as these computers include at least one port of the faster interface as standard. Users with older computers will have a more difficult task tracking down an off the shelf computer that features the USB 3.0 connection. Instead most users will need to add the functionality to an existing system via an upgrade card.

Figure 7.16 Flash memory companies are always producing new products that make the process of downloading files faster than what was possible with the previous generation of cards. Lexar’s latest offering boasts 3400× speed which dramatically decreases the time taken to download large numbers of files. To exemplify the difference download speed makes, in the demonstration above, the same folder of photos (1Gb in size) was downloaded from both a 133× (lower) and a 300× card (upper). The 300× card was noticeably faster, completing the task minutes ahead of the older style flash card and reader.
The essentials – Card speeds
When shooting large numbers of RAW files it is worth investing in memory cards of at least 16, 32 or 64 Gb capacity, preferably with some sort of accelerated read/write speed. In case you’re wondering what that 300×, 133× or even 3400× label means, card performance is based on a benchmark of megabytes per second of read/write rate. Typical rates will be:
9 Mb/sec = 60× 10 Mb/sec = 66×
20 Mb/sec = 133× 45 Mb/sec = 300×
90 Mb/sec = 600× 500 Mb/sec = 3333×
For example, a 120× 2 Gb SD card has a read rate of 21 Mb/sec and a write rate of 18 Mb/sec. Such read/write speeds will provide not only fast storage of large image files to card, they will also facilitate quick viewing of images and faster transfer rates during downloading than, say, a 60× card. The Lexar Professional card range with Write Acceleration provides a staggering 3333× read/write speed which is currently one of the fastest on the market. Many photographers prefer to use two 64 Gb cards instead of one 128 Gb card. If you are creating huge files from a 36 Mp camera then 128 Gb or even 256 Gb will be attractive.
RAW Enabling Windows
One of the difficulties when working with RAW files is that sometimes the computer’s operating system is unable to display thumbnails of the images when viewing the contents of folders or directories.
When using older Windows systems it was necessary to install Microsoft’s RAW Image Thumbnailer and Viewer utility before the operating system was able to recognize, and display, RAW files. The system was slow and most users reverted to employing Bridge as the main way they viewed their files.
Now Windows users are migrating to newer versions of the Windows operating system. Recognising that RAW files are a key component of the photographer’s workflow, Microsoft has taken a different approach to the problem in its latest operating system offering. In creating a more ‘RAW aware’ operating system, Microsoft has made use of a structure where the various camera manufacturers supply their own CODECs (Compression Decompression drivers) to be used with their particular type of RAW files inside Vista. With this approach the user has to install the CODEC for the camera that he or she uses before they are able to view their images in the system folders or directories.
Though a little troublesome to start with, as you need to install codecs for all the cameras you use or have used in the past, this approach will hopefully future proof the operating system’s support for RAW files. It is a simple matter in the future to support the latest camera, or RAW file type, by installing the latest CODEC from the manufacturer.
Use the following steps as a guide for RAW enabling your own Windows Vista machine.

01 Locate the CODEC
Start by searching the internet, or your camera manufacturer’s support site, for the specific Vista CODEC that supports your RAW files. Once located, download, and in some cases, extract, or decompress, the files to your desktop ready for installation.

02 Follow the manufacturer’s install instructions
Next follow the install instructions. Here I am installing the Nikon Raw CODEC for Vista. As part of the process, the user is required to input location and language selections.

03 Reboot the computer (if necessary)
As the CODEC forms part of the file processing functions of the operating system it may be necessary to reboot (turn off and turn back on again) your computer after installing the software.

04 Test the install
After rebooting check to see that the CODEC is functioning correctly by displaying an Icon View of an image folder that you know contains RAW files. You should see a series of thumbnails representing your image files.
Camera and card reader connections
The connection that links the camera/card reader and computer is used to transfer the picture data between the two machines. Because digital photographs are made up of vast amounts of information this connection needs to be very fast. Over the years several different connection types have developed, each with their own merits. It is important to check that your computer has the same connection as the camera/card reader before finalizing any purchase.

CONNECTION |
MERITS |
SPEED RATING |
| USB 2.0 |
• Hot swappable • Can link many devices • Standard on most models • Can be added to older machines using an additional card |
Extremely fast (60 Mbs per sec) |
| USB 3.0 |
• Hot swappable • Can link many devices • Standard on newer models • Can be added to older machines using an additional card • Backwards compatible to USB 2.0 |
Fastest connection available (1.2 Gbs per sec) |
| Firewire |
• Hot swappable • Can link many devices • Becoming a standard on Windows machines, especially laptops • Can be added using an additional card • Standard on Macintosh machines |
Extremely fast (50 Mbs per sec) |
| Firewire 800 |
• Hot swappable • Can link many devices • Can be added using an additional card • Not yet standard but some new machines feature the connection |
Fastest connection available (100 Mbns per sec) |
Camera-specific download
Most digital cameras now ship with a host of utilities designed to make the life of the photographer much easier. As part of this software pack the camera manufacturers generally include an automated download utility designed to aid the transfer of files from camera or card reader to computer. These camera-specific download managers are clever enough to know when a camera or card reader is connected to the computer and will generally display a connection dialog when the camera is first attached or a memory card inserted into the reader.

Figure 7.17 Some camera manufacturers supply specialist download software with their cameras. Nikon Transfer, pictured above, is an example of this type of software. These small utilities handle the job of transferring photos from camera or memory card to the computer.
For instance, Nikon owners have the option to use the Nikon Transfer manager, a small popup utility that automates the moving of files from card/camera to hard drive. See Figure 7.17. The manager is installed along with camera drivers, photo browser and basic RAW conversion software when you load the software on the disk that accompanies your camera. Generally this type of software provides settings for choosing destination directories, renaming files on the fly, adding in copyright information and determining if the files are deleted from the camera or card after transfer.
Software-specific download
Some photographers choose not to rely on the download options available with their camerabased software or the manual copy route provided by the operating system. Instead they manage the download component of their workflow with the main imaging software package. Here we look at routes for transferring your photos with both Photoshop Elements and Photoshop.
Photoshop Elements and the Adobe Photo Downloader (APD)
After attaching the camera, or inserting a memory card into the reader, you will see the Adobe Photo Downloader dialog. This utility is designed specifically for managing the download process and contains the option of either a Standard or Advanced dialog. The Standard option offers the simplest method of transferring your files and the Advanced option provides more settings the user can customize (see Figure 7.18).
APD – Standard mode
After finding and selecting the source of the pictures (the card reader or camera) via the drop-down menu at the top of the dialog, you will then see a thumbnail of the first file stored on the camera or memory card. By default all pictures on the card will be selected ready for downloading and cataloging.
Next set the Import Settings. Browse for the folder where you want the photographs to be stored and if you want to use a subfolder select the way that this folder will be named from the Create Subfolder drop-down menu. To help with finding your pictures later it may be helpful to add a meaningful name, not the labels that are attached by the camera, to the beginning of each of the images. You can do this by selecting an option from the Rename File drop-down menu and adding any custom text if needed. It is at this point that you can choose what action Elements will take after downloading the files via the Delete Options menu.
It is a good idea to choose the Verify and Delete option as this makes sure that your valuable pictures have been downloaded successfully before they are removed from the card. Clicking the Get Photos will transfer your pictures to your hard drive – you can then catalog the pictures in the Organizer workspace. For more choices during the download process you will need to switch to the Advanced mode.
• select Get Photos and Videos > From Camera or Card Reader.
• locate the card reader in the drop-down menu.
• browse for the folder to store the pictures.
• elect to Rename or Auto Fix Red Eye, and then
• click the Get Media button.

Figure 7.18 To download the pictures from your camera’s memory card whilst in Photoshop Elements Organizer workspace:
(1) select Get Photos and Videos > From Camera or Card Reader.
(2) locate the card reader in the drop-down menu.
(3) browse for the folder to store the pictures.
(4) elect to Rename or Auto Fix Red Eye, and then
(5) click the Get Media button.

The Adobe Photo Downloader software also provides an autostart option (right) that allows the user to select the feature from a pop-up window when a memory card (in reader) or camera is attached to the computer.

Windows users may also see the operating system’s AutoPlay dialog when inserting a card or connecting a camera. To use Adobe Photo Downloader simply select the Organize and edit option from the list of available choices.
APD – Advanced mode
Selecting the Advanced Dialog button at the bottom left of the Standard mode window will display a larger dialog with more options and a complete set of preview thumbnails of the photos stored on the card. If for some reason you do not want to download all the images, then you will need to deselect the files to remain by unchecking the tick box at the bottom right-hand of the thumbnail.
The Advanced version of the Photo Downloader contains the same Location for saving transferred files, Rename and Delete after importing options that are in the Standard dialog. In addition, this mode contains the following options:
• Automatically Fix Red Eyes – This feature searches for and corrects any red eye effects in photos taken with flash.
• Automatically Suggest Photo Stacks – Select this option to display groups of photos that are similar in either content or time taken. The user can then opt to convert these groups into image stacks or keep them as individual thumbnails in the Organizer.
• Automatically Stack Raw and JPEG – This option groups (as an image stack) Raw and JPEG versions of the same image together in the Organizer.
• Make ‘Group Custom Name’ as a Tag – To aid with finding your pictures once they become part of the larger collection of images in your Elements’ catalog, you can group tag the photos as you download them. Adding tags is the Elements equivalent of including searchable keywords with your pictures. The tag name used is the same as the title added in the Rename section of the Photo Downloader utility.
• Apply Metadata (Author and Copyright) – With this option you can add both author name and copyright details to the metadata that is stored with the photo. Metadata, or EXIF data as it is sometimes called, is saved as part of the file and can be displayed at any time with the File Info (Editor) or Properties (Organizer) options in Elements or with a similar feature in other imaging programs.

Figure 7.19 The default settings for the Adobe Photo Downloader are located in the Camera or Card Reader section of the Edit > Preferences option in the Organizer workspace. This is also the place for adjusting the options for the Automatic Download feature as well.
Automatic downloads
Some versions of both the Standard and Advanced dialogs contain an option to use automatic downloading the next time a camera or card reader is attached to the computer. if available, the settings used for the auto download, as well as default values for features in the Advanced mode of the Photo Downloader, can be adjusted in the Organizer: Edit > Preferences > Camera or Card Reader dialog (see Figure 7.19).
Photoshop and Bridge
Photoshop users also have the option of transferring their images with the Adobe Photo Downloader. But the transfer utility needs to be started from inside of the Bridge program (which ships with Photoshop). Bridge is essentially a browser program and in the latest release contains a version of the Adobe Photo Downloader that we have just seen in action. If required Photoshop users can also employ other methods for transferring photos to their computer. These include the options outlined earlier such as:
• a manual method of transferring files using the computer’s operating system or
• a camera-specific download manager such as the Nikon Transfer utility.
Once the files have been downloaded they can be managed and sorted using the features in Bridge.
Processing the picture file
As we have already seen, selecting the file format you choose to store your captured photos in camera has implications for how the picture document is handled. Photos saved in the JPEG or TIFF formats can be edited or enhanced as soon as they are transferred from the camera or memory card, whereas those images stored in the RAW file format need to be processed or converted first before they can be manipulated (see Figure 7.20).
The conversion task can be handled by software supplied by your camera manufacturer, with features that are built into your image editing program or via dedicated utilities designed specifically for the task. Both Photoshop and Photoshop Elements contain Adobe’ own RAW conversion software called Adobe Camera RAW (ACR) and, for most photographers, it will be this utility that will handle their RAW file processing. Despite being based on the same core design, the version of Adobe Camera RAW that appears in Photoshop Elements is slightly different, with a smaller feature set, than Photoshop’ version. Use the following step-by-step guide to help you convert your RAW files.

Figure 7.20 Photos captured and saved in JPEG or TIFF formats need no further processing before they can be edited or enhanced in software such as Photoshop or Photoshop Elements. In contrast, most RAW files need to be converted to another format before they can be manipulated.
RAW conversion using Adobe Camera RAW (ACR)
Use the following workflow when converting your RAW photos with ACR in Photoshop Elements. The same utility is also used in conjunction with Photoshop and Bridge.

Step 1: Opening the RAW file
Once you have downloaded your RAW files from camera to computer you can start the task of processing. Keep in mind that in its present state the RAW file is not in the full color RGB format that we are used to, so the first part of all processing is to open the picture into Adobe Camera Raw. Selecting File > Open, or Open in Camera Raw, from inside Elements will automatically display the photo in the ACR dialog.

Step 2: Starting with the Organizer
Starting in the PhotoBrowser or Organizer workspace simply right-click on the thumbnail of the RAW file and select the Edit with Photoshop Elements Editor option from the pop-up menu to transfer the file to the Elements version of ACR in the Editor workspace.

Step 3: Rotate Right (90 CW) or Left (90 CCW)
Once the raw photo is open in ACR you can rotate the image using either of the two Rotate buttons at the top of the dialog. if you are the lucky owner of a recent camera model then chances are the picture will automatically rotate to its correct orientation. This is thanks to a small piece of metadata supplied by the camera and stored in the picture file that indicates which way is up.

Step 4: Crop and Straighten
The Straighten tool can automatically rotate a picture taken with the horizon slightly crooked. Simply drag the tool along the line in the image that is meant to be level and ACR will automatically rotate and crop the photo to realign the horizon. Use the Crop tool to remove unwanted areas around your photo or to reshape the format of the image to fit a specific paper type. The tool can be click-dragged around the area you want to keep or a specific cropping format can be selected from the drop-down menu accessed via the small downward facing arrow in the bottom right of the Tool button.

Step 5: Preset changes
When it comes to the White Balance options applied to your photo you can opt to stay with the settings used at the time of shooting (‘As Shot’) or select from a range of light source-specific settings in the White Balance drop-down menu of ACR. For best results, try to match the setting used with the type of lighting that was present in the scene at the time of capture. Or choose the Auto option from the drop-down White Balance menu to get ACR to determine a setting based on the individual image currently displayed.

Step 6: Manual adjustments
If none of the preset White Balance options perfectly matches the lighting in your photo then you will need to fine-tune your results with the Temperature and Tint sliders (located just below the Presets drop-down menu). The Temperature slider settings equate to the color of light in degrees Kelvin – so daylight will be 5500 and tungsten light 3200. It is a blue to yellow scale, so moving the slider to the left will make the image cooler (more blue) and to the right warmer (more yellow). In contrast the Tint slider is a green to magenta scale. Moving the slider left will add more green to the image and to the right more magenta.
Step 7: The White Balance tool
Another quick way to balance the light in your picture is to choose the White Balance tool and then click on a part of the picture that is meant to be neutral gray or white. ACR will automatically set the Temperature and Tint sliders so that this picture part becomes a neutral gray and in the process the rest of the image will be balanced. For best results when selecting lighter tones with the tool ensure that the area contains detail and is not a blown or specular highlight.

Step 8: Setting the exposure
To start modifying the tones, adjust the brightness with the Exposure slider. Moving the slider to the right lightens the photo and to the left darkens it. The settings for the slider are in f-stop increments, with a +1.00 setting being equivalent to increasing exposure by 1 f-stop. Use this slider to set the middle tones. Your aim is to balance the middle tones of the image without clipping (converting the pixels to pure white) the highlights or shadows. To do this, hold down the Alt/Option whilst moving the slider. This action previews the photo with the pixels being clipped against a black background. Move the slider back and forth until no clipped pixels appear.

Step 9: Adjusting the shadows
Next we’ll specifically adjust the darker tones using the Shadows slider. The aim is to darken these tones but not to convert (or clip) delicate details to pure black. Again the Alt/Option key can be pressed whilst making Blacks adjustments to preview the pixels being clipped. Alternatively the Shadow and Highlights Clipping Warning features can be used to provide instant clipping feedback on the preview image.
NOTE: Shadow pixels that are being clipped are displayed in blue and clipped highlight tones in red.

Step 10: Highlights changes
The next step is to adjust lighter areas of the photo with the Highlights slider. Your goal with this control is to lighten the highlights but not to convert (or clip) delicate details to pure white. Again the Alt/Option key can be pressed whilst making Whites adjustments to preview the pixels being clipped. Alternatively the Shadow and Highlights Clipping Warning features can be used to provide instant clipping feedback on the preview image.

Step 11: Recovering extreme Highlight and Shadow detail
If the highlights are still being clipped then use the Whites slider to recreate detail in the problem area. Likewise, if the shadows areas are too dark then drag the Blacks slider to the right to lighten these tones in the photo. Be careful with overapplication of either of these controls as it can make the image look low in contrast.

Step 12: Increasing/decreasing contrast
The last tonal control in the dialog, and the last to be applied to the photo, is the Contrast slider. The feature concentrates on the midtones in the photo with movements of the slider to the right increasing the midtone contrast and to the left producing a lower contrast image. Like the Brightness slider, Contrast changes are best applied after setting the white and black points of the image with the Exposure slider.

Step 13: Local Contrast Control
The Clarity slider is used to alter the local contrast or the contrast of details within the photo. It works well with photos that have been photographed with diffused light or on a cloudy day. Use Clarity and Contrast sliders together.

Step 14: Saturation control
The strength or vibrancy of the colors in the photo can be adjusted using the Saturation slider. Moving the slider to the right increases saturation, with a value of +100 being a doubling of the color strength found at a setting of 0. Saturation can be reduced by moving the slider to the left, with a value of −100 producing a monochrome image. Some photographers use this option as a quick way to convert their photos to black and white but most prefer to make this change in Photoshop Elements proper, where more control can be gained over the conversion process.

Step 15: Vibrance Adjustment
Unlike the Saturation slider which increases the strength of all colors in the photo irrespective of their strength in the first place, Vibrance targets its changes to just those colors that are desaturated. As well as targeting only pastel like colors, the Vibrance slider tends to protect skin tones when making changes to the saturation of colors in the photo. For these reasons you should use this control to boost color strength with less risk of posterized results or overly saturated skin tones.

Step 15: To sharpen or not to sharpen
The latest version of ACR contains four separate sharpening controls. Use the Amount slider to determine the overall strength of the sharpening effect. The Radius is used to control the number of pixels from an edge that will be changed in the sharpening process.

Step 16: Targeting sharpening
The Detail and Masking sliders are both designed to help target the sharpening at the parts of the image that most need it (edges) and restrict the sharpening effects from being applied to areas that don’t (skin tone and smooth graded areas). Moving the Detail slider to the right increases the local contrast surrounding edge areas. The Masking control interactively applies an edge locating mask to the sharpening process. A setting of 0 applies no mask and moving the slider to the right gradually isolates the edges until at a setting of 100 sharpening is only being applied to contrasty or dominant edges in the picture.

Step 16: Reducing noise
ACR contains two different noise reduction controls. The Luminance Smoothing slider is designed to reduce the appearance of grayscale noise in a photo. This is particularly useful for improving the look of images that appear grainy. The second type of noise is the random colored pixels that typically appear in photos taken with a high ISO setting or a long shutter speed. This is generally referred to as chroma noise and is reduced using the Color Noise Reduction slider in ACR. The noise reduction effect of both features is increased as the sliders are moved to the right.

Step 17: Controlling output options
The section below the main preview window in ACR contains the output options settings. Here you can adjust the color depth (8 or 16 bits per channel) of the processed file. Earlier versions of Photoshop Elements were unable to handle 16 bits per channel images but the latest releases have contained the ability to read, open, save and make a few changes to these high color files.

Step 18: Opening the processed file
The most basic option is to process the RAW file according to the settings selected in the ACR dialog and then open the picture into the Editor workspace of Photoshop Elements. To do this simply select the OK button. Select this route if you intend to edit or enhance the image beyond the changes made during the conversion.

Step 19: Saving the processed RAW file
Users have the ability to save converted RAW files from inside the ACR dialog via the Save button. This action opens the Save Options dialog which contains settings for inputting the file name as well as file type-specific characteristics such as compression. Use the Save option over the Open command if you want to process photos quickly without bringing them into the Editing space. Pro’s tip: Holding down the Alt/Option key whilst clicking the Save button allows you to store the file (with the raw processing settings applied) without actually going through the Save Options dialog.

Step 20: Applying the RAW conversion settings
There is also an option for applying the current settings to the RAW photo without opening the picture. By Alt-clicking the OK button (holding down the Alt key changes the button to the Update button) you can apply the changes to the original file and close the ACR dialog in one step. The great thing about working this way is that the settings are applied to the file losslessly. No changes are made to the underlying pixels, only to the instructions that are used to process the raw file. When next the file is opened, the applied settings will show up in the ACR dialog ready for fine-tuning, or even changing completely.

ACR Differences between Photoshop and Photoshop Elements
The Adobe Camera RAW utility is available in both Photoshop Elements and Photoshop (and Bridge) but the same functionality and controls are not common to the feature as it appears in each program. The Photoshop Elements version contains a reduced feature set but not one that overly restricts the user’s ability to make high-quality conversions.
The following features and controls are common to both Photoshop/Bridge and Photoshop Elements:
White Balance presets, Temperature, Tint, Exposure, Shadows, Highlights, Whites, Blacks, Contrast, Clarity, Auto checkboxes for tonal controls, Vibrance, Saturation, Sharpness, Luminance Smoothing, Color Noise Reduction, Rotate Left, Rotate Right, Shadow and Highlights Clipping Warnings, Preview checkbox, Color Histogram, RGB readout, Zoom tool, Hand tool, White Balance tool, Color Depth, Advanced Sharpening options, Open processed file, Apply conversion settings without opening.
These options are only available in ACR for Photoshop/Bridge:
Tone Curve, Convert to gray, Hue, Saturation and Luminance, Split Toning, Chromatic Aberration, Vignetting, Curves, Calibration controls, Color Sampler tool, Color Space, Image size, Image resolution, Save settings, Save processed file direct from ACR and Develop Presets.

Figure 7.21 The capture format you pick determines where the first enhancement steps will be performed. RAW shooters will initially adjust their images in Adobe Camera Raw before moving the processed file to Photoshop or Photoshop Elements for further editing and output (see upper workflow diagram). When capturing in TIFF or JPEG file formats the first processing steps are carried out inside the image editing program itself (see lower workflow diagram).
First steps in enhancing
If you choose to use a non-RAW capture format, such as JPEG or TIFF, then the enhancement steps applied to RAW files via utilities like Adobe Camera Raw will need to be undertaken in an image editing program such as Photoshop Elements. See Figure 7.21. To start your introduction to non-RAW based image processing, we will duplicate the adjustments that I demonstrated in the last section on RAW files, in Photoshop Elements. The following basic steps those that most photographers perform after each shooting session:
1 Starting the process.
2 Changing the picture’s orientation.
3 Cropping and straightening.
4 Spreading the image tones.
5 Removing unwanted casts.
6 Applying a little sharpening.
7 Saving the picture.
These basic alterations take a standard picture captured by a camera, or scanner, and tweak the pixels so that the resultant photograph is cast free, sharp and displays a good spread of tones.
No matter what image editing program you are using, the tools and features designed to perform these steps are often those first learned. Here the steps are demonstrated using Photoshop Elements, but these basic steps can be performed with any of the main image editing programs currently available on the market. A summary of the tools and menu options needed to perform these steps in Photoshop is also included at the end of each section. A trial version of Photoshop Elements and Photoshop can be obtained by downloading the 30-day demo from the www.adobe.com website.

Step 1. Starting the process
When opening Photoshop Elements for the first time, the user is confronted with the Quick Start or Welcome screen, see Figure 7.22, containing several options. You can select between a range of workspaces using the options in this screen. To download and import photos from your camera or card reader select the Organizer option. To make fast general changes with the added benefit of before and after preview screens or for more sophisticated and complex editing and enhancement tasks click on the Edit button. The final options, Create and Share, are used to start the production of a range of photo projects. These include creating slideshows, web galleries, photo books or collages and emailing images to friends and relatives.
Most photographers start in the Organize option which takes you directly to the Organizer workspace. Here you will see a series of thumbnails of the photos in your collection. If you have transferred your pictures using the Adobe Photo Downloader then they will already be cataloged and included in the display. If you are yet to add your photos, then choose one of the options in the File > Get Photos and Videos menu. Selecting From Camera or Card Reader will display the Adobe Photo Downloader dialog, which can be used to automate the transfer process. If the pictures have been transferred with another utility then select File > Get Photos and Videos > From Files or Folders.
After cataloging the next step is to open a photo into an editing workspace. To do this rightclick on a thumbnail displayed in the Organizer and then select Full Edit from the pop-up menu. The picture will then open in the Editor workspace.
This step in Photoshop:
To browse for a picture: File > Browse
To open a picture from a folder: File > Open
To import an image from a connected camera: File > Import
To use the Adobe Photo Downloader: In Bridge choose File > Get Photos from Camera
Step 2. Changing a picture’s
orientation
Turning your camera to shoot images in portrait mode will generally produce pictures that need to be rotated to vertical after importing. Elements provides a series of dedicated Rotate options under the Image menu designed for this purpose. Here the picture can be turned to the right or left in 90° increments or to custom angles, using the Canvas Custom feature. See Figure 7.23.

Figure 7.23 Change a picture’s orientation using the Image > Rotate menu option (top) or the Rotate buttons at the bottom of the workspace (bottom).
There is even an option to rotate the whole picture 180° for those readers who, like me, regularly place prints into their scanners upside down.
This step in Photoshop:
To rotate a picture: Image > Rotate Canvas > Select an option
Step 3. Cropping and straightening
Most editing programs provide tools that enable the user to crop the size and shape of their images. Elements provides two such methods. The first is to select the Rectangular Marquee tool and draw a selection on the image the size and shape of the required crop. Next choose Image > Crop from the menu bar. The area outside of the marquee is removed and the area inside becomes the new image.

Figure 7.24 Cropping and straightening.
The second method uses the dedicated Crop tool that is also located in the toolbox. Just as with the Marquee tool, a rectangle is drawn around the section of the image that you want to retain. The selection area can be resized at any time by clicking and dragging any of the handles positioned in the corners of the box. To crop the image, click the Commit button (green tick) at the bottom of the Crop marquee or double-click inside the selected area. See Figure 7.24. An added benefit of using the Crop tool is the ability to rotate the selection by clicking and dragging the mouse when it is positioned outside the box. To complete the crop, click the Commit button, but this time the image is also straightened based on the amount that the selection area was rotated.
As well as this manual method, Elements provides an automatic technique for cropping and straightening crooked scans. The bottom two options in the Rotate menu, Straighten Image and Straighten and Crop Image, are specifically designed for this purpose.
This step in Photoshop:
To crop a picture: use the Crop tool or Rectangular Marquee tool in the same way as detailed in the Photoshop Elements steps above


Figure 7.26 Adjust the brightness and contrast of your photos manually using features such as Levels or Brightness/Contrast.
Step 4. Spreading your image tones
When photographers produce their own traditional monochrome prints, they aim to spread the image tones between maximum black and white; so too should the digital image maker ensure that their pixels are spread across the whole of the possible tonal range. In a full color 24-bit image, this means that the tonal values should extend from 0 (black) to 255 (white).
Elements provides both manual and automatic techniques for adjusting tones. The Auto Contrast and Auto Levels options are both positioned under the Enhance menu. See Figure 7.25. Both features will spread the tones of your image automatically, the difference being that the Auto Levels function adjusts the tones of each of the color channels individually, whereas the Auto Contrast command ignores differences between the spread of the Red, Green and Blue components and just concentrates on adjusting the overall contrast.
If your image has a dominant cast, then using Auto Levels can sometimes neutralize this problem. The results can be unpredictable, though, so if after using the feature the colors in your image are still a little wayward, undo the changes using the Edit > Undo command and use the Auto Contrast feature instead. This feature concentrates on tones and ignores colors.
If you want a little more control over the placement of your pixel tones, then Adobe has also included the same slider-based Contrast/Brightness and Levels features used in Photoshop in their entry-level software. Both these features, Levels in particular, take back the control for the adjustment from the program and place it squarely in the hands of the user. See Figure 7.26.
This step in Photoshop:
To automatically adjust the contrast only in a picture: Image > Adjustments > Auto Contrast
To automatically adjust the contrast and color in a picture: Image > Adjustments > Auto Levels
Manual adjustment of contrast and brightness: Image > Adjustments > Brightness/Contrast or Image > Adjustments > Levels

Step 5. Ridding your pictures of unwanted color casts
Despite the quality of modern digital cameras’ white balance systems, images shot under mixed lighting conditions often contain strange color casts. The regularity of this problem led Adobe to include the specialized Color Cast tool (Enhance > Adjust Color > Color Cast) in Elements. Simply click the eyedropper on a section of your image that is meant to be gray (an area that contains equal amounts of red, green and blue values) and the program will adjust all the colors accordingly. See Figure 7.27. This process is very easy and accurate – if you have a gray section in your picture, that is.
For those pictures without the convenience of this reference, and for users of Photoshop Elements version 12 or earlier, the Variations feature (Enhance > Adjust Color > Color Variations) provides a visual ‘ring-around’ guide to cast removal. The feature is divided into four parts. The top of the dialog contains two thumbnails that represent how your image looked before changes and its appearance after. The radio buttons in the middle-left section allow the user to select the parts of the image they wish to alter. In this way, highlights, midtones and shadows can all be adjusted independently. The ‘Amount’ slider in the bottom left controls the strength of the color changes.
The final part, bottom left, is taken up with six color and two brightness preview images. These represent how your picture will look with specific colors added or when the picture is brightened or darkened. Clicking on any of these thumbnails will change the ‘after’ picture by adding the color chosen. To add a color to your image, click on a suitably colored thumbnail. To remove a color, click on its opposite.
This step in Photoshop:
To automatically adjust the color in a picture: Image > Adjustments > Auto Color
To adjust the color in a picture using preview thumbnails: Image > Adjustment > Variations
Step 6. Applying some sharpening
The nature of the capture or scan process means that most digital images can profit from a little careful sharpening. I say careful, because the overuse of this tool can cause image errors, or artifacts, that are very difficult to remove. Elements provides several sharpening choices including both manual and automatic options.
The Auto Sharpen feature found in the Enhance menu provides automatic techniques for improving the clarity of your images. The effect is achieved by altering the contrast of adjacent pixels and pixel groups. The Auto Sharpen feature applies a set amount of sharpening and provides no way for the user to adjust the effect.

Figure 7.28 Applying some sharpening.
In contrast Elements also contains two manual sharpening control options. The Unsharp Mask and Adjust Sharpness filters provide the user with manual control over which pixels will be changed and how strong the effect will be. The key to using these features is to make sure that the changes made by the filter are previewed in both the thumbnail and full image at 100 per cent magnification. This will help to ensure that your pictures will not be noticeably oversharpened.
This step in Photoshop:
To automatically adjust the sharpness: Filter > Sharpen > Sharpen or Sharpen More or Sharpen Edges
To manually adjust sharpness: Filter > Sharpen > Smart Sharpen or Unsharp Mask
Step 7. Saving your images
The final step in the process is to save all your hard work. The format you choose to save in determines a lot of the functionality of the file. If you are unsure of your needs, always use the native PSD or Photoshop format. These files maintain layers and features like editable text and saved selections and do not use any compression (keeping all the quality that was originally contained in your picture). If you are not using Photoshop or Elements and still want to maintain the best quality in your pictures, then you can also use the TIF or Tagged Image File Format, but this option has fewer features than the Photoshop format. JPEG and GIF files should only be used for web work or when you need to squeeze your files down to the smallest size possible. Both these formats lose image quality in the reduction process, so keep a PSD or TIF version as a quality backup.
To save your work, select File > Save As, entering the file name and selecting the file format you desire before pressing OK.

Figure 7.29 Saving your images.
This step in Photoshop:
To save pictures in a given format: you can use the same File > Save As option in Photoshop that was available in Photoshop Elements
Editing techniques
Now let’s throw a few more techniques into the editing arena for good measure. More than enhancing existing detail, these techniques are designed to change the information in your pictures and so are usually considered editing techniques.

Figure 7.30 Too much Dust and Scratches filtering can destroy image detail and make the picture blurry. Before (right) and after (left) Dust and Scratches filter application.
Figure 7.31 Select an area of the image that doesn’t have a lot of detail first and then apply the Dust and Scratches filter using the Radius first and then the Threshold slider.
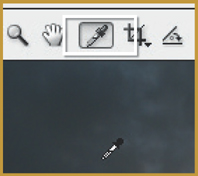
Dust and Scratches filter
It seems that no matter how careful I am, my scanned images always contain a few dust marks. The Dust and Scratches filter in Photoshop and Photoshop Elements helps to eliminate these annoying spots by blending or blurring the surrounding pixels to cover the defect. The settings you choose for this filter are critical if you are to maintain image sharpness whilst removing small marks. Too much filtering and your image will appear blurred, too little and the marks will remain (see Figure 7.30).
To find settings that provide a good balance, try adjusting the threshold setting to zero first. Next use the preview box in the filter dialog to highlight a mark that you want to remove. Use the zoom controls to enlarge the view of the defect. Now drag the Radius slider to the right. Find, and set, the lowest radius value where the mark is removed. Next increase the threshold value gradually until the texture of the image is restored and the defect is still removed (see Figure 7.31).
Generally, I only use this filter on the picture parts where there is little detail such as the background in the example. I select this area first and then apply the filter. This action successfully removes dust from smoothly graded areas such as skies without losing details in the important parts of the picture.
This feature in Photoshop:
Photoshop also contains the Dust and Scratches filter.
Clone Stamp
In some instances, the values needed for the Dust and Scratches filter to erase or disguise picture faults are so high that it makes the whole image too blurry for use. In these cases, it is better to use a tool that works with the problem area specifically rather than the whole picture surface.
The Clone Stamp tool (sometimes called the Rubber Stamp tool) samples an area of the image and then paints with the texture, color and tone of this copy onto another part of the picture. This process makes it a great tool to use for removing scratches or repairing tears or creases in a photograph. Backgrounds can be sampled and then painted over dust or scratch marks, and whole areas of a picture can be rebuilt or reconstructed using the information contained in other parts of the image (see Figure 7.32).
Using the Clone Stamp tool is a two-part process. The first step is to select the area that you are going to use as a sample by Alt-clicking (Windows) or Option-clicking (Macintosh) the area (see Figure 7.33). Now move the cursor to where you want to paint and click and drag to start the process (see Figure 7.34).
The size and style of the sampled area are based on the current brush and the opacity setting controls the transparency of the painted section.
This feature in Photoshop:
Photoshop also contains the Clone Stamp tool.

Figure 7.32 The Clone Stamp tool is perfect for retouching the marks that the Dust and Scratches filter cannot erase. Before (left) and after (right) applying the Clone Stamp tool to the dust spots on the jacket.

Figure 7.33 Alt + click (Windows) or Option + click (Mac) to mark the area to be sampled.

Figure 7.34 Move the cursor over the mark and click to paint over with the sampled texture.

Figure 7.35 The Healing Brush, which can be found in more recent versions of Photoshop, is an advanced retouching tool that works in the same basic ‘sample and paint’ way as the Clone Stamp tool. The difference is that the Healing Brush merges the newly painted area into the pixels that surround the mark, creating a more seamless repair.

Figure 7.36 Use this three-step approach to retouch using the Healing Brush.
Using the Healing
Brush
Designed to work in a similar way to the Clone tool, the user selects the area to be sampled before painting. This Photoshop-only tool achieves great results by merging background and source area details as you paint. Just as with the Clone Stamp tool, the size and edged hardness of the current brush determines the characteristics of the Healing tool tip (see Figure 7.35).
To use the Healing Brush, the first step is to locate the areas of the image that need to be retouched. Next, hold down the Alt key and click on the area that will be used as a sample for the brush. Notice that the cursor changes to cross-hairs to indicate the sample area (see Figure 7.36).
Now move the cursor to the area that needs retouching and click and drag the mouse to ‘paint’ over the problem picture part. After you release the mouse button, Photoshop merges the newly painted section with the image beneath.
Spot Healing Brush
In recognition of just how tricky it can be to get seamless dust removal with the Clone Stamp tool, Adobe decided to include the Spot Healing Brush in Elements. After selecting the tool you adjust the size of the brush tip using the options in the tool’s option bar and then click on the dust spots and small marks in your pictures. The Spot Healing Brush uses the texture that surrounds the mark as a guide to how the program should ‘paint over’ the area. In this way, Elements tries to match color, texture and tone whilst eliminating the dust mark. The results are terrific and this tool should be the one that you reach for first when there is a piece of dust or a hair mark to remove from your photographs.
This feature in Photoshop:
Photoshop contains both the Spot Healing and Healing Brushes.

Red eye removal
The dreaded red eye appears all too frequently with images shot using the built-in flash on compact digital cameras. The flash is too close to the lens and the light reflects back from the inside of the subject’s pupil, giving the tell-tale red glow. Red eye removal features can be found in most digital photography software and usually consist of a brush tool that replaces the red color with a hue that is more natural.
Photoshop Elements contains a specialist tool to help retouch these problems in our pictures. Called the Red Eye Removal tool, it changes crimson color in the center of the eye for a more natural-looking black (see Figure 7.37). To correct the problem is a simple process that involves selecting the tool and then clicking on the red section of the eye. Elements locates the red color and quickly converts it to a more natural dark gray. The tool’s options bar provides settings to adjust the pupil’s size and the amount that it is darkened. Try the default settings first and if the results are not quite perfect, undo the changes and adjust the option’s settings before reapplying the tool.
This feature in Photoshop:
Photoshop also contains a version of this feature called the Red Eye tool. You can find it nestled in the fly-out menu (to display, click and hold the mouse pointer over the small triangle in the bottom-right corner of the tool icon in the toolbox) of the Spot Heaing Brush, Healing Brush and Patch tools. The Photoshop version works in the same way as the Elements tool detailed here.

The Dodge and Burn-in tools
Over the years, the people at Adobe have borrowed many traditional darkroom terms and ideas for use in their Photoshop and Photoshop Elements image editing packages. I guess part of the reasoning is that it will be easier for us to understand just how a feature works (and what we should use it for) if we have a historical example to go by.
The Photoshop Elements dodging and burning-in tools have roots in traditional darkroom techniques that enabled photographers to selectively darken and lighten sections of their pictures. These techniques involve shielding the print from light (‘dodging’) during exposure or adding extra light (‘burning in’) after the initial overall exposure. In this way, and unlike brightness changes, which alter the tones across the whole picture, burning-in and dodging techniques are used to darken or lighten just a portion of the picture (see Figure 7.38).
The digital versions of the technique use brush-shaped tools that are dragged over the picture area to be changed. The pixels beneath the dragged brush are either lightened or darkened according to the Exposure value selected and how many times the area is brushed. By selecting different Range options in the tool’s options bar, the tonal changes can be limited to either highlights, shadows or midtones.

Figure 7.39 Photoshop Elements (top left – toolbar, top right – tool options) and Photoshop (bottom) both contain the same set of Dodge and Burn tools.
This feature in Photoshop:
The same tools are available in both Photoshop and Photoshop Elements. See Figure 7.39.
Dodging and burning in
practice
1 With an image open and a dodging tool selected, adjust the Brush, size, target tonal Range and Exposure values in the options bar. To start with, use a small, soft-edged brush, select midtones and ensure that the exposure is around 20 percent (see Figure 7.40).
2 For dark areas of the image, select the dodging tool and, using a series of overlapping brush strokes, click and drag over the area to lighten it. If the lightening effect is too great, Edit > Undo the changes and select a lower exposure value (see Figure 7.41). Note: to apply these changes non-destructively duplicate the image layer first.
3 For lighter parts, switch to the burning-in tool and brush the whole area except the steps (see Figure 7.42).
4 In some cases the act of lightening or darkening specific picture parts may cause the color in the altered areas to become more saturated or vibrant. If this occurs use the Sponge tool (which is grouped with the Dodge and Burn tools) set to desaturate, to reduce the strength of the color.

Figure 7.40 Setting the values for the dodging tool.

Figure 7.41 The dodging tool in practice, lightening darker areas of the photo.

Figure 7.42 The burning-in tool in practice.
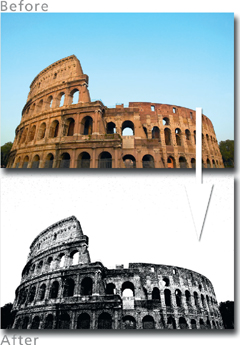

Figure 7.44 Most filters are supplied with a preview and settings dialog that allows the user to view changes before committing them to the full image. (1) Filter preview thumbnail. (2) Filter controls.
Applying a filter to your image
Using a filter to change the way that your picture looks should not be a completely new technique to readers, as we have already looked at a sharpening technique that used the Unsharp Mask filter to crispen our pictures. Here we will look at filters more generally and also find out how we can filter only a part of the picture, leaving the rest unchanged (see Figure 7.43).
The filters in Adobe Photoshop Elements and Photoshop can be found grouped under a series of sub-headings based on their main effect or feature in the Filter menu. Selecting a filter will apply the effect to the current layer or selection. Some filters display a dialog that allows the user to change specific settings and preview the filtered image before applying the effect to the whole of the picture (see Figure 7.44). This can be a great time saver, as filtering a large file can take several minutes. If the preview option is not available then, as an alternative, make a partial selection of the image using the Marquee tool first and use this to test the filter. Remember, filter changes can be reversed by using the Undo feature, but not once the changes have been saved to the file.
The number and type of filters available can make selecting which to use a difficult process. To help with this decision, both Photoshop and Photoshop Elements contain a Filter Gallery feature that displays thumbnail versions of different filter effects. Designed to allow the user to apply several different filters to a single image, it can also be used to apply the same filter several different times. The dialog consists of a preview area, a collection of filters that can be used with the feature, a settings area with sliders to control the filter effect and a list of filters that are currently being applied to the picture (see Figure 7.45).

Multiple filters are applied to a picture by selecting the filter, adjusting the settings to suit the image and then clicking the New effect layer button at the bottom of the dialog. Filters are arranged in the sequence they are applied. Applied filters can be moved to a different spot in the sequence by click-dragging them up or down the stack. Click the eye icon to hide the effect of the selected filter from preview. Filters can be deleted from the list by selecting them first and then clicking the dustbin icon at the bottom of the dialog.
Filters in action
1 Check to see that you have selected the layer that you wish to filter (see Figure 7.46).
2 Select Filter > Filter Gallery and then select or click on the filter to display the preview dialog or to apply. Adjust settings in the preview dialog (if available for the particular filter chosen). Click Apply to finish (see Figure 7.47).

Figure 7.46 Filters in action
Figure 7.47 Filters in action.
Restricting your
filtering
You can restrict your filtering to just a single part of the picture by isolating this area with a selection tool first before applying a filter. Choose a selection tool, such as the Rectangular Marquee tool, draw a selection of part of the picture, and then choose and apply the filter of your choice. Notice that only the area that was defined by the selection has been changed (see Figure 7.48).
Introduction to layers
It doesn’t take new digital photographers much time before they want to do more with their pictures than simply download and print them. Before you know it, they are adding text to their photographs, combining several images together and even adding fancy borders to their pictures. In some image editing packages, these sorts of activities are performed directly on the picture, which means making corrections, or slight modifications of these changes at a later date, difficult, if not almost impossible.
The leading programs, such as Photoshop and Photoshop Elements, use a better approach to image editing by providing a layer system to their files. The system enables users to separate individual components of a picture onto different layers. Each layer can be moved and edited independently. This is a big advantage compared to programs that treat the picture as a flat file, where any changes become a permanent part of the picture (see Figure 7.49).
Though each program handles this system differently, all provide a palette that you can use to view each of the layers and their content. The layers are positioned one above each other in a stack and the picture you see in the work area is a preview of the image with all layers combined (see Figures 7.50 and 7.51).

Figure 7.48 By selecting a portion of your picture first before filtering, you can restrict the area where the effect is applied.

Figure 7.49 Image parts, text and editing functions can all be separated and saved as individual layers that can be moved and edited independently.

Layered pictures are only possible with file formats that support the feature. The Photoshop or PSD format supports layers and so should be used as your primary method of storing your digital pictures. Formats like JPEG and GIF don’t support layers.
Getting to know how layers work in your favorite program will help you create more exciting and dynamic images in less time.
Photoshop:
Very similar filters are available in both Photoshop and Photoshop Elements.

Figure 7.51 Most layer functions and features can be accessed via buttons and menus in the Layers palette. These features can also be activated from the Layers option in the menu bar.
Adding text to your pictures
Combining text and pictures used to be the job of a graphic designer or printer, but the simple text functions that are now included in image retouching programs mean that more and more people are trying their hand at adding type to pictures (see Figure 7.52).
Photoshop as well as Photoshop Elements provide the ability to input type directly onto the canvas rather than via a type dialog. This means that you can see and adjust your text to fit and suit the image beneath. As the text is stored on a separate layer to the rest of the picture, it can be moved and altered independent of the other image parts. Just like when you are using a word processing program, changes of size, shape and style can be made at any stage by selecting the text and applying the alterations.
Text in action
1 Select the Type tool from the toolbox. There are two different versions to choose from – one produces horizontal type and the other vertical. Click on the picture surface at the point where you want the type to start. At this point, you can also choose the type style, font, color and size in the options bar (see Figure 7.53).
2 Enter the text using the keyboard. To begin a new line, press the Enter key. Click the OK button (shaped like a tick) in the options bar to complete the process (see Figure 7.54).
3 To add to the text later, select the Type tool, click next to the existing characters and continue typing (see Figure 7.55).
4 To change the font, style, color or size of the type, select the text and input the altered values in the options bar. To add fancy 3D styles and textures to the type, make sure the type layer is selected and then choose one of the Layer Styles options (see Figure 7.56).

Figure 7.52 Current image editing programs like Elements have a range of custom text features that not only allow you to add text to your pictures, but also control the way that the text looks.
Photoshop:
The text options in Photoshop and Elements are very similar.

Figure 7.53 Select text Type tool.

Figure 7.54 Add text to canvas.

Figure 7.55 Reselect text to add more.

Figure 7.56 Add style to text.
On-phone and in-camera enhancing
Over the last few years there has been a big change in the way that most of the pictures in the world are being taken, process and viewed. For many photographers the whole process now revolves around a mobile device such as a phone or tablet.
The rise of the ‘smart phone’ has driven this change. This single device now combines a camera, software for image processing and a means of viewing not just your own photos, but via photo sharing sites, the photos of millions of photographers from around the world.

Figure 7.57 The power and sophistication of smart phones now means they are capable of handling all aspects of the photographic workflow from capture, through processing, to viewing and sharing.
Processing photos on your phone
Typically the built-in image processing abilities found on many phones are contained in the default gallery or photo library app (application). These apps work in conjunction with the Camera app to provide a seamless experience of shooting, reviewing and processing.
Though not as sophisticated as desktop processing software, the image tweaking features found in these apps are often more than enough for improving the look of ‘snapshots’ or pictures destined for the family album. Enhancement options generally include:
• Simple cropping, rotating and straightening of images
• Application of one-click filters to produce an immediate effect such as monochrome, faded color, instant transfer or chrome looks,
• Adjustment of exposure, contrast, shadows and highlights,
• Changes to color including altering saturation removing of contrast, and
• Converting color photos to black and white.
Once the changes have been applied the user is given the choice of saving the process photo as a new file, cancelling the editing process or reverting the picture back to its original form.
The following example demonstrates the editing options in the Photos app for iPhone.

Figure 7.58 Photo processing features are often found within the Camera or Photo Library applications (apps) that ship with your phone.

Figure 7.59 In this example, we use three of the enhancement options available when images are displayed in the Edit mode of the iPhone Photos app to process a photo. Tapping the options icon displays the controls and/or options for the feature. (1) Cropping, (2) filters, and (3) manual adjustments.
Alternatives to default
photo processing apps
There are hundreds, if not thousands of additional photo processing apps available for your smart phone. Most apps provide base functionality for free or at a little cost and then offer additional or advanced features as an In App purchase.
Some of the big names in photography, like Adobe, have created apps that provide a good mix of features that are easy to use and link in well with their cloud-based photo storage and sharing option (Adobe Revel).
Whether you stay with Adobe, or choose another app provider, use the following as a guide for making your purchase:
1. Make sure the app saves the original image as well as the processed file,
2. It is always an advantage for the app to sync with any existing cloud software you are using to store your photo archive,
3. Check the functionality of the software that ships with your phone first before buys additional apps as these offerings are getting more sophisticated with each new release,
4. Ease of use should be your main priority as trying to manipulate a complex interface on a phone screen is never going to be fun…or that useful.

Figure 7.59 There are many photo processing apps available for use on your phone or tablet. Check the functionality of the apps that ship with your phone first before going to the trouble and expense of buying additional apps that might duplicate existing capabilities.
Processing your photos in-camera
The smart phone or tablet is not the only mobile device where images are being processed – many modern cameras also have the ability to adjust the photos they capture. Processing of pictures before they are downloaded is nothing new, as we have already seen in part 3, making changes to camera settings such as white balance, sharpness, and contrast all affect the way the downloaded picture looks, but in this age of apps, some camera manufacturers have taken the idea to a new level.
It is now possible to download and install a range of apps designed to extend the functionality of the camera. Sony is one camera manuafacturer who has taken to this approach with vigor. They have established an ‘app store’ for their camera apps (playmemoriescameraapps.com), enabled a range of their camera models to utilize the apps and have opened up the system so that third-party developers can create apps alongside the Sony engineers.

Figure 7.60 Sony provides additional functionality for their cameras via Play Memories Apps.

Some example additional processing options that are available for Sony cameras include:
Photo Retouching App – Adjustments for individual photos such as Framing, Brightness Control, Saturation Control, Contrast Control, and Horizontal Adjustment.
Picture Effect App – Processing options include Partial Color, Soft High Key, Miniature, Toy Camera, and Water and Illustration effects.
Figure 7.62 Picture Effect app examples
(1) Water Color
(2) Toy
(3) Miniature
(4) Soft High Key
(5) Partial Color
(6) Illustration
Installing camera apps
The addition of WIFI connectivity to modern cameras means that finding and installing additional apps is a very simple process.
| Step 01 | Connect camera to available WIFI network. |
| Step 02 | Locate the ‘Play Memories Camera Apps’ entry in the applications screen of the camera. |
| Step 03 | Choose and app from the online store and download the app to the camera before using. |
NOTE: An account registration step may be required. Some apps are free to download, others require payment.
Printing your digital files
It is one thing to be able to take great pictures with your digital camera and quite another to then produce fantastic photographic prints. With film-based photography, many photographers passed on the responsibility of making a print to their local photo store. In contrast, with the advance of the digital age the center of much digital print production sits squarely on the desk in the form of a tabletop printer.
The quality of the output from these devices continues to improve, as does the archival life of the prints they produce, but the first choice for many shooters for printing is still the local photolab. Here, too, times are changing. Not only can they make prints from negatives, but also from digital camera cards and CD-ROMs.
The decision about whether you print your own, or have your pictures printed for you, is generally a personal one, based on ease and comfort as much as anything. A summary of the current state of play is given in Table 7.1.
If you opt to make your own prints, there are several different printer technologies that can turn your digital pictures into photographs. The most popular, at the moment, is the inkjet (or bubble jet) printer, followed by dye sublimation and laser machines.
| ‘Do It Yourself’ desktop printing | Photo-lab printing | |
| Set-up cost | Initial purchase of printer US $50–400 | Nil |
| Cost per print | Moderate | Small |
| Ease | You will need a little instruction to get started | Very easy to use |
| Quality | Good | Good |
| Archival life | Good for some models, average for others | Good |
| Ability to change results to suit your own taste or ideas | Almost unlimited options to make user changes to how the print looks | Limited options or none |
| Convenience | Print whenever you want | Limited to shop hours, unless lab has online options |
The inkjet printer
Starting at a price of around US $50, the inkjet printer provides the cheapest way to enter the world of desktop printing. The ability of an inkjet printer to produce great photographs is based on the production of a combination of fineness of detail and seamless graduation of the color and tone. The machines contain a series of cartridges filled with liquid ink. The ink is forced through a set of tiny print nozzles using either heat or pressure. Different manufacturers have slightly different systems, but all are capable of producing very small droplets of ink (some are four times smaller than the diameter of a human hair!). The printer head moves back and forth across the paper laying down color, whilst the roller mechanism gradually feeds the print through the machine. Newer models have multiple sets of nozzles that operate in both directions (bidirectional) to give faster print speeds.
The most sophisticated printers from manufacturers like Canon, Epson and Hewlett Packard also have the ability to produce ink droplets that vary in size. This feature helps create the fine detail in photographic prints.
Most photographic quality printers have very high resolution, approaching 6000 dots per inch, which equates to pictures being created with very small ink droplets, and six, seven or even eight different ink colors, enabling these machines to produce the highest quality prints. These printers are often more expensive than standard models, but serious photographers will value the extra quality they are capable of.
Printers optimized for business applications are often capable of producing prints faster than the photographic models. They usually only have three colors and black, and so do not produce photographic images with as much subtlety in tonal change as the special photo models.
One of the real advantages of inkjet printing technologies for digital photography is the choice of papers available for printing. Different surfaces (gloss, semi-gloss, matte, iron-on transfer, metallic, magnetic and even plastic), textures (smooth, watercolor and canvas), thickness (from 80 to 300 gsm) and sizes (A4, A3, 10 in × 8 in, 6 in × 4 in, panorama and even roll) can all be fed through the printer. This is not the case with laser, where the choice is limited in surface and thickness, or dye sublimation, where only the specialized paper supplied with the colored ribbons can be used.

Figure 7.63 Standard inkjet printers use a four-color system containing cyan, magenta, yellow and black to produce color pictures.

Figure 7.64 Inkjet printers designed especially for photographic printing often contain five or more colors plus black, and some models can even print up to A3+ (bigger than A3).

Before you start to print
Make sure that your printer is turned on and then with an image editing program open your photograph ready for printing. Select the Print option from the File menu (generally File > Print). This will open up a general print dialog which contains settings for print layout, printer selection and print size. With Windows-based machines choosing the Page Setup option will display another dialog with specific printer settings. The Printer button shows the machine’s control panel, often called the printer driver dialog. It is here that you will need to check that the name of the printer is correctly listed in the Name box. If not, select the correct printer from the dropdown menu. Click on the properties button and choose the ‘Main Tab’. Select the media type that matches your paper, the ‘Color’ option for photographic images and ‘Automatic and Quality’ settings in the mode section. These options automatically select the highest quality print settings for the paper type you are using. Click OK. Now with your printer set for the paper, quality and type of print you require, let’s output the first image.
Note: Many of the specific dialogs and controls involved in printing from both Photoshop and Photoshop Elements are determined by the operating system (OSX or Windows) and the printer model and make you have installed so they may differ from those illustrated here. The key features and controls should be similar, they just might be presented differently.
Making your first digital print
With an image open in Photoshop or Photoshop Elements, open the Print preview dialog (File > Print). Check the thumbnail to ensure that the whole of the picture is located within the paper boundaries. To change the paper’s size or orientation, select the Page Setup and Printer Properties options. Whilst here, check the printer output settings are still set to the type of paper being used. Work your way back to the Print Preview dialog by clicking the OK buttons (see Figure 7.66).

Figure 7.66 You can change the size and position of your image on its paper background via the Print preview dialog.
To alter the position or size of the picture on the page, deselect both Scale to Fit Media and Center Image options, and then select the Show Bounding Box feature. Change the image size by clicking and dragging the handles at the edge and corners of the image. Move the picture to a different position on the page by clicking on the picture surface and dragging the whole image to a different area (see Figure 7.67). To print, select the Print button and then the OK button.

Figure 7.67 Change the size and position of the image on the page with the Print Preview dialog.
Printing in action
1 Select Print preview (File > Print or File > Print with Preview) and click the Page Setup button. Check the Printer Properties options are set to the paper type, page size and orientation, and print quality options that you require. Click OK to exit these dialogs and return to the Print Preview dialog (Figure 7.68).
2 At this stage you can choose to allow Photoshop or Elements to automatically center the image on the page (tick the Center Image box) and enlarge or reduce the picture so that it fits the page size selected (tick the Scale to Fit Media box) – see Figure 7.69.
3 Alternatively, you can adjust the position of the picture and its size manually by deselecting these options and ticking the ‘Show Bounding Box’ feature. To move the image, click inside the picture and drag to a new position. To change its size, click and drag one of the handles located at the corners of the bounding box. With all the settings complete, click Print to output your image (Figure 7.70).

Figure 7.68 Display the print preview dialog.
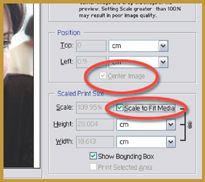
Figure 7.69 Adjust image size and placement

Figure 7.70 Manually fine tune.
Producing a digital contact sheet
Digital photographers are not afraid to shoot as much as they like because they know that they will only have to pay for the production of the very best of the images they take. Navigating through all the images can be quite difficult and many shooters still prefer to edit their photographs as prints rather than on screen. The people at Adobe must have understood this situation when they developed the Contact Print feature for Photoshop and Elements. With one simple command, the imaging program creates a series of small thumbnail versions of all the images in a directory or folder. These small pictures are then arranged on pages and labelled with their file names. From there, it is an easy task to print a series of contact sheets that can be kept as a permanent record of the folder’s images. The job of selecting the best pictures to manipulate and print can then be made with hard copies of your images without having to spend the time and money to output every image to be considered (see Figure 7.71).
The options contained within the Contact Sheet dialog allow the user to select the size and the number of thumbnails that will be placed on this page.

Figure 7.71 The Contact Sheet feature creates thumbnail versions of all the selected images (Photoshop Elements) or those located in a specific directory (Photoshop).
Figure 7.72 Choose the Photo Prints option.
Contact sheets in action
1 With several images open in the Elements Editor space, select Create > Photo Prints. Photoshop users should choose File > Automate > Contact Sheet and then use the Browse button to pick the folder or directory containing the images to be placed on the contact sheet (Figure 7.72).
2 In Photoshop – In the Document area, input the values for width, height, resolution and mode of the finished contact sheet. In the Thumbnails section, select the Place or sequence used to layout the images, as well as the number of columns and rows of thumbnails per page.
With Elements – Choose Contact Sheet as the Type of Print and choose the number of columns in the Layout settings (pictured). If you selected more images than can fit on one page, Elements or Photoshop will automatically make new pages to accommodate the other thumbnails (Figure 7.73).
3 In the final section you can elect to place a file name, printed as a caption, under each image. The size and font family used for the captions can also be chosen here. Click OK to make the contact sheet and then File > Print (Figure 7.74).

Figure 7.73 Select the contact sheet entry.

Figure 7.74 Pick layout options.