
Chapter 2
Hello World
In this chapter, you’ll learn about the basics of BlackBerry application development by creating a simple Hello World application with the BlackBerry JDE Plug-in for Eclipse. The code will be the same regardless of what IDE you use—in fact, throughout the rest of this book, we’ll focus on the code, not the development environment—but the details about creating the project, adding classes and resource files, and running and debugging will be different. Our application is a simple BlackBerry application with a single screen that will display “Hello World.” We’ll walk through creating the workspace and project, creating and building out the necessary classes, and compiling and running on a simulator. Then we’ll add a few extra bits of polish, including a proper application name, version information, and an icon. Finally, you’ll see how to build, sign, and run the application on an actual device.
This is a quick-start chapter, so the goal is to gain basic proficiency with the development tools and a bit of understanding of the basics of a BlackBerry application without going too deep. You’ll probably have a lot of questions throughout this chapter, but the best way to proceed is to just go through step by step—things will become clearer as we explore details of application development later on.
There’s a lot to do here, so let’s get going.
Creating an Application with the BlackBerry JDE Plug-In for Eclipse
If you have worked with Eclipse in the past on a generic Java project, then creating a BlackBerry project will be very similar to what you’ve done with other generic Java projects.
We’ll walk through creating the same Hello World application with the JDE Plug-in for Eclipse. Along with the walkthrough, we’ll also provide explanations of the code to give you a more complete picture.
If you haven’t installed the JDE Plug-in for Eclipse, refer to Chapter 1 for instructions about where to get it and how to install it.
Creating the Project
With Eclipse, workspace creation is implicit, and the JDE plug-in uses the same concept of workspace as Eclipse itself does. When you start Eclipse, you’re asked for a workspace location, which can be any directory. Select (or create) an appropriate one and click OK, as shown in Figure 2–1.

Figure 2–1. Creating a new workspace in Eclipse
If this is the first time you’ve opened this workspace, you’ll see Eclipse’s new workspace Welcome screen (see Figure 2–2). There are useful things here, but for this tutorial, you can close the window.
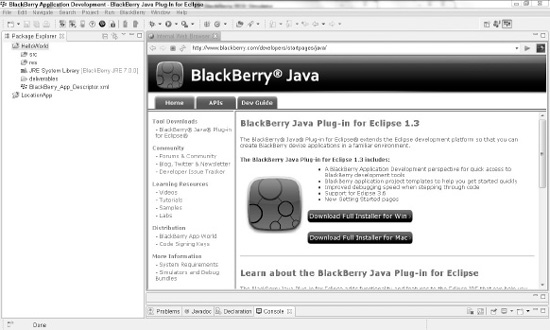
Figure 2–2. The Eclipse new workspace Welcome page
To create a new BlackBerry project, click the File menu, and choose New ![]() BlackBerry Project.
BlackBerry Project.
In the New BlackBerry Project dialog, as shown in Figure 2–3, name your project HelloWorld, and click Finish. Your Eclipse workspace should contain a single project in the Package Explorer on the left-hand side. When expanded, you should see the following, as shown in Figure 2–4:
srcfolder: Where all our source files will resideresfolder: Where all resource files (i.e., images) will reside- JRE System Library: The BlackBerry runtime library containing the BlackBerry API (by default, it is OS 7)
BlackBerry_App_Descriptor.xmlfile: A file where you can configure your application, including the name of the application and the icon your application will use
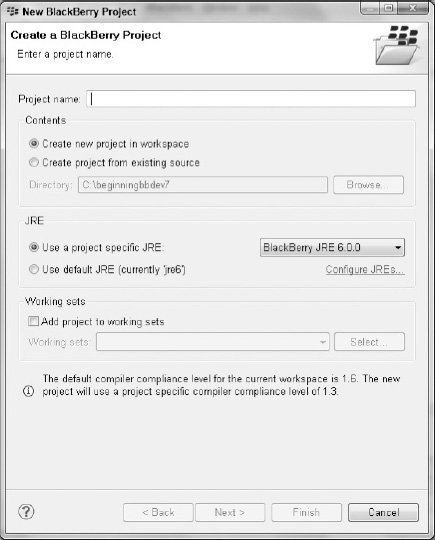
Figure 2–3. The New BlackBerry Project dialog

Figure 2–4. A new BlackBerry project in Eclipse with the application descriptor opened
By default, two classes, MyApp.java and MyScreen.java, will be created for you under the mypackage package. For the sake of the tutorial, delete the package so you can start from scratch by right-clicking on the mypackage package and selecting Delete.
Creating the Application Classes
Creating class files is just as simple as creating a project. When creating new classes, it’s a very good idea to put your classes into packages. As you will see, Eclipse has a very easy way of letting you specify the package for your class.
Creating the Main Application Class
Right-click the HelloWorld project icon in the Package Explorer, and from the pop-up menu, select New ![]() Class. In the dialog, type the following values:
Class. In the dialog, type the following values:
- Package:
com.beginningblackberry - Name:
HelloWorldApp(you can leave off the.javafile extension) - Superclass:
net.rim.device.api.ui.UiApplication
NOTE: A handy shortcut throughout Eclipse, both in the New Java Class dialog and in the code editor, is to type part of the class name and then press Ctrl+spacebar to get a list of class suggestions. For example, to automatically get the class name net.rim.device.api.ui.UiApplication in the Superclass field of the New Java Class dialog, type UiApp and press Ctrl+spacebar. Eclipse will look for possible completions in the RIM API and in any classes you’ve created in your workspace. This also works for other Java constructs, such as method names.
Under “Which method stubs would you like to create?” make sure the first two check boxes, for generating a main method and constructors, are checked (the third box can be checked or not—there are no abstract methods in UiApplication, so it won’t make a difference). Everything else can be left at the default (see Figure 2–5).

Figure 2–5. Creating the main application class with Eclipse
You’ll get the following source code:
package com.beginningblackberry;


import net.rim.device.api.ui.UiApplication;


public class HelloWorldApp extends UiApplication {


    public HelloWorldApp() {

        // TODO Auto-generated constructor stub

    }


    /**

     *@param args

     */

    public static void main(String[] args) {

        // TODO Auto-generated method stub


    }


}
There are even TODO markers where we have to write our logic. We’ll do that, but first, let’s understand what is on our screen.
You just created the main application class’ its job is to do three things:
- Create an instance of the application
- Create the main screen and push it onto the display stack
- Start the event dispatch thread
This is generally the pattern you’ll follow for all your applications, unless you need to do something like automatically start when the BlackBerry device boots.
Subclassing the UiApplication Class
All applications that display a user interface (screens, menus, etc.) must subclass net.rim.device.api.ui.UiApplication. As we created the HelloWorldApp class, we specified the superclass for our main class to be UiApplication.
Creating the Main Screen Class
Click New ![]() Class again (or right-click the package in the tree view and select New
Class again (or right-click the package in the tree view and select New ![]() Class, and you won’t have to reenter the package name). Fill in the following values:
Class, and you won’t have to reenter the package name). Fill in the following values:
- Package:
com.beginningblackberry - Name:
HelloWorldMainScreen - Superclass: net
.rim.device.api.ui.container.MainScreen(or type MainS, and press Ctrl+spacebar)
Leave all other values at their defaults, and click Finish to create the following source code:
package com.beginningblackberry;


import net.rim.device.api.ui.container.MainScreen;


public class HelloWorldMainScreen extends MainScreen {


}
Filling In the Hello World Classes
Next, we flip back to HelloWorldApp, our main class. We’ll fill in the constructor of HelloWorldApp. This will create the main screen and push it onto the display stack:
class HelloWorldApp extends UiApplication {

    HelloWorldApp() {

        HelloWorldMainScreen mainScreen = new HelloWorldMainScreen();

        pushScreen(mainScreen);

    }

}
Finally, we need to complete the main method. This will be familiar to you if you’re a Java SE, .NET, or C developer, but it is different from the Java ME/MIDP way of doing things. The main method acts as the entry point for our application and always has the same signature. You should only have one main method per application. The main method will create an instance of our application and start the event dispatcher, which is the mechanism that does all the drawing to the screen, and listens for all user interaction for our application.
class HelloWorldApp extends UiApplication {

   …

    public static void main(String[] args) {

        HelloWorldApp app = new HelloWorldApp();

        app.enterEventDispatcher();

    }

}
The enterEventDispatcher method will never return as long as the application is running. Essentially, the thread that entered the main application becomes the event dispatch thread. We’ll explore this in greater depth later, but for now, just remember that the method won’t return during the application’s normal life cycle.
Coding Up the Main Screen Classes
At this point, we need to add some GUI components to our main screen class with the following code for HelloWorldMainScreen.java:
public class HelloWorldMainScreen extends MainScreen {

    public HelloWorldMainScreen() {

        net.rim.device.api.ui.component.LabelField labelField = new

net.rim.device.api.ui.component.LabelField("Hello World");
        add(labelField);

    }

}
Note that we subclass MainScreen instead of Screen because MainScreen gives us a couple of things automatically—namely a basic layout manager (to position our UI controls on the screen) and a default menu. Later, we’ll want to handle some of that functionality ourselves, but for this application, the default behavior of MainScreen is just what we want.
Basic GUI Fields Explained
We’ll deal with the user interface more in-depth later, but for now, here’s a brief overview of how things work, so you’re not walking totally blindfolded.
The BlackBerry User Interface API follows a fields/layout managers/screens model: fields (UI controls such as buttons and text boxes) are contained within layout managers, which arrange and draw the fields in specific positions. The managers themselves are contained within other managers, and ultimately a Screen class, which represents the visible display on the BlackBerry. If you’ve used Java’s Abstract Window Toolkit (AWT), Swing, Windows Forms, or any number of other UI toolkits, these concepts will be familiar to you. In fact, if you’re an experienced Swing user, you’ll find things very familiar.
For now, we’ll gloss over some of the details, but basically, a MainScreen instance contains a single VerticalFieldManager instance, which arranges all fields that it contains, one below the other, in the order that they’re added.
The BlackBerry API contains a useful variety of fields and managers already. For Hello World, we’ll just need one: the LabelField, which displays (as you might expect) a text label. If you’re interested in exploring a bit more, you can find most of the built-in fields in the net.rim.device.api.ui.component package and the built-in layout managers in net.rim.device.api.ui.container.
Now that the application’s finished, let’s take a look at it in action in the simulator.
Running the Simulator
The application is automatically built and deployed when we launch the simulator (in fact, with Eclipse, the Java code is compiled whenever you make any change, which makes spotting errors easy). Running the simulator involves an extra step or two, because you have to create a debug configuration. The advantage of this is that you can create multiple device configurations for different simulators and quickly select whichever one you need.
Click the arrow next to the debug icon on the Eclipse toolbar, and select Debug Configurations, as shown in Figure 2–6.

Figure 2–6. The Eclipse Debug Configurations drop-down
The Debug Configurations dialog (see Figure 2–7) lets you set up different configurations, which may be different simulators or actual devices. Each configuration can have different debug parameters, and as you develop applications, you’ll likely end up with a few different configurations for debugging different OS versions, screen sizes, and so on. Feel free to explore these options at any time.
For now, select the BlackBerry Simulator icon on the left side, and click the New button on the toolbar in the dialog window that’s shown in Figure 2–7.
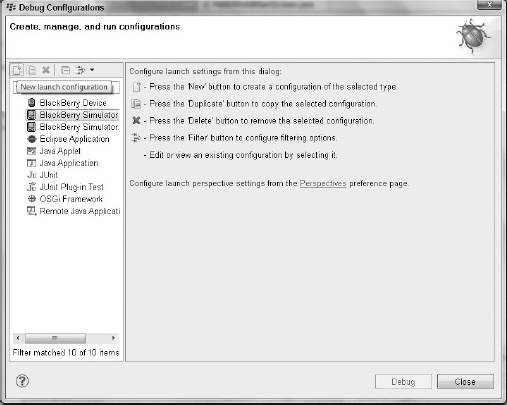
Figure 2–7. Setting up a simulator debug configuration with the Eclipse plug-in
We will need to specify which BlackBerry project we want the simulator to launch. On the Project tab shown in Figure 2–8, check the newly created HelloWorld project. As for the rest of the other tabs, keep all the defaults. Then click the Debug button at the bottom of the dialog. The simulator will launch with your application deployed. From this point on, you can access your debug configuration directly from the Debug drop-down menu on the main Eclipse toolbar by clicking the downward-facing arrow next to the debug icon.
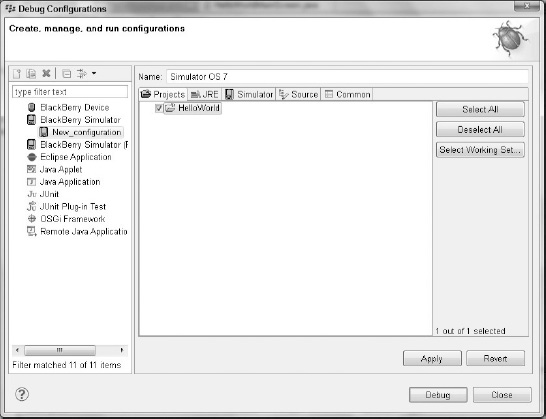
Figure 2–8. The default values for a new debug configuration
After you click the Debug button, the simulator will start up. When it is finished, you will see your HelloWorld app on the BlackBerry simulator home screen, as shown in Figure 2–9.

Figure 2–9. Launching the HelloWorld app in the simulator
When the simulator launches, the HelloWorld app will not start up on its own; you will need to launch it manually. Using your mouse, click the icon on the screen to launch the app. You can use the arrow keys to navigate and highlight the HelloWorld app, and press Enter to launch it (this is useful for older, non–touch screen simulators) (see Figure 2–10).
Figure 2–10. The HelloWorld app shown in the simulator
Using Breakpoints and the Debug Perspective
A breakpoint can be set for a line from the Run menu using Toggle Breakpoint (Ctrl+Shift+B).
A breakpoint will cause your application to pause and open the debug view when that line is reached. From that point, you can step through your code line by line to look at the values of variables, the call stack, and other information.
Let’s try this with Hello World now. Open HelloWorldMainScreen.java in the editor and move the cursor to the first line in the constructor, as shown in Figure 2–11.

Figure 2–11. A breakpoint is indicated by the circle to the left of the LabelField initialization.
Click the Debug button to run the HelloWorld app, and when the application stops at a breakpoint, you’ll be prompted to show the Eclipse Debug perspective (see Figure 2–12).

Figure 2–12. The Eclipse Debug perspective, stopped at a breakpoint
In the top-right panel is a list of variables that are currently in scope. If we step to the next line (using F6 or Run ![]() Step Over),
Step Over), labelField will appear in that list; you can then inspect and view the value and content of labelField.
Using the Profiler
The JDE plug-in includes several useful profiler and memory views that you can use to optimize and analyze your application. While you probably won’t need these for the HelloWorld application, they will certainly be handy as the complexity of your applications grows.
While at a debug point, go to the Window menu and click Show View ![]() BlackBerry Profiler View (see Figure 2–13). This will open up the Profiler view. At the top right of the Profiler View tab, you can click the “reload data” button to see profiler details, as shown in Figure 2–14.
BlackBerry Profiler View (see Figure 2–13). This will open up the Profiler view. At the top right of the Profiler View tab, you can click the “reload data” button to see profiler details, as shown in Figure 2–14.

Figure 2–13. Getting to the BlackBerry Profiler view
There are two other views that can further help you profile your application: BlackBerry Memory view and BlackBerry Object view, both of which can launched similarly to BlackBerry Profiler view.

Figure 2–14. BlackBerry Profiler view, showing profiling information
Building with Different JDE Versions
Building with different versions of the JDE using the JDE plug-in can accomplished by changing your BlackBerry JRE library configuration within the Java build path. By default, the JDE plug-in comes with a single version of the JDE; you must download others as outlined in Chapter 1.
To compile your BlackBerry project using another version of the BlackBerry SDK, follow these steps:
- Highlight your project, click the Project menu item, and select Properties.
- Select Java Build Path from the navigation box on the left.
- Click the Library tab and remove the current JDE version if it exists.
- Click the Add Library button, and the Add Library dialog will appear.
- From the Add Library dialog, select JRE System Library, and the JRE Library dialog will appear.
- Click the Alternate JRE radio button, and select a BlackBerry JRE from the drop-down list, as shown Figure 2–15.
- Click the Finish button.
At this point, your BlackBerry project will rebuild. This process is similar to switching to building your project with Java 1.5 instead of Java 1.6.

Figure 2–15. Changing JDE versions in Eclipse
Packaging and Signing Your Application
The HelloWorld application is not the most exciting, certainly, but it’s a real, fully functional application. It has a menu with a Close menu item (you can open the menu by clicking the BlackBerry key); you can start and exit it, and with a tiny bit of work, you’ll be able to put it onto a real device. Typically, if you use signature-required APIs during the course of your development, you will need to sign the application before installing it on a real BlackBerry smartphone.
The Hello World application is simple enough that you don’t need to sign it to run on a device, but it’s a good idea to get used to signing your applications for when you will need to do so. If you don’t have your code signing keys yet, you can skip the rest of this section.
To package your project and sign the binary, click the BlackBerry menu item and choose Package ![]() Project(s), as shown in Figure 2–16.
Project(s), as shown in Figure 2–16.

Figure 2–16. Invoke the code signing process so you can load your app onto a real BlackBerry smartphone.
You can also invoke the signing project separately. To do so, click the BlackBerry menu item and choose Sign ![]() Sign with Signature Tool.
Sign with Signature Tool.
Debugging on a Device
The JDE plug-in allows you to debug code on a real device. This requires the creation of a new debug configuration. From the Debug toolbar menu, select Debug Configurations, and create a new BlackBerry device configuration by highlighting that icon and clicking the New button, as shown in Figure 2–17.

Figure 2–17. Setting up on-device debugging using the Eclipse plug-in
Polishing the Application
Now that we’ve created and run our first application in the Eclipse, we’ll finish off by adding a few bits of polish: the application icon and a slightly friendlier name.
Setting the Title in the BlackBerry Application Descriptor
The application title and version are configured through the BlackBerry application descriptor file (BlackBerry_App_Descriptor.xml), which is located within your project, as shown in Figure 2–18. If you don’t specify an application title, the BlackBerry device will use your project name as the title of the application on the home screen. In our case, we’ll add a space between Hello and World and an exclamation point to make it more exciting, so type Hello World! in the Title field.

Figure 2–18. The BlackBerry application descriptor file for the HelloWorld project
Creating an Icon
A BlackBerry icon should be a PNG image. Because there are different screen resolutions, the image size will depend on the devices you want to support, though 48×48 pixels is reasonable for most devices (many older ones will scale it down). For more information about ideal icon sizes for different devices, you can refer to the BlackBerry UI Guidelines. The easiest way to find them is to search the BlackBerry Developer Zone (see Chapter 1) for “UI Guidelines.” By default, the BlackBerry JDE Eclipse plug-in creates a default icon.png file in the /res/img/ folder, and it is automatically set for you in the BlackBerry application descriptor. We have prepared another more colorful icon available for you to use, which you can download from the Apress website.
To change the icon, simply click the Add button at the bottom left of the BlackBerry application descriptor file, and browse to the icon.png file in the /res/img/ folder. You can add another icon as a rollover icon to make your icon more dynamic. You can make a rollover icon by checking the Rollover box next to the image.
Seeing It All in Action
Go ahead and rerun the simulator again. Our fancy new icon and more user-friendly name will be displayed on the home screen, just like in Figure 2–19.

Figure 2–19. The shiny new Hello World! name and icon
Summary
Congratulations! You’ve successfully built your first BlackBerry application. You’ve learned how to run and debug it in the simulator and how to load and debug it on a real BlackBerry device. That’s a good start, but obviously, we haven’t even scratched the surface of the rich BlackBerry API, so there’s still a lot to learn. In the next chapter, we’ll briefly discuss and consolidate some of the concepts that you have learned here, and set the stage for a deeper exploration of the BlackBerry API.