
CHAPTER 8
User Interfaces
In this chapter, you will look at one of the most common tasks a programmer needs to perform—the art of putting pixels on the screen. In F# this is all about the libraries and API that you call, and you have a lot of choices in this area. You can create WinForms, a set of classes found in System.Windows.Form.dll. These classes allow you to create desktop applications based on forms and controls. You can create ASP.NET applications. This library is contained in System.Web.dll, which is a simple way to create server-based dynamic HTML applications. You also have the option to use Windows Presentation Foundation (WPF), which is a new library distributed with .NET 3.0 that allows you to design interfaces in an XML-based language called XAML. These three technologies (WinForms, ASP.NET, and WPF) will be the focus of this chapter. Since whole books have been written on each topic, I won't be able to cover them all in detail. Instead, you'll look at techniques for working with these technologies in F#.
F# can also use a lot of other graphics libraries—some designed to work with the technologies already mentioned and others, such as the DirectX or GTK# libraries, designed to replace them.
Introducing WinForms
WinForms are based on the System.Windows.Forms.Form class. By creating an instance of this class, you essentially create a new window. You must then create an event loop, a way of ensuring user interactions with the window are responded to. You do this by calling the System.Windows.Application.Run method and passing it the form object you have created. You can control the look of the form by setting its properties and calling its methods. The following example demonstrates this:
#light

open System.Drawing

open System.Windows.Forms


let form = new Form(BackColor = Color.Purple, Text = "Introducing WinForms")


Application.Run(form)
This example will not work with F# interactive, fsi, because you cannot start an event loop from within fsi. So to work with forms in fsi, you simply call the form's Show method or set the form's Visible property to true. This example shows the second technique:
> #light

open System.Drawing

open System.Windows.Forms


let form = new Form(BackColor=Color.Purple,

                    Text="Introducing WinForms",

                    Visible=true);;
Either way, you have the advantage that you can dynamically interact with your form object. For example:
> form.Text <- "Dynamic !!!";;
When working with WinForms, you can take one of two approaches: drawing forms yourself or using controls to build them. First you'll look at drawing your own forms, and then you'll move on to using controls.
Drawing WinForms
Drawing your own forms means you take responsibility for the pixels that actually appear on the screen. This low-level approach might appeal to many F# users, because they might find that many controls that come with the WinForms library are not perfectly suited to displaying their data structures and the results of functions and algorithms. However, be warned that this approach can be time-consuming, and your time is usually better spent looking for a graphics library that abstracts some of the presentation logic.
To draw a WinForm, you attach an event handler to the form's or the control's Paint event. This means every time Windows requests the form to be drawn, your function will be called. The event argument that is passed into this function has a property called Graphics, which contains an instance of a class also called Graphics. This class has methods (such as DrawLine) that allow you to draw pixels on the form. The following example shows a simple form where you draw a pie on it:
#light

open System.Drawing

open System.Windows.Forms


let brush = new SolidBrush(Color.Red)


let form =

    let temp = new Form()

    temp.Resize.Add(fun _ -> temp.Invalidate())

    temp.Paint.Add

        (fun e ->

            if temp.Width - 64 > 0 && temp.Height - 96 > 0 then

                e.Graphics.FillPie

                    (brush,

                        32,

                        32,

                        temp.Width - 64,

                        temp.Height - 64,

                        0,

                        290))

    temp


Application.Run(form)
Figure 8-1 shows the resulting form.

Figure 8-1. A WinForm containing a pie shape
Because this image is linked to the size of the form, you must tell the form to redraw itself whenever the form is resized. You do this by attaching an event handling function to the Resize event. In this function, you call the form's Invalidate method, which tells the form that it needs to redraw itself.
You'll now look at a more complete WinForms example. Imagine you want to create a form to display the Tree type defined in the next code example and displayed in Figure 8-2.
// The tree type

type 'a Tree =

| Node of 'a Tree * 'a Tree

| Leaf of 'a


// The definition of the tree

let tree =

    Node(

        Node(

            Leaf "one",

            Node(Leaf "two", Leaf "three")),

        Node(

            Node(Leaf "four", Leaf "five"),

            Leaf "six"))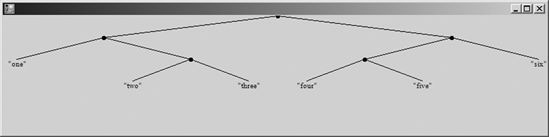
Figure 8-2. A WinForm showing a tree structure
You can draw this tree with the code in Listing 8-1. I will walk you through how the code works directly after the listing.
Listing 8-1. Drawing a Tree
#light

open System

open System.Drawing

open System.Windows.Forms


// The tree type

type 'a Tree =

| Node of 'a Tree * 'a Tree

| Leaf of 'a


// The definition of the tee

let tree =

    Node(

        Node(

            Leaf "one",

            Node(Leaf "two", Leaf "three")),

        Node(

            Node(Leaf "four", Leaf "five"),

            Leaf "six"))


// A function for finding the maximum depth of a tree

let getDepth t =

    let rec getDepthInner t d =

        match t with

        | Node (l, r) ->

            max

                (getDepthInner l d + 1.0F)

                (getDepthInner r d + 1.0F)

        | Leaf x -> d

    getDepthInner t 0.0F

// Constants required for drawing the form

let brush = new SolidBrush(Color.Black)

let pen = new Pen(Color.Black)

let font = new Font(FontFamily.GenericSerif, 8.0F)


// a useful function for calculating the maximum number

// of nodes at any given depth

let raise2ToPower (x : float32) =

    Convert.ToSingle(Math.Pow(2.0, Convert.ToDouble(x)))


let drawTree (g : Graphics) t =

    // constants that relate to the size and position

    // of the tree

    let center = g.ClipBounds.Width / 2.0F

    let maxWidth = 32.0F * raise2ToPower (getDepth t)


    // function for drawing a leaf node

    let drawLeaf (x : float32) (y : float32) v =

        let value = any_to_string v

        let l = g.MeasureString(value, font)

        g.DrawString(value, font, brush, x - (l.Width / 2.0F), y)


    // draw a connector between the nodes when necessary

    let connectNodes (x : float32) y p =

        match p with

        | Some(px, py) -> g.DrawLine(pen, px, py, x, y)

        | None -> ()


    // the main function to walk the tree structure drawing the

    // nodes as we go

    let rec drawTreeInner t d w p =

        let x = center - (maxWidth * w)

        let y = d * 32.0F

        connectNodes x y p

        match t with

        | Node (l, r) ->

            g.FillPie(brush, x - 3.0F, y - 3.0F, 7.0F, 7.0F, 0.0F, 360.0F)

            let d = (d + 1.0F)

            drawTreeInner l d (w + (1.0F / d)) (Some(x, y))

            drawTreeInner r d (w - (1.0F / d)) (Some(x, y))

        | Leaf v -> drawLeaf x y v


    drawTreeInner t 0.0F 0.0F None

// create the form object

let form =

    let temp = new Form(WindowState = FormWindowState.Maximized)

    temp.Resize.Add(fun _ -> temp.Invalidate())

    temp.Paint.Add

        (fun e ->

            e.Graphics.Clip <-

                new Region(new Rectangle(0, 0, temp.Width, temp.Height))

            drawTree e.Graphics tree)

    temp


Application.Run(form)
You define a function, drawTree, that has two parameters: the Graphics object and the tree to be drawn:
let drawTree (g : Graphics) t =
This is a common pattern when drawing WinForms. Creating a function that takes the Graphics object and a data type to be drawn allows the function to be easily reused by different forms and controls.
To implement drawTree, you first calculate a couple of constants to be used by the function, center and maxWidth. These are nice—since they can't be seen by functions outside drawTree yet, they can be used within all its inner functions without having to be passed around as parameters.
// constants that relate to the size and position

// of the tree

let center = g.ClipBounds.Width / 2.0F

let maxWidth = 32.0F * raise2ToPower (getDepth t)
The rest of the function is implemented by breaking it down into inner functions. You define drawLeaf to take care of drawing leaf nodes:
// function for drawing a leaf node

let drawLeaf (x : float32) (y : float32) v =

    let value = any_to_string v

    let l = g.MeasureString(value, font)

    g.DrawString(value, font, brush, x - (l.Width / 2.0F), y)
You use connectNodes to take care of drawing the connections between nodes, where appropriate:
// draw a connector between the nodes when necessary

let connectNodes (x : float32) y p =

    match p with

    | Some(px, py) -> g.DrawLine(pen, px, py, x, y)

    | None -> ()
Finally, you define drawTreeInner as a recursive function that does the real work of walking the Tree type and drawing it:
// the main function to walk the tree structure drawing the

// nodes as we go

let rec drawTreeInner t d w p =

    let x = center - (maxWidth * w)

    let y = d * 32.0F

    connectNodes x y p

    match t with

    | Node (l, r) ->

        g.FillPie(brush, x - 3.0F, y - 3.0F, 7.0F, 7.0F, 0.0F, 360.0F)

        let d = (d + 1.0F)

        drawTreeInner l d (w + (1.0F / d)) (Some(x, y))

        drawTreeInner r d (w - (1.0F / d)) (Some(x, y))

    | Leaf v -> drawLeaf x y v
This function uses parameters to store values between recursive calls. Because it is an inner function, you know that the outside world cannot misuse it by initializing its initial values incorrectly; this is because the outside world cannot see it. Hiding parameters to store working values between recursive function calls is another common pattern in functional programming.
In some ways this tree-drawing function is satisfactory; it gives a nice hierarchical overview of the tree in a fairly concise 86 lines of F# code. However, there is a limit to how well this approach scales. As you draw more complicated images, the number of lines of code can grow rapidly, and working out all the geometry can become time-consuming. To help manage this complexity, F# can use controls, as discussed in the next section.
Caution Although you can use these techniques to produce animation, such animations will flicker. To avoid this flicker, you must use a technique called double buffering, which requires you to understand a lot about how Windows draws forms. For more information about double buffering, please see http://strangelights.com/FSharp/Foundations/default.aspx/FSharpFoundations.DoubleBuffering.
To make the most of drawing on WinForms, you should get to know the System.Drawing namespace contained in System.Drawing.dll. You should concentrate on two areas, first learning how to use the Graphics object, particularly the overloads of methods prefixed with either Draw or Fill. To help you get started, Table 8-1 summaries them.
Table 8-1. Important Methods on the System.Drawing.Graphics Object
The second area is closely related to the System.Drawing.Graphics object; it is the creation of the Icon, Image, Pen, and Brush objects that are used by its methods. Table 8-2 shows examples of how to create these objects via their constructors.
Table 8-2. Important Methods on the System.Drawing.Graphics Object
| Snippet | Description |
Color.FromArgb(33, 44, 55) |
Creates a color from its red, green, and blue components |
Color.FromKnownColor(KnownColor.Crimson) |
Creates a color from a member of the KnownColor enumeration |
Color.FromName("HotPink") |
Creates a color from its name in string form |
new Font(FontFamily.GenericSerif, 8.0f) |
Creates a new font that is a generic serif font and 8 points tall |
Image.FromFile("myimage.jpg") |
Creates a new image from a file |
Image.FromStream(File.OpenRead |
Creates a new image from a stream |
new Icon("myicon.ico") |
Creates a new icon from a file |
new Icon(File.OpenRead("myicon.ico")) |
Creates a new icon from a stream |
new Pen(Color.FromArgb(33, 44, 55)) |
Creates a pen, used to draw lines, from a color |
new Pen(SystemColors.Control, 2.0f) |
Creates a pen, used to draw lines, from a color and with a width of 2 pixels |
new SolidBrush(Color.FromName("Black")) |
Creates a solid brush that can be used to draw filled shapes |
new TexturedBrush(Image.FromFile |
Creates a new textured brush from an image and draws a filled shape with an image mapped across it |
If you prefer to use standard objects, you can use several classes in the System.Drawing namespace that contain predefined objects. These are Brushes, Pens, SystemBrushes, SystemColors, SystemFonts, SystemIcons, and SystemPens; the following is a quick example of using these:
#light

open System.Drawing


let myPen = Pens.Aquamarine

let myFont = SystemFonts.DefaultFont
Working with Controls in WinForms
A control is simply a class that derives from System.Windows.Forms.Control. Any class that derives from this can be displayed in a form by adding it to the Controls collection on the form object.
You'll now look at a way to draw the tree using controls. The WinForms library defines a TreeView class, which is specifically for displaying tree-like structures, so you'll use this control to display the tree. To use TreeView, you create an instance of it and configure it by setting its properties and calling its methods. Most important, you add to its Nodes collection the nodes you want to display. Once the control is ready to be displayed, you add it to the form's Controls collection.
The TreeView class uses TreeNode objects to represent nodes, so you'll define the function mapTreeToTreeNode to recursively walk the tree structure and create a TreeNode graph. The program in Listing 8-2 produces the tree in Figure 8-3.
Listing 8-2. Drawing a Tree via a TreeView Control
#light

open System.Windows.Forms


// The tree type

type 'a Tree =

| Node of 'a Tree * 'a Tree

| Leaf of 'a


// The definition of the tee

let tree =

    Node(

        Node(

            Leaf "one",

            Node(Leaf "two", Leaf "three")),

        Node(

            Node(Leaf "four", Leaf "five"),

            Leaf "six"))


// A function to transform our tree into a tree of controls

let mapTreeToTreeNode t =

    let rec mapTreeToTreeNodeInner t (node : TreeNode) =

        match t with

        | Node (l, r) ->

            let newNode = new TreeNode("Node")

            node.Nodes.Add(newNode) |> ignore

            mapTreeToTreeNodeInner l newNode

            mapTreeToTreeNodeInner r newNode

        | Leaf x ->

            node.Nodes.Add(new TreeNode(any_to_string x)) |> ignore

    let root = new TreeNode("Root")

    mapTreeToTreeNodeInner t root

    root

// create the form object

let form =

    let temp = new Form()

    let treeView = new TreeView(Dock = DockStyle.Fill)

    treeView.Nodes.Add(mapTreeToTreeNode tree) |> ignore

    treeView.ExpandAll()

    temp.Controls.Add(treeView)

    temp


Application.Run(form)

Figure 8-3. A TreeView control used to view a tree
This code is about half the length of Listing 8-1, when you drew the tree yourself. It is also more functional, because it allows you to fold away parts of the tree in which you're not interested. This greatly improves the size of tree that can be manageably displayed.
In this example, you use the "dock style" to control how the control looks. You do this by setting the control's Dock property with a member of the DockStyle enumeration. Docking means that the control will take up as much space as available in the form that contains it on the left side if you use DockStyle.Left, on the right side if you use DockStyle.Right, at the top if you use DockStyle.Top, on the bottom if you use DockStyle.Bottom, and on the whole form if you use DockStyle.Fill. This is great when you have just a few controls, because it creates a nice dynamic effect because the controls are resized when the user resizes the form; however, it does not work well with a lot of controls because it is difficult to get lots of controls to fit together nicely using this technique. For example, if you have two controls that are docked to the left, it's confusing which one is supposed to be the leftmost one and how much of the left side they both take up. A better solution with a lot of controls is to explicitly control their layout using the Top and Left properties. You can create a dynamic effect by using the Anchor property to anchor the control to the edge of the containing form. The following example creates a form with a single textbox on it that will grow and shrink as the user resizes the form:
#light

open System

open System.Windows.Forms


let form =

    let temp = new Form()

    let textBox = new TextBox(Top=8,Left=8, Width=temp.Width −24.

                              Anchor = (AnchorStyles.Left |||

                                        AnchorStyles.Right |||

                                        AnchorStyles.Top))

    temp.Controls.Add(textBox)

    temp


[<STAThread>]

do Application.Run(form)
However, this method of working with controls is not always satisfactory. Here you displayed only one control. Often you want to display tens, even hundreds, of controls on a form. Writing all the code to create and configure the controls can quickly become tedious and error-prone. To get around this, Visual Studio provides some form designers that allow you to graphically create forms. However, a designer is not currently available for F#, so the next section will discuss working in F# with forms created with the C# designer.
One of the difficulties facing the WinForms programmer when working with controls is that there are many controls from which to choose. In this chapter, I have covered just one control. Unfortunately, in learning what works, there's no real substitute for experience. The MSDN library (http://msdn.microsoft.com) provides an excellent reference, but the volume of information there can also be a little off-putting for learners, so I have summarized some of the most useful ones in Table 8-3 to give you a head start.
Table 8-3. Common WinForm Controls and Their Usages
| Control | Description |
Label |
A control for displaying text information to the user; generally most other controls should be accompanied by a Label to explain their usage. Placing an & in the text of the Text property of the Label will underline the letter directly after it and allow the keyboard user to hop to the control associated with the Label (the control next in the tab order) by pressing Alt+<letter>; this is good for improving application usability. |
TextBox |
A box for entering text. The default is a single line of text but can be changed to support multiline entry if you set the Multiline property to true; in this case, also check that the WordWrap and ScrollBar properties are to your liking. This is also useful for displaying text to the user that you want them to be able to copy and paste; in this case, set the ReadOnly property to true. |
MaskedTextBox |
A textbox similar in a lot of respects to the previous control; it allows you limit the data a user can enter via setting the Mask property. |
Button |
A button for the user to click; as with the Label control, placing an & in the text of the Text property of the Button control will allow underline the letter directly after it and allow the keyboard user to hop to the Button by pressing Alt+<letter>. Again, this is great for usability. |
LinkLabel |
Not really to be used as a label as the name might suggest but as a type of button that looks like an HTML link. This is great for users who are used to a web environment or to indicate that clicking the button leads to opening a web page. |
CheckBox |
A box for the users to check if you have a set of options that are not mutually exclusive. |
RadioButton |
Similar to a CheckBox but for options that are mutually exclusive. Several of these placed in the same container are automatically mutually exclusive. The container is usually a Form. |
DateTimePicker |
A control to allow the user to pick a date via a drop-down calendar. |
MonthCalander |
A control to allow a user to pick a date from a calendar that is permanently on display. |
ComboBox |
A control to allow a user to make a selection from a drop-down list; this is great for showing a dynamic set of data via data binding. For more details on this, see Chapter 9. |
ListBox |
Similar to a ComboBox but the list of items is displayed within the form rather than as a drop-down list. Favor this one if your form has lots of free space. |
DataGridView |
A control to provide an excellent way to display information from a database table, though this can be used to display any kind of tabular data. This should always be used in preference to the older DataGrid. I'll discuss this further in Chapter 9. |
TreeView |
Another control great for showing dynamic data, but this time it is most useful for data in a tree-like form. |
ProgressBar |
Giving your users feedback about any long-running activity is vital for a usable application, and this control provides a good way to do this. |
RichTextBox |
A control for providing a way to display and edit rich text documents, which is useful if your users want a little more formatting than offered by the standard textbox. |
WebBrowser |
A control for displaying HTML documents; this is useful since a lot of information is available in HTML format. |
Panel |
A control for breaking your form into different sections; this is highly effective when used with HScrollBar and VScrollBar. |
HScrollBar |
A horizontal scroll bar, used to fit more information on a Form or Panel. |
VScrollBar |
A vertical scroll bar, used to fit more information on a Form or Panel. |
TabControl |
A form that uses a series of tabs to display user controls. |
Using the Visual Studio Form Designer's Forms in F#
F# does not yet have a form designer of its own; however, thanks to the great interoperability of .NET, it is easy to use forms created with the designer in F#. You have two approaches. You can create an F# library and call functions from this library in your Windows form, or you can create a library of forms and use them from your F# application. You'll look first at creating an F# library, and then you will look at creating a forms library. Then I'll compare the two techniques. Both examples will be based on the same Fibonacci calculator shown in Figure 8-4.
Caution This book is about F#, and for the majority of the material, knowledge of no other programming language is necessary. However, for this topic, it will be necessary to understand a little of another .NET programming language, in this case C#. Specifically, you'll see two short listings in C# in this section. You can easily replace the C# code with Visual Basic .NET code if you feel more comfortable with that language.

Figure 8-4. A Fibonacci calculator form created with the Visual Studio designer
The main consideration in creating an F# library to be used from a form is making it easy to use from the form. In this case, you'll create a function to calculate the Fibonacci number, so this will take an integer and return an integer. This makes things simple since a form has no problem using the .NET integer type. You want the library to be reasonably efficient, so create a lazy list of Fibonacci numbers and define a function that can get the nth number:
#light

module Strangelights.Fibonacci

let fibs =

    (1,1) |> Seq.unfold

       (fun (n0, n1)  ->

           Some(n0, (n1, n0 + n1)))


let getFib n =

    Seq.nth n fibs
Using this function from a form is pretty straightforward; you just need to reference your F# .dll from the Visual Studio form project. You can use the module Strangelights.Fibonacci by opening the Strangelights namespace and treating Fibonacci as if it were a class in C#. The following example shows how to call the function in C# and place the result in a control. Note that because this form was created with Visual Studio 2005, the control definitions are in a separate source file.
using System;

using System.Windows.Forms;

using Strangelights;

namespace CSApp

{

    public partial class FibForm : Form

    {

        public FibForm()

        {

            InitializeComponent();

        }


        private void calculate_Click(object sender, EventArgs e)

        {

            int n = Convert.ToInt32(input.Text);

            n = Fibonacci.get(n);

            result.Text = n.ToString();

        }

    }

}
If you want to be able to use the form created in C# from F#, you need to expose certain controls as properties. Not all controls need to be exposed—just the ones that you want to interact with from F#. The following example shows how to do this in C#; again, any designer-generated code is hidden in a separate file:
using System;

using System.Windows.Forms;


namespace Strangelights.Forms

{

    public partial class FibForm : Form

    {

        public FibForm()

        {

            InitializeComponent();

        }


        public Button Calculate

        {

            get { return calculate; }

        }


        public Label Result

        {

            get { return result; }

        }

        public TextBox Input

        {

            get { return input; }

        }

    }

}
It is then very straightforward to reference the C# .dll from F# and create an instance of the form and use it. The following example demonstrates the code you use to do this:
#light

open System.Windows.Forms

open Strangelights.Forms


let fibs =

    (1,1) |> Seq.unfold

       (fun (n0, n1)  ->

           Some(n0, (n1, n0 + n1)))


let getFib n =

    Seq.nth n fibs


let form =

    let temp = new FibForm()

    temp.Calculate.Click.Add

        (fun _ ->

            let n = int_of_string temp.Input.Text

            let n = getFib n

            temp.Result.Text <- string_of_int n)

    temp


Application.Run(form)
As you have seen, you can use both techniques to produce similar results, so which is best to use when? The problem with a C# form calling F# is that you will inevitably end up writing quite a bit of C# to glue everything together. It can also be difficult to use some F# types, such as union types, from C#. Considering these two facts, I generally create a C# forms library and use this from F#. I discuss the problem of making F# libraries ready for use with other .NET languages in Chapter 13.
Working with WinForms Events and the IEvent Module
The IEvent module, first discussed in Chapter 7, can be useful when working with events in WinForms. When working with events in a WinForm, there is often not an event that exactly fits what you want. For example, the MouseButton event is raised when either the left or right mouse button is clicked, but you might want to respond only to the click of the left mouse button. In this case, it can be useful to use the IEvent.filter function to create a new event that responds only to the left mouse button click. The next example demonstrates how to do this:
light

open System.Windows.Forms


let form =

    let temp = new Form()

    temp.MouseClick

    |> IEvent.filter (fun e -> e.Button = MouseButtons.Left)

    |> IEvent.listen

        (fun _ ->

            MessageBox.Show("Left button") |> ignore)

    temp


Application.Run(form)
Here the filter function is used with a function that checks whether the left mouse button is pressed; the resulting event is then piped forward to the listen function that adds an event handler to the event, exactly as if you had called the event's .Add method. You could have implemented this using an if expression within the event handler, but this technique has the advantage of separating the logic that controls the event firing and what happens during the event itself. If you want, several event handlers can reuse the new event.
Listing 8-3 demonstrates using more of IEvent's functions to create a simple drawing application (shown in Figure 8-5). Here you want to use the MouseDown event in different ways, first to monitor whether the mouse is pressed at all and then to split the event into left or right button presses using the IEvent.partition function. This is used to control the drawing color, either red or black.
Listing 8-3. Using Events to Implement a Simple Drawing Application
#light

open System

open System.Drawing

open System.Windows.Forms


let form =

    let temp = new Form(Text = "Scribble !!")


    let pointsMasterList = ref []

    let pointsTempList = ref []

    let mouseDown = ref false

    let pen = ref (new Pen(Color.Black))


    temp.MouseDown.Add(fun _ -> mouseDown := true)

    let leftMouse, rightMouse =

        temp.MouseDown

        |> IEvent.partition (fun e -> e.Button = MouseButtons.Left)


    leftMouse.Add(fun _ -> pen := new Pen(Color.Black))

    rightMouse.Add(fun _ -> pen := new Pen(Color.Red))


    temp.MouseUp

    |> IEvent.listen

        (fun _ ->

            mouseDown := false

            if List.length !pointsTempList > 1 then

                let points = List.to_array !pointsTempList

                pointsMasterList :=

                    (!pen, points) :: !pointsMasterList

            pointsTempList := []

            temp.Invalidate())


    temp.MouseMove

    |> IEvent.filter(fun _ -> !mouseDown)

    |> IEvent.listen

        (fun e ->

            pointsTempList := e.Location :: !pointsTempList

            temp.Invalidate())


    temp.Paint

    |> IEvent.listen

        (fun e ->

            if List.length !pointsTempList > 1 then

                e.Graphics.DrawLines

                    (!pen, List.to_array !pointsTempList)

            !pointsMasterList

            |> List.iter

                (fun (pen, points) ->

                    e.Graphics.DrawLines(pen, points)))

    temp


[<STAThread>]

do Application.Run(form)
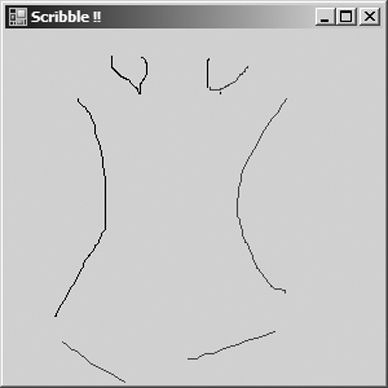
Figure 8-5. Scribble: a simple drawing application implemented using events
Events created this way can also be published on the form's interface so that code consuming the form can also take advantage of these events.
Again, a big problem facing a programmer working with events in WinForms is the volume of events available, which can make choosing the right one difficult. Perhaps surprisingly, most events are defined on the class Control, with each specialization providing only a handful of extra events. This generally makes life a bit easier, because if you have used an event with a control, odds are it will also be available on another. To help beginners with the most common events on the Control class, I have provided a summary in Table 8-4.
Table 8-4. A Summary of Events on the Control Class
| Event | Description |
Click |
This event is caused by the user clicking the control. It is a high-level event, and although it is ordinarily caused by the user clicking with the mouse, it might also be caused by the user pressing Enter or the spacebar when on a control. There are a series of events called MouseDown, MouseClick, and MouseUp that provide more detailed information about the actions of the mouse, but because these events just provide information about the mouse actions, generally the Click should be handled instead of these events. Otherwise, this will lead to the control responding in ways users expect, because it will respond to keystrokes and mouse clicks. |
DoubleClick |
This is raised when the mouse is clicked twice in quick succession; the amount of time is determined by the user's operating system settings. Programmers should be careful when handling this event because every time this event is raised, a Click event will have been raised before it, so in general programmers should handle either this event or the Click event. |
Enter |
This event is raised when the control becomes active—either the user presses Tab to enter it, the programmer calls Select or SelectNextControl, or the user clicks it with the mouse. It is usually used to draw attention to the fact that the control is active, such as setting the background to a different color. It is suppressed on the Form class, and programmers should use Activated instead. |
Leave |
This event is raised when the control is deactivated—either the user presses Tab to leave it, the programmer calls Select or SelectNextControl, or the user clicks another control with the mouse. The programmer might be tempted to use this event for validation, but they should not do this and should use the Validating and Validated events instead. This event is suppressed on the Form class, and programmers should use Activated instead. |
KeyPress |
This event is part of a sequence of events that can be used to get detailed information about the state of the keyboard. To get details about when a key is first pressed, use KeyDown, and to find out when it is released, use KeyUp instead. |
Move |
This event is raised whenever the control is moved by the user. |
MouseHover |
This event is useful to find out whether the mouse is hovering over a control so can be used to give users more information about the control. The events MouseEnter and MouseLeave are also useful for this. |
Paint |
This event occurs when the form will be repainted by Windows; handle this event if you want to take care of drawing the control yourself. For more information about this, see the section "Drawing WinForms" earlier in this chapter. |
Resize |
This event occurs when the user resizes the form; it can be useful to handle this event to adjust the layout of the form to the new size. |
Creating New Forms Classes
So far you've looked only at a script style of programming, using an existing form and controls to quickly put forms together. This style of programming is great for the rapid development of single-form applications but has some limitations when creating applications composed of multiple forms or creating libraries of forms for use with other .NET languages. In these cases, you must take a more component-oriented approach.
Typically, when creating a large WinForms application, you'll want to use some forms repeatedly; furthermore, these forms typically communicate with each other by adjusting their properties and calling their methods. You usually do this by defining a new form class that derives from System.Windows.Forms. Listing 8-4 shows a simple example of this, using the class syntax introduced in Chapter 5.
Listing 8-4. A Demonstration of Creating a New Type of Form
#light

open System

open System.Windows.Forms

type MyForm() as x = class

    inherit Form(Width=174, Height=64)

    let label = new Label(Top=8, Left=8, Width=40, Text="Input:")

    let textbox = new TextBox(Top=8, Left=48, Width=40)

    let button = new Button(Top=8, Left=96, Width=60, Text="Push Me!")

    do button.Click.Add

           (fun _ ->

               let form = new MyForm(Text=textbox.Text)

               form.Show())

    do x.Controls.Add(label)

    do x.Controls.Add(textbox)

    do x.Controls.Add(button)

    member x.Textbox = textbox

end


let form =

    let temp = new MyForm(Text="My Form")

    temp.Textbox.Text <- "Next!"

    temp


[<STAThread>]

do Application.Run(form)
Figure 8-6 shows the resulting forms.
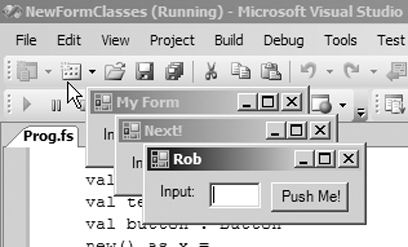
Figure 8-6. A demonstration of creating a new type of form for easy reuse
In this example, you created a form that has three fields: label, textbox, and button. These fields can then be manipulated by external code. At the end of the example, you created a new instance of this form and then set the Text property of the textbox field.
Events can be exposed on the interface of a form much the same way that fields can. This takes a little more work because of some restrictions. The idea is to create a new event, then store this event in a field in the class, and finally make this event a subscriber to the filtered event. This is demonstrated in the next example, where you filter the MouseClick event to create a LeftMouseClick:
#light

open System.Windows.Forms


type LeftClickForm() as x = class

    inherit Form()

    let trigger, event = IEvent.create()

    do x.MouseClick

       |> IEvent.filter (fun e -> e.Button = MouseButtons.Left)

       |> IEvent.listen (fun e -> trigger e)

    member x.LeftMouseClick = event

end
Forms created in this component-based manner will undoubtedly be easier to use than forms created with a more scripted approach, but there are still pitfalls when creating libraries for other .NET languages. Please refer to Chapter 13 for more information about making F# libraries usable by other .NET languages.
Introducing ASP.NET 2.0
ASP.NET 2.0 is a technology designed to simplify creating dynamic web pages. The simplest way to do this is to implement an interface called IHttpHandler. This interface allows the implementer to describe how an HTTP request should be responded to; the next section of the chapter will concentrate on how this works.
Merely implementing the IHttpHandler interface will not allow you to take full advantage of the ASP.NET 2.0 feature set. ASP.NET allows users to create web forms, which are composed of controls that know how to render themselves into HTML. The advantage of this is that the programmer has a nice object model to manipulate rather than having to code HTML tags. It also allows a programmer to separate out the layout of controls in an .aspx file. An .aspx file is basically all the static HTML you don't want to worry about in your F# code, plus a few placeholders for the dynamic controls. This approach is great for programming in F#, because it allows you to separate the code that represents the layout of a form, which can look a little long in F#, from the code that controls its behavior. ASP.NET also lets you store configuration values in an XML-based web.config file.
Working with ASP.NET presents an additional challenge; you must configure the web server that will host the ASP.NET application. Your configuration will vary depending on your development environment.
Visual Studio 2005 comes with a built-in web server, so to create a new web site, it is just a matter of selecting File ![]() New
New ![]() Web Site and then choosing the location for the web site. This site will run only those pages written in C# or Visual Basic .NET, so you need to add an F# project to the solution and then manually alter the solution file so that it lives inside the web site directory. This is easier than it sounds. You just need to copy the
Web Site and then choosing the location for the web site. This site will run only those pages written in C# or Visual Basic .NET, so you need to add an F# project to the solution and then manually alter the solution file so that it lives inside the web site directory. This is easier than it sounds. You just need to copy the .fsharpp file to the web site directory, open the .sln file in Notepad, and alter the path to the .fsharpp file. After this you merely need to configure the project file to output a library and write this to a bin subdirectory. This might seem like a lot of effort, but after this you will just be able to press F5, and your project will compile and run.
If you do not have Visual Studio 2005, then the next best thing to do is host the site in IIS. In some ways, this is easier than hosting in Visual Studio but doesn't have the convenience of just being able to execute your code once coding is completed. To host your code in IIS, you need to create an IIS virtual directory with a subdirectory called bin. You then need to copy your .aspx pages and your web.config file to the virtual directory.
Note Getting ASP.NET to work with F# and Apache is possible but is more difficult than the situation either with or without Visual Studio 2005. Please see the following site for more details of how to do this: http://strangelights.com/FSharp/Foundations/default.aspx/FSharpFoundations.Apache.
Creating an IHttpHandler
Creating an IHttpHandler is the simplest way to take advantage of ASP.NET 2.0. It is a simple interface with just two members. The first of these members is a read-only Boolean property called IsReusable that the programmer should use to indicate whether the runtime can reuse the instance of the object. It is generally best to set this to false.
The other member of the interface is the ProcessRequest method, and this is called when a web request is received. It takes one parameter of HttpContent type; you can use this type to retrieve information about the request being made through its Request property and also to respond to the request via its Response property. The following code is a simple example of an IHttpHandler that just responds to a request with the string "<h1>Hello World</h1>":
#light

namespace Strangelights.HttpHandlers

open System.Web


type SimpleHandler() = class

    interface IHttpHandler with

        member x.IsReusable = false

        member x.ProcessRequest(c : HttpContext) =

            c.Response.Write("<h1>Hello World</h1>")

    end

end
After this, you must configure the URL where the IHttpHandler is available. You do this by adding an entry to the web.config file. If a web.config file is not already in the project, you can add one by right-clicking the web project and choosing Add New Item. The handlers are added to the httpHandlers section, and you need to configure four properties for each handler: path, which is the URL of the page; verb, which configures which HTTP verbs the handler will respond to; type, which is the name of the type that will be used to handle the request; and finally validate, which tells the runtime whether it should check the availability of the type when the application is first loaded.
<configuration>

  <system.web>

    <httpHandlers>

      <add

        path="hello.aspx"

        verb="*"

        type="Strangelights.HttpHandlers.SimpleHandler"

        validate="True" />

    </httpHandlers>

</configuration>
Figure 8-7 shows the resulting web page.

Figure 8-7. The resulting web page when the SimpleHandler is executed
This technique is unsatisfactory for creating web pages, because it requires the HTML tags to be mixed into the F# code. It does have some advantages, though. You can use this technique to put together documents other than HTML documents; for example, you can use it to dynamically create images on the server. The following example shows an IHttpHandler that generates a JPEG image of a pie shape. The amount of pie shown is determined by the angle value that that is passed in on the query string.
#light

namespace Strangelights.HttpHandlers

open System.Drawing

open System.Drawing.Imaging

open System.Web

type PictureHandler() = class

    interface IHttpHandler with

        member x.IsReusable = false

        member x.ProcessRequest(c : HttpContext) =

            let bitmap = new Bitmap(200, 200)

            let graphics = Graphics.FromImage(bitmap)

            let brush = new SolidBrush(Color.Red)

            let x = int_of_string(c.Request.QueryString.Get("angle"))

            graphics.FillPie(brush, 10, 10, 180, 180, 0, x)

            bitmap.Save(c.Response.OutputStream, ImageFormat.Gif)

    end

end
Again, you still need to register this type in the web.config file; the required configuration is as follows:
<configuration>

  <system.web>

    <httpHandlers>

      <add

        path="pic.aspx"

        verb="*"

        type="Strangelights.HttpHandlers.PictureHandler"

        validate="True" />

    </httpHandlers>

</configuration>
Figure 8-8 shows the resulting image. In this case, I passed in an angle of 200.
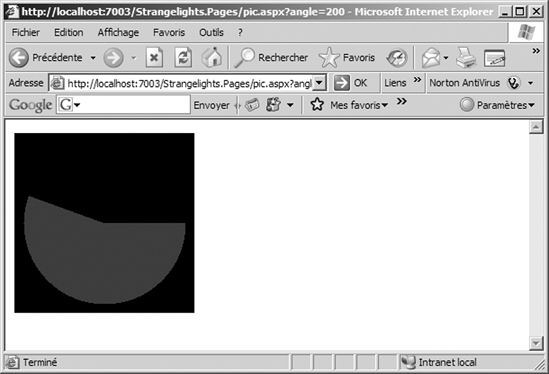
Figure 8-8. Using an IHttpHandler to dynamically generate a picture
Although this is a great technique for spicing up web sites, you should be careful when using it. Generating images can be very processor intensive, especially if the images are large or complicated. This can lead to web sites that do not scale up to the required number of concurrent users; therefore, if you do use this technique, ensure you profile your code correctly. For more information about profiling your applications and for some general performance enhancements, please see Chapter 13.
Working with ASP.NET Web Forms
If you want to create dynamic web pages, then you will probably have an easier time using ASP.NET forms than implementing your own IHttpHandler. The main advantage of web forms is that you do not need to deal with HTML tags in F# code; most of this is abstracted away for you. There are other, smaller advantages too, such as that you do not have to register the page in web.config.
To create an ASP.NET web form, you generally start by creating the user interface, defined in an .aspx file. The .aspx file is all the static HTML, plus some placeholders for the dynamic controls. An .aspx file always starts with a Page directive; you can see this at the top of the next example. The Page directive allows you to specify a class that the page will inherit from; you do this by using the Inherits attribute and giving the full name of the class. This will be a class in F# that provides the dynamic functionality.
If you look at the following example, in among the regular HTML tags you'll find some tags that are prefixed with asp:. These are ASP.NET web controls, and these provide the dynamic functionality. A web control is a class in the .NET Framework that knows how to render itself into HTML, so for example, the <asp:TextBox /> tag will become an HTML <input /> tag. You will be able to take control of these controls in your F# class and use them to respond to user input.
<%@ Page Inherits="Strangelights.HttpHandlers.HelloUser" %>

<html>

    <head>

        <title>F# - Hello User</title>

    </head>

    <body>

        <p>Hello User</p>

        <form id="theForm" runat="server">

            <asp:Label

                ID="OutputControl"

                Text="Enter you're name ..."

                runat="server" />

            <br />

            <asp:TextBox

                ID="InputControl"

                runat="server" />

            <br />

            <asp:LinkButton

                ID="SayHelloButton"

                Text="Say Hello ..."

                runat="server"

                OnClick="SayHelloButton_Click" />

        </form>

    </body>

</html>
When designing your class, you need to provide mutable fields with the same name as the controls you want to manipulate. Although the HTML page you created had three controls in it, you provide only two mutable fields, because you don't want to manipulate the third control, a link button. You just want it to call the SayHelloButton_Click function when you click it. You do this by adding the function name to the OnClick attribute of the asp:LinkButton control.
When the other two controls are created, a label and a textbox, they will be stored in the mutable fields OutputControl and InputControl, respectively. It is the code contained in the .aspx page, not your class, that is responsible for creating these controls. This is why you explicitly initialize these controls to null in the constructor. Finally, all that remains in SayHelloButton_Click is to take the input from InputControl and place it into OutputControl.
#light

namespace Strangelights.HttpHandlers


open System

open System.Web.UI

open System.Web.UI.WebControls


type HelloUser = class

    inherit Page

    val mutable OutputControl : Label

    val mutable InputControl : TextBox

    new() =

        { OutputControl = null

          InputControl = null }


    member x.SayHelloButton_Click((sender : obj), (e : EventArgs))  =

        x.OutputControl.Text <- ("Hello ... " + x.InputControl.Text)

end
Figure 8-9 shows the resulting web page.
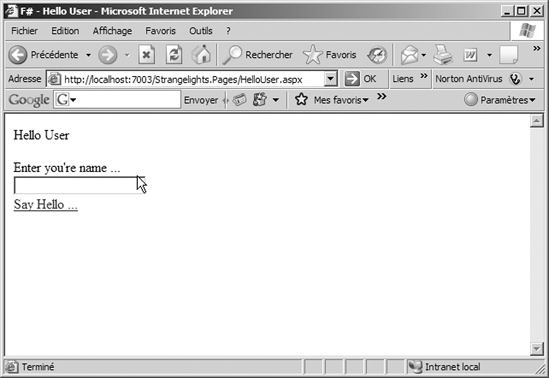
Figure 8-9. A page created using an ASP.NET form
This form doesn't look great, but the nice thing about your application being defined in HTML is that you can quickly use images and Cascading Style Sheets (CSS) to spice up the application. Figure 8-10 shows the results of a little CSS magic.
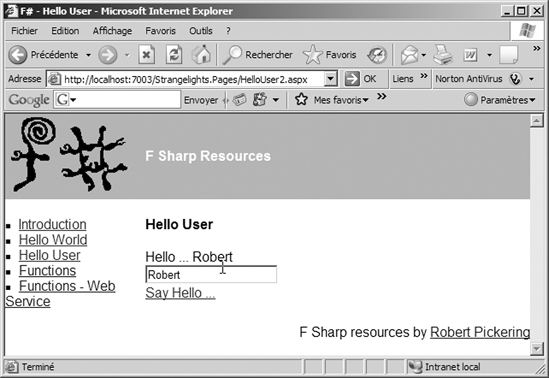
Figure 8-10. A web page that takes full advantage of HTML and CSS
You have taken only a brief look at all the functionality offered by ASP.NET. To give beginners a starting point for investigating this further, Table 8-5 summarizes all the namespaces available in System.Web.dll that contains the ASP.NET functionality.
Table 8-5. A Summary of the Namespaces Available in System.Web.dll
| Namespace | Description |
System.Web |
This namespace provides types that are the basis to the HTML rendering process that is ASP.NET; this is where the IHttpHander interface, which I have already discussed in this chapter, lives. |
System.Web.Mail |
This namespace provides types that can be used to send emails from ASP.NET applications. |
System.Web.HtmlControls |
This namespace provides controls that are exact copies of HTML tags. |
System.Web.WebControls |
This namespace provides controls that are like HTML tags but are more abstract. For example, the TextBox control is rendered as an input tag if its TextMode property is set to TextBoxMode.SingleLine and as a textarea if it is set to TextBoxMode.MultiLine. |
System.Web.WebControls.Adapters |
This namespace provides adapters that can be used to affect the rendering of other controls to alter their behavior or render different HTML tags for different types of browsers. |
System.Web.WebControls.WebParts |
This namespace provides web parts, controls that support a system where users can add, remove, and dynamically configure them within a page to give a personalized experience. |
Introducing Windows Presentation Foundation
WPF is a library that offers a completely new programming model for user interfaces. It is aimed at creating desktop applications that have more pizzazz than the ones that are created with WinForms. WPF also comes with a new XML-based language called XAML, which can be used to code the bulk of the layout of the form, leaving F# code free to describe the interesting parts of the application.
Note Several XAML designers are now available; these allow F# users to design their interface using a graphical WYSWIG tool and then add the interactivity to it using F#. Mobiform offers a designer called Aurora (http://www.mobiform.com/eng/aurora.html), and Microsoft offers a designer called Expression Blend (http://www.microsoft.com/products/expression/en/expression-blend/default.mspx).
The first example you'll look at is how to create a simple form in XAML and then display it to the user using F#. Listing 8-5 shows the XAML definition of a form with four controls: two labels, a textbox, and a button.
Listing 8-5. A Simple Form Created in XAML
<Window

  xmlns="http://schemas.microsoft.com/winfx/2006/xaml/presentation"

  xmlns:sys="clr-namespace:System;assembly=mscorlib"

  xmlns:x="http://schemas.microsoft.com/winfx/2006/xaml" >

  <Grid>

  <Grid.ColumnDefinitions>

    <ColumnDefinition Width="64" />

    <ColumnDefinition Width="128" />

    <ColumnDefinition Width="128" />

    <ColumnDefinition Width="128" />

  </Grid.ColumnDefinitions>

  <Grid.RowDefinitions>

    <RowDefinition Height="24"/>

  </Grid.RowDefinitions>


  <Label Grid.Row="0" Grid.Column="0" >Input: </Label>

  <TextBox Name="input" Grid.Column="1" Text="hello" />

  <Label Name="output" Grid.Row="0" Grid.Column="2" ></Label>

  <Button Name="press" Grid.Column="3" >Press Me</Button>

  </Grid>

</Window>
To make this XAML definition of a form useful, you need to do two things. You must load the form's definition and show it to the user, but just doing this will offer no interaction with the user, so the other thing you need to do is make the form interactive. To do this, you use F# to add event handlers to the controls, in this case to add an event handler to the button to place the contents of the textbox into the second label. The function createWindow is a general-purpose function for loading an XAML form. You then use this function to create the value window, and you pass this value to the form's FindName method to find the controls within the form so you can interact with them. Finally, in the main function you create an instance of the Application class and use this to show the form (see Listing 8-6).
Listing 8-6. Displaying the XAML Form and Adding Event Handlers to It
#light

open System

open System.Collections.Generic

open System.Windows

open System.Windows.Controls

open System.Windows.Markup

open System.Xml


// creates the window and loads the given XAML file into it

let createWindow (file : string) =

    using (XmlReader.Create(file)) (fun stream ->

            (XamlReader.Load(stream) :?> Window))

// create the window object and add event handler

// to the button control

let window =

    let temp = createWindow "Window1.xaml"

    let press = temp.FindName("press") :?> Button

    let textbox = temp.FindName("input") :?> TextBox

    let label = temp.FindName("output") :?> Label

    press.Click.Add (fun _ -> label.Content <- textbox.Text )

    temp


// run the application

let main() =

    let app = new Application()

    app.Run(window) |> ignore


[<STAThread>]

do main()
To get this program to compile, you must add references to PresentationCore.dll, PresentationFramework.dll, and WindowsBase.dll, which are usually found in the directory C:Program FilesReference AssembliesMicrosoftFrameworkv3.0. In the other examples in this chapter, you didn't need to add references, since the libraries were automatically referenced by the compiler. The form appears as in Figure 8-11.
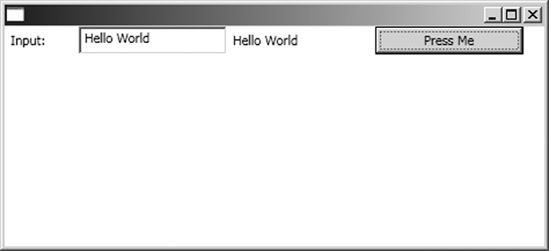
Figure 8-11. A form created using XAML and F#
Introducing Windows Presentation Foundation 3D
Another great advantage of WPF is the huge number of controls it offers. One control that you'll dig a little deeper into is Viewport3D, which offers the ability to create impressive 3D graphics, something not readily available with the WinForms library. You'll learn how you can display a 3D plane and then map an equation over it.
The example (shown later in Listing 8-7) starts with the XAML script. Both XAML and 3D graphics are huge topics; my aim is not to cover them in detail but to give you enough of an idea of what they involve and to give you the basis for your own experiments. The following XAML script describes a window with one control, a Viewport3D, on it. The script is fairly lengthy because there are quite a few elements required to make a 3D scene. First you must define a camera so you know which direction you are looking at the scene from. You do this using the <Viewport3D.Camera> element:
<Viewport3D.Camera>

  <PerspectiveCamera Position="0,0,2" LookDirection="0,0,-1" FieldOfView="60" />

</Viewport3D.Camera>
The tags inside <Model3DGroup> describe what the scene will look like. The <AmbientLight Color="White" /> tag describes how the scene will be lit, and the <GeometryModel3D.Geometry> tag describes the 3D shape in the scene:
<GeometryModel3D.Geometry>

  <MeshGeometry3D />

</GeometryModel3D.Geometry>
Here you could describe all the objects that make up the scene by giving the points that make them up using the <MeshGeometry3D /> tag; however, you don't describe the points that make up the shape since it is a lot easier to do this in F# than in XAML. The <GeometryModel3D.Material> tag describes what the surface of the shape will look like:
<GeometryModel3D.Material>

  <DiffuseMaterial>

    <DiffuseMaterial.Brush>

      <ImageBrush ImageSource="venus.jpg" />

    </DiffuseMaterial.Brush>

  </DiffuseMaterial>

</GeometryModel3D.Material>
The <GeometryModel3D.Transform> tag describes a transformation that will be applied to the shape, that is, a transformation that will mean the shape will be rotated by a certain angle:
<GeometryModel3D.Transform>

  <RotateTransform3D>

    <RotateTransform3D.Rotation>

      <AxisAngleRotation3D

        x:Name="MyRotation3D"

        Angle="45"

        Axis="0,1,0"/>

      </RotateTransform3D.Rotation>

    </RotateTransform3D>

</GeometryModel3D.Transform>
You do this mainly so you can use the <Viewport3D.Triggers> tag to define an animation that will alter the angle it is shown at over time:
    <Viewport3D.Triggers>

      <EventTrigger RoutedEvent="Viewport3D.Loaded">

        <EventTrigger.Actions>

          <BeginStoryboard>

            <Storyboard>

              <DoubleAnimation

                From="-80"

                To="80"

                Duration="0:0:12"

                Storyboard.TargetName="MyRotation3D"

                Storyboard.TargetProperty="Angle"

                RepeatBehavior="Forever"

                AutoReverse="True" />

            </Storyboard>

          </BeginStoryboard>

        </EventTrigger.Actions>

      </EventTrigger>

    </Viewport3D.Triggers>
To demonstrate how these various sections hang together, Listing 8-7 shows the complete example.
Listing 8-7. An XAML Definition of a 3D Scene
<Window

  xmlns="http://schemas.microsoft.com/winfx/2006/xaml/presentation"

  xmlns:x="http://schemas.microsoft.com/winfx/2006/xaml">


  <Viewport3D Name="ViewPort">

    <Viewport3D.Camera>

      <PerspectiveCamera Position="0,0,2" LookDirection="0,0,-1" FieldOfView="60" />

    </Viewport3D.Camera>


    <Viewport3D.Children>

      <ModelVisual3D>

        <ModelVisual3D.Content>

          <Model3DGroup >

            <Model3DGroup.Children>

              <AmbientLight Color="White" />

              <GeometryModel3D>

                <GeometryModel3D.Geometry>

                    <MeshGeometry3D />

                </GeometryModel3D.Geometry>

                <GeometryModel3D.Transform>

                  <RotateTransform3D>

                    <RotateTransform3D.Rotation>

                      <AxisAngleRotation3D

                        x:Name="MyRotation3D"

                        Angle="45"

                        Axis="0,1,0"/>

                    </RotateTransform3D.Rotation>

                  </RotateTransform3D>

                </GeometryModel3D.Transform>


                <GeometryModel3D.Material>

                  <DiffuseMaterial>

                    <DiffuseMaterial.Brush>

                      <ImageBrush ImageSource="venus.jpg" />

                    </DiffuseMaterial.Brush>

                  </DiffuseMaterial>

                </GeometryModel3D.Material>


              </GeometryModel3D>

            </Model3DGroup.Children>

          </Model3DGroup>

        </ModelVisual3D.Content>

      </ModelVisual3D>

    </Viewport3D.Children>


    <Viewport3D.Triggers>

      <EventTrigger RoutedEvent="Viewport3D.Loaded">

        <EventTrigger.Actions>

          <BeginStoryboard>

            <Storyboard>

              <DoubleAnimation

                From="-80"

                To="80"

                Duration="0:0:12"

                Storyboard.TargetName="MyRotation3D"

                Storyboard.TargetProperty="Angle"

                RepeatBehavior="Forever"

                AutoReverse="True" />

            </Storyboard>

          </BeginStoryboard>

        </EventTrigger.Actions>

      </EventTrigger>

    </Viewport3D.Triggers>

  </Viewport3D>

</Window>
The example continues later in Listing 8-8, with the F# script, which borrows a couple of functions from Listing 8-6; it also assumes that Listing 8-7 is saved in a file called Window2.xaml. You use the createWindow function to load the window and use a similar main function to display the window. You then use the findMeshes function to find any meshes in the picture (a mesh is a set of points used to describe the 3D plane). You find the meshes by walking the various objects in the Viewport3D and building up a list:
// finds all the MeshGeometry3D in a given 3D view port

let findMeshes ( viewport : Viewport3D ) =

    viewport.Children

    |> Seq.choose

        (function :? ModelVisual3D as c -> Some(c.Content) | _ -> None)

    |> Seq.choose

        (function :? Model3DGroup as mg -> Some(mg.Children) | _ -> None)

    |> Seq.concat

    |> Seq.choose

        (function :? GeometryModel3D as mg -> Some(mg.Geometry) | _ -> None)

    |> Seq.choose

        (function :? MeshGeometry3D as mv -> Some(mv) | _ -> None)
I kept this function generic so it could work with any Viewport3D. It is highly likely that you will want to grab a list of all the meshes in your 3D scene in any 3D work you do in XAML and F# because it is likely that you will want to manipulate your meshes in some way in F#. Then you use createPlaneItemList, createSquare, createPlanePoints, createIndicesPlane, and addPlaneToMesh to add a flat plane to the mesh object in the scene. The function mapPositionsCenter centers the plane so it is in the middle of the scene. Finally, a clever little function called changePositions maps the function movingWaves repeatedly across the plane ten times a second. The core of this function creates a new Point3DCollection from the Point3D objects contained within the old one using the function movingWaves to decide what the new Z position should be.
let changePositions () =

    let dispatcherTimer = new DispatcherTimer()

    dispatcherTimer.Tick.Add

        (fun e ->

            let t = (float_of_int DateTime.Now.Millisecond) / 2000.0

            let newPositions =

                mesh.Positions

                |> Seq.map

                    (fun position ->

                        let z = movingWaves t position.X position.Y

                        new Point3D(position.X, position.Y, z))

            mesh.Positions <- new Point3DCollection(newPositions))

    dispatcherTimer.Interval <- new TimeSpan(0,0,0,0,100)

    dispatcherTimer.Start()
Using the DispatcherTimer class means that the code is executed on the thread that created the form, meaning there is no need to call back to this thread to update the form. It needs to be called at least ten times a second to create a smooth animation effect. Listing 8-8 shows the complete example.
Listing 8-8. Displaying and Interacting with a 3D XAML Scene
#light

open System

open System.Collections.Generic

open System.IO

open System.Windows

open System.Windows.Controls

open System.Windows.Markup

open System.Windows.Media

open System.Windows.Media.Media3D

open System.Windows.Threading

open System.Xml


// creates the window and loads the given XAML file into it

let createWindow (file : string) =

    using  (XmlReader.Create(file))

        (fun stream ->

            let temp = XamlReader.Load(stream) :?> Window

            temp.Height <- 400.0

            temp.Width <- 400.0

            temp.Title <- "F# meets Xaml"

            temp)


// finds all the MeshGeometry3D in a given 3D view port

let findMeshes ( viewport : Viewport3D ) =

    viewport.Children

    |> Seq.choose

        (function :? ModelVisual3D as c -> Some(c.Content) | _ -> None)

    |> Seq.choose

        (function :? Model3DGroup as mg -> Some(mg.Children) | _ -> None)

    |> Seq.concat

    |> Seq.choose

        (function :? GeometryModel3D as mg -> Some(mg.Geometry) | _ -> None)

    |> Seq.choose

        (function :? MeshGeometry3D as mv -> Some(mv) | _ -> None)


// loop function to create all items necessary for a plane

let createPlaneItemList f (xRes : int) (yRes : int) =

    let list = new List<_>()

    for x = 0 to xRes - 1 do

        for y = 0 to yRes - 1 do

            f list x y

    list

// function to initialize a point

let point x y = new Point(x, y)

// function to initialize a "d point

let point3D x y = new Point3D(x, y, 0.0)


// create all the points necessary for a square in the plane

let createSquare

    f (xStep : float) (yStep : float) (list : List<_>) (x : int) (y : int) =

    let x' =  Float.of_int x * xStep

    let y' =  Float.of_int y * yStep

    list.Add(f x' y')

    list.Add(f (x' + xStep) y')

    list.Add(f (x' + xStep) (y' + yStep))

    list.Add(f (x' + xStep) (y' + yStep))

    list.Add(f x' (y' + yStep))

    list.Add(f x' y')


// create all items in a plane

let createPlanePoints f xRes yRes =

    let xStep = 1.0 / Float.of_int xRes

    let yStep = 1.0 / Float.of_int yRes

    createPlaneItemList (createSquare f xStep yStep) xRes yRes


// create the 3D positions for a plane, i.e., the thing that says where

// the plane will be in 3D space

let createPlanePositions xRes yRes =

    let list = createPlanePoints point3D xRes yRes

    new Point3DCollection(list)


// create the texture mappings for a plane, i.e., the thing that

// maps the 2D image to the 3D plane

let createPlaneTextures xRes yRes =

    let list = createPlanePoints point xRes yRes

    new PointCollection(list)


// create indices list for all our triangles

let createIndicesPlane width height =

    let list = new System.Collections.Generic.List<int>()

    for index = 0 to width * height * 6 do

        list.Add(index)

    new Int32Collection(list)


// center the plane in the field of view

let mapPositionsCenter (positions : Point3DCollection) =

    let newPositions =

        positions

        |> Seq.map

            (fun position ->

                new Point3D(

                            (position.X - 0.5 ) * −1.0,

                            (position.Y - 0.5 ) * −1.0,

                             position.Z))

    new Point3DCollection(newPositions)


// create a plane and add it to the given mesh

let addPlaneToMesh (mesh : MeshGeometry3D) xRes yRes =

    mesh.Positions <- mapPositionsCenter

                        (createPlanePositions xRes yRes)

    mesh.TextureCoordinates <- createPlaneTextures xRes yRes

    mesh.TriangleIndices <- createIndicesPlane xRes yRes


let movingWaves (t : float) x y =

    (Math.Cos((x + t) * Math.PI * 4.0) / 3.0) *

        (Math.Cos(y * Math.PI * 2.0) / 3.0)


// create our window

let window = createWindow "Window2.xaml"


let mesh =

    // grab the 3D view port

    let viewport = window.FindName("ViewPort") :?> Viewport3D

    // find all the meshes and get the first one

    let meshes = findMeshes viewport

    let mesh = Seq.hd meshes

    // add plane to the mesh

    addPlaneToMesh mesh 20 20

    mesh


let changePositions () =

    let dispatcherTimer = new DispatcherTimer()

    dispatcherTimer.Tick.Add

        (fun e ->

            let t = (float_of_int DateTime.Now.Millisecond) / 2000.0

            let newPositions =

                mesh.Positions

                |> Seq.map

                    (fun position ->

                        let z = movingWaves t position.X position.Y

                        new Point3D(position.X, position.Y, z))

            mesh.Positions <- new Point3DCollection(newPositions))

    dispatcherTimer.Interval <- new TimeSpan(0,0,0,0,100)

    dispatcherTimer.Start()

let main() =

    let app = new Application()

    changePositions()

    // show the window

    app.Run(window) |> ignore


[<STAThread>]

do main()
Figure 8-12 shows the resulting window. It doesn't show off the animated results, so I encourage you to try the application yourself.
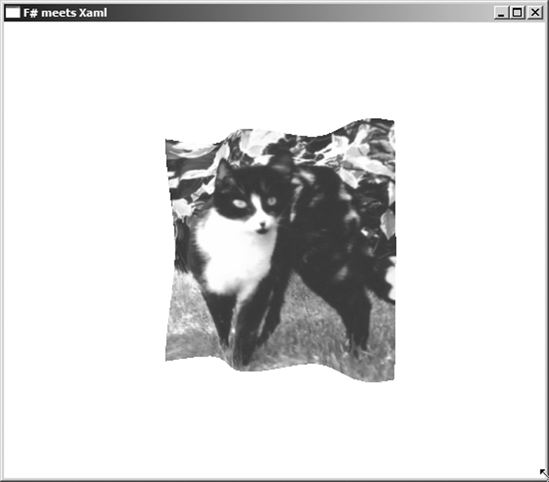
Figure 8-12. A 3D scene created using XAML and F#
One other thing I encourage you to do is play with this sample in fsi. You can subtly alter the sample to run inside fsi, and then the function applied to the plane can be altered dynamically. The original script must be altered in several small ways.
First, you must set the reference to the .dll files in an fsi style:
#I @"C:Program FilesReference AssembliesMicrosoftFrameworkv3.0" ;;

#r @"PresentationCore.dll" ;;

#r @"PresentationFramework.dll" ;;

#r @"WindowsBase.dll" ;;
Then, you must alter the changePositions function to use a mutable function:
// mutable function that is used within changePositions function

let mutable f  = (fun (t : float) (x : float) (y : float) -> 0.0)


// function for changing the plane over time

let changePositions () =

    let dispatcherTimer = new DispatcherTimer()

    dispatcherTimer.Tick.Add

        (fun e ->

            let t = (float_of_int DateTime.Now.Millisecond) / 2000.0

            let newPositions =

                mesh.Positions

                |> Seq.map

                    (fun position ->

                        let z = f t position.X position.Y

                        new Point3D(position.X, position.Y, z))

            mesh.Positions <- new Point3DCollection(newPositions))

    dispatcherTimer.Interval <- new TimeSpan(0,0,0,0,100)

    dispatcherTimer.Start()
Then, finally, you show the window using its .Show() method rather than the Application class's Run method, not forgetting to set its Topmost property to true so that it is easy to interact with the window and see the results:
// show the window, set it the top, and activate the function that will

// set it moving

window.Show()

window.Topmost <- true

changePositions ()
Finally, you need to define some other functions to map across the plane. This can be any function that takes three floating-point numbers (the first representing the time and the next two representing the X and Y coordinates, respectively) and returns a third floating-point representing the Z coordinate. I'm practically fond of using sine and cosine functions because these generate interesting wave patterns. Here are some examples of what you could use, but please feel free to invent your own:
let cosXY _ x y =

    Math.Cos(x * Math.PI) * Math.Cos(y * Math.PI)


let movingCosXY (t : float) x y =

    Math.Cos((x + t) * Math.PI) * Math.Cos((y - t) * Math.PI)
You can then easily apply these functions to the plane by updating the mutable function:
f <- movingCosXY
Using this technique produces the image in Figure 8-13.
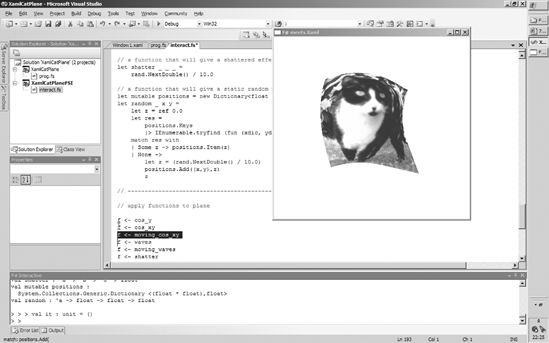
Figure 8-13. Controlling a 3D XAML scene interactively using F# interactive
The WPF framework contains lots of types and controls that will take any programmer some time to learn. Fortunately, many resources are available on the Internet to help you do this. A good resource is the NetFx3 WPF site (http://wpf.netfx3.com) and of course the WPF section of MSDN (http://msdn2.microsoft.com/en-us/netframework/aa663326.aspx).
Summary
This chapter provided an overview of various options for creating user interfaces with F#. Because of the scope of this topic, I didn't cover all the options for user interface programming in F#. For example, there are hundreds of third-party components, built on ASP.NET, WinForms, or WPF. These help raise the level of abstraction when creating user interfaces. There are also libraries that offer complete alternative programming models, such as DirectX, which is designed for high-performance 3D graphics, and the GTK# library, which is designed to give better cross-platform support.
The next chapter will take a look at another important programming task—how to access data.