SharePoint 2007 is a significant product with many functional areas to master. Installing the software and creating a web application are only the beginning of the administrative and programming tasks you must perform to develop a professional site. These tasks include managing users, configuring authentications, and deploying functionality to the site. In this chapter, I cover the fundamental configurations, features, and functions that are required to get a site up and running.
Once you have created a web application and a site collection, you will want to give users permission to access the new site. Adding users is relatively straightforward. However, determining the permissions that should be granted to each user requires understanding and planning. When planning user permissions, you should consider what permissions you will make available to a web application and how to group those permissions for assignment to end users.
SharePoint defines 33 separate rights divided into three categories: list permissions, site permissions, and personal permissions. The list permissions determine whether a user can create new lists or manage list items within the site. The site permissions determine whether a user can change the content and appearance of various site aspects. The personal permissions allow the user to manage personal content. All of the available SharePoint rights are explained in the following three tables.
Table 3-1 shows list permissions and their descriptions.
Table 3.1. List Permissions
Right | Description |
|---|---|
Manage Lists | Create and delete lists, add or remove columns in a list, and add or remove public views of a list. |
Override Check Out | Discard or check in a document that is checked out to another user. |
Add Items | Add items to lists, add documents to document libraries, and add web discussion comments. |
Edit Items | Edit items in lists, edit documents in document libraries, edit web discussion comments in documents, and customize web part pages in document libraries. |
Delete Items | Delete items from a list, documents from a document library, and web discussion comments in documents. |
View Items | View items in lists, documents in document libraries, and web discussion comments. |
Approve Items | Approve a minor version of a list item or document. |
Open Items | View the source of documents with server-side file handlers. |
View Versions | View past versions of a list item or document. |
Delete Versions | Delete past versions of a list item or document. |
Create Alerts | Create e-mail alerts. |
View Application Pages | View forms, views, and application pages. Enumerate lists. |
Table 3-2 shows site permissions and their descriptions.
Table 3.2. Site Permissions
Right | Description |
|---|---|
Manage Permissions | Create and change permission levels on the web site and assign permissions to users and groups. |
View Usage Data | View reports on web site usage. |
Create Subsites | Create subsites such as team sites, meeting workspace sites, and document workspace sites. |
Grant the ability to perform all administration tasks for the web site as well as manage content and permissions. | |
Add and Customize Pages | Add, change, or delete HTML pages or web part pages, and edit the web site using a Windows SharePoint Services-compatible editor. |
Apply Themes and Borders | Apply a theme or borders to the entire web site. |
Apply Style Sheets | Apply a style sheet (CSS file) to the web site. |
Create Groups | Create a group of users that can be used anywhere within the site collection. |
Browse Directories | Enumerate files and folders in a web site using SharePoint Designer and WebDAV interfaces. |
Use Self-Service Site Creation | Create a web site using self-service site creation. |
View Pages | View pages in a web site. |
Enumerate Permissions | Enumerate permissions on the web site, list, folder, document, or list item. |
Browse User Information | View information about users of the web site. |
Manage Alerts | Manage alerts for all users of the web site. |
Use Remote Interfaces | Use SOAP, WebDAV, or SharePoint Designer interfaces to access the web site. |
Use Client Integration Features | Use features that launch client applications. Without this permission, users will have to work on documents locally and upload their changes. |
Open | Allow users to open a web site, list, or folder in order to access items inside that container. |
Edit Personal User Information | Allow a user to change his or her own user information, such as adding a picture. |
Table 3-3 shows the personal permissions and their descriptions.
Table 3.3. Personal Permissions
Right | Description |
|---|---|
Manage Personal Views | Create, change, and delete personal views of lists. |
Add/Remove Private Web Parts | Add or remove private web parts on a web part page. |
Update Personal Web Parts | Update web parts to display personalized information. |
SharePoint allows you to control which of these rights are available for assignment to a user in a web application; not all of them must be made available to every site. Depending upon the site template you use, several of the rights may already be available to your web application by default. However, you can change the available rights for any site as you require.
Follow these steps to view and modify the rights available in a web application:
Open the Central Administration site by selecting Start

In the Central Administration site, click the Application Management tab.
Under the Application Security section, click the link titled User Permissions for Web Application.
On the User Permissions for Web Application Page, select the rights that will be available to the web application.
Click the Save button.
Although you can specifically control the availability of each of the individual SharePoint rights, you will never directly assign one of these rights to a user. Instead, SharePoint gives you a way to collect rights into permission levels and levels into SharePoint groups. You then assign a user to a group, which assigns all of the contained rights from the associated permission levels.
Levels and groups are defined and assigned by an administrator directly within the SharePoint site. If you have appropriate permissions within the site to perform administrative tasks, you will see the Site Actions menu on the page. Clicking this item causes a drop-down menu to appear with available administrative options. The Site Actions menu, along with just about everything else in SharePoint, is security-trimmed. This means that users will only see options and menus that are valid for their permission set. This is a big improvement over the previous version of SharePoint, which allowed users to click any menu item only to be denied access later when the system discovered they had insufficient rights.
Although there are several specific items on the drop-down menu, the easiest way to get started with site administration is to open the Site Settings page. The Site Settings page gives you access to a broad range of settings grouped together by category. In order to access the Site Settings page through the MOSS site you created in Chapter 2, click the Site Actions menu and select Site Settings

When you create a site collection within a web application, SharePoint provides you with several predefined permission levels and groups that you can use immediately to assign rights to users. From the Site Settings page, you can see the predefined groups by clicking the link titled Advanced Permissions under the Users and Permissions section. From the list, select Add
When you look at the list of available groups, you'll notice that they are associated with permission levels that have unfamiliar names. For example, the Hierarchy Managers group is associated with the permission levels Limited Access and Manage Hierarchy. When you first set up SharePoint, it can be difficult to know exactly what rights are being assigned to a user in these groups. Fortunately, you can access the definition for the permission levels by selecting Settings
Table 3.4. Default Groups, Permission Levels, and Rights
Right | Approvers | Designers | Hierarchy Managers | Members | Owners | Visitors | Quick Deploy Users | Restricted Readers |
|---|---|---|---|---|---|---|---|---|
Manage | X | X | X | |||||
Override Check | X | X | X | X | ||||
Add Items | X | X | X | X | X | |||
Edit Items | X | X | X | X | X | |||
Delete Items | X | X | X | X | X | |||
View Items | X | X | X | X | X | X | X | |
Approve Items | X | X | X | |||||
Open Items | X | X | X | X | X | X | X | |
View Versions | X | X | X | X | X | X | ||
Delete Versions | X | X | X | X | X | |||
Create Alerts | X | X | X | X | X | X | ||
View Application Pages | X | X | X | X | X | X | ||
Manage Permissions | X | X | ||||||
View Usage Data | X | X | ||||||
Create Subsites | X | X | ||||||
Manage Web Site | X | X | ||||||
Add and Customize Pages | X | X | ||||||
Apply Themes and Borders | X | X | ||||||
Apply Style Sheets | X | X | ||||||
Create Groups | X | X | ||||||
Browse Directories | X | X | X | X | X | |||
Use Self-Service Site Creation | X | X | X | X | X | X | ||
View Pages | X | X | X | X | X | X | X | |
Enumerate Permissions | X | X | ||||||
Browse User Information | X | X | X | X | X | X | X | X |
Manage Alerts | X | X | ||||||
Use Remote Interfaces | X | X | X | X | X | X | X | X |
Use Client Integration Features | X | X | X | X | X | X | X | X |
Open | X | X | X | X | X | X | X | X |
Edit Personal User Information | X | X | X | X | X | |||
Manage Personal Views | X | X | X | X | X | |||
Add/Remove Private Web Parts | X | X | X | X | X | |||
Update Personal Web Parts | X | X | X | X | X |
Before you can configure a site to allow anonymous access, the associated web application must first have anonymous access enabled through Central Administration. If the web application is set through Central Administration to allow anonymous access, you can control what parts of your site are visible to anonymous users. If the central administrator has not enabled anonymous access for the web application, the functionality will not be visible.
Follow these steps to enable anonymous access for the web application:
Open the Central Administration site by selecting Start
In the Central Administration site, click the Application Management tab.
Under the Application Security section, click the link titled Authentication Providers.
On the Authentication Providers page, make sure that the correct web application is selected. If not, drop the menu and select Change Web Application.
On the Authentication Providers page, click the Default Zone link.
On the Edit Authentication page, check the box labeled Enable Anonymous Access.
Click the Save button.
Once the web application is configured for anonymous access, you can return to the Permissions page. From the Permissions page, you can select Settings
Along with assigning rights to end users, you can also establish broader security policies for a web application. On the Application Management tab of the Central Administration site, you can click the link titled Policy for Web Application to set security policies. Using the Policy for Web Application page, you can change the policy for anonymous access, grant full control, or deny all access. These security policies override the rights that have been assigned through the Site Settings page so they should only be used when you want to grant a high-level of permission to an administrator or completely deny access to a set of users. You used this functionality in Chapter 2 to grant access rights to the administrator in the development environment. Additionally, these policies are set for a given zone, which determines whether they apply to users inside the firewall or outside. Zones are discussed in detail later in the section titled "Understanding Authentication Options."
When you first create a web application and a site collection, you will notice that a default structure has been created for you based on the template you selected. You will likely want to modify the site structure significantly before making it accessible to end users. Modifying the structure, however, should not be done lightly. You should first begin by understanding all of the sites, pages, and lists that come with the template. Then you can move on to making changes. Figure 3-2 shows the home page of the site collection you created in Chapter 2, which contains a number of predefined sites, pages, and lists.

The best way to understand the existing site collection structure is to examine it inside SharePoint using the Site Content and Structure explorer, which is only available within MOSS. This page presents a tree view of the entire site collection that you can navigate. Additionally, you can add and delete elements from the site collection directly from this one page. You can access the Site Content and Structure explorer by selecting Site Actions
A site collection in SharePoint contains one or more sites. Sites within a site collection represent a security boundary and a way to group teams and functionality for a business purpose. When you create a site collection, SharePoint will define some initial sites based on the template that you selected. The sites that SharePoint creates are designed to support the audience for which the template was designed. In the case of the MOSS site collection you created in Chapter 2, SharePoint defined sites named Document Center, News, Reports, Search, and Sites. If you created a site collection in WSS, you'll only see a home page with no additional sites defined.
The Document Center site in MOSS is designed to act as a central repository for documents throughout the organization. This site seems to be an acknowledgement that many customers simply want to use SharePoint as a document management system without necessarily taking advantage of its many other features. In previous versions of SharePoint, it was difficult to create such a document management system because of limitations in the library metadata and available document templates. SharePoint 2007 has largely overcome these limitations; I discuss the document management features in detail in Chapter 6.
The News site is designed to support the creation and publishing of news articles for the organization. This site makes use of special article templates, content management, and publishing features that allow the creation and approval of content directly within SharePoint. Content management is a major area of new functionality within SharePoint 2007 that I cover in Chapter 5.
The Reports site is a site designed to function as a report center for all business intelligence information within an organization. Using this site, you may define data connections to external sources such as SQL databases, and utilize that data to create reports and dashboards. These reports and dashboards can be presented in a number of ways, including scorecards, Excel spreadsheets, and SQL Reporting Services reports. Business intelligence is another major area of functionality that I cover in detail in Chapter 8.
The Search site implements an enterprise search capability that allows you to search all of the content within MOSS as well as external content and even external databases. Search is greatly enhanced in this version of SharePoint, and the Search site has the ability to truly function across all enterprise systems. I cover search in Chapter 4.
The Sites site forms a site directory that lists and catalogs all of the sites within the collection. The Site Directory helps end users locate sites of interest and understand the structure of the collection. If you have appropriate permissions, you can also create a new site within the collection by clicking the Create Site link. The Create Site link is a shortcut to the site creation page, which can also be reached through the Site Settings page. Most administrators will use the Site Settings page for site creation because it is conveniently grouped with other administrative tasks and works the same in both MOSS and WSS.
To create a new site, follow these steps:
Open the home page of the intranet site you created in Chapter 2 (
http://vsmoss/sites/intranet).Select Site Settings
Under the Site Administration section, click the link titled Sites and Workspaces.
On the Sites and Workspaces page, click the Create link.
On the New SharePoint Site page, enter Softball Team in the title field.
Enter softball in the URL field.
Under the Permissions section, select the option to Use Same Permissions as Parent Site.
Under the Template section, select to create a site based on the Team Site template.
Click the Create button.
When you create sites in WSS or MOSS, you may see some different options for configuring how the site is displayed in the navigation system or how it is categorized in the Site Directory. If you are using MOSS in particular, you will notice that you have options to specify a division and a region with which to associate the site. These are the same options available in the previous version of SharePoint Portal Server. These options are configurable and can even be eliminated altogether (which is good because I don't know of any organization that uses the default values). The key to altering these options lies in modifying the columns associated with the Sites list.
Follow these steps to modify the division and region options in MOSS:
Click the Sites tab in MOSS to open the Site Directory.
On the Site Directory page, click View All Site Content.
On the All Site Content page, click the Sites list.
On the Sites list page, select Settings
On the Customize Sites page, scroll down to the Columns section and click either the Division column or the Region column.
On the Change Column page, change the list of available options and click the OK button. Alternately, you could click the Delete button to eliminate the column.
Lists represent a broad umbrella of functionality in SharePoint that encompasses everything from document management to scorecards. This is because at the lowest level, SharePoint manages groups of items as lists regardless of what the items are. For administrative purposes, however, SharePoint divides list functionality into four distinct categories: Libraries, Communications, Tracking, and Custom lists. The Libraries category contains list types for managing documents. The Communications category contains list types for communicating with other people. The Tracking category contains list types for managing tasks, plans, and issues. The Custom category allows you to create a custom list to meet your own needs. In this section, I provide an overview of each list type.
Using Document Libraries
In many ways, libraries are the central feature of SharePoint. Nearly all site users will be involved with creating, retrieving, and sharing documents. You can create document libraries at any level in the site hierarchy and assign different permissions at the item or library level. This makes libraries useful for facilitating collaboration among organizational teams. What's more, you'll see in Chapters 6, 7, and 9 that document libraries are fully integrated with Microsoft Office 2007.
When a new site is created it often comes with predefined libraries. The softball site you created earlier uses the Team Site template, which comes with a document library suitable for managing all kinds of documents including Office documents, text documents, PDF documents, and others. In WSS, you can also elect to create a picture library, a form library, or a wiki library for managing images, InfoPath forms, and wiki pages, respectively. In MOSS, you can create additional types of libraries for managing documents in multiple languages, reports, data connections, and slide libraries of PowerPoint presentations.
When new documents are added to any library, a document profile is created based on the content type of the new document. A content type is a set of characteristicssuch as a document template, workflow processes, and propertiesthat uniquely define a document. Content types allow you to manage multiple kinds of documents within a single library. This is a great improvement over the previous version of SharePoint, which was designed to support only a single document profile for every document in a library. I discuss content types in greater detail throughout the book.
Once documents are part of a library, users can take advantage of the document management features built into SharePoint. These document management features include check-in, checkout, version control, initiating workflows, editing properties, and publishing. You may restrict the ability of users to utilize the document management feature set based on their membership in a security group, as I described earlier in the section "Managing Users." In this version of SharePoint, you may control these permissions at the document level, whereas the previous version controls them at the library level. Access to the document management features of a library is accomplished through a drop-down list associated with each document. Figure 3-3 shows the drop-down list for a document in a library.

You can check out documents directly from the document library using the drop-down list. When a document is checked out, it is still listed in the document library and visible to site users, but the username of the person who checked it out is visible in the list. For each library, you may control whether to require a checkout before a document can be edited. If you do not require a checkout, the document can be opened in a read-only mode by other users.
Follow these steps to require checkout for a document library:
Open the home page of the softball team site you created earlier.
In the Quick Launch pane, click the link titled Shared Documents.
On the Shared Documents page, select Settings
On the Customize Shared Documents page, click the link titled Versioning Settings.
On the Document Library Versioning Settings page, select the Yes option under the Require Check Out section.
Once changes are made to a document, it may be saved back to the library and checked in. Users can be granted the authority to cancel an existing checkout by another person. This action causes the document to be checked back in to the library immediately; however, all changes made to the document since it was checked out are lost. This feature is primarily used to recover a checked-out document when the holder is unavailable for some reason.
By default, the document library overwrites the old document version with the new version and does not keep any history. If you would like to keep version history, you must enable it from the Versioning Settings page. These settings allow you to specify whether you want to create major or minor versions and how many versions to retain. Once versioning is enabled, you can access the version history page from the drop-down menu associated with a document. This page will list all of the document versions and allow you to restore any of them as the current version.
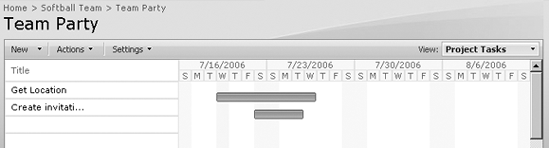
Along with version control, you can also enable content approval for a document library. When document approval is enabled, new documents will not be visible to the general population of site users. Instead, the documents must be approved before they become generally available. Rejections and approvals are issued directly in the portal using the drop-down menu associated with each document.
Using Form Libraries
A form library can be thought of as a special document library. The purpose of the form library is to store XML-based forms created through Microsoft InfoPath. For example, you might create a form library in the human resources area of the site that contains a vacation request form, a 401(k) change form, or a health insurance change form. In this way, key forms are centralized and easily located.
Creating a form library can be done directly in the SharePoint site if you have appropriate permissions. Unlike document libraries, form libraries do not generally exist by default. When you create a form library, it is given a default form template for use with the library, but you will certainly want to modify it. As with any library, you can have multiple content types associated with the form library.
To create a form library, follow these steps:
Open the home page of the softball team site you created earlier.
Select Create from the Site Actions drop-down menu.
On the Create Page, click the Form Library link under the Libraries section.
In the Name field type Team Forms.
Click the Create button.
Once the form library is created, you can create and upload forms. Forms in InfoPath may be designed based on an existing template or a database schema or from scratch. All of the forms created with InfoPath are interactive with complete control sets such as list boxes, options, and text fields. Once the form is created, you can publish it to the form library.
Take these steps to publish a default InfoPath form:
Open Microsoft InfoPath 2007 on VSCLIENT.
In the Getting Started dialog, select Customize a Sample.
In the Customize a Sample window, double-click Sample - Travel Request.
In the Design Tasks window, select Publish Form Template.
When prompted, save the file to your desktop as
Travel.xsn.When the Publishing Wizard starts, select the publishing option To a SharePoint Server With or Without InfoPath Forms Services.
Click the Next button.
Type in the URL of the site you created earlier (e.g.,
http://vsmoss/sites/intranet/softball).On the next screen of the wizard, uncheck the box labeled Enable This Form to Be Filled Out by Using a Browser.
Click the Next button.
On the next screen of the wizard, select the option to Update the Form Template in an Existing Document Library.
Select the Team Forms library and click the Next button.
On the next screen of the wizard, simply click the Next button.
On the next screen of the wizard, click the Publish button.
On the final screen of the wizard, check the box labeled Open This Document Library, and then click the Close button.
When the form library opens, you should be able to fill out the new form by selecting New
Using Picture Libraries
Like form libraries, picture libraries are a special type of document library. These libraries are specifically intended to manage digital photography and images such as corporate logos and web site images. Although images can be stored in any document library, picture libraries have special features to view and use graphical content.
Uploading pictures into the library is similar to uploading any document or form and can be done using the Upload menu on the library toolbar. Once the images are uploaded, however, they may be presented in special views available only in the picture library. The images may also be edited with Microsoft Picture Manager or sent directly to any Office application for inclusion in a document.
Using Announcements
An announcements list is used to create a list of announcements with a title and a rich-text body. Announcements are simple list types that typically display the title and a few lines of the body on the home page of a site. Additionally, each item can be given an expiration date so that they are automatically hidden after a period of time.
Using Contacts
A contact list is used to track contact information about people. You can either type contact information directly into the list, or import the information from an address book. SharePoint contact lists can also be synchronized with Outlook contact lists by selecting Actions
Using Discussion Boards
Discussion boards are lists that can be used to start threaded discussions. Threaded discussions allow users to post topics and responses in a tree structure that keeps them together. Discussion boards are superior to e-mail threads when you want to preserve the discussion postings for reference.
Using Links
Link list items are hyperlinks to web pages of interest to a team or an organization. A blank list of links typically appears on any new site added to the portal. When users add links to the list, they provide the target URL and a description.
Using Calendars
Calendars are events associated with meetings, seminars, parties, and so on. When you create a new site, a blank calendar list typically appears on the home page. Users may enter new events directly from the home page and can also associate a document with the event. This is useful for linking directions or agendas with events. Calendars can be synchronized with Outlook by selecting Actions
Using Tasks
Task items form a to-do list for a team. When a new site is created, a blank task list is available. When you create a new task in the list, you may assign it to a team member. The list may then be viewed in summary to track all items for the team. Task lists can be synchronized with Outlook by selecting Actions
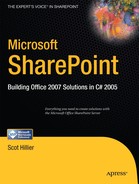
Using Project Tasks
Project task items are similar to normal task items except that they show the task list using a Gantt chart format. This list type is useful for creating mini project plans and tracking progress. Project task lists can be synchronized with Outlook by selecting Actions
Using Issues Tracking
Issue tracking lists are used to track problems for resolution. This list type is used like a simple help-desk application that assigns an identifier to each issue, a person to resolve it, and a due date. You can also associate other related issues together.
Using Surveys
Surveys provide a way to poll portal users for input on a subject. When a site is first created, it usually does not have a survey associated with it. Once created, surveys support a wide variety of response types from simple yes/no answers to free-form text. When the survey is filled out, you may display a number of simple reports to show the results. The list also supports branching logic for surveys, which allows you to present questions based on the response to previous questions.
Using Custom Lists
Custom lists in SharePoint allow you to create your own list with your own field definitions. You can create your custom list either in a standard list format or in a datasheet view. Additionally, you can import an existing Excel spreadsheet to create a custom list in SharePoint.
Along with using lists to manage documents and items, you can also configure them to receive e-mail. E-mail-enabled lists are given their own e-mail addresses. When they receive mail, the message can be stored and any attached documents can be saved. Configuring e-mail-enabled lists first requires that you set up the SMTP service on the server running MOSS.
Follow these steps to install and configure the SMTP service:
Log in to VSMOSS as an administrator.
Select Start
In the Configure Your Server Wizard, click the Next button.
On the Preliminary Steps screen, click the Next button.
On the Server Role screen, select Mail Server (POP3, SMTP) and click the Next button.
On the Configure POP3 Service screen, enter vsmoss.domain.local in the E-Mail Domain Name field.
Click the Next button.
On the Summary of Selections screen, click the Next button.
When the SMTP service is installed, click the Finish button.
Open the IIS Manager by selecting Start
In the IIS Manager, right-click the Default SMTP Server and select Properties from the context menu.
In the Properties dialog, click the Access tab.
On the Access tab, click the Relay button.
On the Relay Restrictions screen, select the option to allow All Except the List Below and click the OK button.
Click the OK button.
Once the SMTP service is set up, you need to configure the general incoming e-mail settings for the farm. This is done through the Central Administration site. When you configure these settings, you can choose to simply relay incoming mail to the targeted list with no other frills, or you can choose to enable the directory management service (DMS). DMS is used to create mailing lists that you can use through Exchange and Outlook. This makes it easy to find addresses for lists in the same way that you find them for people.
Follow these steps to configure incoming e-mail settings:
Open the Central Administration site by selecting Start
In the Central Administration site, click the Operations tab.
On the Operations page, click the link titled Incoming E-Mail Settings under the Topology and Services section.
On the Configure E-Mail Settings page, select the Yes option under the Enable Incoming E-Mail section.
Click the OK button.
Once the incoming e-mail settings are configured for the farm, you can finally enable an individual list to receive mail. Enabling a list is done through the settings associated with the list. In these settings, you specify the address to use for the list and options regarding the handling of attachments and the original mail message.
Follow these steps to e-mail-enable a list:
Open the home page of the softball team site you created earlier.
In the Quick Launch pane, click the link titled Shared Documents.
On the Shared Documents page, select Settings
On the Customize Shared Documents page, click the Incoming E-Mail Settings Link.
On the Incoming E-Mail Settings page, select the Yes option under the Incoming E-Mail section.
Enter softball in the E-Mail Address field.
Click the Yes option under Save Original E-Mail.
Click the OK button.
Now try sending an e-mail to [email protected] and verify that the new e-mail appears in the list.
When you first create a site, it is made up of only the home page. However, you can add additional pages to the site at any time by using the Create page. Although you can access the Create page from the Site Settings page, it is often easier to simply select Site Actions
Follow these steps to create a new page:
Open the home page of the softball team site you created earlier.
Select Create from the Site Actions drop-down menu.
On the Create page, click the Document Library link under the Libraries section.
On the New page, name the new document library Basic Pages.
In the Document Template drop-down list, select Basic Page.
Click the Create button.
When the Basic Pages library appears, click New
On the New Basic Page, enter SoftballRules in the name field.
Click the Create button.
When the rich-text editor appears, type Rule #1: Have Fun!.
Try using various format tools in the dialog to make the text look interesting.
Click the Save button.
When the new page appears in the browser, copy the URL from the address bar so you can make a link to the new page.
Return to the home page of the softball site and locate the Links list.
Click the link titled Add New Link.
On the Add New Link page, paste the URL you copied earlier into the URL field.
Type Softball Rules in the description field.
Click the OK button, and you should now have a link from the home page to your new page.
Alerts provide notification to a particular user when an item of interest has been added or updated within the portal. When a new alert is created, the user can define the areas of interest and set up how the notification will occur. An alert can be established for any list in SharePoint by selecting Actions
Really Simple Syndication (RSS) is a mechanism for aggregating web content from multiple sources and displaying it in a reader. SharePoint 2007 now supports RSS feeds, which have long been available on the Internet and can make any SharePoint list a source for RSS. Additionally, Outlook 2007 contains an RSS reader that can collect the information from SharePoint lists and display it. You can establish an RSS feed for any SharePoint list by selecting Actions

In the previous version of SharePoint, a significant distinction exists between collaboration sites and portal sites. Microsoft saw these two types of sites as fundamentally different. As a result, different capabilities are built into them. For example, SharePoint Portal Server 2003 has the ability to hide content based on the current user's membership in a group known as an audience. However, Windows SharePoint Services Version 2 team sites do not have this capability. With this newest release of SharePoint, however, capabilities are packaged into Features that can be activated and deployed to any site in a collection. This means that every site in the collection can have a different combination of portal and collaboration capabilities as desired. While it's still true that MOSS has more Features than WSS, WSS sites can now use the MOSS Features when they are deployed together.
Features can be activated or deactivated at the farm, web application, and site level. You can see the list of available Features for the farm by clicking the link titled Manage Web Application Features on the Application Management tab of the Central Administration site. Similarly, you can access the available Features for a site by opening the Site Settings page and clicking the link titled Site Features. While some Features enable simple changes in a site, many of the listed Features represent significant areas of functionality that I describe in detail in later chapters. Figure 3-7 shows a typical list of Features associated with a site.

In Chapter 2, I discuss in detail how SharePoint utilizes Windows authentication in the form of NTLM or Kerberos and include detailed steps for enabling Kerberos. A SharePoint site always uses Windows authentication to start; however, you can change the authentication provider later to support authenticating users in a variety of ways. Typically, you will establish a new access zone, which is a configuration option representing an alternate access path, and associate an authentication mechanism with the new zone. Besides Windows authentication, you can configure web form authentication, web single sign-on authentication, or Active Directory Account Creation Mode.
WSS and MOSS support a set of zones that allow you to establish different access methodologies to a single web application. Zones are an administrative category, which you use to specify a different URL for accessing the same web application. The value of this configuration is that you can establish different authentication methods for different zones while delivering the same content to each zone.
When you first create a new web application, it is always created in the Default zone. The Default zone is always set up to utilize Windows authentication either through NTLM or Kerberos as you specify. If your web application will only be accessed inside the firewall, you can simply use the Default zone and not worry about any further configuration. However, if you want to make the same content available outside the firewall or change the authentication method, you should extend the web application into another zone.
Extending a web application is done from the Central Administration pages on the Application Management tab. Under the SharePoint Web Application Management section, there is a link titled Create or Extend Web Application. Whenever you extend an existing web application, you can choose to associate it with a zone. Figure 3-8 shows part of the administration page where you can select to extend an existing web application into another zone.

Forms authentication uses a web form to collect a username and password that is submitted for verification against a credential store. This is a common way to authenticate users who are not members of the domain. The nice thing about Forms authentication is that you can use a SQL Server database or another Lightweight Directory Access Protocol (LDAP) source to authenticate the user. The data source you use is dictated by an authentication provider that is capable of authenticating users against the desired store. While you can use any authentication provider with SharePoint, common ones include SqlMembershipProvider for use with a SQL Server database; ActiveDirectoryMembershipProvider for use with Active Directory; and LDAPMembershipProvider for use with other LDAP sources such as Lotus Notes.
When you want to use Forms authentication, you must add a connectionStrings and a membership section to the web.config file of the web application. Additionally, you must add the same sections to the SharePoint Central Administration application so that permissions can be managed centrally. The exact syntax of the new sections varies, and you may have to perform some additional steps depending on what data store you will use. I cover the configuration details for key providers in the next few sections.
Tip
Save a backup copy of each web configuration file before you modify it. You may want to roll back your changes later.
Authentication with SqlMembershipProvider
One of the most common scenarios with Forms authentication employs a SQL Server database as the credential store. The SqlMembershipProvider is used to authenticate users against a SQL database when that database utilizes the same schema as a standard ASP.NET 2.0 application. When Visual Studio 2005 is installed, it automatically configures an instance of SQL Express to serve as a credential store for any ASP.NET 2.0 applications. If you want to use a SQL Server 2005 database instead, it must be configured with the appropriate schema. Creating a credential store in SQL Server 2005 that can be used with Forms authentication in SharePoint is done using the ASPNET_REGSQL.EXE utility.
Follow these steps to create a credential store in SQL Server 2005:
Log in to VSMOSS or VSWSS as a local administrator.
Open a command prompt window and change the directory to C:WINDOWSMicrosoft.NETFrameworkv2.0.50727.
At the command prompt, run ASPNET_REGSQL.EXE.
On the Welcome screen of the wizard, click the Next button.
On the Select a Setup Option screen, select the option labeled Configure SQL Server for Application Services.
Click the Next button.
On the Select the Server and Database screen, enter VSSQL in the Server field.
Click the Next button.
On the Confirm Your Settings screen, click the Next button.
On the Finish Screen, click Next.
When using SQL Server 2005 as the credential store, you are not provided with a good interface for initially populating the database with usernames. If no names are initially in the database, no one can be designated as the site administrator for managing additional users. Therefore, you have to find a way to get at least one name into the database before enabling Forms authentication.
The best option for entering users is to simply use the web site configuration tools that ship with Visual Studio 2005. These tools are preconfigured to work with an instance of SQL Express installed alongside Visual Studio. The strategy is to create an ASP.NET project and add a web configuration file that refers to the database you created earlier. Then you can configure the database directly from Visual Studio.
Follow these steps to edit the credential database with Visual Studio:
Log in to VSMOSS or VSWSS as a local administrator.
Start Visual Studio 2005.
In Visual Studio, select File
In the New Web Site dialog, select to create a new ASP.NET Web Site.
In the Location drop-down list, select File System.
Click the OK button.
In the Solution Explorer, right-click the project and select Add New Item from the context menu.
In the Add New Item dialog, select Web Configuration File and click the Add button.
In the web configuration file, replace the
<connectionStrings/>element with the following:<connectionStrings> <remove name="LocalSqlServer" /> <add name="LocalSqlServer" connectionString="Server=VSSQL;Database=aspnetdb;Integrated Security=SSPI;" providerName="System.Data.SqlClient" /> </connectionStrings>
Select Build
After the project is built, select Website
Tip
If you have trouble running the Web Site Administration Tool, you can try creating your web site as an HTTP web site. I have seen some issues when file-based web sites and SharePoint are on the same machine.
In the Web Site Administration Tool, click the Security tab.
On the Security tab, click the link titled Select Authentication Type.
Click the option labeled From the Internet, and click the Done button.
On the Security tab, click the Create User link.
Fill in some information to create a user and click the Create button.
Once the credential store is created, you can add the new sections to the web.config files of the SharePoint sites. Remember, you must add the section to both the application you want to access and the Central Administration site. The configuration files are all located in subfolders in the path InetpubwwwrootwssVirtualDirectories. Here you will find a subdirectory for each of the web applications you have created and the Central Administration site.
Note
SharePoint often uses port numbers to name the application subdirectories. This can make it hard to tell which site is associated with which directory. You can figure this out by examining the Local Path field in the site properties dialog in IIS Manager.
For each file, create a connectionStrings section immediately before the <system.web> tag and a membership section immediately following the <system.web> tag. The connectionStrings section defines a valid connection string to access the credential database. The membership section provides configuration information for the SqlMembershipProvider class to use the information in the credential store. Listing 3-1 shows example sections with the <system.web> tag visible between them. These entries are based on the database you created earlier.
Example 3.1. A Partial Web Configuration File
<connectionStrings>
  <add name="DBService"
  connectionString="Server=VSSQL;Database=aspnetdb;Integrated Security=SSPI;"
  providerName="System.Data.SqlClient" />
</connectionStrings>
<system.web>
  <membership defaultProvider="DB">
    <providers>
      <add connectionStringName="DBService"
        enablePasswordRetrieval="false"
        enablePasswordReset="true"
        requiresQuestionAndAnswer="true"
        applicationName="/"
        requiresUniqueEmail="false"
        minRequiredPasswordLength="1"
        minRequiredNonalphanumericCharacters="0"
        passwordFormat="Clear"
        maxInvalidPasswordAttempts="5"
        passwordAttemptWindow="10"
        passwordStrengthRegularExpression=""
        name="DB"
        type="System.Web.Security.SqlMembershipProvider,
          System.Web, Version=2.0.0.0, Culture=neutral,
          PublicKeyToken=b03f5f7f11d50a3a" />
    </providers>
  </membership>
System.Web, Version=2.0.0.0, Culture=neutral,
PublicKeyToken=b03f5f7f11d50a3a" />
</providers>
</membership>Note
Not all of the configuration elements associated with the SqlMembershipProvider are necessary for SharePoint. When you use Visual Studio to create the membership database, however, it creates many of the configuration entries by default. You can learn more about the SqlMembershipProvider options at http://msdn2.microsoft.com/en-us/library/system.web.security.sqlmembershipprovider.aspx.
After the configuration files are updated, you are ready to enable Forms authentication. This is done through the Central Administration site. In the Central Administration site, you will switch the provider for the extended web application from Windows to Forms authentication.
Follow these steps to enable Forms authentication:
Open the Central Administration site by selecting Start
In the Central Administration site, click the Application Management tab.
Under the Application Security section, click the link titled Authentication Providers.
On the Authentication Providers page, locate the entry for the extended web application. It will be listed alongside the zone into which it was extended and will currently show that it is using Windows authentication.
Click the Windows Authentication link to change the provider.
On the Edit Authentication page, select the Forms option under Authentication Type.
In the Membership Provider Name field, type DB, which is the name of the provider as it appears in the web configuration file.
Click the Save button.
Click the Application Management tab.
Under the Application Security section, click the link titled Policy for Web Application.
If the correct web application is not already selected, drop down the web application selection list and click Change Web Application.
Click the Add Users button.
On the Add Users page, select the Custom zone where you extended the application earlier.
Click the Next button.
On the Add Users page, type the name of the user you entered into the credential database into the Users field and click the Check Names image button.
Note
If the Central Administration application cannot find the username you entered, it is very likely that the connection string contained in the configuration file is incorrect. You will generally not receive an error telling you this, but the vast majority of issues are related to the connection string.
Under the Choose Permissions section, check the box labeled Full Control - Has Full Control.
Click the Finish button.
Once the initial user has been given rights to the site you can open the site in a browser. You should see a login page where you can type the credentials you entered into the database earlier. Because you granted full control to this user, you can now use the Site Settings from within the site to add new users and give them rights.
Authentication with ActiveDirectoryMembershipProvider
The ActiveDirectoryMembershipProvider is an authentication provider for use with Active Directory. Using this provider, you can set up Forms authentication for users who have accounts within the domain. This type of authentication is good for creating extranet solutions where you want to provide a login screen rather than just popping up the ugly gray Windows authentication box. Exercise 3.1 at the end of this chapter uses the ActiveDirectoryMembershipProvider to create an extranet, so I will not cover it in detail here.
Authentication with LDAPMembershipProvider
MOSS ships with an additional authentication provider called LDAPMembershipProvider. The LDAPMembershipProvider allows you to authenticate users against other LDAP sources such as Lotus Notes. This provider is most useful for environments that are not using Active Directoryalthough it certainly could be used with Active Directory, which is LDAP-compliant. Like all of the other providers, the LDAPMembershipProvider requires you to make connectionString and membership entries in the web configuration file. Listing 3-2 shows an example configuration for the provider for the Active Directory you set up in Chapter 2.
Example 3.2. Configuring LDAP Authentication
<membership defaultProvider="LDAP">
 <providers>
  <add name="LDAP"
    type="Microsoft.Office.Server.Security.LDAPMembershipProvider,
      Microsoft.Office.Server, Version=12.0.0.0, Culture=neutral,
      PublicKeyToken=71E9BCE111E9429C"
    server="VSPDC" port="389"
    useSSL="false" userDNAttribute="distinguishedName"
    userNameAttribute="sAMAccountName"
    userContainer="CN=Users,DC=domain,DC=local"
userObjectClass="person"
userFilter="(|(ObjectCategory=group)(ObjectClass=person))" scope="Subtree"
otherRequiredUserAttributes="sn,givenname,cn" />
</providers>
</membership>In addition to the authentication providers already discussed, SharePoint also gives you the option to use a web single sign-on service for authentication. A web single sign-on service is a separate third-party service used to provide authentication across many disparate systems. Windows Live ID service is an example of a web single sign-on service. In addition to registering a provider in the web configuration file, these types of providers also require you to register an HTTP module with specific information about the provider. Web single sign-on providers are beyond the scope of this book.
The final authentication option available in SharePoint is a special account mode known as Active Directory Account Creation (ADAC). This mode is intended for use by Internet service providers (ISPs) who support large constituencies that are not members of the hosting domain. In ADAC mode, users can self-register using e-mail addresses instead of domain accounts. In this way, an ISP can host Internet users without having to specifically add them to a domain.
It's important to note that ADAC is incompatible with the normal domain account mode. During the installation of WSS, you select the mode in which the farm will operate. After you make the selection, you cannot alter it. Throughout this book, I assume that SharePoint Services are operating in domain account mode.
Once a new web application is created in SharePoint you can extend the web application onto another IIS site. Extending an existing web application to another IIS site allows you to create multiple access paths to the same web application. This is useful for setting up scenarios in which a web application will be accessed by one group of people inside the firewall and another group of people outside the firewall. Each time you extend a web application, you have the opportunity to change the authentication methods and URL mappings to suit the intended audience. Additionally, you can secure SharePoint sites using Secure Sockets Layer (SSL).
When you create a new web application in WSS or MOSS, it is configured by default to utilize internal server names and URLs. This means that a web application in the Default zone is not initially suitable for exposure outside the firewall. If you were to simply forward port 80 from your firewall to the internal IP address of the SharePoint server, you would discover that external users are redirected to the internal name of the server and access would fail. In order to make external access function correctly, you must provide an alternate access mapping that directs the incoming URL to the SharePoint web application. Incoming URLs are associated with a specific zone so you can limit the mapping to a given set of users.
Establishing alternate access maps is done through the Central Administration site on the Operations tab. Figure 3-9 shows a page from the Central Administration site with some mappings defined. Exercise 3.1 at the end of this chapter covers the steps necessary to create alternate mappings for an externally facing site.

When you create or extend a web application, you will have the option to enable SSL. Enabling SSL provides an extra level of security based on certificates and encryption. In order to enable SSL for SharePoint, you must obtain and install a server certificate on any IIS web sites that will be accessed through SSL. Exercise 3.1 walks you through the process of creating a secure site with SSL enabled.
In the previous version of SharePoint, creating web sites that are accessible from outside the firewall is a challenge. Under SharePoint 2007, this capability is greatly improved through the use of zones, Forms authentication, and alternate access mappings. In this exercise, you will create a secure Internet site using several of these capabilities. This exercise assumes that you have set up the development environment described in Chapter 2 and will work with either WSS or MOSS. If your environment is different, you may have to modify some steps.
Note
If you have previously modified your SharePoint installation to use another Forms authentication providersuch as SqlMembershipProviderwhile working through the chapter text, roll those changes back before you start this exercise.
When you created your first web application in Chapter 2, it was created in the Default zone using Windows authentication. Generally speaking, it is a good idea to always use Windows authentication in conjunction with the Default zone so that users inside the firewall can access the web application. If you want to make the web application available outside the firewall, you should extend it into the Internet or Extranet zone. In this exercise, you will extend the existing web application into the Extranet zone in order to create a secure site.
Follow these steps to extend the existing web application into the Extranet zone:
Tip
Normally, you would want to set up the Default zone on a port other than port 80. Then when you extend the web application, you would extend it onto port 80. In this exercise, you are setting up the extranet on a port other than 80, because you used port 80 in Chapter 2.
Open the Central Administration site by selecting Start
In the Central Administration site, click the Application Management tab.
Under the SharePoint Web Application Management section, click the link titled Create or Extend Web Application.
On the Create or Extend Web Application page, click the link titled Extend an Existing Web Application.
On the Extend Web Application to Another IIS Web Site page, drop down the Web Application selection list and click Change Web Application.
In the Select Web Application page, click the link for the web application that you set up in Chapter 2.
Under the IIS Web Site section, choose Create a New IIS Web Site.
In the Description field type Extranet, but leave the port number in parentheses as part of the name.
Under the Security Configuration section, choose Yes from the Use Secure Sockets Layer (SSL) option group.
Under the Load Balanced URL section, select Extranet from the Zone drop-down list.
Make note of the URL for the extended web application so you can access it later.
Click the OK button.
Creating an alias for your web site is a simple matter of making a new record entry in the Domain Name Service for the network. Creating an alias will allow you to use a name such as sharepoint.domain.local when accessing a web application. Although you will create your alias solely for internal use, you can create an alias for external use and map it to an IP address that will expose the portal on the Internet.
Note
Remember to add a new incoming URL entry to SharePoint when you utilize an external IP address. The steps for adding an incoming URL entry are covered earlier in this exercise.
Follow these steps to create an alias for the SharePoint server:
Log in to VSPDC as the domain administrator.
Select Start
In the dnsmgmt dialog, expand the Forward Lookup Zones folder.
Right-click the domain.local folder and select New Alias (CNAME) from the pop-up menu.
In the New Resource Record dialog, type extranet.
Click the Browse button.
Double-click the VSPDC node.
Double-click the Forward Lookup folder.
Double-click the domain.local folder.
Select the VSWSS or the VSMOSS entry from the list as appropriate and click the OK button.
In the New Resource Record dialog, click the OK button.
Server certificates can be purchased commercially from a trusted source such as VeriSign, or you can create your own using Microsoft Certificate Services. In our exercise, we will install and utilize Microsoft Certificate Services. Making your own certificates is fine for testing and limited production use, but if you are going to allow access to the portal to a wide audience, you should consider getting a certificate from a trusted provider.
Adding the Application Server Role
IIS is required in order to make certificates available for download and distribution. Therefore, you must install IIS before installing Certificate Services. Follow these steps to configure VSPDC:
Log in to VSPDC as a domain administrator.
Start
On the Preliminary Steps screen, click the Next button.
On the Server Role screen, select Application Server (IIS, ASP.NET) from the list of available roles and click the Next button.
On the Application Server Options screen, check the ASP.NET box and click the Next button.
On the Summary of Selections screen, click the Next button.
Adding Certificate Services
Once IIS is installed, you may proceed to add Certificate Services to the server. This will allow you to issue your own trusted certificates to SharePoint servers. Follow these steps to install Certificate Server:
Log in to VSPDC as a domain administrator.
Select Start
In the Add or Remove Programs dialog, click the AddRemove Windows Components button.
In the Windows Components dialog, check the Certificate Services box.
Respond to the warning dialog by clicking the Yes button.
Uncheck the Internet Explorer Enhanced Security Configuration box.
In the Windows Components dialog, click the Next button.
In the CA Type step, select Stand-Alone Root CA.
Click the Next button.
In the CA Identifying Information step, type VSPDC into the Common Name for This CA text box.
Click the Next button.
In the Certificate Database Settings step, accept the default values and click the Next button.
Click the Finish button to complete the operation.
Creating a certificate begins by preparing a request using the virtual server that you want to secure. This server prepares a text file that may then be submitted to Certificate Services. In this exercise, you can create a request for either VSWSS or VSMOSS depending upon whether you installed WSS or MOSS in Chapter 2.
Follow these steps to prepare a request:
Log in to VSWSS or VSMOSS as a local administrator.
Open the Windows File Explorer.
Create a new directory named c:certificatessharepoint.
Select the c:certificates directory, right-click it and select Sharing and Security from the pop-up menu.
On the Sharing tab, select Share This Folder.
Click the Permissions button.
Select Grant Everyone Full Control and click the OK button.
Press the OK button to close the directory properties dialog.
Select Start
Open the Web Sites folder.
Right-click the Web Site node where the web application was extended into the Extranet zone and select properties from the pop-up menu.
On the Directory Security tab, click the Server Certificate button.
In the Web Server Certificate Wizard, click the Next button.
In the Server Certificate step, select the option to create a new certificate, and click the Next button.
In the Delayed or Immediate Request step, select the option to Prepare the Request Now, but Send It Later, and click the Next button.
In the Name and Security Settings step, leave the values as they are and click the Next button.
In the Organization Information step, type your company name in the Organization field and your company unit in the Organizational Unit field.
Click the Next button.
In the Your Site's Common Name step, type VSWSS or VSWOSS in the Common Name field as appropriate.
Click the Next button.
In the Geographical Information step, enter the appropriate information and click the Next button.
In the Certificate Request File Name step, click the Browse button.
In the Saves As dialog, navigate to the c:certificatessharepoint directory and click the Save button.
In the Certificate Request File Name step, click the Next button.
In the Request File Summary step, click the Next button.
Click the Finish button to complete the operation.
Once the request is prepared, you may use it to create a new certificate. Certificate Services uses the text file created under IIS to generate the certificate. The new certificate may then be installed on the SharePoint server.
Follow these steps to create the new server certificate:
Log in to VSPDC as the domain administrator.
Open the Internet Explorer and navigate to
http://vspdc/certsrv/default.asp.Click the Request a Certificate link.
Click the Advanced Certificate Request link.
Click the link to submit a certificate request by using a base-64-encoded CMC or PKCS #10 file, or submit a renewal request by using a base-64-encoded PKCS #7 file.
Open the certificate text file in Notepad that you previously saved at \vswsscertificatessharepoint or \vsmosscertificatessharepoint as appropriate.
Copy the entire contents of the certificate file and paste it into the Saved Request field.
Click the Submit button.
Select Start
In the Certification Authority dialog, expand the tree and open the Pending Requests folder.
Locate the pending request, right-click it and select All Tasks
Open Internet Explorer and navigate to
http://vspdc/certsrv/default.asp.Click the link titled View the Status of a Pending Certificate Request.
Click the link for the pending certificate.
On the Certificate Issued page, click the Download Certificate link.
In the File Download dialog, click the Save button.
Save the file into the certificatessharepoint directory.
On the Certificate Issued page, click the Download Certificate Chain link.
In the File Download dialog, click the Save button.
Save the file into the certificatessharepoint directory.
Once the new certificate is created, you can install it on the SharePoint server. When using the Microsoft Certificate Services, you must install the certificate file with the P7B extension. This file will establish the appropriate trusts to ensure that you can view the web application.
To install the new certificate, do the following:
Log in to VSWSS or VSMOSS as the local administrator.
Select Start
Expand the VSWSS or VSMOSS node as appropriate and open the Web Sites folder.
Right-click the Web Site node where web application was extended into the Extranet zone and select Properties from the context menu.
On the Directory Security tab, click the Server Certificate button.
In the Web Server Certificate wizard, press the Next button.
In the Pending Certificate Request step, select Process the Pending Request and Install the Certificate.
Press the Next button.
In the Process a Pending Request step, press the Browse button.
In the Open dialog, navigate to the certificatessharepoint directory and select the file with the P7B extension.
Click the Open button.
In the Process a Pending Request step, click the Next button.
In the SSL Port step, accept the default value and click the Next button.
In the Certificate Summary step, view the details and click the Next button.
Click the Finish button to complete the operation.
In the Default Web Site Properties dialog, click the View Certificate button.
In the Certificate dialog, verify that the certificate is valid by viewing the Certification Path tab.
Click the OK button.
In the Web Site Properties dialog, click the Edit button under the Secure Communications section.
In the Secure Communications dialog, check the Require Secure Channel box and click the OK button.
In the Web Site Properties dialog, click the OK button.
Forms authentication allows you to configure a SharePoint page as a login form instead of utilizing Windows authentication directly. SharePoint supports many different providers for authenticating users against other data stores such as SQL Server or an LDAP service. In this exercise, you will make use of the ActiveDirectoryMembershipProvider to configure Forms authentication against Active Directory. In this scenario, users will enter their Windows credentials into the login form to gain access to the secure site.
Follow these steps to set up Forms authentication:
Log in to VSWSS or VSMOSS as the local administrator.
Open the File Explorer and navigate to InetpubwwwrootwssVirtualDirectories.
Under the VirtualDirectories folder, identify the subdirectory that is associated with your extranet site and the folder associated with the Central Administration site.
Note
Because the subdirectory names can be quite cryptic, it is often useful to open the properties dialog for a web site directly in the IIS Manager to determine which directory is associated with which site.
Open the
web.configfile for both the extranet site and the Central Administration site. The provider information must be added to both files.Directly above the
<system.web>tag in both files, add the following section to define a connection to Active Directory:<connectionStrings> <add name="ADService" connectionString="LDAP://vspdc.domain.local/DC=domain,DC=local" /> </connectionStrings>Directly underneath the
<system.web>tag in both files, add the following section to utilize theActiveDirectoryMembershipProvideras the authentication provider:Note
Be sure to change the password in the following code to match your development environment.
<membership defaultProvider="AD">
      <providers>
        <add name="AD"
        type="System.Web.Security.ActiveDirectoryMembershipProvider, System.Web,
          Version=2.0.0.0, Culture=neutral, PublickeyToken=b03f5f7f11d50a3a"
          connectionStringName="ADService"
          connectionUsername="DOMAINAdministrator"
          connectionPassword="P@ssw0rd"
          connectionProtection="None"
          attributeMapUsername="sAMAccountName" />
      </providers>
    </membership>
Save and close both files.
Select Start
Open the Central Administration site by selecting Start
In the Central Administration site, click the Application Management tab.
Under the Application Security section, click the link titled Authentication Providers.
If the correct web application is not already selected, drop down the Web Application selection list and click Change Web Application. Then click the link for the initial web application that you set up in Chapter 2.
On the Authentication Providers page, click the Windows link associated with the Extranet zone.
On the Edit Authentication page, select Forms as the Authentication Type.
In the Membership Provider Name field, type AD, which is the name of the provider as it appears in the
web.configfile.Click the Save button.
In the Central Administration site, click the Application Management tab.
Under the Application Security section, click the link titled Policy for Web Application.
If the correct web application is not already selected, drop down the Web Application selection list and click Change Web Application. Then click the link for the initial web application that you set up in Chapter 2.
Click the Add Users button.
On the Add Users page, select Extranet from the zone list.
Click the Next button.
On the Add Users page, type Administrator into the Users field and click the Check Names image button.
Under the Choose Permissions section, check the box labeled Full Control - Has Full Control.
Click the Finish button.
Whenever you use an alias or external IP address to access a SharePoint site, you must set up alternate access mappings or else the authentication will fail. This is because SharePoint will deliver URLs that reference internal server names by default. In this exercise, you need to add a new incoming URL because the project site uses an alias.
Follow these steps to specify an incoming URL:
Open the Central Administration site by selecting Start
In the Central Administration site, click the Operations tab.
Under the Global Configuration section, click the link titled Alternate Access Mappings.
On the Alternate Access Mappings page, click the Add Internal URLs button.
On the Add Internal URLs page, drop down the Alternate Access Mapping Collection selection list and click Change Alternate Access Mapping Collection.
In the Select Alternate Access Mapping page, click the link for the initial web application that you set up in Chapter 2.
In the URL Protocol, Host, and Port field, enter
https://extranet.domain.local:[port].In the Zone drop-down list, select Extranet.
Click the Save button.
On the Alternate Access Mappings page, click the Edit Public URLs button.
On the Edit Public Zone URLs page, enter
https://extranet.domain.local:[port]in the Extranet field replacing the internal reference that SharePoint initially created.Click the Save button.
Once the certificate is installed on the SharePoint server, you are ready to utilize SSL. When users access the portal through SSL, they will initially see the certificate warning. They can subsequently install the certificate on their machines and trust your root authority. This will allow them to access the portal without acknowledging the certificate each time.
Follow these steps to test secure communications:
Log in to VSCLIENT as a portal end user.
Open Internet Explorer and navigate to
https://extranet.domain.local:[port]/sites/intranet/Pages/default.aspx, which should correspond to the home page of the extended web application if you set up the environment in Chapter 2.When the Security Alert dialog appears, click Yes.
When the login form appears, enter Administrator in the Username field along with the associated password and click the Sign In button. Figure 3-10 shows the login page.
