CHAPTER 7
Your Third Batch of Cider and Beyond

The first lesson of cidermaking is that the apples make the cider. The second thing you learn is that good cidermaking is all about practice: learning to smell, taste, and see the cues that the developing cider is providing you, and how to respond (or not respond) to those signals. The first time you make a batch of cider, it will probably be good. The next time you follow that same process, drawing on your observations from the previous batches, it will probably be better and so on. So, don’t be in a rush to move on from making the basic cider outlined in chapter 5. But when you feel accomplished at making a consistent cider, there’s a whole world of cider to explore. At other respected cideries, cidermakers experiment with méthode champenoise, spontaneously fermented cidre, and ice cider. Other tools available to the cidermaker include blending cider, returning sugar, and introducing carbonation.
The other approaches to cidermaking outlined in this chapter have one thing in common with Farnum Hill Ciders’ basic approach: The cider is an expression of the fruit. The processes are very different and the results of each process are unique, but the cidermakers featured here share a belief that cider starts with the apple and that the cidermaker’s job is to intervene as little possible to turn the apple into a delicious fermented drink.
BLENDING
Commercial cideries often blend fermented ciders to create the finished product.
As discussed in previous chapters, commercial cideries rarely ferment a single apple variety in a batch, preferring to balance the cider’s characteristics with the best qualities of different apples. Some cideries bottle directly from the tank when fermentation is complete; others blend finished ciders.
The blending process allows the cidermakers to adjust the aromas, tastes and sensations of the final product naturally. The home cidermaker who has several unbottled batches of fully fermented cider on hand can also experiment with blending.
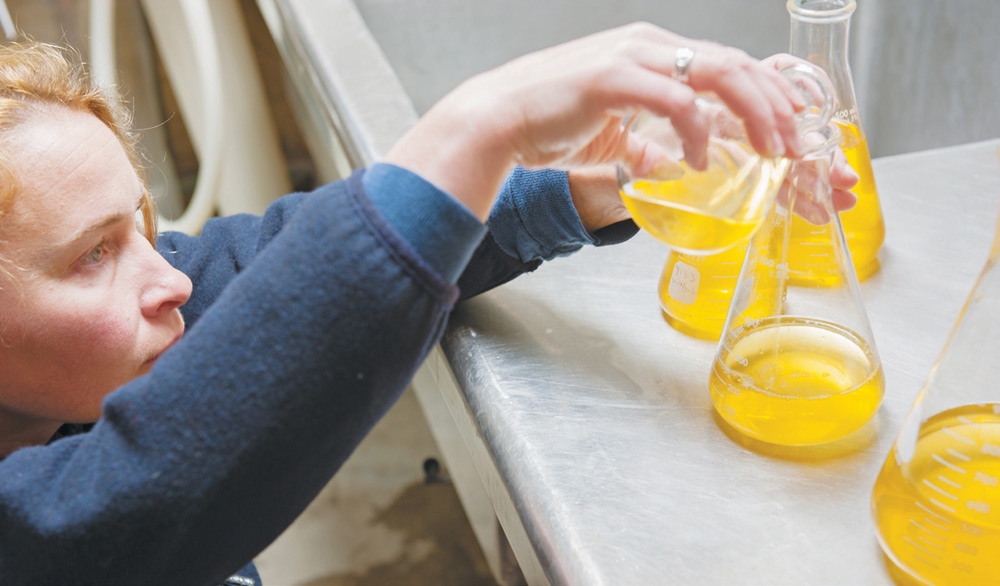
The first step is tasting the ciders objectively, as outlined in chapter 2. When the tasting process is complete, consider your ideal cider. Does it have more or less acid? More or less bitterness? The goal of blending is to create something close to this ideal.
Now, identify the batch of cider that is most similar to your ideal. This will be your base; the other batches of cider will be used to add the other characteristics you desire. Perhaps you love the funky flavors of a cider that accidently went through malolactic fermentation, but wish it had an acidic component. If you have a more acidic batch available, you can add that.
Work in small batches. The results of blending can be surprising—and not always desirable. Take notes on the amount of each cider you add as you prepare each blend. Stir or swirl the blend gently, and allow it to sit for a few minutes to fully combine the liquids. Then taste the blends. Which is your favorite? When you’ve found a combination you love, use your notes to blend a full batch with the same ratios.
CARBONATION
Following the process outlined in chapter 5 produces a classic cider fermented to dryness. But sparkling cider is popular with many cider drinkers. One classic way to add bubbles to a fermented cider is through méthode champenoise, explained in the next section. However, this process, which involves a second fermentation in the bottle, also changes the cider in other ways.
A relatively simple process is used to add an effervescence to some still ciders without making additional changes to the flavors, aromas, and sensations of the cider. Carbon dioxide (CO2) is slowly added to the cold cider in a steel tank.
The home cidermaker can experiment with carbonation using the following: a five-gallon (19 L) cornelius—or “corney”—keg with ball fittings, readily available from home brewing suppliers; compatible liquid and gas lines; and a carbon dioxide cylinder.


A cornelius keg is a steel cylinder with a removable lid (which allows for easy cleaning) designed to hold a liquid under pressure. There are two connections, one with a short tube to the top of the keg, and one with a longer tube to the bottom. Typically a cornelius keg is used to store and dispense a carbonated liquid, such as soda or beer. The liquid is dispensed from the bottom of the keg and an inert gas is added to the top of the keg to maintain the pressure. Home cidermakers can add carbonation by attaching the gas line to the bottom of the keg instead. This allows the carbon dioxide to bubble up through the liquid. Over time, the carbon dioxide will be absorbed into the liquid, providing carbonation.

To carbonate your still cider, begin with cold liquid, which absorbs carbon dioxide more easily. Add the cider to the keg. Close the keg, being sure the gasket seals, and connect the gas line and carbon dioxide cylinder to the fitting reaching to the bottom of the keg. Let the carbon dioxide trickle into the keg for about 1 minute while agitating the keg. (If you are using a pressure gauge, look for 4 to 10 psi.) Continue agitating the keg for several minutes to aid carbon dioxide absorption, and allow it to sit for a day. Repeat the procedure on day two and day three. Adding the carbon dioxide over time produces fine bubbles, which most cidermakers prefer over large bubbles.
There are tools available to test the pressure of your keg, but the best approach is to evaluate the cider with your senses. Remove the gas line and replace it with the liquid line to sample a small amount of the cider. Does it have the amount of carbonation you prefer?
To dispense the sparkling cider into glasses, use the liquid line. If you plan to drink the cider over time, add the gas line to the top of the keg to introduce carbon dioxide above the liquid as you dispense it.
 CIDERMAKING TIP
Equipment and Ingredients for Carbonation
• 5 gallons (19 L) still cider
• 5-gallon (19 L) Cornelius keg with ball fittings
• Compatible liquid and gas lines
• Carbon dioxide cylinder

RETURNING SUGAR
Sugar can be reintroduced to a completely fermented, dry cider as is common in champagne production. Some cidermakers will choose to add unfermented apple juice to the completed cider, but the juice dramatically changes the flavor profile of the cider. Instead, at Poverty Lane Orchards, the cidermakers use small amounts of white sugar, as needed, to adjust a cider. The sugar has a more subtle effect than apple juice.
White sugar can be used to make a sweet cider or, as it is most often used at Poverty Lane Orchards, to bring out desirable fruit flavors that are muted in the dry cider.
There are also dangers associated with reintroducing sugar. The additional sugar can serve as food for any remaining yeast or other microbes. For this reason, only add sugar to fully dry ciders, store them at a low temperature, and use a cornelius keg instead of glass bottles. A cornelius keg is designed to withstand pressure that microbes can produce.
To return sugar to your cider, rack the cider into a cornelius keg. You can draw off some cider, as in blending, to experiment with, but the amounts of sugar you will add are so small as to make such small-scale experimentation difficult.
The amount of sugar to add is a matter of taste. About 10 grams of sugar per liter of liquid is returned to most brut champagnes. (The addition of sugar in Champagne production is called “dosage.”) For the sweeter extra-dry Champagne, winemakers return up to 20 grams of sugar per liter. A noticeably sweet commercial cider may have as much as 40 grams of sugar per liter. At Poverty Lane Orchards, three to five grams of sugar are added per liter to produce its off-dry ciders.
Add the sugar, seal the cornelius keg, and store your cider at a cool temperature.
CIDERMAKING TIP
Equipment and Ingredients for Returning Sugar
• 5 gallons (19 L) still cider
• 5-gallon (19 L) cornelius keg with ball fittings
• Compatible liquid and gas lines
• Carbon dioxide cylinder
• White sugar
• Scale
MÉTHODE CHAMPENOISE
Méthode champenoise cider, so named for its use in Champagne production, uses a second, in-bottle fermentation to produce sparkling cider with delicate, persistent bubbles. The mouthfeel of a sparkling cider produced through this process will be different from one produced through carbonation. This is a low-tech way of creating bubbles, but disgorgement, one step in the process, does take some practice. Here, Autumn Stoscheck and Ezra Sherman of Eve’s Cidery in the Finger Lakes region of New York share their well-practiced process for making méthode champenoise cider.
The process begins with the production of a fully dry still cider. A home cidermaker fermenting cider for this process should follow the steps in chapter 5, ensuring that the cider ferments completely, with one noticeable exception: In méthode champenoise production, you add less sulfur dioxide, in the form of Campden tablets, at racking. Because sulfur dioxide acts as an antimicrobial as well as an antioxidant, too much sulfur dioxide will create an inhospitable environment for the second fermentation. Instead of the 30 to 35 parts per million of sulfur dioxide called for in the still cidermaking process, add 15 to 20 parts per million. Then rack as described. With less sulfur dioxide present, the cider is more susceptible to malolactic fermentation. To reduce the chances of this, store the cider at cool temperatures after racking.
CIDERMAKING TIP
Equipment and Ingredients for Méthode Champenoise
• 5 gallons (19 L) fermented cider, with reduced sulfur dioxide
• Cane sugar
• Plastic tubing
• Sparkling wine or Champagne yeast
• Sparkling wine bottles
• Crown caps and capper
• Crate
• Four 2’ × 4’ (0.6 × 1.2 m) pieces of wood
• Bottle opener
• Safety goggles and gloves
• Dry cider, as needed
• Notebook
Bottling
Before bottling, however, the cider should be warmed to 50°F (10°C). Collect the necessary equipment and ingredients for beginning secondary fermentation and bottling the cider: plastic tubing for siphoning, cane sugar, sparkling wine yeast, sparkling wine bottles, and crown caps and a capper.
Begin by calculating the amount of yeast and sugar to add to the carboy of cider. Most sparkling cider has less sparkle than sparkling wines. Different sugar levels produce different levels of pressure, which is why starting with a fully dry cider is essential. Otherwise, the sugar calculations will be incorrect and the pressure could be dangerously high. Champagne makers often add about 12 grams of sugar per 750-milliliter bottle. At Eve’s Cidery, cidermakers add 9.75 to 10.5 grams per bottle. Home cidermakers can choose their preferred style within an 8 to 12 gram range. For those without a gram scale, 2 teaspoons of cane sugar per bottle is recommended. (This will be about 8 to 10 grams of sugar, producing a safe amount of pressure.) Be very precise with your measurements to avoid over pressurizing.
Once you have measured the proper amount of sugar, use the plastic tubing to siphon off a small amount of cider. Dissolve the sugar in this cider and return the sugar-cider mixture to the carboy.
The sugar is food for the yeast, which is added next. Choose a neutral sparkling wine or Champagne yeast, which can withstand the pressure and higher alcohol levels of an in-bottle fermentation. Follow the directions on the package to measure and hydrate the yeast before adding it to the carboy.
Bottle immediately into bottles designed for sparkling wine. (Do not use thinner glass, such as the glass used for beer bottles, which is likely to shatter from the pressure produced during fermentation.) Add a crown cap to each bottle.
After you begin the secondary fermentation, always wear gloves and safety goggles when handling the bottles, to prevent injury from shattered glass.
You should store the bottles in a cool place through the secondary fermentation, which will take a least a month. At 50°F (10°C), the fermentation progresses slowly, which is desirable. A slower fermentation produces finer bubbles. A warmer, faster fermentation will produce coarser bubbles.
Riddling
Through the fermentation process, you will “riddle” the bottles, turning them and reorienting them to slowly collect the dying yeast in the neck of the bottle. The bottles will begin the process horizontally and slowly move to a vertical position. This can be easily accomplished with a crate and some pieces of wood. Fill the crate with the bottles, neck down, and then prop the crate with a pile of four 2’ × 4’ (0.6 × 1.2 cm) pieces of wood under one side of the crate until the bottles are almost horizontal. Each week, give each bottle a one-quarter turn and a light tap to dislodge some of the yeast that has collected around the shoulders of the bottle and remove one of the pieces of wood until the crate and the bottles are sitting vertically, upside down.
CIDERMAKING TIP
Timeline for Méthode Champenoise
In Advance
• Ferment a 5-gallon (19 L) carboy of cider, following the process in chapter 5
• Purchase the necessary equipment and ingredients.
Day 1
• Rack the cider, adding sulfur dioxide.
• Calculate and add the appropriate amounts of sugar and yeast.
• Bottle in sparkling wine bottles with crown caps.
• Place in a cool place on a crate for riddling.
About Day 2 to Week 5
• Each week, riddle the bottles.
About Week 5
• Taste the cider.
• If the in-bottle fermentation is completed, disgorge the bottles.
• Recap the bottles.
Many variables affect the length of the fermentation process. Test your cider after about five weeks, when the bottles are sitting vertically, by opening a bottle and using your senses to evaluate it. If it is bubbly and you don’t taste any noticeable sweetness, the fermentation is complete.
At this point, you can continue with the process, or allow the remaining bottles of cider to mature. Cider that is finished earlier in the process typically has more fruit flavors and aromas; cider that sits on its lees typically has the creamier mouthfeel and yeasty flavors and aromas associated with Champagne. Cider can sit for months or years. As with the amount of sugar to use, this is a stylistic choice. Eve’s Cidery cidermakers prefer fruitier ciders.
Disgorgement
The final step in the méthode champenoise process is disgorgement, removing the expired yeast from the neck of the bottle where it collected during riddling. The step is not essential, if you desire the flavor and aromas of lees aging. The home cidermaker can simply store the sparkling cider upright, allowing the sentiment to settle to the bottom, a process called “bottle conditioning” that is common in beer making. The bubbles in the cider will make the liquid hazy, but some cidermakers appreciate this rustic appearance. (If bottle conditioning is your plan, the riddling isn’t necessary. Simply store the bottle on its side until the fermentation is complete.)
If you are going to disgorge the cider, begin by collecting the necessary supplies: bottle opener; safety goggles and gloves; dry cider, as needed; and crown caps and a capper. You could also use a Champagne cork and wire hood, but that requires additional specialized equipment. Disgorging makes a mess—especially as you are learning the technique. Work outside or in a garage where the surfaces can easily be washed, and dress accordingly.
In most Champagne production, the necks of the bottles are frozen with dry ice which can make the disgorgement process easier, but the home cidermaker can simply chill the bottles as cool as possible without freezing, keeping the bottles upside down to capture the yeast in the neck. The colder the bottle, the easier the process will be because the cider will fizz less.
In the disgorgement process, the pressure inside the bottle expels the yeast and a small amount of liquid from the bottle as it is opened. At Eve’s Cidery, Ezra Sherman can disgorge a bottle with a loss of just 10 or 15 milliliters of liquid. As you are learning the process, you may lose as much as 50 milliliters of the 750-milliliter bottle. Any cider you lose will be replaced with still dry cider (or another neutral liquid, if no cider is available).
Wearing safety goggles and safety gloves, grasp the neck of a chilled bottle, keeping the bottle upside down. Hold the bottle in front of you. With the other hand, grasp the bottle opener. As you quickly turn the bottle right side up, you will open the bottle, allowing the pressure to expel the yeast while keeping most of the liquid in the bottle.
To explain this motion in more detail: If you are right handed, hold the bottle by the neck in your left hand upside down in front of your body. Hold the opener in your right hand and position it on the cap. Now use your left hand to smoothly and quickly swing the neck of the bottle away from you (the base of the bottle will come toward your body), bringing the bottle right side up. When the neck is about halfway through its arc (about vertical), pop the cap with your right hand.
Replace any liquid you lost and then recap the bottles. The cider is now finished. Store it in a cool place until you are ready to drink it.
CIDRE
Yeast is naturally present all around us. That’s why many cidermakers start the fermentation process with a dose of sulfur dioxide to remove naturally occurring yeasts before introducing the yeast of their choice to the juice. At E.Z. Orchards in Oregon’s Willamette Valley, however, Kevin Zielinski makes cider in a traditional style from Normandy, which relies on spontaneous fermentation from naturally occurring yeast. The result is an aromatic cidre with soft effervescence.
French cidre is dependent on the quality of the apples or juice used. If you have a relationship with an apple grower, you can ask questions about the available fruit or juice. You are looking for juice made from extremely ripe apples with low levels of nitrogen (low levels of nitrogen are often produced by older trees that are not over-nourished), which provides a better environment for a controlled fermentation. In a high-nitrogen environment, wild yeast will ferment rapidly, which can reduce the desirable fruity flavors and aromas, and the home cidermaker must work to slow the fermentation. At the least, you must start with juice that has not been pasteurized or otherwise treated. These processes are designed to kill the naturally occurring yeast and provide an inhospitable environment for fermentation.
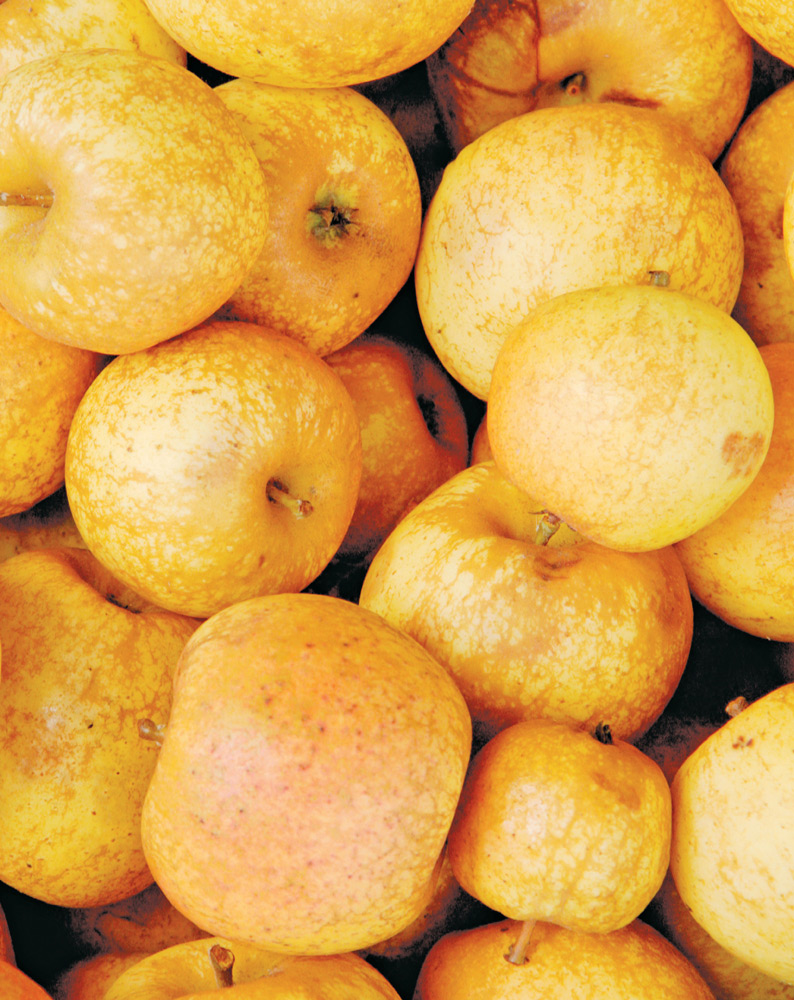
French cidre is commonly made with French bittersweets and bittersharps, producing very low-acid ciders. But the home cidermaker without ready access to these traditional fruits can experiment with most moderate- and low-acid, high-tannin apples (with a pH of 3.7 or more). The most attractive cidre apples are often small, gnarled fruits from neglected trees.
Begin by measuring the specific gravity of your juice at 60°F (16°C) using a hydrometer. Typically, the initial measurement will be about 1.050. Record this measurement in a notebook, which you will use throughout the process to collect all temperature and specific gravity readings and any additional observations about the process. Then fill a five-gallon (19 L) carboy with the freshly pressed juice, and cork it with a solid bung. Place the carboy in a cold place and allow the juice to settle for several days to a week. Sediment from the juice may collect on the bottom of the carboy. If it collects a half inch (1.3 cm) or more, rack the juice into a second carboy, discarding the sediment. (The sediment would provide additional nutrients for the wild yeast, which could produce an overly rapid fermentation.) Place the remaining half gallon (2 L) of juice in the freezer to top off the carboy later in the process, as needed.
After racking, juice should reach the shoulders of the carboy, leaving ample headspace. If it doesn’t, you can thaw and add some of the reserved juice, as needed.
Fermentation
Once you have racked the juice, close the carboy with an airlock and place it in a warmer environment—between 55F° to 60°F (13C° to 16°C)—to begin fermenting. In about five to seven days, you will see evidence of fermentation, with small bubbles forming in the liquid, especially around the shoulders of the carboy. Over the next two to four days, the fermentation will pick up speed, creating a cap of brown bubbles on top of the juice. When the fermentation is moving quickly, the airlock will bubble every three to four seconds. (If you don’t see any fermentation after two weeks, there is likely not enough yeast present for spontaneous fermentation. Consider using the juice to produce a different type of cider that calls for a yeast inoculation, as in chapter 5.)
Now that fermentation is underway, place the carboy in a colder environment—38°F to 42°F (3°C to 6°C) to relax the fermentation. Fermentation will slow significantly, with the airlock bubbling about every thirty seconds. This is desirable, as it increases the fruity characteristics of the finished cider. You will also control the fermentation through repeated racking to remove the sediment or nutrients and expired yeast as it collects on the bottom of the carboy.
After a week of fermentation in this cold environment, test the specific gravity of the juice. When testing the specific gravity, it’s important to bring the small amount of juice to be tested up to 60°F (16°C) so that the results of each test are comparable. If the specific gravity has fallen to about 1.040, it is time to rack the juice. You can add additional juice, if desired, at this point to reach the shoulders of the carboy. Replace the airlock and return the carboy to the cold environment.
After another week to ten days, test the specific gravity again. At about 1.025, rack the cider again. Do not add additional juice. Replace the airlock and move the carboy to a 50°F to 55°F (10°C to 13°C) environment, to finish the fermentation. At this point, the fermentation process will be moving very slowly, with perhaps minutes between each bubble of the airlock.
Wait ten days to two weeks before testing the specific gravity again. If you have a slow fermentation with a reading of 1.008, you can consider bottling this as a semisweet cider, in which all the fermentable sugar has not been consumed. If the specific gravity is higher, however, bottling is dangerous, as the cider will continue to ferment in the bottle. Too much in-bottle fermentation could create enough pressure to shatter the bottle. (For this reason, do not add unfermented juice to the cidre at this point in the process.) Test again periodically until the specific gravity measurement reaches 1.006 to bottle a dry cider. The fermentation will not be complete, as the cidre process is designed for continued fermentation in the bottle.
Equipment and Ingredients for Cidre
• 51/2 gallons (21 L) of the best apple juice you can find
• Thermometer
• Hydrometer, measuring specific gravity
• 100-milliliter graduated cylinder
• Two 5-gallon (19 L) glass carboys
• Solid carboy bung
• Refrigerator
• Plastic tubing, for racking
• Bored carboy bung
• Airlock
• Sparkling wine bottles
• Crown caps and capper
Bottling
Bottle your cidre into a bottles designed for sparkling wine, taking care not to draw the lees into the bottles as you siphon the liquid from the carboy. Add a crown cap to each bottle. Sanitation, important in all types of cidermaking, is of particular importance when bottling cidre, which is more susceptible to contamination because it does not contain sulfur dioxide. Cidre is also susceptible to malolactic fermentation in the bottle, which some cidermakers desire in cidre and others dislike. (Without adding sulfur dioxide, which could halt in-bottle fermentation, sanitation and cooler temperatures are the only preventive measures available.)
Place your bottles upright in a 50°F to 55°F (10°C to 13°C) environment, out of direct sunlight. Lees will continue to collect at the bottom of the bottle as fermentation continues, producing bubbles in the cidre. After two to three weeks, open a bottle to evaluate the level of carbonation. If there is already a high level of carbonation—the bottle will open with a strong pop and you’ll see aggressively streaming bubbles after pouring a glass—return the cidre to the carboy to ferment to dryness before rebottling, taking care to limit the cider’s exposure to oxygen. If carbonation is present but not overwhelming—a slight hiss when you open the bottle, bubbles collecting at the edge of the liquid—it is progressing as planned. Test again in a month. The goal now is to have subdued yeast, which continues to change the cidre in positive ways.
The process from the start of fermentation to bottling can be two to four months. For many cidermakers, longer is the goal. The slower fermentation often produces more nuanced flavors and aromas and, in the bottle, finer, more integrated bubbles. The slower the fermentation, the easier it is to bottle a semi-sweet cider as well. In the bottle, the fermentation process can also take up to four months (the yeast may remain viable for as long as eighteen months). Typically, the slower the initial fermentation, the slower the in-bottle fermentation.
Timeline for Cidre
In Advance
• Purchase the necessary equipment and ingredients.
Day 1
• Purchase the best apple juice you can. Measure the specific gravity.
• Transfer juice to a carboy and place it in the refrigerator.
About Week 1
• Rack the juice into a second carboy.
• Place the carboy with an airlock in a warm place 55°F to 60°F (13°C to 16°C) to begin fermentation.
About Week 2 to Week 3
• Watch for initial signs of fermentation, then signs of rapid fermentation.
• Move the carboy to a colder place 38°F to 42°F (3°C to 6°C) to relax the fermentation.
About Week 4
• Test the specific gravity. If it reads about 1.040, rack the carboy.
• Return the carboy to a cold environment 38°F to 42°F (3°C to 6°C).
About Week 5 to 6
• Test the specific gravity again. If it reads about 1.024, rack the carboy.
• Place the carboy in a warmer environment 50°F to 55°F (10°C to 13°C) to finish fermentation.
About Week 8
• Test the specific gravity again. When it reads 1.006 to 1.008, consider bottling.
• Store bottled cidre at 50°F to 55°F (10°C to 13°C) out of direct sunlight for in-bottle fermentation.
About Week 10 to 11
• Open a bottle to evaluate carbonation.
About Week 14 to 15
• Open a bottle to evaluate carbonation.
After Week 15
• Drink the cidre or allow it to continue to mature.
ICE CIDER
Ice cider is apple dessert wine, a full-bodied after-dinner drink with a balance of the sweetness and acidity of apples. Ice cider, which originated in the cold climate of Southern Quebec, is also known by the French as cidre de glace. Unlike many fermented apple products, ice cider tastes primarily of apples.
At Eden Orchards in West Charleston, Vermont, Eleanor and Albert Leger make delicious Eden Vermont Ice Cider from apples as varied as Empire, McIntosh, Roxbury Russett, and Esopus Spitzenburg. The apples are harvested at the peak of ripeness and kept in cold storage until the temperatures plummet, and then the apples are pressed.
Ice cider is made in the traditional way, picking fully ripe apples, pressing them, and using the freezing temperatures of the cold winter to concentrate the liquid. Over six to eight weeks, the natural fluctuations in outdoor temperatures separate the water from the concentrating apple sugars. The concentrate is then fermented in a process similar to the cidermaking process (as outlined in chapter 5). However, the fermentation process is halted before the cider ferments to dryness, resulting in a sweet-tart ice cider with at least 13 percent residual sugar and 9 to 12 percent alcohol by volume.
Ice cider is typically bottled in 375-milliliter glass bottles; at Eden Orchards, about eight pounds (3.6 kg) of apples go into each bottle.
The home cidermaker can replicate the Eden Vermont Ice Cider process. If you live in a cold climate, where temperatures regularly drop to 10°F (–12°C) at night, you can make the cider outside. If not, a commercial freezer will serve the same function.
Ice cider production does take more space than other apple fermentations. The process of concentrating the juice can reduce its volume by about 75 percent. Starting with eighteen gallons (68 L) of juice in four five-gallon (19 L) carboys will give you between 4 and 4.5 gallons of ice cider, or 40-to-45 375-milliliter bottles. You can make ice cider in smaller quantities, but the need for frequent testing of the specific gravity during the cidermaking process will use some cider. It’s a long process for the eight or ten bottles you would produce starting with a mere 4.5 gallons (17 L) of unconcentrated juice.
The best ice cider is made from a balanced blend of apples. There are few apples that have both the sweetness and the acidity needed to produce a tempting ice cider. (Eden Orchards does make a single-variety Honeycrisp ice cider.) Ice cider does not depend on hard-to-find bittersweet apples common in hard cider production. A blend at Eden Orchards may have less than 5 percent bittersweets. The balance is made up of baking apples for acidity, dessert apples for sweetness, and heirloom apples for aromatics and complexity. The juice is delicious. (As with any cider production, choose a juice without additives.)
Start by tasting your juice to help you decide what the final specific gravity of your ice cider will be. Specific gravity is correlated with alcohol content, and a finished ice cider typically has 9 to 12 percent alcohol by volume. (See chart on page 85.) Eden Vermont Ice Ciders are typically between 10 and 11 percent alcohol by volume; it’s a stylistic choice that the cidermakers reach by tasting the original juice. Taste your juice. If it is very sweet, it may make a better 11 or 12 percent alcohol ice cider. If it has some tartness to it, it may make a better 9 or 10 percent alcohol ice cider.
Concentrating the Juice
To begin, fill each of the 5-gallon (19 L) plastic carboys with 41/2 gallons (17 L) of juice. Plastic carboys won’t shatter as the ice expands and are lighter and easier to work with. Seal each carboy with a solid bung and place the carboys in a very cold environment. If the temperature in your area is regularly dropping to 10°F to 15°F (–12°C to –9°C) at night and isn’t rising above 32°F (0°C) during the day, you can place the carboys outside. If the weather isn’t cooperating with your cidermaking, use a commercial freezer. Commercial freezers typically maintain a temperature of about 4°F (16°C).
If your juice is outside, the natural fluctuations will freeze and thaw the juice, concentrating it. Store the cider outside for fifteen to eighteen days, depending on weather. If the cider is in a freezer, you will take the juice out of the freezer periodically to achieve this same result. Freeze the juice for five days; then remove it for one day. Return the juice to the freezer for another five days; then remove it for another day. Return the juice to the freezer again for another five days.
As the cider freezes and thaws, water will separate, concentrating the apple’s sugars in a syrupy liquid. The water will begin to rise to the top of the carboy, forming a whiter layer of ice; the concentrate, a brownish liquid, will drop to the bottom. This separation will be obvious, but not distinct; don’t expect a clean line between the ice and the concentrate.
Separating the Concentrate
After fifteen to eighteen days, it’s time to separate the concentrate from the ice. You will build a makeshift stand with a 5-gallon (19 L) bucket and some pieces of wood to create a stand that will hold the plastic carboy upside down over the bucket.
Remove one of the carboys from the freezer and place in the stand. It can take several hours for the concentrate to drop from the ice, so you want to keep the environment you are working in relatively cold. If the ice begins to melt, diluting the concentrate, you can return the carboy to the freezer until the water has solidified again.
Achieving the proper concentrations of sugar is essential in ice cidermaking. The concentrate should have a specific gravity of 1.155 to 1.165 at this point in the process. Use a thermometer, hydrometer, and a graduated cylinder to measure the temperature of the concentrate and, following the package instructions for the hydrometer, test and record the specific gravity. If it is not in the proper range, return the concentrate to the carboy and continue the freezing and thawing process.
If the specific gravity is between 1.155 and 1.165, repeat the separation process with the remaining carboys. You should have between 4 and 4.5 gallons (15 to 17 L) of concentrate in the bucket. Pour the concentrate into a 5-gallon (19 L) glass carboy for fermentation.
Fermentation
The first step is to warm up the ice-cold concentrate. It’s probably about 25°F (–4°C) following separation. Place the carboy in a warm place to bring the temperature up to 55°F to 57°F (13°C to 14°C). You don’t have to worry about warming the liquid quickly, but you don’t want to leave it sitting around too long once you’ve reached the proper temperature.
Following the package instructions, hydrate the yeast in a container of warm water, stirring to combine, and let the mixture stand for twenty minutes to proof. The yeast will be frothing. Then feed the yeast with a small amount of concentrate and allow it to continue to froth for about 10 more minutes. This step makes the yeast stronger and cools the temperature of the yeast mixture. The yeast mixture needs to be within 7 degrees of the concentrate mixture. Add concentrate slowly every 10 minutes until the yeast mixture is in range. This step is known as atemperating. Then pour the yeast mixture into the carboy, making sure you get all the yeast into the carboy.
Equipment and Ingredients for Ice Cider
• 18 gallons (68 L) of the best apple juice you can find
• Four 5-gallon (19 L) plastic carboys
• 4 solid bungs
• Commercial freezer, as needed
• One 5-gallon (19 L) plastic pail
• One 5-gallon (19 L) glass carboy
• Pieces of wood, as needed
• Thermometer
• Hydrometer, measuring specific gravity
• 100-milliliter graduated cylinder
• Wine thief
• Campden tablets
• Lalvin BA11 or another basic saccharomyces cerevisiae wine yeast
• Airlock
• Refrigerator
• Plastic tubing
• Home brewing filtration system
• Bottles and seals, for bottling
Store the carboy at 57°F to 60°F (14°C to 16°C) during the fermentation. The process of fermentation will look similar to that described in chapter 5. Add a bung and airlock.
In ice cidermaking, it is important to test the specific gravity every couple of days. Using the wine thief, thermometer, hydrometer, and graduated cylinder, measure and record the specific gravity. In the beginning of the process, the specific gravity may drop as much as .006 points per day. Quickly, however, it will slow to a drop of .002 points per day. This is ideal for ice cider fermentation.
If the specific gravity is dropping too quickly, place the carboy in a cold-water bath to slow the fermentation process. If it is dropping too slowly, as can happen near the end of the process, you can speed up the fermentation by placing in the carboy in a place that is 60°F to 65°F (16°C to 18°C).
The process of fermenting ice cider takes an average of 6 weeks, but numerous variables, including temperature, can affect the actual length of fermentation in your carboy. As you near your target specific gravity reading, test the concentrate every day. As soon as you reach the chosen specific gravity, it’s time to halt fermentation.
Halting Fermentation
Ice cider is not fermented to dryness. That means you still have yeast and nutrition for the yeast in your carboy when you have reached the desired specific gravity. For the home cidermaker, the easiest way to halt fermentation is to add sulfur dioxide and shock the yeast with cold temperature. Fully stopping the fermentation is essential to the ice cidermaking process.
Follow the instructions on the package of the Campden tablets to prepare 80 to 100 parts per million of sulfur dioxide and add it to the carboy. Store the carboy in a place with a consistent temperature of 30°F to 45°F (–1°C to 6°C). A refrigerator typically works best. Allow the carboy to sit undisturbed for four days. Dying yeast will settle on the bottom of the container.
After four days carefully rack the ice cider into a clean carboy, leaving the yeast behind. Return the racked ice cider to the refrigerator. After one week, rack the cider again, discarding the yeast, and return it to the refrigerator for a month. After a month, rack the cider for third and final time. The goal is to remove all the yeast from the ice cider.
A home brewing filtration system will ensure that you have accomplished this. After the final racking, run the ice cider through the coarse, medium and fine filters before bottling. (If you don’t want to use a filtration system, you run the risk of remaining yeast that will restart the fermentation. Prevent this by storing the ice cider at 30°F to 45°F (–1°C to 6°C) after bottling.)
Finally, bottle and seal the ice cider in 375 milliliter bottles. It can be consumed immediately, but ice cider typically improves as the flavors mellow with maturing. Try your ice cider at six months and again at two years and note the changes. Eden Orchards releases its ice cider after one year, but cidermaker Eleanor Leger prefers it after two years of maturation.
Serve your ice cider at 40°F to 50°F (4°C to 10°C) for the best expression of its aromas and taste.
CIDERMAKING TIP
Timeline for Ice Cider
In Advance
Purchase the necessary equipment and ingredients.
Day 1
Purchase the best apple juice you can. Taste the juice and determine the goal specific gravity/alcohol by volume.
Transfer juice to carboys and place in a very cold place.
About Day 2 to Week 3
If you are storing the carboys outside, allow the natural temperature fluctuations 10°F to 32°F (–9°C to 0°C) to freeze and thaw the juice. If using a freeze, freeze the juice for 5 days and thaw for one day. Repeat twice more.
About Week 3
After fifteen to eighteen days of freezing and thawing, separate the concentrate from ice and test for proper specific gravity, 1.155 to 1.65. Transfer concentrate to carboy, add yeast, and begin fermentation.
About Week 4 to 10
Test the specific gravity every couple of days to ensure the proper speed of fermentation.
About Week 10
Once you have reached your goal specific gravity, halt fermentation by adding sulfur dioxide and chilling the ice cider. After four days of chilling, rack the ice cider.
About Week 11
Rack the ice cider a second time and continue to chill.
About Week 15
Rack the ice cider a third time. Filter the ice cider with a home brewing filtration system. Bottle ice cider.
 NOTES FROM THE CIDERY, STEVE WOOD
Respecting the Apple

In most of this book, the methods suggested for making cider at home are based on how we make Farnum Hill Ciders. Many of our closest colleagues—Diane Flynt at Foggy Ridge in Virginia, Dan Wilson at Slyboro in New York, Mike Beck at Uncle John’s in Michigan, and others—take the same basic approach. Their ciders are very different from ours, and from each other, but they’re all delicious examples of this general method.
Then there are our colleagues included in this chapter, who use completely different methods of cidermaking that can produce equally delicious results—in the right hands.
All of our early experiments with “natural” fermentations at Farnum Hill were microbial disasters. But Kevin Zielinski, an able apple grower in Salem, Oregon, has figured it out. By a happy combination of cleverness and luck, he has some strain of wild yeast around E.Z. Orchards that ferments reliably, and doesn’t seem to mind a little stress. Unlike many of his “natural cidre” counterparts, he is careful not to allow the microbes to run the entire show, and to finish his cidre cleanly in a bottle. Anything resembling vinegar scares us to death here, but we love the faintly acetic bite of Kevin’s cidres, complementing all the dried fruit, forest, animal, and other aromas and flavors he coaxes out of his apples.
We tried méthode champenoise here as well. Geysers from bottles and alcoholic heat—we’re done with that one too, we think. The only way to get tiny, consistent rising bubbles in a glass is to go through the exacting process of preparing a second fermentation from the results of the first, bottling it, maturing it, riddling the bottles, and disgorging and corking them. Most ciders don’t really benefit from that elaborate process, and some actually lose their first appeal. But Autumn Stoscheck and Ezra Sherman at Eve’s Cidery show that it can be done brilliantly. Taste Eve’s for a bubbly standard—if you can even approximate, in your cider, Eve’s concentrated fruit, jam, warm spice, and balanced sweetness and acid, you’ve done better at méthode champenoise than we ever will.
Last: we never used to like ice cider. For our money, most of it is cloyingly sweet, with indifferent acid and some vague reminder of fresh apples. But Eden Ice Cider, made in northern Vermont by Eleanor and Albert Leger, is the nectar of the gods. These ciders are stunningly balanced, with just the right bright acidity to balance their amazing fruity sweetness. Yet their fruit and sweetness and acid aren’t the main point—they have some sort of hedonistic gravitas. They’re the opposite of cloying—potent, rich, full, and beautifully clean. We adore this stuff.
So, delicious cider is delicious cider, but it can take many forms, and be made in many different ways. But one thing has become clear to many of us cider folks, over the years (including all the colleagues named here): The most delicious ciders in the world, by our lights, are either made by apple growers, or by non-growers who pay profound attention to the apples they use, and their provenance.