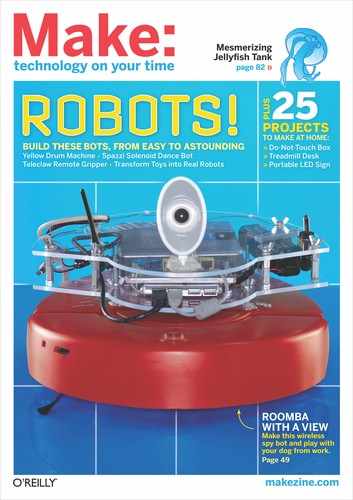
ROOMBA RECON
TURN AN OLD ROOMBA INTO A WEB-CONTROLLED WIRELESS REMOTE SURVEILLANCE VEHICLE.

Garry McLeod
Who said a Roomba was just for vacuuming? For robot makers, it’s an excellent platform for modifications. Why not start with an already-working autonomous vehicle? We collaborated with our friend Rob Schumaker and decided to turn an old Roomba into a remote surveillance vehicle, which Raymond now uses to spy on and play with his dog while he’s at work.
The key to the Roomba Recon’s operation is that it carries a wireless router on its back. The router acts as the Roomba’s “brain.” Its wi-fi side communicates with a nearby computer, which sends it instructions and receives captured images. Meanwhile, the USB side of the router connects to both the Roomba itself and a USB webcam “eye” on top through a small USB hub. The router gets power from its own onboard battery pack.
To enable the router to interface with the computer, Roomba, and webcam, we first replaced its native firmware with the open source OpenWrt. This allowed us to install 2 more pieces of free software on the router: RoombaCMD, which enables control of the robot through a serial port on its side (available at roombahacking.com/roombahacks); and Spca5xx, a device driver for the webcam from the folks at mxhaard.free.fr. The webcam plugs into the USB splitter directly, while the Roomba connects via a hacked USB-TTL cable outfitted with an 8-pin mini-DIN plug that fits the Roomba’s serial port.
MATERIALS
See makeprojects.com/v/27 for recommended suppliers, prices, and other sourcing information.
Wireless router, Linksys WRTSL54GS You could use another router compatible with OpenWrt (see wiki.openwrt. org/toh/start for a list), but it might need different drivers.
iRobot Roomba robotic vacuum cleaner We used an old Roomba Red 4100 model (Discovery/400 series).
Webcam, compatible with Spca5xx driver See mxhaard.free.fr/spca5xx.html for a list. We used a cheap Creative Live Cam.
USB hub, 4-port, aka splitter
TTL to USB serial cable, TTL-232R We used #TTL-232R-5V from FTDI (ftdichip.com).
8-pin mini-DIN cable
DC power plug, size M coaxial aka barrel connector
9V battery snap connector
Battery holder, 8xAA
AA batteries, 2,700mAh (8)
Diode, 1N4001
Switch, SPDT (single-pole double-throw) toggle
Electrical tape
Windows computer with wi-fi and internet connection Other platforms should also work, using their own Telnet/SSH and FTP utilities.
For mean, green LED/acrylic bling (optional): Acrylic/plexiglass sheet, clear, 3/16" thick, 36"×30" 9V battery snap connectors (2) in addition to 1 above LEDs, green (4)
Resistor, 330Ω
Switch, SPST (single-pole single-throw)
Machine screws, #10-24, 5" (16) These can be cut down to size as necessary.
Wing nuts, #10-24 (14)
Rod couplings, ¼-20×7/8" (14)
Machine screw nuts, 3/16" (19)
Flat bar, about ½" wide (2 pieces) to secure the USB hub and battery holder. We cut aluminum plate to size, but anything will work — wood, plexiglass, etc. We secured the hub with a bar, 2 machine screws, and wing nuts; and the battery holder with a bar and 2 inverted machine screws, no wing nuts.
Hot glue (optional)
TOOLS
OSMO/Hacker serial interface (optional) Needed for older Roombas; see makeprojects.com/v/27 for details.
CAT5 network cable aka Ethernet cable
Soldering iron and solder
Multimeter
Wire strippers
Drill and drill bits for machine screws
Screwdrivers to match screw type
Cutter or saw for acrylic (optional) We used a homemade CNC cutter.
Finally, every project needs LEDs. So we added a few to make this thing light up the darkest of rooms. We mounted 4 green LEDs around the back of the custom-cut clear acrylic frame that carries the project components. Engraved on top of the plexiglass is our engineering team name, Zero Cool, from that awesome movie Hackers.

START
1. Make the USB-to-serial cable.
To connect the Roomba to the router, we constructed a USB-to-serial tether by splicing together 2 cables: a USB-TTL converter cable with an FTDI FT232R serial chip in its female USB end, and an 8-pin mini-DIN cable that fits into the Roomba’s serial jack.
With the TTL-232R cable, cut off the serial end (with a straight 6-pin header) and strip the black, orange, yellow, and green wires (brown and red are cut short). With the 8-pin mini DIN cable, cut off the female end, peel away some of its outer sheathing, and strip the green, yellow, white, red, brown, and orange wires (cut the other 2 short).
Use a multimeter set to “continuity” to trace which pins on the mini-DIN plug go to what color wire (Figure A). Write it all down.

Solder the wires from the mini-DIN cable to the TTL-232R according to Figure B. The orange (transmit data, TXD) and yellow (receive data, RXD) wires from the TTL-232R cable connect to pins 5 and 3 of the mini-DIN plug, respectively. Black (ground) connects to pins 7 and 8, green (device detect, DD) to pin 6, and V+ to pins 1 and 2.

If you want to steal power from the Roomba battery for lighting the LEDs, as we did, solder a 9V battery snap between V+ and ground (Figure C).

Raymond Caruso
2. Enable the Roomba serial interface (if necessary).
On newer Roombas, the serial interface (the Roomba Open Interface, or ROI) is enabled out of the box. But for models manufactured before October 2005, like ours, you can only communicate through the robot’s serial port after flashing its firmware with an OSMO/hacker device.
To use the OSMO/hacker, remove the serial port cover on the Roomba’s side. Plug the OSMO/hacker into the port and watch its LED blink for about 90 seconds. Then unplug the device after the light stops blinking.
3. Install OpenWrt on the router.
Our router “brain” will drive the Roomba, but first we have to open it up with the third-party software, OpenWrt. When installed as a router’s firmware, OpenWrt not only lets the router create wireless networks or join existing ones, but enables it to run additional software like RoombaCMD. Furthermore, OpenWrt has a built-in Linux web server that serves pages at the router’s own IP address (http://192.168.1.1). This lets us use a browser to both configure the router software and, later, control the Roomba remotely.
To install OpenWrt, visit downloads.openwrt.org/whiterussian/0.9 and download whiterussian-0.9.tar.bz2. There are several builds available, but White Russian was the most stable with the RoombaCMD code and our device drivers. RoombaCMD won’t run on the more recent Kamikaze builds unless it’s recompiled with new libraries.
Connect your computer to the router with an Ethernet cable, then point a browser to http://192.168.1.1 to access the router settings. To log in, leave the username blank and use the password admin. Then click Administration → Firmware Upgrade.
Click Browse, navigate to the firmware you just downloaded, and click Upgrade. Don’t turn the router off; it will reset itself when complete, after at least 5 minutes.
Reload http://192.168.1.1 in the browser to open the OpenWrt dashboard and set the router password. If the password can’t be set on the web interface, open a command prompt or use a Telnet client to telnet to 192.168.1.1, then enter passwd.
Click the Wireless tab and either specify Ad-Hoc Mode (Figure D) or Client Mode, select your existing home wireless network for ESSID (extended service set identifier), and fill in your network settings. This setup will let our computer talk to the router, which we’ll be doing a lot of.

4. Make the battery pack.
To avoid our router’s having to use up precious Roomba battery power, we decided to run it off its own battery pack. Our Linksys WRTSL54GS router used a 12V DC wall wart adapter, so we substituted an 8xAA battery pack and added an SPST switch to make the process of restarting the router a little easier.
Solder the cathode side (marked with a stripe) of a 1N4001 diode to the positive side of a DC power plug that fits your router (Figure E). This will prevent reverse voltage from frying the router. Solder a short wire between the diode’s anode and the middle/common pin (sometimes marked “ACC”) of an SPDT switch.

Solder a wire between one side of the switch and the red (+) wire of a 9V battery snap. Solder wires to connect the opposite side of the switch to the snap’s black (–) wire and the negative side of the barrel connector. Insulate all connections with electrical tape (Figure F). The snap can now be attached to the battery pack.

5. Install the USB and serial drivers.
Now it’s time to start installing drivers on the router. To do this from our Windows laptop, we used the free SSH client PuTTY, which you can download from the.earth.li/~sgtatham/putty/0.60/x86 as putty.exe.
The first drivers to install, kmod-usb-serial and kmod-usb-ohci, and the FTDI driver enable the router to control its USB port and the FTDI chip on our hacked cable.
Start by connecting the router to your computer with an Ethernet cable to check that your computer has internet connectivity. Launch PuTTY and start a session connected to IP address 192.168.1.1 via your router, using the password you set earlier (Figure G).

In the PuTTY session window (Figure H), enter the sequence of commands listed at makeprojects.com/v/27 to install the drivers using the ipkg utility. OpenWrt knows where to download most of its drivers, so when you enter ipkg install [package-name], it looks up the package’s location and automatically downloads it from there.

6. Add the webcam eye.
A USB webcam allows the Roomba Recon to capture and stream JPEG images using OpenWrt’s built-in web server. These images display on a Flash-based page alongside the robot’s browser-accessible control panel.
To keep our robot looking sleek, we shortened our webcam’s cord (Figure J). To do this, open the camera case and cut the cord about 2" from where it connects to the board, then unsheath the wires. Shorten the cable wires to just a few inches, unsheath, and resolder the wires back together (Figure I). Tape up the solder joints and tuck it all back inside the case.


Gregory Hayes (J)
To install the camera drivers, use PuTTY to connect to the router, as in Step 5, then follow the instructions listed at makeprojects. com/v/27. From the PuTTY session window, you will download and unzip the spca5xx webcam driver, then install it and other needed drivers and libraries into OpenWrt’s startup folder. You’ll also install the spcacat utility, which captures the webcam’s current image.
Finally, you’ll need to install ImageSnap, a simple, three-line script that calls spcacat and stores the resulting image file where the OpenWrt web server can find it. Download imagesnap from makeprojects.com/v/27. To upload it to the router, you can use the free file-transfer program WinSCP (winscp.net). Launch WinSCP (Figure K) and connect to your router as you have been with PuTTY. Then navigate to imagesnap in your computer’s pane and the root (/) directory in your router’s pane, and drag-drop imagesnap over to the router.

Connect to your router through PuTTY and enter the following commands (type what comes after each # sign, followed by Return):
root@OpenWrt:~# chmod +x imagesnap
root@OpenWrt:~# mv imagesnap /usr/bin
root@OpenWrt:~# imagesnap &
root@OpenWrt:~# ln -s /tmp/SpcaPict.jpg /www/
SpcaPict.jpg
This gives the ImageSnap script the proper permissions and location, starts it running, and creates a symbolic link so that OpenWrt’s web server can find its output.
7. Install RoombaCMD.
RoombaComm, originally written by Tod E. Kurt, is a Java library for communicating and controlling the Roomba from a computer. RoombaCMD, which we’ll use, ports this remarkable code to run on a router. It allows us to send commands to the Roomba, making it move as we please. In addition, it has premade templates for the web interface we’ll add later.
To install RoombaCMD, connect to the router through PuTTY and enter the following commands:
root@OpenWrt:~# wget http://roombahacking.com/
software/openwrt/roombacmd_1.0-1_mipsel.ipk
root@OpenWrt:~# ipkg install roombacmd_1.0-1_
mipsel.ipk
8. Build the Flash page.
A Flash page published by the router’s web server lets you control your Roomba, see through its webcam, and show it off to your friends from anywhere in the world. The Flash interface is encoded in 4 files, which can be downloaded from roombahacking.com/roombahacks/roombacmd/roombapanel. Then download and unzip RoombaControl.zip from makeprojects.com/v/27.
Connect to your router with WinSCP as in Step 6 and point the remote pane to the /www directory. Move all roombapanel and Roomba-Control files to /www, and exitWinSCP.
Now you can control your Roomba by pointing your browser to http://192.168.1.1/roomba.html (Figure L), or use the snazzy Flash interface at http://192.168.1.1/roombapanel.html (Figure M).


NOTE: You need to run imagesnap & each time after you reboot the router (or you can add to the startup script; see makeprojects.com/v/27 for instructions).
9. Take it worldwide.
The next step is to control the Roomba from anywhere with internet access. To do this, connect the Roomba router to your home wireless network and open up a port on your home router to redirect any traffic coming in from port 80 to the Roomba router.
With this working, you can access the robot’s web page under your WAN address (the IP address that your ISP gives you) rather than at http://192.168.1.1. See makeprojects.com/v/27 for more detailed instructions on how to forward your router ports.
10. Make it mean (optional).
You can piggyback the router, camera, and USB splitter hardware on the Roomba any way you want, but we decided to add some bling by mounting them inside a Roomba-shaped plexiglass frame trimmed with green, glowing LEDs around the back (Figure N).

We used a homemade CNC to cut 2 acrylic panes and engrave the top one with our team name, Zero Cool (Figure O). Then we joined the panes using bolts, wing nuts, and rod couplings to sandwich the electronics in between.

The plexiglass assembly is attached to the Roomba by 4 inverted machine screws that run through the bottom piece of acrylic and are hot-glued to the top of the Roomba. There are other ways to attach it, so be creative!
For the LEDs, we used ledcalc.com to determine that the current-limiting resistor needed for four 2V/20mA LEDs connected in series with a 14.4V supply voltage was 330Ω. The LEDs are connected together with hookup wire to a 9V battery snap that easily connects and disconnects with the 9V snap wired to the router’s battery pack and switch.
Now what trouble can you cause with your new remote reconnaissance vehicle? The possibilities are endless. Every robot project is improved by some sort of weapon, so perhaps future versions of the Roomba Recon could incorporate something like Luke Cole’s USB missile launcher?
![]() Visit makeprojects.com/v/27 for further instructions, resources, and the aforementioned USB missile launcher.
Visit makeprojects.com/v/27 for further instructions, resources, and the aforementioned USB missile launcher.

Garry McLeod (P)
Raymond Caruso is an IT professional from Connecticut. A student at Iona College in New York, he enjoys all types of projects, particularly those that modify existing products.