
In this recipe let's explore how to use the SQLite file we created in the first recipe, Overview of SQLite Studio, as the local data store for our MyTasks app.
For this recipe we shall use the project template we created in the Chapter 1,Data Binding to UI Elements.
In the following steps, we will create a MyTasks project to use the sample SQLite database file we created in the preceding recipe and then learn how to use the SQLite Client API to insert and display the results.
- Create a project from the
CH1_MyTaskstemplate and name itCh5_MyTasks_SQLiteClient. - Add the existing file
MyDatabase.sqlitewe created in the first recipe, Overview of SQLite Studio, and add it to the project root folder. - Copy the
DBHelper.csfile from the SQLite Client project in the new folderHelpers. - Add a project reference to the assembly
Community.CsharpSqlite.WP.dll. - Open the
App.xaml.csfile and addusingdeclaratives at the top of the file:using Ch5_MyTasks_SQLiteClient.Helpers; using System.Reflection;
- Next in the
Appclass, declare the followinggetproperty:private DBHelper _db; public DBHelper db { get { Assembly assem = Assembly.GetExecutingAssembly(); if (_db == null) _db = new DBHelper(assem.FullName.Substring(0, assem.FullName.IndexOf(',')), "MyDatabase.sqlite"); return _db; } } - Now open
MainPage.xamland add the declaration formyTaskscollections:private ObservableCollection<DataClass> myTasks;
- Next, add the method
IntializeList, which will query the data collection class and return the results. The result from the query is databound to a list box control'sItemsSource:private void InitalizeList() { string selectQuery = "Select * from MyTasks"; myTasks = (Application.Current as App). db.SelectObservableCollection<DataClass>(selectQuery); lstTasks.ItemsSource = myTasks; } - In the
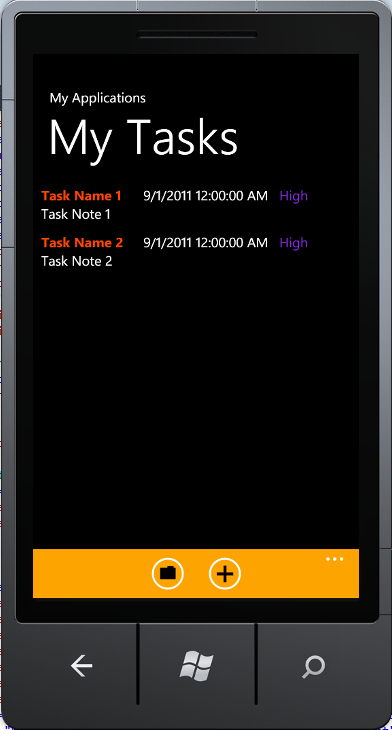
Main_Loadedevent, call the methodInitializeList(). - Press F5 and run to see the resulting listing from the local database, as shown in the following screenshot:
- Now we shall update using the form. Open the
.csfile, and replace theAdd_Clickmethod, as follows:private void btnAdd_Click(object sender, RoutedEventArgs e) { DateTime createdDate = DateTime.Now; int rec; string strInsert = "Insert into MyTasks values (@Name,@Notes,@Priority, @DateDue)"; MyTasks newTask = new MyTasks { Name = txtName.Text.ToString(), Notes = txtNotes.Text.ToString(), Priority = txtPriority.Text.ToString(), DateDue = DateTime.Parse(txtPrioirty.Text.ToString()); }; rec = (Application.Current as App).db.Insert <MyTasks>(newTask, strInsert); } - Press F5 and run again. Now you can add the new task to the database.

We initially loaded the database file using the DBHelper class. Then, we used the select query and executed it to return the results. The list is then assigned to a list box for display. Once we have the list displayed, we then add the code to insert the task using the form. Here we used an insert SQL statement.
This recipe demonstrates how easy it is to implement the popular SQLite database as an embedded database in your apps. You can reuse SQLite across other mobile platforms as well. So this makes the SQLite a very portable solution for multiple platforms.
Check the following recipe to see how SQL CE is used as an embedded database. In the following two recipes, we discuss other options available as local database storage. Also, check Chapter 7, Windows Communication Framework - WCF, which discusses how to store the data externally.