
Chapter 2
Android Studio Basics
WHAT'S IN THIS CHAPTER?
- How to create an Android Studio project
- Android project structure
- Creating and configuring virtual devices
- Building and running your project via ADB
- Migrating Android projects from Eclipse IDE
Welcome to Android Studio! Whether you are an Eclipse-based ADT veteran or a total newbie to Android development, you will enjoy Android Studio, which is based on IntelliJ IDEA and offers new tools, a UI editor, a whole new build system, memory/CPU analyzers, and many more new features and functionalities.
After long years of the Eclipse-based ADT plugin suite, Google announced (at Google I/O 2014) that Android Studio would be the official supported IDE for Android Development. Of course, you can still use ADT if you are coming from a strong Eclipse background; however, you will probably face problems that you may need to solve on your own.
As an Eclipse committer who has written code for several Eclipse projects, I preferred to stay with ADT for a long time. However, with the announcement that Android Studio is the official IDE, “resistance is futile.”
If you are new to Android development, it may even be easier to adapt to Android Studio because your previous Eclipse experience might not necessarily help you a lot on the IntelliJ platform.
CREATING A NEW SAMPLE PROJECT
Figure 2.1 shows the welcome screen of Android Studio, which is the first screen you will see when you launch Android Studio. From here, you can start a new project. In this chapter, you will work on a sample project, so let's open an existing project by importing the code.

Figure 2.1 Welcome to Android Studio window
- Click the Import an Android code sample option in the list shown in Figure 2.1.
Numerous sample projects are hosted in GitHub. Because those projects are always up-to-date and new ones are added when a new API or functionality is introduced, it is a good idea to use them as a reference template for your own projects. Plus, all those samples are under the Apache software license, which makes them available to be used freely even in commercial products.
Because everyone loves selfies, in this example you build yet another selfie app.
- Scroll down to Camera and select Camera2 Basic from the list shown in Figure 2.2.
Keep the Application name and Project location that appear on the Sample Setup screen (see Figure 2.3).
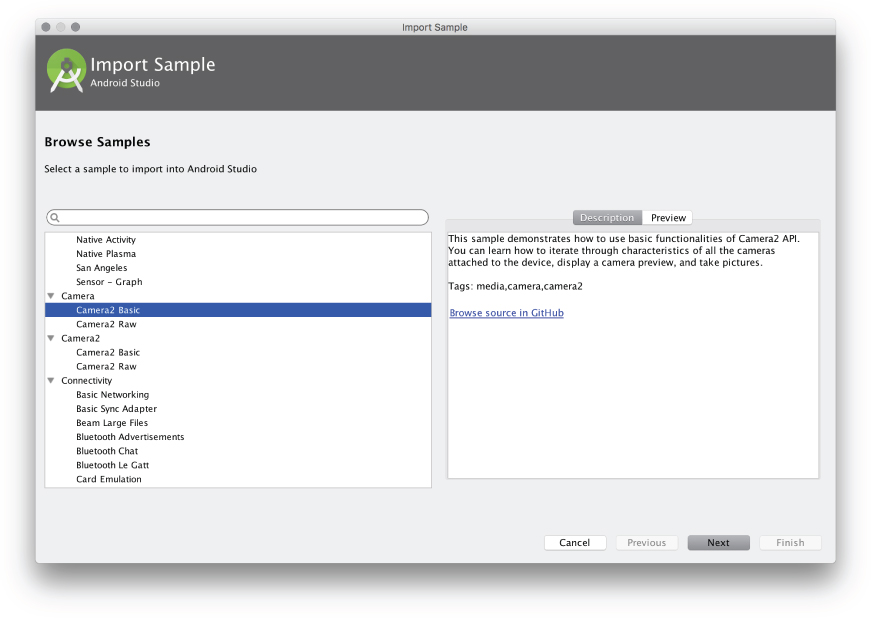
Figure 2.2 Import Sample—Browse Samples window

Figure 2.3 Import Sample—Sample Setup window
- Click Finish.
Your project will be downloaded from GitHub, and the main IDE window, which is mostly empty, will appear.
Once you click Finish, Android Studio creates the project and switches to the main development layout. Before you figure out where to find your project files, let's take a look at Android SDK configuration in the following sidebar.
Using Different SDKs
When the SDK installations are complete, you can start working with one of them. As long as your Android project does not make use of a feature that is introduced with a specific version of an SDK, you can easily convert your project to work with an older SDK.
Android Project Structure
Everything looks great? Well, not exactly because you should probably be looking at an empty screen, as shown in Figure 2.7.

Figure 2.7 Android Studio after importing the sample project
Although the initial project screen shows nothing about your project, Android Studio gives you a list of hints about how to move to the next step. For this example, press Command+1 on Mac or Alt+1 on Windows to open the project view. The project view, shown in Figure 2.8, displays all the contents of your project.

Figure 2.8 Project view on Android Studio
If you prefer to list resources similar to the way they are hosted in the file system, click the Android list on the top left and a menu with different options will open. Choose Project, and Android Studio will group your project resources as they appear in the file system, as shown in Figure 2.9.

Figure 2.9 Traditional project view
Let's examine this view to gain a better understanding of Android Studio project structure. Every project has a few hidden folders, which you might not be able to navigate with your file manager.
Typically, an Android project has three hidden folders, as listed at the top left of Figure 2.9. The hidden folders are:
- .idea folder—This folder keeps IntelliJ-specific project metadata and settings not necessarily shared with source control systems (so not shared to someone else).
- .gradle folder—This folder keeps Gradle-related bin files. This folder's contents are not subject to change unless you change the project's Gradle version.
- .google folder—This folder includes sample packing files from Google.
-
Next is the application folder. The name of this folder can change depending on your application name and preferences. However, you can easily recognize the folder because it has a small device symbol on the lower right of the folder icon. This type of folder holds the source code, application files, and configuration.
There can be more than one Application folder in your project depending on its size and architecture. In this chapter we will assume there's one named “app,” but will dig into different combinations in later chapters.
Expand the app folder by clicking the triangle to the left of the folder name. If you have developed Android applications before, the contents should be familiar to you. If not, the following pages give detailed information.
The project folders are:
- build folder—This folder might be the least important of all because, as a developer, you won't need to deal with or edit anything inside it. The Gradle build system will be triggered to build your source files by the IDE and produce the output into this folder.
- src/main folder—This folder might be the most important folder because it hosts all your source code except for tests. If you expand the src folder, you may see package folders that group your source files. We will explain this later in this chapter.
- src/test and src/androidTest folders—These folders might be the most underestimated in the whole Android project. The basic convention with tests is to place Unit tests into src/test and instrumentation tests into src/androidTest folders. They hold your test files, which can be run during compilation, packaging, or even on a build server. Good test coverage for your source files is needed if you want to keep your code maintainable, open to change, and still bug free!
There are also several files in the root of the project folder. These are essential because they usually affect each module in the project. You may need to edit the following essential project files.
- build.gradle—Although each module in a project has its own build.gradle file, the top level build.gradle is inherited by each of them. Any global Gradle setting for a repository or a library can be added to this file.
- local.properties—Each user has an SDK and NDK file path in their computer. For example, say you work for a corporation where you need to have proxy settings, including your credentials. Adding that personal data to a Gradle file, which would be added to source control, may not be wise. Such info can be added to local.properties and kept out of source control.
- settings.gradle—Most Android projects have multiple modules, which may consist of libs or wear extensions. Once a build is executed, Gradle checks settings.gradle to figure out which projects need to be included in the build.
You may find additional files in the root project folder, which you don't need to edit or worry about for now. Although we covered all root level files and folders, we haven't covered the most important one, the src folder.
The src folder hosts all source, resource, and application manifests. Expand the source folder to list its contents, as shown in Figure 2.10.
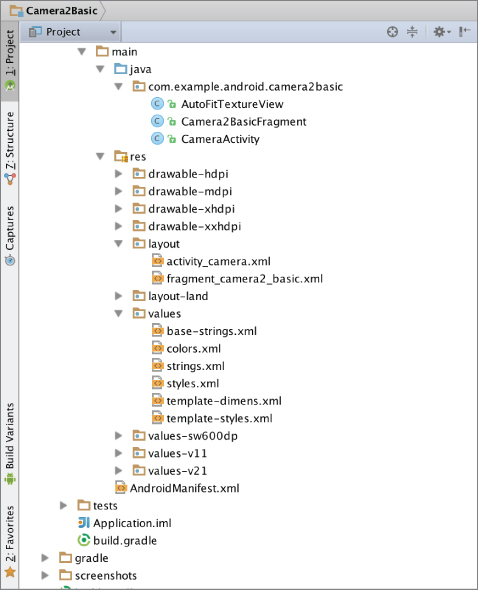
Figure 2.10 Expanded view of project folders
Inside the src folder is only one folder, which is named main. The main folder contains the java and res folders, which have different icons than other folders to highlight their importance.
The java folder contains all the packages in the format of reverse URL and Java classes. In our example, we have only one package, com.example.android.camera2basic, which has three Java classes. Clicking a class file will open the editor and display the chosen Java file's contents, as shown in Figure 2.11.

Figure 2.11 Opened Java file on Android Studio
We cover the editor in detail but first let's move to the other folder inside main. The res folder holds all resource files, including images, layouts, localization files, and so on. Android projects have different folders for different screen sizes, pixel densities, and other parameters, as shown in Figure 2.12.

Figure 2.12 res folder in Android project view
Placing different sizes of the same image into a drawable folder will leverage the ability of Android to display the most appropriate image for the device your application is running on. The idea is the same for the layout and values folders. Different layouts can be added for landscape and portrait views, and different values can be added for different versions and pixel densities.
This approach has given Android the capability to run on different screen sizes and densities from the beginning, unlike most other mobile platforms, which used to offer only a fixed resolution.
Finally, we can focus on one final file that is very trivial for an Android application, the AndroidManifest.xml file. The Android manifest holds metadata from the list of activities, services, application name and version, target and minimum SDK requirements, and hardware requirements for the target devices, as well as the permissions that your app requires. Listing 2.1 shows the contents of AndroidManifest.xml.
Our manifest file starts with the manifest declaration, which also declares the main package. This declaration enables us to refer to subpackages and classes by using only the suffix after the root package.
Next, the manifest declares the permissions, followed by the uses-feature tag to declare the hardware requirements of the application.
Every activity and service component that resides in an Android project must be listed under the application tag. The sample project consists of only one activity, which is used as the entry point of the sample app, so the activity is listed as .CameraActivity, only with the full path and name after the root package and with the LAUNCHER intent. This activity will be used for launching the application presented in the Android manifest.
Building and Running a Project
The sample project is a complete and ready-to-run application, so we can move on to building and running the application. Android Studio offers different ways to compile and run projects. To simply build a project, select Build from the toolbar and then the Make Project option, as shown in Figure 2.13.

Figure 2.13 Build menu list
Although this option will compile and package your app, it will not execute your app on either a device or the emulator. To run the sample project, select Run from the toolbar and then the Run Application option, as shown in Figure 2.14.

Figure 2.14 Run menu items in Android Studio
Alternatively, you can click the green Play icon (or Control+R on Mac, Ctrl+R in Windows), as shown in Figure 2.15.

Figure 2.15 Android Studio Run ‘Application’ button
Depending on your computer's hardware, Android Studio will spend some time to build the application and later will ask for a target device, which can also be an emulator, to run the application on. You haven't either created a virtual device or connected a real device yet, so you'll do that in the next section.
ANDROID EMULATOR
Android Emulator is a great tool that is bundled with Android Studio. It enables your computer to emulate Android hardware and operating system to run your apps and provide a preview of how it would behave on a real device. The Android emulator enables you to test your application on a variety of screen sizes, hardware configurations, Android versions, and even different CPU architectures.
However, the Android emulator has a bad reputation for being very slow. Developers used to make fun of it by saying, “If you optimize your app for the emulator, it will run smoothly on any device.” This may sound exaggerated but was almost true in the past.
The main performance problem behind the emulation resulted from the ARM CPU emulation on personal computers, which mostly run on x86 CPU architecture. In 2011, Intel introduced HAXM and Google started providing x86-based Android system images, which boosted the emulator performance by using the host CPU instead of emulating a different CPU architecture.
Installing HAXM
To start using the emulator, you need to install HAXM and the x86 image of the desired version of Android. HAXM requires a minimum version of Android SDK 17. In most cases, HAXM installation is pretty straightforward. If you already installed the SDK (see Chapter 1), you can start creating your virtual device. If you didn't install it, you can set it up with the SDK Manager, as discussed in the “Android SDK Configuration Inside Android Studio” sidebar earlier in this chapter.
- Click Launch Standalone SDK Manager (refer to Figure 2.5) to open the Standalone SDK Manager shown in Figure 2.6.
- Scroll down to Extras and select Intel x86 HAXM Emulator Accelerator (HAXM Installer), as in Figure 2.16.

Figure 2.16 Intel HAXM selection in Windows
- Once the download of HAXM is complete, you need to manually trigger its installer, from
sdkextrasintelHardware_Accelerated_Execution_Manageron Windows, orsdk/extras/intel/Hardware_Accelerated_Execution_Manager/on Mac.
Creating a New Android Virtual Device
It is very easy to create a new Android device. AVD (Android Virtual Device) Manager is the next icon. It's to the left of the SDK Manager, as shown in Figure 2.17.

Figure 2.17 Android Studio AVD Manager button
- Click the AVD Manager button. Because you haven't created a virtual device before, AVD Manager is currently empty (see Figure 2.18).
- Click the Create Virtual Device button, shown in Figure 2.18, to start creating a virtual Android device.

Figure 2.18 AVD Manager's initial appearance
A list of available devices appears, as shown in Figure 2.19. At the top of the list are Nexus devices, which are the reference devices released by Google. The rest of the list contains common screen sizes and device properties. You are free to modify any device from the list or even create your own for testing purposes. Creating your own device might be a good idea for testing devices that you don't have access to. In addition to creating virtual devices to simulate phones, AVD Manager also supports tablets, wear, and TV.

Figure 2.19 List of virtual device hardware
- Select Nexus 5X. The Nexus 5x is one of the two reference devices released with Android 6.0. Although you will continue with Nexus 5X here, you can choose any device to create a virtual device.
- Select Marshmallow and make sure the target column (see Figure 2.20) includes “(with Google APIs).” In this step, you are free to choose either the ARM or Intel-based Android images listed in Figure 2.20.

Figure 2.20 System Image selection for AVD
Nexus 5X is an ARM-based device. Although selecting ARM will provide more accurate device/virtual device testing, emulating ARM on an x86-based laptop will require additional memory and processing power and will result in performance issues. By installing HAXM, you can have your virtual device run an Intel image to provide better performance.
- Click the Next button shown in Figure 2.20 to tweak final settings of your virtual device.
- Make the final configurations, as shown in Figure 2.21, and click Finish.

Figure 2.21 AVD configuration window
That is it—you created a virtual device that can run your sample project. To run the emulator, open AVD Manager and click the Play icon shown in the Actions column of the virtual device, as shown in Figure 2.22.

Figure 2.22 List of created virtual devices
Depending on your hardware configuration, the emulator may take a while to boot up. The initial bootup will take longer than subsequent launches, which might be close to instantaneous if you have chosen the Store a snapshot for faster startup option.
You now have a new Android device to play with and it didn't cost you a penny.
Using ADB
You have now imported and built your project and created a new Android virtual device. In this section, you learn how to deploy the binary to the virtual device. To do that, you need to know how to connect the two.
Luckily, you won't need to do much; Android Debug Bridge (ADB) will handle all the heavy lifting here. ADB works almost seamlessly to deploy and run your app in a virtual or real device. However, you can always access ADB through your OS's shell and execute commands manually. ADB bridges between your computer and the connected device whether it is a real or a virtual device. Most of the time, you won't need to interact with ADB manually. To use ADB, open a console and type adb
Given that the emulator you just created is still running, if you execute adb devices you'll see a list of the devices available over ADB. You can use adb install <apk path> to install a packaged apk to the connected device. However, because the IDE performs this for you, you won't be using the install option extensively.
Other useful adb options are push and pull. These commands are used to access the device's file system. The following commands will copy a file from your computer to the device and from your device to the computer:
$ adb push <local> <remote>
$ adb pull <remote> <local>
MIGRATING PROJECTS FROM ECLIPSE
Eclipse ADT and Android Studio have very different project structures and configurations, but importing projects from Eclipse to Android Studio is very straightforward in most cases.
The first option for migrating your Eclipse project to IntelliJ is to import the project into Android Studio.
- Select File ⇨ New ⇨ Import Project as shown in Figure 2.23.

Figure 2.23 Start migrating from Eclipse
- Navigate through your Eclipse project folder and click OK, as shown in Figure 2.24.

Figure 2.24 Select project path to import
The IDE will create the necessary files, including Gradle files, and set up your project.
Once the import is complete, import-summary.txt will be shown, which displays the results of the migration.
Another way to migrate your project is to export the project from Eclipse. To export from Eclipse, your ADT plugins should be up-to-date.
- Right-click on your project and select Export, as shown in Figure 2.25.

Figure 2.25 Export from Eclipse
- Navigate to the Android folder group and select Generate Gradle build files, as shown in Figure 2.26.

Figure 2.26 Export window on Eclipse
- Follow the instructions in the wizard that opens. That will generate the Gradle files needed for Android Studio.
Although your project is converted to Gradle by the end of this process, the project still needs to be imported to Android Studio for IntelliJ-specific files to be created.
Both methods work on most of Android projects without any problem. However, if you happen to come across a problem in either method, switch to the other method to complete the migration.
SUMMARY
This chapter gave you a basic overview of the whole Android Studio project structure, Gradle, and ADB. We have seen how to create and configure virtual Android devices using an emulator and how to run your applications using ADB.
We also covered how to migrate Eclipse ADT-based Android projects to new Android Studio–based Gradle projects.