
BY NIKOLAS CHARLEBOIS-LAPRADE
Recently announced by Microsoft, the SharePoint Framework is generating a lot of interest in the industry. Built around the latest web development trends, it allows organizations to leverage the skill set of their current developers to build rich SharePoint experiences. In this chapter, I will be introducing that new framework and will cover the various components that are involved in developing modern applications on top of SharePoint using it. Microsoft announced at the Virtual SharePoint Summit on May 16, 2017, the framework available on-premises via Feature Pack 2 for SharePoint 2016. While the chapter’s example focuses mostly on Office 365, everything covered in it will also be applicable to on-premises SharePoint 2016 environments.
History of SharePoint Development
Anyone who’s been involved with the SharePoint technology for the past few years has seen the platform’s developer story evolve from simply supporting customization via C# to supporting a wide range of other, more modern web technologies. Back in the SharePoint 2007 days, the only way to customize and extend the platform was to create server-side solutions using C# and deploying them in the server’s Global Assembly Cache (GAC), by packaging them as Windows SharePoint Package solutions (.wsp). These solutions were referred to as Full Trust Code and required a server administrator to connect to the SharePoint server and deploy the solution using a command line tool (STSadm.exe).
When SharePoint 2010 was released a few years later, it introduced two new development models: Sandboxed solutions and the client-side object model. Sandboxed solutions allowed for a limited set of the SharePoint Object Model to be used and limited the solutions’ scopes to the site collection in which they were deployed. Users having site collection administrator permissions could deploy the solutions, still packaged as .wsp files, directly in the new solutions gallery. There was no longer a need to deploy packages by connecting directly to the server and running STSadm.exe to have them deployed; it could now be done remotely. The client-side object model built on that idea of remote solutions and allowed users to develop solutions that would either run directly on the client side (using the JavaScript flavor) or that could be hosted on a server hosted outside of the SharePoint farm (using the Silverlight or .NET flavor) and have them interact with SharePoint remotely.
Then SharePoint 2013 came along and introduced a completely new development model, called SharePoint Apps model at the time and later renamed SharePoint Add-ins model. The beauty of this model was that it allowed for an add-in to be developed once, and be deployed to either a SharePoint on-premises environment or to SharePoint Online in Office 365. This new model came with the premise that all the code interaction with SharePoint would be done either on the client side or outside of SharePoint. The main goal of that new model was to reduce the load on the SharePoint server itself and have the solution run outside of the SharePoint processes.
As part of this new development model, two deployment flavors where offered. (there were three in the beginning, but the Auto-hosted one was discontinued): SharePoint-hosted or Provider-hosted. The SharePoint-hosted model implied that the code would be hosted on the SharePoint server but would be contained in a web site running outside of the SharePoint processes’ scope. All SharePoint-hosted add-ins would have to be written in JavaScript and either use CSOM or call the available REST APIs to interact back with SharePoint. On the other hand, Provider-hosted add-ins had to be hosted entirely outside of SharePoint, on a different server. They could be coded in any web language available (PHP, .NET, JavaScript, etc.) and would also be communicating back to the SharePoint server, using CSOM or REST API calls. Now, if you built some widget-like user interface components for these add-ins and wanted to include them directly in one of your SharePoint pages, you had to wrap them into what is called an add-in part. An add-in part is nothing more than an iframe that you add on your page and that loads the remote (SharePoint-hosted or Provider-hosted) add-in. While this provided an interesting way of creating rich dashboard within your SharePoint sites, it also introduced its share of problems, notably issues with Cross-Domain scripting. The add-in model came a long way from the traditional server-side way of doing SharePoint customization, but still there was room for improvements.
New Framework
At the “Future of SharePoint” event hosted on May 4, 2016, Microsoft introduced a new development framework for SharePoint 2016 named the SharePoint Framework. The SharePoint Framework, often referred to as SPFx, runs entirely on the client side, directly within a SharePoint page. While it is a new development model for SharePoint 2016, it really is considered an addition to the existing add-in model introduced with SharePoint 2013. The SharePoint Framework leverages the same skill set required to build SharePoint Hosted add-ins, which are all built using JavaScript. In the past, developers wanting to get around the restrictions imposed by the traditional add-in model were using a Script Editor web part to inject JavaScript components and mimic add-ins parts. The SPFx aims at providing more elegant ways for these developers to create rich and interactive interfaces in SharePoint, by having the code loaded directly within the page, without the use of an iframe.
The new framework is technology agnostic, in the sense that, while requiring developers to know JavaScript, it supports any flavors of the language. Most examples from Microsoft you will find on the Web use the React.js and TypeScript frameworks, but in reality, you could use whatever JavaScript variant you wish. This makes it easier for organizations to reuse the current skill sets of their employees. Another interesting aspect of the framework is that it doesn’t lock you down to using Microsoft-specific development tools. One could very well be using a Mac Book with XCode on it and be coding SharePoint applications, using the new SharePoint Framework. Visual Studio does, however, remain a first-class citizen with the SPFx and provides all the required scaffolding for the framework’s projects.
The SharePoint Framework really reveals its strengths when we start talking about web parts. It introduces a new concept called Client-Side Web Parts , which can be thought of as traditional web parts having no server components whatsoever. They are made available directly in the Web Part section of the SharePoint ribbon and can be inserted directly within a page, without generating an iframe in the background. As with all SharePoint Framework solutions, Client-Side Web Parts is packaged as a new file format, represented by the file extension .SPPKG, and is deployed to your SharePoint sites using the traditional Add-in Catalog that was introduced with SharePoint 2013.
Client-Side Web Parts are added to SharePoint pages by using the new SharePoint page canvas, which is almost the equivalent of what page layouts are for classic SharePoint pages. While a canvas acts the same way a regular web part zone would, it differs in a way that is it reactive by default. What we mean by reactive is that if you were to modify the web part’s properties, these properties would automatically take effect without you having to save the properties’ changes and wait for the page to post back. For example, imagine a dumb Client-Side Web Part that simply displays a square of a given color. If that color is controlled by a color picker in the web part’s properties, the moment you change the selected value (e.g., change from blue to red), the web part will get updated, and the new color will show up, even if you didn’t save the web part’s changes (Figure 8-1).

Figure 8-1. Custom Client-Side Web Part showing properties panel
If you pay close attention to Figure 8-1, you can clearly see that the Suite bar (top menu bar) wears the mention “SharePoint Workbench.” We will be covering the SharePoint workbench in more depth in a later section of the current chapter, but for the moment all that is important is to understand that this new component of the SharePoint Framework is run locally and allows developers to easily test their Client-Side Web Parts. Not only does the SharePoint workbench run locally, it also doesn’t require any SharePoint specific bits to be installed on the machine, and most of all doesn’t require Visual Studio to be installed on the developer’s workstation in order to let them interact with it. This is a huge step forward for Microsoft, who now truly allows anyone, running on any platform, to start developing on SharePoint.
With the evolution of the SharePoint developers’ story, we’ve seen the requirements for a developer workstation be reduced to a minimum. Table 8-1 shows the evolution of the requirements for a SharePoint developer’s workstation over the years, as new versions of the SharePoint product were released.
Table 8-1. Development Model Comparisons
Full Trust Code | Sandboxed Solution | Client Side (JSOM, .NET, Silverlight) | Add-in Model | SharePoint Framework | |
|---|---|---|---|---|---|
Available in Product Version | 2003, 2007, 2010, 2013, 2016 | 2010, 2013, 2016*, Online* | 2010, 2013, 2016, Online | 2013, 2016, Online | Online |
Requires development to be done on Windows Server OS | Yes** | No | No | No | No |
Requires Visual Studio | Yes | Yes | No | No | No |
Programming language specific | Yes (.NET) | Yes (.NET) | Yes (.NET, JSOM, or Silverlight) | No*** | No |
While some may argue that the SharePoint Framework is not really language-agnostic, as shown in Table 8-1, because it fundamentally requires JavaScript to work, it is important to understand that it will support any flavors of libraries built on top of it. Some developers may be more familiar with pure Angular.js, while others may prefer to use Typescript (which is built on Angular.js 2), owing to its similarities to C# coding.
Additionally, if you pay close attention to the third data row of Table 8-1 , you’ll see that the SharePoint Framework doesn’t require you to use Visual Studio to build components. This is particularly interesting for developers who want to develop on Mac. Now that Microsoft has released both Visual Studio for Mac and Visual Studio code, Mac developers can now benefit from the advantages offered by one of the most popular integrated development environments (IDEs) out there. However, as specified in the table, you are not required to use Visual Studio to do development against the framework. One could very well decide to use any other IDE out there, or even use plain old Notepad to do so, if he/she wished. Most examples covered in the current chapter will be using Typescript to ease the transition between traditional SharePoint C# developers to SharePoint Framework developers, but know you can use whatever library you wish to follow along. The beauty of the SharePoint Framework is that this is totally up to the developer to choose what language and what tool set he/she wants to use.
An Evolutive Process
At the time of writing this chapter, the SharePoint Framework had just hit General Availability (GA) , which means it had been rolled out to all Office 365 tenants. The SharePoint engineering team is continuously improving the framework’s API and tools, and changes to the developers’ components are being kept on GitHub as an open source project. You can get access to this project by browsing to the following URL: https://github.com/SharePoint/sp-dev-docs .
In order to ensure consistency across this chapter, and to avoid any confusion between various versions, we will be using the SharePoint Framework Release Candidate version 0 for all of our examples. While some components are likely to change slightly before the framework hits its production milestone, it is not expected that any breaking changes will be introduced, and, therefore, code written in this chapter should continue to work with future versions.
Major Components of the Framework
At a first glance, you may think that the SharePoint Framework is fairly simple to understand. After all, it is just JavaScript running inside a page, right? In reality, there is much more to the framework than meets the eye on the surface. Under its cover, the framework is made up of a mix of various components that are each essential to getting developers up and running. If you have been reading various articles on the Web about the SharePoint Framework, you’ve probably stumbled on some of these components but don’t quite understand their roles within the begin scheme of things. Software components such as Node.js, Yeoman, NVM/NPM, and Gulp may not mean much to you at this point, but fear not, we will be covering each one of these in greater details in this section.
Node.js
This component is probably the most important of them all when it comes to the internal mechanics of the SharePoint Framework. By definition, Node.js is an event-driven, non-blocking IO model built on top of Chrome's JavaScript engine, but in order to simplify and keep things within the context of the SharePoint Framework, let me provide you with my own tuned-down explanation of what Node.js really does. In a nutshell, Node.js allows a developer to run JavaScript code server side; it is a server-side JavaScript engine. At its core, Node.js is made up of three main components:
libuv: Cross-Platform I/O library
Chrome V8: Google Chrome’s JavaScript engine
Js/C++ code: core of the tool
Because this chapter is not about making you become a Node.js expert, it is not important for you to fully understand how Node.js’s internals work. What is important for you to grasp, though, is that even if Node.js allows you to run JavaScript on the server, it is not itself built in JavaScript (at least, not entirely). In order to leverage Node.js on your machine, you have to download the installer and properly install it. In my case, I will be doing development directly from my Windows 10 machine. Therefore, I will have to go and download Node.js and install it on my client-operating system directly. The latest version of the Node.js installer can be obtained at https://nodejs.org/en/download/ . It currently supports installation on Linux, Mac, and Windows.
In the context of the SharePoint Framework, Node.js is used to properly render the components of the framework’s workbench (covered in a later section). If you really want to dumb it down, you can almost compare Node.js to what IIS Express is for Visual Studio. It is a lightweight software component that quickly allows us to run streamlined server-side code and test our applications. It doesn’t require much configuration to get started. Figure 8-2 is an evolutive graph that shows where Node.js fits in the SharePoint Framework ecosystem. We will build upon this graph, as I cover additional components of the framework.

Figure 8-2. Overview of how Node.js fits in the SPFx ecosystem
Installing Node.js
The following steps must be initiated if you wish to install Node.js on your Windows machine:
Browse to https://nodejs.org/en/download/ and download the distribution that is supported by your machine (.msi or .exe). I used the Windows 64-bit distribution for my Windows 10 machine.
Execute the download setup. On the main screen, click Next (Figure 8-3).

Figure 8-3. Main Node.js installation screen
On the second screen, check the “I accept the terms in the License Agreement” and click Next (Figure 8-4).

Figure 8-4. Node.js License Agreement
On the next screen, keep the default path and click Next (Figure 8-5).

Figure 8-5. Node.js installation path
On the Custom Setup screen, keep all default options by default and click Next (Figure 8-6).

Figure 8-6. Node.js Custom Setup screen
On the next screen, click the Install button and accept any confirmation from the User Account Control (UAC) (Figure 8-7).

Figure 8-7. Node.js Initiate installation screen
Wait for the installation process to finish and click Finish (Figure 8-8).

Figure 8-8. Node.js completed installation
To confirm the installation, launch a new command prompt window and type in the following command: node -help.
If the installation was successful, you should now see an exhaustive list of all available Node.js commands, as shown in Figure 8-9.

Figure 8-9. Node.js help content
Node Package Manager (NPM )
While the Node Package Manager itself is not directly involved in the SharePoint Framework, you’ll see it being referenced enough times throughout our various examples that it is important to define what it is used for. NPM allows developers to manage various JavaScript packages (and their various versions), by allowing them to be acquired from various central repositories. As a comparison, we can compare it to the NuGet engine for the JavaScript world. NPM comes preinstalled with Node.js, and it is used to acquire the latest version of the SPFx workbench from official Microsoft repositories.
For example, one of the prerequisites for our workbench to properly run is to have the Visual C++ Build Tools 2015 installed on our machine. Using the Node Package Manager, these can easily be obtained and installed, using the following easy steps:
Launch a new command prompt window (or a PowerShell session) as an administrator.
Type in the following command: npm install -g --production windows-build-tools.
If the installation worked as expected, you should see in your output window an output like the one in Figure 8-10.

Figure 8-10. Installing Visual C++ Build Tools 2015 with Node Package Manager
Yeoman
This component is responsible for doing what we call the scaffolding of our SharePoint Framework components. As an analogy, Yeoman is taking care of the same job the Visual Studio “New Project” wizard is doing. Scaffolding is the process of setting up all the various files and components that together make up a solution. To better help you understand what scaffolding really is about, let us consider an example in which you would open Visual Studio and create a new SharePoint Full Trust Code solution. Figure 8-11 shows you the Visual Studio New Project wizard that allows us to perform this task.

Figure 8-11. New Project wizard in Visual Studio
Upon clicking the OK button in the Visual Studio New Project wizard, the scaffolding process will be automatically initiated, and Visual Studio will go ahead and create all the required components that make up a SharePoint 2016 Empty solution, as in the example shown in Figure 8-11. This includes a Features folder, a Package folder, and a signing key (as shown in Figure 8-12).

Figure 8-12. Scaffolding of a SharePoint 2016 Empty Full Trust Code solution
Of course, you could go in and manually create all of these files and folders yourself, but everyone needs a little bit of automation in their life, don’t they? Scaffolding is there to make everyone’s life easier, and just for the record, currently an empty SharePoint Framework client web part is made up of a few thousand files, so you may be my guest if you wish to create them manually, but I choose to use scaffolding. There are several other Scaffolding tools available out there in the wild: yoga, cookiecutter, Mimosa, Assemble, etc. The SharePoint team has settled on Yeoman as its default scaffolding tool.
The idea behind Yeoman is that you don’t directly install a Yeoman client per say on your machine. Instead, you have to create what we refer to as a Yeoman Generator, which is then responsible for defining the scaffolding workflow to be executed. These generators are what must be installed on your development machine. They can be hosted and made discoverable on any repositories in your organization. Luckily for us, Microsoft has already created a SharePoint generator and has made it available on its servers.
Installing Yeoman SharePoint Generator
As in the case for the Visual C++ Build Tools 2015 (see the preceding “Node Packet Manager” section), we will be using the NPM to acquire and install the Yeoman SharePoint generator on our machine. The following steps will guide you through the installation process :
Open a new command prompt as an administrator.
Execute the following commands:
npm install -g yonpm install -g @microsoft/generator-sharepointExecuting the preceding command will automatically retrieve, download, and install the SharePoint Generator.
Upon completion of the installation, you should see displayed in the output window a list of the components that were just installed (see Figure 8-13 for an example).

Figure 8-13. Completed installation of the Yeoman SharePoint generator
If you are like me and are always curious by nature, you may wonder what exactly has been downloaded to your machine by executing the preceding command. By default, the Node Package Manager keeps all its packages under the following path:
C:Users<user name>AppDataRoaming
pm
ode_modules
If you navigate to this location, you will find a folder named generator-sharepoint that contains all the files associated with our generator. While I will not be covering the creation of a Yeoman generator in this chapter, it may be useful for you to take a look at the index.js file located under the /app folder. It contains the execution flow for the Yeoman SharePoint generator.
Scaffolding a Project
Once the Yeoman SharePoint Generator has been properly installed on your machine, we can initiate the scaffolding process for a SharePoint Framework project. Before initiating a scaffolding operation, which will generate a good number of files, I recommend that you go ahead and create a new folder somewhere on your development machine. This will ensure that we keep everything isolated. In my case, I will be creating a new folder called SPFxDemo, which will be located directly at the root of my c: drive (Figure 8-14).

Figure 8-14. New empty folder at the root of my C: drive
Open a command line console and navigate to the newly created folder. To initiate the scaffolding operation, simply type in the following Yeoman command in your console:
yo @microsoft/sharepointUpon executing this line of code, Yeoman will prompt you to specify a name for the solution you are about to create. Pick a name and press Enter. In my case, the solution will be called SPFxDemo1. Upon entering a name for your solution, Yeoman will then proceed to ask you if you wish to reuse the current folder to create the solution in, or if you wish for it to create the folder structure for you. In our case, since we already created an isolated folder, we will simply choose the option to use the current folder. Yeoman is currently only allowing us to create client web part projects. It will, therefore, ask you to pick a name for that new web part you are about to create. For this example, we will be naming our web part “StockPrices.” Yes, you’ve guessed right, our example will be about creating a client web part that allows us to display the current stock price of a given registered company. Input the name for the web part and provide a description of what it will be doing, as shown in Figure 8-15.

Figure 8-15. Yeoman inputs for a new client web part
The last prompt from Yeoman will ask you to pick what flavor of JavaScript you wish to use for your solution. Based on your choice, Yeoman will properly scaffold your solution to include any dependencies required by the library you chose. In either case, we want to keep things “low-level,” in order to properly demonstrate how everything works internally. We will, therefore, be choosing the option “No JavaScript web framework,” which will allow us to use pure JavaScript as our programming language. Upon choosing what flavor of JavaScript to use, Yeoman will go ahead and generate all the required files for us. If everything went as planned, you should see something similar to Figure 8-16 in your PowerShell session.

Figure 8-16. Results from a successful Yeoman scaffolding operation
Once the operation has completed, you can open Windows Explorer and take a look at the files that were automatically generated. If you were to look at the properties for your folder, you would see that there are more than 30,500 files that have been generated, together representing over 208MB of data (see Figure 8-17). Note that these numbers are subject to change as updates are made to the framework.

Figure 8-17. Files generated by Yeoman and their associated file size
Command Line Operation
While initiating the Scaffolding operation by simply calling the Yeoman generator is an effective way of getting started with the SharePoint Framework, you may be wondering if there is a more direct way to generate the files, or at least to automate this operation. Every Yeoman generator allows users to pass in the required parameters directly, so we are in luck. No need to manually answer each question every time Yeoman requires information (e.g., solution name, web part name, web part description, etc.). Instead, we can simply pass all these values at once, upon calling the Yeoman generator, and have the files generated with a simple line of code.
On top of accepting parameters directly, every Yeoman generator also defines a help switch that can be called with --help and provides additional information about the parameters that are accepted (see Figure 8-18). In the case of the SharePoint Yeoman generator, this help feature can be accessed by using the following command:

Figure 8-18. Help output for the SharePoint Yeoman generator
yo @microsoft/sharepoint --helpBased on Figure 8-18, we can see that the generator only requires values for four parameters: solutionName, componentType, componentName, and framework. Therefore, we are not required to pass the web part’s description as a parameter. If we want to initiate the scaffolding of a new SharePoint Framework client web part with a single line of code, we can do so by calling the following:
yo @microsoft/sharepoint:app --solutionName="SPFxDemo1" --componentType="webpart" --componentName="StockPrices" --framework="none" --component-description="Displays the Stock Price for a given Organization"With Yeoman, arguments must be provided in the order they are defined. In our case, if we look at the result from the help operation (Figure 8-18), the first argument is solutionName, and the last one is to be framework. Options, on the other hand, are to be provided as a key/pair entry. If you pay closer attention to the preceding code example, you can see that the web part’s description is passed using the --component-description= clause. Calling the preceding command will automatically initiate the scaffolding of the SharePoint client web part project into a new folder called SPFxDemo1. Figure 8-19 shows the execution of this command to initiate the scaffolding operation.

Figure 8-19. Yeoman scaffolding of a SharePoint client web part by passing arguments
Overview of the Ecosystem with Yeoman
To recap what we have covered so far, the new Microsoft SharePoint Framework requires Node.js to render files to the user. It acts as a web server to render content. The files to be rendered by Node.js are generated by Yeoman, using the SharePoint generator that is provided by the SharePoint Product Group. Figure 8-20 shows the evolution of the SPFx ecosystem with the pieces we’ve covered thus far.

Figure 8-20. The SharePoint Framework ecosystem with Node.js and Yeoman
Gulp
The final piece of the puzzle is what glues together everything we have seen so far. Gulp is a way to streamline your development process. While this may seem great in writing, you are probably wondering what it is concretely used for within the context of the SharePoint Framework. In recent days, development is all about making things more performant, saving milliseconds of execution here and there. One of the best ways to improve performance of web sites is to minify resources. Minifying is the process by which we try to reduce the overall size of a given file by removing useless empty spaces and carriage returns in the file. While this often makes the file less readable to a human eye, it helps speed the process of acquiring the resource files by the network, because these are now smaller in size.
The process of minifying files is a somewhat repetitive task in our development pipeline. Automating this process would not only save us time but would allow us to make modifications to code on the fly and test the results within seconds, without having to “recompile” the resources or do any manual intervention on them. This is what Gulp is there to do: automate the repetitive tasks of the development flow to speed up development. With the help of Gulp, you can edit your files in what I would call their “maxified” shapes. By that, I mean that their content will have spacing and tabs to make it more readable. Once your changes are done, the simple fact of saving them will kick off a Gulp process that will automatically take care of optimizing your files and deploying them back to Node.js to be rendered.
Installing Gulp
As in the case for Yeoman, we will be using NPM to install Gulp onto our development machine. To initiate the installation process, make sure you navigate to the folder where your files have been generated by Yeoman and simply execute the following command (Figure 8-21 shows the execution of the command):

Figure 8-21. Gulp installation using NPM
npm install gulp-cli -gnpm install gulp -D
Serving Pages with Gulp
Now that Gulp is properly installed on our development box, we can go ahead and have Gulp initiate a pipe to server our files and allow us to render the content of our solution. In order to initiate the Gulp process, you must execute the following command (make sure you navigate to the root of your solution folder first, e.g., C:SPFxDemoSPFxDemo1):
gulp serveBecause Gulp uses an SSL end point to serve the pages, it requires a developer to configure a default certificate, in order to render the pages through HTTPS. If you simply run the preceding command, you will receive the following warning in your console (Figure 8-22):

Figure 8-22. Certificate error running Gulp
Warning - [serve] When serving in HTTPS mode, a PFX cert path or a cert path and a key path must be provided, or a dev certificate must be generated and trusted. If a SSL certificate isn't provided, a default, self-signed certificate will be used. Expect browser security warnings.
Luckily for us, the framework comes with a developer certificate that we can use to get around this error. This development certificate can be easily configured by simply executing the following Gulp command:
gulp trust-dev-certUpon executing this command, you will be prompted to install the certificate, as seen in Figure 8-23. Simply click Yes to have the certificate installed and configured.

Figure 8-23. Installation prompt for the SharePoint Framework developer’s certificate
With the certificate configured, you can now initiate a new Gulp process, by running Gulp Serve, and this time, you shouldn’t receive any certificate errors and be able to view the SharePoint Framework workbench, as shown in Figure 8-24. What you are seeing here is what we refer to as the SharePoint Framework workbench. It is the component that allows you to locally test your solution without having to deploy it to Office 365.

Figure 8-24. SharePoint Framework workbench
Overview of the Ecosystem with Gulp
We have now completed the tour of our SharePoint Framework tool chain that is used to serve our solutions locally. Figure 8-25 gives a complete picture of what the three main pillars of the SharePoint Framework are and how they each fit within the bigger picture.

Figure 8-25. Complete SharePoint Framework ecosystem with Gulp
SharePoint Framework Workbench
I have already mentioned the SharePoint Framework workbench several times throughout this chapter. The workbench is what allows you to run and test your solutions locally. Concretely, the workbench is an HTML file generated by the SharePoint Yeoman Generator and is located under the temp folder in our solution folder (Figure 8-26).

Figure 8-26. The SharePoint Framework workbench file
If you were to take a closer look at the file’s content, you would see that it simply contains about 20 lines of HTML and JavaScript imports. I don’t recommend that you modify this file directly in any way. This file is meant to provide you with an offline way of testing a solution that is targeted for a remote SharePoint 2016 instance (be it SharePoint Online or on-premises). Modifying that local file may lead to things not working as expected when the time comes to deploy it remotely.
The fact that the workbench is really nothing more than a classic HTML page in nature, which is served by Gulp, means that it is platform-agnostic. People working with Mac can easily obtain, deploy, and run the SharePoint Framework’s workbench on their machine. Once you deploy your solution onto the remote SharePoint server, you will soon realize that the workbench is actually hosted as a .NET application page located at /_layouts/15/workbench.aspx. The fact that it is running as a .NET page on the other end will not affect how your solution behaves between your local and remote development environment. The workbench had to be generalized as an HTML file locally, to ensure a broader platform support.
Client-Side Web Parts
We are all familiar with the traditional SharePoint web parts that have been around since the early versions of the product. Those are contained pieces of functionality that serve a specific purpose and can be connected to other web parts on a page, to create rich dashboard type applications. With SharePoint 2013, Microsoft introduced the concept of App parts, which were iframes exposing a client-side app hosted outside the given SharePoint site (SharePoint-hosted or Provider-hosted). Now, with the SharePoint Framework, we are now talking about Client-Side Web Parts, which are nothing more than a classic SharePoint web part, but running entirely on the client side. TheseCclientSide Web Parts will appear under the web part section under the Insert tab of the ribbon, and not under the App Part button, like App parts do.
Creating Your First Client-Side Web Part
Let us now look at how we can get started and create our very first Client-Side Web Part. By default, the Microsoft Yeoman generator automatically generates all the required files for our web part. If you remember correctly from the previous examples, we have already created our Client-Side Web Part called StockPrices . In fact, if you just attempt to run gulp serve on the project folder created earlier, you will see that the workbench already allows you to add that web part to your page (see Figure 8-27).

Figure 8-27. New Client-Side Web Part showing on the workbench
If we were to add this web part to the workbench as it stands, it would simply generate generic HTML to indicate that no logic or content has been included with that web part (see Figure 8-28).

Figure 8-28. Adding a newly created Client-Side Web Part to the local workbench
If you take a closer look at the set of files that were automatically generated by the Microsoft Yeoman generator, you can see that under the src folder, we have a folder named webparts, which contains a subfolder having the name we gave to our solution (see Figure 8-29).

Figure 8-29. Generated content for our Client-Side Web Part
To modify the code of our web part, I will be using Visual Studio 2017; however, feel free to use whatever your favorite editor software happens to be, because remember that in the end, all we will be editing is HTML and JavaScript. Inside of Visual Studio, I will simply choose the option to open a folder and will browse to the C:SPFxDemoSPFxDemo1 folder I created earlier (see Figures 8-30 and 8-31).

Figure 8-30. Opening a folder in Visual Studio 2017

Figure 8-31. Viewing our Client-Side Web Part folder with Visual Studio Solution Explorer
The file we are interested in modifying first is named StockPricesWebPart.ts and is located directly under our stockPrices folder. This is a TypeScript file, and it contains the core logic for our Client-Side Web Part. If you take a closer look at the render() method in there, you will see that it is where the HTML printed out by default when we add our web part to the workbench is declared. For the purpose of our example, our web part will accept the name of an organization as part of its properties and will randomly display a fictive stock quote for that given organization. To achieve this, we will start by modifying the render() method , by replacing its entire content with the following:
public render(): void{this.domElement.innerHTML = `<div id="StockPricePanel"><p>The stock price for ${escape(this.properties.Organization)} is ` +Math.round((Math.random()) * 100).toString()+ `$</p></div>`;}
This tells the web part that upon rendering its output back to the client, it has to display a sentence that will use the provided organization name in the properties panel, along with a random number between 0 and 100. This may not be the most exciting web part ever created, but the important thing here is to ensure that you have an overview of the various pieces involved in creating a new Client-Side Web Part.
Simply trying to run a Gulp process with this code in place will generate errors, because TypeScript doesn’t know anything about that Organization property we just specified. For us to make TypeScript aware of the fact that this property exists, we have to define it in our web part’s interface, which is named IStockPricesWebPartProps.ts. Replace the entire file’s content with the following:
export interface IStockPricesWebPartProps{Organization: string;}
This tells our web part that we must expose a custom property named Organization and let the users be able to modify its value. Now, if you go back to our main web part file (StockPricesWebPart.ts), we will modify the property panel to reflect the new Organization property we wish to capture. At the bottom of the file, there is a method defined, which is called getPropertyPaneConfiguration(). This method is expected to return a structured set of properties and values that will contain information about how our web part’s property panel will be displayed to the user. We are particularly interested in changing the labels that will be displayed, to show messages that are specific to the Organization property we are trying to capture. If you pay close attention to the structure returned by this method, you’ll see a section named groupFields. This is the section we wish to modify, to affect the rendering of the property panel. Replace the entire content of the groupFields section by the following lines of code:
groupFields: [PropertyPaneTextField('Organization', {label: strings.OrganizationLabel})]
We are almost there. We now have only to make two more minor modifications for our web part to be functional again. As part of the groupFields property that we just modified, we are now specifying that the property we will be capturing is a property named Organization, and that the field that is exposed in the web part property panel allowing the user to enter a value should have a label defined in a localized string variable named OrganizationLabel. This localized string must be defined in a TypeScript definition file named mystrings.d.ts, which is located under the /src/webparts/<project name>/loc folder. Open the file and replace the content of the IStockPriceStrings interface with the following lines of code:
declare interface IStockPricesStrings {PropertyPaneDescription: string;BasicGroupName: string;OrganizationLabel: string;}
We have now defined that our property panel will expose a localized label named Organization, but we have not specified what the value for that label should be. By default, our web part is localized for English US and, therefore, under the loc folder, you will find a JavaScript file named en-us.js that will contain the localized values for our labels. Open that file, replace the default labels, and add our new one, by replacing the entire content with the following lines of code:
define([], function() {return {"PropertyPaneDescription": "Stock Price Properties","BasicGroupName": "Settings","OrganizationLabel":"Patate"}});
Our web part is now fully functional. As mentioned previously, the purpose of this example is not to build a real-life web part that you can use immediately in your production environment. It is, rather, to give you all the information and tools you need to get started on your own projects.
Testing Your Web Part
We are ready to test our web part. Remember that for your code to be deployed and the workbench to be made available, you have to run the gulp serve command in a command prompt that is currently pointed onto our project’s folder. Upon launching the workbench, you will see that you have the option of adding your StockPrice web part to your page. Once the web part has been added, you will have the option to edit its properties, by clicking the pencil icon at its top leftmost corner. This will bring up the property panel we just modified, with all the proper labels we set up for it (see Figure 8-32).

Figure 8-32. Displaying our custom web part property panel
Packaging Your Client-Side Web Part
Once you are done making the changes to your web part, you are ready to bundle it into a .sppkg package. We will need to use Gulp to achieve this. In a new console, browse to your project’s folder and type in the following line of command:
gulp package-solution --shipThis will automatically generate your .sppkg package, under the folder <project path>/SharePoint/solution/ (see Figure 8-33).

Figure 8-33. SharePoint Client-Side Web Part Package generation
Deploying Your Client-Side Web Part
The question you are probably asking yourself now is how to actually deploy this Client-Side Web Part onto your Office 365 tenant. This is actually done the same way you would deploy a SharePoint Add-in: via the Add-in Catalog. To deploy your web part to the rest of your organization, simply navigate to your Office 365 tenant’s Add-in Catalog and browse to the Apps for SharePoint library (see Figure 8-34).

Figure 8-34. Apps for SharePoint in a SharePoint Online Add-in Catalog site
Once you are in the library, simply click the Upload button to open the browse dialog that will allow you to select our web part file. Browse to the .sppkg package created in the previous section and upload it into the library. Upon completion of the upload process, SharePoint will automatically prompt you to trust your new web part (see Figure 8-35). Simply click Deploy, to have that new Client-Side Web Part available to the rest of your organization.
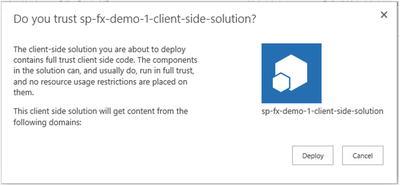
Figure 8-35. Deploying a Client-Side Web Part via the Add-in Catalog
Reuse Your Client Side Web Part
Now that your web part has been properly deployed in the Add-in Catalog, you can go and install it onto any SharePoint site within your organization. Because it has been deployed through the catalog, in order to use it within a site, you must proceed the same way you would if it were a SharePoint Add-in: you need to install it at the web level. The first thing you have to do is navigate to the site in which you wish to use your newly created Client-Side Web Part. Once you are there, click the Site Action icon at the top right (cog icon), then select Add and App. In the left navigation, select From your Organization. This will automatically filter the list of available add-ins and display our newly uploaded solution (see Figure 8-36).

Figure 8-36. Adding our custom Client-Side Web Part solution to a SharePoint site
From there, simply click your solution’s icon, to install it onto your SharePoint site. Once the installation completes, you will be able to access your web part, by editing a page on your site (see Figure 8-37).

Figure 8-37. Adding a custom Client-Side Web Part to a page
What’s Next
It was announced at build 2017 that the SharePoint Framework will soon be extended to include what we refer to as Extensions, which will also allow users to embed client-side code in list viewing and other components of SharePoint. That, combined with the announcement on May 16, 2017, at the Virtual SharePoint Summit, that Microsoft will be making the framework available to on-premises environment via Feature Pack 2 for SharePoint 2016, is a testament of Microsoft’s promise to make the SharePoint Framework the most attractive development model for users to build rich and modern experiences.
Summary
The SharePoint Framework offers lots of potential for modern web developers. By providing a platform-agnostic development tool chain, it opens the door for developers of all kinds to leverage the “Rapid Application Development” component of SharePoint. Where developers used to inject JavaScript code directly in the page, by using Content Editor and Script Editor Webparts, the new framework offers a supported way of packaging and reusing contained sets of client-side logic. Any developer who is serious about getting into the SharePoint development space should start by looking at this new way of building rich and dynamic interfaces.