
BY MIKE FARRAN
What’s better than convenient access to data? Secure convenient access to data, and the ability to share that data with whomever you want, knowing it will be protected in its digital travels. Your company has a lot of data that it must protect. When everything was on-premise, securing data wasn’t difficult to do. Users had to physically be on-site and have a computer that was physically connected to the network by network cable. Virtual private networks (VPNs) came in, and we had to extend that protection to home computers. Wireless networking came in with mobile devices, and the security perimeter had to be further extended, which, in turn, increased the scenarios in which we could leak data. Your users are already sharing this data via e-mail and uploading the data to cloud services. You have no control over how this data is protected, unless you implement rights management.
Sharing data is a good thing. It’s fast and easy and encourages collaboration. It also creates a huge challenge: protecting that data after it leaves your company’s secure infrastructure. With Azure Rights Management (RMS) , you can share almost any file on almost any platform inside and outside of your company, and do it securely. RMS is built on modern encryption and authentication standards that protect your data both in motion and at rest. Implementing RMS will help to begin planning or solve questions such as
How do I control access to this data?
How do I control how they are used?
What is my sensitive data?
How do I track who has accessed them?
What Is Azure RMS ?
Azure RMS is a cloud-based service that uses encryption, identity, and authorization policies to help secure your files and e-mail. This works across all the devices employees may use to complete their daily tasks: phones, tablets, and PCs. Your information will be protected within your organization and outside your organization, because that protection remains with the data, even when it leaves your organization’s perimeter.
Following, you’ll see Figure 7-1, which describes how Azure RMS protects your information for both Office 365 and on-premises servers and services. You’ll also see that it supports the end-user devices that your company may allow through its “bring your own device policy”: Windows, Mac OS, iOS, Android, and Windows Phone.

Figure 7-1. How Azure RMS protects your information
How Do I Control Access to This Data?
Control access via the following steps.
How Does It Work?
Azure RMS is built around four core principles :
Identity: Active Directory user identities are used to restrict or allow access to your documents.
Encryption: Your documents are strongly encrypted at rest, in-motion, and in-use.
Authorization Policy: This contains the actions users can enact on your documents, such as edit, print, and forward.
Access Logging: Access to your documents is logged wherever and whenever it’s used. This includes access by users and administrators.
Figure 7-2 shows our secret Cola formula , as perceived by Azure RMS, and the client application used to open the document. The ingredients are water, sugar, and a secret substance known as brown #16. This information is stored in documents all over your organization, and you want to keep that information protected, whether it’s inside your perimeter or shared with an authorized external source.

Figure 7-2. Azure RMS encryption —high-level
Every document is protected with a content key (green key) that is generated by the client application used to open the document. A unique key is generated for every document protected. When the document is opened, a call is made to the Azure Information Protection tenant, where the root key is stored (red key, labeled “License protected by customer-owned RSA key”). Without having both keys, the contents (red box) is unreadable. Your tenant root key can be automatically generated by Microsoft, or you can manage your own key.
Note
This process is handled at the client level. The secret formula document does not pass through any Microsoft service.
Identity
The first time a user opens a right-protected document on a new device, a call is made to Azure RMS. This is an automatic and invisible check of the user’s identity, made against their Azure Active Directory. Once it’s determined the user is authenticated and authorized to access the document, the connection is, again, automatically redirected to the organization’s Azure Information Protection tenant. This will issue a certificate for the Azure RMS to retrieve the part of the document that has the authorization policy (green box in Figure 7-2). Azure RMS isn’t concerned about the contents of the document, just the policy. Your data isn’t passed through the service. Figure 7-3 shows the authentication flow.

Figure 7-3. Azure RMS Identity
Encryption
At rest, in transit, on-premise, in the cloud, or a hybrid setup—no matter what configuration you use, you can be assured that Azure RMS will protect your data. Azure RMS uses industry-standard cryptography, has worked diligently to pass many security compliances around the world, and uses a wide array of secure transmission technology to transmit your data securely. When your data is shared from SharePoint, copied to another cloud service, and even if a document is e-mailed as an attachment, your files will be protected. The protection and instructions on how to access the file travel with it.
Referring to Figure 7-4, your content (red box) is protected by an Advanced Encryption Standard (AES) symmetric encryption algorithm. This is used to encrypt and decrypt your documents. Briefly, AES symmetric encryption algorithms use one key for encryption and another key for decryption. You need both keys to access the contents of the document. If a user fails the authorization to Azure RMS, the document will be unreadable, as the user won’t receive the decryption key.

Figure 7-4. Azure RMS encryption keys
The encryption keys used are the unique keys that are generated for every document or e-mail you wish to protect (green key). Each document or e-mail protected by Azure RMS has its own key, and it travels with the document or e-mail. The decryption key (red key) is your Azure Information Protection Tenant Key. This key is common to all documents and e-mail that are protected by Azure RMS.
Microsoft Managed Tenant Key
By default, when you sign up for Azure Information Protection, Microsoft takes care of generating your tenant key. Microsoft can take care of generating your key and manage all aspects related to your key. Your key will be stored in Microsoft Online Services in a highly controlled and secure environment. Choosing Microsoft to manage your key is the simplest option. After you sign up for Azure Information Protection, you choose Microsoft to manage the key, and Microsoft takes care of the rest.
Bring Your Own Key
The other option is to choose to manage your own key, which is referred to as “bring your own key” (BYOK ). This is handled through a service called the Azure Key Vault. You can use the Azure Key Vault not only for your Azure RMS Tenant key but also for other authentication keys, such as a custom application developed in Azure that requires keys, storage account keys, data encryption keys, .PFX files, and passwords. This process involves generating a tenant key on-premises from a Hardware Security Module (HSM) . An HSM is an encryption device with functions that include generating keys and helping to encrypt or decrypt data. Once you generate a key from your HSM, you securely transfer your key from your HSM to Microsoft-owned and -managed HSMs. Your key is then stored in your Azure Key Vault.
Authorization Policy
After the identification and authorization step is completed and a user has their authorization policy, Azure RMS decrypts and evaluates the policy to determine the user’s rights. The authorization policy is a wrapper around the document that details what can be done with the data and who can access it (see Figure 7-5).

Figure 7-5. User rights
The policy or policies for what can be done to the file can include whether it can be saved, edited, forwarded, or printed. Table 7-1 shows the rights that can be assigned and their descriptions.
Table 7-1. User Rights
User Right | Description |
|---|---|
Edit Content, Edit Policy: DOCEDIT | Allows the user to modify, rearrange, format, or filter the content inside the application. It does not grant the right to save the edited copy. |
Save Policy: EDIT | Allows the user to save the document in its current location. In Office applications, this right also allows the user to modify the document. |
Comment Policy: COMMENT | Enables the option to add annotations or comments to the content. This right, available in the SDK, is also available as an ad-hoc policy in the Azure Information Protection and RMS Protection module for Windows PowerShell and has been implemented in some software vendor applications. However, it is not widely used and is not currently supported by Office applications. |
Save As, Export Policy: EXPORT | Enables the option to save the content to a different file name (Save As). For Office documents and the Azure Information Protection client, the file can be saved without protection. This right also allows the user to perform other export options in applications, such as Send to OneNote. Note: If this right is not granted, Office applications let a user save a document to a new name, if the selected file format natively supports Rights Management protection. |
Forward Policy: FORWARD | Enables the option to forward an e-mail message and to add recipients to the To and Cc lines. This right does not apply to documents; only e-mail messages. Does not allow the forwarder to grant rights to other users as part of the forward action. Note: When you send an e-mail to another organization, the recipient’s Outlook client or Outlook web app requires the Edit Content, Edit right (common name), in addition to Forward. |
Full Control Policy: OWNER | Grants all rights to the document, and all available actions can be performed. Includes the ability to remove protection and to re-protect a document. |
Print Policy: PRINT | Enables the options to print the content. |
Reply Policy: REPLY | Enables the Reply option in an e-mail client, without allowing changes in the To or Cc lines. Note: When you send an e-mail to another organization, the recipient’s Outlook client or Outlook web app requires the Edit Content, Edit right (common name), in addition to Reply. |
Reply All Policy: REPLYALL | Enables the Reply All option in an e-mail client but doesn’t allow the user to add recipients to the To or Cc lines. Note: When you send an e-mail to another organization, the recipient’s Outlook client or Outlook web app requires the Edit Content, Edit right (common name), in addition to Reply All. |
View, Open, Read Policy: VIEW | Allows the user to open the document and see the content. |
Copy Policy: EXTRACT | Enables options to copy data (including screen captures) from the document into the same or another document. In some applications, it also allows the whole document to be saved in unprotected form. |
Allow Macros Policy: OBJMODEL | Enables the option to run macros or perform other programmatic or remote access to the content in a document. |
Who can access the file is controlled by the permission polices. These policies can be assigned to an individual or group. Table 7-2 shows the permission polices that can be assigned and their operations.
Table 7-2. Permissions Policies
Permissions Level | Rights Included (Common Name) |
|---|---|
Viewer | View, Open, Read; Reply; Reply All Note: Do not use this permission level for Reply or Reply All when you send an e-mail to another organization and the recipient uses Outlook or the Outlook web app. Instead, use Reviewer, which includes the Edit Content, Edit right (common name), which these e-mail clients require to reply. |
Reviewer | View, Open, Read; Save; Edit Content, Edit; Reply; Reply All; Forward |
Co-Author | View, Open, Read; Save; Edit Content, Edit; Copy; View Rights; Allow Macros; Save As, Export; Print; Reply; Reply All; Forward |
Co-Owner | View, Open, Read; Save; Edit Content, Edit; Copy; View Rights; Allow Macros; Save As, Export; Print; Reply; Reply All; Forward; Full Control |
RMS-Enlightened Applications
To access rights-protected documents, we must use RMS-enlightened applications. RMS-enlightened applications can process the encrypted file information and allow users to consume the content, according to the permissions that are defined in the authorization policy. Table 7-3 shows which client applications are RMS-enlightened.
Table 7-3. RMS-Enlightened Applications
Operating System | Word, Excel, PowerPoint | Protected PDF | Other File Types | |
|---|---|---|---|---|
Windows | Office 2010 Office 2013 Office 2016 Office Mobile apps (Azure RMS only)1 Office Online 2 | Azure Information Protection client for Windows Gaaiho Doc GigaTrust Desktop PDF Client for Adobe Foxit Reader Nitro PDF Reader RMS sharing app | Outlook 2010 Outlook 2013 Office 2016 Outlook Web App (OWA) 3 Windows Mail 4 | Azure Information Protection client for Windows: Text, images, pfile RMS sharing application for Windows: Text, images, pfile SealPath RMS plug-in for AutoCAD : .dwg |
iOS | Office for iPad and iPhone 5 Office Online 2 TITUS Docs | Azure Information Protection app1 Foxit Reader TITUS Docs | Azure Information Protection app 1 Citrix WorxMail NitroDesk 4 Outlook for iPad and iPhone 4 OWA for iOS 3 TITUS Mail | Azure Information Protection app1: Text, images TITUS Docs: Pfile |
Android | GigaTrust App for Android Office Online 2 Office Mobile (Azure RMS only) 1 | Azure Information Protection app 1 GigaTrust App for Android Foxit Reader RMS sharing app 1 | 9Folders 1 Azure Information Protection app 1 GigaTrust App for Android 4 Citrix WorxMail NitroDesk 4 Outlook for Android 4 OWA for Android 3 and Samsung Email (S3 and later) TITUS Classification for Mobile | Azure Information Protection app 1: Text, images |
OS X | Office 2011 (AD RMS only) Office 2016 for Mac Office Online 2 | Foxit Reader RMS sharing app 1 | Outlook 2011 (AD RMS only) Outlook 2016 for Mac Outlook for Mac | RMS sharing app 1: Text, images, pfile |
Windows 10 Mobile | Office Mobile apps (Azure RMS only) 1 | Not supported | Citrix WorxMail Outlook Mail | Not supported |
Windows RT | Office 2013 RT Office Online 1 | Not supported | Outlook 2013 RT Mail app for Windows Windows Mail 4 | Siemens JT2Go: JT files |
Windows Phone 8.1 | Office Mobile (AD RMS only) | RMS sharing app 1 | Outlook Mobile 4 | RMS sharing app 1: Text, images, pfile |
Blackberry 10 | Not supported | Not supported | Blackberry e-mail 4 | Not supported |
How Do I Control How They Are Used?
In order to get Information Rights Management in SharePoint Online, you must activate Rights Management in Azure. Once Azure Rights Management is enabled, you’ll have protection across your Azure services, as well as the offerings in Office 365: Exchange, Office, OneDrive, and SharePoint. There are some requirements that must be taken care of before we can activate RMS. These are listed in Table 7-4.
Table 7-4. Rights ManagementRrequirements
Requirement | Description |
|---|---|
Subscription | Azure RMS requires a subscription for Enterprise Mobility Suite or an Azure Information Protection Premium subscription. |
Azure Active Directory | This is the only identity provider Azure RMS authenticates against. If you want to use your on-premise accounts, Active Directory federation or AD DS must be in place. |
Network | There are connection configurations that must to be implemented to allow access to Azure and O365 services. These can be found in the following article: https://support.office.com/en-us/article/Office-365-URLs-and-IP-address-ranges-8548a211-3fe7-47cb-abb1-355ea5aa88a2?ui=en-US&rs=en-US&ad=US should I list out all these ports in another table?. |
Activating RMS
Here are the steps to activate the Rights Management Services (Figure 7-6).
Sign into the Azure Classic Portal or https://manage.windowsazure.com .
In the left pane, click ACTIVE DIRECTORY—near the bottom.
From the active directory page, click RIGHTS MANAGEMENT.
Select the directory to manage for Rights Management, click ACTIVATE, and then confirm your action .

Figure 7-6. Activate Azure Rights Management
Note
If you haven’t set up the above-mentioned subscriptions, you will see the error in Figure 7-7.

Figure 7-7. Azure subscription error
If the subscriptions are active, you’ll see the activation page, such as that shown in Figure 7-8.

Figure 7-8. Rights Management activation page
Upon clicking the activate button, you’ll see the activate button change to deactivate.
Back on the Rights Management page, you’ll see the previously selected directory’s Rights Management status set to Active (see Figure 7-9).

Figure 7-9. Active Rights Management status
There are four other Rights Management Statuses to be aware of, as shown in Table 7-5.
Table 7-5. Rights Management Status
Status | Description |
|---|---|
Active | Rights Management is enabled. |
Inactivate | Rights Management is disabled. |
Unavailable | Rights Management services is down. |
Unauthorized | You don’t have permission to view the status of Rights Management. Your account may be locked out, or you’re not the Global Administrator. |
Clicking our recently activated Rights Management Directory, we’re taken to the start page for Rights Management (see Figure 7-10).

Figure 7-10. Rights Management start page
RMS Activation for Office 365
Azure Rights Management has been enabled in your Azure tenant and can now be turned on in both Exchange and SharePoint. You first must go to your Office 365 admin portal and activate IRM for Office 365 and then follow these steps (Figure 7-11):
Browse to https://portal.office.com and log in.
Navigate to Settings then Service & Add-ins.
Find and Select Microsoft Azure Information Protection.
Click Manage Microsoft Azure Information Protection Settings in the window that slides in.

Figure 7-11. Activate Azure RMS in Office 365
Click activate on the next window, as shown in Figure 7-12 (it looks the same as the page in Azure Rights Management).

Figure 7-12. Azure RMS in Office 365 not activated
You should see Rights Management as Activated, as in Figure 7-13.

Figure 7-13. Azure RMS in Office 365 activated
RMS Activation for SharePoint Online
SharePoint Online can require activation for RMS at the SharePoint Admin level for lists and libraries to inherit whatever policies are created in your Azure RMS.
Admin Activation
Here are the steps to activate the Admin features:
Browse to the SharePoint Admin page https://domain-admin.sharepoint.com/_layouts/15/online/TenantSettings.aspx .
Click settings on the left.
Select “Use the IRM service specified in your configuration.”
Click the Refresh IRM Settings button.
If you don’t click Refresh IRM Settings on activation (Figure 7-14), users won’t see Information Rights Management configuration settings on lists or libraries.

Figure 7-14. RMS in SharePoint Online
Library Activation
Document libraries and lists have additional settings that can be configured. Here are the steps to follow to achieve this:
Browse to the library or list you wish to activate.
Click the cog
 on the upper right of the library.
Click Library settings (Figure 7-15).

Figure 7-15. Library settings options
Under Permissions and Management , click Information Rights Management (Figure 7-16).

Figure 7-16. Information Rights Management settings
On the Information Rights Management Settings page, select the Restrict permission to documents in this library on download check box (Figure 7-17).

Figure 7-17. Restrict permissions on library option
Choose a descriptive name for the policy title that coincides with the purpose of the policy. For example: A document library has Word Docs that contain the latest schematics for a new product, we don’t want our users to take screenshots of the document. We do not check the “Allow viewers to print” and name the policy “Newest Product no Print on Download” (Figure 7-18).

Figure 7-18. RMS in SharePoint Online Document Library Settings
Click Show Options button to reveal what IRM protection can be applied. Options are listed in Table 7-6.
Table 7-6. IRM Protection Options
List Item
Description
Do not allow users to upload documents that do not support IRM
Requires users to upload documents from IRM-enlightened applications only.
Stop restricting access to the library at
Remove restricted permissions from this list or library on a specific date.
Prevent opening documents in the browser for this Document Library
If a user doesn’t have a compatible application to view a document, Office Web Apps allows rendering of documents in the browser.
Selecting this option renders the documents in the browser in Read Only Mode.
Note: Screen capture prevention doesn’t work for browsers.
Allow viewers to print
Enables printing of documents from the list or library.
Allow viewers to run script and screen reader to function on downloaded documents
Allow people with at least the View Items permission to run embedded code or macros on a document.
Allow viewers to write on a copy of the downloaded document
Allow users to edit the documents after download.
After download, document access rights will expire after these number of days (1-365)
Prevents access to a downloaded document after the specified number of days.
Users must verify their credentials using this interval (days)
Require users to re-authenticate at specific intervals.
Allow group protection
Allow group protection, so that users can share with members of the same group.
RMS Activation for Exchange Online
Exchange online IRM is enabled through PowerShell. There isn’t a GUI component. The following commands must be run:
Point Exchange to your Azure RMS Key Location by running
Set-IRMConfiguration -RMSOnlineKeySharingLocation https://sp-rms.na.aadrm.com/TenantManagement/ServicePartner.svcImport the key by running
Import-RMSTrustedPublishingDomain -RMSOnline -name "RMS Online"Enable IRM Functionality by running
Set-IRMConfiguration -InternalLicensingEnabled $true
Protecting Your Files
Azure RMS allows the protection of documents and enforcement of user rights through Enlightened Applications (as discussed previously). We call this Native Protection. Azure RMS also provides protection to documents that don’t have an RMS-enlightened application, such as an image file. This is called Generic Protection. With Generic Protection, we protect the files with encryption and authentication but can’t enforce Authentication Policies (user rights and restrictions). To access these files, Microsoft provides a free downloadable application called the Rights Management Sharing Application (RMS Sharing App). The RMS Sharing App not only protects the generic files that are protected by your RMS but also allows you to access and edit files from other organizations that use Azure RMS.
Protecting E-mail with Outlook Client
In Outlook, start a new e-mail and click on the Options tab. Then, click the Permissions button and select the permission level you wish to protect the e-mail with (see Figure 7-19).

Figure 7-19. Protecting Outlook e-mails
Protecting a Document with Office Suite Client
In an MS Office Application, click the File Menu Option. Then click Protect Document and select the permission level you wish to protect the document with (Figure 7-20).

Figure 7-20. Protecting Office documents
Protecting Files with RMS Sharing App in Outlook and the Office Suite
Outlook and Office have different UIs, but the process is the same. Figure 7-21 shows the Outlook interface, and Figure 7-22 shows the Office interface.

Figure 7-21. Outlook and RMS Sharing App
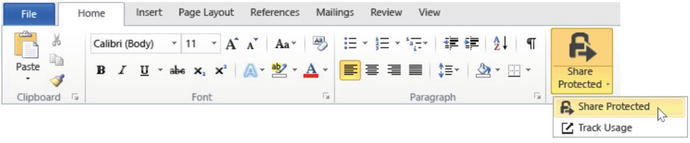
Figure 7-22. Office and RMS Sharing App
Selecting the Share Protected option will bring up a dialog box with options to protect the file (shown in Figure 7-23). Table 7-7 lists these options and their descriptions.

Figure 7-23. RMS Sharing App dialog box
Table 7-7. Share Protected Options
Option | Description |
|---|---|
USERS | List of user e-mails intended to open the file. Note: Personal e-mail addresses are not currently supported by the RMS Sharing app. |
Viewer—View Only Reviewer—View and Edit Co-Author—View, Edit, Copy, and Print Co-Owner—All Permissions | Select one of these options to define the rights of the protected document. |
Expire these documents on | Prevents access to the file on the specified date. |
Email me when somebody tries to open these documents | Receive e-mail notifications whenever somebody tries to open the document that you’re protecting. The e-mail message will say who tried to open it, when, and whether they were successful. |
Allow me to instantly revoke access to these documents | Revocation or “Remote Kill” allows you to revoke access to the documents later, by using the document tracking site. Note: If option isn’t selected, you can revoke access later, by using the document tracking site. |
PDDF File
When a Word, Excel, PowerPoint, or PDF file is protected through the RMS Sharing App in Outlook, a second file is added as an attachment with a .pddf extension. This is a read-only protected version of the document that can only be accessed by authorized users. In order for the intended user to read this file, they must be authorized and have the AMS Sharing App.
Azure RMS Templates
Templates are containers for assigning policy to your documents. When Azure RMS was activated, a few default templates were created automatically.
Confidential
When we assign this template to a document, the document will not be able to be shared outside your organization. Users have permission to interact with the file as they normally would; they just can’t share the file outside the organization.
Confidential View Only
When we assign this template to a document, the document will not be able to be shared outside your organization, and users have permission view to only the contents of the document.
Note
The default templates cannot be deleted, only archived.
Custom Templates
If the default templates don’t fulfill your organization’s needs, or you want to build off of them, you can create custom templates.
You can access your templates from either the Office 365 portal or the Azure portal. I have discussed both methods previously. Whichever method you choose, you’ll be taken to the same location: the Azure administration portal.
Adding New Template
Browse back to your active directory and select Rights Management (Figure 7-24).

Figure 7-24. Azure RMS Rights Management
From Manage, click Create a new rights policy template (Figure 7-25).

Figure 7-25. Create a new rights policy template
On the next window, enter the language, name of the policy, and description, then click the check mark (Figure 7-26).

Figure 7-26. Add a new rights policy template
You’ll see Azure working on creating your new template then take you back to the Azure RMS start screen. Click Manage your rights policy templates. The next screen, shown in Figure 7-27, shows the two default templates, as well as the custom template that was just created. Click the new Template.

Figure 7-27. New template creation
You can then choose to continue with the wizard to complete the next three tasks of configuring the rights, publishing the template, and other configurations. For this example, I’ll select Rights, at the top of the page (Figure 7-28).

Figure 7-28. Configuring rights
Configure Rights and Scopes for Users and Groups
Let us go back to the start screen for user rights. Click the Get Started Now link. If you have set up AD Sync, you will see a list of users and groups that are syncing from your on-premise AD. If this list is empty, AD Sync has not been set up. Select the users and/or groups you wish to add to the policy then click the check mark (Figure 7-29).

Figure 7-29. Selecting users and groups
Note
Groups will not be listed here unless they are e-mail-enabled groups. Groups that aren’t e-mail-enabled will be displayed with an X (orange box).
Select the rights to the selected users and groups. You can mouse over the question mark to get more information about the right. Next, click the arrow at the lower right (Figure 7-30).

Figure 7-30. Assigning rights to selected users and groups
Azure will create the custom template and take you back to the Rights page, to display what you previously configured. Clicking Scopes will take you to a similar page as Rights. In this screen, you select the users or groups that will be able to apply this template. By default, all users and groups in your organization can apply this template.
Additional Configurations and Publishing Your Template
Clicking Configure takes us to the screen where we can Publish and select other configurations . The top of the page is where we can choose to Publish the template, making it accessible to users and groups within our organization, or we can choose to Archive the template, removing it from view from our Office Applications, Azure, and Office 365 (Figure 7-31 and Table 7-8).

Figure 7-31. Publishing a template
Table 7-8. Publishing a Template
Setting | More Information |
|---|---|
Language | Make sure that you add each language that your company requires for the policy. Users with specific language configurations will see the language they’ve selected. |
Content expiration | Number of days files that are protected by the template should not open. You can specify a date or the number of days, starting from the time that the protection is applied to the file. |
Offline access | When a user reaches the limit of the specified number of days without Internet connection, or we choose Content is only available with an Internet Connection, the users will have to sign in again before they can open the file. |
When all configuration items are set for the policy, scroll back to the top of the page and click Publish and then Click the Disk icon at the bottom of the page, to publish the template (Figure 7-32).

Figure 7-32. Saving publishing options
Once published, all users and groups selected during the template creation will now see this template (Figure 7-33).
Figure 7-33. Template status shown as “Publish”
Summary
Azure Rights Management is critical for every organization that is serious about protecting its sensitive information against unauthorized access. It is crucial for IT employees to take the time to learn how to properly configure and manage this service. By providing control to the administrator to monitor how this sensitive information is accessed and consumed, Azure RMS is a critical component of the success of any enterprise.