
In order to build the web application, we make use of Node.js.
Download and install Node.js:
- node.js can be downloaded from the link here: https://nodejs.org/en/.
For the version that we are building now, we will use the 8.11.1 LTS version of Node.js on Windows 64-bit machine. - Once you download the executable file from https://nodejs.org/dist/v8.11.1/node-v8.11.1-x64.msi, make sure to install Node.js using the default parameters.
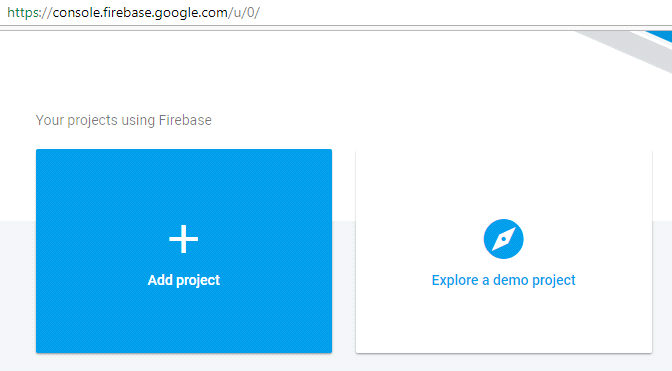
Create a Firebase project:
- A Firebase project can be created by logging in to the Firebase console here: https://console.firebase.google.com
- Within the console, click on Add project:
- Enter project name (highlighted in red) and fetch project ID (highlighted in black), as follows:

- Install Firebase tools using Node.js package manager, as follows:
- Change directory to the folder where the firebase function files need to be stored. In the following screenshot, we are creating a folder named firebase in the E drive:

- We install Firebase tools using the following code snippet:

Log in and initialize Firebase:
- We log into Firebase, by specifying:
firebase login --reauth
- The previous code snippet would allow us to log in using our credentials. Make sure to allow Firebase CLI to access your Google account.
- Once we are logged into Firebase, we initialize firebase as follows:
firebase init
- You will get the following screen:

- Press Y to initialize Firebase.
- Select the features that are needed for the current application by pressing the space bar, and, once done with selection, press Enter:

- Once selected, for the version that we use here, let us specify that our functions are deployed with JavaScript, as follows:

- Once selected, we set the project with the project directory:

Note that mytranslator is the project that we created in step 2. Also note that once we've initialized Firebase, the folder structure looks like this:

- In Command Prompt, press Enter for the various prompts after initializing Firebase. At the end of initialization, you should get a confirmation upon completing initialization as follows:

Install Google Translate using Node.js package manager after scrolling to the functions folder:

We specify all the functionalities (public API methods) that are required for our use case. These functions handle all the server programming:
- In order to specify these, let us overwrite the index.js file present in the functions folder with the following code snippet.
const functions = require('firebase-functions');
const Translate = require('@google-cloud/translate');
const admin = require("firebase-admin")

//setting connection to db
admin.initializeApp();

const translate = new Translate({
    projectId: 'mytranslator-c656d'
});
//Extract the most searched term

exports.getMessageStats=functions.https.onRequest((req,res) =>
 {
 var output;
 var db = admin.database();
 var ref = db.ref("/translateMessageStats");

// Attach an asynchronous callback to read the data at our posts reference
 ref.orderByChild("count").limitToLast(1).on("value", function(snapshot) {

console.log(snapshot.forEach(element => {
 output=element.key+" : "+element.val().count + 'times'
 }))
 res.header("Access-Control-Allow-Origin", "*");
 return res.send(JSON.stringify(output));
 }, function (errorObject) {
 console.log("The read failed: " + errorObject.code);
 });
})

// create a public API method of name "translateMessage"

exports.translateMessage=functions.https.onRequest((req,res) =>
 {
 const input = req.query.text;

translate.translate(input,'en').then(results =>
 {
 const output = results[0];
 console.log(output);

const db = admin.database();
var ref = db.ref("/translateMessageStats");

//update database
 var dataRef= ref.child(input);

dataRef.once('value', function(snapshot) {
 if (snapshot.exists()) {
 dataRef.update({"count":snapshot.val().count+1});
 console.log("data exists")
 }
 else
 {
 console.log("data does not exist")
 dataRef.update({"count":1});
 }
 });

res.header("Access-Control-Allow-Origin", "*");
 return res.send(JSON.stringify(output));
 })
});
- In this code, we import the required Node.js packages by using the following code:
const functions = require('firebase-functions');
const Translate = require('@google-cloud/translate');
const admin = require("firebase-admin")
- We initialize the connection to the database by specifying the following:
admin.initializeApp();
- We create translate object and pass the project ID as a parameter in it, as follows:
const translate = new Translate({
    projectId: 'mytranslator-c656d'
});
- We then create a public facing API with name translateMessage, as follows:
exports.translateMessage=functions.https.onRequest((req,res) =>
- The input given by user is fetched through the following line:
const input = req.query.text;
- The translation of input text and the corresponding storage of translated text in the output is done by this code:
translate.translate(input,'en').then(results =>
{
    const output = results[0];
- We create an instance of database, as follows:
const db = admin.database();
 var ref = db.ref("/translateMessageStats");
- The input is updated in the database:
var dataRef= ref.child(input);
- If a new input is given, count is initialized to 1; else, count is incremented by 1:
dataRef.once('value', function(snapshot) {
    if (snapshot.exists()) {
        dataRef.update({"count":snapshot.val().count+1});
        console.log("data exists")
    }
    else
    {
        console.log("data does not exist")
        dataRef.update({"count":1});
    }
  });
Enable the Google Cloud Translation API, as follows:

Deploy the firebase function:
- We can deploy the firebase function as shown in the following screenshot:

- Once the function is deployed, check out Functions in the DEVELOP section of Project Overview:

- Once we click on Functions, we should be able to see a dashboard that contains the function that we just created—translateMessage:

Note that, the previous event provides us with a URL, using which we should be able to translate the input text, as follows:

Note the usage of ?text= in the URL, which is the input.
In case there is an issue with the execution, we should be able to understand them in the Logs tab (of the Functions dashboard).
Additionally, all the inputs that we have searched for, are stored in database:

Note that the count value is initialized as searched for the term hola.
Replace the content of index.html file in the public folder with the following code snippet. The output of following code snippet would be to create a textbox that lets us give an input text, translate the text, and produce the translated output.
- In your execution, replace the project ID mytranslator-c656d with your own project ID:
<html>
  <script src="https://ajax.googleapis.com/ajax/libs/jquery/3.1.0/jquery.min.js">  </script>
  <script>

    $(document).ready(
      getMessageStats()
    );
<!-- The following code extracts the most searched term from the database that we create in the next function -->

    function getMessageStats(){
      var xhr = new XMLHttpRequest();
      xhr.open('GET', "https://us-central1-mytranslator-c656d.cloudfunctions.net/getMessageStats", true);
      xhr.send();

      xhr.onreadystatechange = processRequest;

      function processRequest(e) {
        if (xhr.readyState == 4) {
          var response = JSON.parse(xhr.responseText);
          document.getElementById("mostSearched").innerHTML=response;
        }
      }
    }
<!-- the following function translates the input value into english -->
    function translateText()
    {
      var textInput= document.getElementById("input").value;
      var xhr = new XMLHttpRequest();
      xhr.open('GET', "https://us-central1-mytranslator-c656d.cloudfunctions.net/translateMessage?text="+textInput, true);
      xhr.send();

      xhr.onreadystatechange = processRequest;
      function processRequest(e) {

        if (xhr.readyState == 4) {
          var response = JSON.parse(xhr.responseText);
          document.getElementById("output").innerHTML=response;
          getMessageStats();
        }
      }
    }
  </script>
<!-- the following code creates the layout of web application, with input text box and output-->
  <body>
    <label>Enter Input Text</label>
    <input id="input" type="text-area"></input>
    <button onclick="translateText()" id="btnTrans">Translate</button>
    <label id="output"></label>
    <br/>
    <div>
      <h1>Most Searched element</h1>
      <label id="mostSearched"></label>
    </div>
  </body>
</html>
We deploy Firebase so that we upload the HTML file that specifies the structure of the final URL we would be working on:

We should now be able to access the link shown, which helps us in translating text, as follows:

From this, we have seen that we are able to create a web application that translates any given input text. Note that the web application made use of the API endpoint that was created by function, and the frontend code would only vary by the framework that we use—it could be different when we use Angular over HTML, but the server side code would remain the same.