


Configuring CICS for the example scenarios
This chapter describes how to prepare your Customer Information Control System (CICS) environment for the scenarios presented in Part 3, “Application development and scenarios” on page 91. The chapter further provides information about each resource definition and its role when CICS handles or makes a request.
The scenarios are described in the following list:
•Taking an existing CICS application and making it available as a JavaScript Object Notation (JSON) web service, as introduced in 4.1.1, “Starting with an existing application (bottom-up)” on page 22. This scenario can be found in Chapter 9, “Language structure to JSON schema scenario” on page 93.
•Creating a new CICS application based upon a JSON schema, introduced in 4.1.2, “Starting with an existing JSON interface (top-down)” on page 23. This scenario is described in Chapter 10, “JSON schema to language structure scenarios” on page 105, where CICS acts as a service provider.
•Using CICS as a JSON client, as explained in 4.2, “CICS as a client for JSON web services” on page 25. This scenario is found in Chapter 11, “Developing a simple JSON web service client application” on page 127.
As described in Chapter 2, “CICS use of mobile technologies” on page 11, the JSON web services functionality of CICS is built upon the established web services infrastructure. The material in this chapter will be familiar to those with experience using SOAP web services.
This chapter contains the following topics:
5.1 Comparison with SOAP web services
To provide support for web services requests using JSON, and the conversion between JSON and application data, internal changes were made to the CICS web services pipeline. The externals, and therefore the CICS resources created in this chapter, are the same as are required for SOAP web services.
At the core of the JSON support in CICS are the JSON assistants. Most relevant to application developers, the assistants consist of job control language (JCL)-based tools used for preparing applications for use as JSON web services. The DFHLS2JS JCL procedure is provided for converting a high-level language structure into a JSON schema. In Chapter 9, “Language structure to JSON schema scenario” on page 93, you see how this can be used to make an existing CICS application available through a web service.
Conversely, the DFHJS2LS JCL procedure also provides for converting a JSON schema into a high-level language structure, suitable for use with a new CICS application or Representational State Transfer (REST)-conforming (RESTful) interface. This utility is demonstrated in Chapter 10, “JSON schema to language structure scenarios” on page 105.
The JSON assistants are equivalent to the web service assistants used for conversion between high-level languages and Web Services Description Language (WSDL). The examples in this IBM Redbooks publication convert JSON schema to and from Common Business Oriented Language (COBOL). In addition to COBOL, the following languages can be converted to and from JSON schemas using the JSON assistants:
•C
•C++
•PL/I
5.2 CICS as a service provider
This section explains the resources used by CICS to process a web services request. This is followed by the steps required to configure CICS, in preparation for the deployment of the services presented in Chapter 9, “Language structure to JSON schema scenario” on page 93, and Chapter 10, “JSON schema to language structure scenarios” on page 105.
5.2.1 How CICS processes a request
Figure 5-1 on page 33 depicts how CICS processes a web services request with JSON data.

Figure 5-1 Architecture of JSON supports in CICS
The following procedure shows how the JSON data is used by CICS to process the web services request:
1. A request is made by the Hypertext Transfer Protocol (HTTP) protocol on a port opened by an installed Transmission Control Protocol/Internet Protocol (TCP/IP) TCPIPSERVICE definition. The port is monitored by the CICS sockets listener (CSOL) transaction. CSOL attaches the transaction specified in the TRANSACTION attribute of the TCPIPSERVICE definition. Usually, this is the CICS web attach transaction CWXN.
2. CWXN matches the incoming request with a Uniform Resource Identifier (URI) URIMAP by scanning all URIMAP definitions for one that has its USAGE attribute set to PIPELINE and its PATH attribute set to the URI found in the request. The URIMAP definition indicates the PIPELINE and WEBSERVICE definitions to be used, and the TRANSACTION that should be attached to process the PIPELINE. The transaction is usually CPIH.
3. As with SOAP web services, the WEBSERVICE definition points to a WSBIND file. This will be used later for data transformation between JSON and application data. The WSBIND file will have been created using the JSON Assistant.
4. Pipeline processing then takes place, passing the request through any defined handlers.
5. The JSON terminal handler and CICS application handler are called. The JSON data is converted into application data, using the language structure description in the WSBIND file. The application handler links to the application program. Note, the application program might be run in a different CICS region.
6. Finally, the PROGRAM output is captured and sent back to the requester as an HTTP response with JSON data.
|
Note: The pipeline processing described previously runs within a Java virtual machine (JVM) server environment. If configured appropriately, some of the processing that takes place within the pipeline is eligible for offloading onto zSeries Application Assist Processors (zAAPs).
|
5.2.2 How to configure CICS as a service provider
To prepare the CICS region for the scenarios described in Chapter 9, “Language structure to JSON schema scenario” on page 93, and Chapter 10, “JSON schema to language structure scenarios” on page 105, the following tasks must be completed:
1. Define and install a TCPIPSERVICE.
2. Install a JVMSERVER, configured for use by a PIPELINE.
3. Define and install a PIPELINE.
|
Important: You must specify TCPIP=YES in your CICS region’s system initialization parameters to activate CICS TCP/IP services.
|
Later chapters show how to create the URIMAP and WEBSERVICE resources automatically using a CICS PIPELINE scan.
Alternatively, you can create these resources yourself. This gives more control, but requires additional resource management.
This book shows how to complete these tasks, which would typically be undertaken by a CICS system programmer, using IBM CICS Explorer 5.1.1.
|
Note: For instructions on how to connect CICS Explorer to a CICS region or IBM CICSPlex® SM system, see the “Configuring the CICS Explorer” topic in the CICS Transaction Server (CICS TS) Information Center.
|
Defining and installing a TCPIPSERVICE
Begin by defining a TCPIPSERVICE in the CICS region. To do this, first open the TCP/IP Service Definitions view from the Definitions menu:
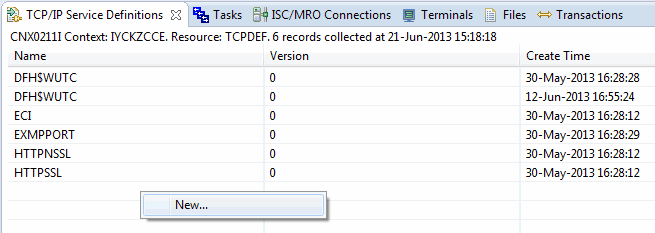
Figure 5-2 Right-click an unpopulated row for the option to create a new resource definition
2. The New TCP/IP Service Definition window opens. Provide the following parameters:
a. In the Resource/CSD Group field, enter the group in which you want to place the new TCPIPSERVICE.
b. In the Name field, enter an appropriate name.
c. In the Description field, describe the TCPIPSERVICE that you are creating.
d. Finally, enter the port that you want CICS to accept incoming requests through in the Port Number field.
Figure 5-3 shows the New TCP/IP Service Definition window and entry fields.

Figure 5-3 Entering the attributes of a new TCPIPSERVICE
3. Click Finish. Click Open editor and a new editor will open, as shown in Figure 5-4. This view shows that the newly created TCPIPSERVICE will use the HTTP protocol.

Figure 5-4 Viewing the attributes of a TCPIPSERVICE
The Backlog attribute specifies the maximum number of inbound TCP/IP connection requests that can be queued in TCP/IP for CICS processing. If this number is reached, TCP/IP will reject additional connection requests. For the purposes of this chapter’s example scenarios, this attribute is set to 10.
The Maxdatalen attribute specifies the maximum data length that can be received by CICS via HTTP. The examples in this scenario are left unchanged, at 32,000. However, before deploying a web service in a production environment, consider the amount of data that you expect that service to receive, and set an appropriate limit. This helps to guard against denial of service attacks using large amounts of data.
The attributes also indicate that no security is currently configured. Although this would be undesirable for a production environment, for the example scenarios in a testing environment this is acceptable. See Chapter 7, “Security and workload management” on page 69 for information about how you can secure TCPIPSERVICEs.
|
Note: For more information about TCPIPSERVICE attributes see the “TCPIPSERVICE resources” topic in the CICS TS Information Center.
|
The new TCPIPSERVICE is also displayed in the TCP/IP Service Definitions view.

Figure 5-5 Preparing to install a TCPIPSERVICE
A Perform Operation window will open, as shown in Figure 5-6.

Figure 5-6 Performing an install of a TCPIPSERVICE
5. Select the CICS system where you want to install the TCPIPSERVICE, and then click OK. The window will close if the operation was performed successfully. If an error occurred, perform the necessary steps to correct the problem and repeat the operation.
6. Open the TCP/IP Services Operations view by clicking Operations → TCP/IP Services.
From this view, illustrated in Figure 5-7, you can see that the TCPIPSERVICE, created for the GENAPP scenarios, was installed and has a Service Status of OPEN.

Figure 5-7 View of installed TCP/IP Services
If you were to open a web browser and send an HTTP request to the address of your CICS system using the port number specified in your TCPIPSERVICE, you will receive an HTTP 404 response. This indicates that CICS cannot locate a resource corresponding to the URI specified.
Installing a JVMSERVER, configured for use by a PIPELINE
To install a JVMSERVER, enabled for use by a PIPELINE, requires a JVM profile that has the JAVA_PIPELINE=YES option specified.
An example JVMSERVER resource definition, called DFH$AXIS, is supplied with CICS, in group DFH$AXIS. The resource DFH$AXIS uses the supplied JVM profile, DFHJVMAX, which specifies JAVA_PIPELINE=YES.
DFHJVMAX can be found in the /JVMProfiles directory of your CICS installation.
Perform the following instructions to install a JVMSERVER resource:
1. Copy DFHJVMAX to a different directory, which should be set as the JVMPROFILEDIR system initialization parameter of your CICS system. You should also copy DFH$AXIS to a new group.
|
Important: Using definitions and files supplied with CICS in their default locations is not suggested, as they could be updated by corrective maintenance.
|
2. To create a copy of DFH$AXIS, click Definitions → JVM Server Definitions. The list will be populated by the JVMSERVER resource definitions within your CICS Explorer context. If necessary, click the refresh button in the upper right part of the view.

Figure 5-8 Creating a new JVMSERVER resource from an existing definition
4. When the new JVM Server Definition window opens, as shown in Figure 5-9, modify the following attributes:
a. Change the Resource/CSD Group to a different location.
b. Using the Name field, change the name of the JVMSERVER.
c. Alter the Description to a more appropriate value.

Figure 5-9 Defining a JVM server
5. Click Finish. Your new JVMSERVER definition will be listed in the JVM Server Definitions view. Right-click the new definition and click Install, as shown in Figure 5-10.

Figure 5-10 About to install a JVM server
6. When the Perform Operation window opens, select your CICS system and click OK. When the operation is complete, you can view your installed JVM servers by clicking Operations → Java → JVM Servers. The JVM server should have an Enable Status of ENABLED, as shown in Figure 5-11.

Figure 5-11 The view of installed JVM servers
You can use one JVM server as the runtime environment for multiple Java pipelines. Note that each task is attached to a JVM thread using a T8 task control block (TCB), with the total number of threads limited by the JVMSERVER resource’s THREADLIMIT attribute. In addition, there is a limit on the number of T8 TCBs that can exist in a CICS region across all JVM servers. For further information, see the topic about managing the thread limit of JVM servers, found in the CICS TS Information Center appropriate to your release version of CICS TS.
You can read about planning for large workloads in 7.4, “Workload management overview” on page 80.
Defining and installing a PIPELINE
To complete preparation for the example scenarios described in Chapter 9, “Language structure to JSON schema scenario” on page 93, and Chapter 10, “JSON schema to language structure scenarios” on page 105, a PIPELINE is required.
Before creating a PIPELINE resource definition, first prepare z/OS File System (zFS) directories for the following items:
•The pipeline configuration file. This is an XML file that describes handler programs that CICS starts when it processes the pipeline. For JSON web services, this will be the CICS JSON terminal handler and application handler, in addition to the JVM server to be used for pipeline processing.
Note that the same directory can be used for many pipeline configuration files, and a pipeline configuration file can be used by many pipelines.
•The WSDIR. This directory, also know as the pickup directory, can be used for installing WSBIND files. You will learn more about this in Chapter 9, “Language structure to JSON schema scenario” on page 93, and Chapter 10, “JSON schema to language structure scenarios” on page 105. You should have one WSDIR per pipeline.
•The shelf directory. This is a directory used by CICS to store WSBIND files. It is used for recovery across a warm restart of CICS.
The CICS Transaction Server for z/OS Feature Pack for Mobile Extensions V1.0 provides a sample pipeline configuration file for JSON pipelines in the /usr/lpp/cicsts/mobilefp/samples/pipelines directory, where /usr/lpp/cicsts/mobilefp is the feature pack installation directory.
The scenario uses this configuration file, named jsonjavaprovider.xml, for the examples. As with the JVM profile, copy the configuration file to a different directory. Further, update the JVM server name specified in the configuration file to match that of the JVMSERVER defined previously.
|
Note: A single PIPELINE resource can be used for multiple JSON or multiple SOAP web services. However, you cannot use a PIPELINE for both types of web service.
|
By default, CICS will use /var/cicsts as the shelf directory.
The next step for creating your PIPELINE is to create a suitable pickup directory. You can create directories using the z/OS perspective of CICS Explorer, using Secure Shell (SSH), or the Udlist utility of IBM Interactive System Productivity Facility (ISPF).
Optionally, create a shelf directory if you do not want to use the default.
|
Important: Ensure that CICS has permission to at least read the pickup directory and the directory used to store pipeline configuration files. CICS must also have permission to read, write, and create sub-directories within the shelf directory.
|
Perform the following steps to define and install a PIPELINE resource:
1. After your directories have been prepared, in CICS Explorer, click Definitions → Pipeline Definitions.

Figure 5-12 How to create a new PIPELINE using CICS Explorer
3. A New Pipeline Definition window will open. Complete the fields as noted in the following sub-steps:
a. In the Resource/CSD Group field, enter the resource group in your CICS system definition data set (CSD) in which you want the new PIPELINE placed.
b. In the Name field, enter an appropriate name.
c. In the Description field, describe the PIPELINE you are creating.
d. Next, in the Configuration File field enter the path to the pipeline configuration file, within z/OS UNIX.
See Figure 5-13 on page 43 for an illustration of the New Pipeline Definition window.

Figure 5-13 Defining a PIPELINE resource
4. Click Finish.
5. Select Open editor. The Pipeline Definition view will open to the right of CICS Explorer, as shown in Figure 5-14. Enter the location of your pickup directory in the Name of a directory (shelf) for WSBind files field in the hierarchical file system (HFS) Details area.

Figure 5-14 Editing a pipeline definition
6. Click File → Save.
7. Next, right-click the newly created PIPELINE in the Pipeline Definitions view and click Install, as shown in Figure 5-15 on page 45.
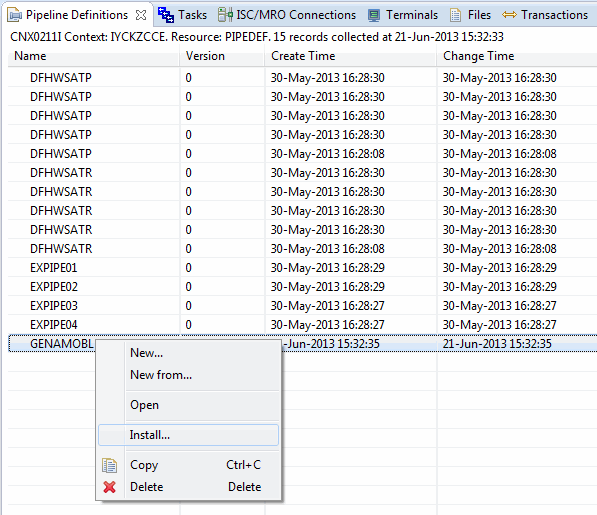
Figure 5-15 Installing a pipeline
8. When the Perform Operation window opens, select your CICS system and click OK.
If the operation failed, diagnose and correct the problem, then repeat the install operation.
9. Open the Pipelines view by clicking Operations → Pipelines. You will see your installed PIPELINE, as shown in Figure 5-16.

Figure 5-16 View of installed pipelines
As part of the installation of the PIPELINE, CICS will have created WEBSERVICE resources for each of the WSBIND files in the pickup directory. In this scenario, the directory was empty, so no web services were created. This is indicated by the messages issued to the CICS message log, as shown in Example 5-1.
Example 5-1 The messages issued when you install a PIPELINE resource
DFHRD0124 I 21/06/2013 15:34:49 IYCKZCCE CICSUSER CWWU INSTALL PIPELINE(GENAMOBL)
DFHPI0703 I 21/06/2013 15:34:50 IYCKZCCE CICSUSER PIPELINE GENAMOBL is about to scan the WSDIR directory.
DFHPI0704 I 21/06/2013 15:34:50 IYCKZCCE CICSUSER PIPELINE GENAMOBL Implicit scan has completed. Number of wsbind files found in the WSDIR directory: 000000. Number of successful WEBSERVICE creates: 000000. Number of failed WEBSERVICE creates: 000000.
10. After the WSBIND files are put into the pickup directory, perform a PIPELINE scan. This will perform an explicit scan of the directory and create WEBSERVICE and URIMAP resources for the WSBIND files.
Your CICS system is now ready for the scenarios described in Chapter 9, “Language structure to JSON schema scenario” on page 93, and Chapter 10, “JSON schema to language structure scenarios” on page 105.
5.3 CICS as a JSON client
In Chapter 11, “Developing a simple JSON web service client application” on page 127, we present a scenario where CICS acts as a client for a JSON web service. The example application performs a transformation between JSON and application data at run time. This CICS functionality is performed within a JVM server environment.
Therefore, if you want to follow this scenario, ensure you install a JVMSERVER with the JAVA_PIPELINE=YES option specified. The JVM server installed in the previous section is sufficient.
Later, more CICS resources will be installed using CICS Explorer as part of the scenario.
..................Content has been hidden....................
You can't read the all page of ebook, please click here login for view all page.