In this chapter
| Introduction |
| Client/server performance |
| Transaction performance |
| Performance configuration options |
| Coding patterns for performance |
| Performance monitoring tools |
Performance is often an afterthought for development teams. Often, performance is not considered until late in the development process or, more critically, after a customer reports severe performance problems in a production environment. After a feature is implemented, making more than minor performance improvements is often too difficult. But if you know how to use the performance optimization features in Microsoft Dynamics AX, you can create designs that allow for optimal performance within the boundaries of the Microsoft Dynamics AX development and run-time environments.
This chapter discusses some of the most important facets of optimizing performance, and it provides an overview of performance configuration options and performance monitoring tools. For the latest information about how to optimize performance in Microsoft Dynamics AX, check the Microsoft Dynamics AX Performance Team blog at http://blogs.msdn.com/axperf. The Performance Team updates this blog regularly with new information. Specific blog entries are referenced throughout this chapter to supplement the information provided here.
Client/server communication is one of the key areas that you can optimize for Microsoft Dynamics AX. This section details the best practices, patterns, and programming techniques that yield optimal communication between the client and the server.
The following three techniques can help reduce round-trips significantly in many scenarios:
Display and edit methods are used on forms to display data that must be derived or calculated based on other information in the underlying table. These methods can be written on either the table or the form. By default, these methods are calculated one by one, and if there is a need to go to the server when one of these methods runs, as there usually is, each function goes to the server individually. The fields associated with these methods are recalculated every time a refresh is triggered on the form, which can occur when a user edits fields, uses menu items, or presses F5. Such a technique is expensive in both round trips and the number of calls that it places to the database from the Application Object Server (AOS).
Caching cannot be performed for display and edit methods that are declared on the data source for a form because the methods require access to the form metadata. If possible, you should move these methods to the table. For display and edit methods that are declared on a table, use the FormDataSource.cacheAddMethod method to enable caching. This method allows the form’s engine to calculate all the necessary fields in one round-trip to the server and then cache the results. To use cacheAddMethod, in the init method of a data source that uses display or edit methods, call cacheAddMethod on that data source and pass in the method string for the display or edit method. For example, look at the SalesLine data source of the SalesTable form. In the init method, you will find the following code:
public void init()
{
    super();
    salesLine_ds.cacheAddMethod(tableMethodStr(SalesLine, invoicedInTotal), false);
    salesLine_ds.cacheAddMethod(tableMethodStr(SalesLine, deliveredInTotal), false);
    salesLine_ds.cacheAddMethod(tableMethodStr(SalesLine, itemName), false);
    salesLine_ds.cacheAddMethod(tableMethodStr(SalesLine, timeZoneSite), true);
}
If you were to remove this code with comments, each display method would be computed for every operation on the form data source, increasing the number of round-trips to the AOS and the number of calls to the database server. For more information about cacheAddMethod, see http://msdn.microsoft.com/en-us/library/formdatasource.cacheaddmethod.aspx.
Note
Do not register display or edit methods that are not used on the form. Those methods are calculated for each record, even though the values are never shown.
In Microsoft Dynamics AX 2009, Microsoft made a significant investment in the infrastructure of cacheAddMethod. In previous releases, this method worked only for display fields and only on form load. Beginning with Microsoft Dynamics AX 2009, the cache is used for both display and edit fields, and it is used throughout the lifetime of the form, including for reread, write, and refresh operations. It also works for any other method that reloads the data behind the form. With all of these methods, the fields are refreshed, but the kernel now refreshes them all at once instead of individually. In Microsoft Dynamics AX 2012, these features have been extended by another newly added feature—declarative display method caching.
You can use the declarative display method caching feature to add a display method to the display method cache by setting the CacheDataMethod property on a form control to Yes. Figure 13-1 shows the CacheDataMethod property.

The values for the new property are Auto, Yes, and No, with the default value being Auto. Auto equates to Yes when the data method is hosted on a read-only form data source. This primarily applies to list pages. If the same data method is bound to multiple controls on a form, if at least one of them equates to Yes, the method is cached.
RunBase classes form the basis for most business logic in Microsoft Dynamics AX. RunBase provides much of the basic functionality necessary to execute a business process, such as displaying a dialog box, running the business logic, and running the business logic in batches.
Note
Microsoft Dynamics AX 2012 introduces the SysOperation framework, which provides much of the functionality of the RunBase framework and will eventually replace it. For more information about the SysOperation framework in general, see Chapter 14. For more information about optimizing performance when you use the SysOperation framework, see The SysOperation framework, later in this chapter.
When business logic executes through the RunBase framework, the logic flows as shown in Figure 13-2.

Most of the round-trip problems of the RunBase framework originate with the dialog box. For security reasons, the RunBase class should be running on the server because it accesses a large amount of data from the database and writes it back. But a problem occurs when the RunBase class is marked to run on the server. When the RunBase class runs on the server, the dialog box is created and driven from the server, causing excessive round-trips.
To avoid these round-trips, mark the RunBase class to run on Called From, meaning that it will run on either tier. Then mark either the construct method for the RunBase class or the menu item to run on the server. Called From enables the RunBase framework to marshal the class back and forth between the client and the server without having to drive the dialog box from the server, which significantly reduces the number of round-trips. Keep in mind that you must implement the pack and unpack methods in a way that allows this serialization to happen.
For an in-depth guide to implementing the RunBase framework to handle round-trips optimally between the client and the server, refer to the Microsoft Dynamics AX 2009 white paper, “RunBase Patterns,” at http://www.microsoft.com/en-us/download/details.aspx?id=19517.
Microsoft Dynamics AX has a data caching framework on the client that can help you greatly reduce the number of times the client goes to the server. In Microsoft Dynamics AX, the cache operates across all of the unique keys in a table. Therefore, if a piece of code accesses data from the client, the code should use a unique key if possible. Also, you need to ensure that all unique keys are marked as such in the Application Object Tree (AOT). You can use the Best Practices tool to ensure that all of your tables have a primary key. For more information about the Best Practices tool, see Chapter 2.
Setting the CacheLookup property correctly is a prerequisite for using the cache on the client. Table 13-1 shows the possible values for CacheLookup. These settings are discussed in greater detail in the Caching section later in this chapter.
Table 13-1. Settings for the CacheLookup property.
Cache setting | Description |
|---|---|
Found | If a table is accessed through a primary key or a unique index, the value is cached for the duration of the session or until the record is updated. If another instance of the AOS updates this record, all AOS instances will flush their caches. This cache setting is appropriate for master data. |
NotInTTS | Works the same way as Found, except that every time a transaction is started, the cache is flushed and the query goes to the database. This cache setting is appropriate for transactional tables. |
FoundAndEmpty | Works the same way as Found, except that if the query cannot find a record, the absence of the record is stored. This cache setting is appropriate for region-specific master data or master data that isn’t always present. |
The entire table is cached in memory on the AOS, and the client treats this cache as Found. This cache setting is appropriate for tables with a known number of limited records, such as parameter tables. | |
None | No caching occurs. This setting is appropriate in only a few cases, such as when optimistic concurrency control must be disabled. |
An index can be cached only if the where clause contains column names that are unique. The unique index join cache is a new feature that is discussed later in this chapter (see The unique index join cache in the Transaction performance section later in this chapter). This cache supports 1:1 relations only. In other words, caching won’t work if a 1:n join is present or if the query is a cross-company query. In Microsoft Dynamics AX 2012, even if range operations are in the query, caching is supported so long as there is a unique key lookup in the query.
A cache that is set to EntireTable stores the entire contents of a table on the server, but the cache is treated as a Found cache on the client. For tables that have only one row for each company, such as parameter tables, add a key column that always has a known value, such as 0. This allows the client to use the cache when accessing these tables. For an example of the use of a key column in Microsoft Dynamics AX, see the CustParameters table.
When you’re writing code, be aware of the tier that the code will run on and the tier that the objects you’re accessing are on. Here are some things to be aware of:
Note that if you mark classes to always run on either the client or the server by setting the RunOn property to either Client or Server, you canvt serialize them to another tier by using the pack and unpack methods. If you attempt to serialize a server class to the client, you get a new object on the server with the same values. Static methods run on whatever tier they are specified to run on by means of the Client, Server, or Client Server keyword in the declaration.
Temporary tables can be a common source of both client callbacks and calls to the server. Unlike regular table buffers, temporary tables are located on the tier on which the first record was inserted. For example, if a temporary table is declared on the server and the first record is inserted on the client, while the rest of the records are inserted on the server, all access to that table from the server happens on the client.
It’s best to populate a temporary table on the server because the data that you need is probably coming from the database. Still, you must be careful when you want to iterate through the data to populate a form. The easiest way to achieve this efficiently is to populate the temporary table on the server, serialize the entire table to a container, and then read the records from the container into a temporary table on the client.
Avoid joining inMemory temporary tables with regular database tables whenever possible, because the AOS will first fetch all of the data in the database table of the current company and then combine the results in memory. This is an expensive, time-consuming process.
Try to avoid the type of code shown in the following example:
public static server void ImMemTempTableDemo()
{
    RealTable rt;
    InMemTempTable tt;
    int i;

    // Populate temp table
    ttsBegin;
    for (i=0; i<1000; i++)
    {
        tt.Value = int2str(i);
        tt.insert();
    }
    ttsCommit;
    // Inefficient join to database table. If the temporary table is an inMemory
    // temp table, this join causes 1,000 select statements on the database table and with
    // that, 1,000 round-trips to the database.

    select count(RecId) from tt join rt where tt.value == rt.Value;
    info(int642str(tt.Recid));
}
If you decide to use inMemory temporary tables, indexing them correctly for the queries that you plan to run on them will improve performance significantly. There is one difference compared to indexing for queries against regular tables: the fields must be in the same order as in the query itself. For example, the following query will benefit significantly from an index on the AccountMain, ColumnId, and PeriodCode fields in the TmpDimTransExtract table:
SELECT SUM(AmountMSTDebCred) FROM TmpDimTransExtract WHERE ((AccountMain>=N'11011201' AND
AccountMain<=N'11011299')) AND ((ColumnId = 1)) AND ((PeriodCode = 1))
You can use TempDB temporary tables to replace inMemory temporary table structures easily. TempDB temporary tables have the following advantages over InMemory temporary tables:
You can join TempDB temporary tables to database tables efficiently.
You can use set-based operations to populate TempDB temporary tables, reducing the number of round-trips to the database.
To create a TempDB temporary table, set the TableType property to TempDB, as shown in Figure 13-3.

Tip
Even if temporary tables aren’t dropped but are instead truncated and reused as soon as the current code goes out of scope, minimize the number of temporary tables that need to be created. There is a cost associated with creating a temporary table, so use them only if you need them.
If you use TempDB temporary tables, don’t populate them by using line-based operations, as shown in the following example:
public static server void SQLTempTableDemo1()
{
    SQLTempTable tt;
    int i;

    // Populate temporary table; this will cause 1,000 round-trips to the database

    ttsBegin;
    for (i=0; i<1000; i++)
    {
        tt.Value = int2str(i);
        tt.insert();
    }
    ttsCommit;
}
Instead, use set-based operations. The following example shows how to use a set-based operation to create an efficient join to a database table:
public static server void SQLTempTableDemo2()
{
    RealTable rt;
    SQLTempTable tt;

    // Populate the temporary table with only one round-trip to the database.

    ttsBegin;
    insert_recordset tt (Value)
        select Value from rt;
    ttsCommit;

    // Efficient join to database table causes only one round-trip. If the temporary table
    // is an inMemory temp table, this join would cause 1,000 select statements on the
    // database table.

    select count(RecId) from tt join rt where tt.value == rt.Value;
    info(int642str(tt.Recid));
}A client callback occurs when the client places a call to a server-bound method and the server then places a call to a client-bound method. These calls can happen for two reasons. First, they occur if the client doesn’t send enough information to the server during its call or if the client sends the server a client object that encapsulates the information. Second, they occur when the server is either updating or accessing a form.
To eliminate the first kind of callback, ensure that you send all of the information that the server needs in a serializable format, such as packed containers or value types (for example, int, str, real, or boolean). When the server accesses these types, it doesn’t need to go back to the client the way that it does if you use an object type.
To eliminate the second type of callback, send any necessary information about the form to the method, and manipulate the form only when the call returns, instead of directly from the server. One of the best ways to defer operations on the client is by using the pack and unpack methods. With pack and unpack, you can serialize a class to a container and then deserialize it at the destination.
To ensure the minimum number of round-trips between the client and the server, group calls into one static server method and pass in the state necessary to perform the operation.
The NumberSeq::getNextNumForRefParmId method is an example of a static server method that is used for this purpose. This method call contains the following line of code:
return NumberSeq::newGetNum(CompanyInfo::numRefParmId()).num();
If this code ran on the client, it would cause four remote procedure call (RPC) round-trips: one for newGetNum, one for numRefParmId, one for num, and one to clean up the NumberSeq object that was created. By using a static server method, you can complete this operation in one RPC round-trip.
Another common example of grouping calls into chunks occurs when the client performs transaction tracking system (TTS) operations. Frequently, a developer writes code similar to that in the following example:
ttsBegin;
record.update();
ttsCommit;
You can save two round-trips if you group this code into one static server call. All TTS operations are initiated only on the server. To take advantage of this, do not invoke the ttsbegin and ttscommit call from the client to start the database transaction when the ttslevel is 0.
The global methods buf2con and con2buf are used in X++ to convert table buffers into containers, and vice versa. New functionality has been added to these methods, and they have been improved to run much faster than in previous versions of Microsoft Dynamics AX.
Converting table buffers into containers is useful if you need to send the table buffer across different tiers; (for example, between the client and the server). Sending a container is better than sending a table buffer because containers are passed by value and table buffers are passed by reference. Passing objects by reference across tiers causes a high number of RPC calls and degrades the performance of your application. Referencing objects that were created on different tiers causes an RPC call every time the other tier invokes one of the instance methods of the remote object. To improve performance, you can eliminate a callback by creating local copies of the table buffers, using buf2con to pack the table and con2buf to unpack it.
The following example shows a form running on the client and transferring data to the server for updating. The example illustrates how to transfer a buffer efficiently with a minimum number of RPC calls:
public void updateResultField(Buf2conExample   clientRecord)
{
    container   packedRecord;

    // Pack the record before sending to the server

    packedRecord = buf2Con(clientRecord);

    // Send packed record to the server and container with the result

    packedRecord = Buf2ConExampleServerClass::modifyResultFromPackedRecord(packedRecord);

    // Unpack the returned container into the client record.

    con2Buf(packedRecord, clientRecord);
    Buf2conExample_ds.refresh();
}
Modify the data on the server tier and then send a container back:
public static server container  modifyResultFromPackedRecord(container _packedRecord)
{
    Buf2conExample recordServerCopy = con2Buf(_packedRecord);
    Buf2ConExampleServerClass::modifyResult(recordServerCopy);
    return buf2Con(recordServerCopy);
}
public static server void modifyResult(Buf2conExample  _clientTmpRecord)
{
    int n = _clientTmpRecord.A;
    _clientTmpRecord.Result = 0;
    while (n > 0)
    {
        _clientTmpRecord.Result = Buf2ConExampleServerClass::add(_clientTmpRecord);
        n--;
    }
}The preceding section focused on limiting traffic between the client and server tiers. When a Microsoft Dynamics AX application runs, however, these are just two of the three tiers that are involved. The third tier is the database tier. You must optimize the exchange of packages between the server tier and the database tier, just as you do between the client tier and the server tier. This section explains how you can optimize transactions.
The Microsoft Dynamics AX run time helps you minimize calls made from the server tier to the database tier by supporting set-based operators and data caching. However, you should also do your part by reducing the amount of data you send from the database tier to the server tier. The less data you send, the faster that data is retrieved from the database and fewer packages are sent back. These reductions result in less memory being consumed. All of these efforts promote faster execution of application logic, which results in smaller transaction scope, less locking and blocking, and improved concurrency and throughput.
Note
You can improve transaction performance further through the design of your application logic. For example, ensuring that various tables and records are always modified in the same order helps prevent deadlocks and ensuing retries. Spending time preparing the transactions to be as brief as possible before starting a transaction scope can reduce the locking scope and resulting blocking, ultimately improving the concurrency of the transactions. Database design factors, such as index design and use, are also important. However, these topics are beyond the scope of this book.
The X++ language contains operators and classes to enable set-based manipulation of the database. Set-based constructs have an advantage over record-based constructs—they make fewer round-trips to the database. The following X++ code example, which selects several records in the CustTable table and updates each record with a new value in the CreditMax field, illustrates how a round-trip is required when the select statement executes and each time the update statement executes:
static void UpdateCustomers(Args _args)
{
    CustTable custTable;

    ttsBegin;

    while select forupdate custTable
        where custTable.CustGroup == '20' // Round-trips to the database
    {
        custTable.CreditMax = 1000;
        custTable.update(); // Round-trip to the database
    }

    ttsCommit;
}
In a scenario in which 100 CustTable records qualify for the update because the CustGroup field value equals 20, the number of round-trips would be 101 (1 for the select statement and 100 for the update statements). The number of round-trips for the select statement might actually be slightly higher, depending on the number of CustTable records that can be retrieved simultaneously from the database and sent to the AOS.
Theoretically, you could rewrite the code in the preceding example to result in only one round-trip to the database by changing the X++ code, as indicated in the following example. This example shows how to use the set-based update_recordset operator, resulting in a single Transact-SQL UPDATE statement being passed to the database:
static void UpdateCustomers(Args _args)
{
    CustTable custTable;

    ttsBegin;

    update_recordset custTable setting CreditMax = 1000
        where custTable.CustGroup == '20'; // Single round-trip to the database

    ttsCommit;
}
For several reasons, however, using a record buffer for the CustTable table doesn’t result in only one round-trip. The reasons are explained in the following sections about the set-based constructs that the Microsoft Dynamics AX run time supports. These sections also describe features that you can use to ensure a single round-trip to the database, even when you’re using a record buffer for the table.
Important
The set-based operations described in the following sections do not improve performance when used on inMemory temporary tables. The Microsoft Dynamics AX run time always downgrades set-based operations on inMemory temporary tables to record-based operations. This downgrade happens regardless of how the table became a temporary table (whether specified in metadata in the table’s properties, disabled because of the configuration of the Microsoft Dynamics AX application, or explicitly stated in the X++ code that references the table). Also, the downgrade always invokes the doInsert, doUpdate, and doDelete methods on the record buffer, so no application logic in the overridden methods is executed.
A set-based operation such as insert_recordset, update_recordset, or delete_from is not downgraded to a record-based operation on a subtype or supertype table unless a condition that would cause the operation to be downgraded is met. Both an insert_recordset and update_recordset can update or insert all qualifying records into the specified table and all subtype and supertype tables, but not into any derived tables. The delete_from operator is treated differently because it deletes all qualifying records from the current table and its subtype and supertype tables to guarantee that the record is deleted completely from the database. For more information about the conditions that cause a downgrade, review the following sections.
The insert_recordset operator enables the insertion of multiple records into a table in one round-trip to the database. The following X++ code illustrates the use of insert_recordset. The code copies entries for one item in the InventTable table and the InventSum table into a temporary table for future use:
static void CopyItemInfo(Args _args)
{
    InventTable                inventTable;
    InventSum                  inventSum;
    InsertInventTableInventSum insertInventTableInventSum;

    // insert_recordset uses only one round-trip for the copy operation.
    // A record-based insert would need one round-trip per record in InventSum.

    ttsBegin;
    insert_recordset insertInventTableInventSum (ItemId,AltItemId,PhysicalValue,PostedValue)
        select ItemId,AltItemid from inventTable where inventTable.ItemId == '1001'
        join PhysicalValue,PostedValue from inventSum
        where inventSum.ItemId == inventTable.ItemId;
    ttsCommit;
    select count(RecId) from insertInventTableInventSum;
    info(int642str(insertInventTableInventSum.RecId));

    // Additional code to use the copied data.
}
The round-trip to the database involves the execution of three statements in the database:
The select part of the insert_recordset statement executes when the selected rows are inserted into a new temporary table in the database. The syntax of the select statement when executed in Transact-SQL is similar to SELECT <field list> INTO <temporary table> FROM <source tables> WHERE <predicates>.
The records from the temporary table are inserted directly into the target table using syntax such as INSERT INTO <target table> (<field list>) SELECT <field list> FROM <temporary table>.
The temporary table is dropped with the execution of DROP TABLE <temporary table>.
This approach has a tremendous performance advantage over inserting the records one by one, as shown in the following X++ code, which addresses the same scenario:
static void CopyItemInfoLineBased(Args _args)
{
    InventTable                inventTable;
    InventSum                  inventSum;
    InsertInventTableInventSum insertInventTableInventSum;

    ttsBegin;
    while select ItemId,Altitemid from inventTable where inventTable.ItemId == '1001'
        join PhysicalValue,PostedValue from inventSum
        where inventSum.ItemId == inventTable.ItemId
    {
        InsertInventTableInventSum.ItemId        = inventTable.ItemId;
        InsertInventTableInventSum.AltItemId     = inventTable.AltItemId;
        InsertInventTableInventSum.PhysicalValue = inventSum.PhysicalValue;
        InsertInventTableInventSum.PostedValue   = inventSum.PostedValue;
        InsertInventTableInventSum.insert();
    }
    ttsCommit;

    select count(RecId) from insertInventTableInventSum;
    info(int642str(insertInventTableInventSum.RecId));

    // ... Additional code to use the copied data
}
If the InventSum table contains 10 entries for which ItemId equals 1001, this scenario would result in one round-trip for the select statement and an additional 10 round-trips for the inserts, totaling 11 round-trips.
The insert_recordset operation can be downgraded from a set-based operation to a record-based operation if any of the following conditions is true:
The table is cached by using the EntireTable setting.
The insert method or the aosValidateInsert method is overridden on the target table.
Alerts are set to be triggered by inserts into the target table.
The database log is configured to log inserts into the target table.
Record-level security (RLS) is enabled on the target table. If RLS is enabled only on the source table or tables, insert_recordset isn’t downgraded to a row-by-row operation.
The ValidTimeStateFieldType property for a table is not set to None.
The Microsoft Dynamics AX run time automatically handles the downgrade and internally executes a scenario similar to the while select scenario shown in the preceding example.
Important
When the Microsoft Dynamics AX run time checks for overridden methods, it determines only whether the methods are implemented. It doesn’t determine whether the overridden methods contain only the default X++ code. A method is therefore considered to be overridden by the run time even though it contains the following X++ code:
public void insert()
{
    super();
}
Any set-based insert is then downgraded.
Unless a table is cached by using the EntireTable setting, you can avoid the downgrade caused by the other conditions mentioned earlier. The record buffer contains methods that turn off the checks that the run time performs when determining whether to downgrade the insert_recordset operation:
Calling skipDataMethods(true) prevents the check that determines whether the insert method is overridden.
Calling skipAosValidation(true) prevents the check on the aosValidateInsert method.
Calling skipDatabaseLog(true) prevents the check that determines whether the database log is configured to log inserts into the table.
Calling skipEvents(true) prevents the check that determines whether any alerts have been set to be triggered by the insert event on the table.
The following X++ code, which includes the call to skipDataMethods(true), ensures that the insert_recordset operation is not downgraded because the insert method is overridden on the InventSize table:
static void CopyItemInfoskipDataMethod(Args _args)
{
    InventTable                inventTable;
    InventSum                  inventSum;
    InsertInventTableInventSum insertInventTableInventSum;

    ttsBegin;

    // Skip override check on insert.

    insertInventTableInventSum.skipDataMethods(true);
    insert_recordset insertInventTableInventSum (ItemId,AltItemId,PhysicalValue,PostedValue)
        select ItemId,Altitemid from inventTable where inventTable.ItemId == '1001'
        join PhysicalValue,PostedValue from inventSum
        where inventSum.ItemId == inventTable.ItemId;
    ttsCommit;

    select count(RecId) from insertInventTableInventSum;
    info(int642str(insertInventTableInventSum.RecId));

    // ... Additional code to use the copied data
}
Important
Use the skip methods with extreme caution because they can prevent the logic in the insert method from being executed, prevent events from being raised, and potentially, prevent the database log from being written to.
If you override the insert method, use the cross-reference system to determine whether any X++ code calls skipDataMethods(true). If you don’t, the X++ code might fail to execute the insert method. Moreover, when you implement calls to skipDataMethods(true), ensure that data inconsistency will not result if the X++ code in the overridden insert method doesn’t execute.
You can use skip methods only to influence whether the insert_recordset operation is downgraded. If you call skipDataMethods(true) to prevent a downgrade because the insert method is overridden, use the Microsoft Dynamics AX Trace Parser to make sure that the operation has not been downgraded. The operation is downgraded if, for example, the database log is configured to log inserts into the table. In the previous example, the overridden insert method on the InventSize table would be executed if the database log were configured to log inserts into the InventSize table, because the insert_recordset operation would then revert to a while select scenario in which the overridden insert method would be called. For more information about the Trace Parser, see the section Performance monitoring tools later in this chapter.
Since the Microsoft Dynamics AX 2009 release, the insert_recordset operator has supported literals. Support for literals was introduced primarily to support upgrade scenarios in which the target table is populated with records from one or more source tables (using joins) and one or more columns in the target table must be populated with a literal value that doesn’t exist in the source. The following code example illustrates the use of literals in insert_recordset:
static void CopyItemInfoLiteralSample(Args _args)
{
    InventTable                inventTable;
    InventSum                  inventSum;
    InsertInventTableInventSum insertInventTableInventSum;
    boolean                    flag = boolean::true;

    ttsBegin;
    insert_recordset insertInventTableInventSum
(ItemId,AltItemId,PhysicalValue,PostedValue,Flag)
        select ItemId,altitemid from inventTable where inventTable.ItemId == '1001'
        join PhysicalValue,PostedValue,Flag from inventSum
        where inventSum.ItemId == inventTable.ItemId;
    ttsCommit;

    select firstonly ItemId,Flag from insertInventTableInventSum;
    info(strFmt('%1,%2',insertInventTableInventSum.ItemId,insertInventTableInventSum.Flag));
    // ... Additional code to utilize the copied data
}
The behavior of the update_recordset operator is similar to that of the insert_recordset operator. This similarity is illustrated by the following piece of X++ code, in which all rows that have been inserted for one ItemId are updated and flagged for further processing:
static void UpdateCopiedData(Args _args)
{

    InventTable                inventTable;
    InventSum                  inventSum;
    InsertInventTableInventSum insertInventTableInventSum;

    // Code assumes InsertInventTableInventSum is populated.

    // Set-based update operation.
    ttsBegin;
    update_recordSet insertInventTableInventSum setting Flag = true
    where insertInventTableInventSum.ItemId == '1001';
    ttsCommit;
}
The execution of update_recordset results in one statement being passed to the database—which in Transact-SQL uses syntax similar to UPDATE <table> <SET> <field and expression list> WHERE <predicates>. As with insert_recordset, update_recordset provides a tremendous performance improvement over the record-based version that updates each record individually. This improvement is shown in the following X++ code, which serves the same purpose as the preceding example. The code selects all of the records that qualify for update, sets the new description value, and updates the record:
static void UpdateCopiedDataLineBased(Args _args)
{

    InventTable                inventTable;
    InventSum                  inventSum;
    InsertInventTableInventSum insertInventTableInventSum;

    // ... Code assumes InsertInventTableInventSum is populated

    ttsBegin;
    while select forUpdate InsertInventTableInventSum
    where insertInventTableInventSum.ItemId == '1001'
    {
        insertInventTableInventSum.Flag = true;
        insertInventTableInventSum.update();
    }
    ttsCommit;
}
If ten records qualify for the update, one select statement and ten update statements are passed to the database, rather than the single update statement that would be passed with update_recordset.
The update_recordset operation can be downgraded if specific methods are overridden or if Microsoft Dynamics AX is configured in specific ways. The update_recordset operation is downgraded if any of the following conditions is true:
The table is cached by using the EntireTable setting.
The update method, the aosValidateUpdate method, or the aosValidateRead method is overridden on the target table.
Alerts are set up to be triggered by update queries on the target table.
The database log is configured to log update queries on the target table.
RLS is enabled on the target table.
The ValidTimeStateFieldType property for a table is not set to None.
The Microsoft Dynamics AX run time automatically handles the downgrade and internally executes a scenario similar to the while select scenario shown in the earlier example.
As with the insert_recordset operator, you can avoid a downgrade unless the table is cached by using the EntireTable setting. The record buffer contains methods that turn off the checks that the run time performs when determining whether to downgrade the update_recordset operation:
Calling skipDataMethods(true) prevents the check that determines whether the update method is overridden.
Calling skipAosValidation(true) prevents the checks on the aosValidateUpdate and aosValidateRead methods.
Calling skipDatabaseLog(true) prevents the check that determines whether the database log is configured to log updates to records in the table.
Calling skipEvents(true) prevents the check to determine whether any alerts have been set to be triggered by the update event on the table.
As explained earlier, use the skip methods with caution. Again, using the skip methods only influences whether the update_recordset operation is downgraded to a while select operation. If the operation is downgraded, database logging, alerting, and execution of overridden methods occur even though the respective skip methods have been called.
Tip
If an update_recordset operation is downgraded, the select statement uses the concurrency model specified at the table level. You can apply the optimisticlock and pessimisticlock keywords to the update_recordset statements and enforce a specific concurrency model to be used in case of a downgrade.
Microsoft Dynamics AX supports inner and outer joins in update_recordset. The support for joins in update_recordset enables an application to perform set-based operations when the source data is fetched from more than one related data source.
The following example illustrates the use of joins with update_recordset:
static void UpdateCopiedDataJoin(Args _args)
{
    InventTable                inventTable;
    InventSum                  inventSum;
    InsertInventTableInventSum insertInventTableInventSum;

    // ... Code assumes InsertInventTableInventSum is populated
    // Set-based update operation with join.

    ttsBegin;
    update_recordSet insertInventTableInventSum setting Flag = true,
    DiffAvailOrderedPhysical = inventSum.AvailOrdered - inventSum.AvailPhysical
    join InventSum where inventSum.ItemId == insertInventTableInventSum.ItemId &&
    inventSum.AvailOrdered > inventSum.AvailPhysical;
    ttsCommit;
}
The delete_from operator is similar to the insert_recordset and update_recordset operators in that it passes a single statement to the database to delete multiple rows, as shown in the following code:
static void DeleteCopiedData(Args _args)
{
    InventTable                inventTable;
    InventSum                  inventSum;
    InsertInventTableInventSum insertInventTableInventSum;

    // ... Code assumes InsertInventTableInventSum is populated
    // Set-based delete operation

    ttsBegin;
    delete_from insertInventTableInventSum
    where insertInventTableInventSum.ItemId == '1001';
    ttsCommit;
}
This code passes a statement to Microsoft SQL Server in a syntax similar to DELETE <table> WHERE <predicates> and performs the same actions as the following X++ code, which uses record-by-record deletes:
static void DeleteCopiedDataLineBased(Args _args)
{

    InventTable                inventTable;
    InventSum                  inventSum;
    InsertInventTableInventSum insertInventTableInventSum;

    // ... Code assumes InsertInventTableInventSum is populated

    ttsBegin;
    while select forUpdate insertInventTableInventSum
    where insertInventTableInventSum.ItemId == '1001'
    {
        insertInventTableInventSum.delete();
    }
    ttsCommit;
}
Again, the use of delete_from is preferable for performance because a single statement is passed to the database, instead of the multiple statements that the record-by-record version parses.
As with the insert_recordset and update_recordset operations, the delete_from operation can be downgraded—and for similar reasons. A downgrade occurs if any of the following conditions is true:
The table is cached by using the EntireTable setting.
The delete method, the aosValidateDelete method, or the aosValidateRead method is overridden on the target table.
Alerts are set up to be triggered by deletions from the target table.
The database log is configured to log deletions from the target table.
The ValidTimeStateFieldType property for a table is not set to None.
A downgrade also occurs if delete actions are defined on the table. The Microsoft Dynamics AX run time automatically handles the downgrade and internally executes a scenario similar to the while select operation shown in the earlier example.
You can avoid a downgrade caused by these conditions unless the table is cached by using the EntireTable setting. The record buffer contains methods that turn off the checks that the run time performs when determining whether to downgrade the delete_from operation, as follows:
Calling skipDataMethods(true) prevents the check that determines whether the delete method is overridden.
Calling skipAosValidation(true) prevents the checks on the aosValidateDelete and aosValidateRead methods.
Calling skipDatabaseLog(true) prevents the check that determines whether the database log is configured to log the deletion of records in the table.
Calling skipEvents(true) prevents the check that determines whether any alerts have been set to be triggered by the delete event on the table.
The preceding descriptions about the use of the skip methods, the no-skipping behavior in the event of downgrade, and the concurrency model for the update_recordset operator are equally valid for the use of the delete_from operator.
Note
The record buffer also contains a skipDeleteMethod method. Calling the method as skipDeleteMethod(true) has the same effect as calling skipDataMethods(true). It invokes the same Microsoft Dynamics AX run-time logic, so you can use skipDeleteMethod in combination with insert_recordset and update_recordset, although it might not improve the readability of the X++ code.
In addition to the set-based operators, you can use the RecordInsertList and RecordSortedList classes when inserting multiple records into a table. When the records are ready to be inserted, the Microsoft Dynamics AX run time packs multiple records into a single package and sends it to the database. The database then executes an individual insert operation for each record in the package. This process is illustrated in the following example, in which a RecordInsertList object is instantiated, and each record to be inserted into the database is added to the RecordInsertList object. When all records are inserted into the object, the insertDatabase method is called to ensure that all records are inserted into the database.
static void CopyItemInfoRIL(Args _args)
{
    InventTable                      inventTable;
    InventSum                        inventSum;
    InsertInventTableInventSumRT     insertInventTableInventSumRT;
    RecordInsertList                 ril;

    ttsBegin;
    ril = new RecordInsertList(tableNum(InsertInventTableInventSumRT));

    while select ItemId,AltItemid from inventTable where inventTable.ItemId == '1001'
    join PhysicalValue,PostedValue from inventSum
    where inventSum.ItemId == inventTable.ItemId
    {
        insertInventTableInventSumRT.ItemId        = inventTable.ItemId;
        insertInventTableInventSumRT.AltItemId     = inventTable.AltItemId;
        insertInventTableInventSumRT.PhysicalValue = inventSum.PhysicalValue;
        insertInventTableInventSumRT.PostedValue   = inventSum.PostedValue;
        // Insert records if package is full
        ril.add(insertInventTableInventSumRT);
    }

    // Insert remaining records into database

    ril.insertDatabase();
    ttsCommit;

    select count(RecId) from insertInventTableInventSumRT;
    info(int642str(insertInventTableInventSumRT.RecId));

    // Additional code to use the copied data.
}
Based on the maximum buffer size that is configured for the server, the Microsoft Dynamics AX run time determines the number of records in a buffer as a function of the size of the records and the buffer size. If the buffer is full, the records in the RecordInsertList object are packed, passed to the database, and inserted individually on the database tier. This check is made when the add method is called. When the insertDatabase method is called from application logic, the remaining records are inserted with the same mechanism.
Using these classes has an advantage over using while select: fewer round-trips are made from the AOS to the database because multiple records are sent simultaneously. However, the number of INSERT statements in the database remains the same.
Note
Because the timing of insertion into the database depends on the size of the record buffer and the package, don’t expect a record to be selectable from the database until the insertDatabase method has been called.
You can rewrite the preceding example by using the RecordSortedList class instead of RecordInsertList, as shown in the following X++ code:
public static server void CopyItemInfoRSL()
{
    InventTable                  inventTable;
    InventSum                    inventSum;
    InsertInventTableInventSumRT insertInventTableInventSumRT;
    RecordSortedList             rsl;

    ttsBegin;
    rsl = new RecordSortedList(tableNum(InsertInventTableInventSumRT));
    rsl.sortOrder(fieldNum(InsertInventTableInventSumRT,PostedValue));

    while select ItemId,AltItemid from inventTable where inventTable.ItemId == '1001'
    join PhysicalValue,PostedValue from inventSum
    where inventSum.ItemId == inventTable.ItemId
    {
        insertInventTableInventSumRT.ItemId        = inventTable.itemId;
        insertInventTableInventSumRT.AltItemId     = inventTable.AltItemId;
        insertInventTableInventSumRT.PhysicalValue = inventSum.PhysicalValue;
        insertInventTableInventSumRT.PostedValue   = inventSum.PostedValue;

        //No records will be inserted.
        rsl.ins(insertInventTableInventSumRT);
    }

    //All records are inserted in database.
    rsl.insertDatabase();
    ttsCommit;

    select count(RecId) from insertInventTableInventSumRT;
    info(int642str(insertInventTableInventSumRT.RecId));

    // Additional code to utilize the copied data
}
When the application logic uses a RecordSortedList object, the records aren’t passed and inserted in the database until the insertDatabase method is called.
Both RecordInsertList objects and RecordSortedList objects can be downgraded in application logic to record-by-record inserts, in which each record is sent in a separate round-trip to the database and the INSERT statement is subsequently executed. A downgrade occurs if the insert method or the aosValidateInsert method is overridden, or if the table contains fields of the type container or memo. However, no downgrade occurs if the database log is configured to log inserts or alerts that are set to be triggered by the insert event on the table. One exception is if logging or alerts have been configured and the table contains CreatedDateTime or ModifiedDateTime columns—in this case, record-by-record inserts are performed. The database logging and alerts occur on a record-by-record basis after the records have been sent and inserted into the database.
When instantiating the RecordInsertList object, you can specify that the insert and aosValidateInsert methods be skipped. You can also specify that the database logging and eventing be skipped if the operation isn’t downgraded.
Often, code is not transferred to a set-based operation because the logic is too complex. However, an if condition, for example, can be placed in the where clause of a query. If you have a scenario that requires an if/else decision, you can achieve this with two queries, such as two update_recordsets. Necessary information from other tables can be obtained through joins instead of being looked up in a find operation. In Microsoft Dynamics AX 2012 insert_recordset and TempDB temporary tables help to extend the possibilities of transferring code into set-based operations.
Some things still might seem difficult to transfer to a set-based operation, such as performing calculations on the columns in a select statement. For this reason, Microsoft Dynamics AX 2012 offers a feature for views that is called computed columns, and you can use this feature to transfer even fairly complex logic into set-based operations. Computed columns can also provide performance advantages when used as an alternative to display methods on read-only data sources. Imagine the following task: Find all customers who bought products for more than $100,000 and all customers who bought products for more than $1,000,000. Those customers are treated as VIP customers who then get certain rebates.
In earlier versions of Microsoft Dynamics AX, the X++ code to set these values would have looked like the following example:
public static server void demoOld()
{
    SalesLine  sl;
    CustTable  ct;
    vipparm    vp;
    int64      total;

    vp = vipparm::find();
    ttsBegin;

    // One + n round-trips per Customer Account in the salesline table.
    while select CustAccount, sum(SalesQty), sum(SalesPrice) from sl group by sl.CustAccount
    {

    // Necessary to select for update causing n additional round-trips.
    ct = CustTable::find(sl.CustAccount,true);
    ct.VIPStatus = 0;

        if((sl.SalesQty*sl.SalesPrice)>=vp.UltimateVIP)
            ct.VIPStatus = 2;
        else if((sl.SalesQty*sl.SalesPrice)>=vp.VIP)
            ct.VIPStatus = 1;

     // Another n round-trips for the update.
        if(ct.VIPStatus != 0)
            ct.update();
    }
    ttsCommit;
}
You could replace this code easily with two direct Transact-SQL statements to make it far more effective. The direct Transact-SQL statements would look like the following:
UPDATE CUSTTABLE SET VIPSTATUS = 2 FROM (SELECT CUSTACCOUNT,SUM(SALESQTY)*SUM(SALESPRICE) AS
TOTAL,VIPSSTATUS = CASE
 WHEN SUM(SALESQTY)*SUM(SALESPRICE) > 1000000 THEN 2
 WHEN SUM(SALESQTY)*SUM(SALESPRICE) > 100000  THEN 1
 ELSE 0 END
 FROM SALESLINE GROUP BY CUSTACCOUNT) AS VC WHERE VC.VIPSTATUS = 2 and CUSTTABLE.ACCOUNTNUM =
VC.CUSTACCOUNT and DATAAREAID = N'CEU'
Note
This code contains only a partial dataAreaId and no Partition field, which highlights its weaknesses. The data access logic is not enforced.
In Microsoft Dynamics AX 2012, with the help of computed columns, you can replace this code with two set-based statements.
To create these statements, you first need to create an AOT query because views themselves cannot contain a group by statement. Further, you need a parameter table that holds the information about who counts as a VIP customer for each company (Figure 13-4). Then, you need to join this information together so that it is available at run time.
The code for the computed column is shown here:
private static server str compColQtyPrice()
{
    str sReturn,sQty,sPrice,ultimateVIP,VIP;
    Map m = new Map(Types::String,Types::String);
    sQty        = SysComputedColumn::returnField(tableStr(mySalesLineView),
                                                 identifierStr(SalesLine_1),
                                                 fieldStr(SalesLine,SalesQty));
    sPrice      = SysComputedColumn::returnField(tableStr(mySalesLineView),
                                                 identifierStr(SalesLine_1),
                                                 fieldStr(SalesLine,SalesPrice));
    ultimateVIP = SysComputedColumn::returnField(tableStr(mySalesLineView),
                                                 identifierStr(Vipparm_1),
                                                 fieldStr(vipparm,ultimateVIP));
    VIP         = SysComputedColumn::returnField(tableStr(mySalesLineView),
                                                 identifierStr(Vipparm_1),
                                                 fieldStr(vipparm,VIP));
    m.insert(SysComputedColumn::sum(sQty)+'*'+SysComputedColumn::sum(sPrice)+
             ' > '+ultimateVIP,int2str(VipStatus::UltimateVIP));
    m.insert(SysComputedColumn::sum(sQty)+'*'+SysComputedColumn::sum(sPrice)+
             ' > '+VIP ,int2str(VipStatus::VIP));
    return SysComputedColumn::switch('',m,'0'),
}
The next step is to add the parameter table to a view and create the necessary computed column, as shown in Figure 13-5.

The view in SQL Server looks like this:
SELECT T1.CUSTACCOUNT AS CUSTACCOUNT,T1.DATAAREAID AS DATAAREAID,1010 AS RECID,T2.DATAAREA
ID
AS DATAAREAID#2,T2.VIP AS VIP,T2.ULTIMATEVIP AS ULTIMATEVIP,(CAST ((CASE  WHEN SUM(T1.
SALESQTY)*SUM(T1.SALESPRICE) > T2.ULTIMATEVIP THEN 2 WHEN SUM(T1.SALESQTY)*SUM(T1.SALES
PRICE) >
T2.VIP THEN 1 ELSE 0 END) AS NVARCHAR(10))) AS VIPSTATUS FROM SALESLINE T1 CROSS JOIN VIPP
ARM T2
GROUP BY T1.CUSTACCOUNT,T1.DATAAREAID,T2.DATAAREAID,T2.VIP,T2.ULTIMATEVIP
Now you can change the record-based update code used earlier to effective, working set-based code:
public static server void demoNew()
{
    mySalesLineView mySLV;
    CustTable       ct;
    ct.skipDataMethods(true);
    update_recordSet ct setting VipStatus = VipStatus::UltimateVIP
    join mySLV where ct.AccountNum == mySLV.CustAccount &&
    mySLV.VipStatus == int2str(enum2int(vipstatus::UltimateVIP));
    update_recordSet ct setting VipStatus = VipStatus::VIP
    join mySLV where ct.AccountNum == mySLV.CustAccount &&
    mySLV.VipStatus == int2str(enum2int(vipstatus::VIP));
}
Executing the code shows the difference in timing:
public static void main(Args _args)
{
    int tickcnt;
    DemoClass::resetCusttable();
    tickcnt = WinAPI::getTickCount();
    DemoClass::demoOld();
    info('Line based' + int2str(WinAPI::getTickCount()-tickcnt));
    DemoClass::resetCusttable();
    tickcnt = WinAPI::getTickCount();
    DemoClass::demoNew();
    info('Set based' + int2str(WinAPI::getTickCount()-tickcnt));
}
The execution time of the operation is as follows:
Record-based 1,514 milliseconds
Set-based 171 milliseconds
Note that this code ran on demo data. Imagine running similar code on an actual database with hundreds of thousands of sales orders and customers.
Another example that might seem tricky to transfer to a set-based operation is if you need to use aggregation and group by in queries, because the update_recordset operator does not support this. You can work around this issue by using TempDB temporary tables and a combination of insert_recordset and update_recordset.
Note
The amount of data that you need to modify determines whether this pattern is beneficial. For example, if you just want to update 10 rows, a while select statement might be more efficient. But if you are updating hundreds or thousands of rows, this pattern can be more efficient. You’ll need to evaluate and test each pattern individually to determine which one provides better performance.
The following example first populates a table and then updates the values in it based on a group by and sum operations in a statement. Note that deleting and populating the data takes longer than the actual execution of the later insert_recordset and update_recordset statements.
public static server void PopulateTable()
{
    MyUpdRecordsetTestTable MyUpdRecordsetTestTable;
    int myGrouping,myKey,mySum;
    RecordInsertList   ril = new RecordInsertList(tablenum(MyUpdRecordsetTestTable));

    delete_from MyUpdRecordsetTestTable;

    for(myKey=0;myKey<=100000;myKey++)
    {
        MyUpdRecordsetTestTable.Key     = myKey;
        if(myKey mod 10 == 0)
        {
          myGrouping += 10;
          mySum     += 10;
        }
        MyUpdRecordsetTestTable.fieldForGrouping    = myGrouping;
        MyUpdRecordsetTestTable.theSum              = mySum;
        ril.add(MyUpdRecordsetTestTable);
    }
    ril.insertDatabase();
}
Combine TempDB temporary tables, insert_recordset, and update_recordset to update the table:
public static void InsertAndUpdate()
{
    MyUpdRecordsetTestTable MyUpdRecordsetTestTable;
    MyUpdRecordsetTestTableTmp MyUpdRecordsetTestTableTmp;
    int tc;

    tc = WinAPI::getTickCount();
    insert_recordset MyUpdRecordsetTestTableTmp(fieldForGrouping,theSum)
    select fieldForGrouping,sum(theSum) from MyUpdRecordsetTestTable
    Group by MyUpdRecordsetTestTable.fieldForGrouping;
    info("Time needed: " + int2str(WinAPI::getTickCount()-tc));

    tc = WinAPI::getTickCount();
    update_recordSet MyUpdRecordsetTestTable setting theSum = MyUpdRecordsetTestTableTmp.t
heSum
    join MyUpdRecordsetTestTableTmp
    where MyUpdRecordsetTestTable.fieldForGrouping == MyUpdRecordsetTestTableTmp.
fieldForGrouping;
    info("Time needed: " + int2str(WinAPI::getTickCount()-tc));
}
When this code ran on demo data, the execution time of the operation was as follows:
insert_recordset statement 1,685 milliseconds
update_recordset statement 3,697 milliseconds
In multiple scenarios in Microsoft Dynamics AX, the execution of some application logic involves manipulating multiple rows from the same table. Some scenarios require that all rows be manipulated within the scope of a single transaction. In such a scenario, if something fails and the transaction is cancelled, all modifications are rolled back, and the job can be restarted manually or automatically. Other scenarios commit the changes on a record-by-record basis. In the case of failure in these scenarios, only the changes to the current record are rolled back, and all previously manipulated records are committed. When a job is restarted in this scenario, it starts where it left off by skipping the records that have already changed.
An example of the first scenario is shown in the following code, in which all update queries to records in the CustTable table are wrapped into the scope of a single transaction:
static void UpdateCreditMax(Args _args)
{
    CustTable   custTable;

    ttsBegin;
    while select forupdate custTable where custTable.CreditMax == 0
    {
        if (custTable.balanceMST() < 10000)
        {
            custTable.CreditMax = 50000;
            custTable.update();
        }
    }
    ttsCommit;
}
An example of the second scenario, executing the same logic, is shown in the following code, in which the transaction scope is handled on a record-by-record basis. You must reselect each individual CustTable record inside the transaction for the Microsoft Dynamics AX run time to allow the record to be updated:
static void UpdateCreditMax(Args _args)
{
    CustTable   custTable;
    CustTable   updateableCustTable;

    while select custTable where custTable.CreditMax == 0
    {
        if (custTable.balanceMST() < 10000)
        {
            ttsBegin;
            select forupdate updateableCustTable
                where updateableCustTable.AccountNum == custTable.AccountNum;

            updateableCustTable.CreditMax = 50000;
            updateableCustTable.update();
            ttsCommit;
        }
    }
}
In a scenario in which 100 CustTable records qualify for the update, the first example would involve 1 select statement and 100 update statements being passed to the database, and the second example would involve 1 large select query and 100 additional select queries, plus the 100 update statements. The code in the first scenario would execute faster than the code in the second, but the first scenario would also hold the locks on the updated CustTable records longer because they wouldn’t be committed on a record-by-record basis. The second example demonstrates superior concurrency over the first example because locks are held for a shorter time.
With the optimistic concurrency model in Microsoft Dynamics AX, you can take advantage of the benefits offered by both of the preceding examples. You can select records outside a transaction scope and update records inside a transaction scope—but only if the records are selected optimistically. In the following example, the optimisticlock keyword is applied to the select statement while maintaining a per-record transaction scope. Because the records are selected with the optimisticlock keyword, it isn’t necessary to reselect each record individually within the transaction scope.
static void UpdateCreditMax(Args _args)
{
    CustTable   custTable;

    while select optimisticlock custTable where custTable.CreditMax == 0
    {
        if (custTable.balanceMST() < 10000)
        {
            ttsBegin;
            custTable.CreditMax = 50000;
            custTable.update();
            ttsCommit;
        }
    }
}
This approach provides the same number of statements passed to the database as in the first example, but with the improved concurrency from the second example because records are committed individually. The code in this example still doesn’t perform as fast as the code in the first example because it has the extra burden of per-record transaction management. You could optimize the example even further by committing records on a scale somewhere between all records and the single record, without decreasing the concurrency considerably. However, the appropriate choice for commit frequency always depends on the circumstances of the job.
Tip
You can use the forupdate keyword when selecting records outside the transaction if the table has been enabled for optimistic concurrency at the table level. The best practice, however, is to use the optimisticlock keyword explicitly because the scenario won’t fail if the table-level setting is changed. Using the optimisticlock keyword also improves the readability of the X++ code because the explicit intention of the developer is stated in the code.
The Microsoft Dynamics AX run time supports both single-record and set-based record caching. You can enable set-based caching in metadata by switching a property on a table definition or writing explicit X++ code that instantiates a cache. Regardless of how you set up caching, you don’t need to know which caching method is used because the run time handles the cache transparently. To optimize the use of the cache, however, you must understand how each caching mechanism works.
Microsoft Dynamics AX 2012 introduces some important new features for caching. For example, record-based caching works not only for a single record but for joins as well. This mechanism is described in the Record caching section, which follows next. Also, even if range operations are used in a query, caching is supported so long as the query contains a unique key lookup.
The Microsoft Dynamics AX 2012 software development kit (SDK) contains a good description of the individual caching options and how they are set up. See the topic “Record Caching” at http://msdn.microsoft.com/en-us/library/bb278240.aspx.
This section focuses on how the caches are implemented in the Microsoft Dynamics AX run time and what to expect when using specific caching mechanisms.
You can set up three types of record caching on a table by setting the CacheLookup property on the table definition: Found, FoundAndEmpty, and NotInTTS. An additional value (besides None) is EntireTable—a set-based caching option. These settings were introduced briefly in the section Caching and indexing, earlier in this chapter, and are discussed in greater detail in this section.
The three types of record caching are fundamentally the same. The differences are found in what is cached and when cached values are flushed. For example, the Found and FoundAndEmpty caches are preserved across transaction boundaries, but a table that uses the NotInTTS cache doesn’t use the cache when the cache is first accessed inside a transaction scope. Instead, the cache is used in consecutive select statements unless a forupdate keyword is applied to the select statement. (The forupdate keyword forces the run time to look up the record in the database because the previously cached record wasn’t selected with the forupdate keyword applied.)
The following X++ code example illustrates when the cache is used inside a transaction scope when a table uses the NotInTTS caching mechanism. The AccountNum field is the primary key. The code comments indicate when the cache is used. In the example, the first two select statements after the ttsbegin command don’t use the cache. The first statement doesn’t use the cache because it’s the first statement inside the transaction scope; the second doesn’t use the cache because the forupdate keyword is applied to the statement.
static void NotInTTSCache(Args _args)
{
    CustTable custTable;

    select custTable                          // Look up in cache. If record
        where custTable.AccountNum == '1101'; // does not exist, look up
                                              // in database.

    ttsBegin;                                 // Start transaction.

    select custTable                          // Cache is invalid. Look up in
        where custTable.AccountNum == '1101'; // database and place in cache.

    select forupdate custTable                // Look up in database because
        where custTable.AccountNum == '1101'; // forupdate keyword is applied.

    select custTable                          // Cache will be used.
        where custTable.AccountNum == '1101'; // No lookup in database.

    select forupdate custTable                // Cache will be used because
        where custTable.AccountNum == '1101'; // forupdate keyword was used
                                              // previously.

    ttsCommit;                                // End transaction.

    select custTable                          // Cache will be used.
        where custTable.AccountNum == '1101';
}
If the table in the preceding example had been set up with Found or FoundAndEmpty caching, the cache would have been used when the first select statement was executed inside the transaction, but not when the first select forupdate statement was executed.
Note
By default, all Microsoft Dynamics AX system tables are set up using a Found cache. This cannot be changed.
For all three caching mechanisms, the cache is used only if the select statement contains equal-to (==) predicates in the where clause that exactly match all of the fields in the primary index of the table or any one of the unique indexes that is defined for the table. Therefore, the PrimaryIndex property on the table must be set correctly on one of the unique indexes that is used when accessing the cache from application logic. For all other unique indexes, without any additional settings in metadata, the kernel automatically uses the cache if it is already present.
The following X++ code examples show when the Microsoft Dynamics AX run time will try to use the cache. The cache is used only in the first select statement; the remaining three statements don’t match the fields in the primary index, so instead, the statements perform lookups in the database.
static void UtilizeCache(Args _args)
{
    CustTable custTable;

    select custTable                                     // Will use cache because only
        where custTable.AccountNum == '1101';            // the primary key is used as
                                                         // predicate.

    select custTable;                                    // Cannot use cache because no
                                                         // "where" clause exists.

    select custTable                                     // Cannot use cache because
        where custTable.AccountNum > '1101';             // equal-to (==) is not used.

    select custTable                                     // Will use cache even if
        where custTable.AccountNum == '1101'             // where clause contains more
        &&    custTable.CustGroup  == '20';              // predicates than the primary
                                                         // key. This assumes that the rec
ord
                                                         // have been successfully cached
                                                         // before. Please see the next sa
mple.
}
Note
The RecId index, which is always unique on a table, can be set as the PrimaryIndex in the table’s properties. You can therefore set up caching by using the RecId field.
The following example illustrates how the improved caching mechanics in Microsoft Dynamics AX 2012 work when the where clause of the query contains more than just the unique index key columns:
static void whenRecordDoesGetCached(Args _args)
{
    CustTable custTable,custTable2;

    // Using Contoso demo data
    // The following select statement will not cache using the found cache because the loo
kup
    // will not return a record.
    // It would cache the record if the cache setting was FoundAndEmpty.

    select custTable
        where custTable.AccountNum == '1101'
        &&    custTable.CustGroup  == '20';

    // Following query will cache the record.

    select custTable
        where custTable.AccountNum == '1101';

    // Following will be cached too as the lookup will return a record.

    select custTable2
        where custTable2.AccountNum == '1101'
        &&    custTable2.CustGroup  == '10';

        // If you rerun the job, everything will come from the cache.
}
The following X++ code example shows how unique index caching works in the Microsoft Dynamics AX run time. The InventDim table in the base application has InventDimId as the primary key and a combination of keys (inventBatchId, wmsLocationId, wmsPalletId, inventSerialId, inventLocationId, configId, inventSizeId, inventColorId, and inventSiteId) as the unique index on the table.
Note
This sample is based on Microsoft Dynamics AX 2012. The index has been changed for Microsoft Dynamics AX 2012 R2.
static void UtilizeUniqueIndexCache(Args _args)
{
    InventDim InventDim;
    InventDim inventdim2;

    select firstonly * from inventdim2;

    // Will use the cache because only the primary key is used as predicate

    select inventDim
    where inventDim.InventDimId == inventdim2.InventDimId;
    info(enum2str(inventDim.wasCached()));

    // Will use the cache because the column list in the where clause matches that of a un
ique
    // index
    // for the InventDim table and the key values point to same record as the primary key
 fetch

    select inventDim
     where inventDim.inventBatchId == inventDim2.inventBatchId
     && inventDim.wmsLocationId    == inventDim2.wmsLocationId
     && inventDim.wmsPalletId      == inventDim2.wmsPalletId
     && inventDim.inventSerialId   == inventDim2.inventSerialId
     && inventDim.inventLocationId == inventDim2.inventLocationId
     && inventDim.ConfigId         == inventDim2.ConfigId
     && inventDim.inventSizeId     == inventDim2.inventSizeId
     && inventDim.inventColorId    == inventDim2.inventColorId
     && inventDim.inventSiteId     == inventDim2.inventSiteId;
    info(enum2str(inventDim.wasCached()));

    // Cannot use cache because the where clause does not match the unique key list or pri
mary
    // key.

    select firstonly inventDim
    where inventDim.inventLocationId== inventDim2.inventLocationId
     && inventDim.ConfigId          == inventDim2.ConfigId
     && inventDim.inventSiteId      == inventDim2.inventSiteId;
    info(enum2str(inventDim.wasCached()));
}
The Microsoft Dynamics AX run time ensures that all fields in a record are selected before they are cached. Therefore, if the run time can’t find the record in the cache, it always modifies the field list to include all fields in the table before submitting the SELECT statement to the database. The following X++ code illustrates this behavior:
static void expandingFieldList(Args _args)
{
    CustTable custTable;

    select CreditRating  // The field list will be expanded to all fields.
        from custTable
        where custTable.AccountNum == '1101';
}
Expanding the field list ensures that the record fetched from the database contains values for all fields before the record is inserted into the cache. Even though the performance when fetching all fields is inferior compared to the performance when fetching a few fields, this approach is acceptable because in subsequent use of the cache, the performance gain outweighs the initial loss of populating it.
Tip
You can avoid using the cache by calling the disableCache method on the record buffer with a Boolean parameter of true. This method forces the run time to look up the record in the database, and it also prevents the run time from expanding the field list.
The Microsoft Dynamics AX run time creates and uses caches on both the client tier and the server tier. The client-side cache is local to the Microsoft Dynamics AX client, and the server-side cache is shared among all connections to the server, including connections coming from Microsoft Dynamics AX Windows clients, web clients, the .NET Business Connector, and any other connection.
The cache that is used depends on the tier that the lookup is made from. If the lookup is executed on the server tier, the server-side cache is used. If the lookup is executed on the client tier, the client first looks in the client-side cache. If no record is found in the client-side cache, it executes a lookup in the server-side cache. If no record is found, a lookup is made in the database. When the database returns the record to the server and sends it on to the client, the record is inserted into both the server-side cache and the client-side cache.
If caching was set in Microsoft Dynamics AX 2009, the client stored up to 100 records per table, and the AOS stored up to 2,000 records per table. In Microsoft Dynamics AX 2012, you can configure the cache by using the Server Configuration form (System Administration > Setup > Server Configuration). For more information, see the section Performance configuration options later in this chapter.
Scenarios that perform multiple lookups on the same records and expect to find results in the cache can suffer performance degradation if the cache is continuously full—not only because records won’t be found in the cache because they were removed based on the aging scheme, forcing a lookup in the database, but also because of the constant scanning of the tree to remove the oldest records. The following X++ code shows an example in which all SalesTable records are iterated through twice: each loop looks up the associated CustTable record. If this X++ code were executed on the server and the number of lookups for CustTable records was more than 2,000 (assuming that the cache was set to 2,000 records on the server), the oldest records would be removed from the cache and the cache would no longer contain all CustTable records when the first loop ended. When the code iterates through the SalesTable records again, the records might not be in the cache, and the run time would go to the database to look up the CustTable records. The scenario, therefore, would perform much better with fewer than 2,000 records in the database.
static void AgingScheme(Args _args)
{
    SalesTable salesTable;
    CustTable  custTable;

    while select salesTable order by CustAccount
    {
        select custTable         // Fill up cache.
            where custTable.AccountNum == salesTable.CustAccount;

        // More code here.
    }

    while select salesTable order by CustAccount
    {
        select custTable         // Record might not be in cache.
            where custTable.AccountNum == salesTable.CustAccount;

        // More code here.
    }

}
Important
Test performance improvements of record caching only on a database where the database size and data distribution resemble the production environment. (The arguments have been presented in the previous example.)
Before the Microsoft Dynamics AX run time searches for, inserts, updates, or deletes records in the cache, it places a mutually exclusive lock that isn’t released until the operation is complete. This lock means that two processes running on the same server can’t perform insert, update, or delete operations in the cache at the same time. Only one process can hold the lock at any given time, and the remaining processes are blocked. Blocking occurs only when the run time accesses the server-side cache. So although the caching possibilities supported by the run time are useful, you should use them only when appropriate. If you can reuse a record buffer that is already fetched, you should do so. The following X++ code shows the same record fetched multiple times. The subsequent fetch operations use the cache, even though it could have used the first fetched record buffer.
static void ReuseRecordBuffer(Args _args)
{
    CustTable    custTable;
    CurrencyCode myCustCurrency;
    CustGroupId  myCustGroupId;
    PaymTermId   myCustPaymTermId;

    // Bad coding pattern

    myCustGroupId = custTable::find('1101').CustGroup;
    myCustPaymTermId = custTable::find('1101').PaymTermId;
    myCustCurrency = custTable::find('1101').Currency;

    // The cache will be used for these lookups, but it is much more
    // efficient to reuse the buffer, because even cache lookups are not "free."
    // Good coding pattern:

    custTable        = CustTable::find('1101'),
    myCustGroupId    = custTable.CustGroup;
    myCustPaymTermId = custTable.PaymTermId;
    myCustCurrency   = custTable.Currency;
}
The unique index join cache is new to Microsoft Dynamics AX 2012 and allows caching of subtype and supertype tables, one-to-one relation joins with a unique lookup, or a combination of both. A key constraint with this type of cache is that you can look up only one record through a unique index and you can join only over unique columns.
The following example illustrates all three possible variations:
public static void main(Args args)
{
    SalesTable      header;
    SalesLine       line;
    DirPartyTable   party;
    CustTable       customer;
    int             i;

        // subtype, supertype table caching

        for (i=0 ; i<1000; i++)
            select party where party.RecId == 5637144829;

        // 1:1 join data caching

        for (i=0 ; i<1000; i++)
            select line
            join header
            where line.RecId == 5637144586
               && line.SalesId == header.SalesId;

        // Combination of subtype, supertype, and 1:1 join caching

        for (i=0 ; i<1000; i++)
            select customer
            join party
            where customer.AccountNum == '4000'
               && customer.Party == party.RecId;
}In addition to using the three caching methods described so far—Found, FoundAndEmpty, and NotInTTS—you can set a fourth caching option, EntireTable, on a table. EntireTable enables a set-based cache. It causes the AOS to mirror the table in the database by selecting all records in the table and inserting them into a temporary table when any record from the table is selected for the first time. The first process to read from the table can therefore experience a longer response time because the run time reads all records from the database. Subsequent select queries then read from the EntireTable cache instead of from the database.
A temporary table is usually local to the process that uses it, but the EntireTable cache is shared among all processes that access the same AOS. Each company (as defined by the DataAreaId field) has an EntireTable cache, so two processes requesting records from the same table but from different companies use different caches, and both could experience a longer response time to instantiate the entire-table cache.
The EntireTable cache is a server-side cache only. When the run time requests records from the client tier on a table that is EntireTable cached, the table behaves like a Found cached table. If a request for a record is made on the client tier that qualifies for searching the record cache, the client first searches the local Found cache. If the record isn’t found, the client calls the AOS to search the EntireTable cache. When the run time returns the record to the client tier, it inserts the record into the client-side Found cache. The EntireTable cache on the server side uses a Found cache in addition when unique key lookups are made.
The EntireTable cache isn’t used in the execution of a select statement that joins a table that is EntireTable cached to a table that isn’t EntireTable cached. In this situation, the select statement is passed to the database. However, when select statements are made that access only a single table that is EntireTable cached, or when joining other tables that are EntireTable cached, the EntireTable cache is used.
The Microsoft Dynamics AX run time flushes the EntireTable cache when records are inserted, updated, or deleted in the table. The next process that selects records from the table suffers degraded performance because it must reread the entire table into the cache. In addition to flushing its own cache, the AOS that executes the insert, update, or delete also informs other AOS instances in the same installation that they must flush their caches of the same table. This prevents old and invalid data from being cached for too long. In addition to this flushing mechanism, the AOS flushes all EntireTable caches every 24 hours.
Because of the flushing that results when modifying records in a table that has been EntireTable cached, avoid setting up EntireTable caches on frequently updated tables. Rereading all records into the cache results in a performance loss, which could outweigh the performance gain achieved by caching records on the server tier and avoiding round-trips to the database tier. You can overwrite the EntireTable cache setting on a specific table at run time when you configure Microsoft Dynamics AX.
Even if the records in a table are fairly static, you might achieve better performance by not using an EntireTable cache if the table has a large number of records. Because an EntireTable cache uses temporary tables, it changes from an in-memory structure to a file-based structure when the table uses more than 128 kilobytes (KB) of memory. This results in performance degradation during record searches. The database search engines have also evolved over time and are faster than the ones implemented in the Microsoft Dynamics AX run time. It might be faster to let the database search for the records than to set up and use an EntireTable cache, even though a database search involves round-trips to the database tier. In Microsoft Dynamics AX 2012, you can configure the amount of memory an entire table can consume before it changes to a file-based structure. To do so, go to System Administration > Setup > System > Server Configuration.
A RecordViewCache object is implemented as a linked list that allows only a sequential search for records. When you use the cache to store a large number of records, search performance is degraded because of this linked-list format. Therefore, you should not use it to cache more than 100 records. Weigh the use of the cache against the extra time spent fetching the records from the database, which uses a more optimal search algorithm. In particular, consider the time required when you search for only a subset of records; the Microsoft Dynamics AX run time must continuously match each record in the cache against the more granular where clause in the select statement because no indexing is available for the records in the cache.
You can use the RecordViewCache class to establish a set-based cache from X++ code. You initiate the cache by writing the following X++ code:
select nofetch custTrans where custTrans.accountNum == '1101';
recordViewCache = new RecordViewCache(custTrans);
The records to cache are described in the select statement, which must include the nofetch keyword to prevent the selection of the records from the database. The records are selected when the RecordViewCache object is instantiated with the record buffer passed as a parameter. Until the RecordViewCache object is destroyed, select statements will execute on the cache if they match the where clause defined when the cache was instantiated. The following X++ code shows how to instantiate and use the cache:
public static void main(Args _args)
{
    InventTrans     inventTrans;
    RecordViewCache recordViewCache;
    int countNone, countSold, countOrder;

    // Define records to cache.

    select nofetch inventTrans
       where inventTrans.ItemId == '1001';

    // Cache the records.

    recordViewCache = new RecordViewCache(InventTrans);

    // Use the cache.

    while select inventTrans
        index hint ItemIdx
        where inventTrans.ItemId == '1001' && inventTrans.StatusIssue == StatusIss
ue::OnOrder
    {
        countOrder++;

        //Additional code here

    }

    // This block of code needs to be executed only after the first while select statement
 and
    // before the second while select statement.

    // Additonal code here

    // Uses the cache again.

    while select  inventTrans
        index hint ItemIdx
        where inventTrans.ItemId == '1001' && inventTrans.StatusIssue == StatusIssue::Sold
    {
        countSold++;
        //Additional code here
    }
    info('OnOrder Vs Sold = '+int2str(countOrder) + ' : ' + int2str(countSold));
}
The cache can be instantiated only on the server tier. The select statement can contain only equal-to (==) predicates in the where clause and is accessible only by the process instantiating the cache object. If the table buffer used for instantiating the cache object is a temporary table or if it uses EntireTable caching, the RecordViewCache object isn’t instantiated.
If the table that is cached in the RecordViewCache object is also cached on a per-record basis, the run time can use both caches. If a select statement is executed on a Found cached table and the select statement qualifies for lookup in the Found cache, the run time performs a lookup in this cache first. If no record is found and the select statement also qualifies for lookup in the RecordViewCache object, the run time uses the RecordViewCache object and updates the Found cache after retrieving the record.
Inserts, updates, and deletions of records that meet the cache criteria are reflected in the cache at the same time that the data manipulation language (DML) statements are sent to the database. Records in the cache are always inserted at the end of the linked list. A hazard associated with this behavior is that an infinite loop can occur when application logic iterates through the records in the cache and at the same time inserts new records that meet the cache criteria.
Changes to records in a RecordViewCache object can’t be rolled back. If one or more RecordViewCache objects exist, if the ttsabort operation executes, or if an error is thrown that results in a rollback of the database, the RecordViewCache objects still contain the same information. Therefore, any instantiated RecordViewCache object that is subject to modification by application logic should not have a lifetime longer than the transaction scope in which it is modified. The RecordViewCache object must be declared in a method that isn’t executed until after the transaction has begun. In the event of a rollback, the object and the cache are both destroyed.
Microsoft Dynamics AX 2012 provides two mechanisms that you can use to cache global variables to improve performance: SysGlobalObjectCache (SGOC) and SysGlobalCache. SGOC is new for Microsoft Dynamics AX 2012 and is an important performance feature.
SGOC is a global cache that is located on the AOS, and not just a session-based cache. You can use this cache to reduce round-trips to the database or to store intermediate calculation results. The data that is stored from one user connection is available for all users. For more information about the SGOC, see the entry “Using SysGlobalObjectCache (SGOC) and understanding its performance implications” on the Microsoft Dynamics AX Performance Team blog (http://blogs.msdn.com/b/axperf/archive/2011/12/29/using-sysglobalobjectcache-sgoc-and-understanding-it-s-performance-implications.aspx).
SysGlobalCache uses a map to save information that is purely session-based. However, there are certain client/server considerations if you use this form of caching. If you use SysGlobalCache by means of the ClassFactory class, global variables can exist either on the client or on the server. If you use SysGlobalCache directly, it runs on the tier from which it is called. If you use SysGlobalCache by means of the Info class or the Application class, it resides on both tiers, causing a performance penalty because of increased round-trips between the client and server. For more information, see “Using Global Variables” at http://msdn.microsoft.com/en-us/library/aa891830.aspx.
Most X++ select statements in Microsoft Dynamics AX retrieve all fields for a record, even though only a few of the fields are actually used. The main reason for this coding style is that the Microsoft Dynamics AX run time doesn’t report compile-time or run-time errors if a field on a record buffer is accessed and hasn’t been retrieved from the database. Because of the normalization of the Microsoft Dynamics AX 2012 data model and the introduction of table hierarchies, limiting field lists in queries is even more important than it was in Microsoft Dynamics AX 2009, particularly for polymorphic tables. With ad hoc mode, you can limit the field list in a query. If you use ad hoc mode, the query is limited to only the table (or tables) that are referenced in the query. Other tables in the hierarchy are excluded. This produces an important performance benefit by reducing the number of joins between tables in subtype and supertype hierarchies.
The following example illustrates the effects of querying both without and with ad hoc mode:
static void AdHocModeSample(Args _args)
{
    DirPartyTable dirPartyTable;
    CustTable     custTable;
    select dirPartyTable join custTable where dirPartyTable.RecId==custTable.Party;

    /*Would result in the following query to the database:

    SELECT T1.NAME,
   T1.LANGUAGEID,

--<...Fields removed for better readability. Basically, all fields from all tables woul
d be
fetched...>

   T9.MEMO FROM DIRPARTYTABLE T1 LEFT OUTER JOIN DIRPERSON T2 ON (T1.RECID=T2.RECID) LEFT
OUTER JOIN DIRORGANIZATIONBASE T3 ON (T1.RECID=T3.RECID) LEFT OUTER JOIN DIRORGANIZATION T
4 ON
(T3.RECID=T4.RECID) LEFT OUTER JOIN OMINTERNALORGANIZATION T5 ON (T3.RECID=T5.RECID) LEFT
 OUTER
JOIN OMTEAM T6 ON (T5.RECID=T6.RECID) LEFT OUTER JOIN OMOPERATINGUNIT T7 ON (T5.RECID=T7.R
ECID)
LEFT OUTER JOIN COMPANYINFO T8 ON (T5.RECID=T8.RECID) CROSS JOIN CUSTTABLE T9 WHERE
((T9.DATAAREAID='ceu') AND (T1.RECID=T9.PARTY))

    Limiting the field list will force the Microsoft Dynamics AX 2012 AOS to query only fo
r the
actual table.
    The following query:*/

    select RecId from dirPartyTable exists join custTable where dirPartyTable.RecId==custT
able.
Party;
    /*
Results only in the following query to SQL Server

    SELECT T1.RECID,        T1.INSTANCERELATIONTYPE FROM DIRPARTYTABLE T1 WHERE EXISTS (SE
LECT
'x' FROM CUSTTABLE T2 WHERE ((T2.DATAAREAID='ceu') AND (T1.RECID=T2.PARTY)))
    */
}
There are additional ways to limit the field list and number of joins in queries through the user interface. These are described in more detail at the end of this section.
The following X++ code, which selects only the AccountNum field from the CustTable table but evaluates the value of the CreditRating field and sets the CreditMax field, won’t fail because the run time doesn’t detect that the fields haven’t been selected:
static void UpdateCreditMax(Args _args)
{
    CustTable custTable;

    ttsBegin;
    while select forupdate AccountNum from custTable
    {
        if (custTable.CreditRating == '')
        {
            custTable.CreditMax = custTable.CreditMax + 1000;
            custTable.update();
        }
    }
    ttsCommit;
}
This code adds 1,000 to the value of the CreditMax field in CustTable records for which the CreditRating field is empty. However, adding the CreditRating and CreditMax fields to the field list of the select statement might not solve the problem: the application logic could still update other fields incorrectly because the update method on the table could be evaluating and setting other fields in the same record.
Important
You could examine the update method for other fields accessed in the method and then select these fields also, but new problems would soon surface. For example, if you customize the update method to include application logic that uses additional fields, you might not be aware that the X++ code in the preceding example also needs to be customized.
Limiting the field list when selecting records results is a performance gain because less data is retrieved from the database and sent to the AOS. The gain is even greater if you can retrieve the fields by using indexes without a lookup of the values in the table or by limiting the field list to reduce the number of joins in hierarchy tables. You can implement this performance improvement and write select statements safely when you use the retrieved data within a controlled scope, such as a single method. The record buffer must be declared locally and not passed to other methods as a parameter. Any developer customizing the X++ code can easily see that only a few fields are selected and act accordingly.
To truly benefit from a limited field list, be aware that the Microsoft Dynamics AX run time sometimes automatically adds extra fields to the field list before passing a statement to the database. One example was explained earlier in this chapter in the Caching section. In that example, the run time expanded the field list to include all fields if the select statement qualifies for storing the retrieved record in the cache.
In the following X++ code, you can see how the Microsoft Dynamics AX run time adds additional fields. The code calculates the total balance for all customers in customer group 20 and converts the balance into the company’s unit of currency. The amountCur2MST method converts the value in the currency specified in the CurrencyCode field to the company currency.
static void BalanceMST(Args _args)
{
    CustTable   custTable;
    CustTrans   custTrans;
    AmountMST   balanceAmountMST = 0;

    while select custTable
            where custTable.CustGroup == '20'
          join custTrans
            where custTrans.AccountNum == custTable.AccountNum
    {
        balanceAmountMST += Currency::amountCur2MST(custTrans.AmountCur,
                                                    custTrans.CurrencyCode);
    }
}
When the select statement is passed to the database, it retrieves all fields in the CustTable and CustTrans tables, even though only the AmountCur and CurrencyCode fields on the CustTrans table are used. The result is the retrieval of more than 100 fields from the database.
You can optimize the field list by selecting the AmountCur and CurrencyCode fields from the CustTrans table and, for example, only the AccountNum field from the CustTable table, as shown in the following code:
static void BalanceMST(Args _args)
{
    CustTable   custTable;
    CustTrans   custTrans;
    AmountMST   balanceAmountMST = 0;

    while select AccountNum from custTable
            where custTable.CustGroup == '20'
          join AmountCur, CurrencyCode from custTrans
            where custTrans.AccountNum == custTable.AccountNum
    {
        balanceAmountMST += Currency::amountCur2MST(custTrans.AmountCur,
                                                    custTrans.CurrencyCode);
    }
}
As explained earlier, the application run time expands the field list from the three fields shown in the preceding X++ code example to five fields because it adds the fields that are used when updating the records. These fields are added even though neither the forupdate keyword nor any of the specific concurrency model keywords are applied to the statement. The statement passed to the database starts as shown in the following example, in which the RECID column is added for both tables:
SELECT A.ACCOUNTNUM,A.RECID,B.AMOUNTCUR,B.CURRENCYCODE,B.RECID
FROM CUSTTABLE A,CUSTTRANS B
To prevent the retrieval of any fields from the CustTable table, you can rewrite the select statement to use the exists join operator, as shown here:
static void BalanceMST(Args _args)
{
    CustTable   custTable;
    CustTrans   custTrans;
    AmountMST   balanceAmountMST = 0;

    while select AmountCur, CurrencyCode from custTrans
        exists join custTable
            where custTable.CustGroup  == '20' &&
                  custTable.AccountNum == custTrans.AccountNum
    {
        balanceAmountMST += Currency::amountCur2MST(custTrans.AmountCur,
                                                    custTrans.CurrencyCode);
    }
}
This code retrieves only three fields (AmountCur, CurrencyCode, and RecId) from the CustTrans table and none from the CustTable table.
In some situations, however, it might not be possible to rewrite the statement to use exists join. In such cases, including only TableId as a field in the field list prevents the retrieval of any fields from the table. To do this, you modify the original example as follows to include the TableId field:
static void BalanceMST(Args _args)
{
    CustTable   custTable;
    CustTrans   custTrans;
    AmountMST   balanceAmountMST = 0;

    while select TableId from custTable
            where custTable.CustGroup == '20'
          join AmountCur, CurrencyCode from custTrans
            where custTrans.AccountNum == custTable.AccountNum
    {
        balanceAmountMST += Currency::amountCur2MST(custTrans.AmountCur,
                                                    custTrans.CurrencyCode);
    }
}
This code causes the Microsoft Dynamics AX run time to pass a select statement to the database with the following field list:
SELECT B.AMOUNTCUR,B.CURRENCYCODE,B.RECID
FROM CUSTTABLE A,CUSTTRANS B
If you rewrite the select statement to use exists join or include only TableId as a field, the select statement sent to the database retrieves just three fields instead of more than 100. As you can see, you can substantially improve your application’s performance just by rewriting queries to retrieve only the necessary fields.
Tip
You can use the Best Practice Parameters dialog box to have Microsoft Dynamics AX analyze the use of select statements in X++ code and recommend whether to implement field lists based on the number of fields that are accessed in the method. To enable this check, in the AOT or the Development Workspace, on the Tools menu, click Options > Development > Best Practices. In the Best Practice Parameters dialog box, make sure that AOS Performance Check is selected and that Warning Level is set to Errors and Warnings.
To use ad hoc mode on forms, navigate to Data Sources node for the form you want in the AOT, and then select the appropriate data source and set the OnlyFetchActive property to Yes, as shown in Figure 13-6. This setting limits the number of fields fetched to only those fields that are used by controls on the form and improves the form’s response time. Additionally, if the data source is a polymorphic table, only the tables that are necessary to return these fields are joined—instead of all tables within the hierarchy.

To see the effect of ad hoc mode, do the following test: create a list page containing the DirPartyTable table as the data source and add only three fields to the list page grid; for example, Name, NameAlias, and PartyNumber. Setting OnlyFetchActive to No results in the following query, which contains all fields in all tables and joins to all tables in the hierarchy:
SELECT T1.DEL_GENERATIONALSUFFIX,T1.NAME, T1.NAMEALIAS,T1.PARTYNUMBER,
/* Field list shortened for better readability. All fields of all tables would be fetched.
 */
T8.RECID, FROM DIRPARTYTABLE T1 LEFT OUTER JOIN DIRPERSON T2 ON (T1.RECID=T2.RECID) LEFT
OUTER JOIN DIRORGANIZATIONBASE T3 ON (T1.RECID=T3.RECID) LEFT OUTER JOIN DIRORGANIZATION T
4 ON
(T3.RECID=T4.RECID) LEFT OUTER JOIN OMINTERNALORGANIZATION T5 ON (T3.RECID=T5.RECID) LEFT
 OUTER
JOIN OMTEAM T6 ON (T5.RECID=T6.RECID) LEFT OUTER JOIN OMOPERATINGUNIT T7 ON (T5.RECID=T7.R
ECID)
LEFT OUTER JOIN COMPANYINFO T8 ON (T5.RECID=T8.RECID)ORDER BY T1.PARTYNUMBER
Setting OnlyFetchActive to Yes results in a much smaller and more efficient query:
SELECT T1.NAME,T1.NAMEALIAS, T1.PARTYNUMBER, T1.RECID,  T1.RECVERSION, T1.INSTANCERELATION
TYPE
FROM DIRPARTYTABLE T1       ORDER BY T1.PARTYNUMBER
For polymorphic tables in datasets for Enterprise Portal web controls, ensure that you also set OnlyFetchActive to Yes on the data source of the dataset to improve performance.
To use ad hoc mode on queries that are modeled in the AOT, do the following:
Navigate to the query you want, and then expand the Data Sources node and the appropriate data source.
Click the Fields node, and then set the Dynamic property to No (see Figure 13-7).
Reduce the fields to only the ones that are necessary.

For an example of a query with a restricted field list, see the DirRestrictPartyTableInAddressBook query in the base application.
Microsoft Dynamics AX supports left-and right-justification of extended data types. With Microsoft Dynamics AX 2012, nearly all extended data types are left justified to reduce the impact of space consumption because of double- and triple-byte storage as a result of Unicode enablement. Left justifying also helps performance by increasing the speed of access through indexes.
When sorting is critical, you can use right justification. However, you should use this technique sparingly.
This section provides an overview of the most important configuration options that can improve the performance of your Microsoft Dynamics AX 2012 installation.
The SQL Administration form (Figure 13-8) offers a set of SQL Server features that were not supported in previous versions of Microsoft Dynamics AX. For example, you can compress a table or apply a fill factor individually. The SQL Administration form is located under System Administration > Periodic > Database > SQL Administration.

Several important performance options are located on the Server Configuration form. You can use this form to specify settings for performance optimization, batch operations, and caching. The Server Configuration form is located under System Administration > Setup > System > Server Configuration.
Some of the most important performance optimization options are as follows:
Maximum number of tables in join Limits the number of tables you can have in a join. Too many joins can have a negative impact on performance, especially if the fields that are joined are not indexed well.
Client record cache factor Determines how many records the client caches. For example, if the server-side cache setting for a table in the Main table group is set to 2,000, and you set this setting to 20, then the client will cache 100 records (2,000/20).
Timeout for user modified queries Specifies the timeout, in seconds, for queries when a user adds conditions by using the SysQueryForm form. A setting of 0 means that there is no timeout. If a query times out, a message is shown.
You can specify whether a server is a batch server and how many threads the server can use to process batch jobs. A good formula to determine how many batch threads a server can use is to multiply the number of cores by 2. The number of threads that a server can use depends on the processes that are running on the server. For some processes, the server can use more than two threads for each core. However, you need to test this on a case-by-case basis.
You can also define the number of records that are stored in a cache and other cache settings (Figure 13-9), such as the size of an EntireTable cache (in kilobytes), the maximum number of objects that the SGOC can hold, and the number of records that can be cached for each table group. Each server can have its own cache settings.
The Microsoft Dynamics AX 2012 Server Configuration tool contains settings that you can use to improve the performance of the AOS. To access the tool, on the Start menu, click Administrative Tools > Microsoft Dynamics AX 2012 Server Configuration. The following options are some of the most important:
Application Object Server tab Generally, the settings Enable Breakpoints To Debug X++ Code Running On This Server and Enable Global Breakpoints should be turned off in production systems. Enable The Hot-Swapping Of Assemblies For Each Development Session should also be turned off in production systems. All three of these options might cause a performance penalty if enabled.
Database Tuning tab Depending on the business processes you run, increasing the value of the Statement Cache setting can improve or degrade performance. This setting determines how many statements the AOS caches. (Only the statements and not the result sets are cached.) You should not change the default value without thorough testing. Also, you should avoid changing the Maximum Buffer Size setting because the larger the maximum buffer size, the more memory that must be allocated for each buffer, which takes slightly more time.
Performance tab If you have multiple AOS instances on one server, use this tab to define an affinity to avoid resource contention between the AOS instances. Note that the AOS in Microsoft Dynamics AX 2012 can scale more than eight cores effectively.

On the AOS, you can use the Microsoft Dynamics AX Configuration tool to set options for Microsoft Dynamics AX clients. To access this tool, on the Start menu, click Administrative Tools > Microsoft Dynamics AX 2012 Configuration. On the Performance tab, under Cache Settings, if you select the Least Memory setting, the loading of certain dynamic-link libraries (DLLs) will be deferred until they are needed, to save memory. This setting slightly decreases performance but is very useful in Terminal Services scenarios to increase the number of users that a Terminal Server can host in parallel.
You can use the Client Performance Options form to centrally disable a set of features that might affect performance. You can access the form under System Administration > Setup > System > Client Performance Options.
For a detailed description of the controls on this form, see the entry “Microsoft Dynamics AX 2012: Client Performance Options” on the Microsoft Dynamics AX Performance Team blog (http://blogs.msdn.com/b/axperf/archive/2011/11/07/ax2012-client-performance-options.aspx).
It is a best practice to review thoroughly all number sequences that are in use to determine whether they should be continuous. If possible, set them to be non-continuous. All number sequences that are not continuous should have caching enabled.
Under Organization Administration > Common > Number Sequences, double-click the number sequence you want, and then on the Performance FastTab, set a preallocation depending on the frequency with which the number sequence is used.
Extensive database logging and other logging mechanisms, such as the sales and marketing transaction log (Sales and Marketing > Setup > Sales and Marketing Parameters), add overhead to the database load and should be reduced to the absolute minimum necessary.
Microsoft Dynamics AX 2012 has optimized performance of the master scheduling and inventory closing processes. Both processes should run at least with one helper thread. However, it is better to use multiple helper threads. For master scheduling, eight helper threads have been found to be optimum with the tested data.
Another option to improve the speed of master scheduling is to have a dedicated AOS and change the garbage collection pattern to client-based garbage collection. To do so, navigate to the installation directory of the appropriate AOS, and then open the Ax32Serv.exe.config file.
Locate the following XML node and set it to false:
<gcServer enabled="true" />
This section discusses coding patterns that you can use to help optimize performance.
You can improve performance by running X++ as common intermediate language (CIL). In general, if a service is called from outside Microsoft Dynamics AX 2012, it is executed in CIL. Batch jobs, services in the AxClient service group, and code that is traversed through the RunAs method are also executed in CIL. Two interfaces are available for this purpose in ClassesGlobal unClassMethodIL and runTableMethodIL. The performance benefit from running X++ in CIL comes mainly from better .NET garbage collection. Depending on your process, the performance improvement can be between 0 and 30 percent. Therefore, you’ll need to test to see whether performance improves by running your process in CIL.
Microsoft Dynamics AX 2009 introduced ways to implement parallel processing easily through the batch framework. These options have been enhanced in Microsoft Dynamics AX 2012. Three common patterns can be applied for scheduling batch jobs that execute tasks in parallel: batch bundling, individual task modeling, and top picking. Each pattern has its own advantages and disadvantages, which are discussed in the following sections.
For more information about the batch framework, see Chapter 18. For code samples and additional information about batch patterns and performance, see the entry “Batch Parallelism Microsoft Dynamics AX – Part I” on the Microsoft Dynamics AX Performance Team blog (http://blogs.msdn.com/b/axperf/archive/2012/02/24/batch-parallelism-in-ax-part-i.aspx). Links to additional entries in this series are provided in the following sections.
With batch bundling, you create a static number of tasks and split the work among these tasks by grouping the work items into bundles. The workload distribution between each task should be as equal as possible. Each worker thread processes a bundle of work items before picking up the next bundle. This pattern works well if all of the tasks take roughly the same amount of time to process in each bundle. In an ideal situation, each worker thread is actively doing the same amount of work. But in scenarios where the workload is variable because of data composition or differences in server hardware, this approach is not the most efficient. In these scenarios, the last few threads might take longer to complete because they are processing larger bundles than the others.
You can find a code example illustrating batch bundling in the AOT at ClassesFormletterServiceBatchTaskManagercreateFormletterParmDataTasks().
With individual task modeling, parallel processing is achieved by creating a separate task for each work item so that there is a one-to-one mapping between the task and the work item. This eliminates the need for preallocation. Because each work item is independently handled by a worker thread, workload distribution is more consistent. This approach eliminates the problem of a number of large work items being bundled together and eventually increasing the response time for the batch.
This pattern is not necessarily suitable for processing a large number of work items because you will end up with a large number of batch tasks. The overhead on the batch framework to maintain a large number of tasks is high because the batch framework must check several conditions, dependencies, and constraints whenever a set of tasks is completed and a new set of tasks must be picked up for execution from the ready state.
You can find a code example that illustrates this pattern on the Microsoft Dynamics AX Performance Team blog (http://blogs.msdn.com/b/axperf/archive/2012/02/25/batch-parallelism-in-ax-part-ii.aspx).
One issue with bundling is the uneven distribution of workload. You can address that by using individual task modeling, but that can produce high overhead on the batch framework. Top picking is another batching technique that can address the problem of uneven workload distribution. However, it causes the same problem as individual task modeling with a large number of work items.
.With top picking, a static number of tasks are created—just as in bundling—and preallocation is unnecessary—just as in individual task modeling. Because no preallocation is performed, the pattern does not rely on the batch framework to separate the work items, but you do need to maintain a staging table to track the progress of the work items. Maintaining the staging table has its own overhead, but that overhead is much lower than the overhead of the batch framework. After the staging table is populated, the worker threads start processing by fetching the next available item from the staging table and continue until no work items are left. This means that no worker threads are idle while other worker threads are overloaded. To implement top picking, you use the PESSIMISTICLOCK hint along with the READPAST hint. Used together, these hints enable worker threads to fetch the next available work item without being blocked.
You can find a code example that illustrates this pattern on the Microsoft Dynamics AX Performance Team blog (http://blogs.msdn.com/b/axperf/archive/2012/02/28/batch-parallelism-in-ax-part-iii.aspx).
In Microsoft Dynamics AX 2012, programming concepts are available and first steps have been taken to replace the RunBase framework. By using its replacement, the SysOperation framework, you can run services in Microsoft Dynamics AX in various execution modes. The SysOperation framework has performance advantages, too. There is a clear separation of responsibilities between tiers, and execution happens solely on the server tier. These enhancements ensure a minimum number of round-trips.
Note
Chapter 14 contains more information about the SysOperation framework and additional code sample that compares the SysOperation framework with the RunBase framework. If you are unfamiliar with the SysOperation framework, it is recommended that you read Chapter 14 before you read this section.
The SysOperation framework supports four execution modes:
Synchronous You can run a service in synchronous mode on the server. The client waits until the process on the server is complete, and only then can the user continue working.
Asynchronous You perform the necessary configurations to the data contract and then execute code on the server. However, the client remains responsive and the user can continue working. This mode also saves round-trips between the client and the server.
Reliable asynchronous Running operations in this mode is equivalent to running them on the batch server, with the additional behavior that the jobs are deleted after they are completed (regardless of whether they are successful). The job history remains. This pattern facilitates building operations that use the batch server run time, but that do not rely on the batch server administration features.
Scheduled batch You use this mode for scheduled batch jobs that run on a regular basis.
The following example illustrates how to calculate a set of prime numbers. A user enters the starting number (such as 1,000,000) and an ending number (such as 1,500,000). The service then calculates all prime numbers in that range. This example will be used to illustrate the differences in timing when running an execution in each mode. The sample consists of two classes (a service class and a data contract), a table to store the results, and a job and an enumerator to demonstrate the execution and execution modes.
Note
Instead of using a job, you would typically use menu items to execute the operation. If you use a menu item, the SysOperation framework generates the necessary dialog box to populate the data contract.
The following code contains the entry point of the service:
[SysEntryPointAttribute(true)]
public void runOperation(PrimeNumberRange data)
{
    PrimeNumbers primeNumbers;

    // Threads mainly take effect while running in the batch framework utilizing either
    // reliable asynchronous or scheduled batch

    int i, start, end, blockSize, threads = 8;
    PrimeNumberRange subRange;
    start = data.parmStart();
    end = data.parmEnd();
    blockSize = (end - start) / threads;
    delete_from primeNumbers;
    for (i = 0; i < threads; i++)
    {
        subRange = new PrimeNumberRange();
        subRange.parmStart(start);
        subRange.parmEnd(min(start + blockSize, end));
        subRange.parmLast(i == threads - 1);
        this.findPrimes(subRange);
        start += blockSize + 1;
    }
}
The next sample is a method that executes differently depending on the operation mode that you chose.
Note
If the method is executed in reliable asynchronous mode or scheduled batch mode, this sample also showcases a bundling pattern that was discussed earlier in the Batch bundling section.
[SysEntryPointAttribute(false)]
public void findPrimes(PrimeNumberRange range)
{
    BatchHeader batchHeader;
    SysOperationServiceController controller;
    PrimeNumberRange dataContract;
    if (this.isExecutingInBatch())
    {
        ttsBegin;
        controller = new SysOperationServiceController('PrimeNumberService',
'findPrimesWorker'),
        dataContract = controller.getDataContractObject('range'),

        dataContract.parmStart(range.parmStart());
        dataContract.parmEnd(range.parmEnd());
        dataContract.parmLast(range.parmLast());

        batchHeader = this.getCurrentBatchHeader();
        batchHeader.addRuntimeTask(controller, this.getCurrentBatchTask().RecId);
        batchHeader.save();
        ttsCommit;
    }
    else
    {
        this.findPrimesWorker(range);
    }
}
Last, but not least, is the method that does the actual work:
private void findPrimesWorker(PrimeNumberRange range)
{
    PrimeNumbers primeNumbers;
    int i;
    int64 time;

    for (i = range.parmStart(); i <= range.parmEnd(); i++)
    {
        if (this.isPrime(i))
        {
            primeNumbers.clear();
            primeNumbers.PrimeNumber = i;
            primeNumbers.insert();
        }
    }

    if (range.parmLast())
    {
        primeNumbers.clear();
        primeNumbers.PrimeNumber = -1;
        primeNumbers.insert();
    }
}
The following code contains a job that runs the prime number example in all four execution modes:
static void generatePrimeNumbers(Args _args)
{
    SysOperationServiceController controller;
    int i, ticks, ticks2, countOfPrimes;
    PrimeNumberRange dataContract;
    SysOperationExecutionMode executionMode;
    PrimeNumbers output;

    <... Dialog code to demo the execution modes ...>

    executionMode = getExecutionMode();
    controller = new SysOperationServiceController('PrimeNumberService', 'runOperation',
executionMode);
    dataContract = controller.getDataContractObject('data'),

    dataContract.parmStart(1000000);
    dataContract.parmEnd(1500000);
    delete_from output;
    ticks = System.Environment::get_TickCount();
    controller.parmShowDialog(false);
    controller.startOperation();

    <... Code to show execution times for demo purposes ...>
}
Executing this code four times in all four execution modes produces the following results:
Synchronous 35,658 prime numbers found in 44.74 seconds. However, the user could not continue working during this time.
Asynchronous 35,658 prime numbers found in 46.93 seconds, but the client was responsive and the user could continue working.
Reliable asynchronous 35,658 prime numbers found in 16.16 seconds by using parallel processing and starting the batch jobs immediately (as mentioned earlier in this section). This execution mode is only running the job on the batch server, but it is not entirely similar to a batch job. The jobs appear in the Batch Job form only temporarily. Another key difference is that even though reliable asynchronous mode uses the batch framework as a vehicle, reliable asynchronous mode is not bound to the Available Threads setting that you can set in the Server Configuration form. So long as the server has resources, it will continue processing reliable asynchronous jobs in parallel and start processing new jobs as well. If you start too many jobs, you might overload your server; on the other hand, it allows programming models to use multicore systems efficiently.
Scheduled batch 35,658 prime numbers found in 31.78 seconds. (The batch job did not start immediately, which caused the difference in execution time between scheduled batch mode and reliable asynchronous mode.)
Also, you need to ensure that there are sufficient CPU resources left to service the regular user load. It is usually a good idea to separate the batch workload from the regular user workload.
The SysOperation framework offers an additional way of parallelizing the workload through business logic. For example, you could build a wrapper class that performs multiple asynchronous business calls. Suppose that your wrapper class invoices all orders of a certain business account. You could build a dialog box that allows the user to select one or more customer accounts to invoice. The logic itself then performs one service call for each customer account. Note, however, that these calls might overload your server resources if not used with care. The following code is a modified version of the previous example to show what this code might look like.
// In practice, this wrapper should be a class and be called through a menu item in the
// appropriate execution mode.
static void generatePrimeNumbersAsyncCallPattern(Args _args)
{
    SysOperationServiceController controller;
    int i, primestart, primeend,blockSize, threads = 8,countOfPrimes,ticks,ticks2;
    PrimeNumberRange subRange;
    PrimeNumberRange dataContract;
    PrimeNumbers output;

    primestart = 1000000;
    primeend = 1500000;

    blockSize = (primeend - primestart) / threads;

    delete_from output;

    ticks = System.Environment::get_TickCount();

    for (i = 0; i < threads; i++)
    {
        controller = new SysOperationServiceController('PrimeNumberServiceAsyncCallPattern
',
        'runOperation', SysOperationExecutionMode::ReliableAsynchronous);
        dataContract = controller.getDataContractObject('data'),

        dataContract.parmStart(primestart);
        dataContract.parmEnd(min(primestart + blockSize, primeend));
        dataContract.parmLast(i == threads - 1);

        controller.parmShowDialog(false);
        controller.startOperation();

        primestart += blockSize + 1;
    }

    <... Code to show execution times for demo purposes ...>
}Depending on the pattern that you use, checking to see whether a record exists can result in excessive calls to the database.
The following code shows an incorrect example of how to determine whether a certain record exists. For each record that is fetched in the outer loop, another select statement is passed to the database to find a particular entry in the WMSJournalTrans table. If the WMSJournalTable table has 10,000 rows, the following logic would cause 10,001 queries to the database:
static void existingJournal()
{
    WMSJournalTable     wmsJournalTable = WMSJournalTable::find('014119_117'),
    WMSJournalTable     wmsJournalTableExisting;
    WMSJournalTrans     wmsJournalTransExisting;

    boolean recordExists()
    {
        boolean foundRecord;
        foundRecord = false;

        while select JournalId from wmsJournalTableExisting
            where wmsJournalTableExisting.Posted    == NoYes::No
        {
            select firstonly wmsJournalTransExisting
                where wmsJournalTransExisting.JournalId         ==
wmsJournalTableExisting.JournalId    &&
                      wmsJournalTransExisting.InventTransType   ==
wmsJournalTable.InventTransType      &&
                      wmsJournalTransExisting.InventTransRefId  ==
wmsJournalTable.InventTransRefId;
            if (wmsJournalTransExisting)
                foundRecord = true;
        }
        return foundRecord;
    }

    if (recordExists())
       info('Record Exists'),
    else
       info('Record does not exist'),
}
The following example shows a better pattern that produces far less overhead. This pattern results in only one query and one round-trip to the database:
static void existingJournal()
{
    WMSJournalTable     wmsJournalTable = WMSJournalTable::find('014119_117'),
    WMSJournalTable     wmsJournalTableExisting;
    WMSJournalTrans     wmsJournalTransExisting;

    boolean recordExists()
    {
        boolean foundRecord;
        foundRecord = false;

        select firstonly wmsJournalTransExisting
        join wmsJournalTableExisting
        where wmsJournalTransExisting.JournalId         ==
        wmsJournalTableExisting.JournalId    &&
        wmsJournalTransExisting.InventTransType   ==
        wmsJournalTable.InventTransType      &&
        wmsJournalTransExisting.InventTransRefId  ==
        wmsJournalTable.InventTransRefId &&
        wmsJournalTableExisting.Posted    == NoYes::No;

        if (wmsJournalTransExisting)
                foundRecord = true;

        return foundRecord;
    }

    if (recordExists())
       info('Record Exists'),
    else
       info('Record does not exist'),
}Often, the same query is executed repeatedly. Even if caching reduces some of the overhead, repeatedly executing the same query sometimes can have a significant impact on performance. But there are ways that you can easily avoid these performance problems. Usually, they are caused by find methods that are called repeatedly—either within loops or within an exists method. The following example shows a loop that makes repeated calls to the CustParameters::find method:
static void doOnlyNecessaryCalls(Args _args)
{
    LedgerJournalTrans ledgerJournalTrans;
    LedgerJournalTable ledgerJournalTable = LedgerJournalTable::find('000242_010'),
    Voucher            voucherNum = '';

    while select ledgerJournalTrans
        order by JournalNum, Voucher, AccountType
        where ledgerJournalTrans.JournalNum == ledgerJournalTable.JournalNum
           && (voucherNum == '' || ledgerJournalTrans.Voucher == voucherNum)
    {
         // Potential unecessary cache lookup and method call if loop returns multiple row
s

         ledgerJournalTrans.PostingProfile = CustParameters::find().PostingProfile;

         // Additional code doing some work...
    }
}
The recurring calls to CustParameters::find always return the same results. Even if the result is cached, these calls produce overhead. To optimize performance, you can move the call outside the loop, preventing repeated calls.
static void doOnlyNecessaryCallsOptimized(Args _args)
{
    LedgerJournalTrans ledgerJournalTrans;
    LedgerJournalTable ledgerJournalTable = LedgerJournalTable::find('000242_010'),
    Voucher            voucherNum = '';
    CustPostingProfile postingProfile = CustParameters::find().PostingProfile;

    while select ledgerJournalTrans
        order by JournalNum, Voucher, AccountType
        where ledgerJournalTrans.JournalNum == ledgerJournalTable.JournalNum
           && (voucherNum == '' || ledgerJournalTrans.Voucher == voucherNum)
    {
         // No unecessary cache lookup and method call if loop returns more than 1 row

         ledgerJournalTrans.PostingProfile = postingProfile;

         // Additional code doing some work...
    }
}For certain queries, it is difficult or almost impossible to create an effective index. This mainly occurs if an OR operator (or ||) is used on multiple columns.
The following example typically triggers an index join in SQL Server, which is potentially less effective than a direct lookup:
static void TwoQueriesSometimesBetterThenOne(Args _args)
{
    InventTransOriginId       inventTransOriginId = 5637201031;
    InventTransOriginTransfer inventTransOriginTransfer;

    // Note: Only one condition can be true at any time

    select firstonly inventTransOriginTransfer
         where inventTransOriginTransfer.IssueInventTransOrigin   == inventTransOriginId
            || inventTransOriginTransfer.ReceiptInventTransOrigin == inventTransOriginId;

    info(int642str(inventTransOriginTransfer.RecId));
}
Using two queries might cause an additional round-trip, but ideally, the following code produces only one. In addition, the first and second queries are efficient direct-clustered and direct-index lookups. In practice, you would need to test this code to ensure that it outperforms the earlier example in your scenario.
static void TwoQueriesSometimesBetterThenOneOpt(Args _args)
{
    InventTransOriginId inventTransOriginId = 5637201031;
    InventTransOriginTransfer inventTransOriginTransfer;

    select firstonly inventTransOriginTransfer
        where inventTransOriginTransfer.IssueInventTransOrigin == inventTransOriginId;

    info(int642str(inventTransOriginTransfer.RecId));

    if(!inventTransOriginTransfer.RecId)
    {
        select firstonly inventTransOriginTransfer
            where inventTransOriginTransfer.ReceiptInventTransOrigin == inventTransOriginI
d;

        info(int642str(inventTransOriginTransfer.RecId));
    }
}Included columns is a new feature that helps you create optimized indexes. With included columns, it is easier, for example, to create covering indexes for queries with limited field lists or for queries that aggregate data. For more information about covering indexes and indexes with included columns, see “Index with Included Columns” on MSDN at http://msdn.microsoft.com/en-us/library/ms190806.aspx.
To create an index with included columns, set the IncludedColumn property on the index to Yes, as shown in Figure 13-10.

Another lesser-known feature is that if you add the dataAreaId field to the key columns of an index, the AOS will not add it as the leading column in the index, which allows better optimization of certain queries. For example, queries that don’t include the dataAreaId and use direct SQL trigger an index scan if the dataAreaId is the leading column of an index when the index is used. In general, you should use this feature only if you notice that the dataAreaId is not in the query and SQL Server is performing an index scan because of that. However, this is not recommended unless it is necessary. If you use this technique, you should always create a new index for that purpose.
The firstfast hint adds OPTION(FAST n) to a SQL Server query and causes SQL Server to prefer an index that is good for sorting because the query returns the first rows as quickly as possible.
select firstfast salestable // results in
SELECT <FIELDLIST> FROM SALESTABLE OPTION(FAST 1)
Note
If you are sorting fields from more than one table, OPTION(FAST n) might not produce the performance improvement you want.
This keyword is used automatically for grids on forms and can be enabled on the data sources of AOT queries. As beneficial as this keyword can be—for example, on list pages that are supported by AOT queries—it can produce a performance penalty on queries in general because it causes SQL Server to optimize for sorting instead of for fastest execution time. If you see the firstfast hint in a query that is running slowly, try disabling it and then check the response time. The Export Letter of Credit/Import Collection form is an example of where this setting makes a difference. In the AOT, navigate to FormsBankLCExportListPageData SourcesBankLCExportListPageData SourcesSalesTable (SalesTable). On this list page, the FirstFast property is set to No; however, performance will improve by setting it to Yes.
You can experiment with a set of optimizations to improve the performance of list pages. Often, list page queries are complex and span multiple data sources. Sorting joined result sets can lead to a performance penalty. To optimize performance, try reducing sorting. For example, reducing sorting can benefit performance for the Contacts form. The query smmContacts_NoFilter (Forms/smmContactsListPage/DataSources/smmContacts_NoFilter) specifies two tables in its Order by clause. To optimize performance, you can sort by ContactPerson.ContactForParty only.
You can also optimize list page performance by working with the FirstFast and OnlyFetchActive properties. Both options are described in detail earlier in this chapter.
Instead of iterating and aggregating within X++ logic, you can often aggregate within the code to save loop iterations and round-trips to the database. The number of loop iterations that you can eliminate depends mainly on the fields on which the aggregation takes place and how many rows can be aggregated. There are instances when you might want to add some values within your code only based on certain conditions.
The following example compares set-based operations and aggregation with row-based operations:
// In practice, you should use static server methods to access data on the server.

public static void main(Args _args)
{
    TransferToSetBased ttsb;
    RecordInsertList   ril = new RecordInsertList(tableName2id("TransferToSetBased"));
    Counter            i;
    Counter            tc;
    int                myAggregate = 0;
    int                my2ndAggregate;

    // Reset table.

    delete_from ttsb;

    // Populate line-based.

    tc = WinAPI::getTickCount();
    for(i=0;i<=1000;i++)
    {
        ttsb.clear();
        ttsb.Iterate=i;
        ttsb.Change=1;
        ttsb.Aggregate=5;
        ttsb.insert();
    }

    // Data populated 1000 records, 1000 round-trips.

    for(i=1001;i<=2000;i++)
    {
        ttsb.clear();
        ttsb.Iterate=i;
        ttsb.Change=1;
        ttsb.Aggregate=5;
        ril.add(ttsb);
    }
    ril.insertDatabase();

    // Data populated 1000 records, many fewer round-trips.
    // Based on buffer size. About 20-150 inserts per round-trip.

    ttsBegin;
    while select forupdate ttsb where ttsb.Iterate > 1000
    {
        if(ttsb.Iterate >= 1100 && ttsb.Iterate <= 1300)
        {
            ttsb.Change = 10;
            ttsb.update();
            myAggregate += ttsb.Aggregate;
        }
        else if(ttsb.Iterate >= 1301 && ttsb.Iterate <= 1500)
        {
            ttsb.Change = 20;
            ttsb.update();
            my2ndAggregate += ttsb.Change;
        }
        else if(ttsb.Iterate >= 1501 && ttsb.Iterate <= 1700)
        {
            ttsb.Change = 30;
            ttsb.update();
            myAggregate += ttsb.Aggregate;
        }

        if(ttsb.Iterate > 1900)
            break;
    }
    ttsCommit;

    // While loop does 1-900 fetches. Does 600 single update statements.
    // Above logic set-based and using aggregation results in 6 queries to the database.

    update_recordSet ttsb setting change = 10 where ttsb.Iterate >= 1100 && ttsb.iterat
e <=
            1300;
    update_recordSet ttsb setting change = 20 where ttsb.Iterate >= 1301 && ttsb.Iterat
e <=
            1500;
    update_recordSet ttsb setting change = 30 where ttsb.Iterate >= 1501 && ttsb.Iterat
e <=
            1700;

    select sum(Aggregate) from ttsb where ttsb.Iterate >= 1100 && ttsb.Iterate <= 1300;
    myAggregate = 0;
    myAggregate = ttsb.Aggregate;

    select sum(Change) from ttsb where ttsb.Iterate >= 1301 && ttsb.Iterate <= 1500;
    my2ndAggregate = ttsb.Change;

    select sum(Aggregate) from ttsb where ttsb.Iterate >= 1501 && ttsb.Iterate <= 1700;
    myAggregate += ttsb.Aggregate;

}Without a way to monitor the execution of your application logic, you implement features almost blindly with regard to performance. Fortunately, the Microsoft Dynamics AX Development Workspace contains a set of easy-to-use tools to help you monitor client/server calls, database activity, and application logic. These tools provide good feedback on the feature being monitored. The feedback is integrated directly with the Development Workspace, making it possible for you to jump directly to the relevant X++ code.
The Microsoft Dynamics AX Trace Parser consists of a user interface and data analyzer that is built on SQL Server 2008 and the Event Tracing for Windows (ETW) framework. The Microsoft Dynamics AX Trace Parser has been significantly improved in Microsoft Dynamics AX 2012, with new features and enhanced performance and usability. The performance overhead for running a single trace is comparatively low. With ETW, you can conduct tracing with system overhead of approximately 4 percent.
Only users with administrative privileges, users in the Performance Log Users group, and services running as LocalSystem, LocalService, and NetworkService can enable trace providers.
To use the Microsoft Dynamics AX Tracing Cockpit in the client, a user must be either in the Administrators or Performance Log Users group. The same is true for users who use Windows Performance Monitor. Additionally, the user must have write access to files in the folder that stores the results of the trace.
The Trace Parser enables rapid analysis of traces to find the longest-running code, the longest-running SQL query, the highest call count, and other metrics that are useful in debugging a performance problem. In addition, it provides a call tree of the code that was executed, allowing you to gain insight into unfamiliar code quickly. It also provides the ability to jump from the search feature to the call tree so that you can determine how the problematic code was called.
The Trace Parser is included with Microsoft Dynamics AX 2012 and is also available as a free download from Partner Source and Customer Source. To install the Trace Parser, run the Microsoft Dynamics AX 2012 Setup program and navigate to Add or Modify Components > Developer Tools > Trace Parser.
Microsoft Dynamics AX 2012 includes several new features for Trace Parser, which can help you understand a performance problem quickly.
Monitor method calls If you right-click a line in X++/RPC view, and then click Jump To Non-Aggregated View, you can view, information such as whether all calls to the method took the same amount of time or if one call was an outlier. The same function is available in the SQL view.
Monitor client sessions If there was an RPC call between the client and the server in either Non-Aggregated view or Call Tree view, you can right-click the line containing the call, and then click Drill Through To Client Session. This feature also works for RPC calls between the server and the client.
Jump between views If you want to jump from Call Tree view to Non Aggregated X++/RPC view, you can right-click, and then select the option you want.
Monitor events In either Non Aggregated X++/RPC view or Call Tree view, you can select two or more events while holding down the Ctrl key and then right-click and select Show Time Durations Between Events. This is extremely useful for monitoring and troubleshooting asynchronous events.
Look up table details Under View, you can click Table Details to look up table details within Microsoft Dynamics AX. A Business Connector .NET connection is required for this functionality, just like the code lookup functionality.
Compare traces Under View, you can click Trace Comparison, which opens a form where you can compare two traces.
Before taking a trace, run the process that you want to trace at least once to avoid seeing metadata loading in the trace file. This is called tracing in a warm state and is recommended because it helps you to focus on the real performance issue and not on metadata loading and caching. Then you can prepare everything so that the amount of time between starting the trace and executing the process you want to trace is as short as possible.
In Microsoft Dynamics AX 2009, you had to set tracing options in multiple places. In Microsoft Dynamics AX 2012, there are only three places to set options. In addition, there is only one trace file for both the client and the server.
You can start a trace in three ways:
From the Tracing Cockpit in the Microsoft Dynamics AX 2012 client
From Windows Performance Monitor
Through code instrumentation
The following sections describe each method in detail.
As mentioned earlier, you must be logged on as an administrator to use the Tracing Cockpit. Table 13-2 describes the options that are available in the Tracing Cockpit.
Table 13-2. Options in the Tracking Cockpit.
To start a trace from the Tracing Cockpit, do the following:
In the Microsoft Dynamics AX 2012 client, open the Development Workspace by pressing Ctrl+Shift+W.
On the Tools menu, click Tracing Cockpit (Figure 13-11).
Set the options for your trace. For example, if you only want to collect a client trace, clear the Collect Server Trace check box.
Bring your process to a warm state (as described earlier) and then click Start Trace.
Choose a location in which to save your trace file.
Execute your process, and then click Stop Trace.
Click Open Trace to open the trace file in the Trace Parser.

To start a trace in Windows Performance Monitor, do the following:
On the Start menu, click Run, and then type perfmon.
Expand Data Collector Sets.
Right-click User Defined, and then click New > Data Collector Set.
Select Create Manually, and then click Next.
Select Event Trace Data, and then click Next.
Next to Providers, click Add, and then In the Event Trace Providers form, select Microsoft-DynamicsAX-Tracing, and then click OK.
Note
If you use Windows Performance Monitor, by default, all events are traced, including events that might collect confidential information. To prevent this, click Edit, and then select only the events necessary. The events that might collect confidential information are noted in their descriptions.
Click Next, and then note the root directory that your traces are stored in.
Click Next to change the user running the trace to an Administrative user, and then click Finish.
In the right pane of Windows Performance Monitor, right-click the newly created data collector set, and click Properties.
In the Properties window, click the Trace Buffers tab and modify the default buffer settings. The default buffer settings do not work well for collecting Microsoft Dynamics AX event traces because large numbers of events can be generated in a short time and fill the buffers quickly. Change the following settings as specified and leave the rest set to the default:
Buffer Size: 512 KB
Minimum Buffers: 60
Maximum Buffers: 60
To start tracing, click the data collector set in the left pane, and then click Start.
You can use the xClassTrace class from the Tracing Cockpit to start and stop a trace. To trace the Sales Form letter logic, see the following sample in ClassesSalesFormLetter:
// Add
xClassTrace xCt = new xClassTrace();

// to the variable declaration.
// ...code...

        if (salesFormLetter.prompt())
        {
            xClassTrace::start("c:\temp\test1.etl");
            xClassTrace::logMessage("test1");
            xCt.beginMarker("marker"); // Add markers at certain points of a trace to
                                       // increase trace readability. You can add
                                       // multiple markers per trace.

            salesFormLetter.run();

            xCt.endMarker("marker");
            xClassTrace::stop();

            outputContract  = salesFormLetter.getOutputContract();
            numberOfRecords = outputContract.parmNumberOfOrdersPosted();
        }

// ...code...
In the call to xClassTrace::start, you can use multiple parameters to specify the events to trace or whether you want to use circular logging, among other things. To find out which keyword equals which parameter, put a breakpoint in the class SysTraceCockpitcontrollerstartTracing and start a trace from the Tracing Cockpit with various events selected.
To import a trace, open the Microsoft Dynamics AX Trace Parser, and then click Import Trace. (You can also use the Open Trace form to import a trace file.) It is possible to import multiple trace files at once.
After you load the trace files into the Trace Parser, you can analyze your trace files through built-in views.
When you open a trace from the Overview tab, you see a summary that gives you a high-level understanding of where the most time is spent within the trace.
On the Overview tab, select a session. If you took the trace, select your session. If you received the trace file from someone else, select the session of the person who took the trace. When you select a session, you’ll see an overview similar to Figure 13-12, but for that session only. To return to the summary for all sessions, select the Show Summary Across All Sessions check box.

After selecting a session in the drop-down list, you can search and review the trace through the X++ methods and RPC calls or the SQL queries, or you can review the call tree of the session. It’s best to start looking for quick improvements by sorting by total exclusive duration. Then, break the process down by sorting by total inclusive duration for detailed tuning. You can jump to the Call Tree view from the X++ methods and RPC calls and from the SQL view.
Use the X++/RPC view to understand patterns in your trace, as shown in Figure 13-13.

SQL view (see Figure 13-14) gives you a quick overview of which queries were executed and how long the execution and data retrieval took.

Call Tree view (see Figure 13-15) is particularly helpful for identifying expensive loops and other costly patterns.

This section provides information about how to troubleshoot a few of the common issues with tracing.
Tracing won’t start If tracing doesn’t start, make sure that the user who is running the trace is a member of the Administrators or Performance Log Users group.
Tracing causes performance problems If you run a trace from a client that is located on an AOS, you will get one trace file. If the client is not on the AOS, you will get two files: one on the client computer and one on the AOS. If you run more than one client tracing session simultaneously, the system will slow down because tracing is processing- and space-intensive in this situation. It is recommended that you not turn on tracing on an AOS instance that is supporting a workload of multiple clients.
Trace doesn’t produce meaningful data If X++ code is running as CIL, a trace might not produce meaningful results. Table 13-3 lists scenarios that might cause tracing problems and describes possible mitigations.
Table 13-3. Troubleshooting tracing for X++ code running as CIL.
You can also trace database activity when you’re developing and testing Microsoft Dynamics AX application logic.
You can enable tracing on the SQL tab of the Options dialog box (in the AOT, on the Tools menu, click Options). You can trace all Transact-SQL statements or just the long-running queries, warnings, and deadlocks. Transact-SQL statements can be traced to the Infolog, a message window, a database table, or a file. If statements are traced to the Infolog, you can use the context menu to open the statement in the SQL Trace dialog box, in which you can view the entire statement and the path to the method that executed the statement.
Note
You should not use this feature except for long-term monitoring of long-running queries. Even then, you should use this feature carefully because it adds overhead to the system.
From the SQL Trace dialog box, you can copy the statement and, if you’re using SQL Server 2008, open a new query window in SQL Server Management Studio (SSMS) and paste in the query. If the Microsoft Dynamics AX run time uses placeholders to execute the statement, the placeholders are shown as question marks in the statement. You must replace these with variables or constants before the queries can be executed in SQL Server Query Analyzer. If the run time uses literals, the statement can be pasted directly into SQL Server Query Analyzer and executed.
When you trace SQL statements in Microsoft Dynamics AX, the run time displays only the DML statement. It doesn’t display other commands that are sent to the database, such as transaction commits or isolation level changes. With SQL Server 2008 and later versions, you can use SQL Server Profiler to trace these statements by using the event classes RPC:Completed and SP:StmtCompleted in the Stored Procedures collection, and the SQL:BatchCompleted event in the TSQL collection, as shown in Figure 13-16.

You can use the Server Process ID (SPID) or user name for a client session to troubleshoot a wide variety of issues, such as contention or queries that run slowly. In previous versions of Microsoft Dynamics AX, the Online Users form contained a column for the SPID of client sessions. In Microsoft Dynamics AX 2012, information about user sessions can be included in the SQL Server connection context. Adding this information has a small performance overhead.
For more information, see the entry “Finding User Sessions from SPID in Dynamics AX 2012” on the Thoughts on Microsoft Dynamics AX blog (http://blogs.msdn.com/b/amitkulkarni/archive/2011/08/10/finding-user-sessions-from-spid-in-dynamics-ax-2012.aspx).
After applying the information from the blog entry, you can also use the following query returns session information, including the user names of Microsoft Dynamics AX users and, to some extent, the queries that they are currently running:
select top 20 cast(s.context_info as varchar(128)) as ci,text,query_plan,* from
sys.dm_exec_cursors(0) as ec cross apply sys.dm_exec_sql_text(sql_handle) sql_text,
sys.dm_exec_query_stats as qs cross apply sys.dm_exec_query_plan(plan_handle) as
plan_text,sys.dm_exec_sessions s
where ec.sql_handle = qs.sql_handle and ec.session_id = s.session_id order by ec.worker_ti
me
desc
You can use the client access log to track the activities of multiple users as they do their daily work. The client access log writes data to the SysClientAccessLog table. For more information about this feature, see the entry “Client Access Log” on the Microsoft Dynamics AX Performance Team blog (http://blogs.msdn.com/b/axperf/archive/2011/10/14/client-access-log-dynamics-ax-2012.aspx).
As mentioned earlier, for certain processes, the only option for tracing might be Visual Studio Profiler. The following are high-level steps for using Visual Studio Profiler with Microsoft Dynamics AX.
Note
Visual Studio Profiler is available with Visual Studio 2010 Premium and Visual Studio 2010 Ultimate editions.
In Visual Studio, on the Debug menu, click Options And Settings.
In the left pane of the Options dialog box, click Debugging, and then click Symbols, and ensure that the symbol file is loaded for the XppIL folder of the AOS that you want to profile. (The profiling tools use symbol [.pdb] files to resolve symbolic names such as function names in program binaries.)
On the Analyze menu, click Launch Performance Wizard to create a new performance session.
Accept the default setting of CPU Sampling, and point to the AOS that you want to profile, but don’t start profiling right away.
Open Performance Explorer, right-click the top node of your session (Figure 13-17), and then click Properties.
In the Properties window, navigate to Sampling and decrease the sampling interval either to 100,000 or 1,000,000 to get better results.
Prepare the process that you want to profile, and then click Attach/Detach to attach to the process (for example, the AOS).
When you are done profiling, click Attach/Detach to detach from the AOS.

After you finish profiling, Visual Studio generates a report that helps you understand the performance problem in detail, as shown in Figure 13-18.
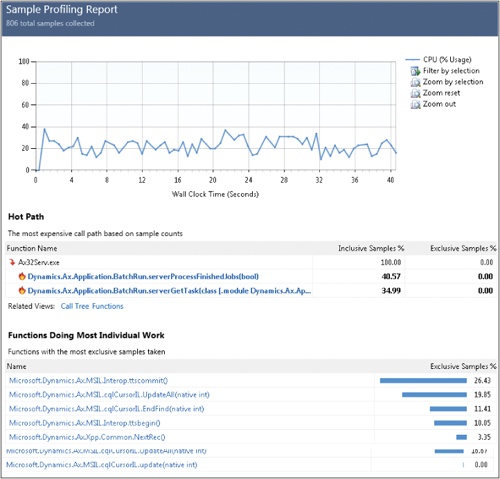
The report offers multiple views such as Summary, Call Tree, and Functions, and it offers options to show functions that called the function you are currently reviewing. If you installed the Visual Studio tools for Microsoft Dynamics AX, you can also quickly navigate to the X++ methods identified in the report without leaving Visual Studio.