
Chapter 6. Level select scene
Pencil Adventure is a big place so we need several different scenes to take us through the story of our hero Steve. To allow our player to see what levels exists, and what levels have been completed, and to select a level to play, we must create a level select scene.
You can read the full source code of our Pencil Adventure game here on Github.
In this chapter you will learn how to use Swift to programmatically create a scene, instead of using the scene editor in Xcode. This is useful for smaller, dynamic scenes that are not part of the actual game play. We will also deal with how to create a load progress indicator, which is useful to improve the user experience of the level select scene.
We will cover the following topics:
- Programmatically creating a Sprite Kit scene - important for the smaller support scenes, and also to create more advanced scenes that cannot be created in the editor.
- Classes, constants and variables - basic OOP patterns in Swift.
- Loops and ranges - iterations in Swift.
- Optionals and forced unwrapping - a very important part of Swift is how it handles pointers.
- String interpolation - a common feature in many languages and in Swift it’s very powerful.
- Background operations - writing threaded code is very important so as not to block the UI updating.
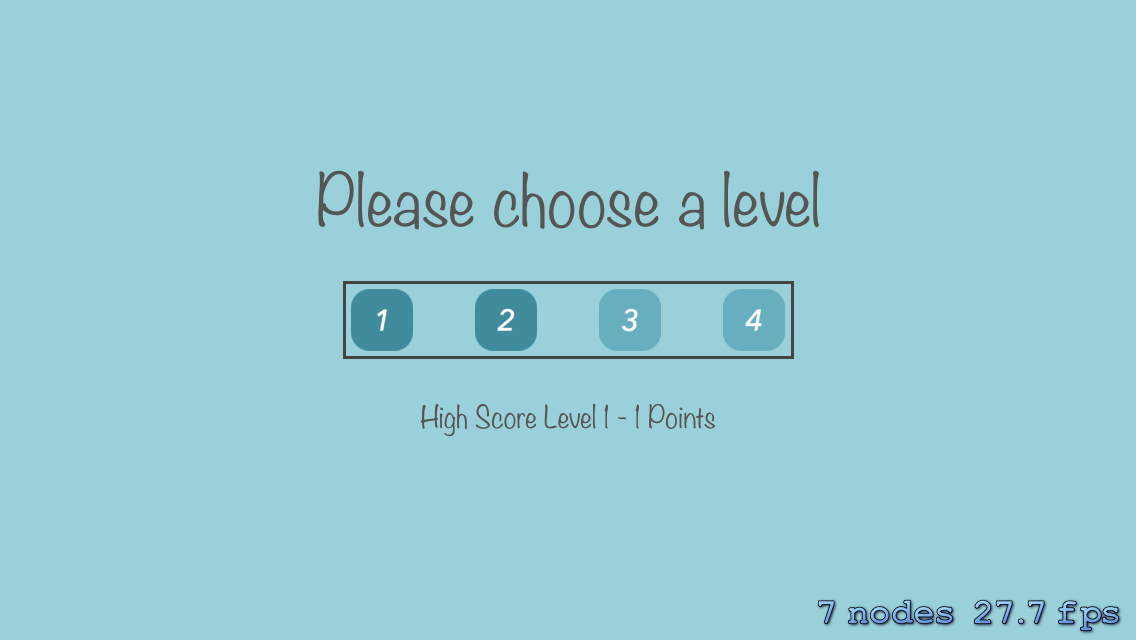
There are two important components to implement in a level select scene:
- A visualization of all the scenes.
- The player must be able to see what scenes are completed and what scenes can be played.
- An indicator to show the loading progress once a level is selected.

There are many other components involved, such as managing the sound for our loading Sprite Kit assets, but we will not talk about them here, because they are covered in other parts of the book.
Creating the scene
Let’s create the scene. Start out by creating a new Swift file that looks something like below, we will add in more code later. Since parts of the code that were previously covered have been omitted, we encourage you to look up the file in the example source code.
importSpriteKitclassLevelSelectScene:SKScene{// ConstantsletMaxLevels=4// VariablesvarprogressLoader:ProgressLoaderNode!...}
Don’t worry about missing pieces, we’ll add those in later in this section. Specific to the level select scene is our constants and variables. We have a MaxLevels constant that tells our scene how many buttons to render a select button for by looping from 1 to the value of MaxLevels. Using this technique, we assume that our levels are numerically named starting from 1.
Looping in Swift
Swift provides us with two interesting loop operators. The for-in and the for loop both allow you to execute a set of statements a certain number of times. The simplest operator is the for-in, which looks like for i in 1..5. This operator works using a range, a sequence, a collection and a progression. In the example, the loop is executed 5 times because 1..5 is the closed range of 1 to 5. For every execution the variable i changes its value to the active member of the range.
We also have an implicitly forced unwrapped optional progressLoader variable, so we don’t have to write out in code how we would like to access the value of the optional. We can assume the optional is there, but it is not set at the same time we declare the variable, because we need to reference self. self is a value that is not available outside of a class function or a computed variable scope. The reason we can implicitly force unwrap, is because we know that the value of the optional will be set before we attempt to use it, which is something we will touch upon later in this section.
We will now explain the addLevelSelectAndHighScoreNodes() method. Its purpose is to add a number of nodes, such as level selectors and high score labels. We will add in pieces of code as we go.
internalfuncaddLevelSelectAndHighScoreNodes(){// Load our our required resources.letatlas=SKTextureAtlas(named:"Levels")letlevelTile=atlas.textureNamed("L1-enabled")...}
The first thing you will notice is that the method is declared as internal. The internal keyword is used to specify the level of privacy of class members, so that other parts of the code may not be able to use that function. This is an important part of object-oriented design because only functions that are intended to be used outside of the class should be publicly visible.
The important part is how we compute the position of our first level selector. The technique is simple, since we know how many levels we have and how wide their selectors are and how wide the gap in between will be. That gives us the width of the region that all of the level selectors will span.
// In order to create a grid for the level buttons,// we a tile width, height and a value for the gap// in between them.vartileWidth=levelTile.size().widthvartileHeight=levelTile.size().heightvargap=tileWidth// We also need a selector width and an initial x// and y coordinate set.varselectorWidth=tileWidth*CGFloat(MaxLevels)+gap*CGFloat(MaxLevels-2)
Then we subtract the selector width from the width of the entire view and divide that value by two in order to get the center. This is the same value as the left edge of the original selectorWidth. This all happens in the following piece of code:
varx=(view.frame.width-selectorWidth)/2vary=view.frame.height/2
The y position is easily calculated as the center of the entire view by just halving the entire view height. Now that we have starting coordinates, we can iterate over the MaxLevels constant as it is in integer using the for i in i..n statement.
// For every level, add a level selector.foriin1...MaxLevels{// Create a level selector node and add it to// the scene.letlevel=SKSpriteNode(texture:atlas.textureNamed("L(i)-(suffix)"))level.name="(i)"level.position=CGPoint(x:x,y:y)level.xScale=getSceneScaleX()level.yScale=getSceneScaleY()addChild(level)// Move the x value over, as to not render two// nodes on top of each other.x+=tileWidth+gap}
As seen in the code excerpt above, this allows us to create a sprite node for every level and name it dynamically according to the iterating variable i. The point here is how we dynamically create a sprite for every level we have based on our MaxLevels constant mentioned earlier, and we keep them centered as we add more.
String Interpolation
Notice in the last code example how we dynamically use the i variable to set the name and retrieve the correct texture for our sprite. This effect is string interpolation in Swift. It is a way of creating more interesting strings using other values such as variables and even expressions inside of a string literal.
To react to taps on the level select sprites and turn them into buttons, we have to create a function that overrides the scenes touchesBegan function.
overridefunctouchesBegan(touches:NSSet,withEventevent:UIEvent){fortouch:AnyObjectintouches{letnode=self.nodeAtPoint(touch.locationInNode(self))ifnode.name=="L1-enabled"||node.parent?.name=="L1-enabled"{loadLevel("1")}ifnode.name=="L2-enabled"||node.parent?.name=="L2-enabled"{loadLevel("2")}ifnode.name=="L3-enabled"||node.parent?.name=="L3-enabled"{loadLevel("3")}ifnode.name=="L4-enabled"||node.parent?.name=="L4-enabled"{loadLevel("4")}}}
The override keyword is used when creating a function in a class that already exists in super class. Usually this pattern is used when the super class depends on the existence of a function, but this allows for you to fill in the functionality of that function. This way, the code will work whether you create the function or not.
The touchesBegan function receives a set of touches in the form of an NSSet which is just a primitive that implements some parts of set theory such as subsets and test of membership. NSSet is enumerable, which in Swift means you can use the for statement to easily loop over ever touch and find out if it is something you can use.
In the previous section we dynamically created our nodes representing each level and used string interpolation to give them a dynamic name. Now it is time to use that name to find out if one of the touches we received touched the screen at the location of that sprite.
We find out by discovering which node that we touched using the self.nodeAtPoint and touch.locationInNode functions as seen in the code excerpt above.
Then we are able to compare the name of the node to one of the names we created for the level select buttons, and if we have a match, we know to load a level.
Now it is time to load our first level.
Load progress indicator
An important part of the user experience is to have a game that feels responsive. It can be a slow process of loading the assets for a game, and waiting until they are ready for use. That is why games have a load progress indicator to let the user know that something is happening in the background, and that the game has not crashed.
Background operations
Swift has great support for background operations. Running code in the background is just slang for running your code in a thread that is different from the main thread, popularly called the UI thread because this is where the user interface is drawn and updated. It is important that an application is always responsive.
Now we are going to create a function that let’s us actually load a level once its corresponding button has been pushed, which we setup in the previous section dealing with the touchesBegan function. Here is the code to start the discussion.
internalfuncloadLevel(level:String){ifisLoading{NSLog("Avoiding interruptive load")return}isLoading=trueaddProgressLoaderNode()...}
The first thing is to make your code defensive. So, declare a bool property on the class isLoading and initialize it false. Check for this value and make sure it is not true before you attempt to load. Then declare the scene variable as nil so you can reference it from any closure functions used later to do the background operations.
varscene:GameScene?=nilvarwork:[Void->Any?]=[]
The code above is a bit strange and very particular to Swift. Consider var work: [Void -> Any?] = [] where we declare the work variable as an empty array of closure functions that take no arguments, but return an optional anything. Basically this just means that you want an array where you can stick any closure that don’t take any arguments, but may or may not return anything. The last bit about the return type is just so you don’t have to worry about the property of closures in Swift. Generally the result of the last expression is also returned unless an actual return statement exists before the end of the function. It is this array of functions that you will later run in the background.
Start by adding one background task, which is to load a scene into the variable declared earlier using the GameScene.unarchiveFromFile function.
work.append{scene=GameScene.unarchiveFromFile(level)as?GameScene}
Create a second task where you access the scene unarchived in the previous task and pass a reference of the progress loader to the scene, so it may move the loader as it loads itself.
work.append{ifscene!=nil{// Give the scene access to the progress loader so it can update progress while it loadsscene!.progressNode=self.progressLoader// Prepare the level, which takes timescene!.prepareLevel()}returnscene}
To start the background task use Apple’s Grand Central Dispatch API functions dispatch_async, dispatch_get_global_queue and dispatch_get_main_queue.
dispatch_async(dispatch_get_global_queue(DISPATCH_QUEUE_PRIORITY_DEFAULT,0)){forjobinwork{job()}...}
The key here is to dispatch a function to any queue using the dispatch_async function and finding queues to use using the other functions. Start by dispatching a function to the background where you loop over the work array and execute the task function that was stuck there earlier. This way all of the jobs are run safely in the background and any heavy processing does not render the user interface unresponsive.
When executing functions in multiple threads one of the tricky things to get right is communicating between threads, but with Grand Central Dispatch this is rather easy. Just use dispatch_async again, but this time instead of using the background thread, ask for the main thread using the dispatch_get_main_queue. In this case, check to see if the new scene has been correctly loaded before you switch to it.
dispatch_async(dispatch_get_main_queue()){ifletnewScene=scene{ifletcurrentLevel=level.toInt(){newScene.currentLevel=currentLevel}SKNode.cleanupScene(self)self.view?.presentScene(newScene)self.isLoading=false}
It is very important that you return to the main thread before changing the scene, because every other piece of code that deals with the rendering of the user interface happens there, and executing on the same thread helps minimize any errors and crashes.
Summary
In this chapter you have learned how to create a level selection scene and how you can use Swift to programmatically create a scene instead of using the scene editor in Xcode. You saw how to load a scene and create jobs that run sequentially and safely in the background.
In the next chapter you will learn how to create the the actual game scenes.