
Chapter 13. Publishing the app
Finally, after all of this hard work, you must be wanting to share your game to the world. Whether you care to just release it as a free game, or to release it as a paid game, Apple’s App Store is a great medium through which you can publicize your app. In this chapter, we will show you how to get your app ready for App Store distribution, create an App Store profile for your app, and walk you through Apple’s submission process.
In this chapter we will go over how to:
- Get the app ready
- Create an App Store profile for your app
- Upload the app and the review process
Chapter 13. Getting the application ready
Before you get started, make sure that you have a good name for your Game. Make sure that it is not too common because it will be hard for someone to find. Also, the name shouldn’t be very long or unique in the sense that it becomes hard for someone to type out. Once you have decided on a name, head over to your Developer Portal https://developer.apple.com/account/overview.action, and in iOS Apps, select Identifiers.
This will take you to the Certificate, Identifiers & Profiles page. Then select App IDs from the left sidebar. This is where you can see all of your iOS App IDs that you have created. If you have not already done so, create an App ID for the game. Fill in the fields on this page as instructed. One thing to note is to make sure that you type out the Bundle ID correctly because that cannot be changed later. The Name and the App Services can be edited later if they need to change.

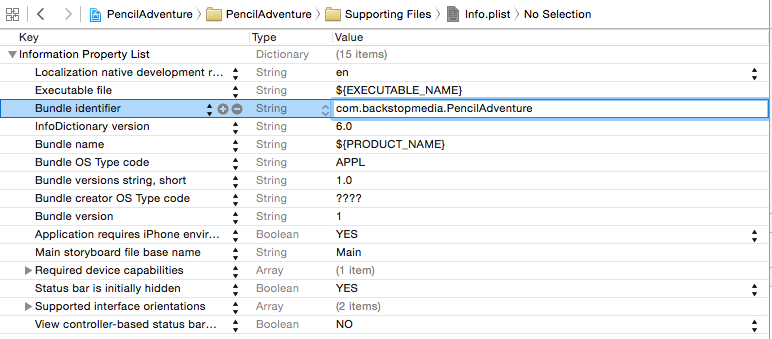
Once you have created an App ID, set the Bundle Identifier in our Xcode Project by opening the Info.plist file using CMD + Shift + O and typing Info.plist. Update the Bundle identifier value with the one you just created.
Now let’s create a Production Certificate and a Distribution Provisioning Profile, if you have not already done so. First, let’s create the Certificate.
Select Production from the Certificate section in the left sidebar, and click the Plus button. Then select the App Store and Ad Hoc option, and follow the instructions on the page to create a Production certificate. This will be used to sign your game that will be published on the App Store. Once created, download and install it by double-clicking the certificate file.

Next, select Distribution from the Provisioning Profiles section in the left sidebar. Click the Plus button, and select the App Store option. Then select the App ID for your game, along with the Production Certificate, and give the Profile a name before creating it. Then you can download it, and let Xcode know of it, by double-clicking that provisioning file.

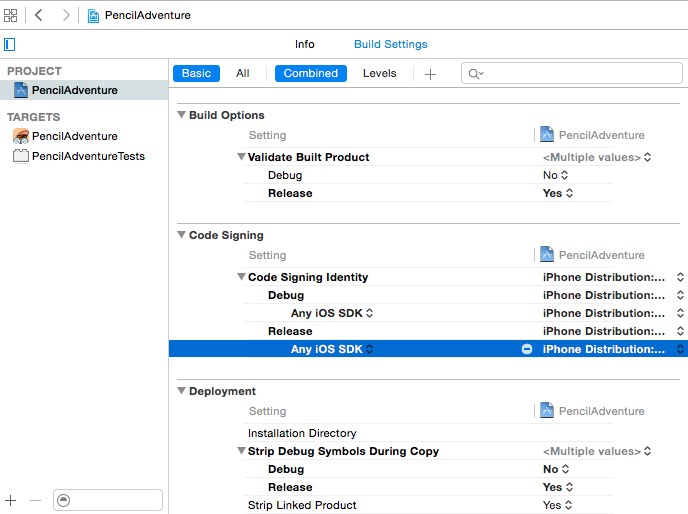
Now, go back to the Xcode project and select the iPhone Distribution Certificate that you just created and installed, by selecting it in the Release for Any iOS SDK, in the Build Setting tabs, as shown.
Now you are ready to create an App Store build, but before you do, make sure you test it out on the Simulator and on a physical iPhone or iPad before creating this build. This is a good time to change and point any URLs to production servers before building.
Select the iOS Device from the list of devices to run on in Xcode, and then select the Product menu item from the menu bar, and click Archive.

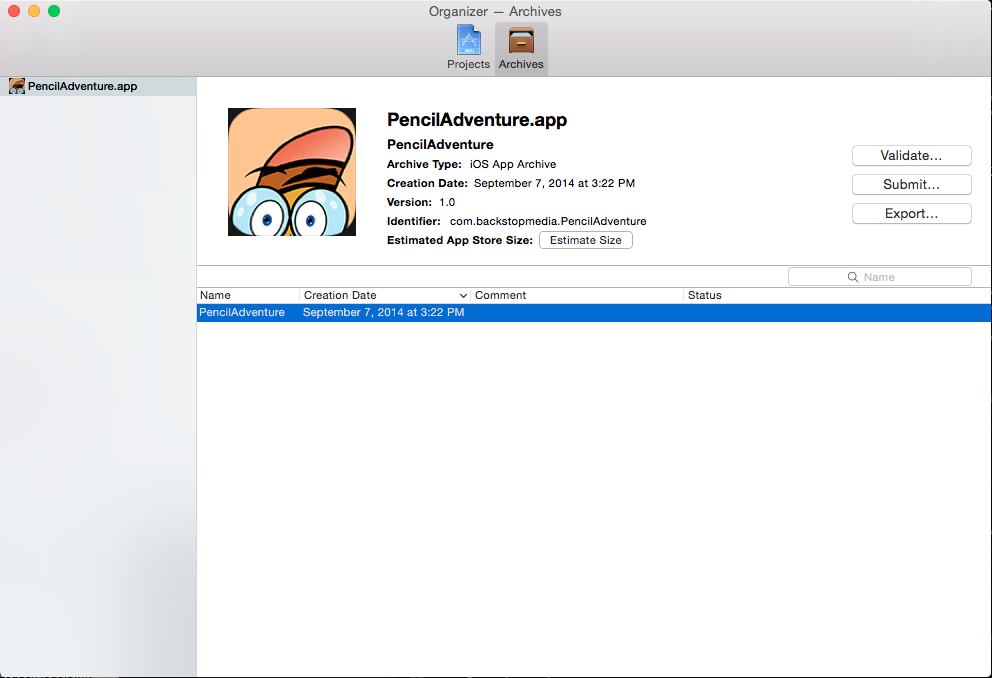
This will start the production build and create a binary executable that can be run on iOS devices like iPhone, iPad, or iPod. Once the build is done, it will open the Organizer window, but if it does not you can open it by selecting the Window menu item, and clicking Organizer.

Chapter 13. Creating an app store profile
The first part of the build process is done. Now you can begin the easy and fun part, which is setting up the game profile for the App Store. Head over to iTunes Connect by going to https://itunesconnect.apple.com.

Login and make sure you have all of your agreements, tax, and banking information setup. For free apps, you might not have to worry about linking your bank account for depositing the revenue from sales.

Once you have those completed, go to My Apps, and click the plus icon. Then click New iOS App. Fill in all of the fields. Be sure to select the correct Bundle ID. Set the version to 1.0 because it will be the initial version and you can type any number for the SKU that makes sense for you to identify the application.

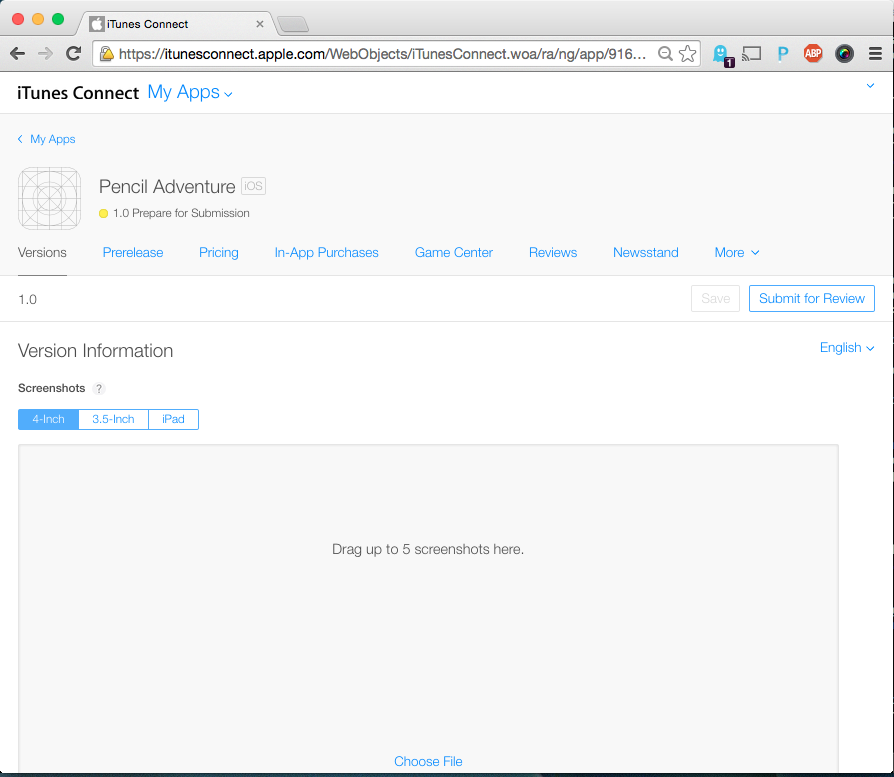
Now, fill in all of the fields on this page and upload the screenshot for both 4-inch, 3.5-inch, and iPad resolution if you plan on supporting those three devices. A few important fields on this page are the App Review Information, where you can supply the contact info if the reviewer has any questions, along with a demo account and any instructions to follow, to be written in the Notes section.
Clicking the Pricing tab will take you to the Pricing page where you can configure the availability date and the Pricing for the app. If you set the date to a date before its approval date, then it will be released immediately after the application is approved in the review process. You can always change the date later, but if you change it to a future date, such as next year, then it will remove the application from the App Store if it is already visible in the Store. Check out the pricing table, and select the correct pricing for your application, and then Save.

After you have filled out the profile for this App, you can upload the build for your game to this app profile by uploading it from the Xcode Organizer.
Chapter 13. Uploading build
Sending the build to Apple is a two-step process. It requires you to first Validate the build, and then Submit it.

Validate is the step in which the build is verified that it has been signed correctly, and that it has a correct distribution profile, and also checks that the app is not using any private methods from Apple’s standard library.
Once the validation is successful, the next step is submitting the app. Click Submit, and follow the steps. That’s it! The app has been uploaded and now you need to go back to iTunes Connect, open your app profile, and click Submit for Review.
Chapter 13. Review process
Everyone complains about Apple’s review process, but there are a few things that you will want to know before you run into any rejections because it can be a slow process. There is no guarantee as to when the app will be approved, but it can take about a week from submission to being approved and available in the App Store. Lucky for us, there is a site called appreviewtimes.com that aggregates data by crowdsourcing, and from tweets to give an average time for an app to get approved.
There are multiple statuses that your review can be in, one of which is Waiting For Review. The app will be in this state for some time, and then will progress to the In Review state. The review process is relatively short, and may take a few hours before it gets approved or rejected.
If approved, celebrate! You have created an awesome game and it will soon be available on the App Store based on the availability date you had set in the App Profile. If you were rejected, don’t worry. Read through the notes of the reviewer and why they rejected the app, and then try to fix it and upload a new build that addresses the issues brought up.
Chapter 13. Sales and trends
You can track how many apps were sold, along with how much money you made by going into Sales and Trends from your iTunes Connect. Here you can generate reports and view your sales for your paid apps. Money gets deposited every month into your bank account specified after Apple takes a cut of 30 percent from the sales.

Chapter 13. Summary
Now you know how to publish your app, so let’s see what you will share with the world. When publishing your game, make sure to create an archive using the Release mode so that the game is optimized for speed, create a good marketing profile to attract users, and include analytics to track what features of the app people use the most. You can take a look at Flurry or Google Analytics, which are great and easy to setup. These tools help give you insight about the app, which you can use to increase sales.