Watercolor Mandalas
ANDREA THOMPSON

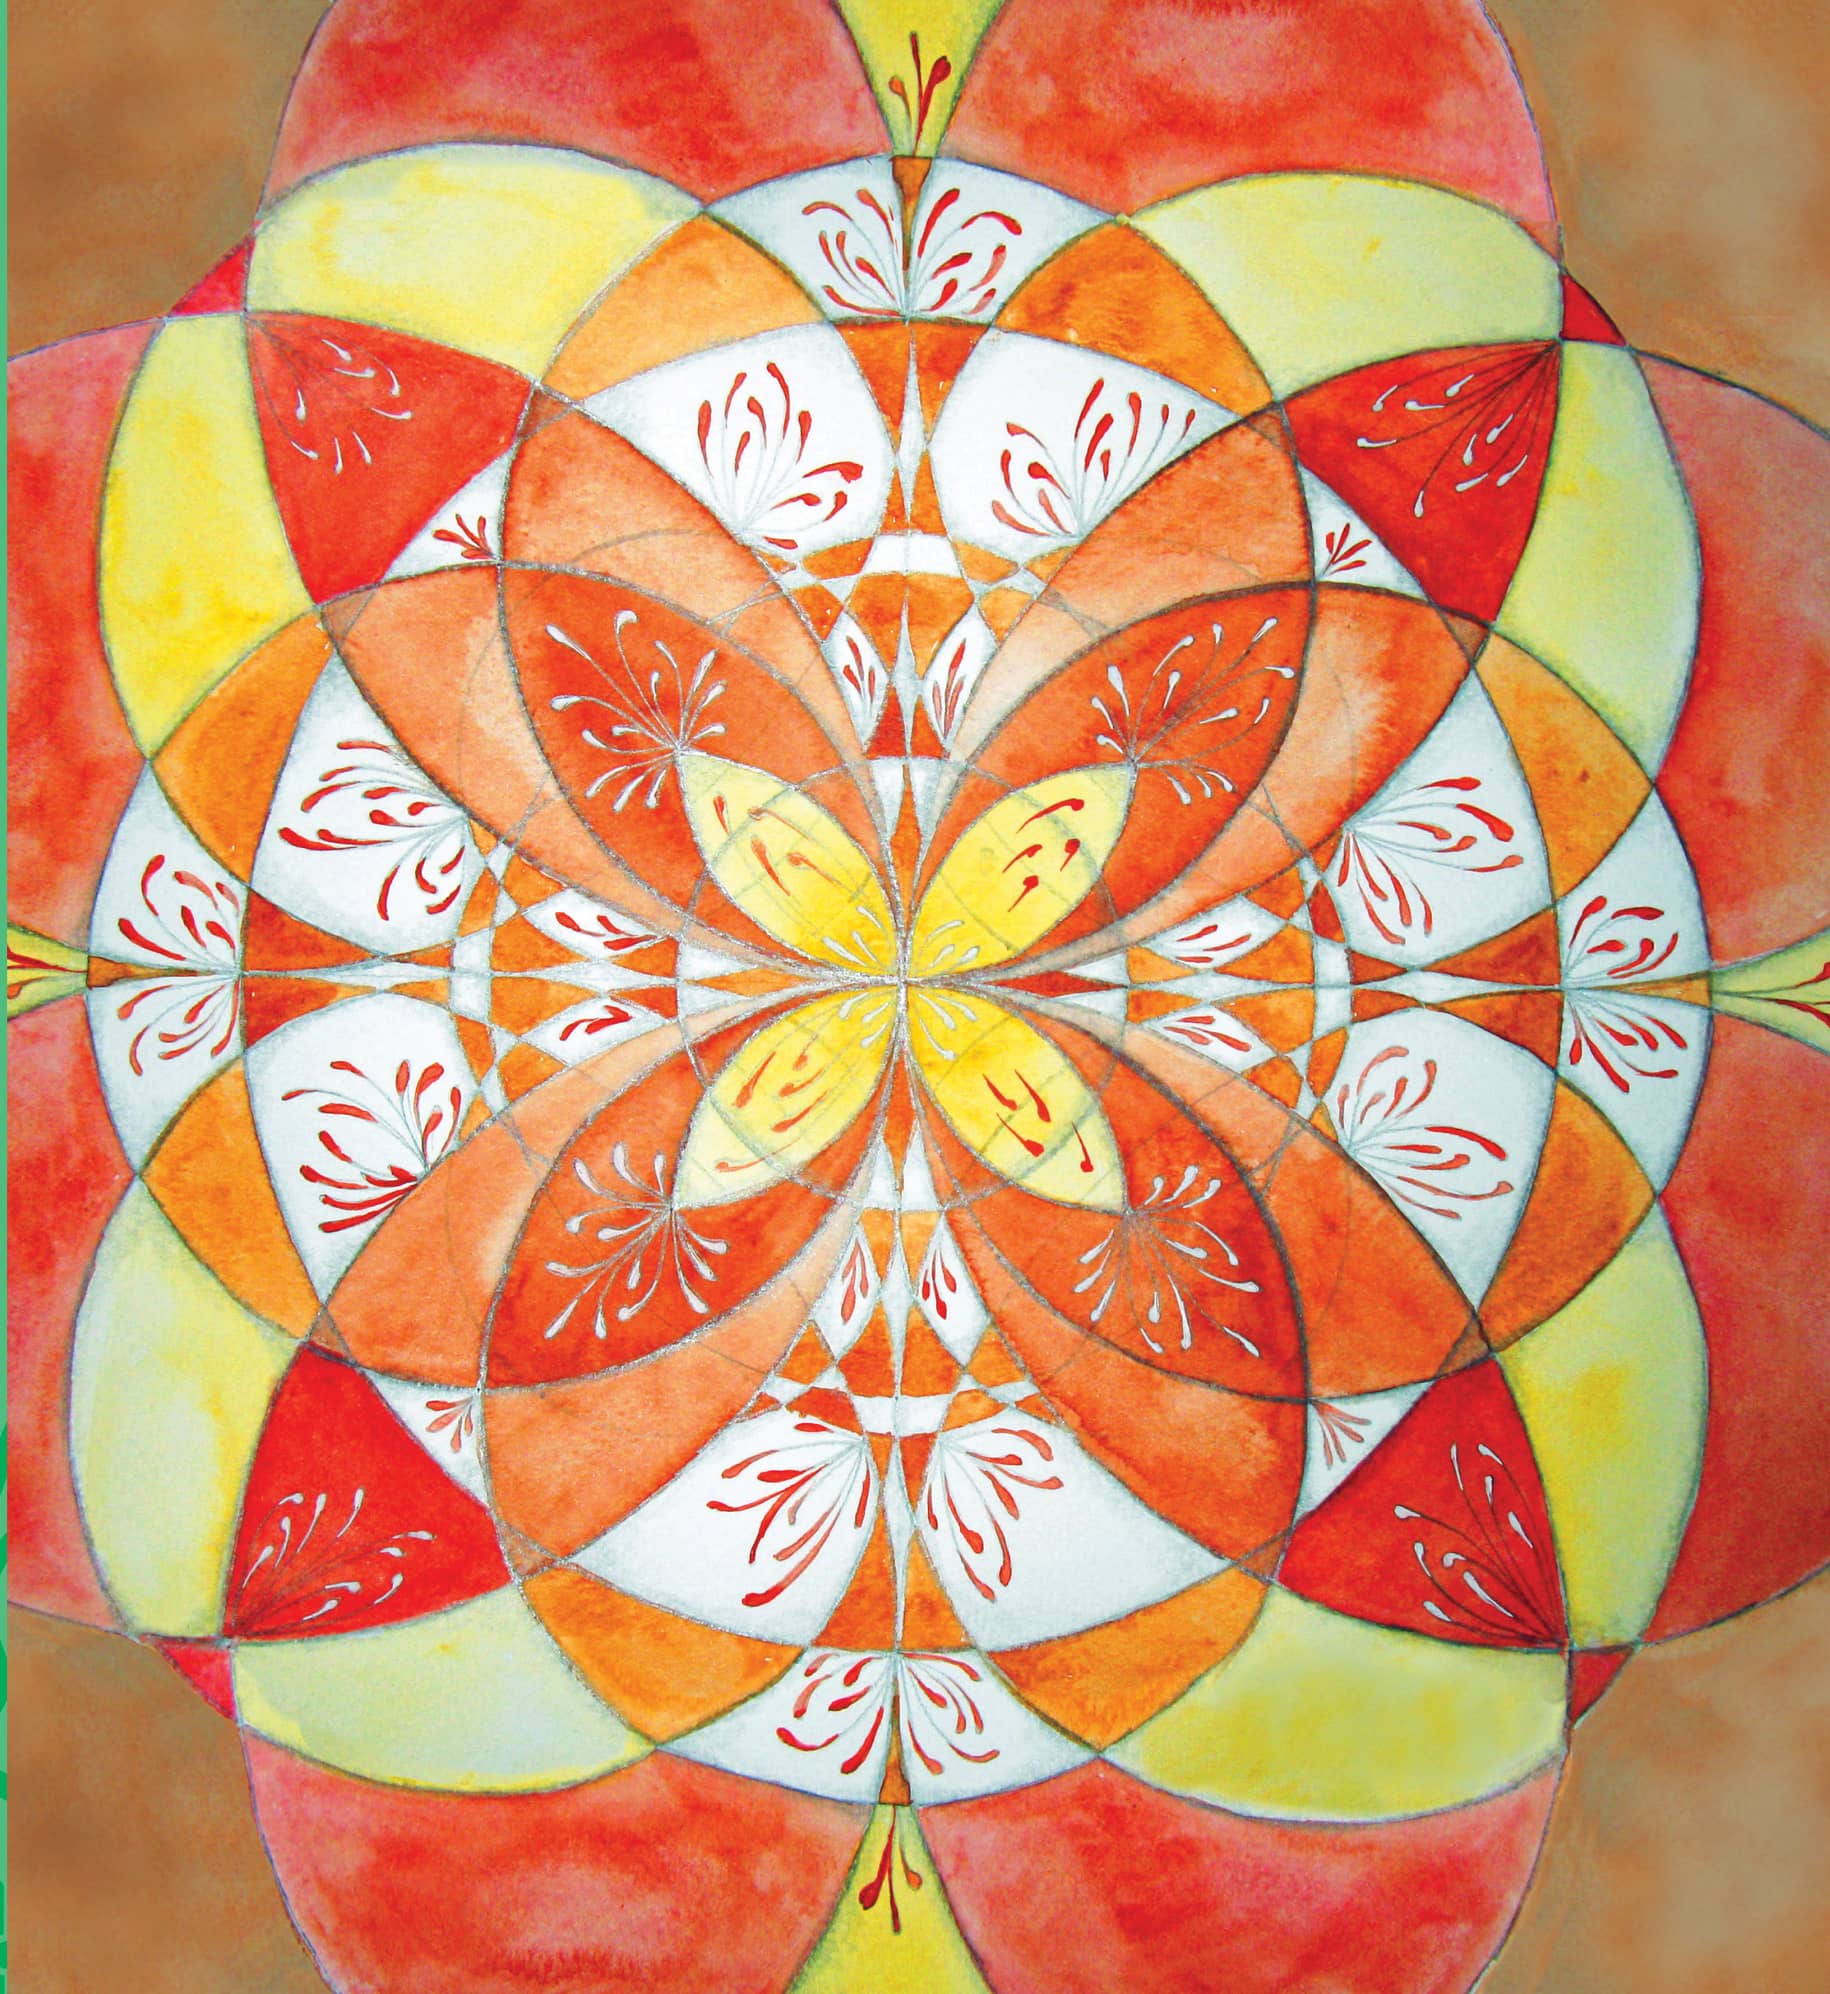
 Petal Mandala

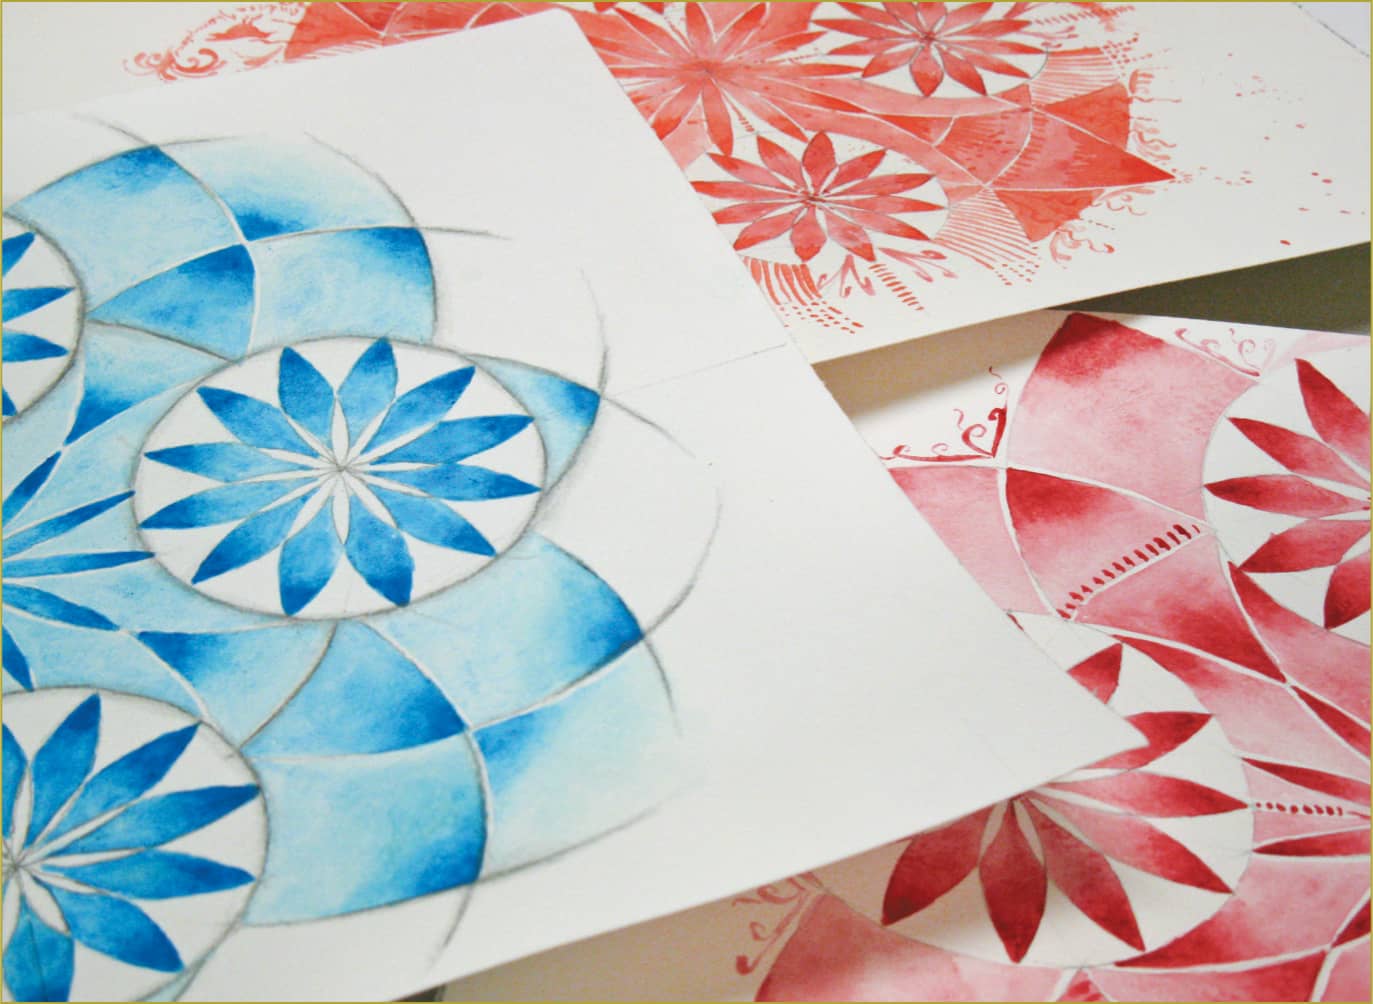
You can use any colors you wish to paint this pretty petal mandala! By varying the placement of the colors, you can achieve a completely different feel in your mandala. I like to place complementary colors next to each other to make the petal shapes really stand out.
 MATERIALS
• Watercolor paper
• Watercolor paints (quinacridone red, yellow ochre, lemon yellow, sap green, Prussian blue)
• Small watercolor brush
• White gel pen
• Compass with a hard-lead pencil
• Ruler or straight edge

STEP 1
Measure the length and width of your paper to find the center. Lightly draw a horizontal and a vertical line through the center. Holding the point of your compass where the lines intersect, lightly draw a circle that is large enough to reach about an inch from both edges.

STEP 2
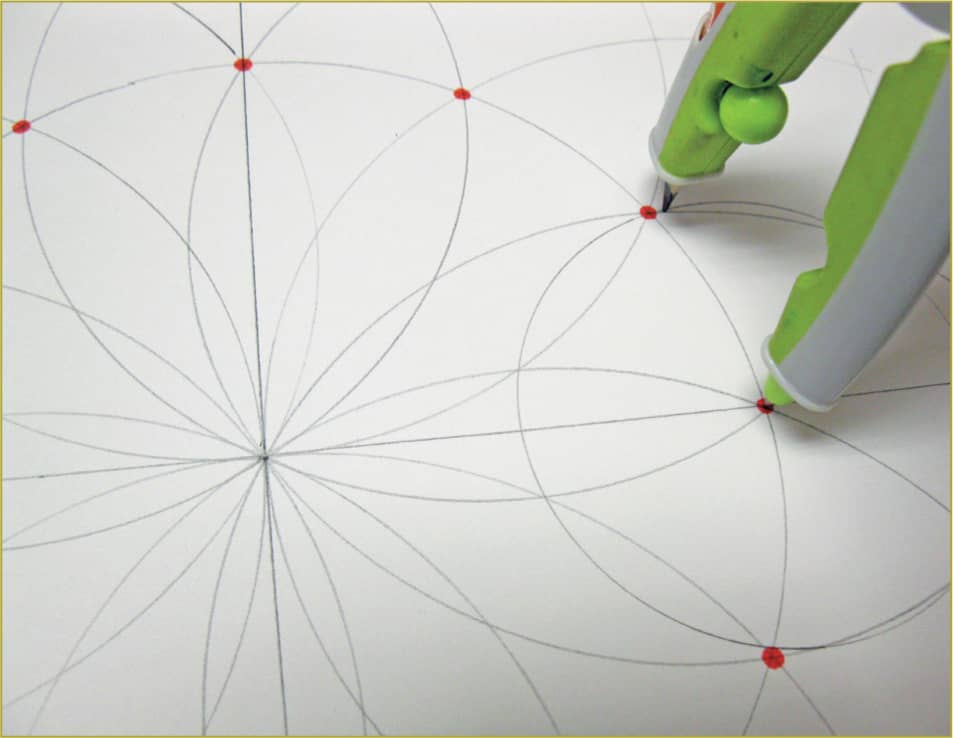
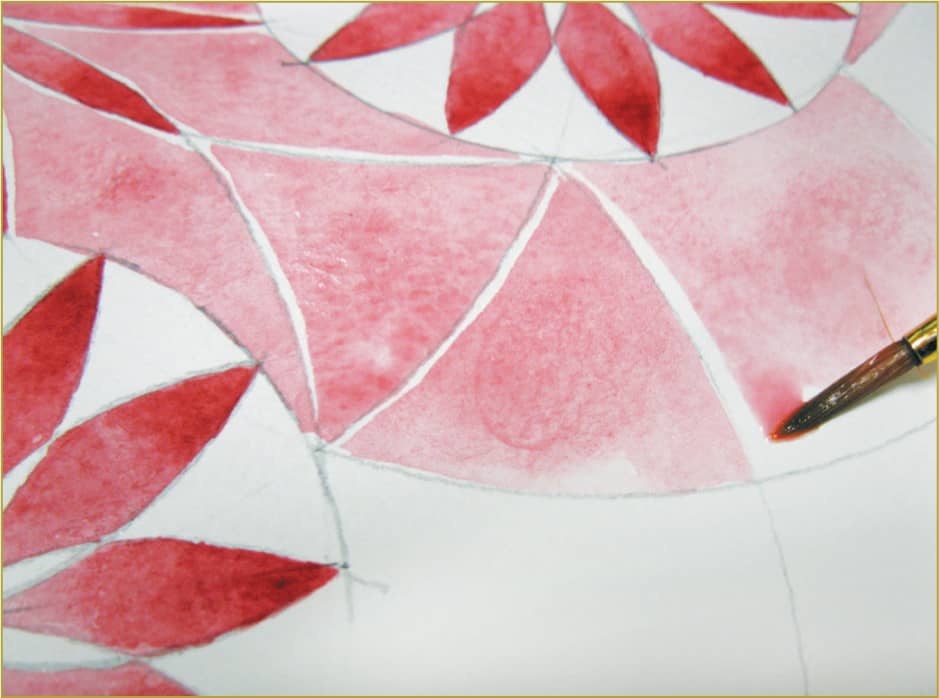
Keeping your compass open to the same distance, hold the point where the circle intersects with the horizontal and verticals lines (see the red dots in the photo), and lightly draw four more circles.

STEP 3
Holding the point of the compass on the new points you have made, (see the red dots in the photo), lightly draw eight more circles. You can now see petal shapes and are ready to start painting! If you have drawn the lines lightly with a hard-lead pencil, there is no need to erase any lines; the marks will not show through in the final piece and shouldn’t bleed with the addition of watercolors.

STEP 4
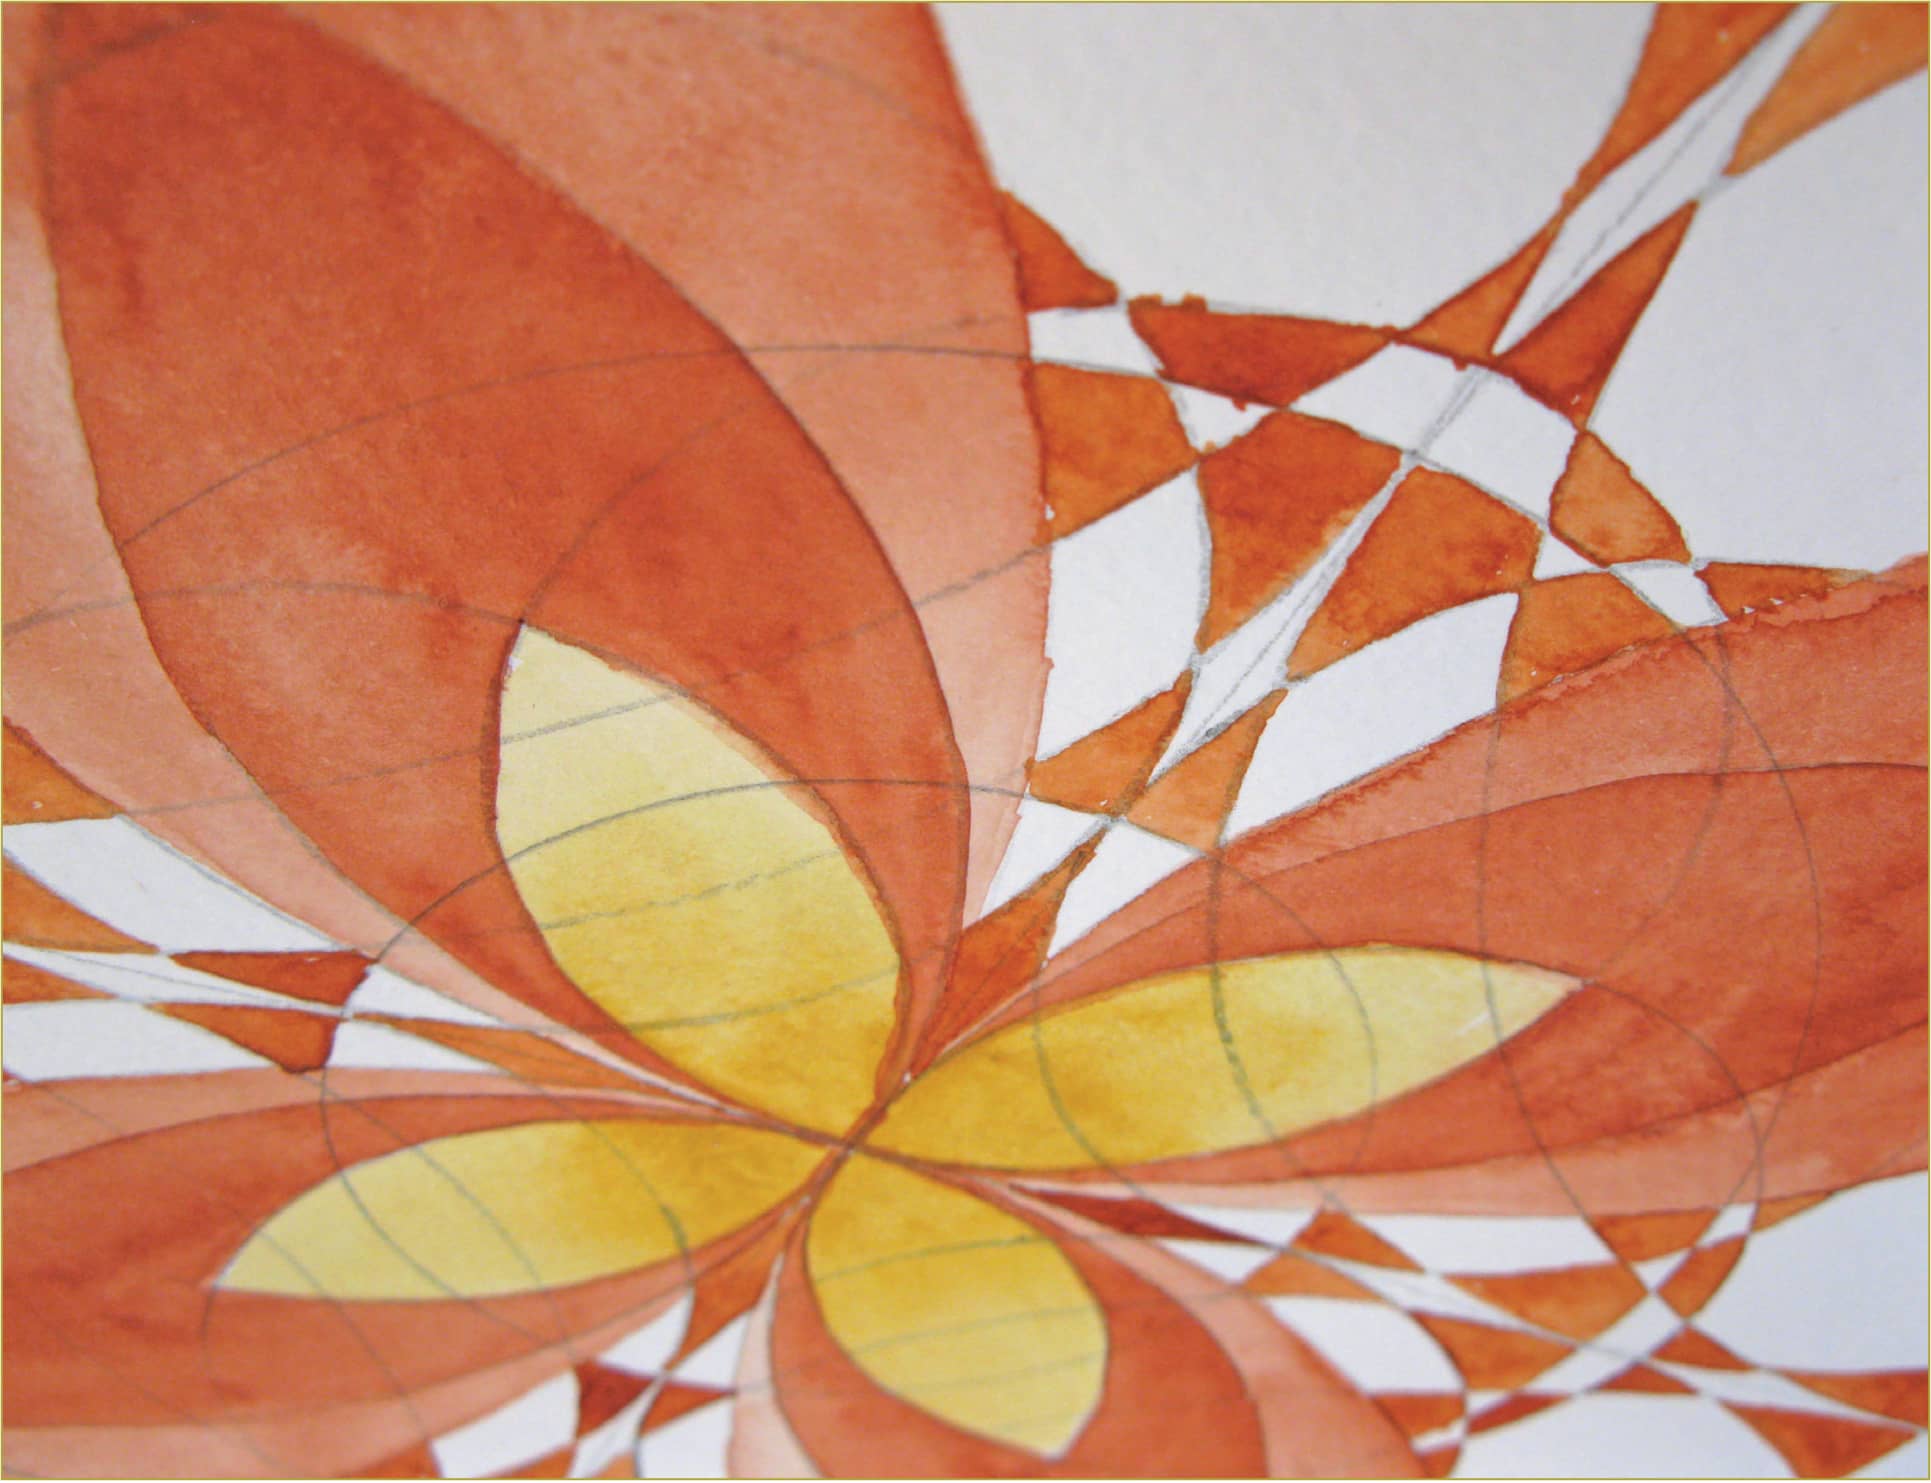
Paint the innermost petals with quinacridone red. Then paint the second-to-last row of petals with a gradated yellow ochre wash, using more pigment at the innermost tip, and blending out with just water at the outer tip.

STEP 5
Paint the in-between petals with a variegated green wash, starting at the inner tip with lemon yellow, followed by sap green, and ending with Prussian blue. While the paint is wet, blend the three colors together with a damp brush. Then mix quinacridone red and Prussian blue to create a violet mix, and paint the outermost petals, making the wash lighter at the outermost tip by using more water.
 ARTIST’S TIP
Skipping the petals in between allows the red paint to dry, so the colors won’t bleed into each other.

STEP 6
Repeat the painting process with a second layer of paint to achieve rich color. Splatter a bit of violet paint around the edges of the mandala by tapping your brush above the paper.
STEP 7
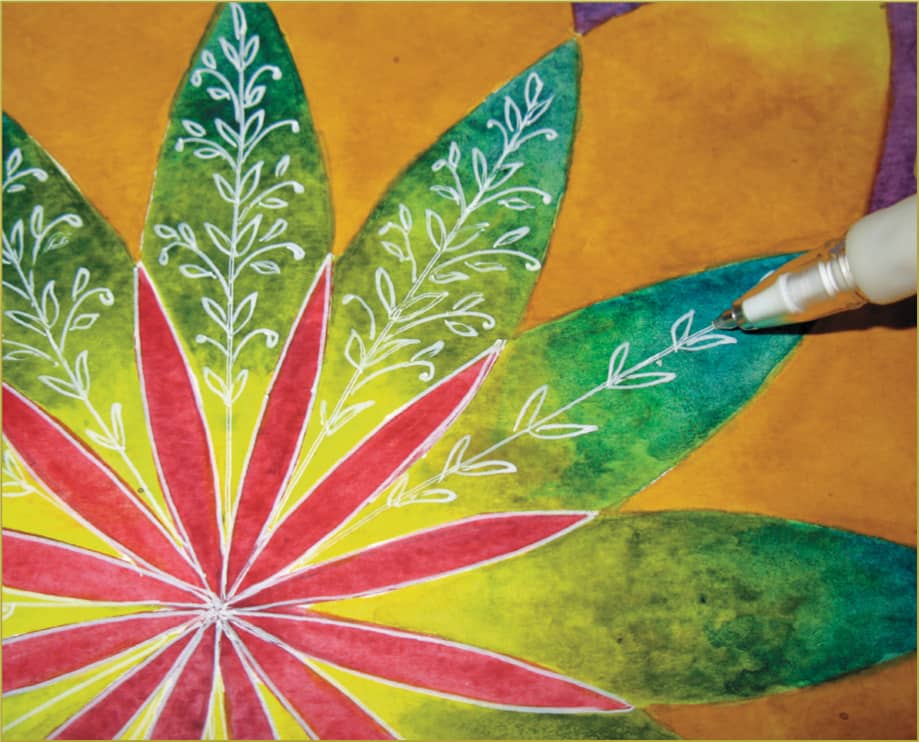
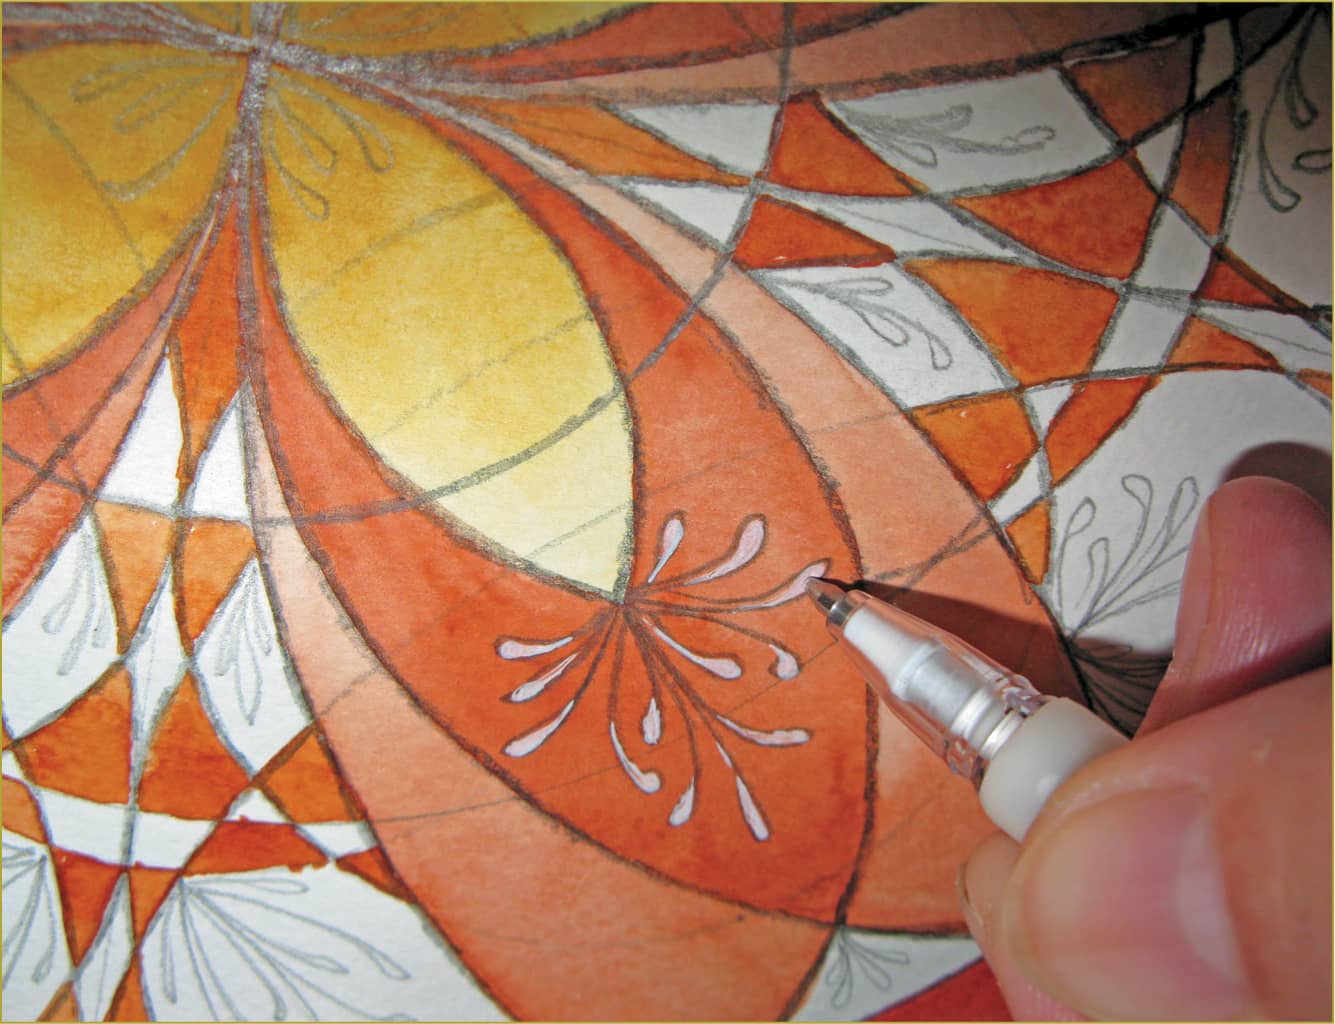
Use a white gel pen to outline the center red flower and draw leafy designs in the green petals.

STEP 8
Draw tiny stems of leaves in the yellow ochre petals, and paint a tiny touch of green in the leaves. To finish, draw scallops in a feathery doodle in the violet petals.


FINISHED PIECE
Monochromatic Mandala
This simple mandala can take on a different look depending on the color you choose and how much detail you add at the end. Sometimes I add shading with pencil, sometimes I add more detail, and sometimes I add less detail—only stop when the piece “feels” done to you!
MATERIALS
• Watercolor paper
• Watercolor paints
• Small watercolor brush
• Compass with a hard lead pencil
• Ruler or straight edge
STEP 1
Follow steps 1 through 3 on page 25, but make the initial circle a little smaller. Next adjust the opening of the compass to the distance between two dots, and draw a small circle at the east point.

STEP 2
Draw a vertical and horizontal line in the small circle using a ruler or straight edge. Note the four yellow points for step 3.

STEP 3
Keep your compass at the same measurement, and draw four circles, starting with the four yellow points shown in step 2. Continue on, drawing eight more circles just as you did with the larger mandala. Repeat to create a small petal mandala at the north, south, and west points.

STEP 4
Pick any paint color—I chose crimson red—and paint the petals with a light watercolor wash.

STEP 5
Paint all the petals and allow the first wash to dry. Then paint a second layer near the tips of the petals, blending out with a damp, clean brush.

STEP 6
Let the petals dry, and repeat with a third layer of paint just at the tips of the petals.
STEP 7
Paint a light wash on all the inner areas of the mandala, leaving a small bit of white paper showing between each section. Paint a second and third layer near the tips of these shapes as you did on the smaller petals, blending the color out with water for each layer. Embellish with dots and lines.

Circles Mandala

Combine multiple circles in this pretty piece for a mesmerizing work of art. You can create this mandala with circles of any size. Use mine as inspiration, but as long as you are consistent with the circles on all four sides you can create any pattern you like!
MATERIALS
• Watercolor paper
• Compass with soft-lead pencil
• Watercolor paints
• Paintbrushes
• Blending stump

STEP 1
Follow steps 1 and 2 on page 25 to get started, filling about 3/4 of the page with your initial circle. Once you have drawn four circles from the initial circle, adjust your compass to about half that width, and repeat these steps, starting at the center point again.

STEP 2
Adjust your compass again to about half of the width, and repeat, overlapping all of the different sizes of circles. To finish the drawing, make another circle at each of the dots shown, adjusting your compass to the previous widths. Remember that you don’t have to follow my exact pattern—you may find it easier to create your own!

STEP 3
Select four petal shapes, and paint them as shown. I used shades of raw sienna, burnt umber, and yellow ochre.
STEP 4
Pick out any pattern you see in your drawing, and paint the details in a checkerboard pattern. Your pattern may look different than mine if you set up your circles differently.

STEP 5
Continue painting outward, filling open areas with one of the three main colors you started with. When the paint is dry, trace the circles with a soft-lead pencil. Draw flourishes or other shapes in the open white segments, as well as some of the painted segments.
STEP 6
Use a white gel pen to fill in the details drawn in the watercolor segments.

STEP 7
Add a touch of watercolor paint (I used red) to the details drawn on the white segments.
FINISHED PIECE
Grayscale Mandala

You don’t need vibrant color to create a compelling mandala. Use Payne’s gray to create a dramatic grayscale mandala like this one.
MATERIALS
• Watercolor paper
• Payne’s gray watercolor paint
• Paintbrushes
• Compass with hard-lead pencil
• Ruler or straight edge

STEP 1
Follow steps 1 and 2 on page 25, starting with a smaller circle that is approximately 1/3 of the page’s height. Without changing the size of the compass, put the point on the four red dots shown, and draw four more small circles.

STEP 2
Use a straight edge to draw a horizontal and a vertical line in each of the four outer circles.

STEP 3
Place your compass point on the red dots shown here, and draw 12 more circles.

STEP 4
Using the petal shapes as a guideline, draw loops in each one with a fine-line marker or pen. Then draw horizontal and vertical lines between each petal shape.
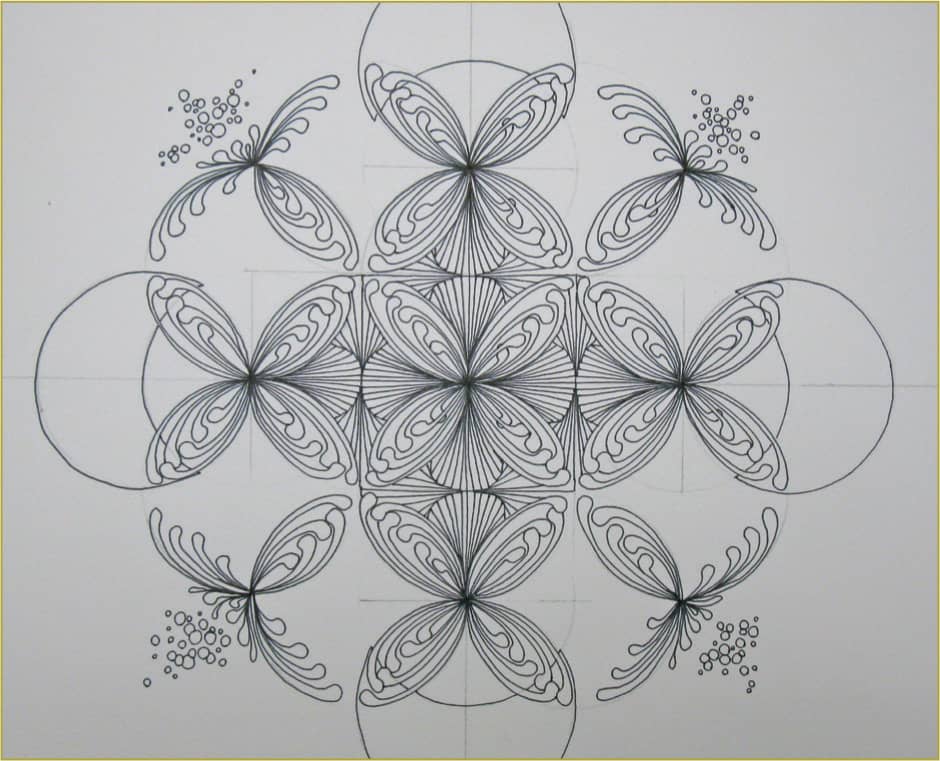
STEP 5
Continue drawing in each of the four sections creating scallop shapes. In the outer circles draw four crescent-moon shapes. Fill in any open spaces with clusters of small circles.

STEP 6
Paint the page with Payne’s gray watercolor paint, using a brush small enough to fit between the looping shapes. Blend paint at the outermost edges out by using a brush filled with just water. Shade the scalloped areas by putting a bit of paint at the tips and blending out with water.
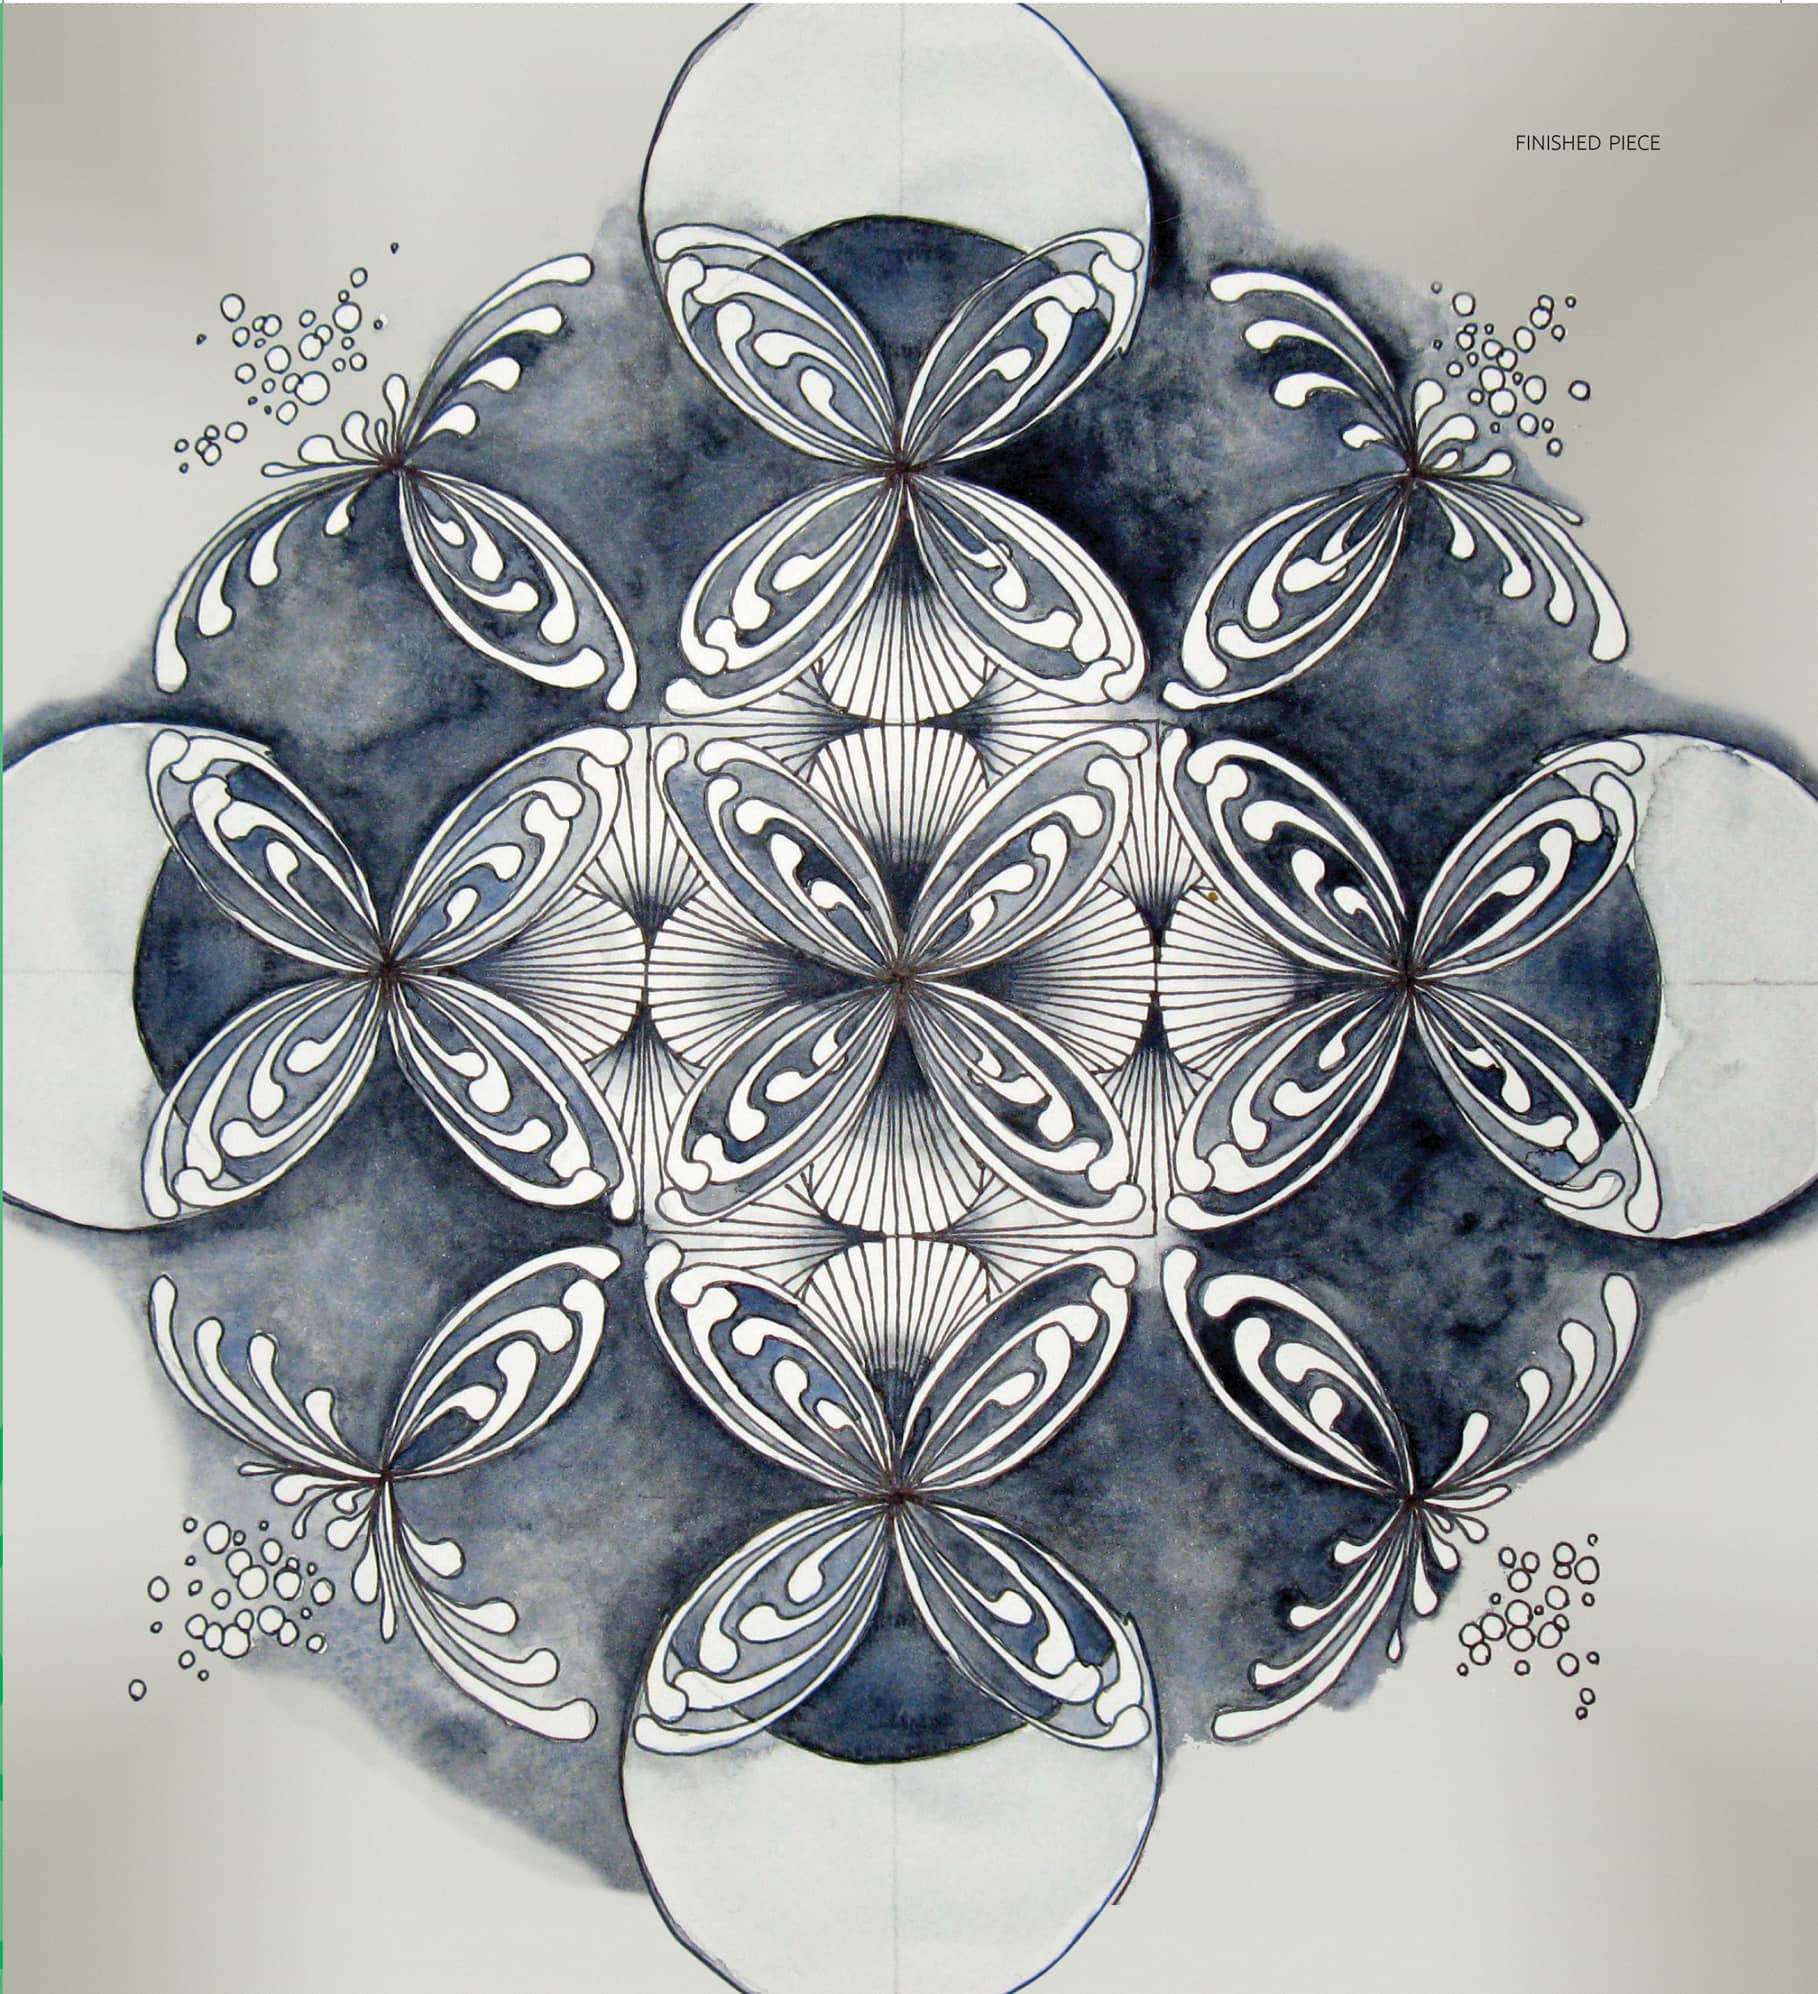
FINISHED PIECE
Sweet Pea Mandala

Use a sweet pea flower for reference to create this whimsical and pretty floral-inspired mandala!
MATERIALS
• Watercolor paints (pink, blue, green, light green, yellow, yellow ochre)
• Cold-pressed watercolor paper
• Black permanent pen
• Compass with soft-lead pencil
• Straight edge

STEP 1
Follow steps 1 and 2 on page 25 to get started. Then draw loops following the lines of the center petals, and draw four leaves where the petals intersect.

STEP 2
Using a wildflower for reference, draw a stemmed flower along one of the petal lines in each of the four sections.

STEP 3
Using a sweet pea flower for reference, draw a sweet pea stem on the opposite side of each quarter in the mandala.

STEP 4
Paint the background with loose splashes of blue and green watercolor paint, blending out the paint with water as you near the edges. You can use liquid frisket to mask the stems and flowers if you like to protect the drawing.

STEP 5
Add an additional layer of paint in some areas, and spatter some paint around the piece.

STEP 6
Paint in the flowers with pink and yellow watercolor paints. Let dry, and apply a second layer of paint to the flowers to create shadows. Paint the stems with yellow-green paint.

FINISHED PIECE