Found Materials Mandalas
ALYSSA STOKES

 Photography & Editing Techniques
Although much of the beauty of the natural or found-object mandala exists in seeing it in real life, it is wonderful to be able to photograph and document your work. These images become artwork that lasts long after your mandala is deconstructed. They are also a great way to share your creations with others. You don’t need fancy equipment or software—I typically photograph and edit my work with an iPhone®, although you can also use a DSLR camera and Adobe® Photoshop® or similar photo-editing software to create higher-resolution images.
SETTING UP THE STUDIO
Mandala-making assemblage doesn’t require much space, and a small work area can easily be accommodated in your home. All you need is a clear, flat surface—on the floor, a desk, or a table. I find working on a tabletop to be most comfortable, although it can limit the size of your arrangements. Set up your workspace next to a window with plenty of natural light if possible. You will need several sheets of white or colored paper to use as backgrounds. I suggest purchasing a large sheet of white drawing paper, approximately 22" × 28", and several smaller sheets in various colors.

EDITING
In this example, I’ve demonstrated editing techniques on an iPhone®. You can achieve similar results with editing software on your own phone or a computer. Start by cropping and rotating the photograph to center the mandala. Then increase the exposure, contrast, brightness, and color saturation.

BEFORE

AFTER
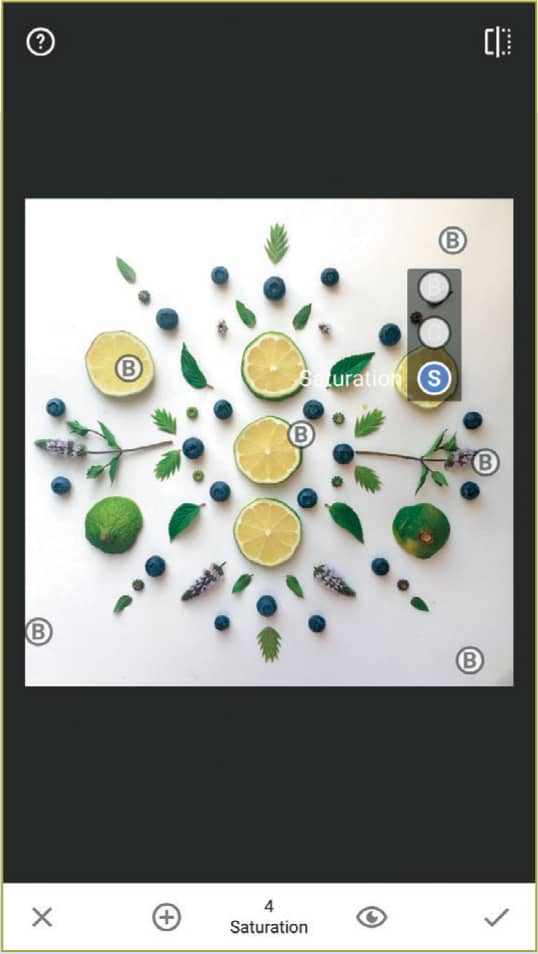
I highly recommend Snapseed™, a free photo-editing application, to anyone serious about mobile photography. I like to use the “Selective” tool to brighten or adjust contrast and saturation in certain areas of the image. Snapseed also has a tool called “Spot Repair” that allows you to tap on the image to erase unwanted specks or marks—perfect for creating flawless imagery!
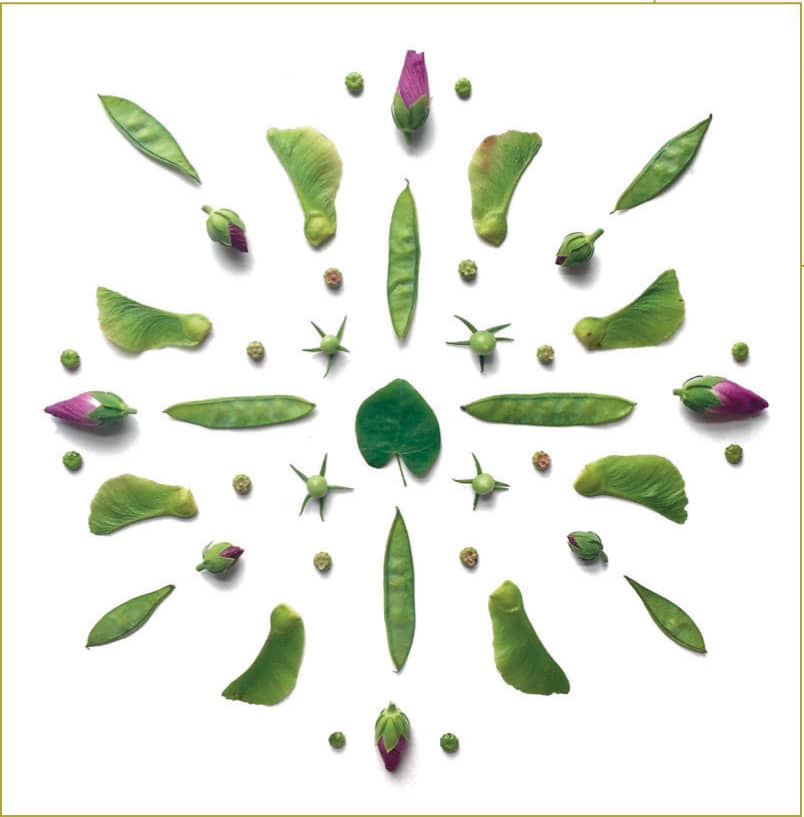
Nature Mandala with Pressed Flowers

Pressing flowers is a great way to preserve and reuse your favorite natural objects in multiple mandala designs. Pressing also allows larger flowers to lay flat, acting as perfect mandala centers.
 MATERIALS
• Cut flowers and small leaves
• Flower press or books
• Parchment paper
• Additional materials, such as beads and small stones*
• Scissors
• Tweezers
*Note: Collect materials that complement your flower focal point in color scheme.
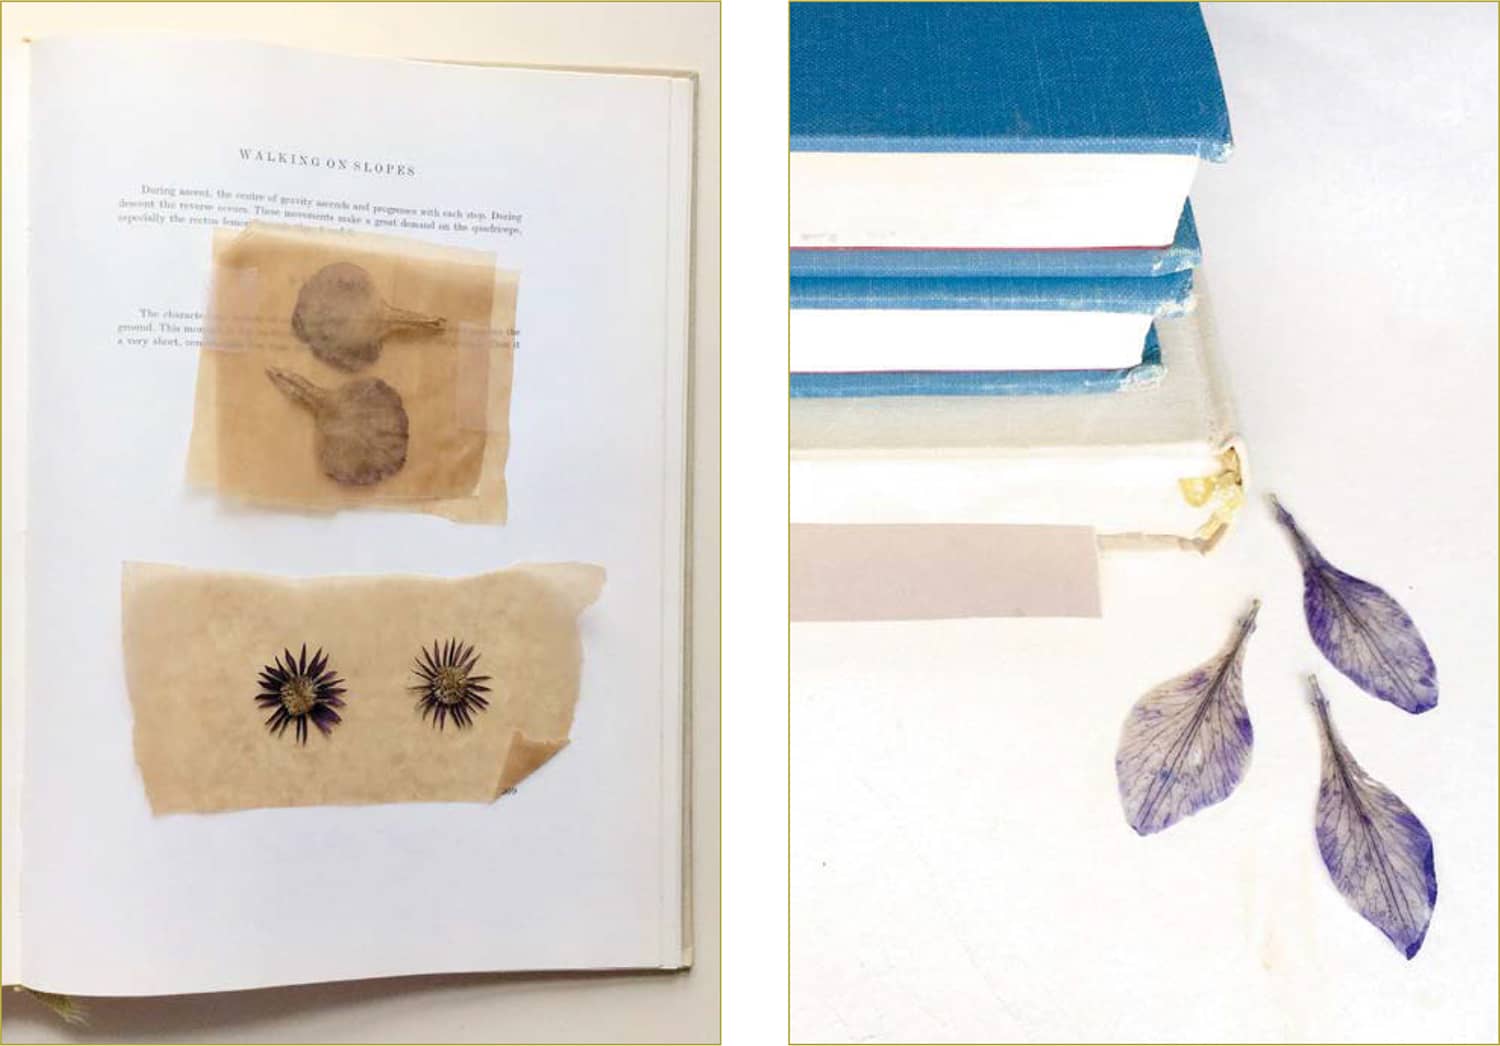
STEP 1
Press your flowers. You can purchase or build a flower press, but all you really need is wax or parchment paper and several heavy books. Place the flowers between two sheets of parchment paper near the back of a large book. Pile several other books on top and wait a few days.
 ARTIST’S TIP
Ensure that the flower is spread flat when you place it in the press. It helps to trim off the stem first. More three-dimensional flowers can be taken apart before pressing and reassembled during the design process.

STEP 2
Arrange the first circular pattern around the pressed flower. Alternate between a natural object, such as a petal, and a circular object, such as a bead. Depending on the size of your objects, you may use 4-8 pieces of each small element.

STEP 3
Repeat with a second circle using different objects, such as leaves instead of petals. To complete your mandala, you may want to extend every other point further. For example, alternate between using a single petal and a leaf combined with a petal. Use tweezers to adjust the placement of your objects.

FINISHED PIECE
Candy Mandala

Candies—sweet and colorful delights—are perfect for crafting a bright and playful mandala.
MATERIALS
• Candy*
• White or colored paper
• Cutting board and knife (optional)
*Note: I suggest purchasing at least six of each larger candy and a dozen of each smaller candy to maximize your options.
Planning a child’s party or a bridal shower? Create a sweet candy mandala to photograph for the invitations!![]()

STEP 1
Lay out your candy bounty on a clean surface—I prefer white—and sort by type, color, and size.
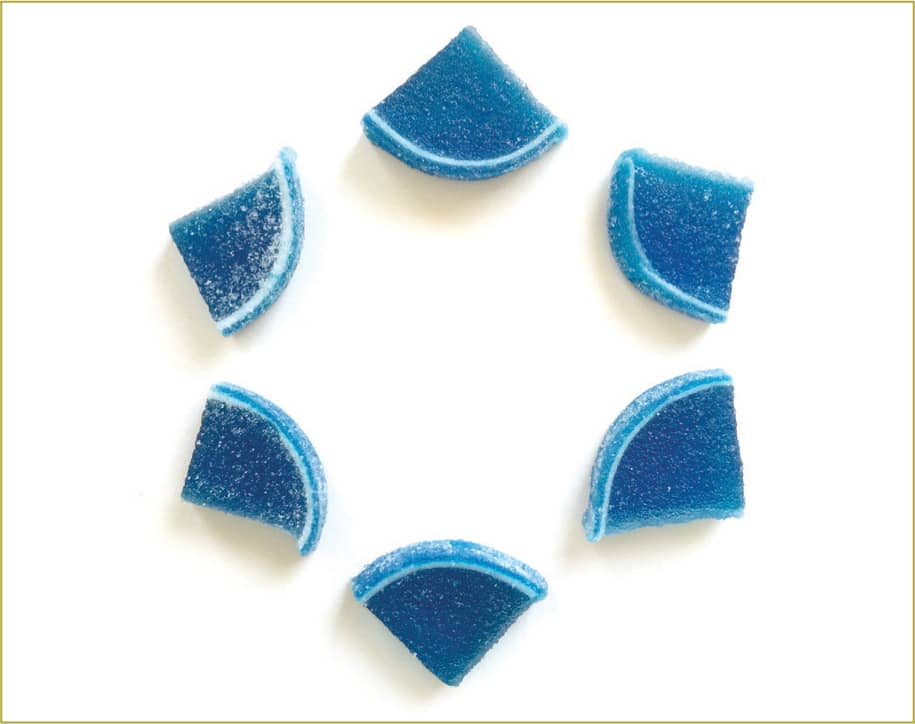
STEP 2
Begin with the largest candy that you would like to include in your mandala. Experiment with circular arrangements of four, six, or eight pieces.

STEP 3
Select and place a center focal point and some smaller candies inside the first candy ring.


STEP 5
Add two or more additional radial rings of candy. Consider creating a candy rainbow, or limit your color palette to shades of two or three colors.
ARTIST’S TIP
Repeat at least one type of candy in a center ring and an outer ring to bring unity to your design.

FINISHED PIECE
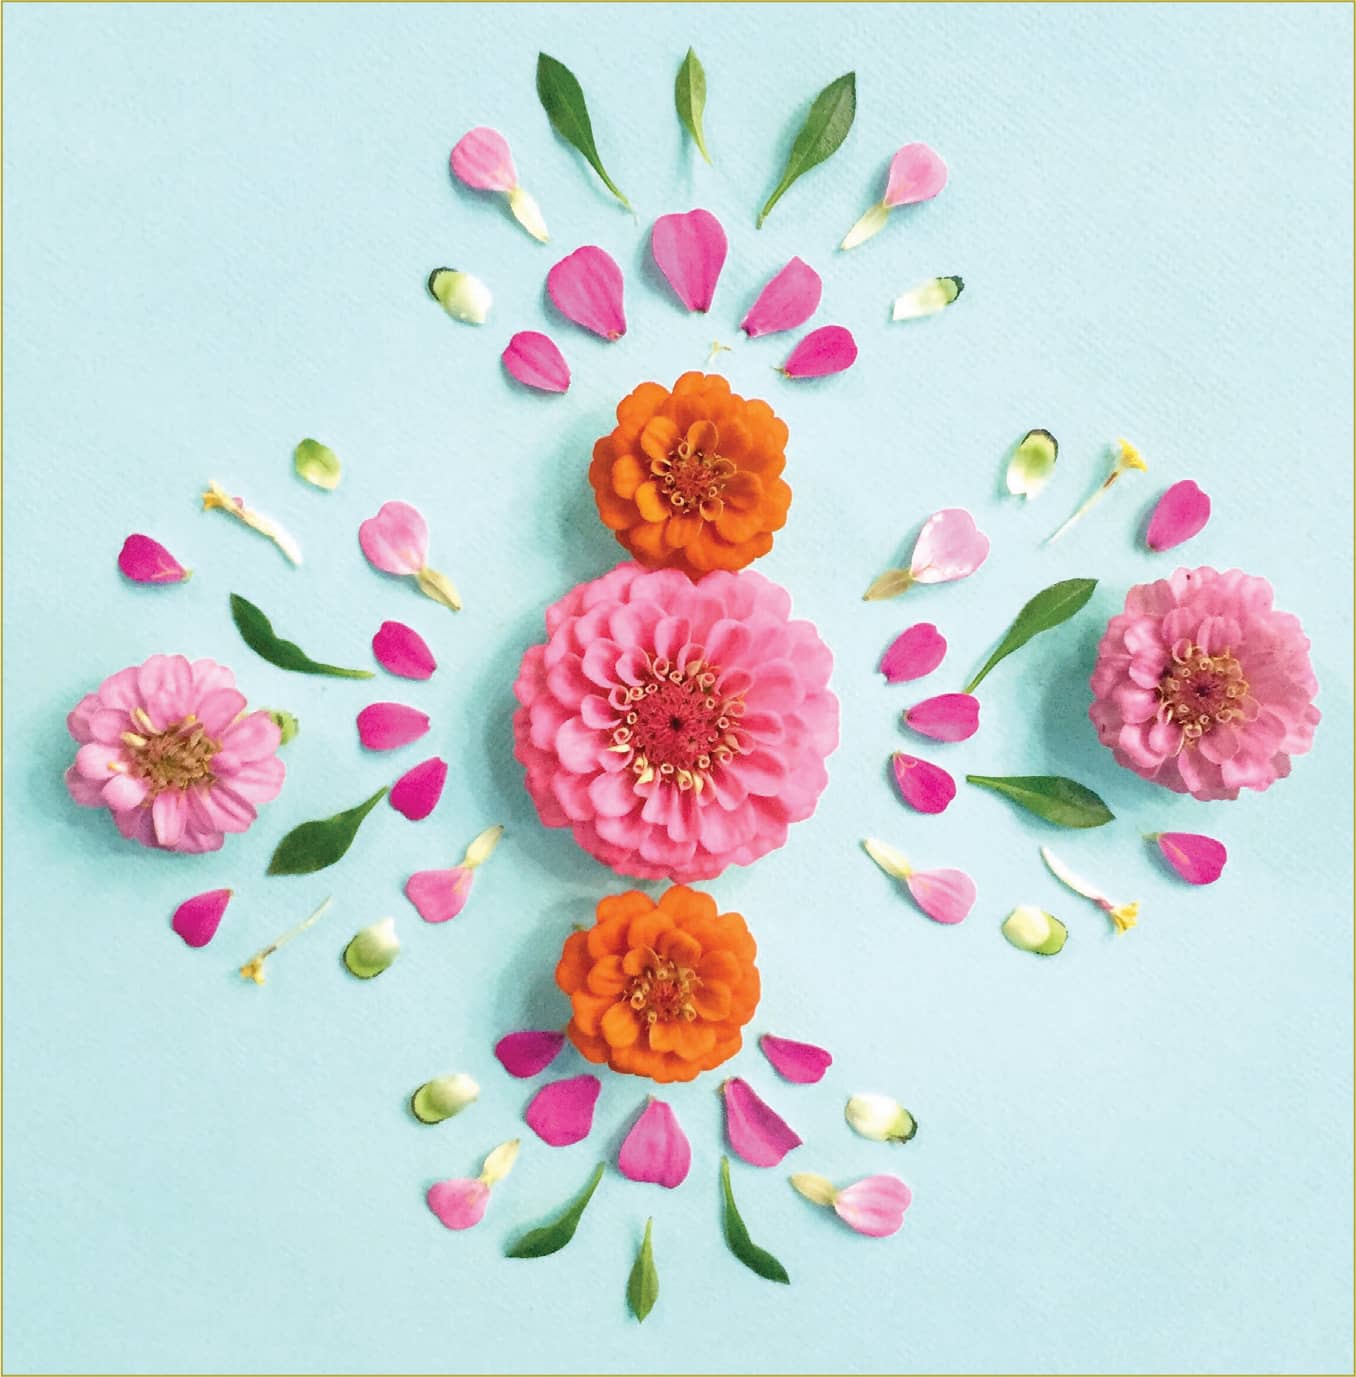
Simple Garden Mandala

This easy-to-create garden mandala uses common weeds and wildflowers to create a sweet pastel design. It’s a great mandala for beginners, and you can also repeat and build upon it to create more complex designs.
MATERIALS
• Cut flowers*
• Clover plant
• Small round objects
• Scissors
• Tweezers
• Color paint swatches (optional)
*Note: Many flowers wilt quickly and must be used almost immediately after picking and not handled too much.
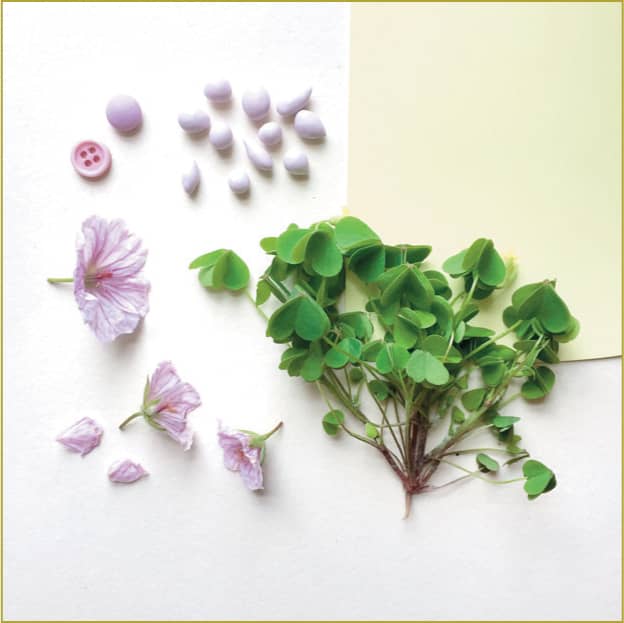
STEP 1
Trim your flowers and clover plant, separating each petal and leaf. Save all parts of the flower—you may be able to use the pieces in your design. Lay out all of your mandala materials. Select a limited color palette, such as the pink and green that you see here. For the small round objects, I am using pink chocolate-covered sunflower seeds. You could use other types of small candies, buttons, stones, or beads.
ARTIST’S TIP
Look for small flowers and weeds. Pick at least one type of flower, preferably something with small flat petals. Pick at least one clover plant, or something similar, with small green leaves.

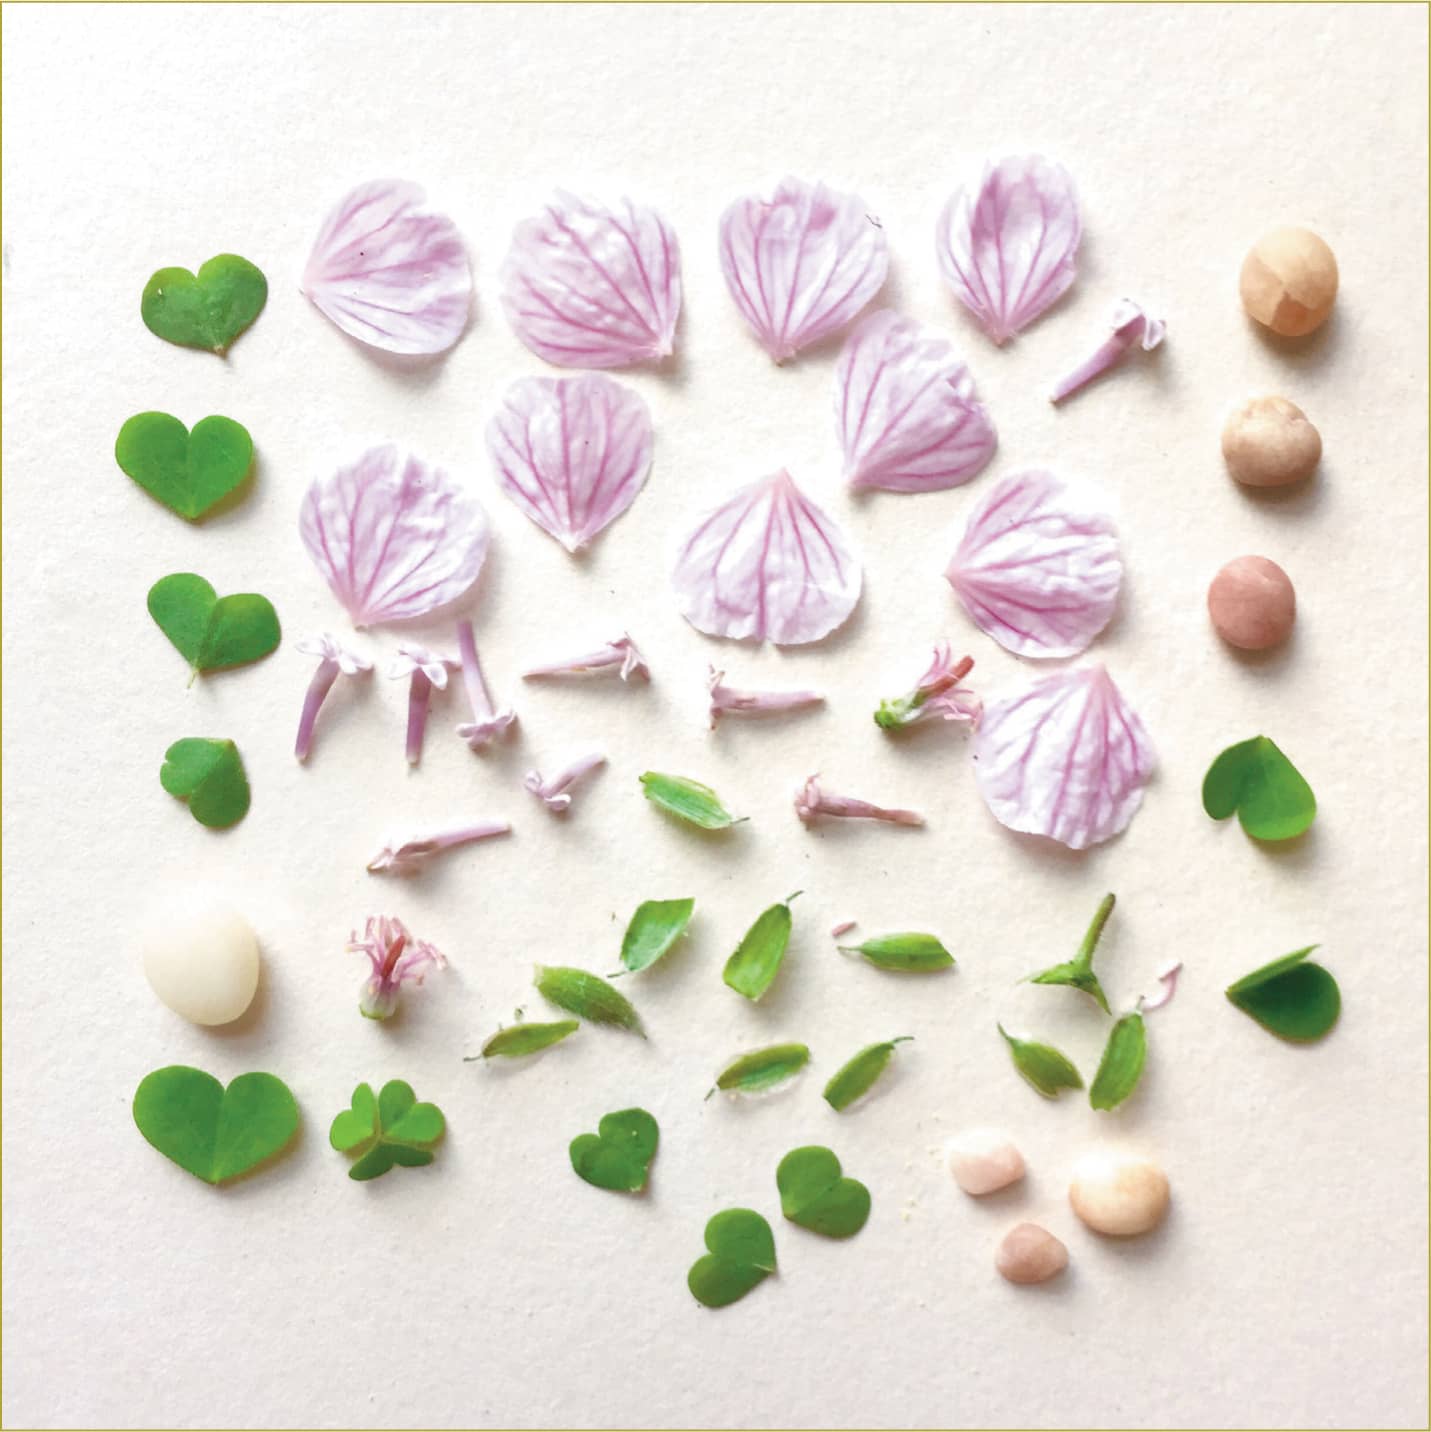
STEP 2
Arrange four or five petals in a circular shape. Place the inside part of the flower, pistil, stamen, or other round object in the middle of the circle.

STEP 3
Select several clover leaves that are about the same size. Place them next to each petal, and use your tweezers to adjust the small leaves so that they all face outward.

STEP 4
Place small round objects or other flower parts in the spaces between each leaf. If you like, complement your simple mandala by placing paint swatches in similar colors next to or behind your design.
![]()
After photographing and editing your mandala, try making your own greeting cards by printing the image on card stock.

FINISHED PIECE
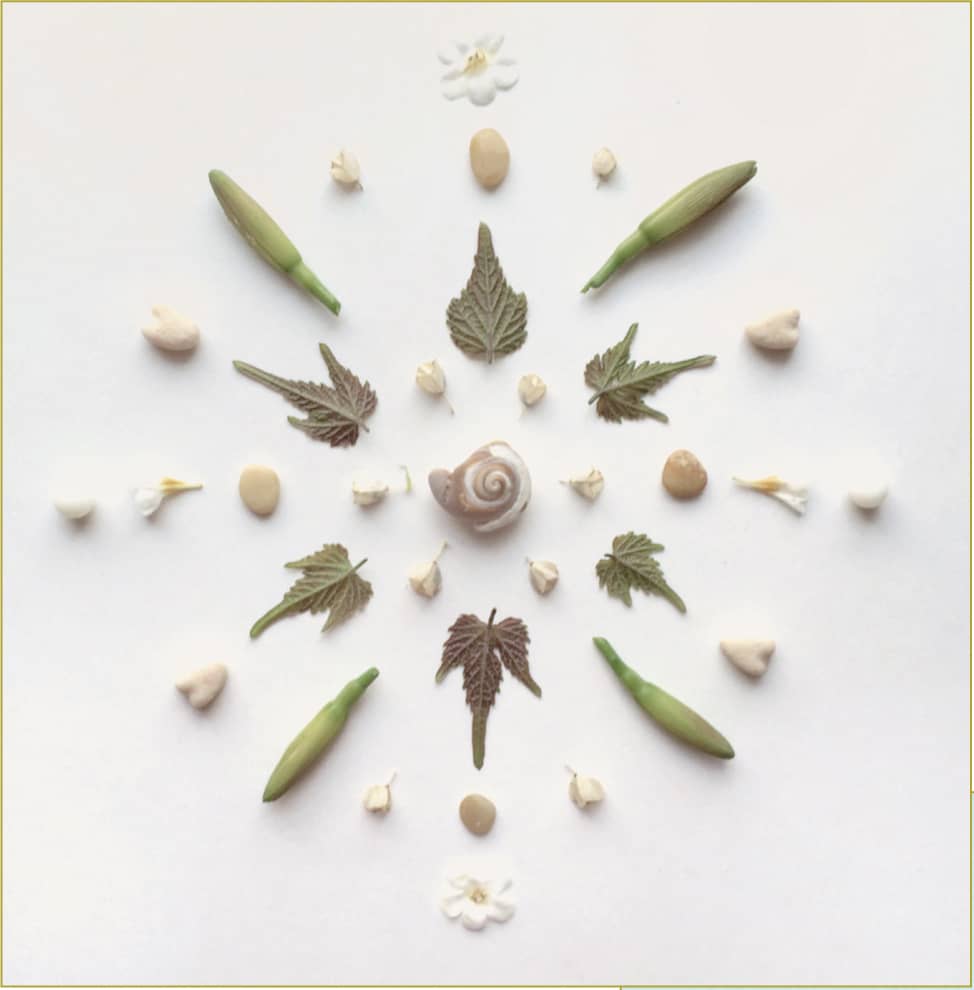
Beach Mandala

This nature mandala is perfect for a summer trip to the beach, but you can create it any time of year using your shell collection and a little gathered sand.
MATERIALS
• Shells*
• Beach stones
• Sand
*Note: Collect multiples of the same type of shell; think in terms of three of a kind or more.


STEP 1
Organize your shells and stones, arranging the items by size and color. I grouped my shells into five sets of three, with three of the same general type, size, and color. Select a few more stones, 6 or 12 in a set, to fill in the mandala design.

STEP 2
Pour and pat the sand into a thin layer that covers an area approximately 12"×12", depending on the size of your shells. Work on a large sheet of white paper for easy cleanup! Create a natural looking edge to the sand by gradually thinning it out.

STEP 3
Select one unique shell for the focal point, and place it in the center of the sand circle. Then begin with two smaller shell sets. Arrange the shells evenly around the central focal point, alternating between the two types.
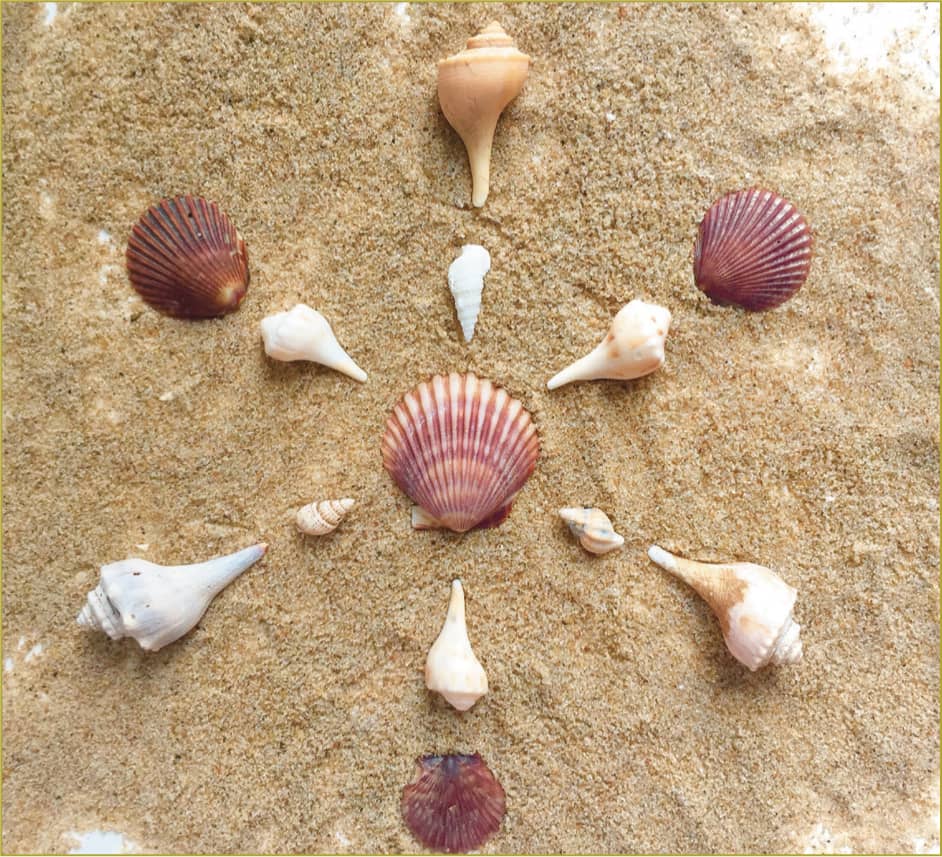
STEP 4
Continue to work out radially from the center point, by placing the next two sets of shells. Line up the outer shells with the inner ring of shells previously placed.

STEP 5
Place six of one type of stone between each shell in the inner ring. Then repeat this for the outer ring, using a different set of stones. If you wish, add more shells or stones to the outer ring of the mandala.
The Beach Mandala makes a great summer-themed centerpiece!![]()
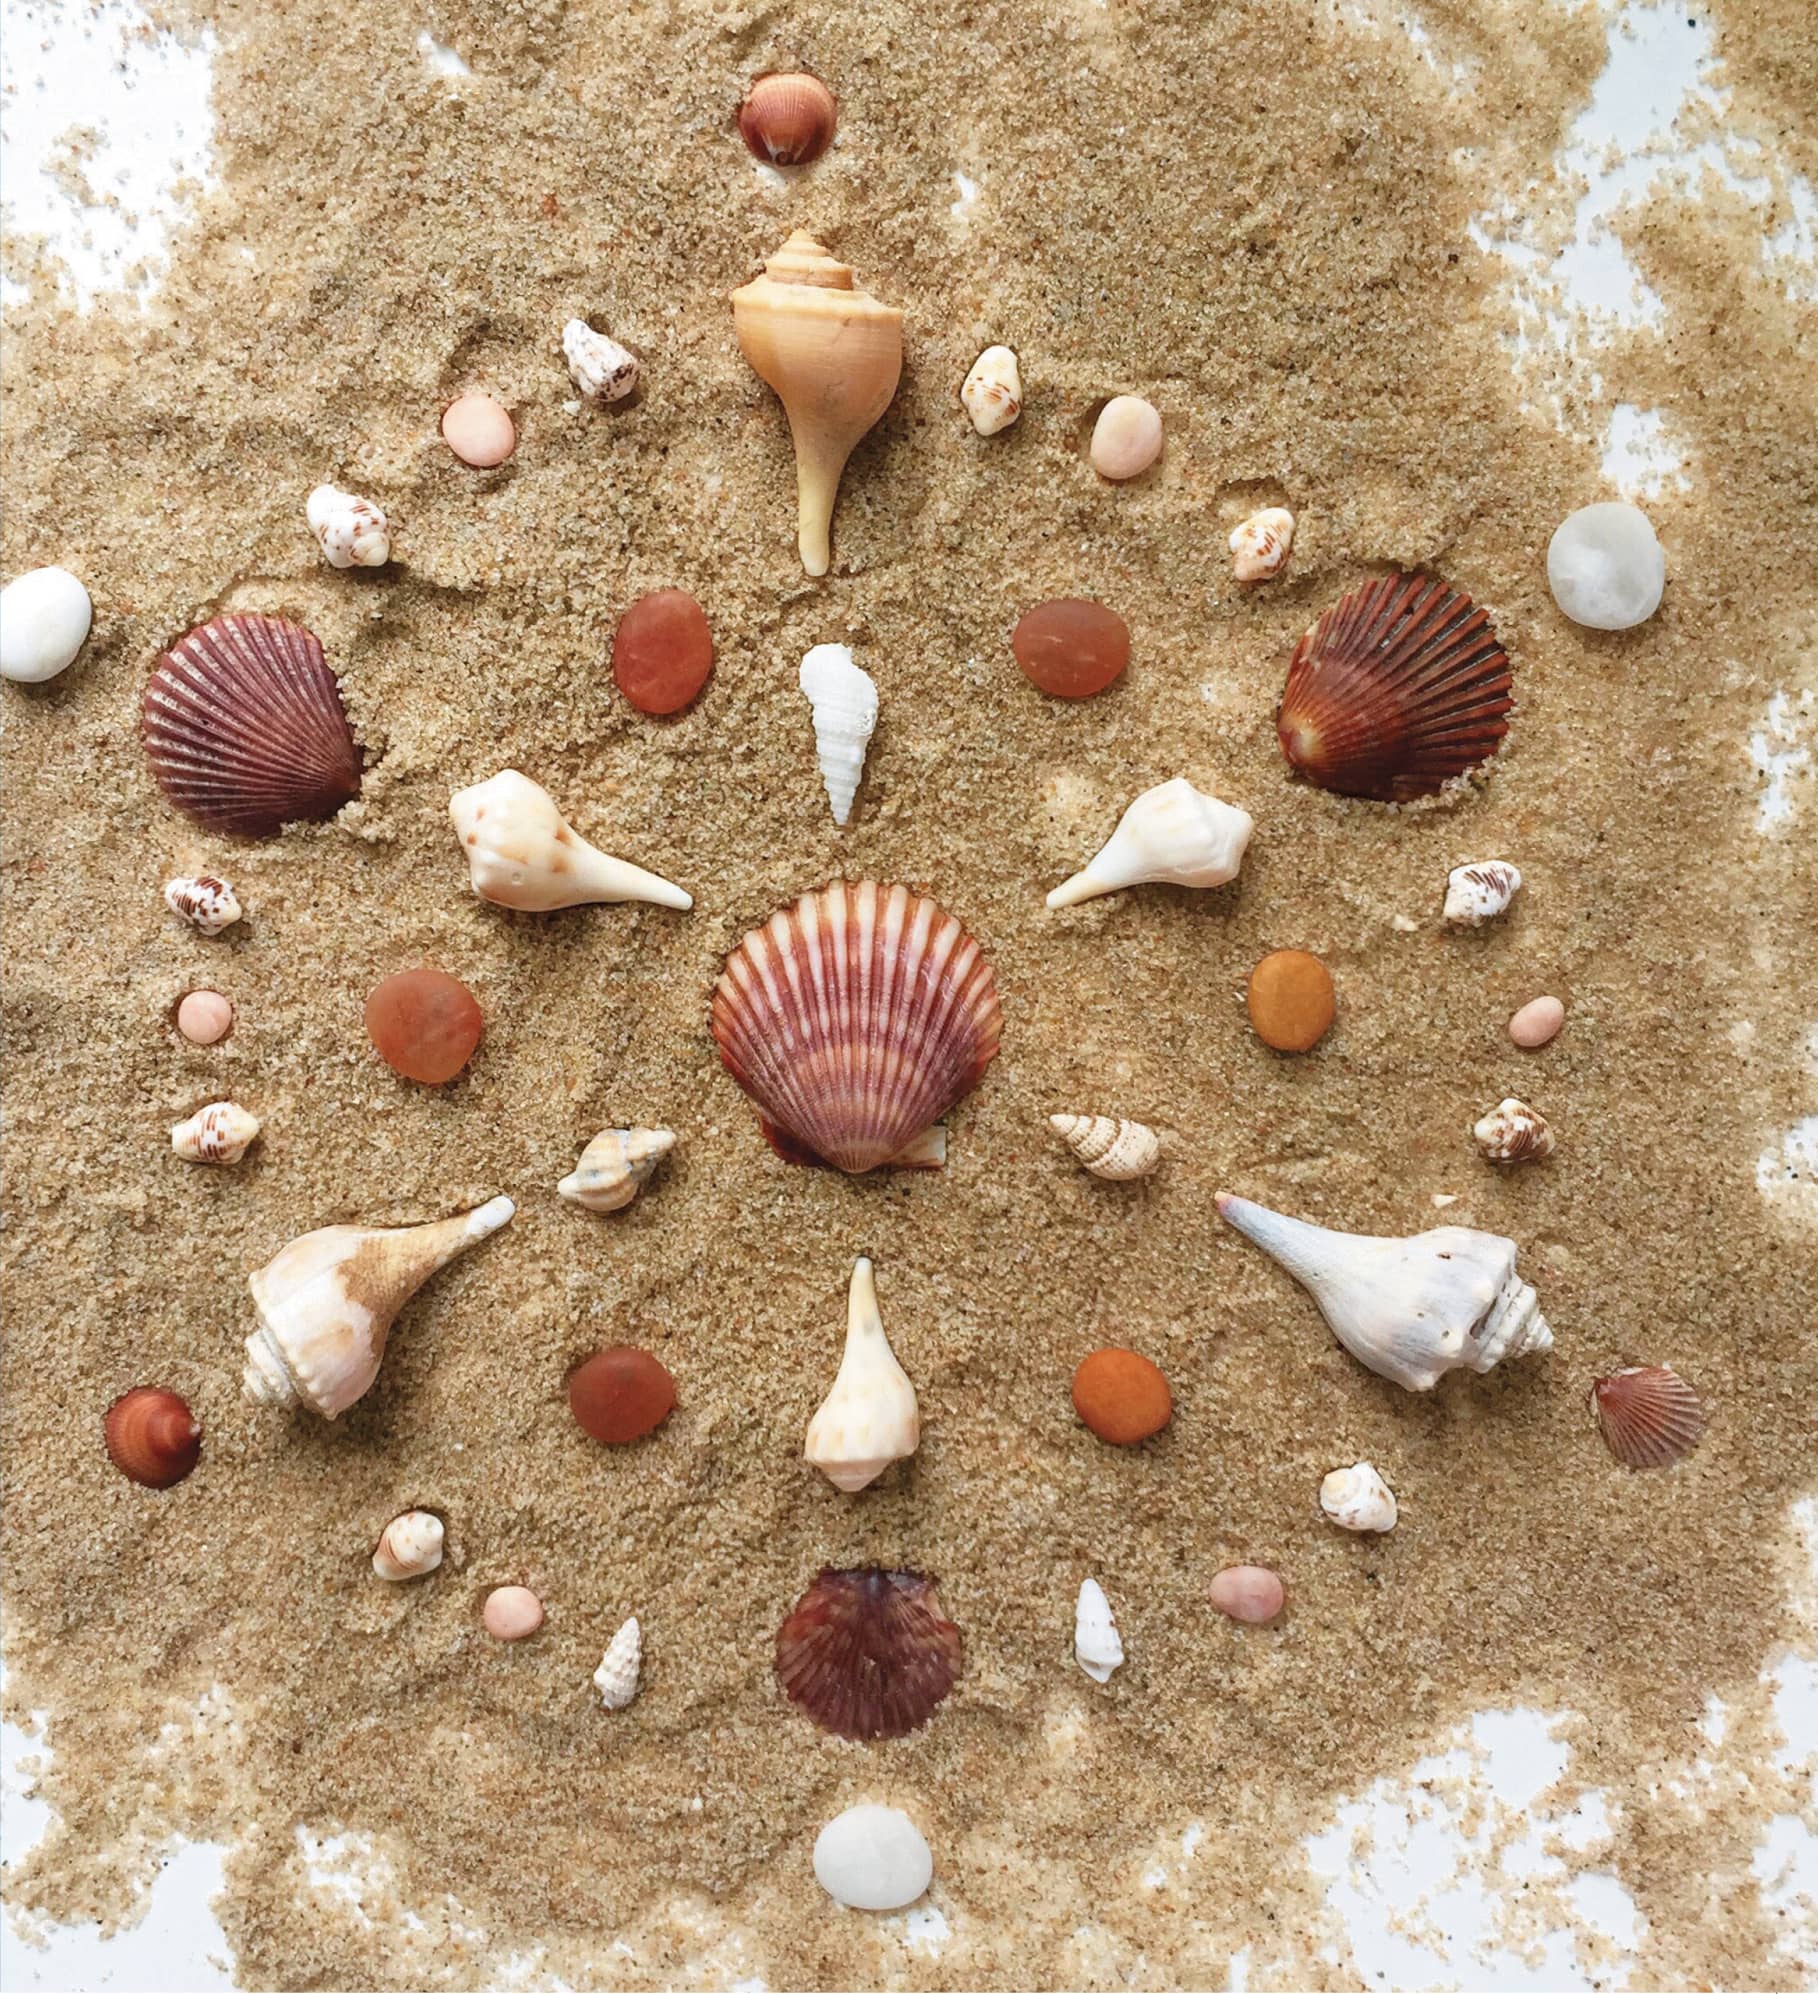
FINISHED PIECE
Mandala Inspiration
If you look around, you can find materials for mandala making just about anywhere.

This walnut and cherry mandala utilizes a complementary color scheme.
Challenge yourself to pick just one color, and build a mandala using only items in that color.
This mandala utilizes a neutral color scheme—it isn’t necessary to use bright colors to create a beautiful mandala.

You don’t need sand to make a pretty beach mandala.
Notice how the light blue paper behind this mandala helps the colors “pop.”
Foodie Mandala
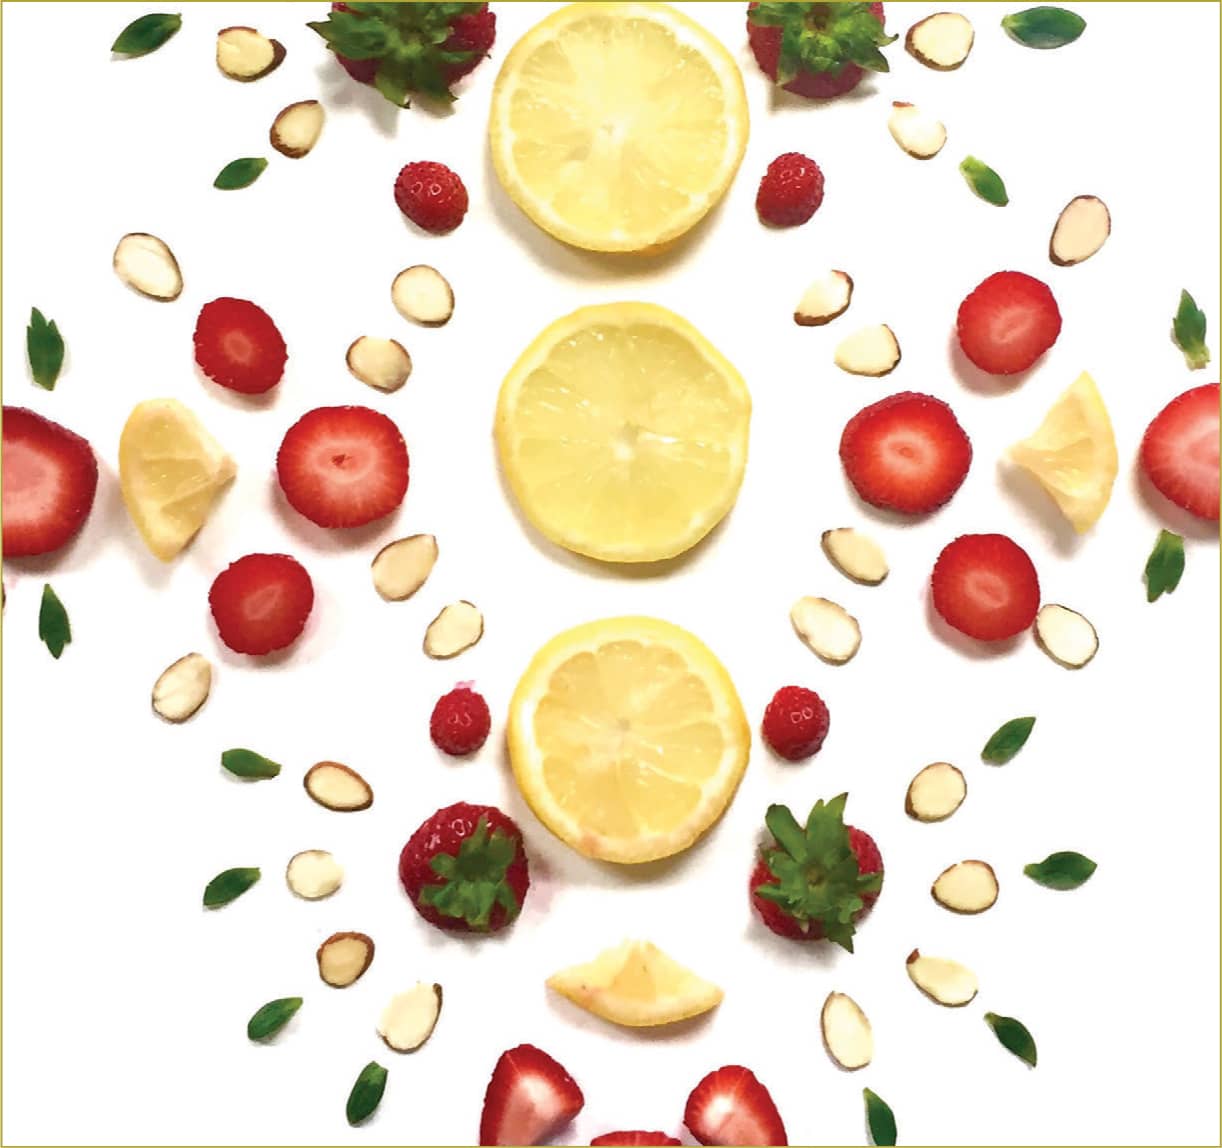
This mandala can be created using your favorite recipe as inspiration or simply by raiding your refrigerator and choosing a colorful selection of fruits and veggies. A trip to the farmer’s market is also a great starting point for this fresh twist on the found-object mandala!
MATERIALS
• Fruit (strawberries and lemon)
• Nuts or grains (sliced almonds)
• Kitchen knife
• Cutting board

STEP 1
Slice the fruit into round, even sections. Cut one of the citrus slices into four triangles. Cut at least two strawberries into triangular segments as well, by cutting off the top, slicing the fruit in half, and then cutting lengthwise.

STEP 2
Place the largest lemon segment in the center, with two similarly sized lemon sections above and below. Place two almond slices in the space between the lemons on the left and right sides. Place two larger strawberry slices, and two citrus triangles, on either side of the center lemon. Add two strawberry tips next to both the top and bottom lemons.
ARTIST’S TIP
Keep all of the cut pieces, including the tops of the strawberries.
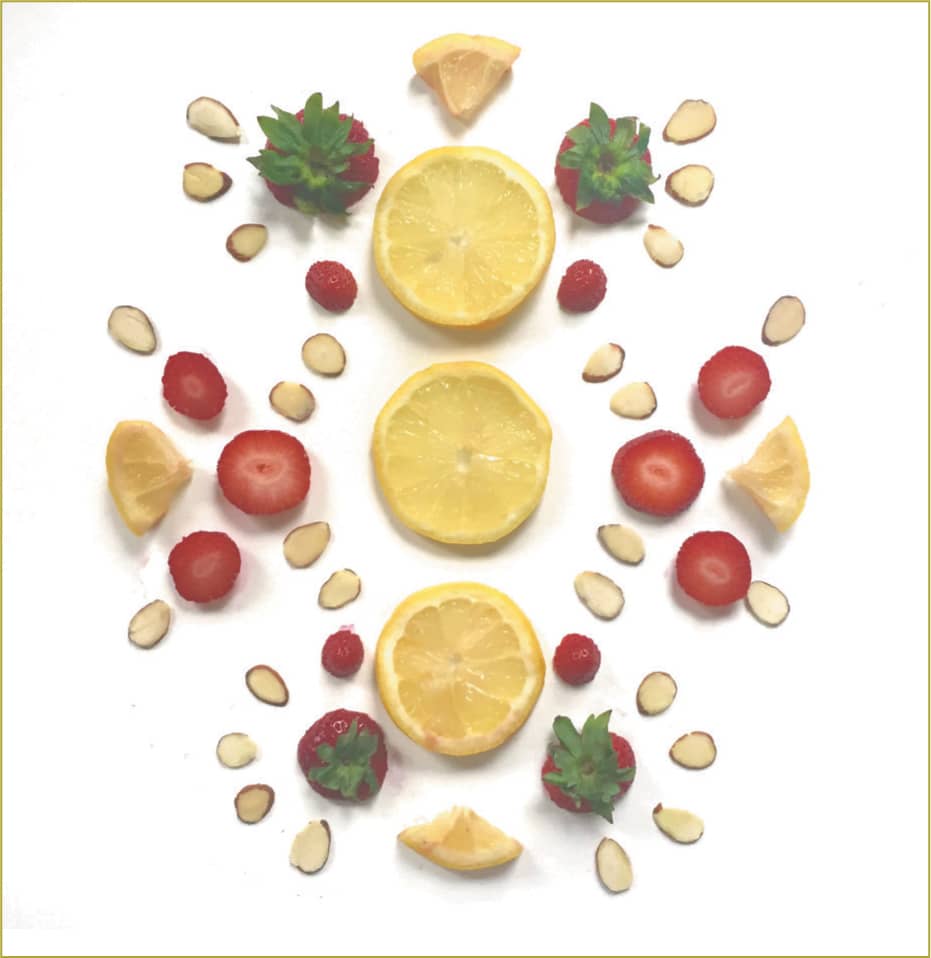
STEP 3
Add to the top and bottom of your design by placing the remaining two citrus triangles, pointing inward. Arrange four strawberry tops on each side of the lemon triangles. Outline the sections of your mandala with almond slices. Add four medium-size, circular strawberry slices to the left and right of the design.

STEP 4
Carefully pick the green leaves off of the tops of your remaining strawberries. Place a final large strawberry slice on the far left and right of your design. Surround each strawberry with five leaves and two small almond slices. Finish by creating a pointed crown on the top and bottom, using triangular strawberry slices (see “FINISHED PIECE”).
![]()
Food mandalas are perfect for making your own recipe cards! They are also a great tool for encouraging young picky eaters to enjoy healthy snacks!

FINISHED PIECE