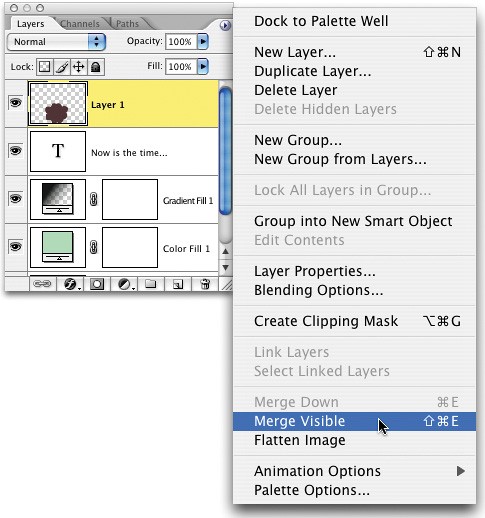
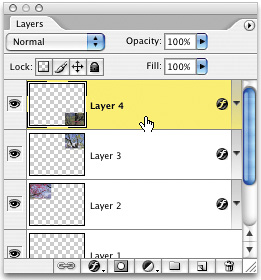
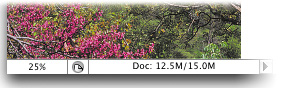
I'm not talking about flattening your image. I'm talking about a new layer that contains a flattened version of your whole layered document, without flattening your layers. That's right—one layer that looks like your flattened document. You could do this in previous versions, but it took a little doin'. Now, it's just one simple keyboard shortcut, and it even creates the layer for you—it's Command-Option-Shift-E (PC: Control-Alt-Shift-E).
©ISTOCKPHOTO/AMANDA ROHDE
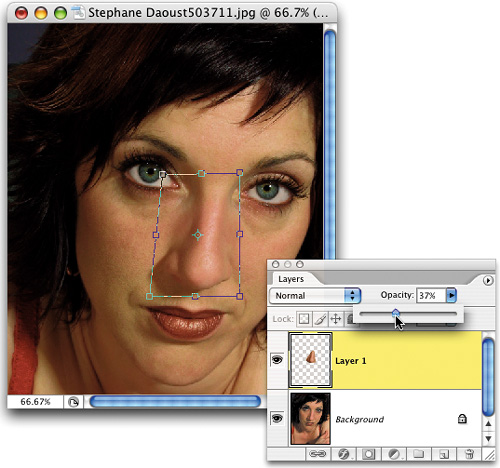
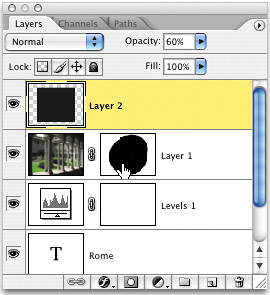
Until CS2, this was impossible, but now when you have Free Transform active on a layer and you need to change the opacity of the layer you're transforming, you can do it by just going to the Layers palette and lowering the Opacity setting. But it's not just Opacity—you can change the blend mode as well. If you do photo restoration, or wind up having to take a head shot from one photo and composite it on another (the groom's eyes were closed, etc.), you know what a time saver this will be.
©ISTOCKPHOTO/STEPHANE DAOUST
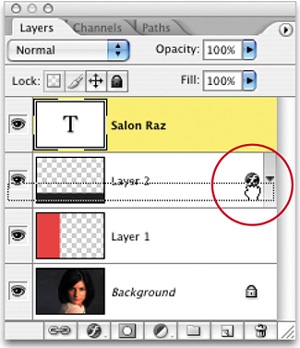
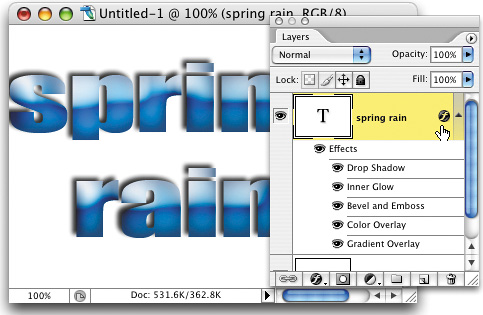
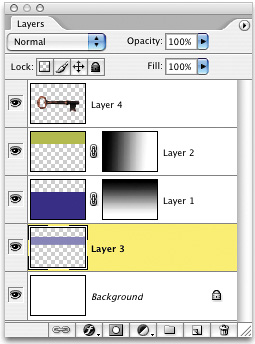
In previous versions of Photo-shop, when you wanted to move an applied effect (like a drop shadow or bevel and emboss) from one layer and have it appear on another layer, you'd copy the effect from your original layer, then paste it onto your preferred layer, then go back to the original layer and drag the effect into the Trash. Four steps are just too much. How about only one—just drag the little round “ƒ” icon from the active layer to the layer you want it on, and it relocates to that layer. If you want to duplicate the effect (rather than move it), just Option-drag (PC: Alt-drag) the icon.
©ISTOCKPHOTO/SHARON DOMINICK

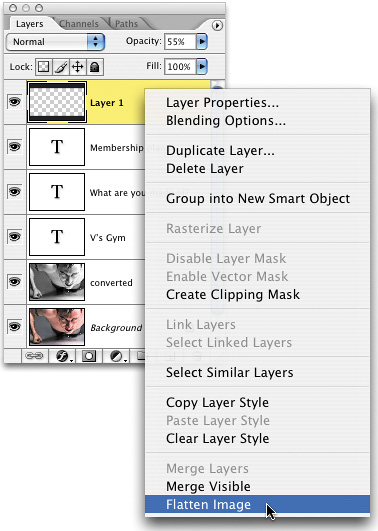
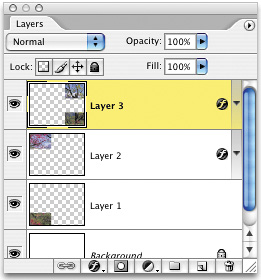
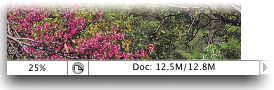
In the past, if you wanted to flatten an image, there was only one way to do it—go to the Layers palette's flyout menu and choose Flatten Image. But in CS2, it's finally right at your fingertips. Just Control-click (PC: Right-click) on any image layer's name in the Layers palette and choose Flatten Image from the contextual menu that appears. It's not perfect, but it's faster than digging through the flyout menu. Note: The options in the contextual menu depend upon the type of layer on which you Command/Control-click.
©ISTOCKPHOTO/MIKE MANZANO
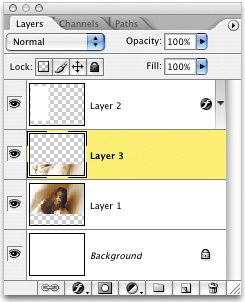
Here's another one we've been waiting (patiently, I might add) for a long time—the ability to unlink all your linked layers with a single click. Just click once on the Link icon at the bottom of the Layers palette and all layers linked to your current linked layer will be unlinked. See, if you just wait long enough….

©ISTOCKPHOTO/MICHELLE JUNIOR
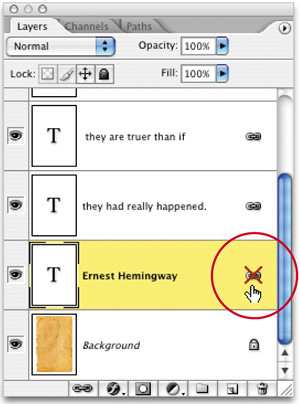
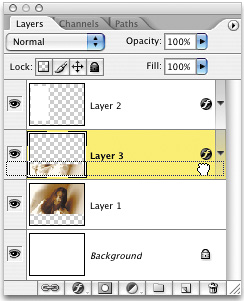
If you have a layer linked to another layer in CS2, you'll see a Link icon appear to the right of the layer's name (it appears there now, because the old Link column that used to appear to the left of layers is gone). If you hold the Shift key and click directly on that Link icon, that layer will be temporarily unlinked (you'll see a red X appear through that layer's Link icon). To relink it, just Shift-click on that icon again.
©ISTOCKPHOTO/KIM SOHEE
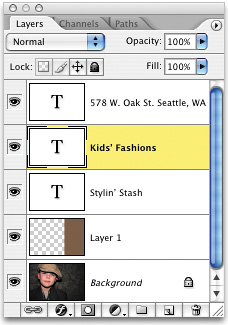
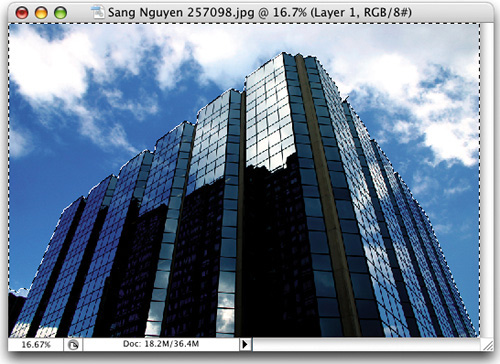
For years now, when you wanted to put a selection around everything on a particular layer, you would Command-click (PC: Control-click) on that layer in the Layers palette, and it pretty much didn't matter where you clicked, as long as you clicked. Well, in CS2, it matters. You now have to click directly on the layer's thumbnail to get the selection to load. So what happens if you Command-click (PC: Control-click) on the other part of a layer (the layer's name for example)? It highlights that layer, so you can select multiple layers at a time.
©ISTOCKPHOTO
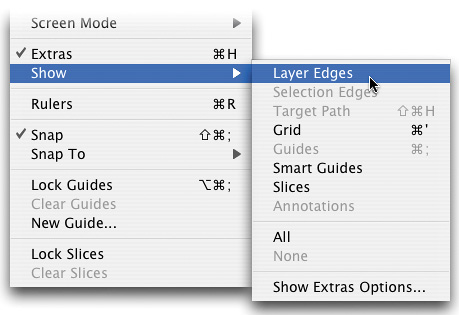
Want to see where the edges of your current layer appear (especially handy if you're working with layers with soft edges)? Just go under the View menu, under Show, and choose Layer Edges. Now a thin blue border will appear around the edges of the currently selected layer to give you a visual cue of your layer's boundaries.
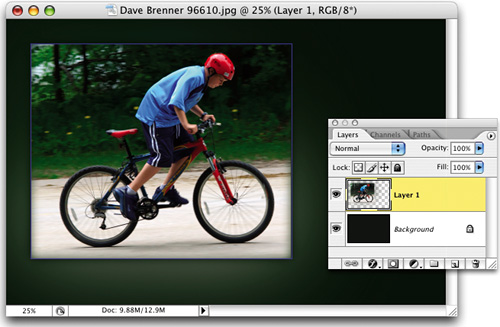
©ISTOCKPHOTO/DAVE BRENNER
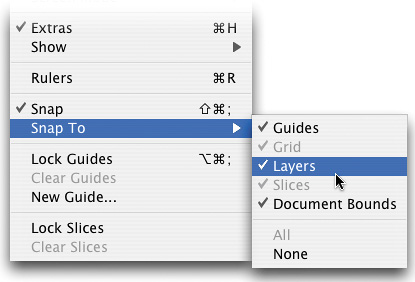
This one is a lot handier than it sounds. If you've ever tried to line up a row of objects, the last thing you want is a little gap between some of them (I just ran across this problem when I was trying to line up a row of television monitors for a video wall I was creating). Well, you don't have to have that gap anymore, because in CS2 you can actually have the layer you're moving snap right to the layer you're trying to align it to. Just go under the View menu, under Snap To, and choose Layers.
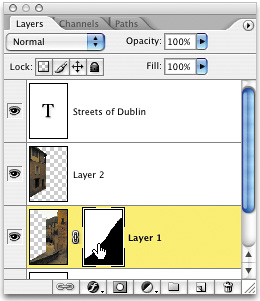
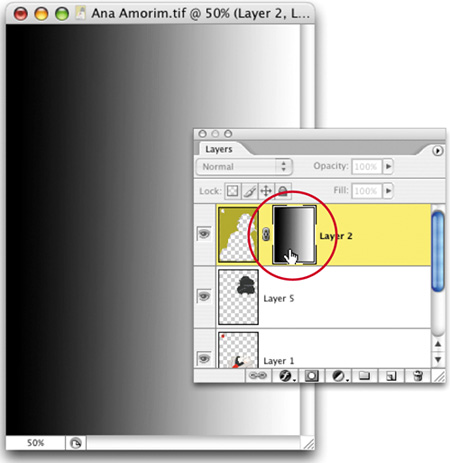
If you wanted to move a layer mask from one layer to another, you used to have to jump through a few hoops, but in CS2 it's much easier. Just click directly on the layer mask's thumbnail and drag it to the layer where you want it. If you want a duplicate of a layer mask (rather than just moving it from one layer to another), press-and-hold the Option key (PC: Alt key) before you drag.
©ISTOCKPHOTO/BART PARREN
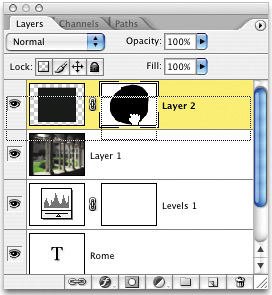
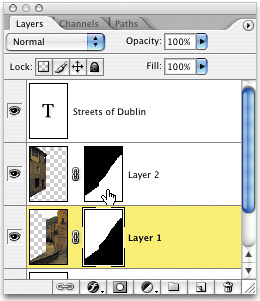
This isn't a hard tip, but it's the kind of thing that only advanced users would want to do. It's the hidden shortcut for inverting a layer mask as you duplicate it (see what I mean)? Well, anyway, here's the tip: First hold the Shift key, then click-and-drag the layer mask thumbnail to the layer you want it to appear on. If you want to invert and duplicate the mask (rather than move it), hold the Option key (PC: Alt key) as well—so the shortcut is Option-Shift (PC: Alt-Shift) to duplicate and invert.
Here we duplicated and inverted the mask.
©ISTOCKPHOTO/BERTRAND COLLET
Although CS2 lets you “drag select” layers (and by that I mean you can drag out a selection around objects on layers in your document, and any layers your selection touches will become active in the Layers palette as if you linked them together), you have to know where to turn this feature on. First, press V to get the Move tool, then in the Options Bar turn on the checkbox for Auto Select Layer. Now, click-and-drag within your image and any layer that falls within your selection becomes active. Now you can move them as one unit.

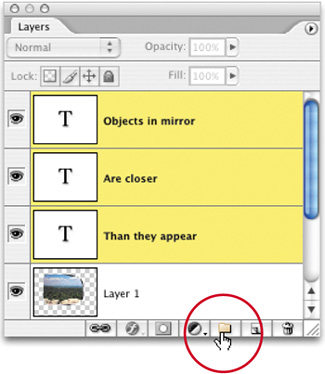
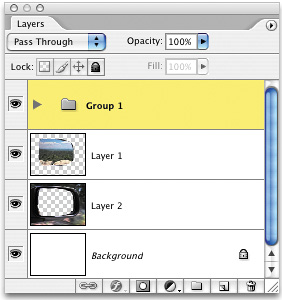
Want a quicker way to create a Layer Group? Command-click (PC: Control-click) on all the layers you want to include in this new Group. Then press-and-hold the Shift key and click on the Create a New Group icon at the bottom of the Layers palette. This will create a brand new Group consisting of all of your linked layers.
©ISTOCKPHOTO/JAIMIE D. TRAVIS
I say “almost” because it works “almost” all the time. If you have a multilayered file and want to quickly flatten it, you can usually press Shift-Command-E (PC: Shift-Control-E). The only time it doesn't work is when you have a hidden layer, because what you're pressing is the new keyboard shortcut for Merge Visible. If all your layers are visible, it flattens them, but if even one layer is hidden, it won't merge all the layers, only the visible ones. So you can use this “almost” all of the time.
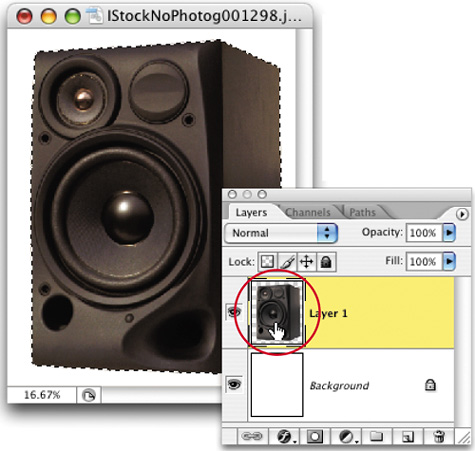
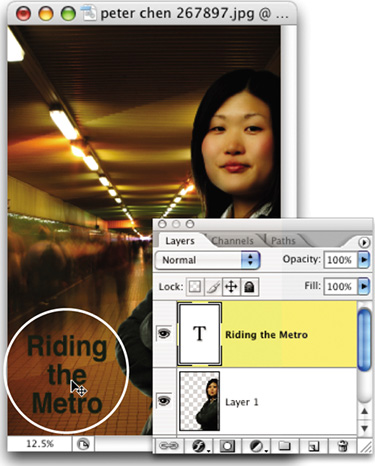
You can jump to any layer in your document without going to the Layers palette. Press V to switch to the Move tool. Now, press-and-hold the Command key (PC: Control key), and click on an object in your image that you want, and you'll instantly jump to that object's layer.
©ISTOCKPHOTO/PETER CHEN
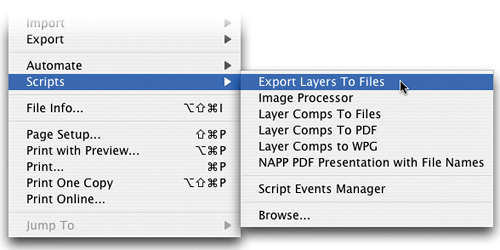
If you have a multilayered document and want to turn each layer into its own separate document, just go under the File menu, under Scripts, and choose Export Layers To Files.
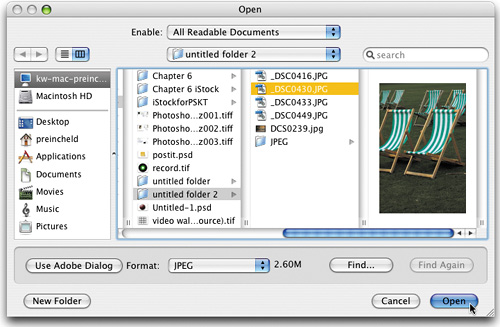
If you have a large multilayered file, you know it can take a while to open, and that's fine—it's part of working with large files. But sometimes you're not going to actually work on the file, and you just want to open it, take a quick look at it, and then close it (maybe you just want to see if it's the version of the file you're looking for). So why waste time opening a huge multilayered file if you just want to take a quick look? Well, you don't have to—just go under the File menu, choose Open, and navigate to the layered file, but before you click the Open button, hold Option-Shift (PC: Alt-Shift). By holding those two keys down before you choose Open, it opens a flattened version of your layered file. Pretty darn slick.
©SCOTT KELBY
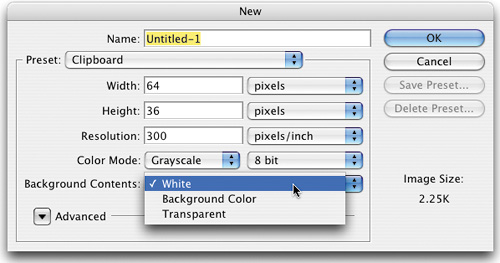
If you're opening new documents and they don't have a Background layer, there's a reason (of course there's a reason, everything has a reason; we just happen to know what it is). The reason is that you've selected the Transparent option in the New document dialog. That seems like a reasonable thing to do; everybody wants transparency, right? However, what it tells Photoshop is “Don't worry about creating a Background layer.” To get Background layers again, the next time you're in the New dialog, under Background Contents, make sure you choose White, and from then on, you'll have Background layers in your documents.
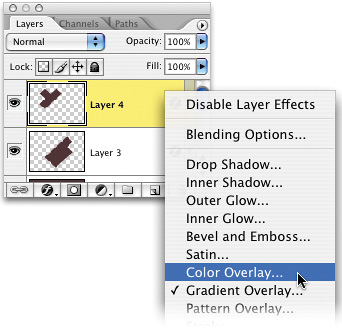
Once you've applied a layer style to a layer, if you need to access some related commands that are in the Layer menu, you don't need to go up to the menu bar and go digging through the submenus. Instead, Control-click (PC: Right-click) on the little “ƒ” icon that appears to the right of your layer's name in the Layers palette. A contextual menu will appear with most of the Layer Style menu commands right at your fingertips—without the searching and digging through menus.
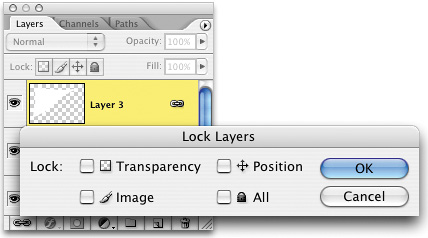
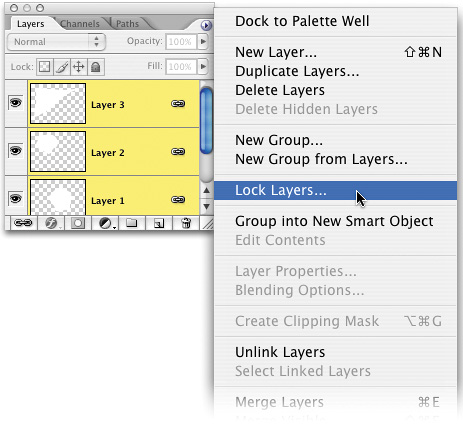
You can lock all of your linked layers at once by choosing Select Linked Layers from the Layers palette's flyout menu, then choosing Lock Layers from the same menu. They'll kick and scratch for a while, but they'll eventually calm right down.
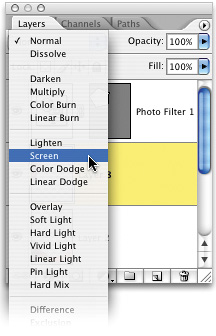
When I'm struggling to get just the right effect by changing the layer blend modes, it's great to be able to rotate through each mode without having to go back to the layer blend mode pop-up menu every time. To do this, simply switch to the Move tool (V), then press Shift–+ (Plus Sign). Every time you press it, it goes to the next blend mode.
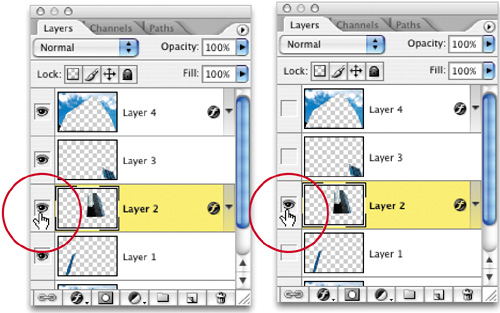
To hide an individual layer, click on the Eye icon in the first column next to that layer in the Layers palette. To make the layer visible again, click on the spot where the Eye icon used to be. If you want to keep one layer visible and hide all the others, hold the Option key (PC: Alt key) and click on the Eye icon beside the layer you want to keep visible. To make the other layers visible again, repeat the process.
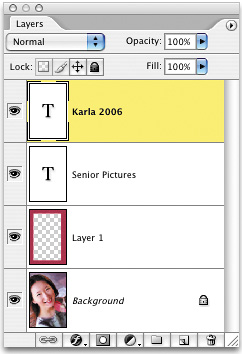
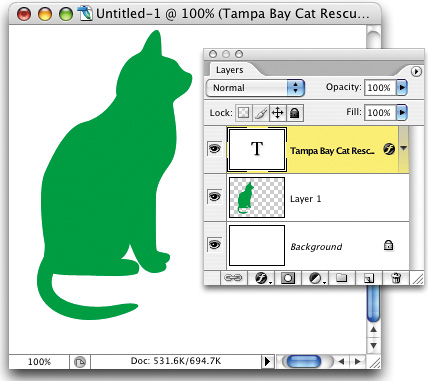
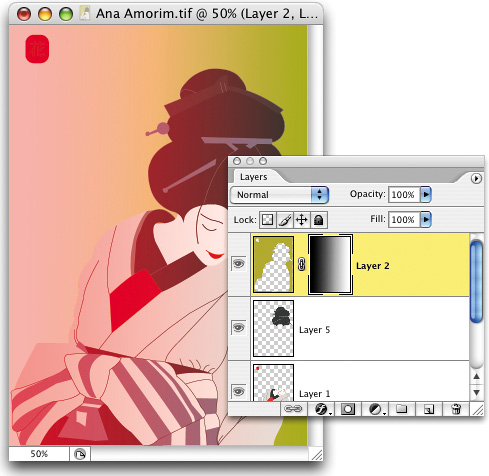
You probably already know that you can apply styles to an image from the Styles palette, and you may even know that rather than just clicking on them, you can drag-and-drop these styles right from the palette straight onto your current layer. But what's the advantage of dragging-and-dropping? Isn't it actually harder to drag-and-drop, rather than just clicking once? The advantage is that you can drag-and-drop styles to any layer, not just your currently active layer. You can also drag-and-drop effects between different open documents (like we did here).

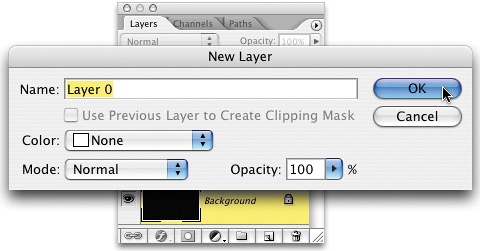
How do you apply a layer style to your Background layer? You can't. That is, unless you double-click on your Background layer. This brings up the New Layer dialog where you can rename your Background layer, and when you do, it turns into a regular layer. Now you can apply layer styles to your heart's content. Want an even faster way? Just hold the Option key (PC: Alt key) and double-click, then you won't get the dialog at all—it will just convert it into a new layer named Layer 0.
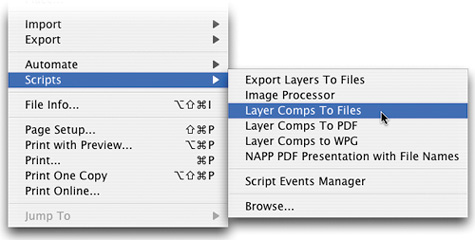
If you're using layer comps to compare different layouts within the same image, you can share these comps with people not on your network (or without access to your computer) by creating a separate document for each layer comp. This makes it easier to email them, and easier for your recipient to view them. Luckily, you don't have to do this all manually; just go under the File menu, under Scripts, and choose Layer Comps To Files.
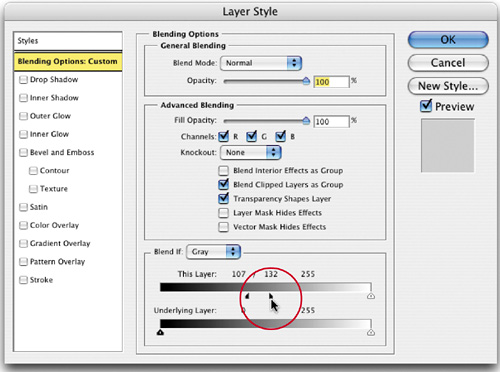
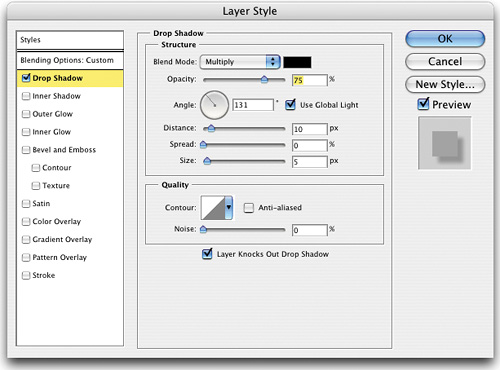
Using blend modes is a great way to get the layer you're on to interact with the layers beneath it. The only problem is you don't have much control over these blend modes—they either look the way you want them to, or not. They're pretty much an “on” or “off” tool. If you're looking for that next level of control over how layers interact with each other, you need the advanced Blending Options. These are found by double-clicking in the empty space just to the right of the layer's name in the Layers palette. What appears onscreen looks like the Layer Style dialog (and in fact, it is), but if you look closely, you'll see two bars with sliders at the bottom of the dialog giving you control over how your layered images interact. Here's another quick tip: If you hold the Option key (PC: Alt key) before you drag one of the sliders, it will split the slider in two, which gives you smoother transitions and more usable blend effects.
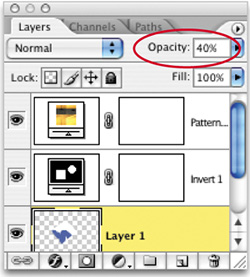
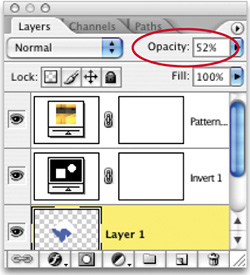
Anytime you want to change the Opacity of the layer you're currently working on, just switch to the Move tool (V) and press a number key on your keyboard: 4 = 40% Opacity, 5 = 50% Opacity, etc. If you want an exact percentage, such as 52%, then type 52. (Note: You have to type quickly, or you'll get 50%, then 20%.)
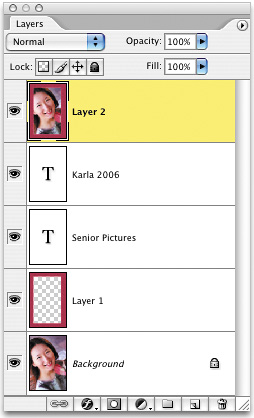
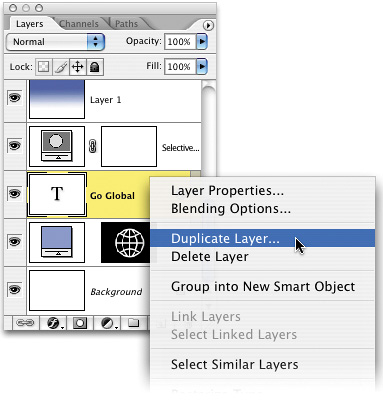
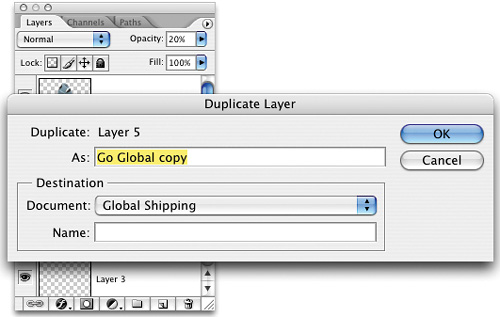
To make a copy of your current layer and have it appear in the exact location in a different Photoshop document, Control-click (PC: Right-click) on the layer in the Layers palette that you want to copy, and choose Duplicate Layer. When the Duplicate Layer dialog appears, choose the Destination from the Document pop-up menu, and click OK.
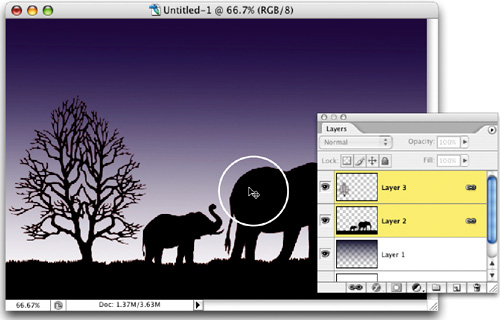
Want to move more than one layer at a time from one document to another? It's easy, as long as you know where to drag from. First, Command-click (PC: Control-click) to select your layers and then click the Link icon at the bottom of the Layers palette to link your layers together. Then, make sure that you drag your layer from within your document itself, rather than trying to drag the layer from the Layers palette. Dragging a layer from the Layers palette to another document is fine, as long as you only want to drag one layer at a time.
©ISTOCKPHOTO/LUKASZ CHYREK
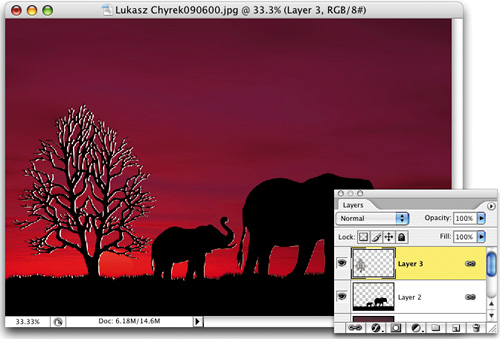
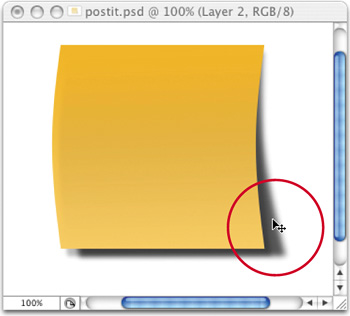
When dragging a layer from one document to another, the object will appear in the new document at the point where your cursor was when you released the mouse button. If you'd prefer that the layer appear perfectly centered within the other document, just hold the Shift key as you drag, and when you release the mouse button, the object will be perfectly centered.
©ISTOCKPHOTO/MARK NAUGHTON
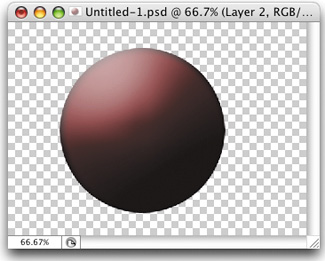
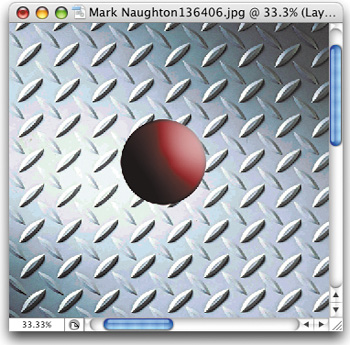
If you're creating a drop shadow using Photoshop's built-in layer styles (from the Add a Layer Style pop-up menu in the Layers palette), rather than setting the Distance and Angle numerically, you can adjust it visually. Just move your cursor outside the dialog right into your image, click on the shadow itself, and drag it where you'd like it.
If you're working on a large, multilayered document and you have the Move tool (V) active, you can jump to the layer you want by Control-clicking (PC: Right-clicking) on a portion of the image. A contextual menu will appear with a list of the layers beneath the point where you clicked your cursor. To make one of those layers the active layer, just choose it from the menu. It's important to note that if there aren't any layers beneath where you're clicking (or the layers are transparent where you're clicking), the only layer that will appear in the menu is the Background layer.

©ISTOCKPHOTO/MAO
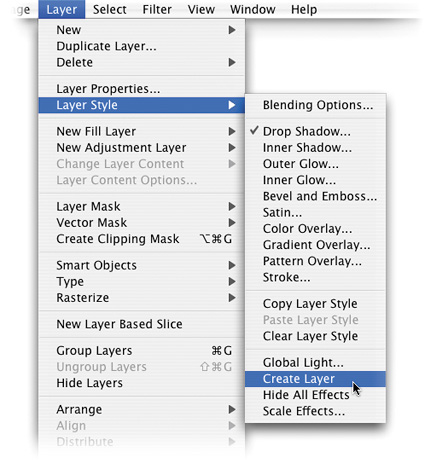
When you apply a layer style to a layer using the Add a Layer Style pop-up menu in the Layers palette, you've done just that—applied a style to a layer, and that style is married to that layer. However, if you'd like to edit your effect separately from the layer, you can ask Photoshop to put the layer style on its own separate layer (or layers if necessary). To do this, click on your layer, then go under the Layer menu, under Layer Style, and choose Create Layer. Your effect will now appear on its own layer beneath your current layer. Note: If you apply a bevel effect, it will create multiple separate layers.
If you want to remove all the layer effects applied to a particular layer, don't drag them all into the Trash one by one. The fastest way is to simply drag the Layer Effects icon (it looks like a little “ƒ”) directly into the Trash icon at the bottom of the Layers palette, and all the effects go right along with it.
©ISTOCKPHOTO/ROHIT SETH
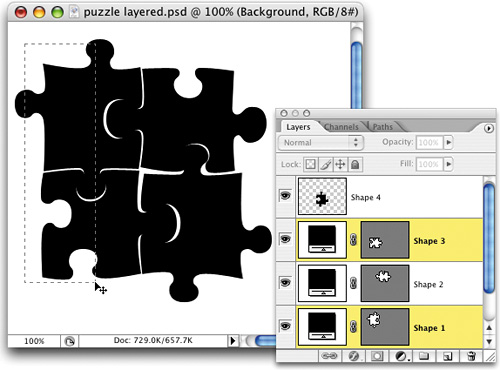
If you use Photoshop's Shape tools, by default they create a Shape layer (which is basically a layer filled with your Foreground color with a clipping path in the shape of your shape, if that makes any sense). We've had loads of email from users asking us, “Do I have to have that funky Shape layer? Can't I just have the shape without the layer and clipping path?” Absolutely! When you choose one of the Shape tools, look in the Options Bar and on the far left you'll see three icons. Click on the third icon from the left and you'll get just the shape—no Shape layer, no paths, no kidding.

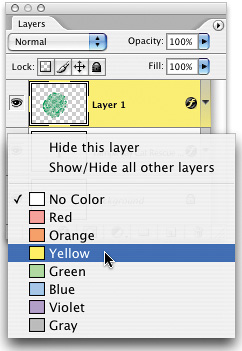
In Photoshop you can color-code layers and layer sets for quick visual identification. One way to do this is to bring up the Layer Properties dialog (from the Layers palette's flyout menu) and choose your colors from a pop-up menu. But there's a much faster way—at least if you know this shortcut: Control-click (PC: Right-click) on the Eye icon next to the layer you want to color-code and a contextual menu of colors will appear where you can choose the shade you'd like.
Every time you add a layer to Photoshop, it adds quite a bit of file size to your image. The larger your file size, the slower Photoshop goes. If you're creating a document that has lots of layers, before long, your file size is going to get pretty huge. One way to keep things lean and mean is to merge any layers that don't need to be separate. You do this by clicking on the topmost image layer in the Layers palette, and then pressing Command-E (PC: Control-E). This merges the current layer with the layer directly beneath it. Think of it this way—every time you merge two layers, your file size drops and Photoshop gets faster. It's like a keyboard shortcut that adds more horsepower. Note: If one merge doesn't drop your file size, try merging again.
©ISTOCKPHOTO/RANDALL CHET
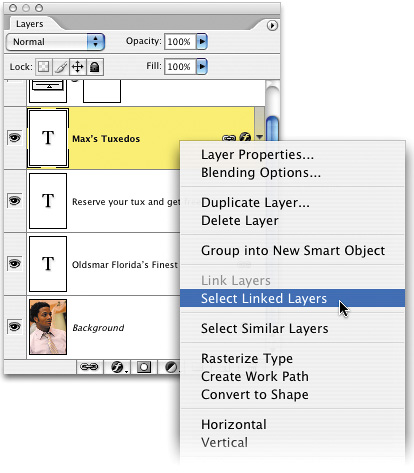
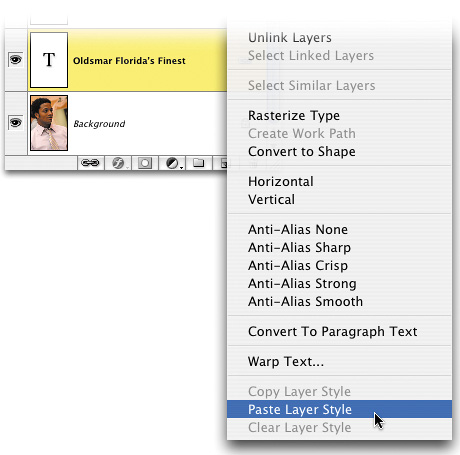
Want to apply a style that's on one layer to a bunch of other layers? It's easy (if you know the trick). Just link all the layers that you want to have that same style by Command-clicking (PC: Control-clicking) on them and clicking the Link icon at the bottom of the Layers palette. Then Control-click (PC: Right-click) on the layer's name with the style you want to copy and choose Select Linked Layers from the contextual menu that appears. Control-click (PC: Right-click) again and choose Paste Layer Style, and your style(s) will instantly paste to every linked layer.
©ISTOCKPHOTO/KEVIN RUSS
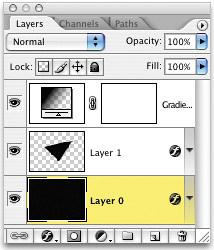
The less you need to be in the Layers palette, the better (at least when it comes to speed), so here are some shortcuts you'll want to know: When you want to select multiple layers, press Option-Shift-Left Bracket ([) (PC: Alt-Shift-Left Bracket) to select layers beneath your current layer. To select layers above your current layer, press Option-Shift-Right Bracket (]) (PC: Alt-Shift-Right Bracket). To move your current layer down one layer at a time, press Command-Left Bracket (PC: Control-Left Bracket). To move it up one layer at a time, press Command-Right Bracket (PC: Control-Right Bracket). To switch to the layer beneath your current layer, press Option-Left Bracket (PC: Alt-Left Bracket). To switch to the Layer above your current layer, press Option-Right Bracket (PC: Alt-Right Bracket). To move your layer to the top of the layer stack, press Command-Shift-Right Bracket (PC: Control-Shift-Right Bracket). To move your layer to the bottom of the layer stack (above your Background layer), press Command-Shift-Left Bracket (PC: Control-Shift-Left Bracket). Trust us, it's worth memorizing this stuff.

©ISTOCKPHOTO/AMANDA ARMSTRONG
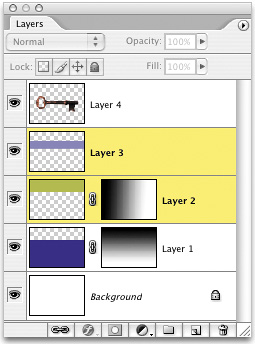
Here we selected the next layer down.
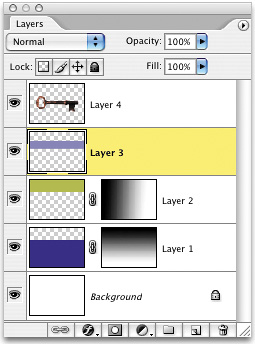
Here we moved our layer to the bottom of the layer stack.
If you want to view your layer mask by itself (rather than how the layer mask affects your overall image), hold the Option key (PC: Alt key) and click directly on the layer mask thumbnail in the Layers palette. This will display just the mask itself. You can also view the layer mask like a Rubylith (a red overlay used in traditional masking) that appears over your image by pressing the Backslash key () on your keyboard.
©ISTOCKPHOTO/ANA AMORIM
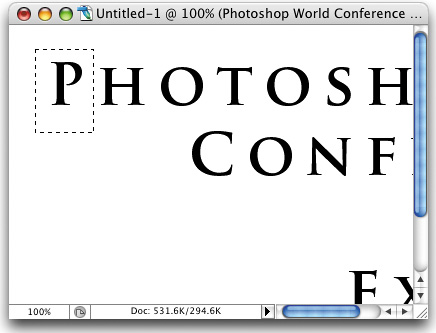
If you have multiple objects on the same layer (like a few words of type that have already been rasterized) and you want to select just one item on that layer (for example, you want to put a selection around one letter so you can move it independently of the rest of the letters), here's how: Use any selection tool to create a loose selection around the object. Hold the Command key (PC: Control key), and then press the Up Arrow key once and the Down Arrow key once. The entire object will become perfectly selected without disturbing anything else on the layer. Now you can move it, edit it, or tweak it separately because it is a “floating selection.”
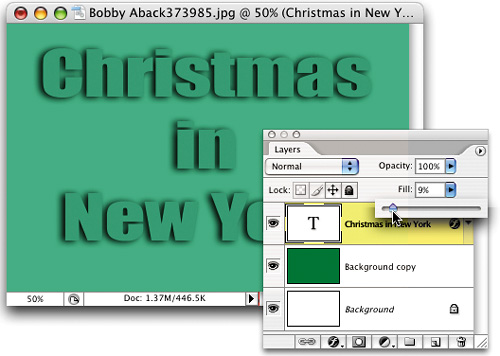
Back in Photoshop 7.0, Adobe brought a once-buried command front and center when they added the Fill option to the Layers palette. This isn't your average everyday fill. No sir, this is a special freaky fill that only works when you've applied a layer style to a layer. To see it in action (and immediately understand its power), create some text, and then apply a drop shadow. Lower the regular Opacity of this layer, and you'll notice that both your type and the shadow fade at the same time. Now raise it back up to 100%. Then lower the Fill amount (in the Layers palette) and you'll notice that the type fades away, but the drop shadow stays at 100%. Ahhhhhh. Makes you stop and think, doesn't it?
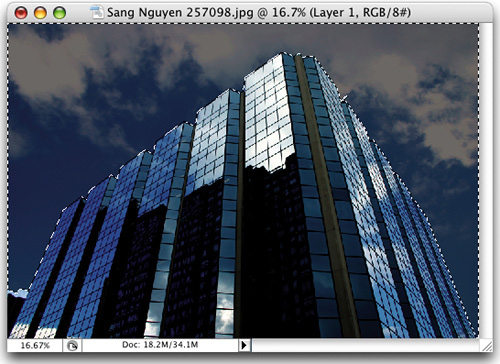
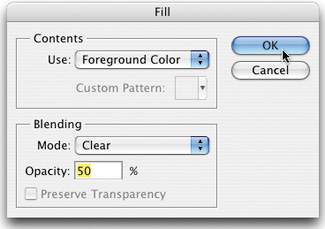
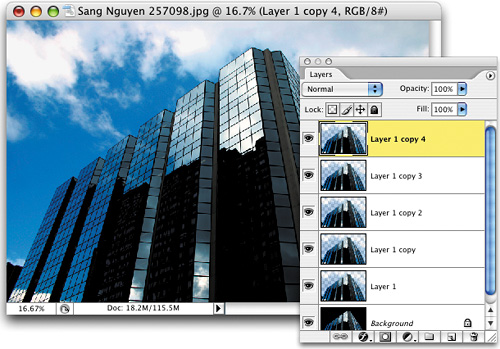
This is a pretty wild tip—how to make just one part of a layer have a lower opacity. We know it sounds impossible, but this is totally cool. Start by making a selection on any area of the layer that you want to become transparent, while the rest of the layer remains at 100%. Then go under the Edit menu and choose Fill. When the Fill dialog appears, from the Mode pop-up menu choose Clear. Then lower the Opacity of the fill to whatever percentage you'd like, then click OK and voilà—part of your layer has opacity, while the rest remains at 100%. Majorly cool! (Note: You have to think in reverse here. Clear set to 100% Opacity will make the selected area completely transparent.) Wait, what if you decide later that you want to fill it back in? Here's how: Just start making copies of your layer by pressing Command-J (PC: Control-J), and as you do, you'll see the transparency disappear. You may have to make five or more copies, but son of a gun if it doesn't work. When it looks right, hide all but those copied layers, and from the Layers palette's flyout menu, choose Merge Visible.
©ISTOCKPHOTO/SANG NGUYEN