
9
Building an Appointment Booking App with Entity Framework and Relational DB
In the previous chapter, we outlined the technical specifications and design decisions for building an appointment booking system for a barber’s salon called Heads Up Barbers. This chapter is a continuation of Chapter 8, Designing an Appointment Booking App, so I strongly advise you to be familiar with what was covered in that chapter first.
This chapter will implement the requirements in TDD style and will use Entity Framework (EF) and SQL Server. The implementation will be applicable to other Relational Database Management Systems (RDBMSs) such as Oracle DB, MySQL, PostgreSQL, and others.
If you are a fan of relational DBs or you are using one at work, then this chapter is for you, whereas if you are using a document database, then you might want to skip this chapter and go to the next one. Both chapters, Chapter 9 and Chapter 10, have the same outcome, but they use different types of backend databases.
I assume you are familiar with EF and how it is wired and used. However, if you are not, then I encourage you to familiarize yourself with it first.
In this chapter, we will cover:
- Planning the code and the project structure
- Implementing the WebApis with TDD
- Answering frequently asked questions
By the end of the chapter, you will have experienced the implementation of an end-to-end app using TDD with mocks and fakes. Also, you will witness the analysis process that precedes writing unit tests.
Technical requirements
The code for this chapter can be found in the following GitHub repository:
To run the project, you will need to have a flavor of SQL Server installed. This can be, Azure SQL, SQL Server Express LocalDB or any other SQL Server flavor.
The implementation doesn’t use any advanced SQL Server features, so feel free to use any. I have tested the application with SQL Server Express LocalDB. You can find more about it here:
https://docs.microsoft.com/en-us/sql/database-engine/configure-windows/sql-server-express-localdb
You can also use any other RDBMS, but you will have to change the DB provider in the code to use the specific .NET DB provider.
To run the project, you have to modify the connection string to your specific DB instance in Uqs.AppointmentBooking.WebApi/AppSettings.json. Currently, it is set to:
"ConnectionStrings": {
  "AppointmentBooking": "Data
    Source=(localdb)\ProjectModels;Initial
    Catalog=AppointmentBooking;Integrated Security=True;…"
},
The connection string is pointing to LocalMachine and will connect to a database called AppointmentBooking.
If you decided to use an alternative RDBMS, then you will have to install the relevant NuGet packages in Uqs.AppointmentBooking.WebApi and change the following code in Program.cs of the same project to your specific RDBMS:
builder.Services
    .AddDbContext<ApplicationContext>(options =>
    options.UseSqlServer(
        builder.Configuration
          .GetConnectionString("AppointmentBooking")
    ));
The previous DB configuration steps are optional. You can implement the requirements for this chapter without using a DB, but you won’t be able to run the project and interact with it in the browser.
Planning your code and project structure
In Chapter 8, Designing an Appointment Booking App, we planned our domain and analyzed what we needed to do. The project architecture will follow the classical three-tier applications of the client application (the website), business logic (the web APIs), and database (SQL Server). Let’s translate this into VS solutions and projects.
In this section, we will create the solution, create the projects, and wire up the components.
Analyzing the project’s structure
Ask a group of senior developers to come up with a project structure, and you will end up with multiple structures! In this section, we will discuss a way of organizing your project structure that I have developed over the years.
Given that we are first going to build a website for the user and later a mobile app (not covered in this book), it makes sense to isolate the business logic to a WebApi project that can be shared by both the website and the mobile app. So, we will build a website project based on Blazor WebAssembly called Uqs.AppointmentBooking.Website.
The domain logic will be exposed as APIs, so we will create an ASP.NET API project for the APIs called Uqs.AppointmentBooking.WebApi.
The previous two projects need to exchange data in an agreed structure called Data Transportation Objects (DTOs), commonly known as contracts, so, we will create a .NET library project called Uqs.AppointmentBooking.Contracts. This project will be referenced by both the website and the WebApi projects.
The WebApi project translates web requests into something we can understand in C#. In technical terms, this will manage the HTTP communication layer with RESTful-style APIs. So, the WebApi project will not contain business logic. The business logic will be in our domain project. We will create a domain project called Uqs.AppointmentBooking.Domain.
Your business logic will live in two places – the UI and the domain layer. The UI business logic will manage UI functionalities such as toggling dropdowns, blocking calendar days, responding to drag and drop, and disabling/enabling buttons, among others. This logic will live in the website project. The language used in writing the code depends on the UI framework in use, such as Angular, React, and Blazor. Usually, you do not implement the features of the UI project using TDD, but you can use unit tests. In our implementation, we will have little code in the UI layer, so we will not be doing any UI unit tests.
The sophisticated business logic will live in the domain layer, and we will be writing it following the concepts of TDD. So, we shall create a project that will hold our domain unit tests and call it Uqs.AppointmentBooking.Domain.Tests.Unit.
To put these projects into perspective and map them to our 3-tier architecture, we can have the following diagram:

Figure 9.1 – The relationship between the projects and the application design
The previous diagram shows the functionality that each project provides to form the 3-tier application. Let’s start by creating the VS solution structure.
Creating projects and configuring dependencies
This is the unavoidable boring part, creating the solution and projects and linking them together. In the following section, we will take the command-line approach rather than the UI approach.
Note
I have added a text file called create-projects.bat to the project source control that contains all the command lines, so you don’t have to manually write them. You can copy and paste this file to your desired directory and then, from your command line, execute the file.
The following is a list of the commands required to create your VS solution and its projects:
- From your OS console, navigate to the directory where you want to create your new solution and execute the following to create the solution file:
md UqsAppointmentBooking
cd UqsAppointmentBooking
dotnet new sln
- Execute this to create the projects and notice that we are using a different template for each project:
dotnet new blazorwasm -n Uqs.AppointmentBooking.Website
dotnet new webapi -n Uqs.AppointmentBooking.WebApi
dotnet new classlib -n Uqs.AppointmentBooking.Contract
dotnet new classlib -n Uqs.AppointmentBooking.Domain
dotnet new xunit -n
Uqs.AppointmentBooking.Domain.Tests.Unit
- Add the projects to the solution:
dotnet sln add Uqs.AppointmentBooking.Website
dotnet sln add Uqs.AppointmentBooking.WebApi
dotnet sln add Uqs.AppointmentBooking.Contract
dotnet sln add Uqs.AppointmentBooking.Domain
dotnet sln add Uqs.AppointmentBooking.Domain.Tests.Unit
- Now let’s set up dependencies between the projects:
dotnet add Uqs.AppointmentBooking.Website reference
Uqs.AppointmentBooking.Contract
dotnet add Uqs.AppointmentBooking.WebApi reference
Uqs.AppointmentBooking.Contract
dotnet add Uqs.AppointmentBooking.Domain reference
Uqs.AppointmentBooking.Contract
dotnet add Uqs.AppointmentBooking.WebApi reference
Uqs.AppointmentBooking.Domain
dotnet add Uqs.AppointmentBooking.Domain.Tests.Unit
reference Uqs.AppointmentBooking.Domain
And the last bit is adding the required NuGet packages to the project. The domain project will communicate with the SQL Server database using EF. The Microsoft.EntityFrameworkCore.SqlServer package allows the required libraries to connect the project to SQL Server. To add this library to the Domain project, use the following:
dotnet add Uqs.AppointmentBooking.Domain package
Microsoft.EntityFrameworkCore.SqlServer
- The unit testing project will require NSubstitute for mocking, so let’s add its NuGet:
dotnet add Uqs.AppointmentBooking.Domain.Tests.Unit
package NSubstitute
- We will be using a fake to test double EF. This fake will create an in-memory database that will make our testing easier to write. We will discuss this in more detail later in this chapter, but for now, let’s add this fake library:
dotnet add Uqs.AppointmentBooking.Domain.Tests.Unit
package Microsoft.EntityFrameworkCore.InMemory
For visual inspection, you can open the solution file with VS, and it should look as such:

Figure 9.2 – A view of VS solution explorer
At this stage, your solution structure should look similar.
Now that the project structure is in place, we will modify the code.
Setting up the domain project
From the domain analysis in Chapter 8, Designing an Appointment Booking App, we have created a list of the domain objects. I will not go through them again; I will just create and add them to the Domain project under DomainObjects:

Figure 9.3 – Added domain objects
These are just data structures with no business logic. Here is the source code of one of them, the Customer domain object:
namespace Uqs.AppointmentBooking.Domain.DomainObjects;
public class Customer
{
    public int Id { get; set; }
    public string? FirstName { get; set; }
    public string? LastName { get; set; }
}
You can view the rest of the files in the chapter’s GitHub repo online.
Next is wiring up the focus of this chapter, EF.
Wiring up Entity Framework
We are going to use EF to store each domain object in a database table that bears the same name but in the plural, as this is the default behavior of EF. So, the Customer domain object will have a Customers table equivalent in the DB.
We will not be customizing much in EF as our intention in this chapter is to focus on TDD, as doing the little setups here and there are only chores and you can find them in the companion code.
Under the Domain project, I have added a directory called Database to contain our EF-related classes. We will need two classes, the ApplicationContext class and the SeedData class:
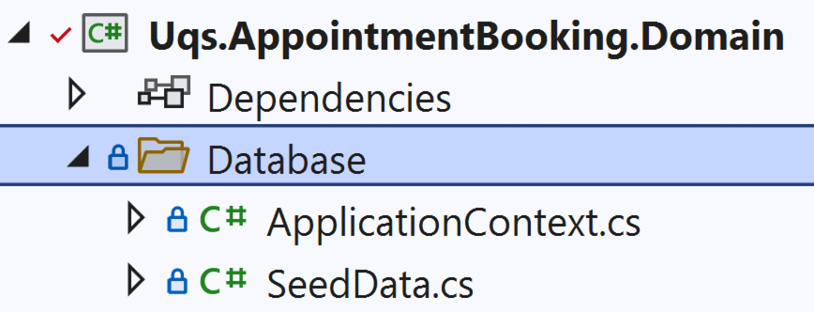
Figure 9.4 – Added EF files
In the next section, we will discuss their role.
Adding the context class
With EF, you add a context class to reference all your domain objects. I called my context class ApplicationContext, and I followed basic EF practices. Here is my class:
public class ApplicationContext : DbContext
{
    public ApplicationContext(
      DbContextOptions<ApplicationContext> options) :
      base(options){}
    public DbSet<Appointment>? Appointments { get; set; }
    public DbSet<Customer>? Customers { get; set; }
    public DbSet<Employee>? Employees { get; set; }
    public DbSet<Service>? Services { get; set; }
    public DbSet<Shift>? Shifts { get; set; }
}
This is the most basic setup of EF with no customization, with every property mapped to a database table name.
From this point onward, we will use ApplicationContext to execute operations on the DB.
Let’s continue with our process and set up EF within WebApi.
Wiring up EF with the WebApi project
The WebApi will wire EF to the right DB provider, which, in this case, is SQL Server, and will pass the connection string to EF at runtime.
So, the first step is to add the connection string to the WebApi’s AppSettings.js:
"ConnectionStrings": {
  "AppointmentBooking": "Data
    Source=(localdb)\ProjectModels;Initial
    Catalog=AppointmentBooking;(…)"
},
Obviously, the connection string may vary based on your DB location and setup.
Note
In this chapter, I am not concerned with setting multiple environments, but you may want to create multiple AppSettings for different environments and change the connection string accordingly.
The next step is to wire up the WebApi with EF and provide it with the connection string. This should be done in Program.cs, preferably directly after the first line, var CreateBuilder(args):
var builder = WebApplication.CreateBuilder(args);
builder.Services.AddDbContext<ApplicationContext>(o =>
  o.UseSqlServer(builder.Configuration.GetConnectionString
    ("AppointmentBooking")));
This is what we need for wiring up EF. However, for development purposes, we might need some test data to fill the pages with some meaningful data. We shall do this next.
Adding seed data
Newly created DBs have empty tables, and the seed class is meant to pre-populate the tables with sample data.
I will not list the code here as it is outside the scope of the chapter, but you can look at the code in the Domain project in Database/SeedData.cs.
We’ve just finished the setup for the WebApi project, which is going to be consumed by the website, so let’s create the website next.
Setting up the website project
Phase one of this implementation includes creating a website to access the APIs to provide a UI for the user, which we did previously in this chapter by command line. However, website implementation is outside the scope of this chapter and the book in general, as it is not related to TDD, so I will not be going through the code.
Though, we are interested in one aspect – what does the website require from the web apis? We will need to understand this in order to build the required functionality in WebApis the TDD way.
We will answer this question bit by bit in the next section of this chapter.
In this section, we covered the setup and configuration aspect of the project, and we have not done anything that is affected by TDD. You may have noticed that I referred you to the companion source code on multiple occasions; otherwise, we would have no place left for the core of this chapter, the TDD part, which we will do next.
Implementing the WebApis with TDD
To build the WebApi project, we are going to look at each requirement from Chapter 8, Designing an Appointment Booking App, and provide the implementation that satisfies it using TDD style.
The requirements are all stated in terms of the Website and its functionality, and they do not dictate how to build our APIs. The Website will have to call the WebApis for any business logic as it has no access to the DB and deals with UI-related business logic only.
This chapter is dedicated to EF for a good reason as we want you to appreciate fakes, which are not as popular as mocks, both from the test doubles family. Also, it will be a typical example of a .NET solution of an ASP.NET Core and a relational DB implementation.
In this section, we will cover working in TDD mode, taking into consideration our persistence provider, EF.
Using the EF in-memory provider
To make our life easier when unit testing the system, we want to abstract the database in an elegant way. When I say elegant, I mean less code and more readability.
However, the challenge we face when testing a system that has a DB is that we do not want to hit the real DB in our unit tests as this would defeat the whole purpose of unit testing and make it a sort of integration or Sintegration testing. Instead, we use test doubles to abstract it. A fake is a test double that replaces a component during unit testing with an equivalent component more suitable for testing purposes, we will be employing a fake to replace our DB for unit testing purposes.
EF has a provider that accesses SQL server, which is what we want to use in production during the system run, but in unit testing, we can’t do this. Lucky for us, EF has what is called an in-memory provider, which can build and destroy an in-memory database during each unit test run.
Building and destroying an in-memory DB during unit testing is cheap compared to doing the same for a physical DB, not to mention the cost and the possibility of random errors that are generated from trying to create and delete a real database so often (with each single unit test execution). As you might have already figured out, the EF in-memory provider acts as a fake.
During runtime, we use the SQL Server provider, and during unit testing, we use the in-memory provider, and we accomplish this switch via dependency injection:

Figure 9.5 – Runtime and test times with respect to EF providers
The previous diagram illustrates injecting different providers in different project stages. The unit testing stage will use the EF in-memory provider and in the production run stage, the proper production provider, EF SQL Server Provider, will be used.
Configuring the in-memory provider
To get the advantage of the in-memory provider, I have created a file in the unit tests project called ApplicationContextFake.cs, and here is the code:
public class ApplicationContextFake : ApplicationContext
{
    public ApplicationContextFake() : base(new
        DbContextOptionsBuilder<ApplicationContext>()
        .UseInMemoryDatabase(databaseName:
        $"AppointmentBookingTest-{Guid.NewGuid()}")
        .Options) {}
}
Note that we are inheriting the main EF object, ApplicationContext, and we configured the option to make it in-memory. ApplicationContextFake is meant to be injected whenever ApplicationContext is required in our unit tests.
We are creating a unique database name, AppointmentBookingTest-{Guid.NewGuid()}, by appending a GUID every time we instantiate the fake. The reason for this is that we don’t want the in-memory provider to have the same database name to avoid caching any data in between unit test calls.
From this point onward, every time we need to inject ApplicationContext in our unit tests, we will inject ApplicationContextFake instead.
Adding sample test data using the builder pattern
Every test that we are going to implement will have a state. For example, we might have a single free barber or a group of barbers with different schedules, so creating sample data for each test might be a mess if we are not careful. There is a clever way to organize our sample data for testing.
We can do this in a pattern called the builder pattern (not to be confused with the GoF Builder design pattern). The builder pattern will allow us to mix and match sample data in a clean and readable way. I have added a file called ApplicationContextFakeBuilder.cs to contain the sample state data with the builder pattern. I have included a part of this class here for brevity but you can see the full class in the companion source code:
public class ApplicationContextFakeBuilder
{
    private readonly ApplicationContextFake _ctx = new();
    private EntityEntry<Employee> _tomEmp;
    private EntityEntry<Employee> _janeEmp;
    …
    private EntityEntry<Customer> _paulCust;
    private EntityEntry<Service> _mensCut;
    private EntityEntry<Appointment> _aptPaulWithTom;
    …
    public ApplicationContextFakeBuilder WithSingleEmpTom()
    {
        _tomEmp = _ctx.Add(new Employee {
            Name = "Thomas Fringe" });
        return this;
    }
    …
    public ApplicationContextFake Build()
    {
        _ctx.SaveChanges();
        return _ctx;
    }
}
This class will prepare in-memory sample data. The unit tests that will use this class will call different methods on it to set the right data state. What is interesting in this class is the following:
- Using the With convention to indicate that we are adding sample data. You will see examples of how the With methods are used later on.
- The With methods return this, which at first instance looks weird. The idea here is to implement a coding convention called chaining so that you can write code like this: _ctxBldr.WithSingleService(30).WithSingleEmpTom().
- The Build() method will save everything to the persisting media (the memory, in this case) and return the context.
The Builder pattern is heavily used when trying to set the state of a certain component. Feel free to look at the companion code for the full code. Chapter 6, The FIRSTHAND Guidelines of TDD, has another example of a build class; you might want to have a look at it to strengthen your understanding.
Implementing the first story
The first story in our requirement is very easy. The website is going to display all the available services that we have. Since the website will request this data from the WebApi through a RESTful API call, the domain layer will have a service that will return this list. Let’s assume this would be the UI output:

Figure 9.6 – A UI of the requirements of Story 1
The UI layer, hosted in the browser, will need to issue a RESTful call to the WebApi, which can look as follows:
GET https://webapidomain/services
This UI will require a few data properties that should be returned by this API. So, the fetched JSON can look like an array of this:
{
    "ServiceId": 2,
    "Name": "Men - Clipper & Scissor Cut",
    "Duration": 30,
    "Price": 23.0
}
You can see where each part is used on the page, but maybe ServiceId is not very clear. It will be used to construct the URL of the select hyperlink. So, we can now design the contract type that will render this JSON, which could look like this:
namespace Uqs.AppointmentBooking.Contract;
public record Service(int ServiceId, string Name,
    int Duration, float Price);
This record contract will render the previous JSON code. And the full returned array contract could look like this:
namespace Uqs.AppointmentBooking.Contract;
public record AvailableServices(Service[] Services);
You can find these contract types and all the other contracts in the Contract project.
Adding the first unit test via TDD
Thinking along the lines of DDD, we will have a domain service called ServicesService, which will handle retrieving all the available services. So, let’s look at the structure of this service. We will create it in the Domain project under Services. Here is the code:
public class ServicesService
{
}
There is nothing special here. I have just helped VS understand that when I type ServicesService, it should guide me to this class.
Note
I have added the previous ServicesService class manually. Some TDD practitioners like to code-generate this file while they are writing their unit test rather than writing it first. Any method is fine as long as you are more productive. I chose to create the file first because sometimes VS creates this file in a different directory from where I intend it to.
I will create my unit tests class, which is called ServicesServiceTests, with the following code:
public class ServicesServiceTests : IDisposable
{
    private readonly ApplicationContextFakeBuilder _ctxBldr
        = new();
    private ServicesService? _sut;
    public void Dispose()
    {
        _ctxBldr.Dispose();
    }
}
I have added ApplicationContextFakeBuilder immediately because I know that I am going to be dealing with sample data in my unit tests.
Now, I need to think of what I need from my service and build a unit test accordingly. The straightforward way to start is to pick the easiest scenario. If we have no barber service, then no service is returned:
[Fact]
public async Task
GetActiveServices_NoServiceInTheSystem_NoServices()
{
    // Arrange
    var ctx = _ctxBldr.Build();
    _sut = new ServicesService(ctx);
    // Act
    var actual = await _sut.GetActiveServices();
    // Assert
    Assert.True(!actual.Any());
}
I have decided in the test that there will be a method named GetActiveServices, and when this method is called, it will return a collection of active services. At this stage, the code doesn’t compile; as such, a method doesn’t exist. We have got our TDD’s fail!
Now, we can instruct VS to generate this method, and then we can write the implementation:
public class ServicesService
{
    private readonly ApplicationContext _context;
    public ServicesService(ApplicationContext context)
    {
        _context = context;
    }
    public async Task<IEnumerable<Service>>
        GetActiveServices()
          => await _context.Services!.ToArrayAsync();
}
This is getting, through EF, all the available services, and since we did not store any service in the sample data, none will return.
If you run the test again, it will pass. This is our TDD’s test pass. There is no need for the refactor stage, as this is a simple implementation. Congratulations, you have finished your first test!
Note
This test is simple, and it seems like a waste of time. However, this is a valid test case, and it also helps us create our domain class and inject the right dependencies. Starting with a simple test helps to progress in steady steps.
Adding the second unit test via TDD
The second feature that we need to add is the ability to get the active services only, not the ones that are no longer active, as they are no longer provided by the barber. So, let’s start with this unit test:
[Fact]
public async Task
  GetActiveServices_TwoActiveOneInactiveService_TwoServices()
{
    // Arrange
    var ctx = _ctxBldr
        .WithSingleService(true)
        .WithSingleService(true)
        .WithSingleService(false)
        .Build();
    _sut = new ServicesService(ctx);
    var expected = 2;
    // Act
    var actual = await _sut.GetActiveServices();
    // Assert
    Assert.Equal(expected, actual.Count());
}
Our Arrange will add three services – two active and one inactive. It is interesting to see the code of WithSingleService:
public ApplicationContextFakeBuilder WithSingleService
    (bool isActive)
{
    _context.Add(new Service{ IsActive = isActive });
    return this;
}
If we run the test, of course, it will fail, as we have not added any filtration functionality to our service. Let’s go ahead and add filtration to the service:
public async Task<IEnumerable<Service>> GetActiveServices()
    => await _context.Services!.Where(x => x.IsActive)
                               .ToArrayAsync();
We have added a Where LINQ statement, which will do the trick. Run the tests again, and this test shall pass.
This was an easy requirement. In fact, all the stories are straightforward except story number 5. We will not list the other stories here because they are similar, but you can find them in the companion source code. Instead, we will focus on story number 5 as its complexity matches real-life production code and reveals the main benefit of TDD.
Implementing the fifth story (time management)
This story is about a time management system. It tries to manage barbers’ time fairly, taking rest time into consideration. If you take a moment to think about this story, it is a complex one with many edge cases.
This story reveals the power of TDD as it will help you find a starting point and adds little incremental steps to build the requirement. When you finish, you will notice that you have automatically documented the story in the unit tests.
In the next sections, we will find a way to start from the easier-to-implement scenarios and climb up to more sophisticated test scenarios.
Checking for records
One gentle way to start our implementation that will make us think of the signature of the method is checking the parameters.
Logically, to determine an employee’s availability, we need to know who this employee is by using employeeId and the length of time required. The length can be acquired from the service by serviceId. A logical name for the method can be GetAvailableSlotsForEmployee. Our first unit test is this:
[Fact]
public async Task
  GetAvailableSlotsForEmployee_ServiceIdNoFound_
    ArgumentException()
{
    // Arrange
    var ctx = _contextBuilder
        .Build();
    _sut = new SlotsService(ctx, _nowService, _settings);
    // Act
    var exception = await
        Assert.ThrowsAsync<ArgumentException>(
        () => _sut.GetAvailableSlotsForEmployee(-1));
    // Assert
    Assert.IsType<ArgumentException>(exception);
}
It doesn’t compile; it is a fail. So, create the method in SlotsService:
public async Task<Slots> GetAvailableSlotsForEmployee(
    int serviceId)
{
    var service = await _context.Services!
        .SingleOrDefaultAsync(x => x.Id == serviceId);
    if (service is null)
    {
        throw new ArgumentException("Record not found",
        nameof(serviceId));
    }
    return null;
}
Now that you have the implementation in place, run the tests again, and they will pass. You can do the same for employeeId and do what we did for serviceId.
Starting with the simplest scenario
Let’s add the simplest possible business logic to start with. Let’s assume that the system has one employee called Tom. Tom has no shifts available in the system. Also, the system has one service only:
[Fact]
public async Task GetAvailableSlotsForEmployee_
  NoShiftsForTomAndNoAppointmentsInSystem_NoSlots()
{
    // Arrange
    var appointmentFrom =
        new DateTime(2022, 10, 3, 7, 0, 0);
    _nowService.Now.Returns(appointmentFrom);
    var ctx = _contextBuilder
        .WithSingleService(30)
        .WithSingleEmployeeTom()
        .Build();
    _sut = new SlotsService(ctx, _nowService, _settings);
    var tom = context.Employees!.Single();
    var mensCut30Min = context.Services!.Single();
    // Act
    var slots = await
        _sut.GetAvailableSlotsForEmployee(
        mensCut30Min.Id, tom.Id);
    // Assert
    var times = slots.DaysSlots.SelectMany(x => x.Times);
    Assert.Empty(times);
}
This will fail, as we have null returned by the method, whatever the input is. We need to continue adding bits of code to the solution. We can start with the following code:
…
var shifts = _context.Shifts!.Where(
    x => x.EmployeeId == employeeId);
if (!shifts.Any())
{
    return new Slots(Array.Empty<DaySlots>());
}
return null;
The previous code is exactly what is required to pass the test. The test is green now.
Elevating scenarios’ complexity
The rest of the unit tests follow the same way of elevating test scenario complexity slightly. Here are other scenarios you might want to add:
[Theory]
[InlineData(5, 0)]
[InlineData(25, 0)]
[InlineData(30, 1, "2022-10-03 09:00:00")]
[InlineData(35, 2, "2022-10-03 09:00:00",
  "2022-10-03 09:05:00")]
public async Task GetAvailableSlotsForEmployee_
OneShiftAndNoExistingAppointments_VaryingSlots(
    int serviceDuration, int totalSlots,
      params string[] expectedTimes)
{
…
The previous test is, in fact, multiple tests (because we are using Theory) with each InlineData elevating complexity. As usual, do the red then green to let it pass before adding another suite of tests:
public async Task GetAvailableSlotsForEmployee_
  OneShiftWithVaryingAppointments_VaryingSlots(
    string appointmentStartStr, string appointmentEndStr,
    int totalSlots, params string[] expectedTimes)
{
…
This is also a test with multiple InlineData. Obviously, we cannot fit all the code here, so please have a look in SlotsServiceTests.cs for the complete unit tests.
As you start adding more test cases, whether by using Theory with InlineData or using Fact, you will notice that the code complexity in the implementation is going up. This is all right! But, do you feel the readability is suffering? Then it is time to refactor.
Now you have the advantage of unit tests protecting the code from being broken. Refactoring when the method is doing what you want it to do is part of the Red-Green-Refactor mantra. In fact, if you look at SlotsService.cs, I did refactor to improve readability by creating multiple private methods.
This story is complex, I will give you that. I could have picked an easier example, and everybody would be happy, but real-life code has ups and downs and varies in complexity, so I wanted to include one sophisticated scenario following the pragmatism theme of the book.
After this section, you might have some questions. I hope I am able to answer some of them below.
Answering frequently asked questions
Now that we have written the unit tests and the associated implementation, let me explain the process.
Are these unit tests enough?
The answer to this question depends on your target coverage and your confidence that all cases are covered. Sometimes, adding more unit tests increases the future maintenance overhead, so with experience, you would strike the right balance.
Why didn’t we unit test the controllers?
The controllers should not contain business logic. We pushed all the logic to the services, then tested the services. What is left in the controllers is minimal code concerned with mapping different types to each other. Have a look at the controllers in Uqs.AppointmentBooking.WebApi/Controllers to see what I mean.
Unit tests excel in testing business logic or areas where there are conditions and branching. The controllers in the coding style that we chose do not have that.
The controllers should be tested but through a different type of test.
Did we test the system enough?
No, we didn’t! We did the unit tests part. We have not tested the controllers or the boot of the system (the content of Program.cs) and other small bits of the code.
We did not test them via unit tests as they are not business logic. However, they need testing, but unit tests are not the best testing type to check for the quality of these areas. You can cover these areas by other types of testing such as integration, Sintegration, and system tests.
We omitted testing some areas, how can we achieve high coverage?
Some areas of the code are not unit tested, such as Program.cs and the controllers. If you are aiming for high code coverage, such as 90%, you might not achieve it via unit testing alone, as there is a good amount of code that went here, in this chapter.
Achieving coverage by unit tests alone is unfair as you need additional testing types to achieve more coverage, or the developers would start cheating by adding meaningless tests to boost coverage. These tests do more harm than good as they will create a maintenance overhead.
Coverage calculation should include other types of tests, rather than relying on units alone. If this is the case, 90% is a realistic target and can lead to a high-quality product.
Sometimes it is hard to configure a coverage meter tool to measure the sum of multiple test types, so in this case, it makes sense to lower your coding coverage target to maybe 80% or so.
Summary
We have seen implementing realistic stories by setting up the system with EF and SQL Server, then building it a bit at a time by incrementally adding unit tests and increasing the complexity with every additional unit test.
We have seen a realistic fake test double and a concrete builder to construct our sample data.
We had to select multiple important scenarios to encourage you to examine the full source code, otherwise, the pages will be filled with code.
If you have read and understood the code, then I assure you that this is the peak of the complexity, as other chapters should be easier to read and follow. So congratulations, you have made it through the hard part of this book! I trust you can now go ahead and start your TDD-based project with EF and a relational DB.
Hopefully, this chapter has given you a guide to starting your new EF and SQL Server-based project. The next chapter does the same implementation but focuses on document DB and has different patterns than this one.